Pages Tab
Creating/ Modifiying/ Deleting an App Page
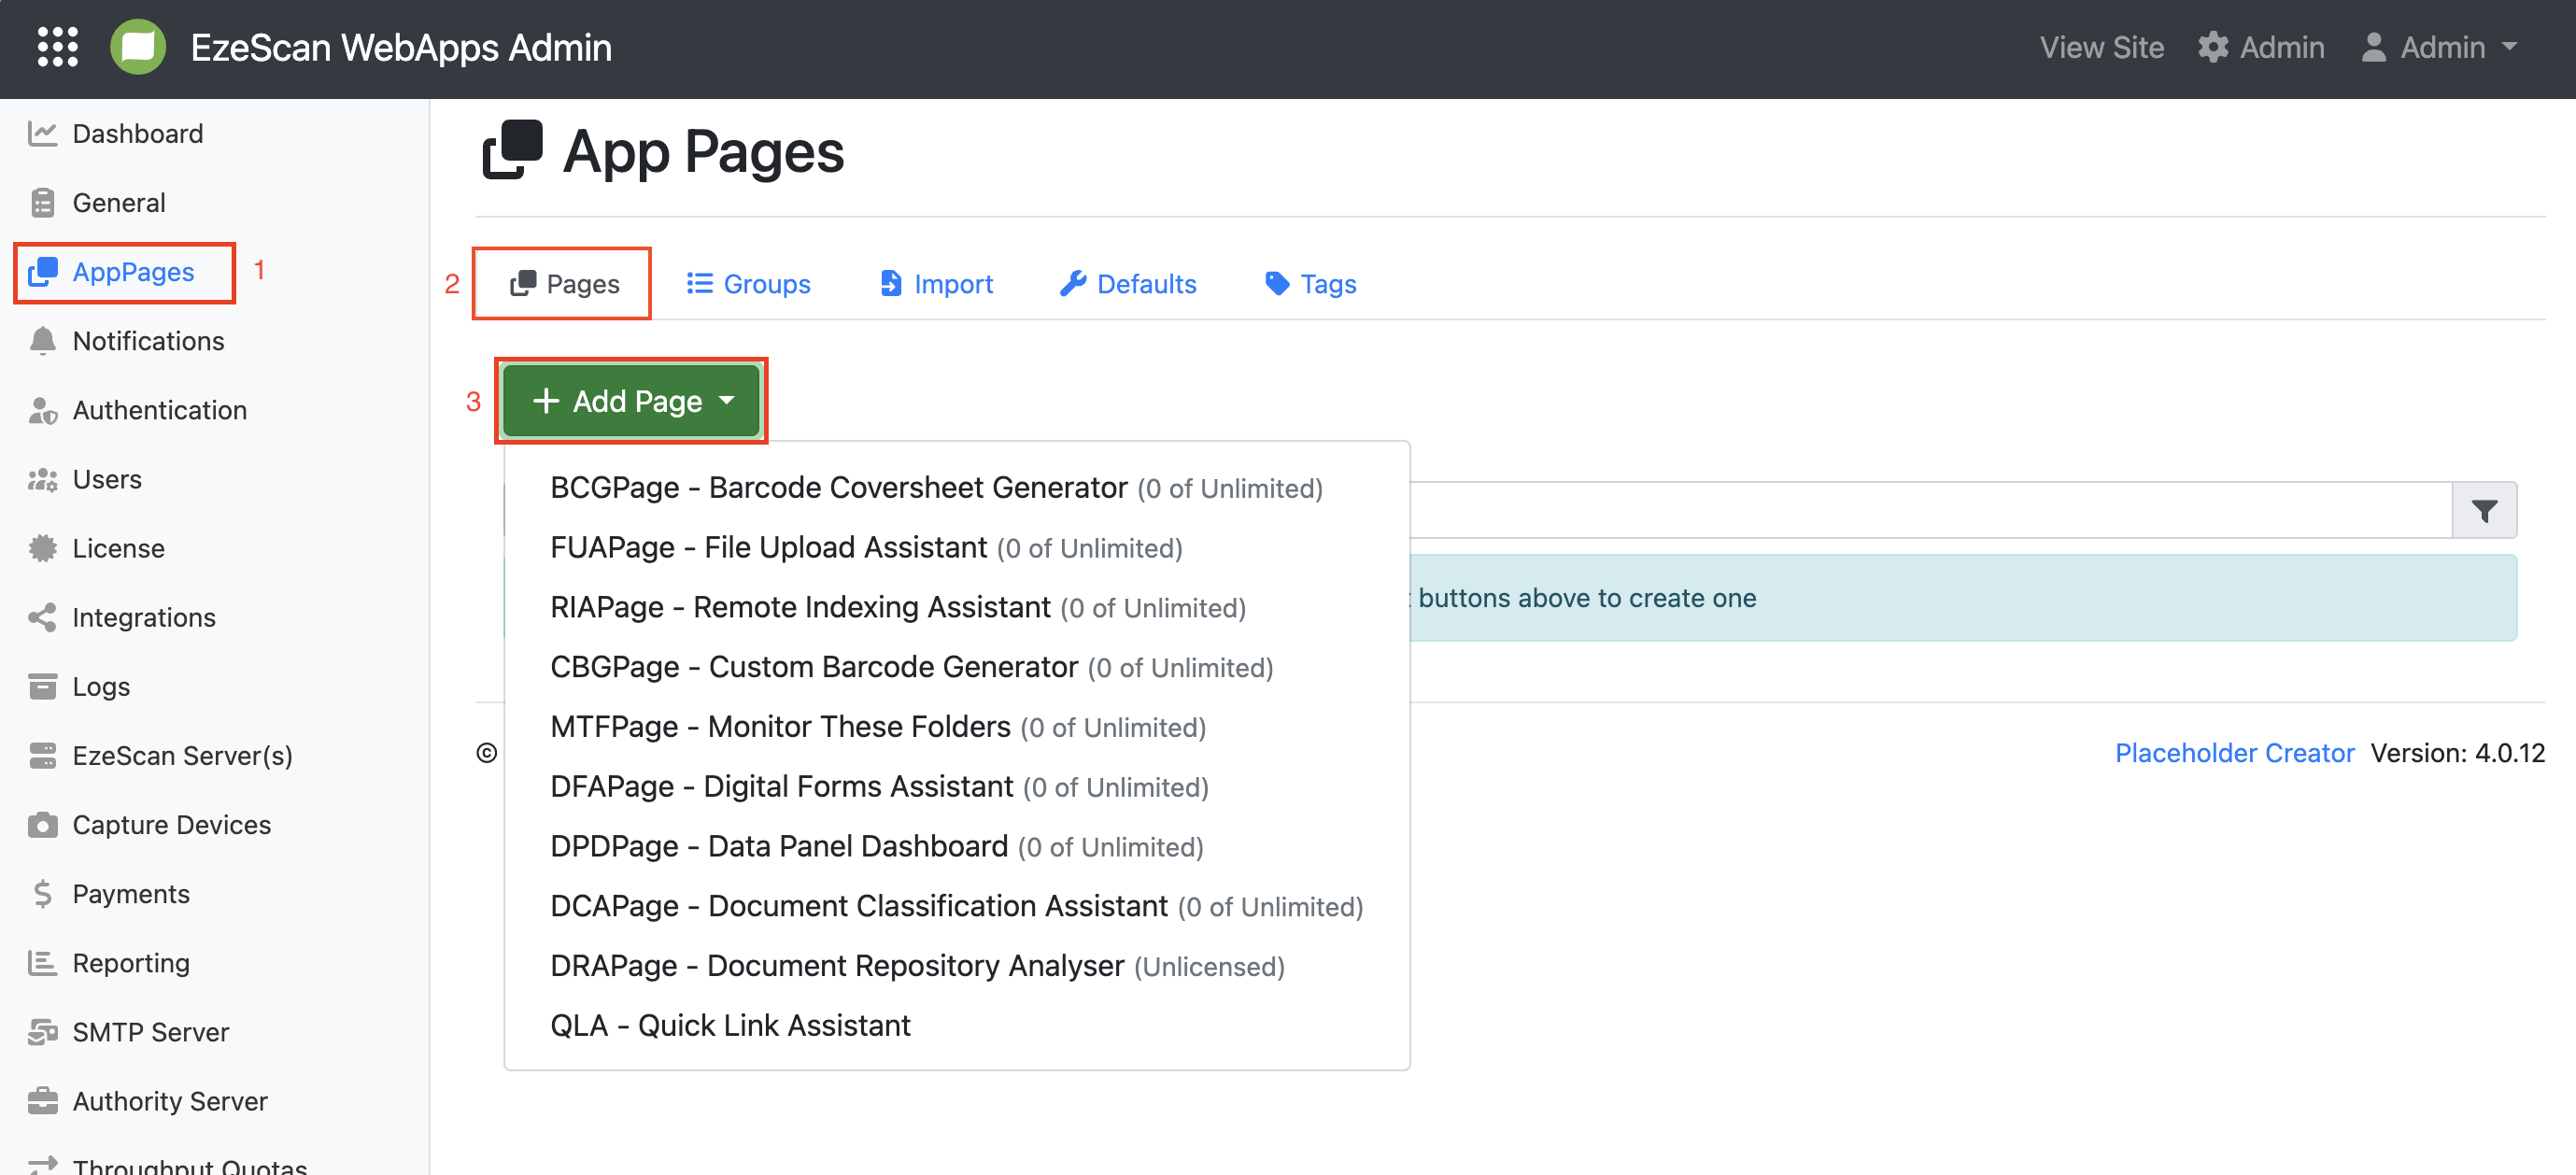
To create a new App Page, navigate to Admin Menu > Pages and ensure the App Pages tab is selected.
Click the + Add Page dropdown menu and choose the required App Page Type from the list. The new page will then be created and available for further configuration.
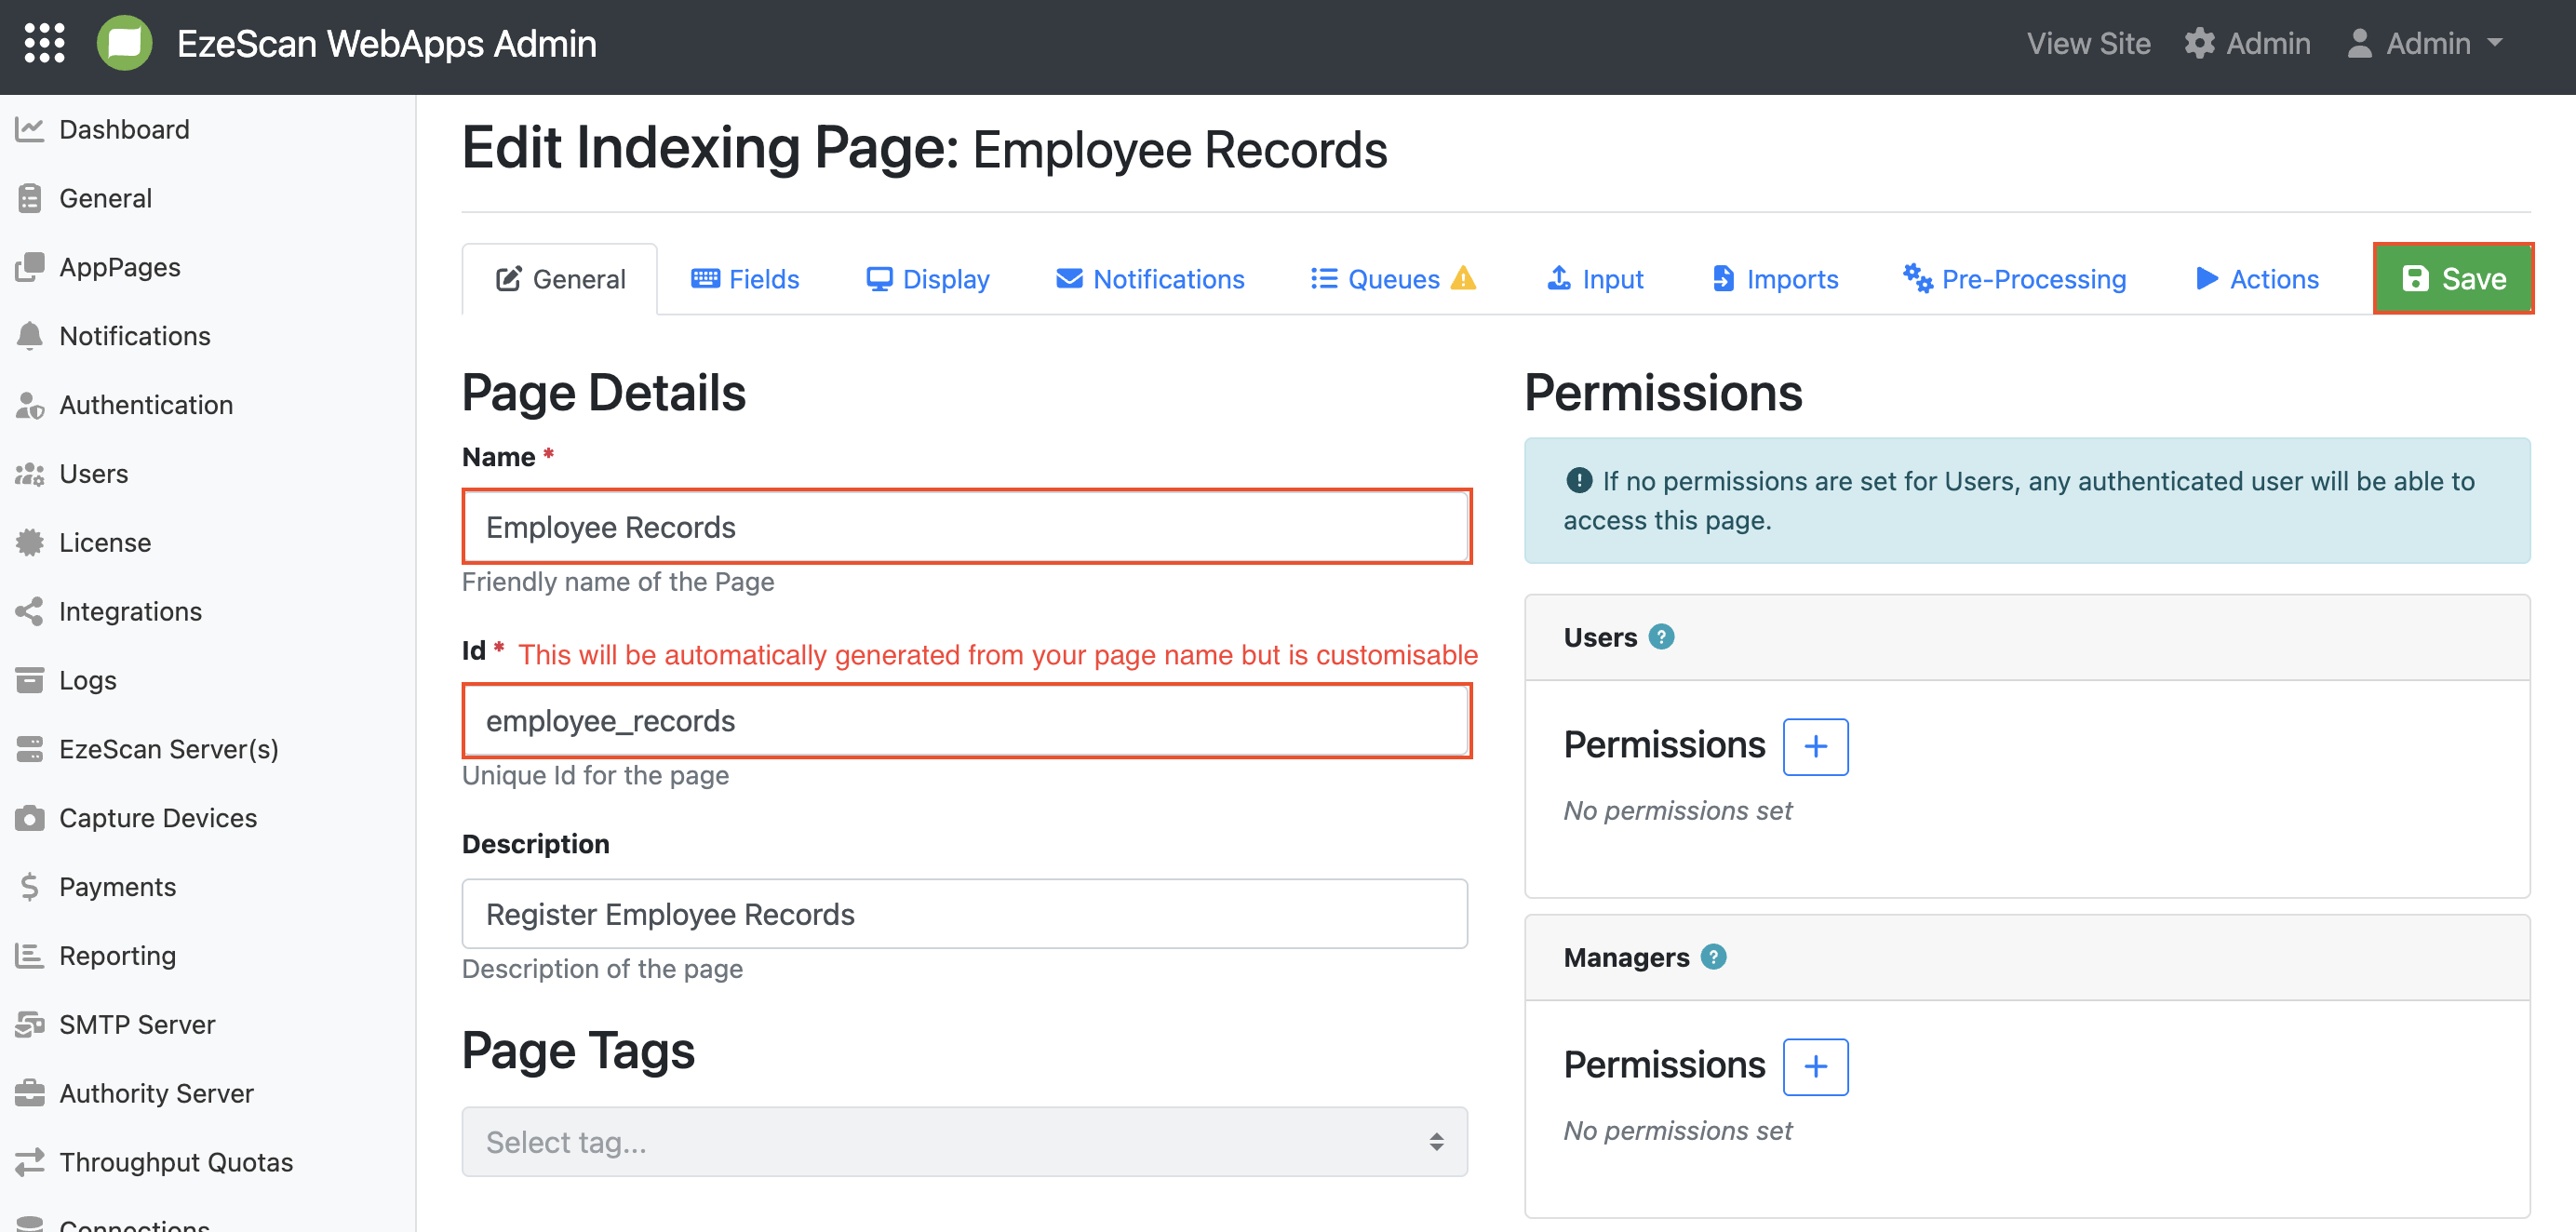
To save a new App Page, you must first enter a Page Name. Once a name is provided, a Page ID will be automatically generated by replacing any spaces with underscores. The generated Page ID can be edited if required.
It is also recommended that you enter a Description for the page to help identify its purpose and make it easier to manage.
Once all required details have been entered, click Save to create and save the App Page.
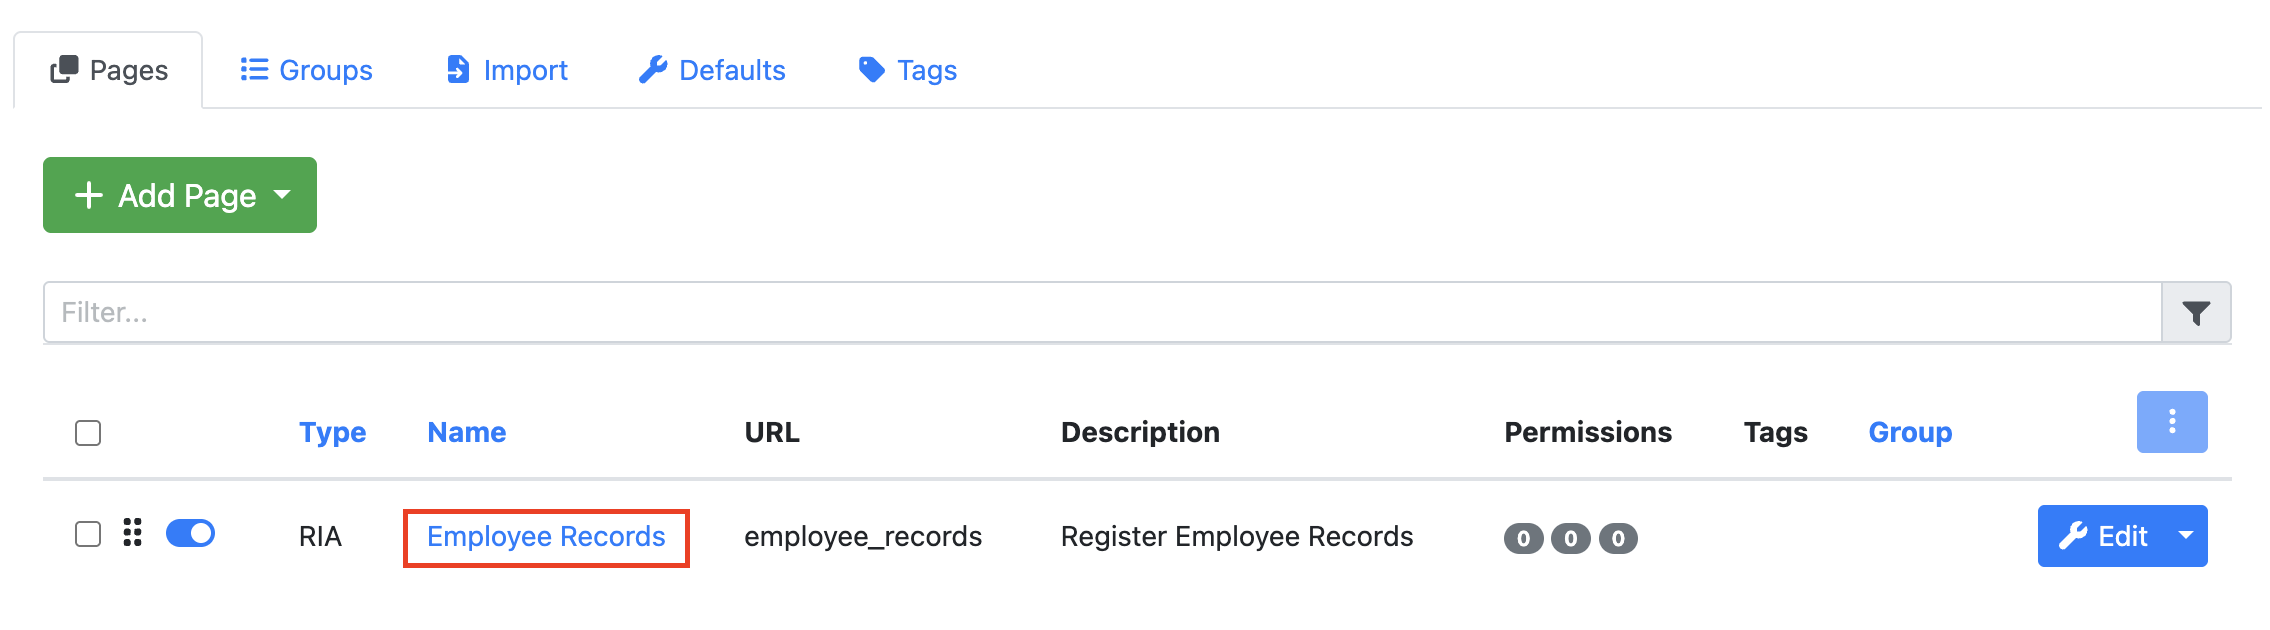
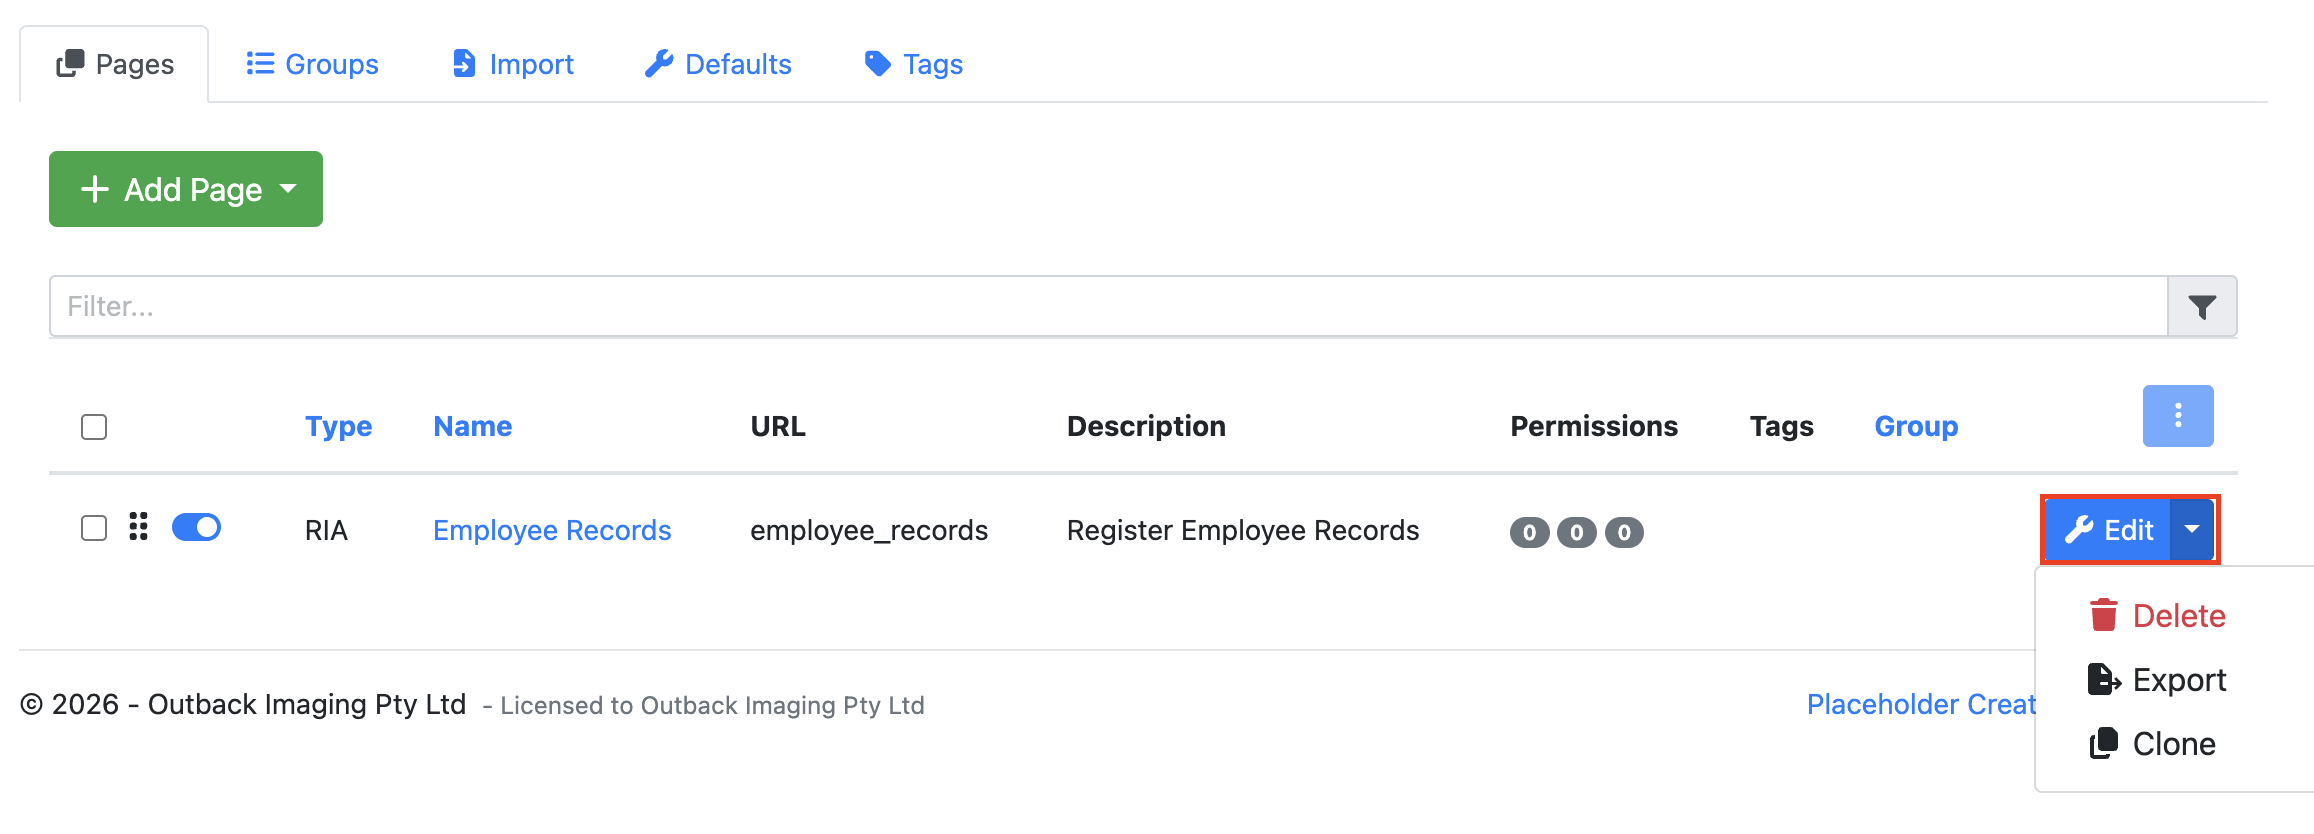
Your new App Page will now appear in the App Pages table. To edit the page, simply click the App Page Name, displayed as a blue hyperlink.
By clicking the Edit button, you can access additional options for the App Page. From here, you can:
-
Delete the App Page if it is no longer required. Please note you will not be able to undo this action.
-
Export the App Page to create a backup or transfer it to another environment.
-
Clone the App Page to create a copy that can be used as the basis for a new page.
Rearranging App Pages
To rearrange the order of your App Pages, click and hold the ![]()
Disabling App Pages
When an App Page is created, it is enabled by default, as indicated by the blue toggle. An enabled App Page is visible to end users and will appear as a tile on the Home screen.
To disable an App Page, click the toggle so that it changes from blue to grey. Once disabled, the App Page will no longer be visible to end users and will be hidden from the Home screen.

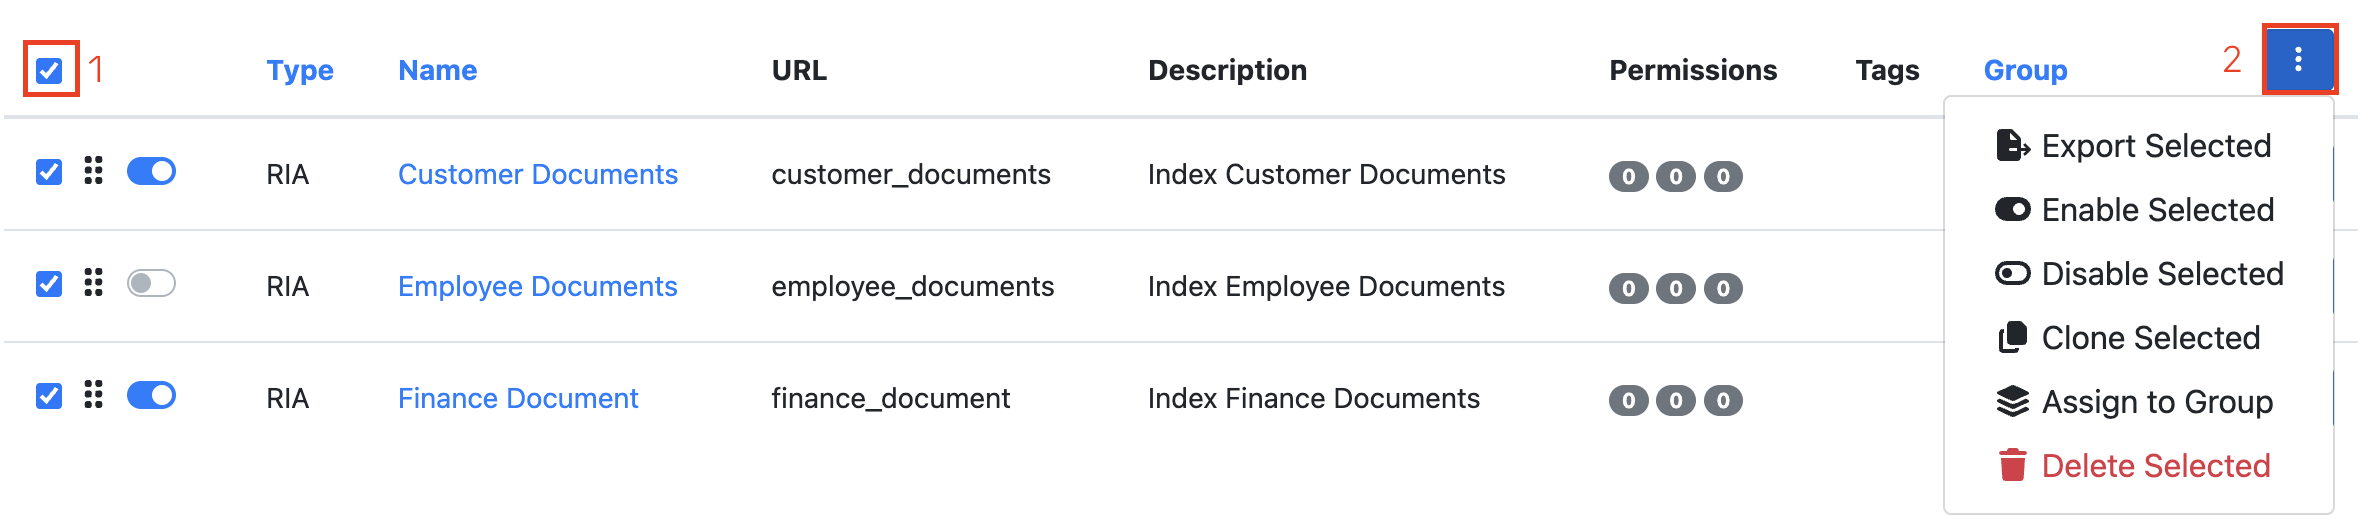
Bulk Actioning App Pages
The checkbox at the top of the list allows you to quickly select all App Pages. You can also select individual App Pages by checking the corresponding boxes next to each page.
When one or more App Pages are selected, the blue action button in the top-right corner becomes active, enabling you to perform bulk actions across the selected pages including:
-
Export Selected – Export the selected App Pages.
-
Enable Selected – Enable the selected App Pages, making them visible to end users.
-
Disable Selected – Disable the selected App Pages, hiding them from end users.
-
Clone Selected – Create copies of the selected App Pages.
-
Assign to Group – Assign the selected App Pages to a group.
-
Delete Selected – Permanently remove the selected App Pages.
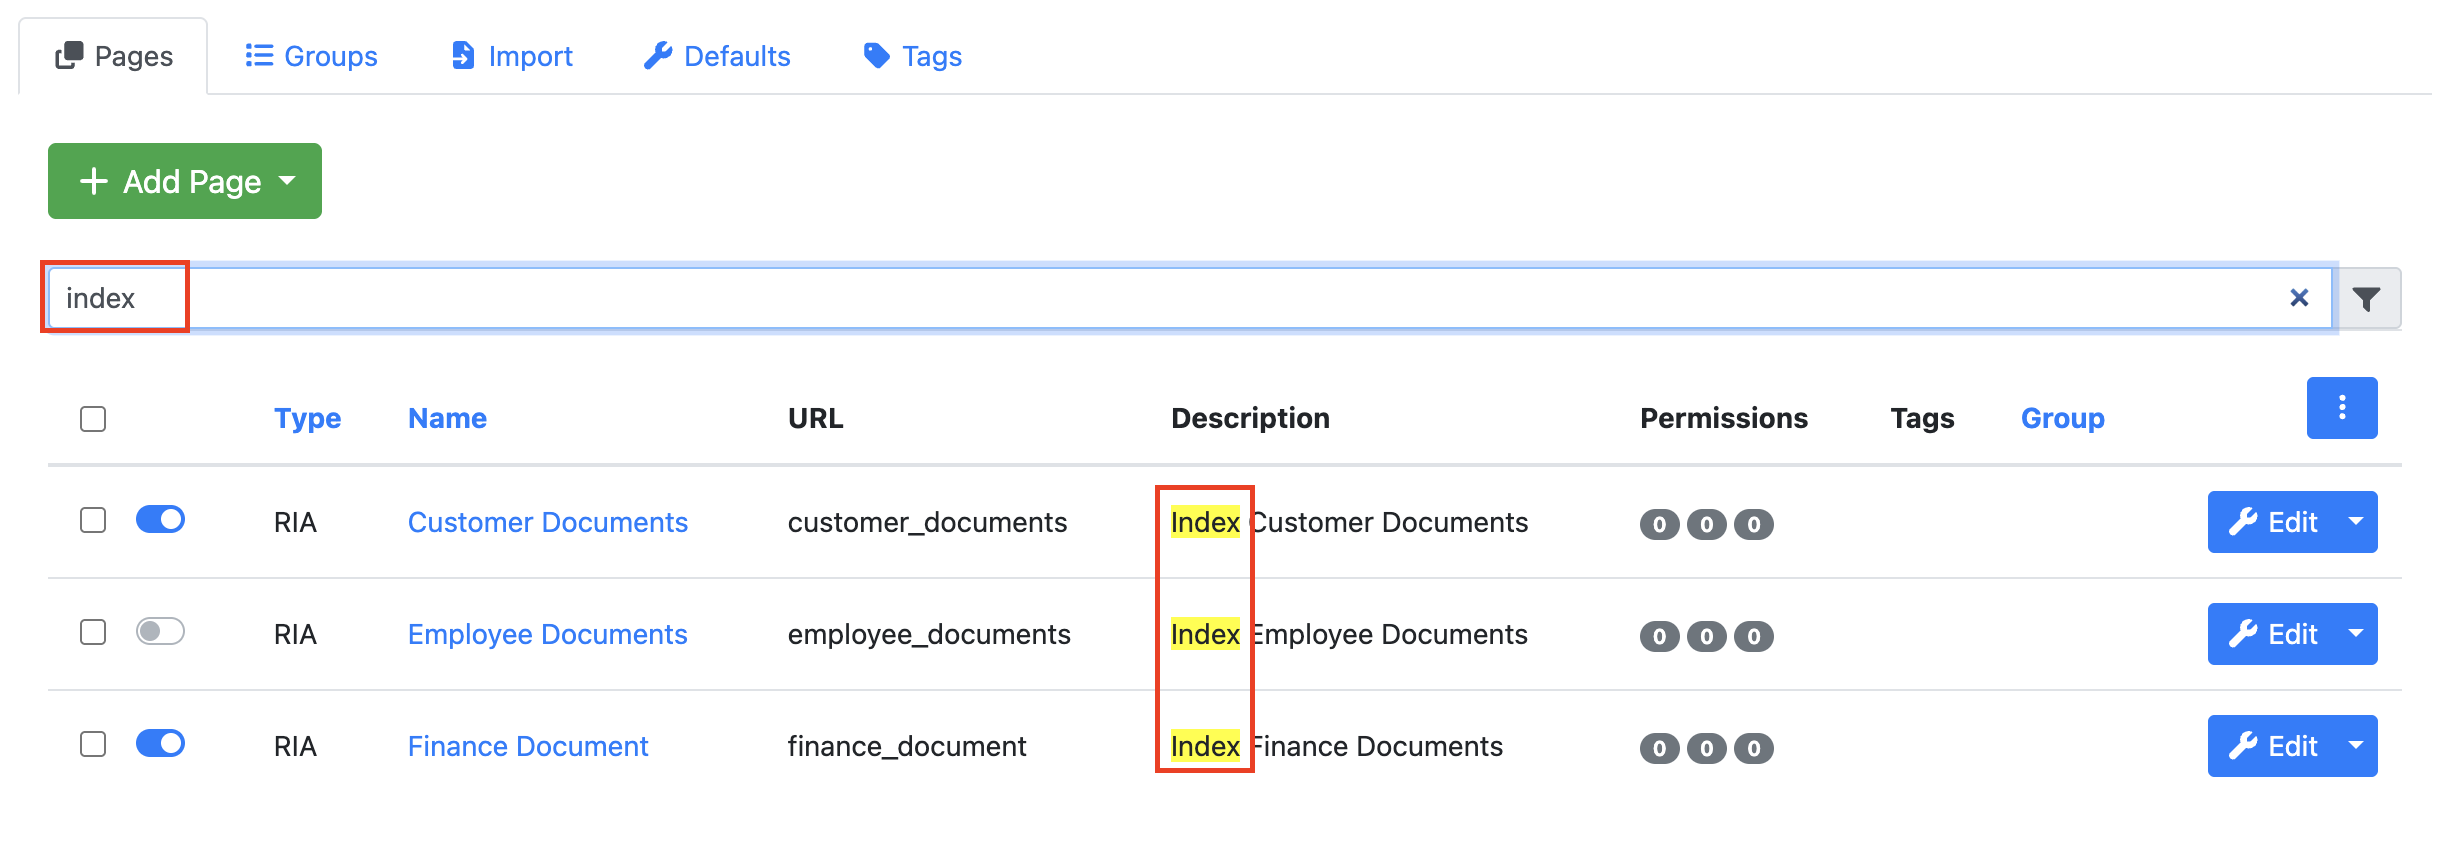
Searching for App Pages
The Filter search bar at the top of the list can be used to quickly find App Pages by entering all or part of the page Name or Description. As you type, the list is automatically filtered to display only the App Pages that match your search criteria.
Groups
The Groups tab allows users to organize App Pages into groups. Grouping related App Pages together improves navigation and provides a more structured experience for end users.
When App Pages are assigned to a group:
-
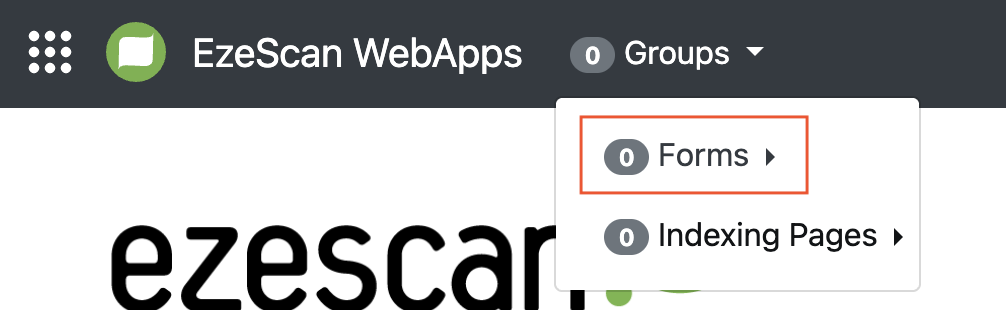
They are displayed together within a grouped section on the Home screen.
-
They appear grouped within the application's navigation menu.
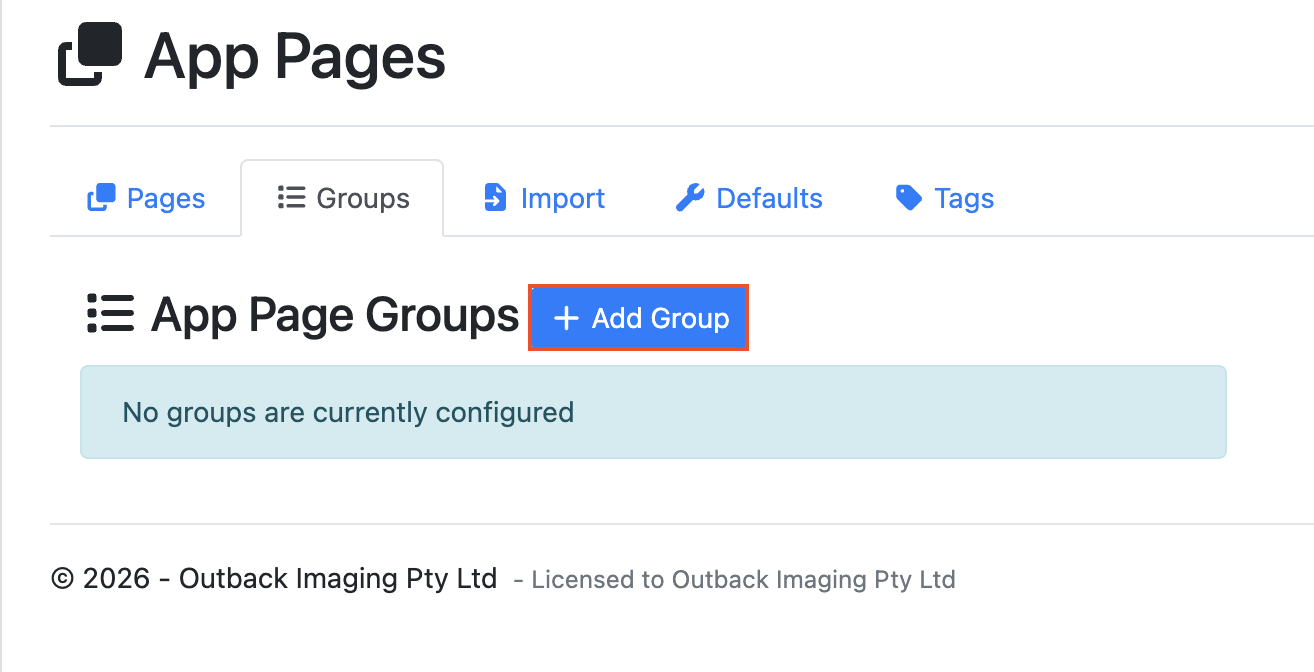
Creating a New Group
To create a new group, click the Add Group button.
Enter a Group Name for your new group. You can also select an Icon from the dropdown menu. The selected icon will be displayed alongside the group name on the Home screen. To assign App Pages to the group, click the + Add Page button.

Select the checkboxes next to the App Pages you want to assign to the group, then click the + App Pages button.
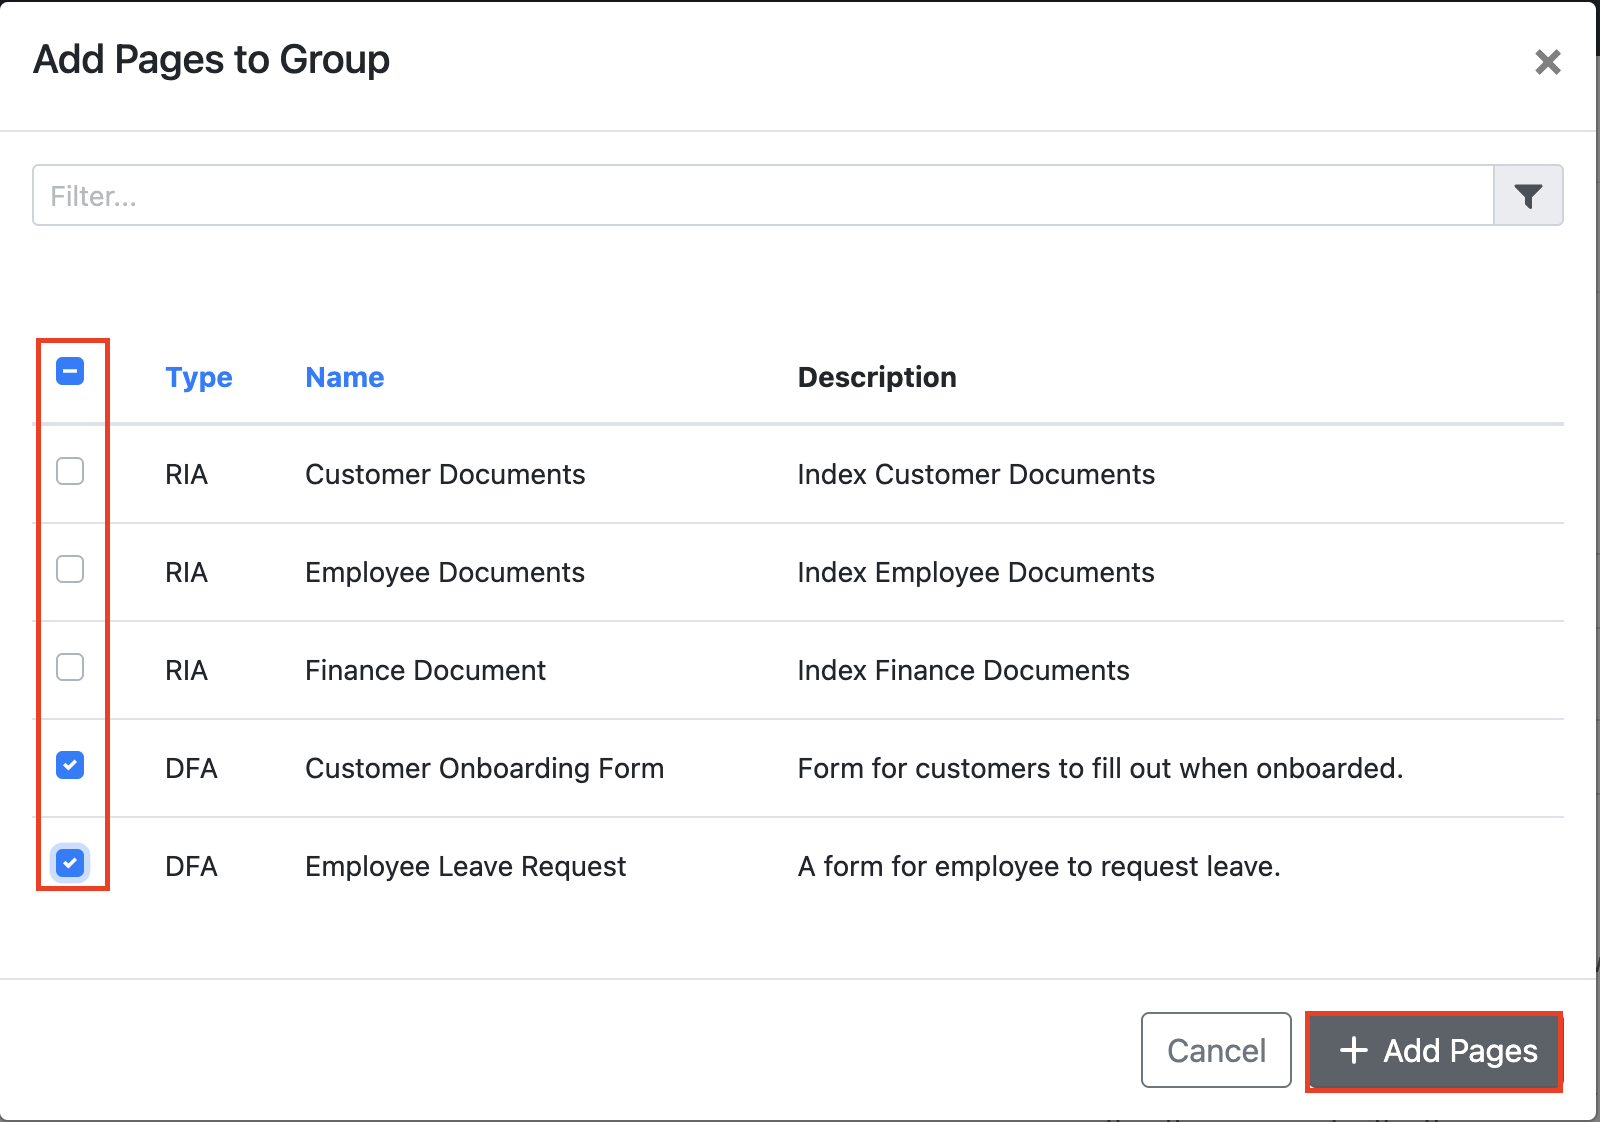
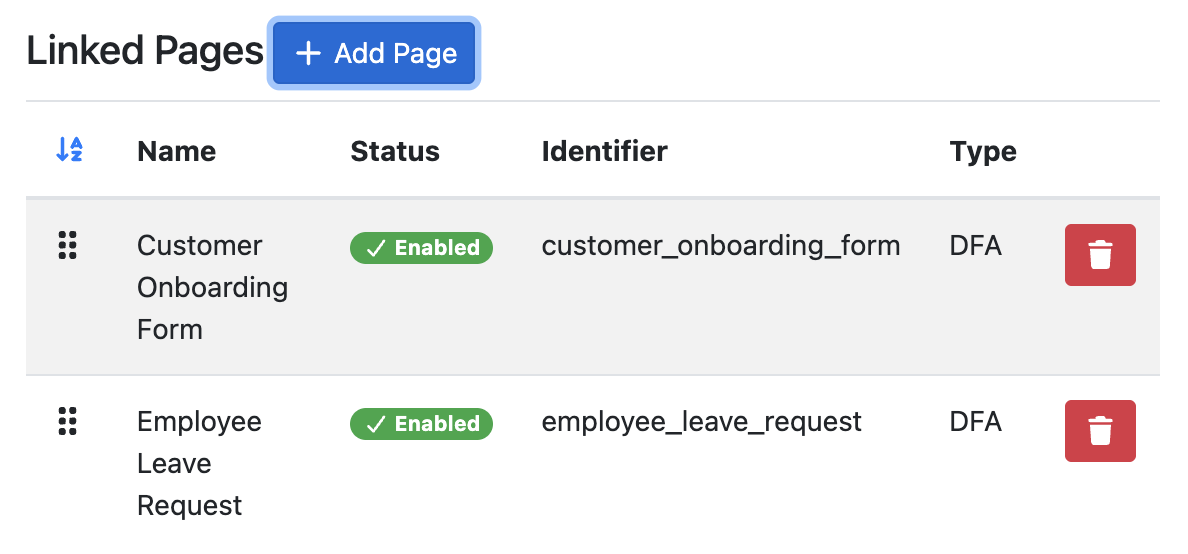
The selected App Pages will now appear in the group's page list.
To remove a page from the group, click the red Trash Can icon next to the page you wish to delete.
You can also rearrange the order of pages within the group by clicking and holding the Move icon, then dragging and dropping the page to the desired position in the list. The order displayed here determines how the pages will appear within the group on the Home screen and in the application's navigation menu.
To save your group, click the green Save button located in the top-right corner of the screen. Additionally you can delete a group by selecting the Delete Group Button below the save button.
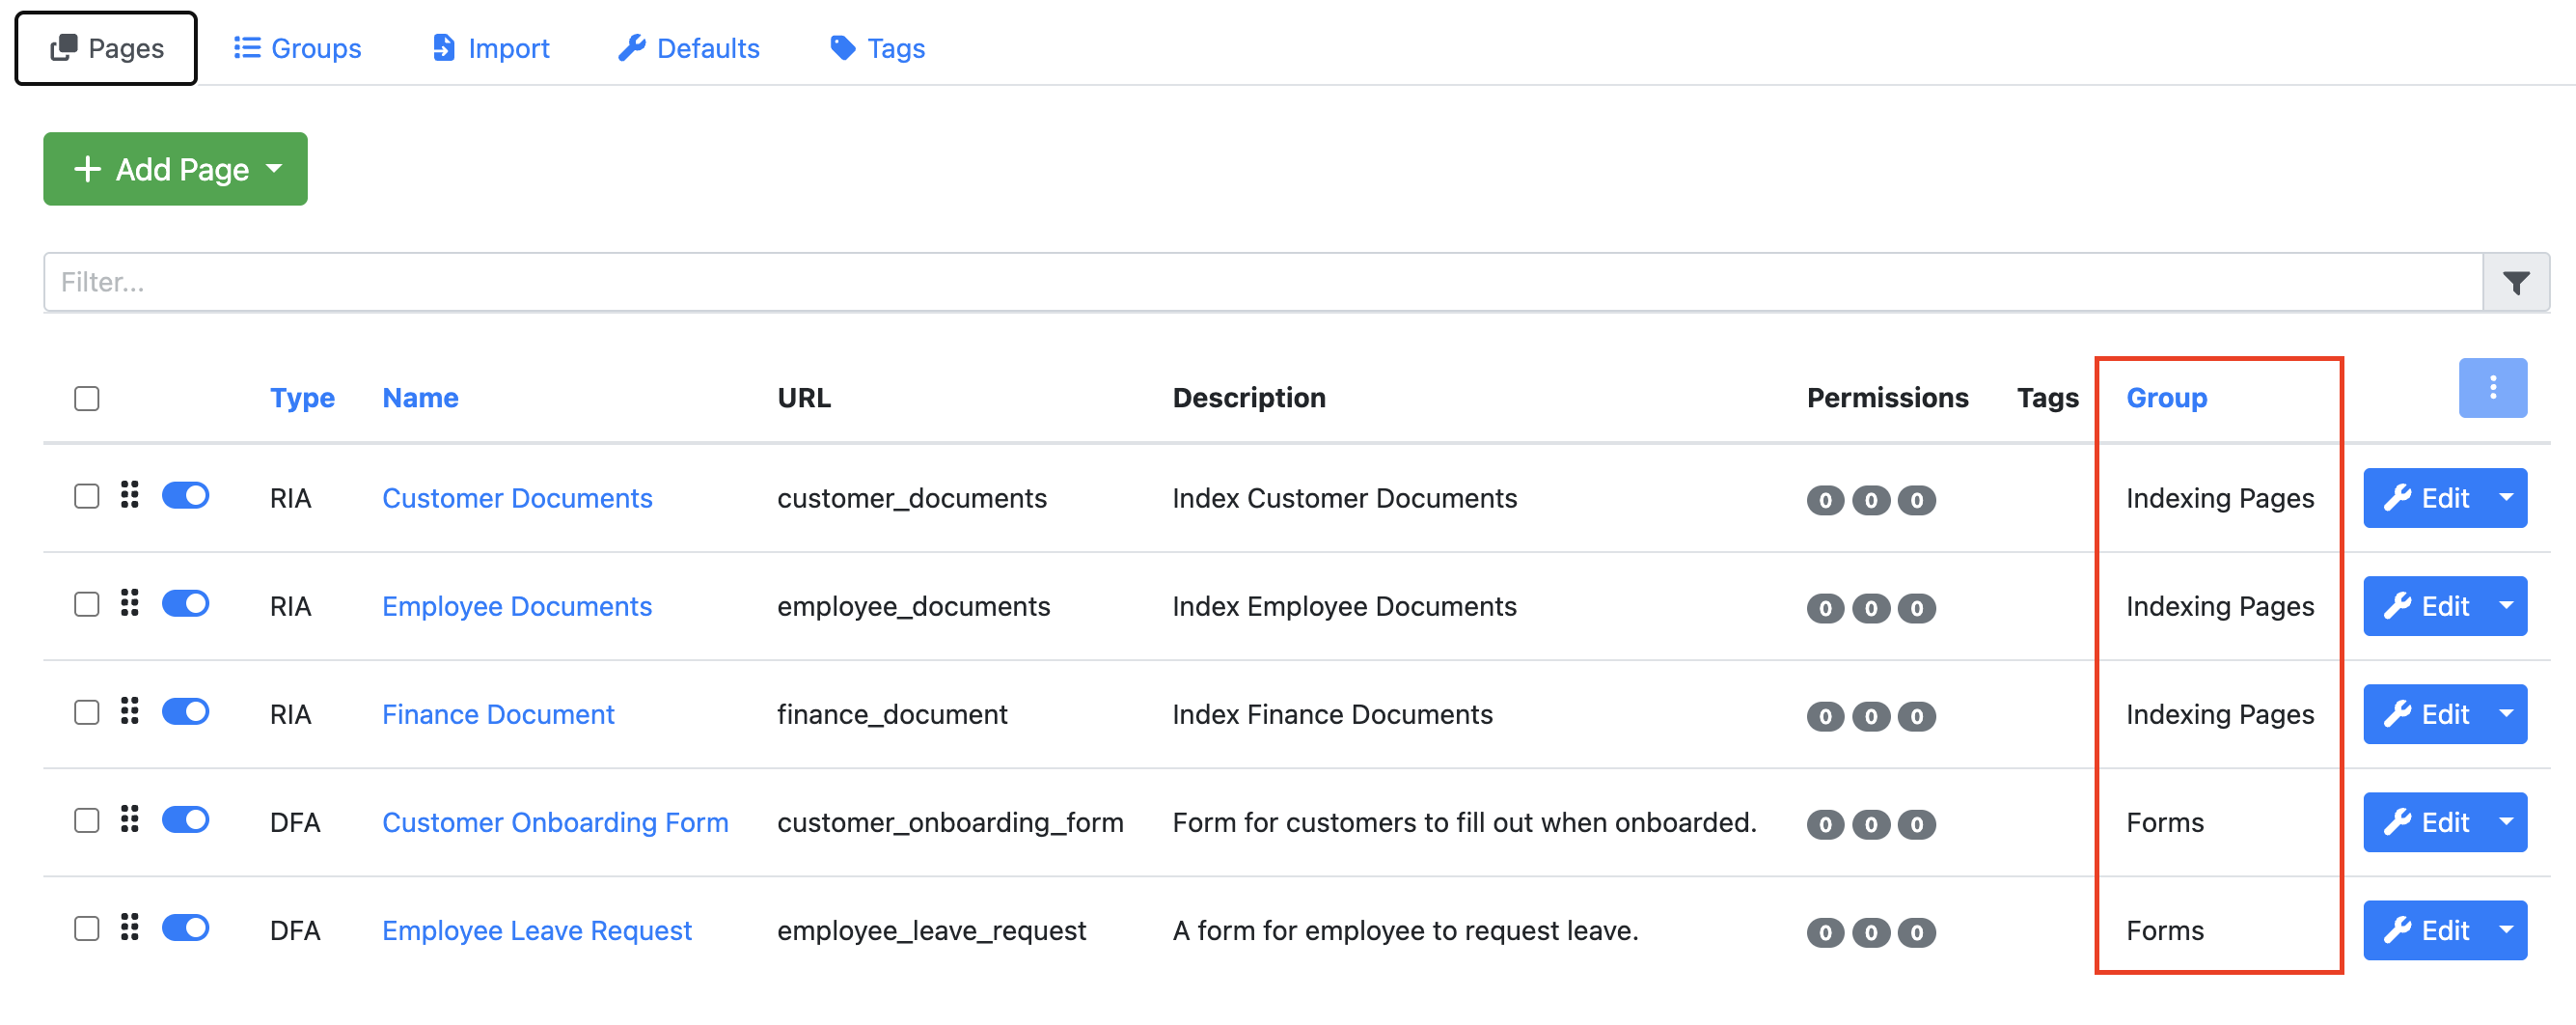
The associated Group name will now be displayed in the Group column for each assigned App Page within the Apps tab.
Deleting a Group
If you no longer require a group, you can remove it by clicking the Delete Group button located directly below the Save button. Deleting a group will remove the group itself; however, the App Pages assigned to the group will remain available and can be reassigned to another group if required.
Additional Group Settings
Display Group as a Single Menu Item
Usually, groups are displaying under one menu item. By selecting the check box Signle Menu Item, this group will be displayed as its own high level menu until instead of being under the “groups” Menu Item.
|
|
|---|---|
|
Single Menu Item Unselected |
Single Menu Item Selected |
Import
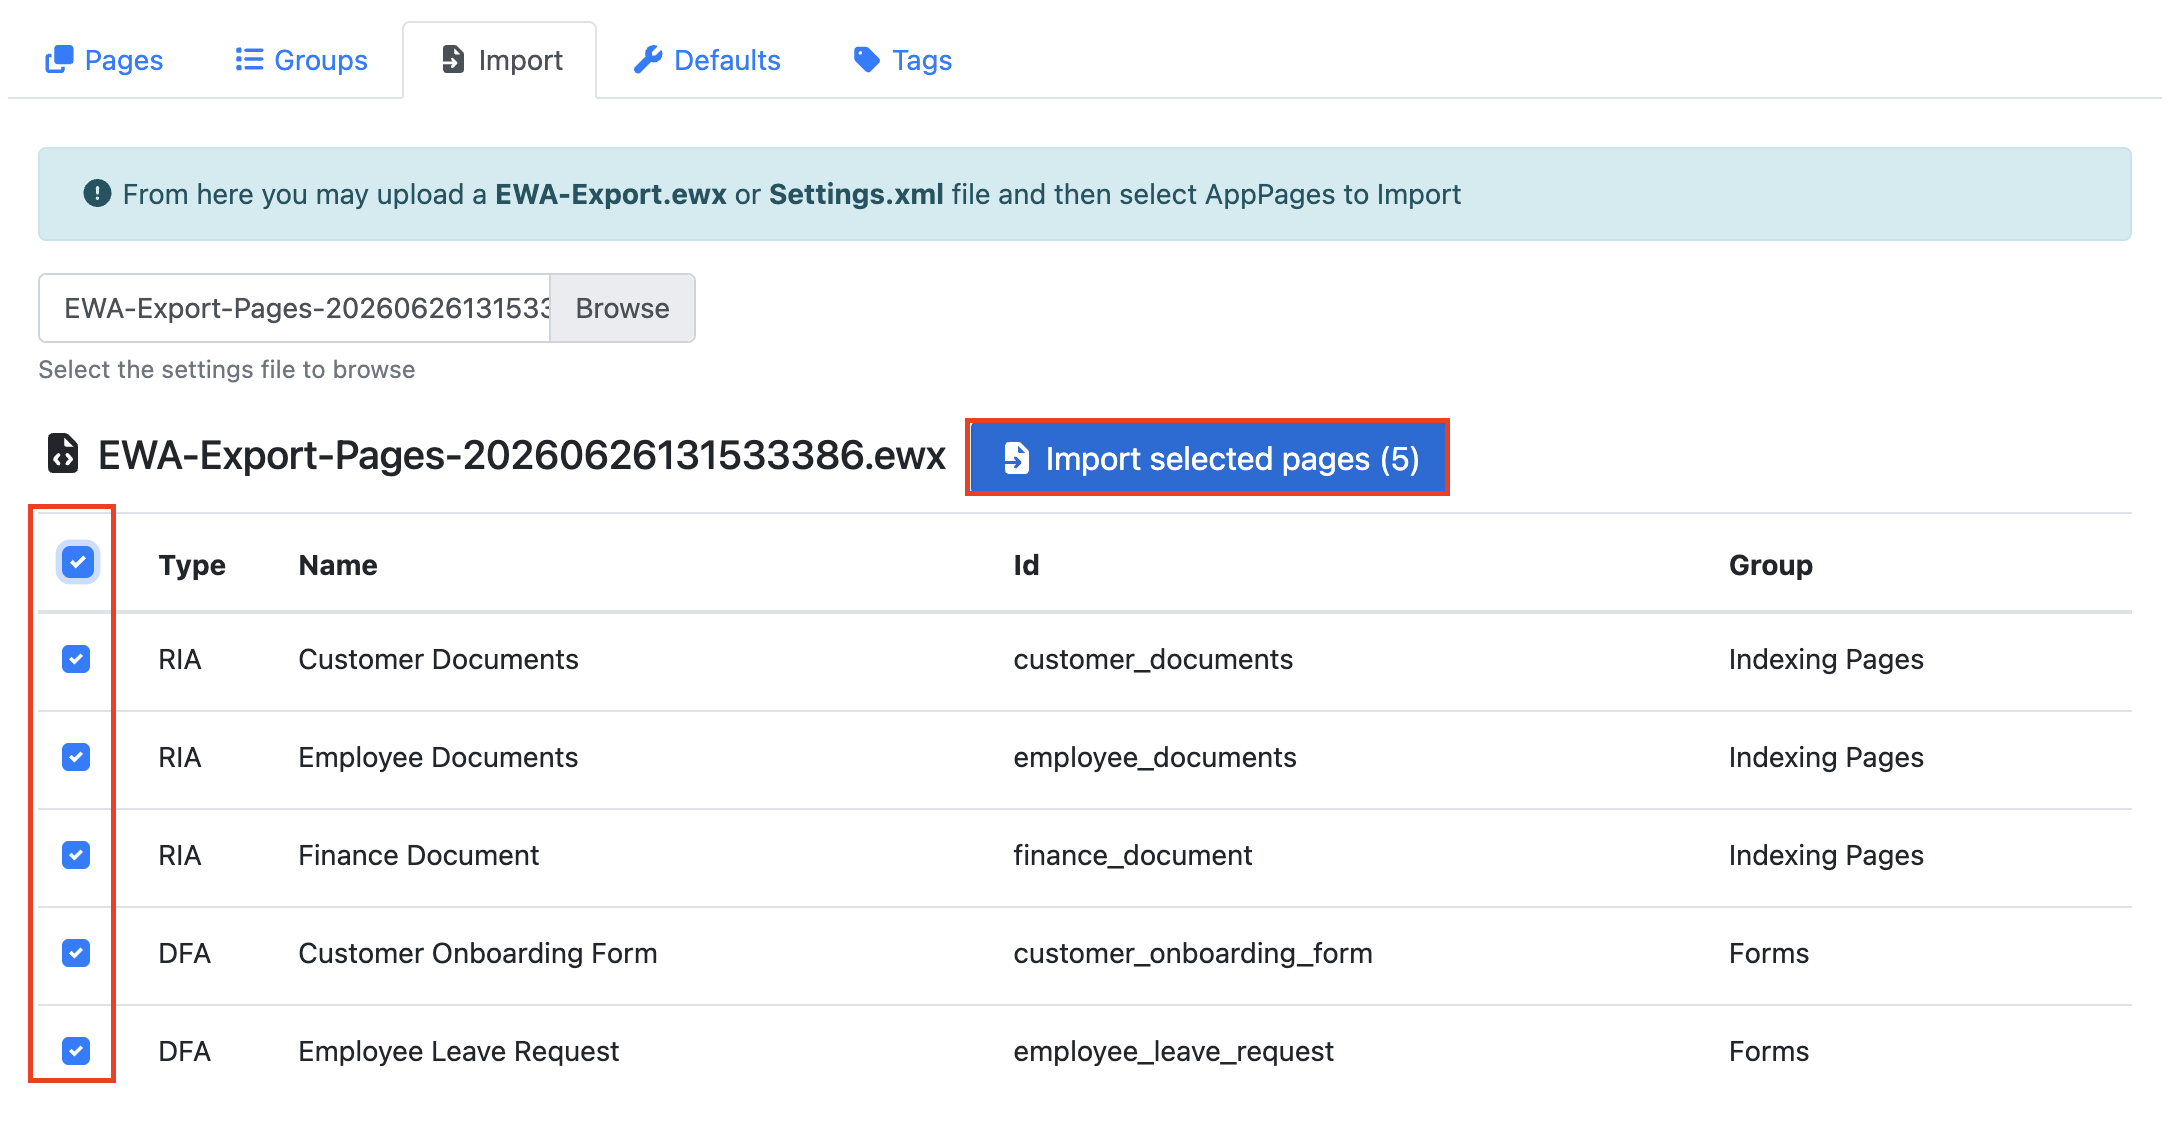
The Import tab allows administrators to import configuration files in either EWA-Export.ewx or Settings.xml format.
To import a file, click the Browse button and select the required EWA-Export.ewx or Settings.xml file from your file system. Click Open to upload the file.
Once the file has been loaded, select the App Pages you wish to import and click the Import Selected Pages button.
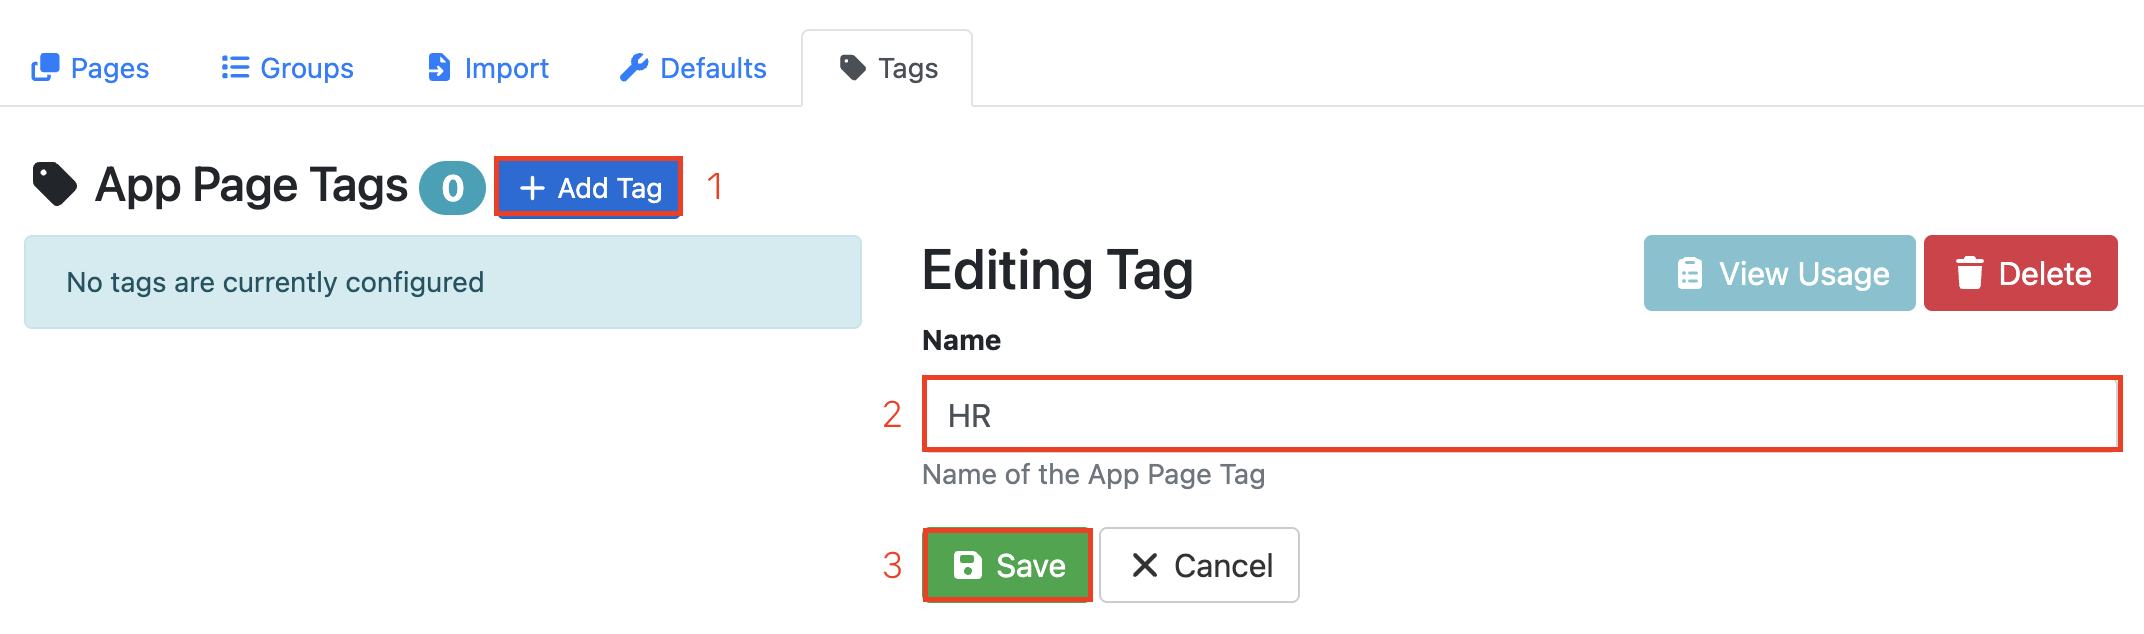
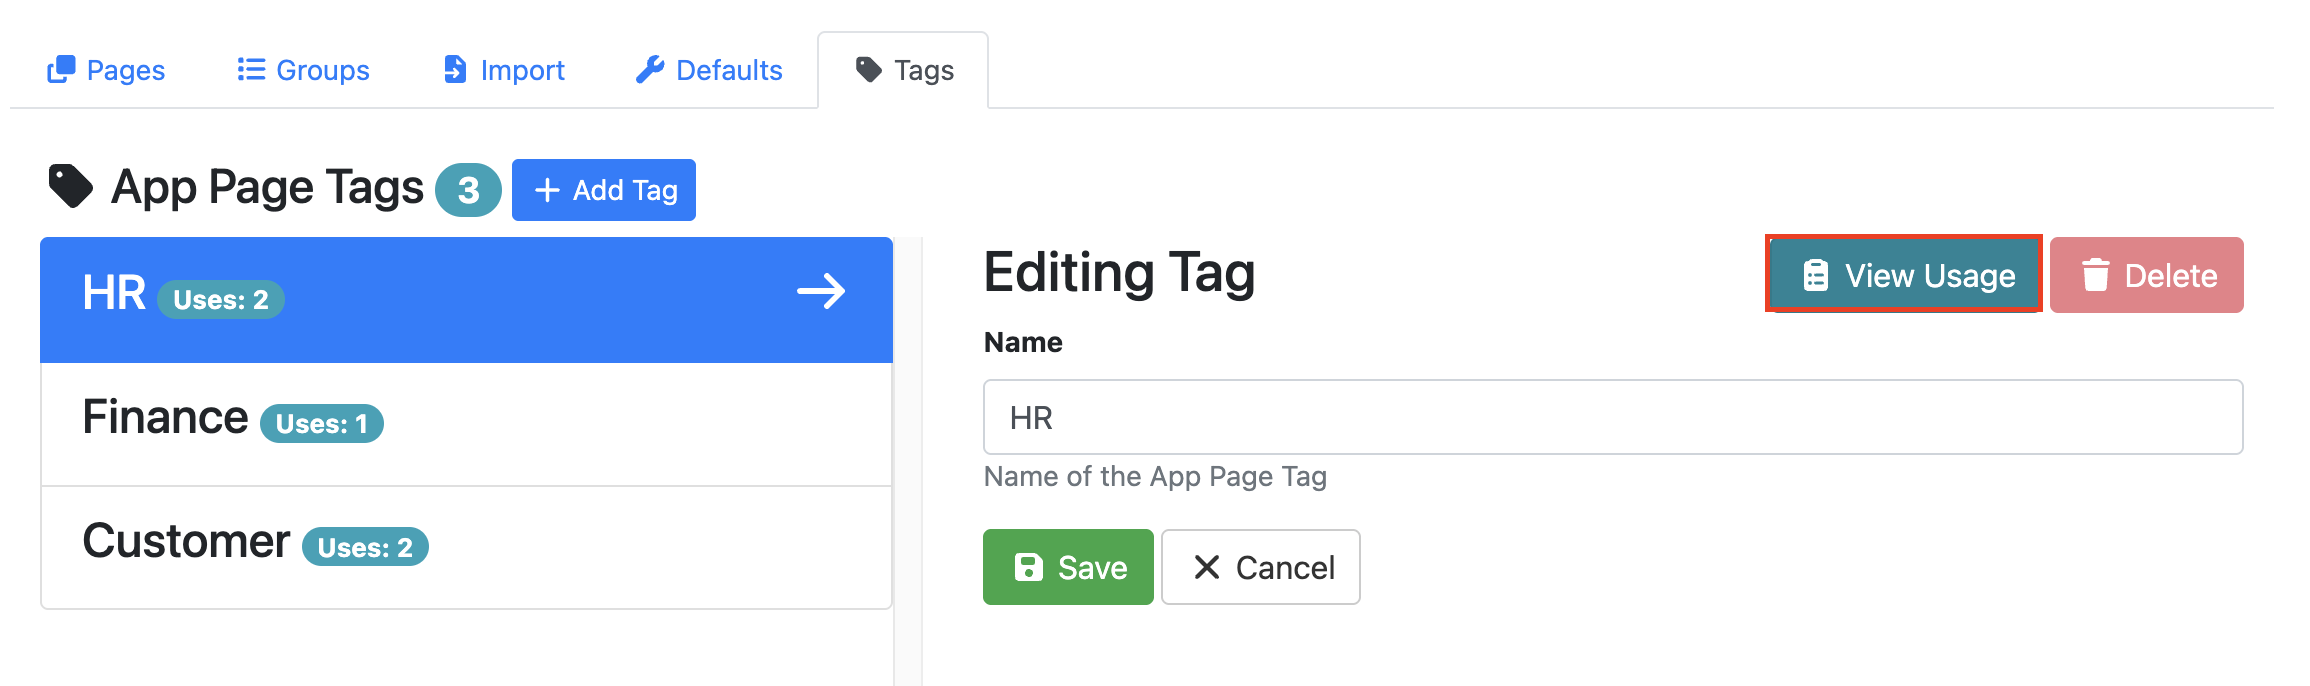
Tags
The tags menu tab allows you to create custom tags for your RIA Pages.
Creating/Deleting Tags
To create a new tag, click the + Add Tag button. Enter a Tag Name and click Save to create the tag.
To delete a tag, select the tag you want to remove and click the Delete button.
Note: Tags that are currently assigned to one or more App Pages cannot be deleted. Before deleting a tag, you must first remove it from all associated App Pages. Once the tag is no longer in use, it can be deleted.
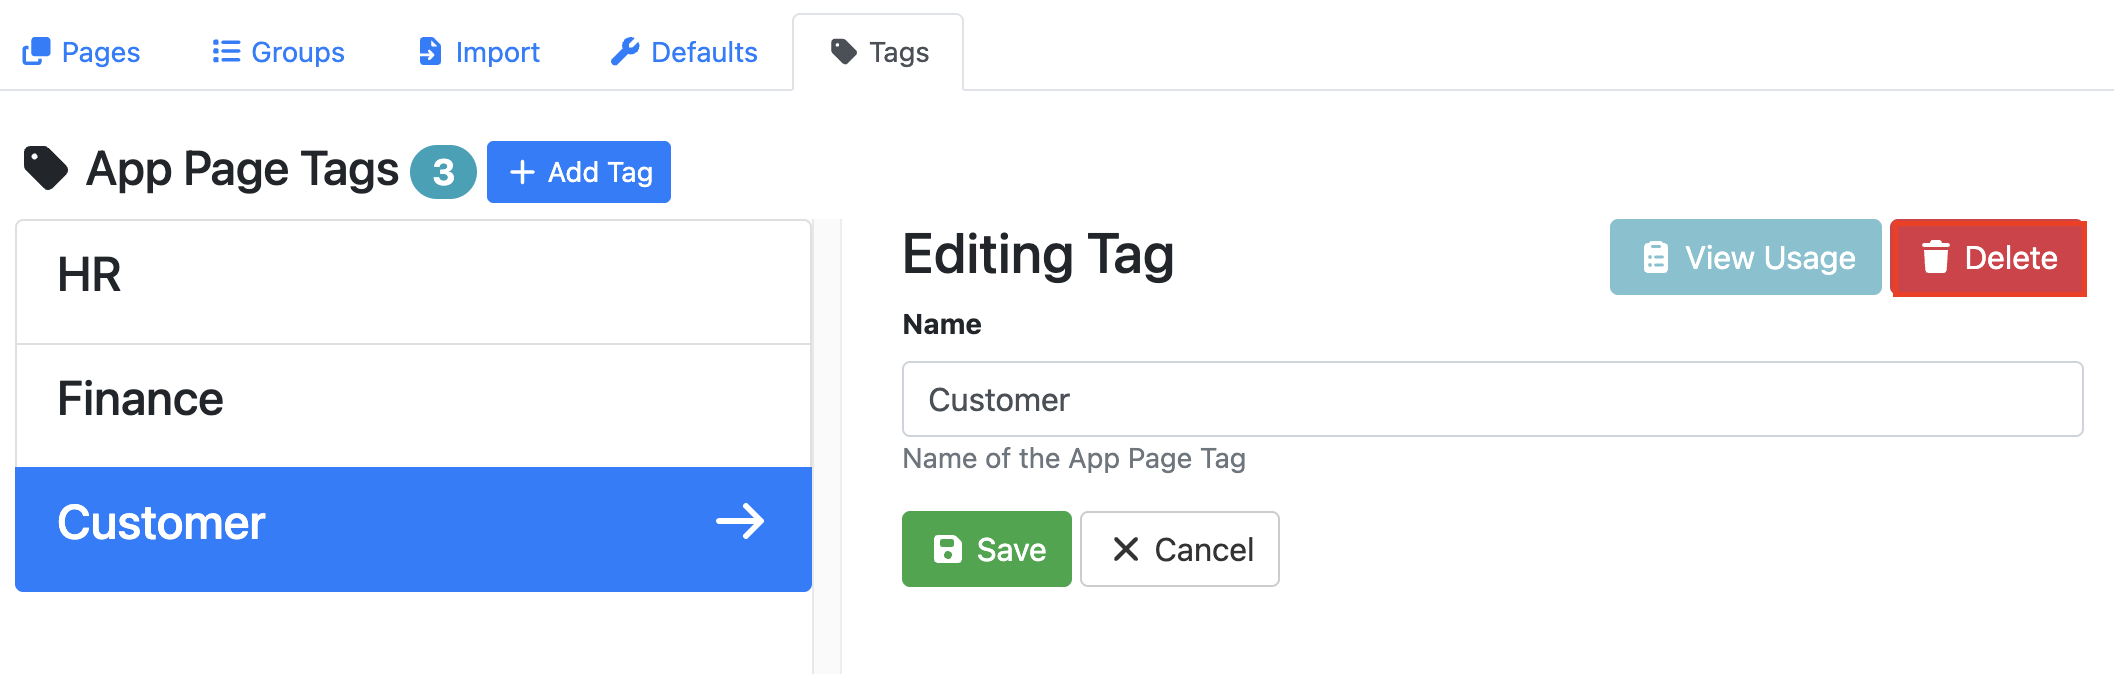
View Tag Usage
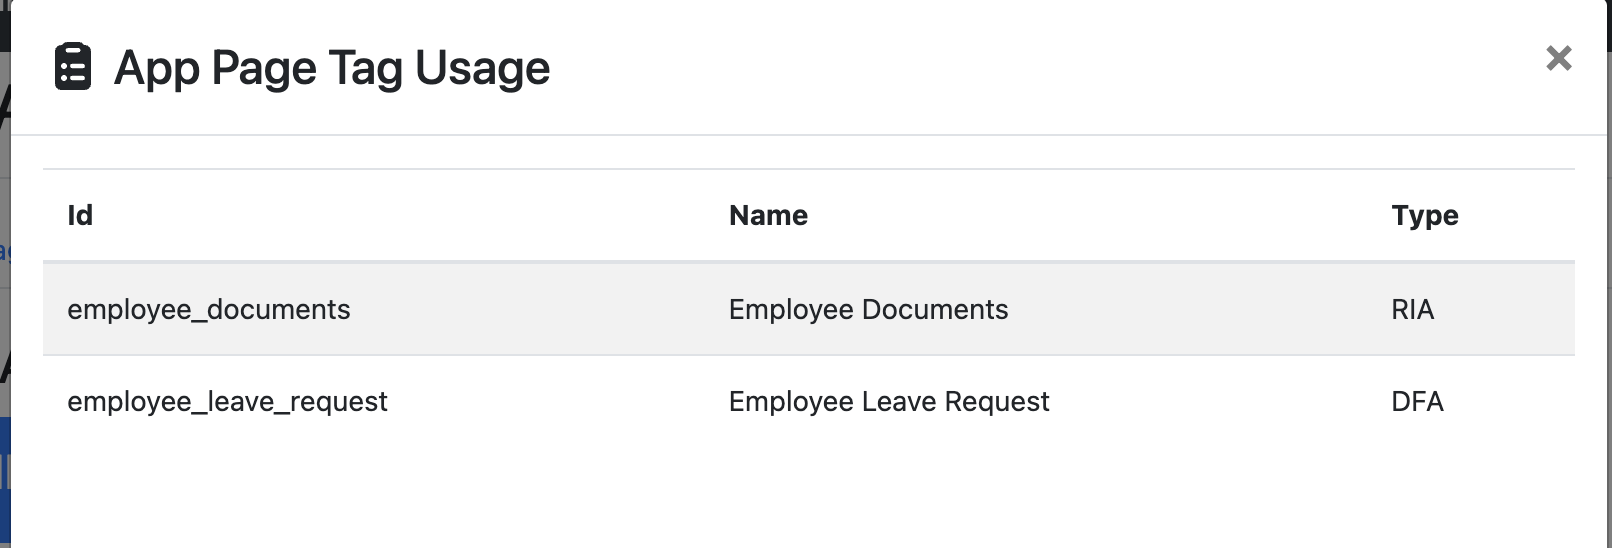
To view where a tag is being used, select the desired tag and click the View Usage button.
A dialog box will appear displaying details of all pages currently assigned to the selected tag, including the Page ID, Page Name, and Page Type.
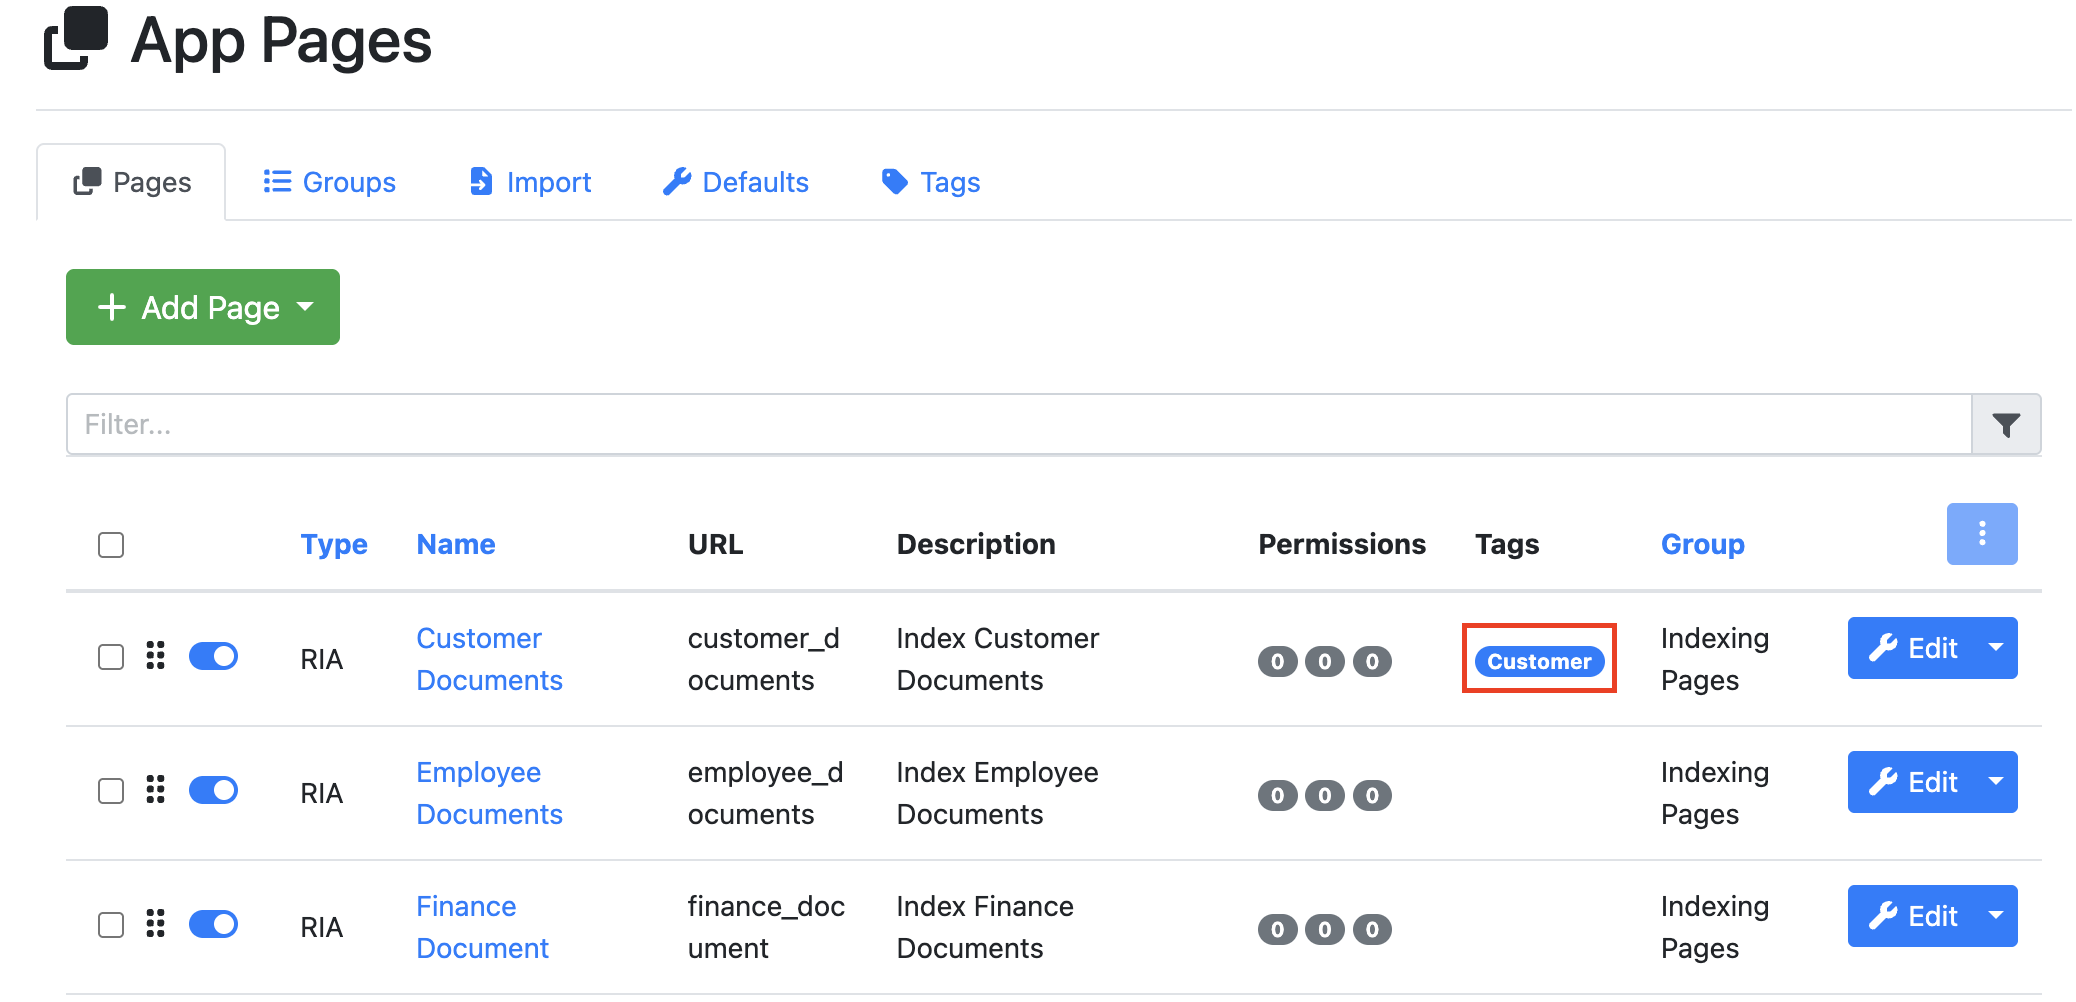
Assigning a Tag to a Page
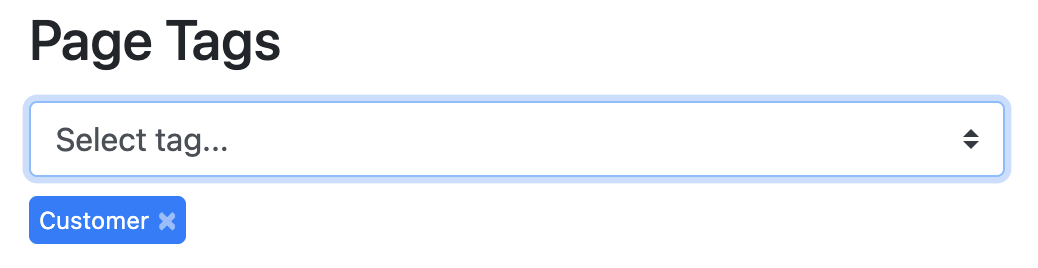
To assign a tag to an App Page, navigate to the Pages tab and open the page you wish to edit. On the General tab, locate the Page Tags field and select a tag from the dropdown list.
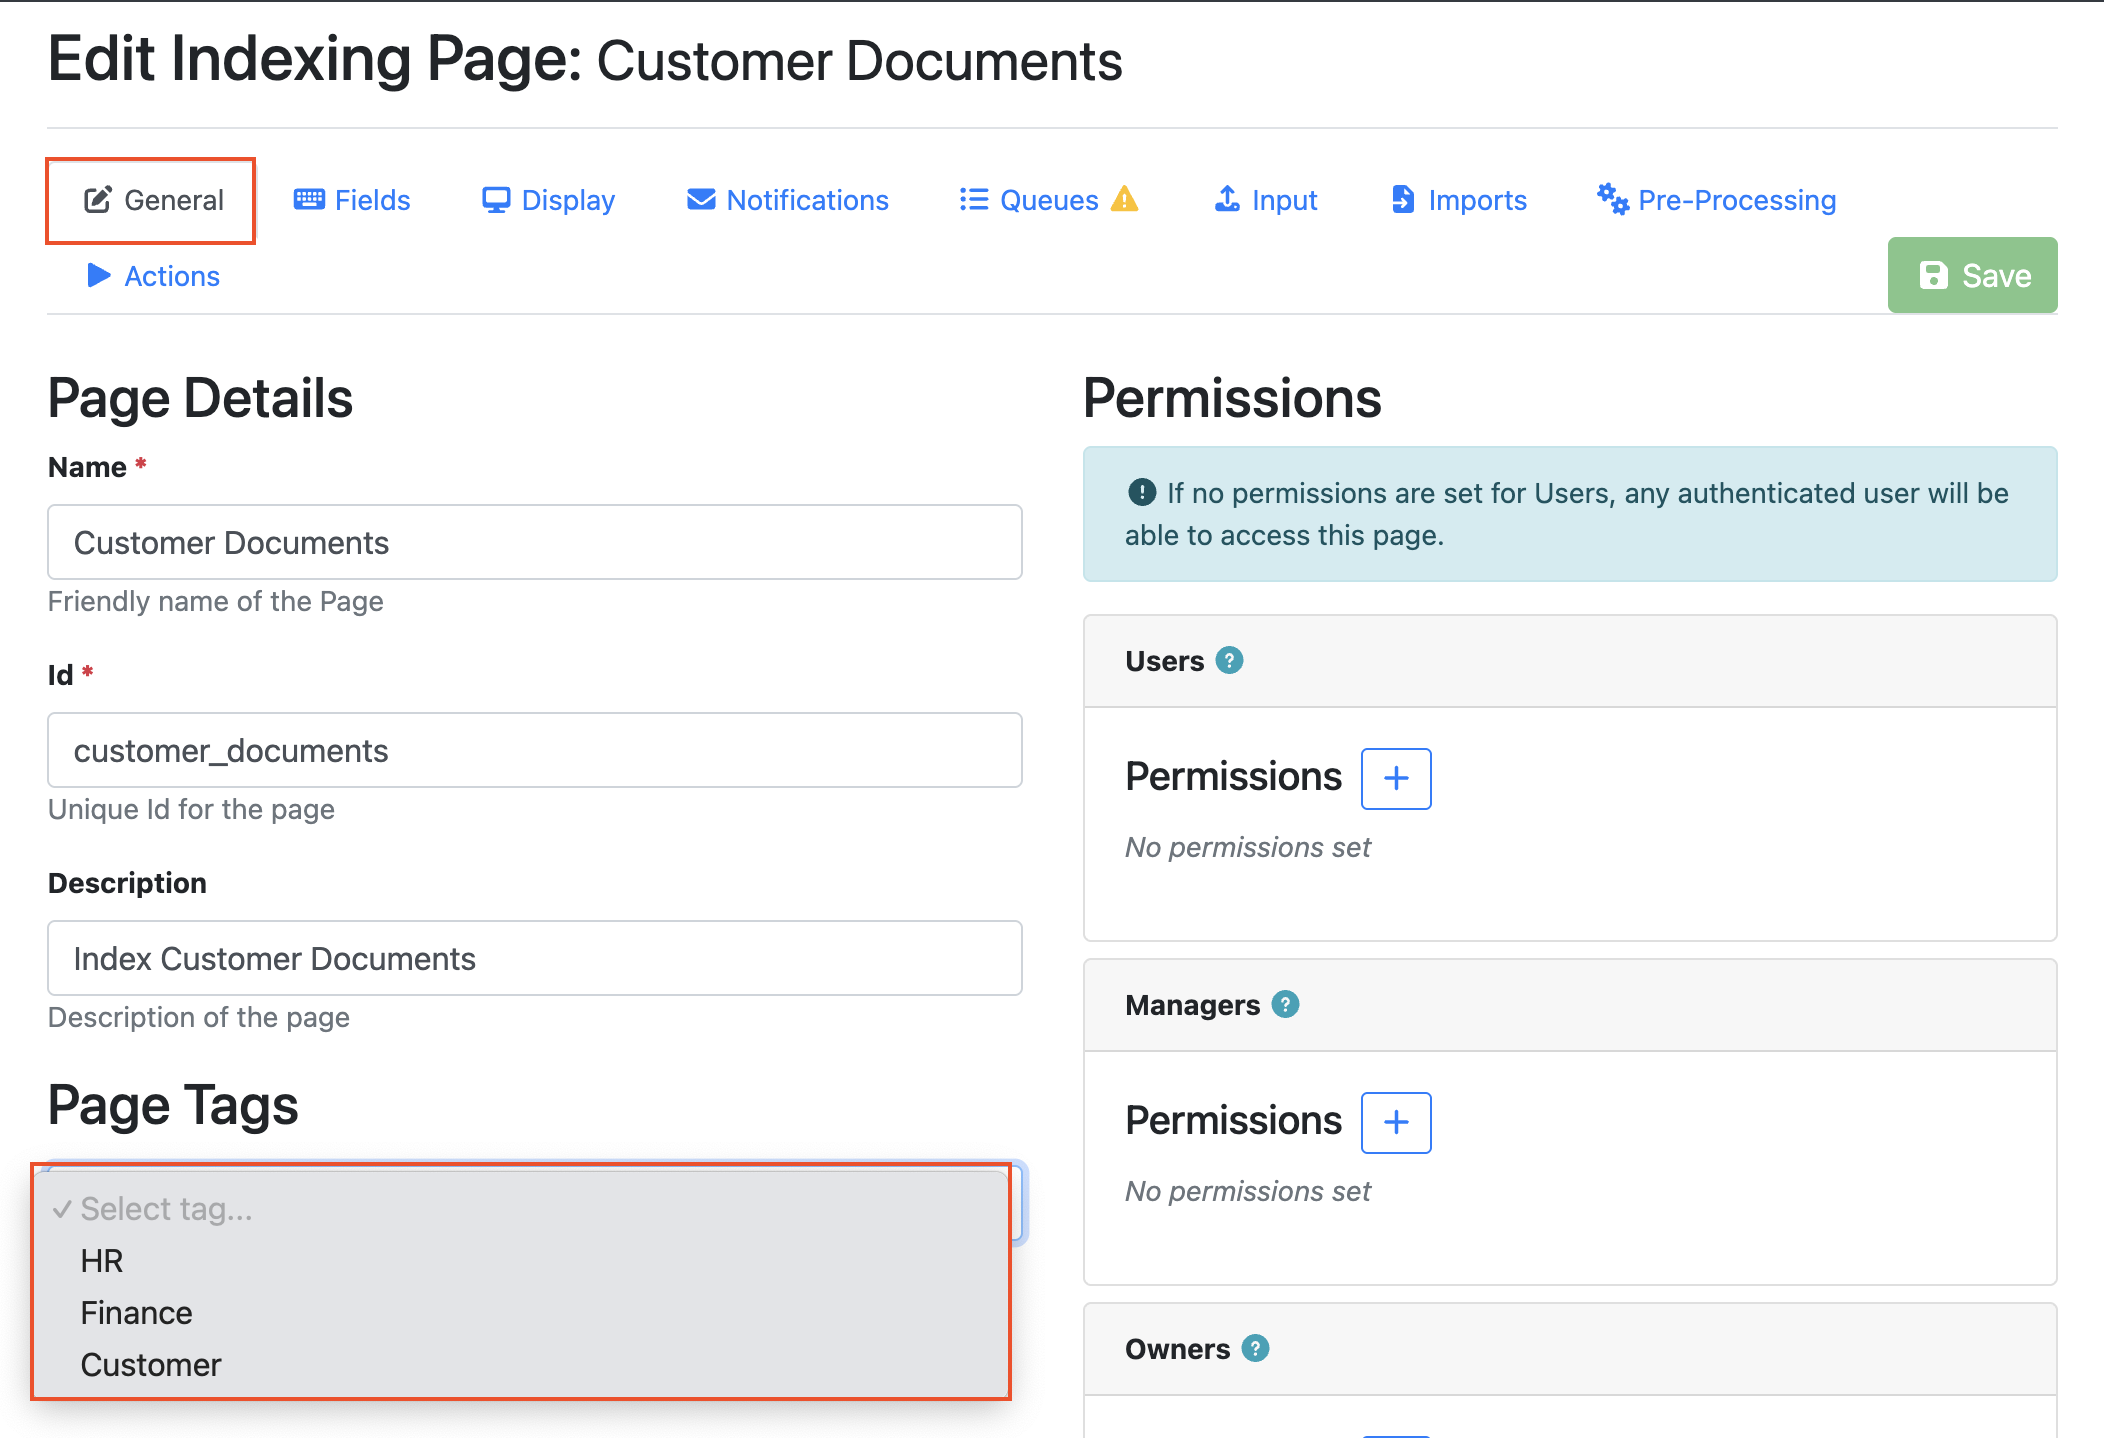
Once selected, the tag will appear below the field as a blue label. To remove a tag, click the X on the tag label.
After making your changes, click Save to update the page. The assigned tags will then be visible in the tags column in App Page List.