
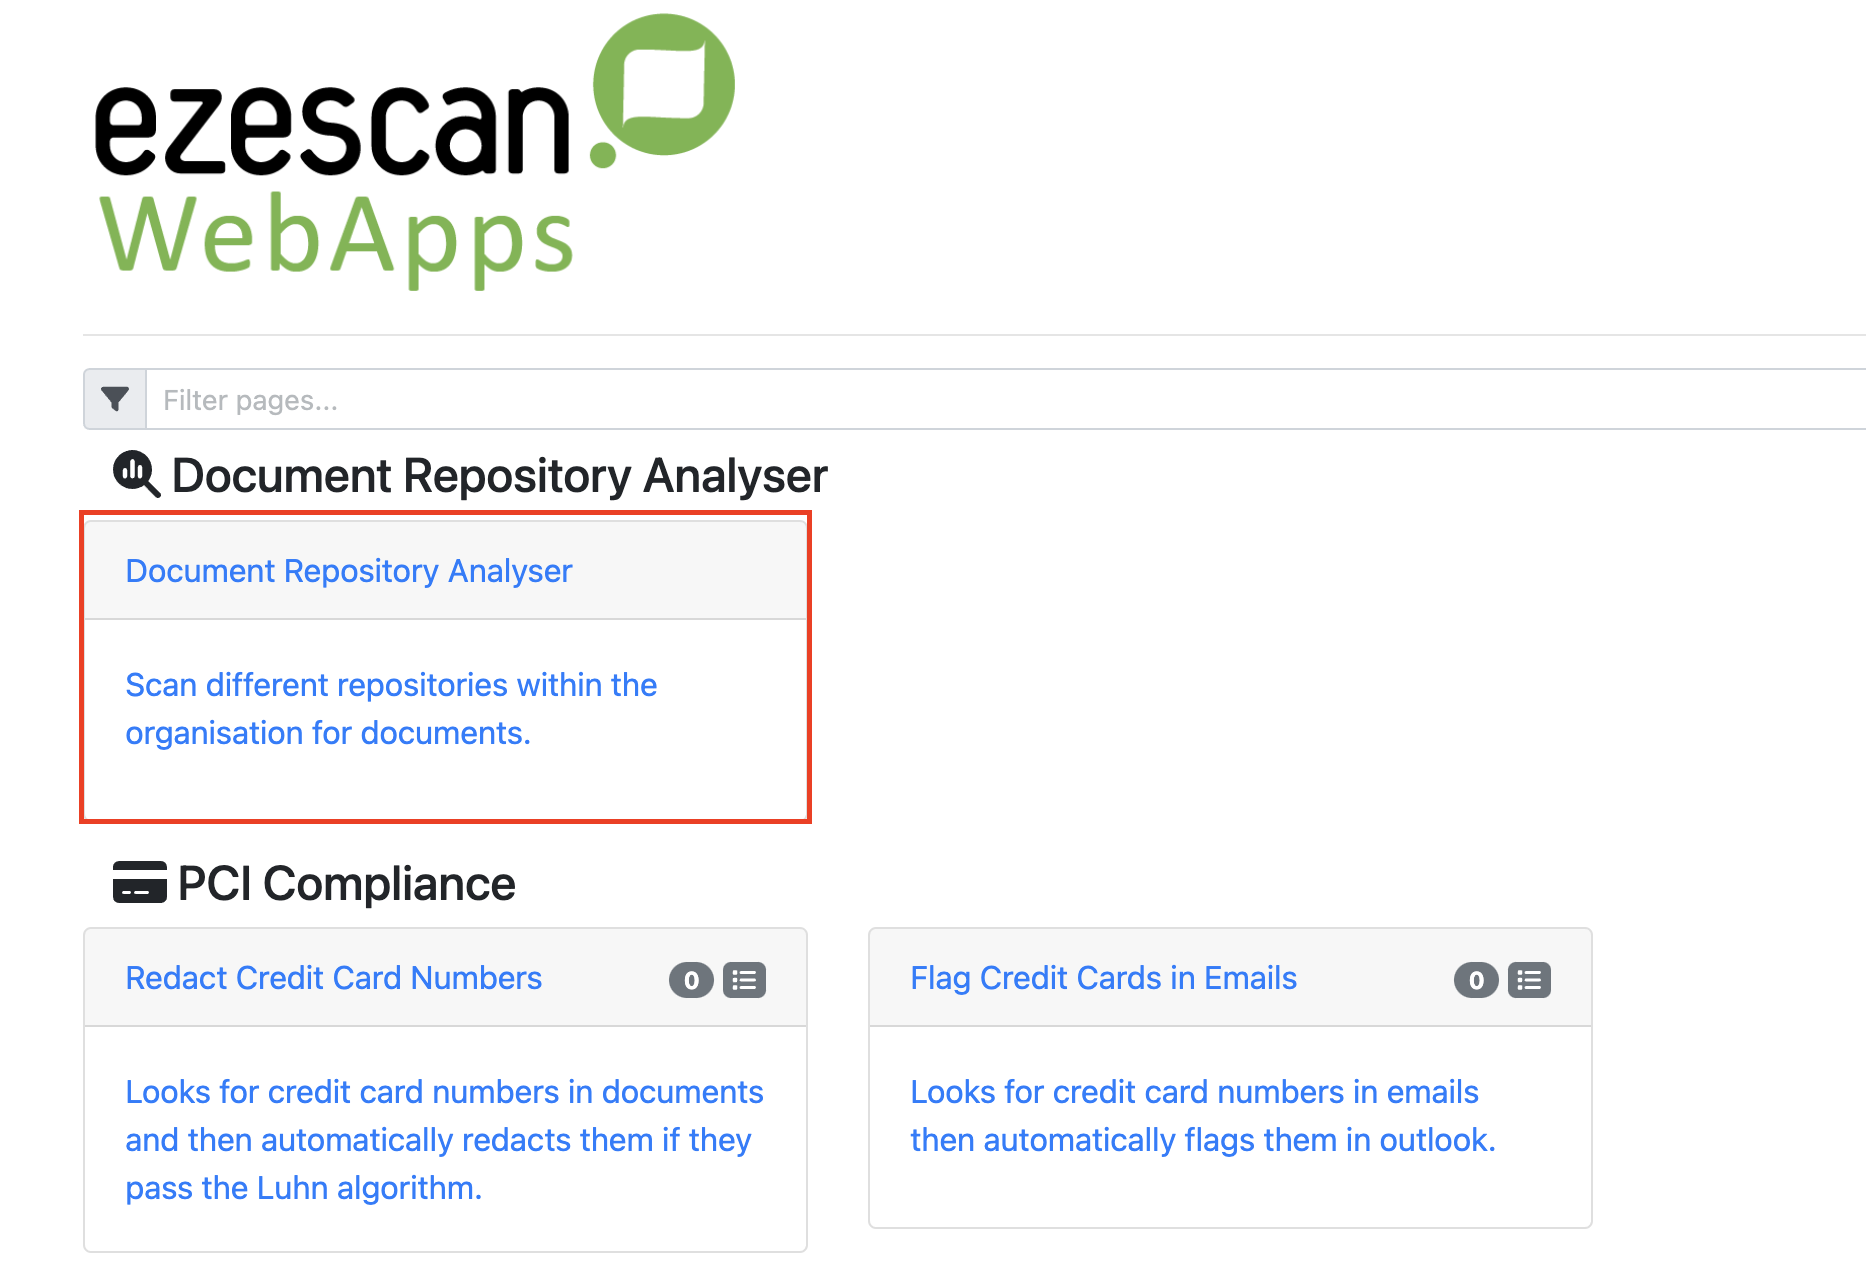
What is DRA?
EzeScan’s Document Repository Analyser (DRA) is a powerful component of the EzeScan WebApp suite, purpose-built to streamline the identification and ingestion of documents into your intelligent processing workflows.
DRA can be configured to crawl network file shares, email servers, and supported EDRMS platforms, automatically locating and cataloguing documents. It compiles a detailed inventory of files, recording essential metadata such as repository name, file name, location, creation date, and processing status.
When integrated with EzeScan’s Remote Indexing Assistant (RIA), DRA becomes part of a robust, end-to-end intelligent document processing solution - empowering your organisation to automate, analyse, and act on documents with confidence.
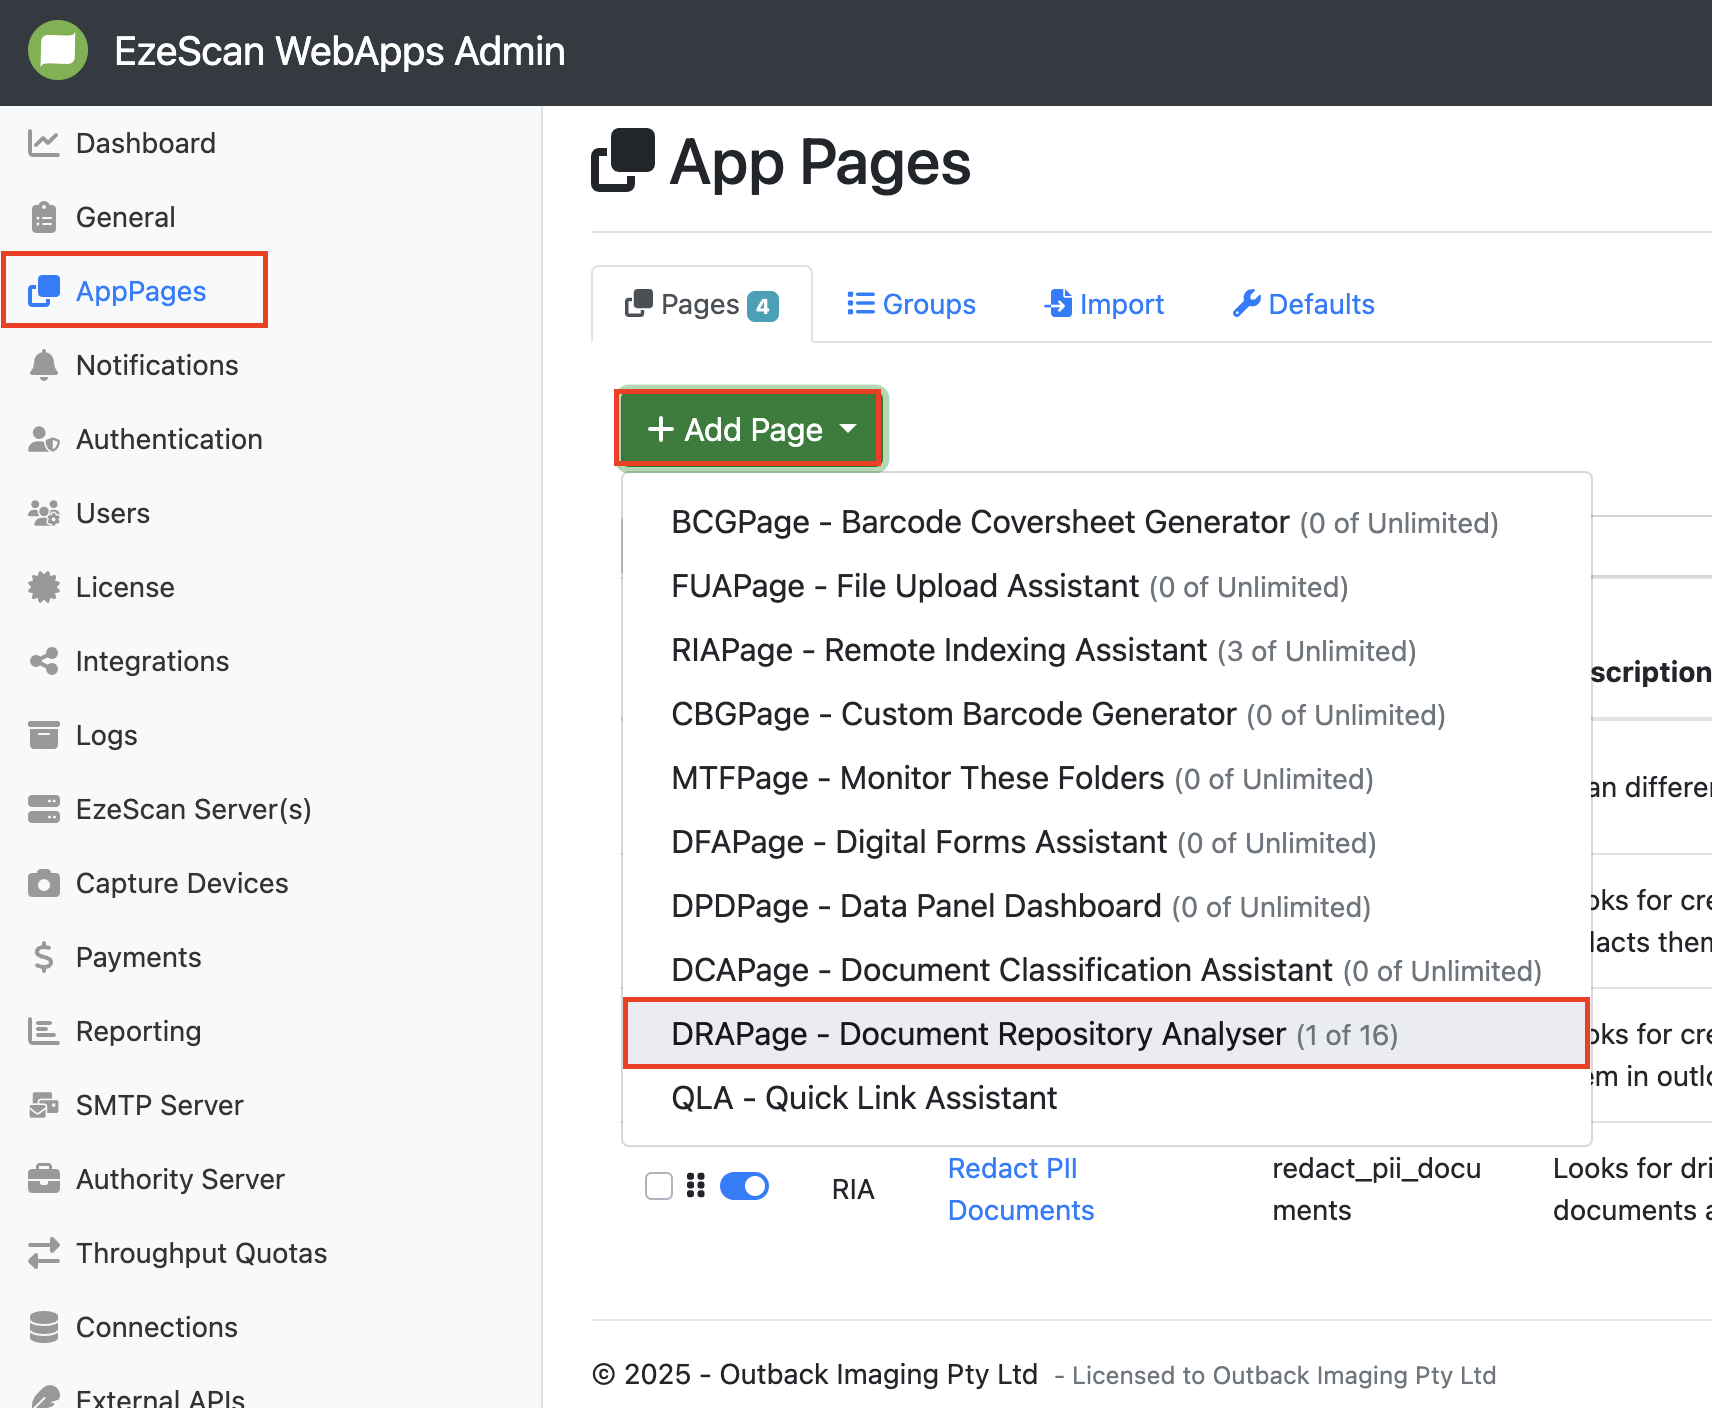
Creating a DRA Page
-
Go to Admin Panel → App Pages → Add Page → Select DRAPage from the drop down menu
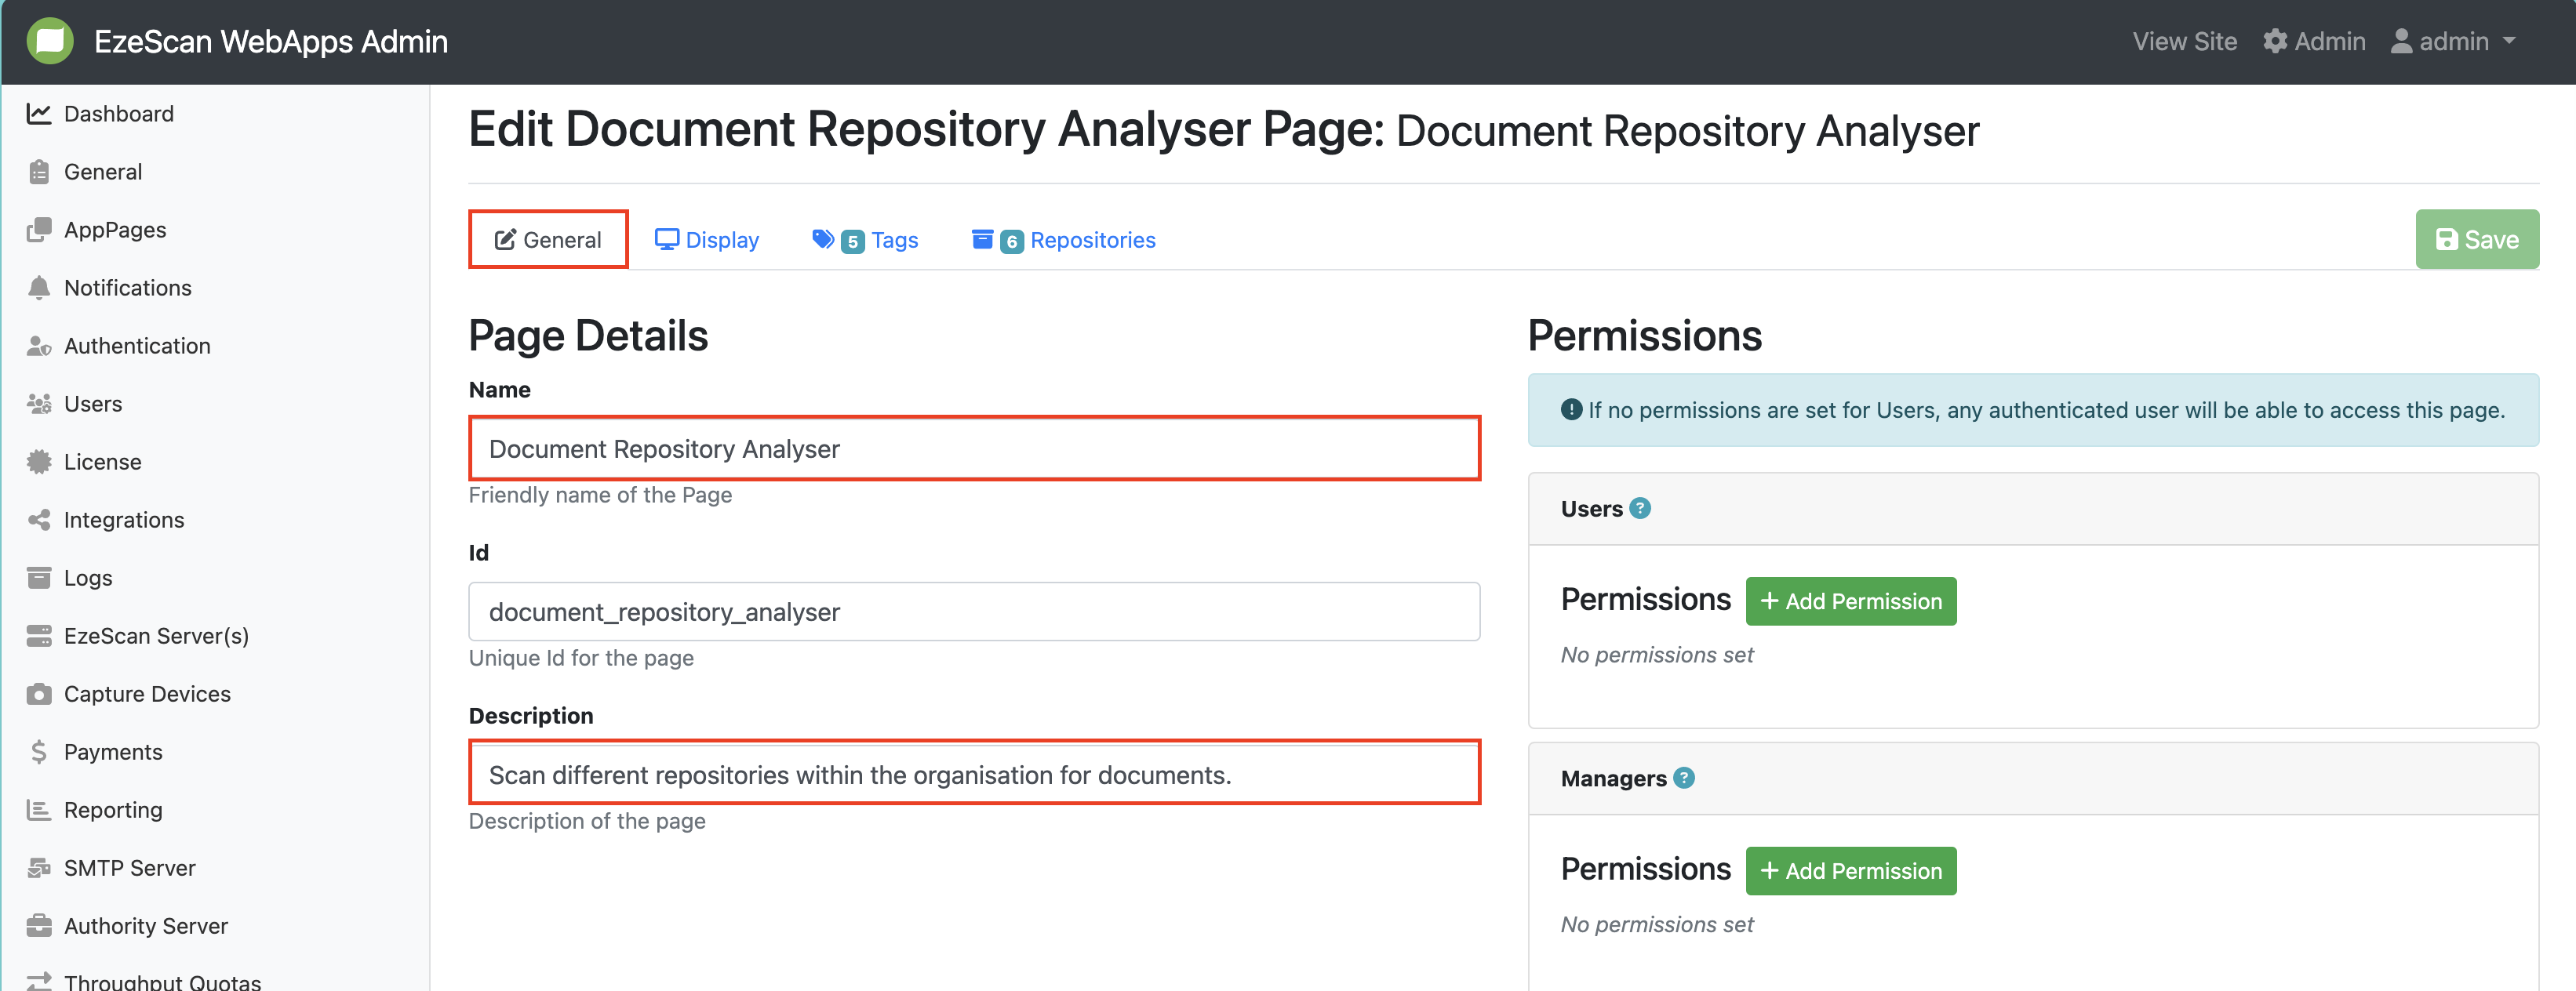
General Tab
Under the General Tab you can give your page a custom name, ID and description. You can also set page permissions.
-
Configure your permissions
Display Tab
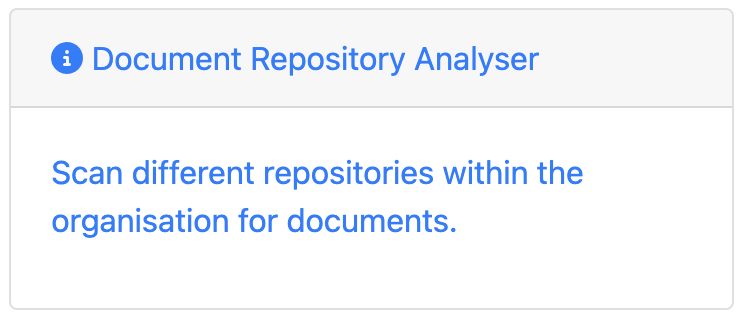
The display tab gives you the ability to configure settings for how the page will appear as a tile on the homepage.
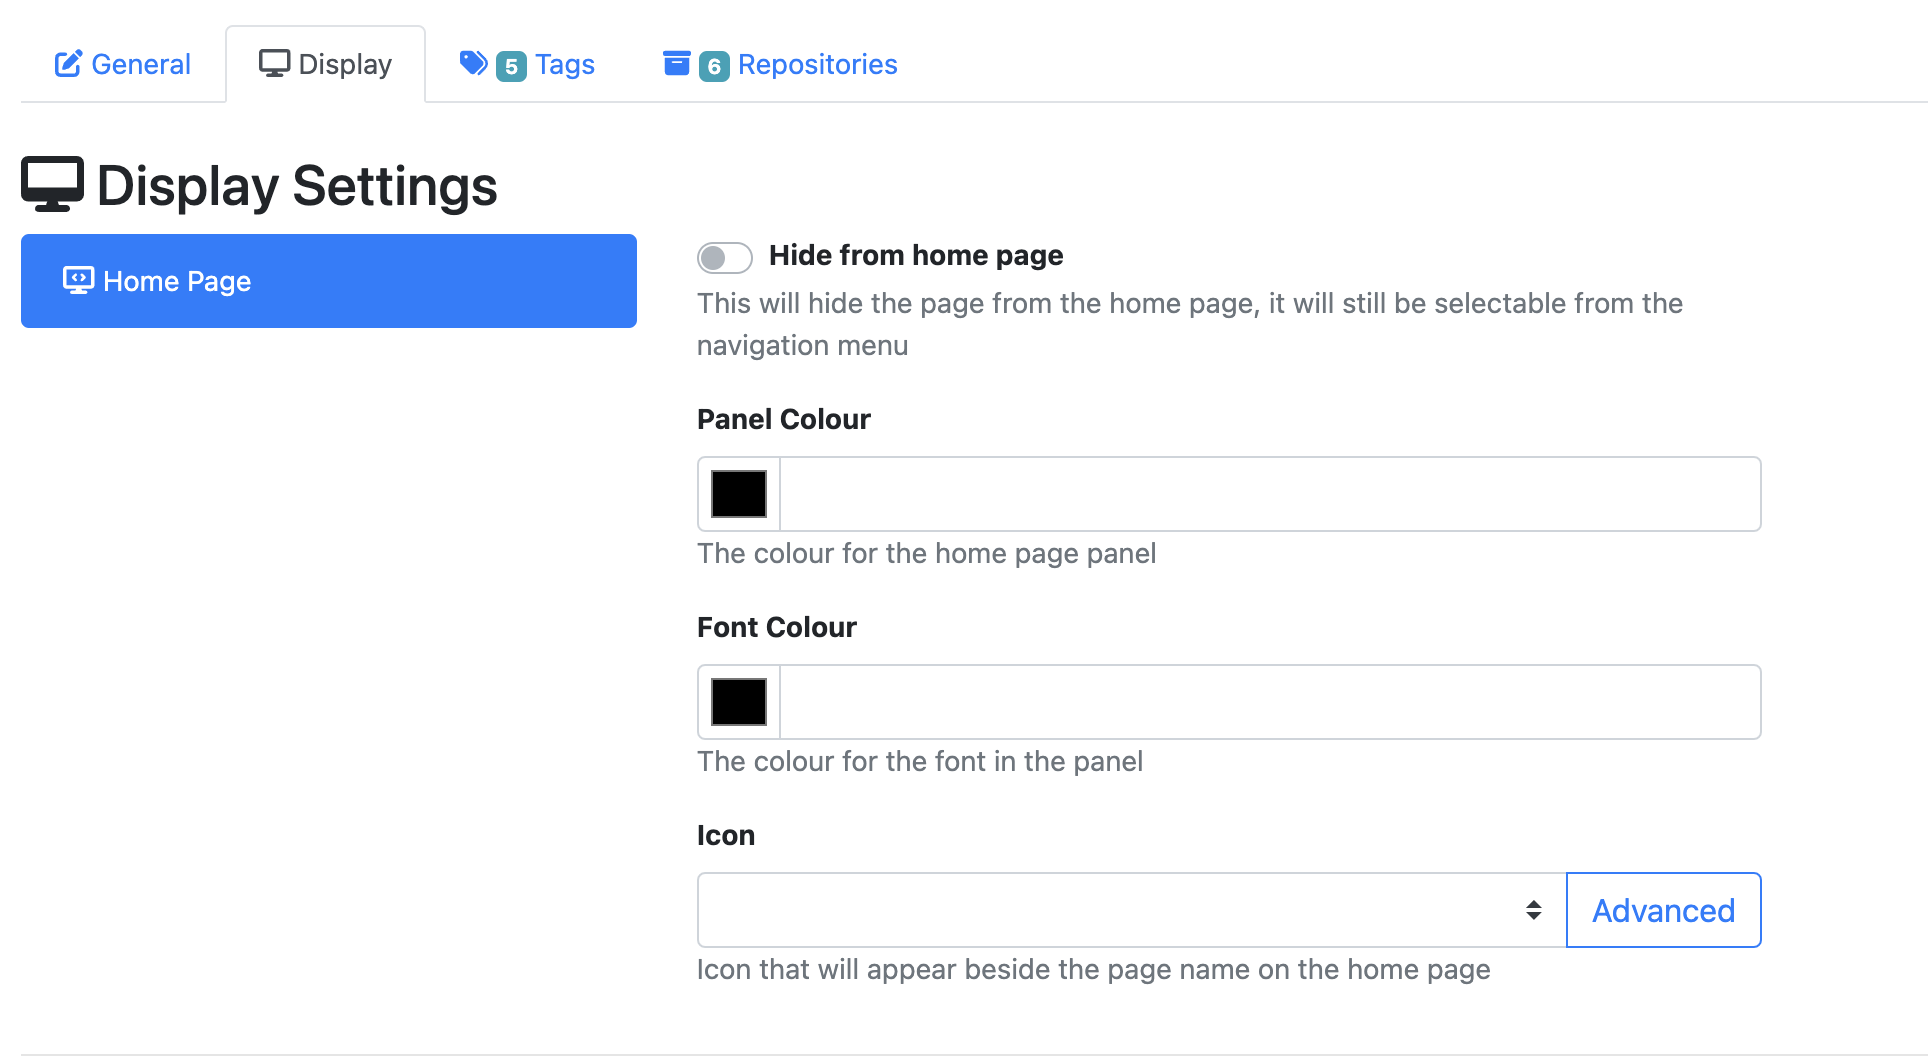
Hide From Home Page
Ability to hide the tile from the homepage screen but still selectable from the navigation menu. By Default this toggle is off which means the tile will appear on the homepage.
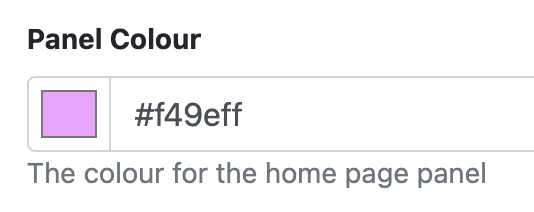
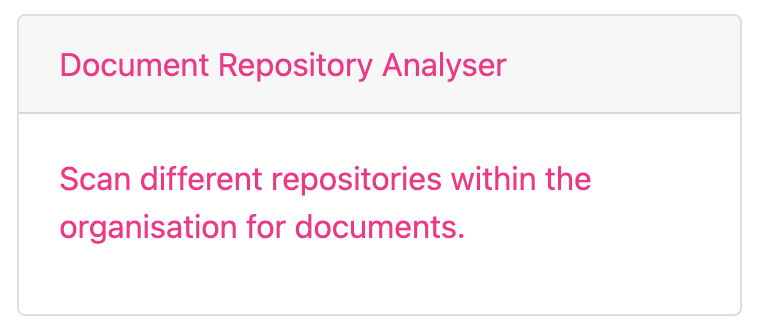
Panel Colour
This changes the background colour of the tile.
It is white by default.
To change the colour you can click the black square to select a colour from the colour pick or type a hex code into the text box.
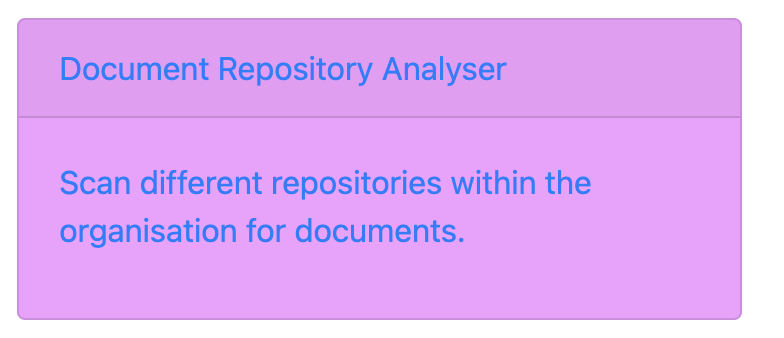
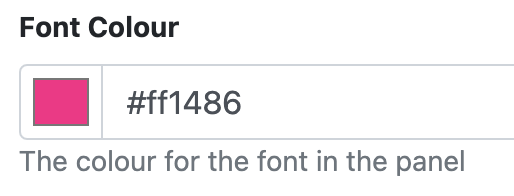
Font Colour
This changes the font colour of the text inside the tile.
It is blue by default.
To change the colour you can click the black square to select a colour from the colour pick or type a hex code into the text box.
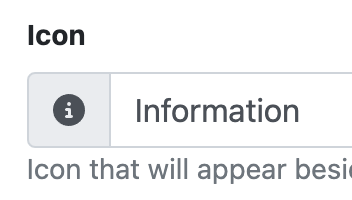
Icon
Allows you to select an icon that will appear beside the page name on the tile.
This can be done in 1 of two ways:
-
Click inside the textbox and select an icon from the list
-
Click the advanced button and type in the icon name.
The selected icon will appear in the grey box.
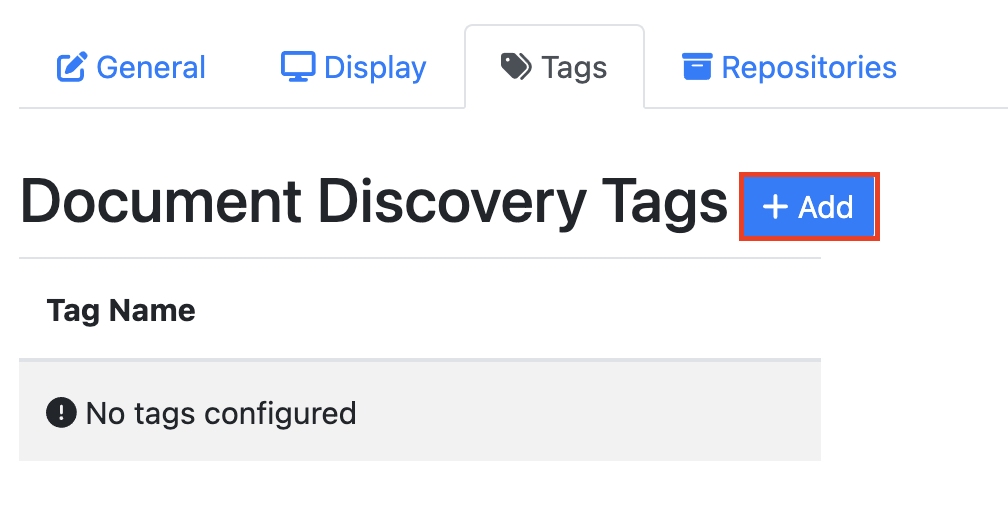
Tags Tab
The tag tab gives the ability to create custom data tags that can appear on documents that have been work-flowed in RIA.
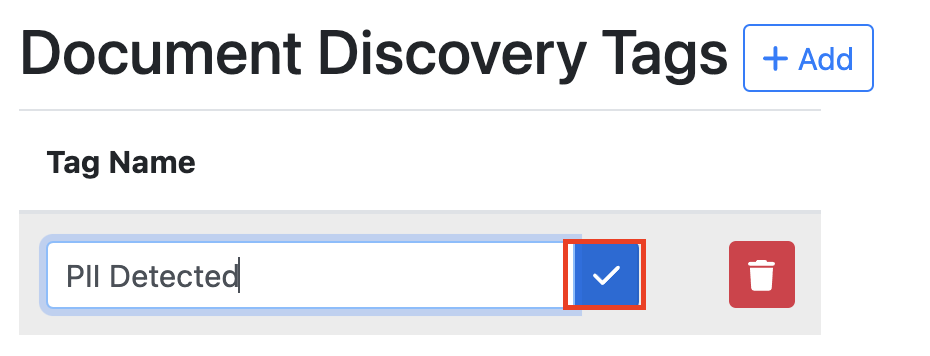
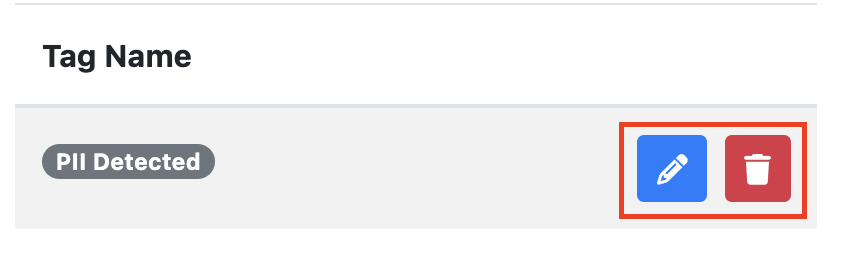
Adding/Editing/Deleting a Tag
-
Click the Add Tag Button.
-
Type in your tag name and click the blue tick
-
To edit a tag’s name click the blue pencil button. To delete a tag click the red rubbish bin button.
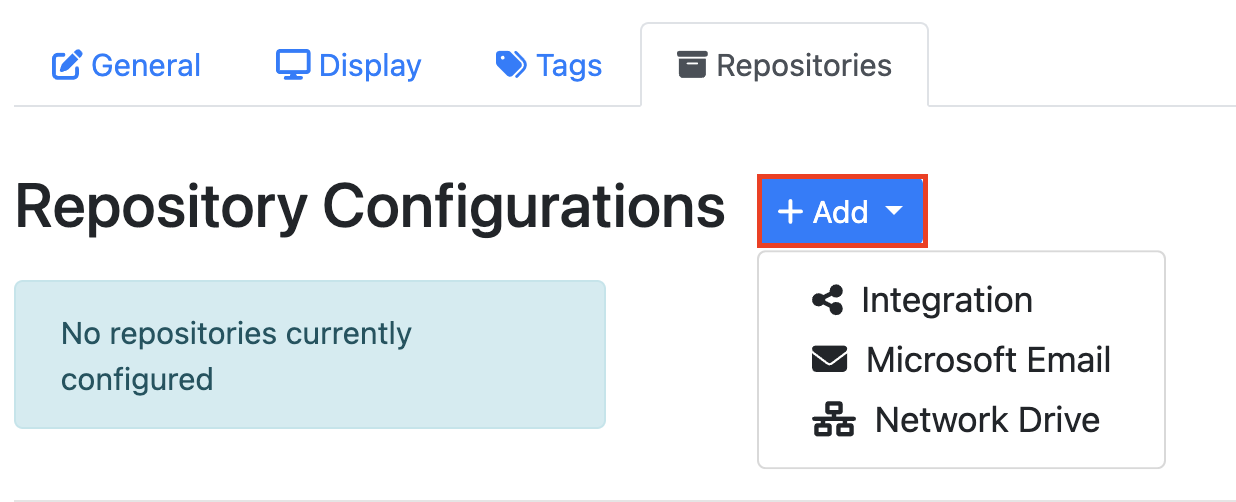
Repositories Tab
This tab gives you the ability to connect a repository to be crawled. There are three types of repositories that can be configured:
-
Integration
-
Microsoft Email
-
Network drive
To add a repository click the blue Add button and select your repository type from the drop-down menu.
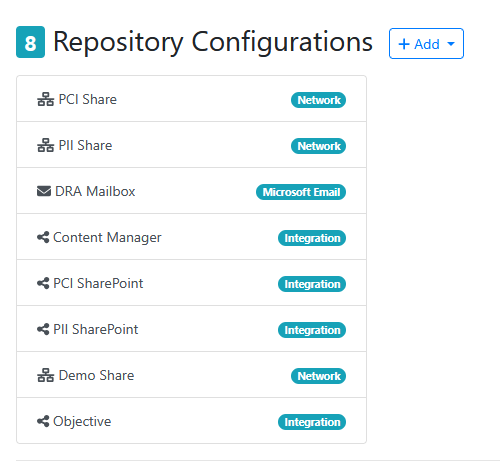
It is possible to add one or more repositories to a DRA Page as shown in the example below:
Basic Tab
The basic tab is where you can set the repository name, description and watcher settings.
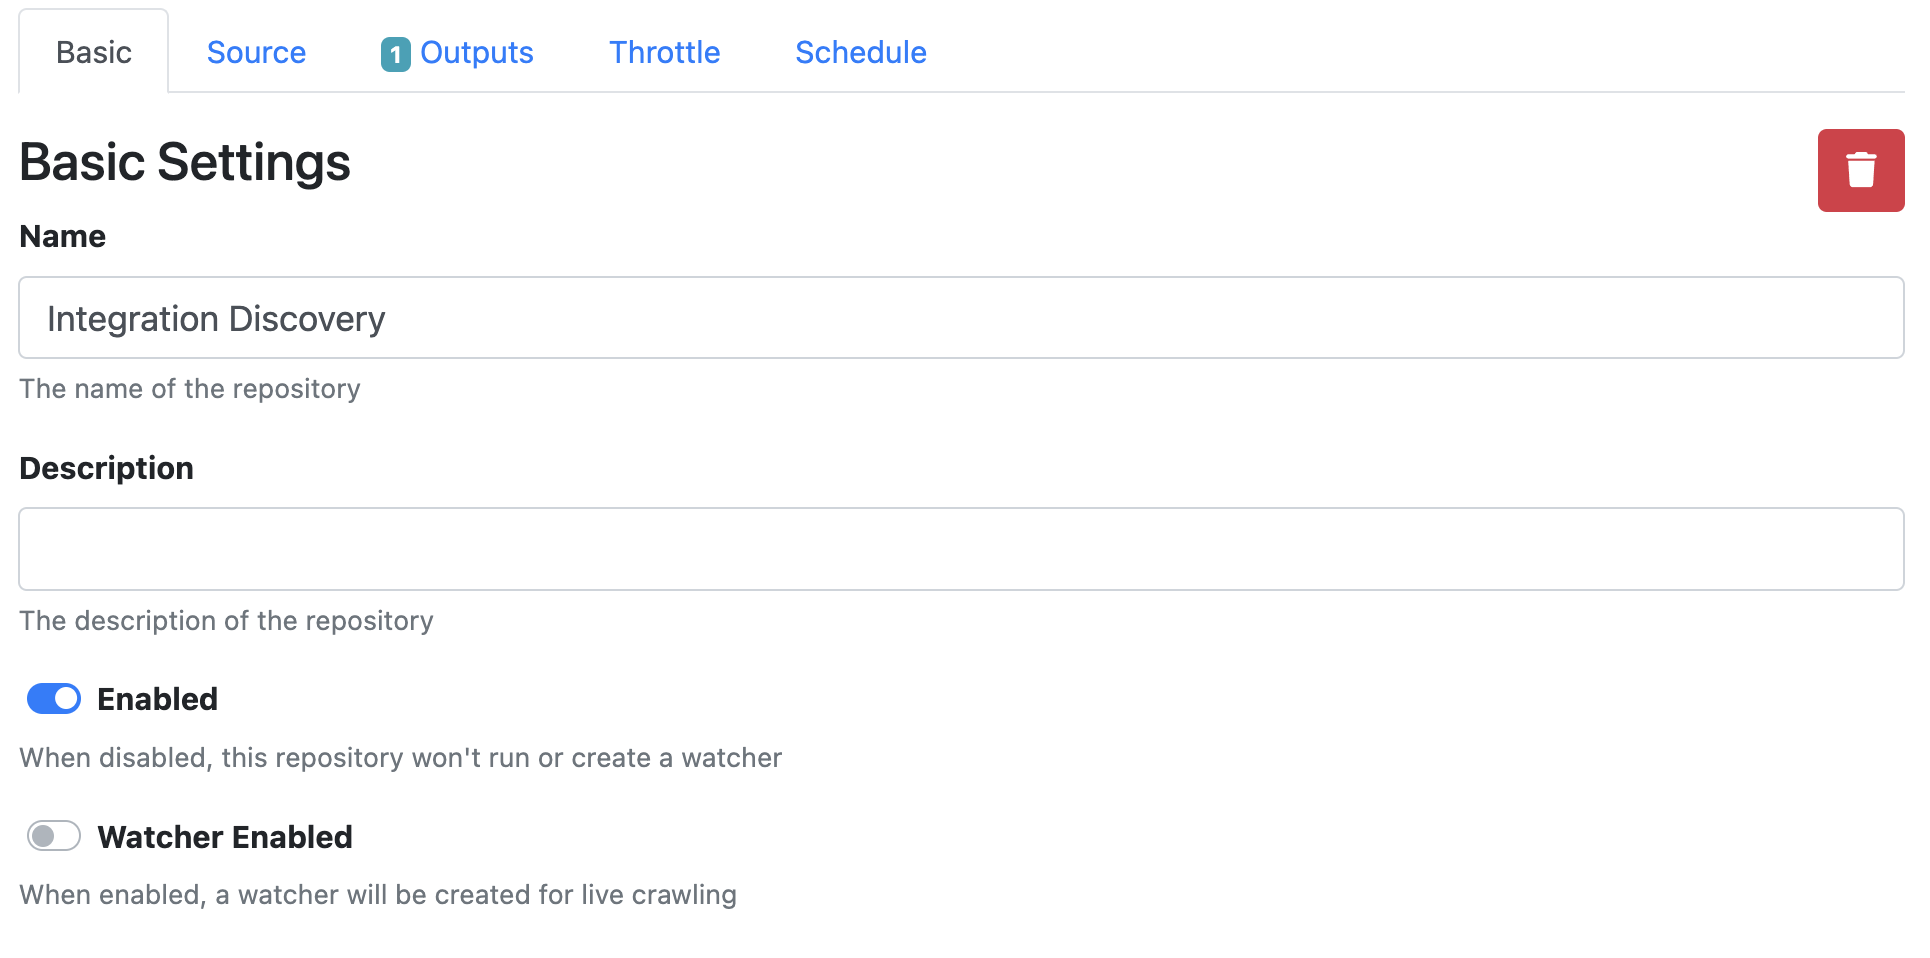
|
Setting |
Description |
|---|---|
|
Name |
Give the repository a custom name |
|
Description |
Describe what the repository is |
|
Enabled |
This is enabled by default. When disabled, this repository won't run or create a watcher. |
|
Watcher Enabled |
This is not enabled by default. When enabled, a watcher will be created for live crawling. |
Source Tab
For Integration Repository
Document and Content Management Systems like OpenText Content Manager, Microsoft SharePoint and Objective ECM.
For Microsoft Email Repository
For Network drive Repository
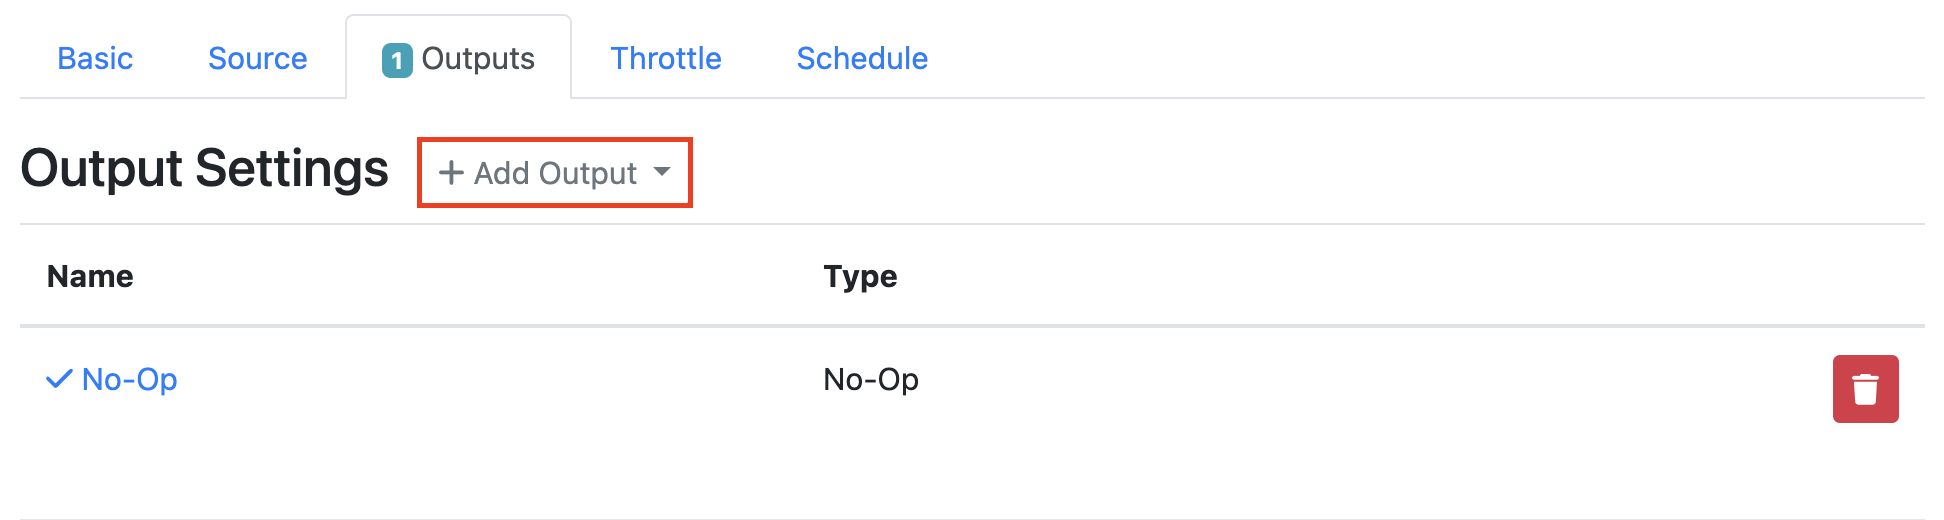
Outputs Tab
The output tab is where you can configure the output actions for that repository.
To add an output click the Add Output button and select an output from the dropdown menu.
Note: The type of available outputs will depend on the type of repository being configured.
For Integration Repository
|
Output Options |
Description |
|---|---|
|
Integration Output |
Content Manager
Objective ECM
SharePoint
|
|
No-Op |
No changes will be made to the original file. A No-Op is applied by default. |
For Microsoft Email Repository
|
Output Options |
Description |
|---|---|
|
Add Email Category |
Adds an email category to the email. |
|
Delete Email |
The original email will be deleted once the file is output. |
|
Move Email |
Moves the email to the target folder once it has been output. You will need to select the email folder to move the email to. |
|
No-Op |
No changes will be made to the original file. A No-Op is applied by default. |
For Network drive Repository
|
Output Options |
Description |
|---|---|
|
Delete |
The original file will be deleted once the file is output. |
|
No-Op |
No changes will be made to the original file. A No-Op is applied by default. |
|
Replace |
The original file will be replaced with the output file. |
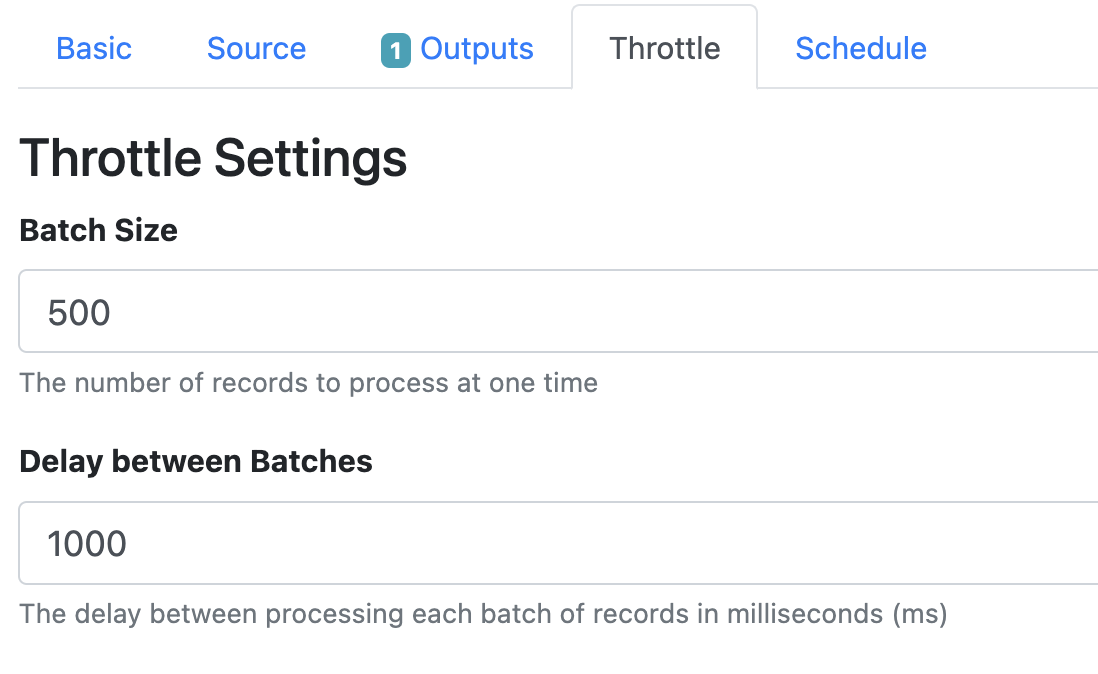
Throttle Tab
The throttle tab lets you configure a throttle limit to the number of records being discovered at one time and how often.
|
Setting |
Description |
|---|---|
|
Batch Size |
Set the number of records to process at one time. This is set to 500 by default. |
|
Delay Between Batches |
Set the delay between processing each batch of records in milliseconds (ms). This is set to 1000 by default. |
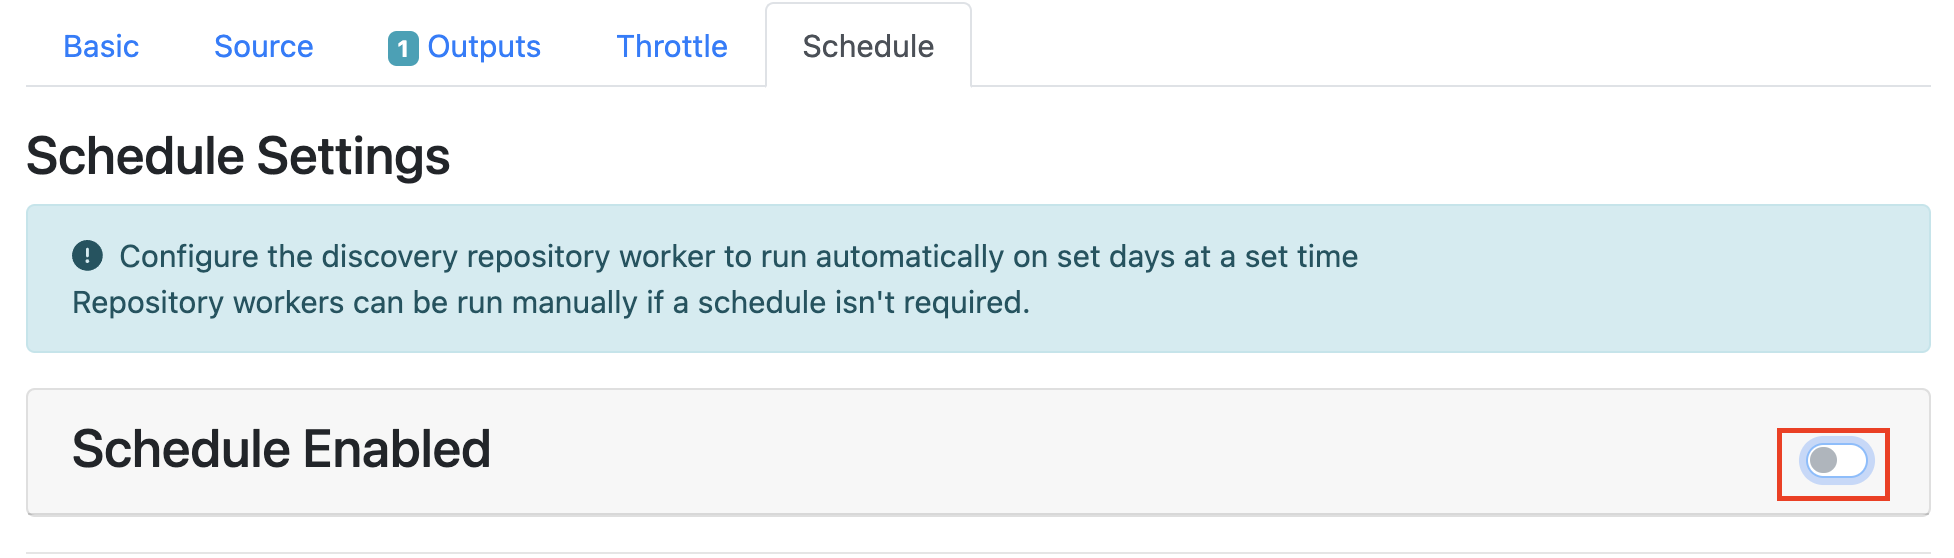
Schedule Tab
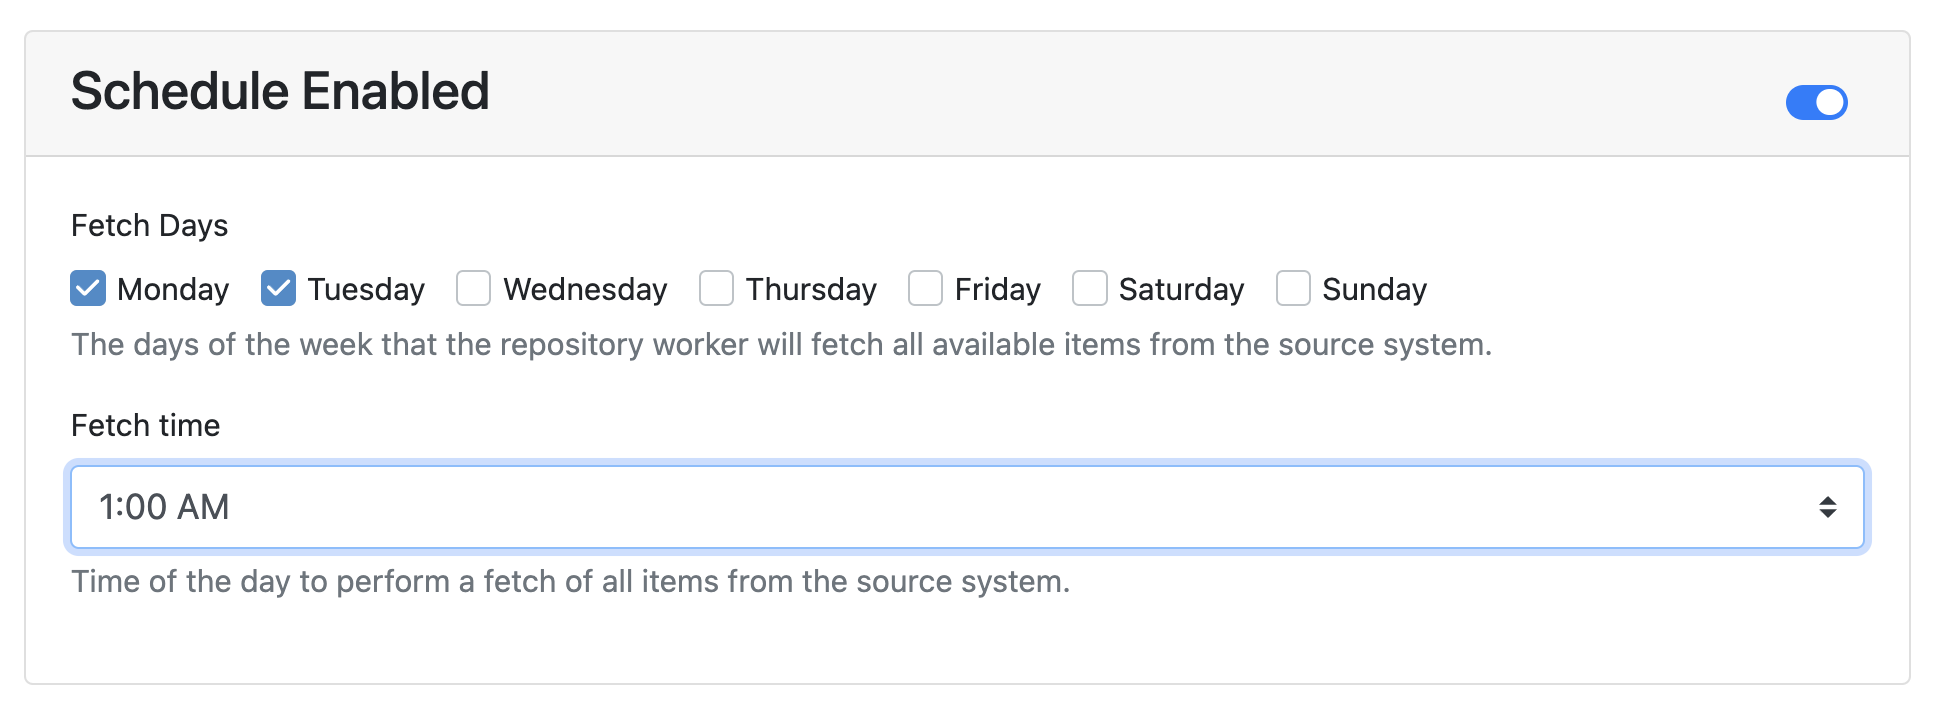
The Schedule tab gives you the ability to configure the discovery repository worker to run automatically on set days at a set time.
By default a schedule is not enabled.
To create a schedule you will need to click the toggle on the Schedule Enabled.
Click the checkbox of the days you want the repository worker to fetch items and select a fetch time from the drop down menu.
Using the DRA Page
Dashboard Tab
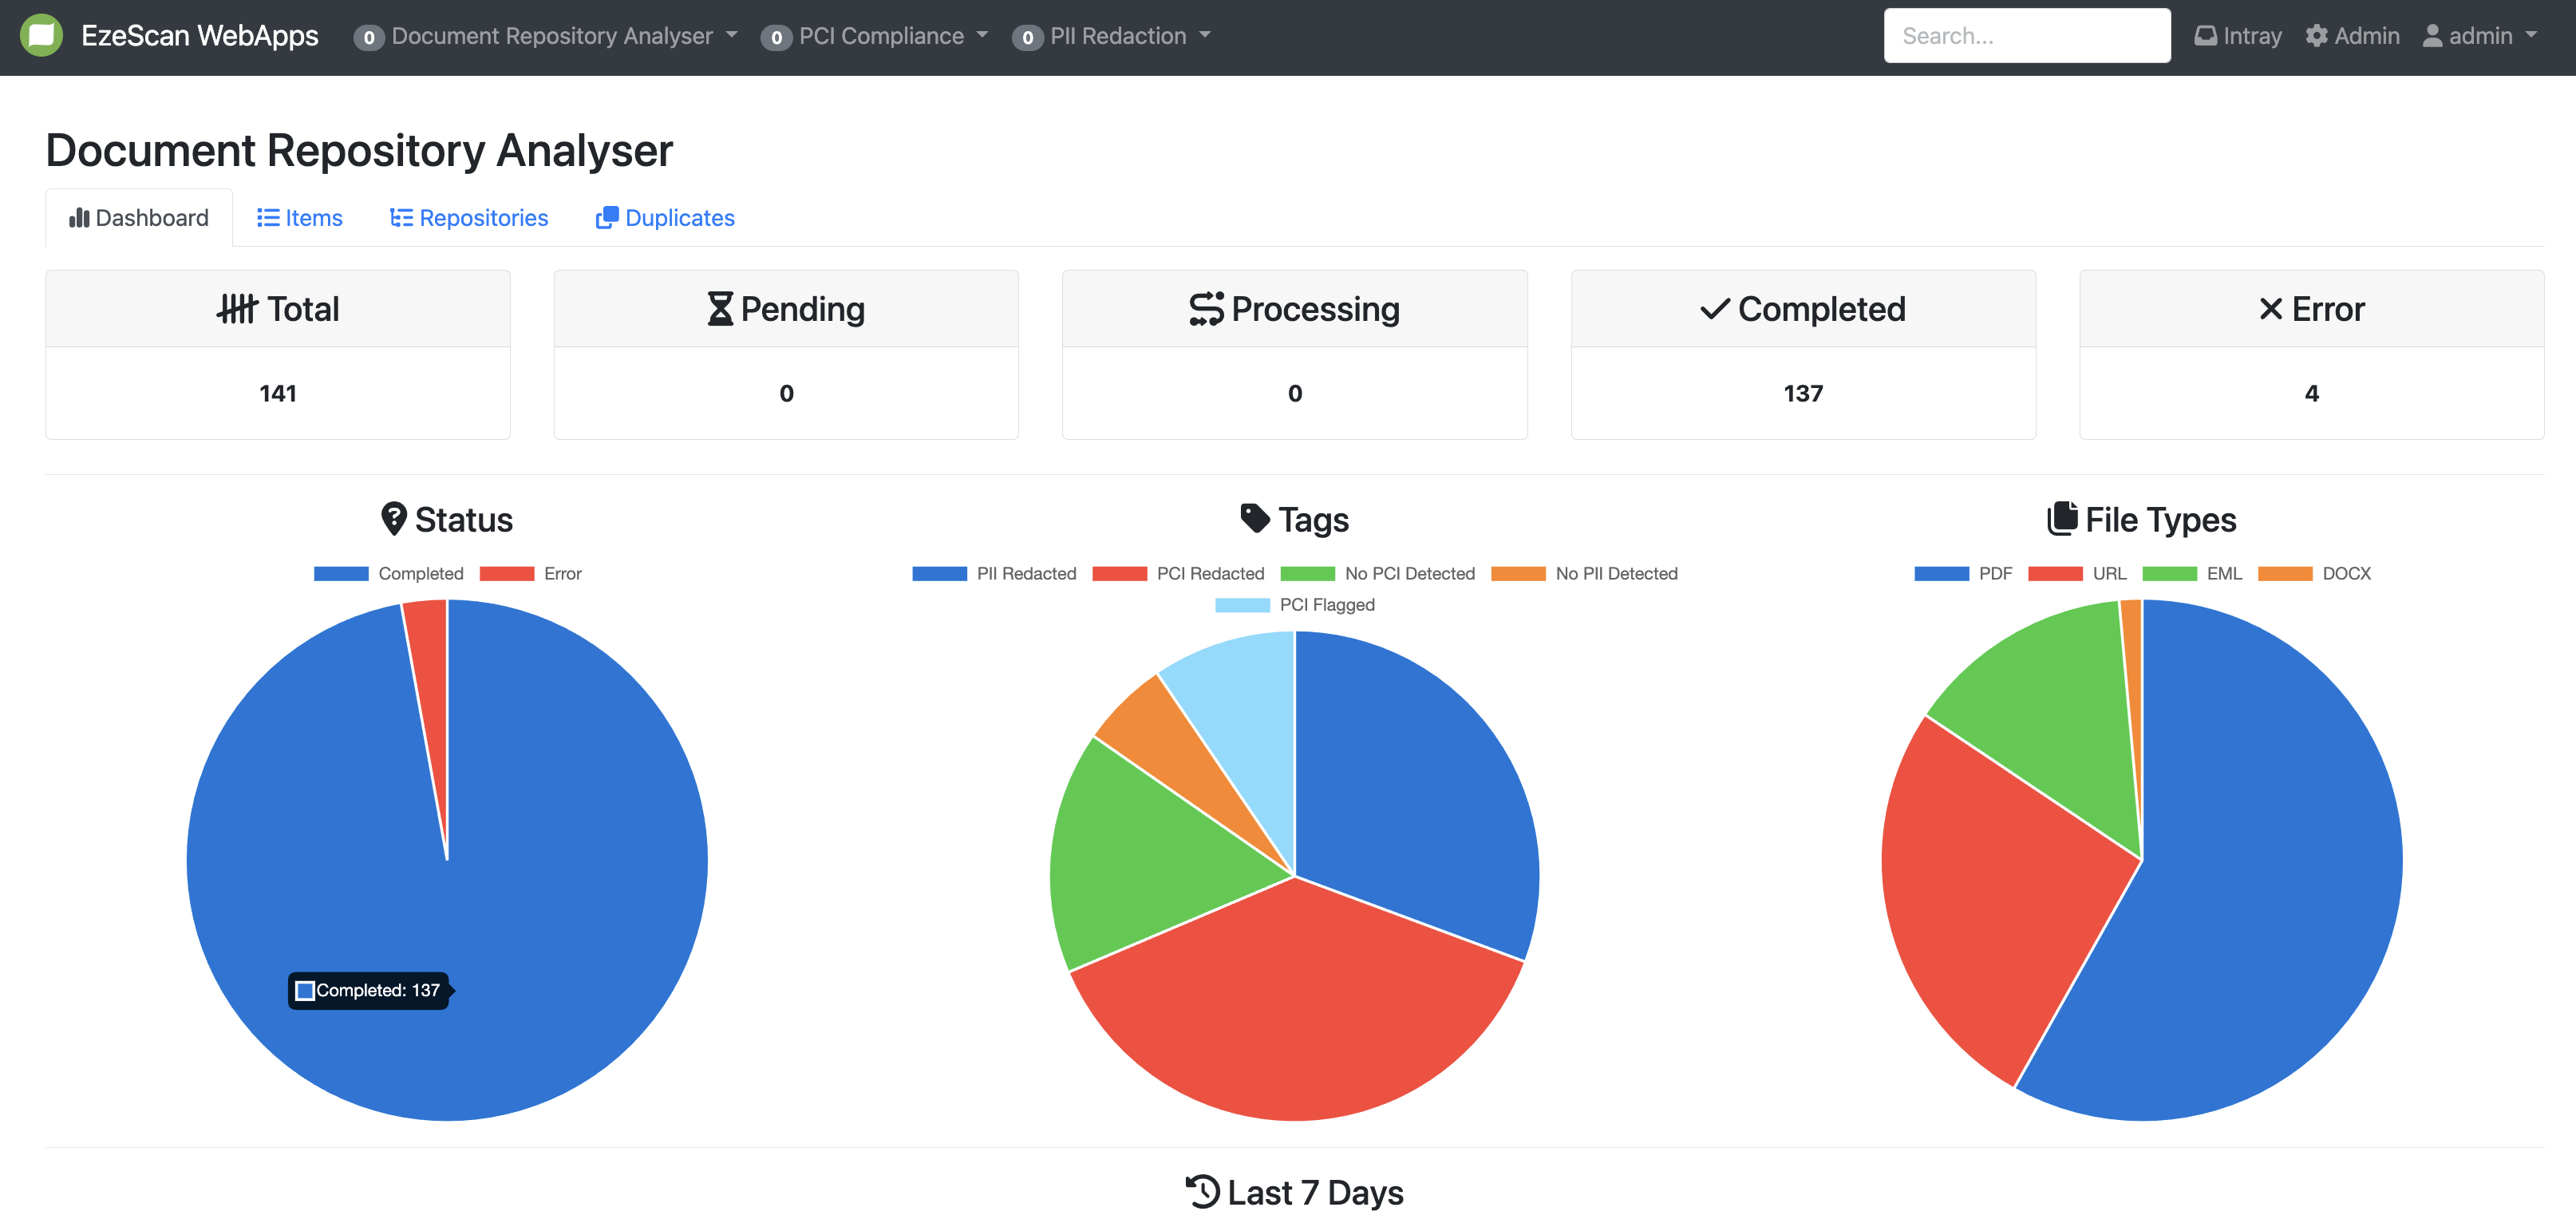
There are 5 tiles (named Total, Pending, Processing, Completed and Error) that show the number of documents at various stages of the DRA processing lifecycle. If you click on the number value shown under the tile heading it will take you to the items tab, where those items at that processing stage will be shown to you.
Items Tab
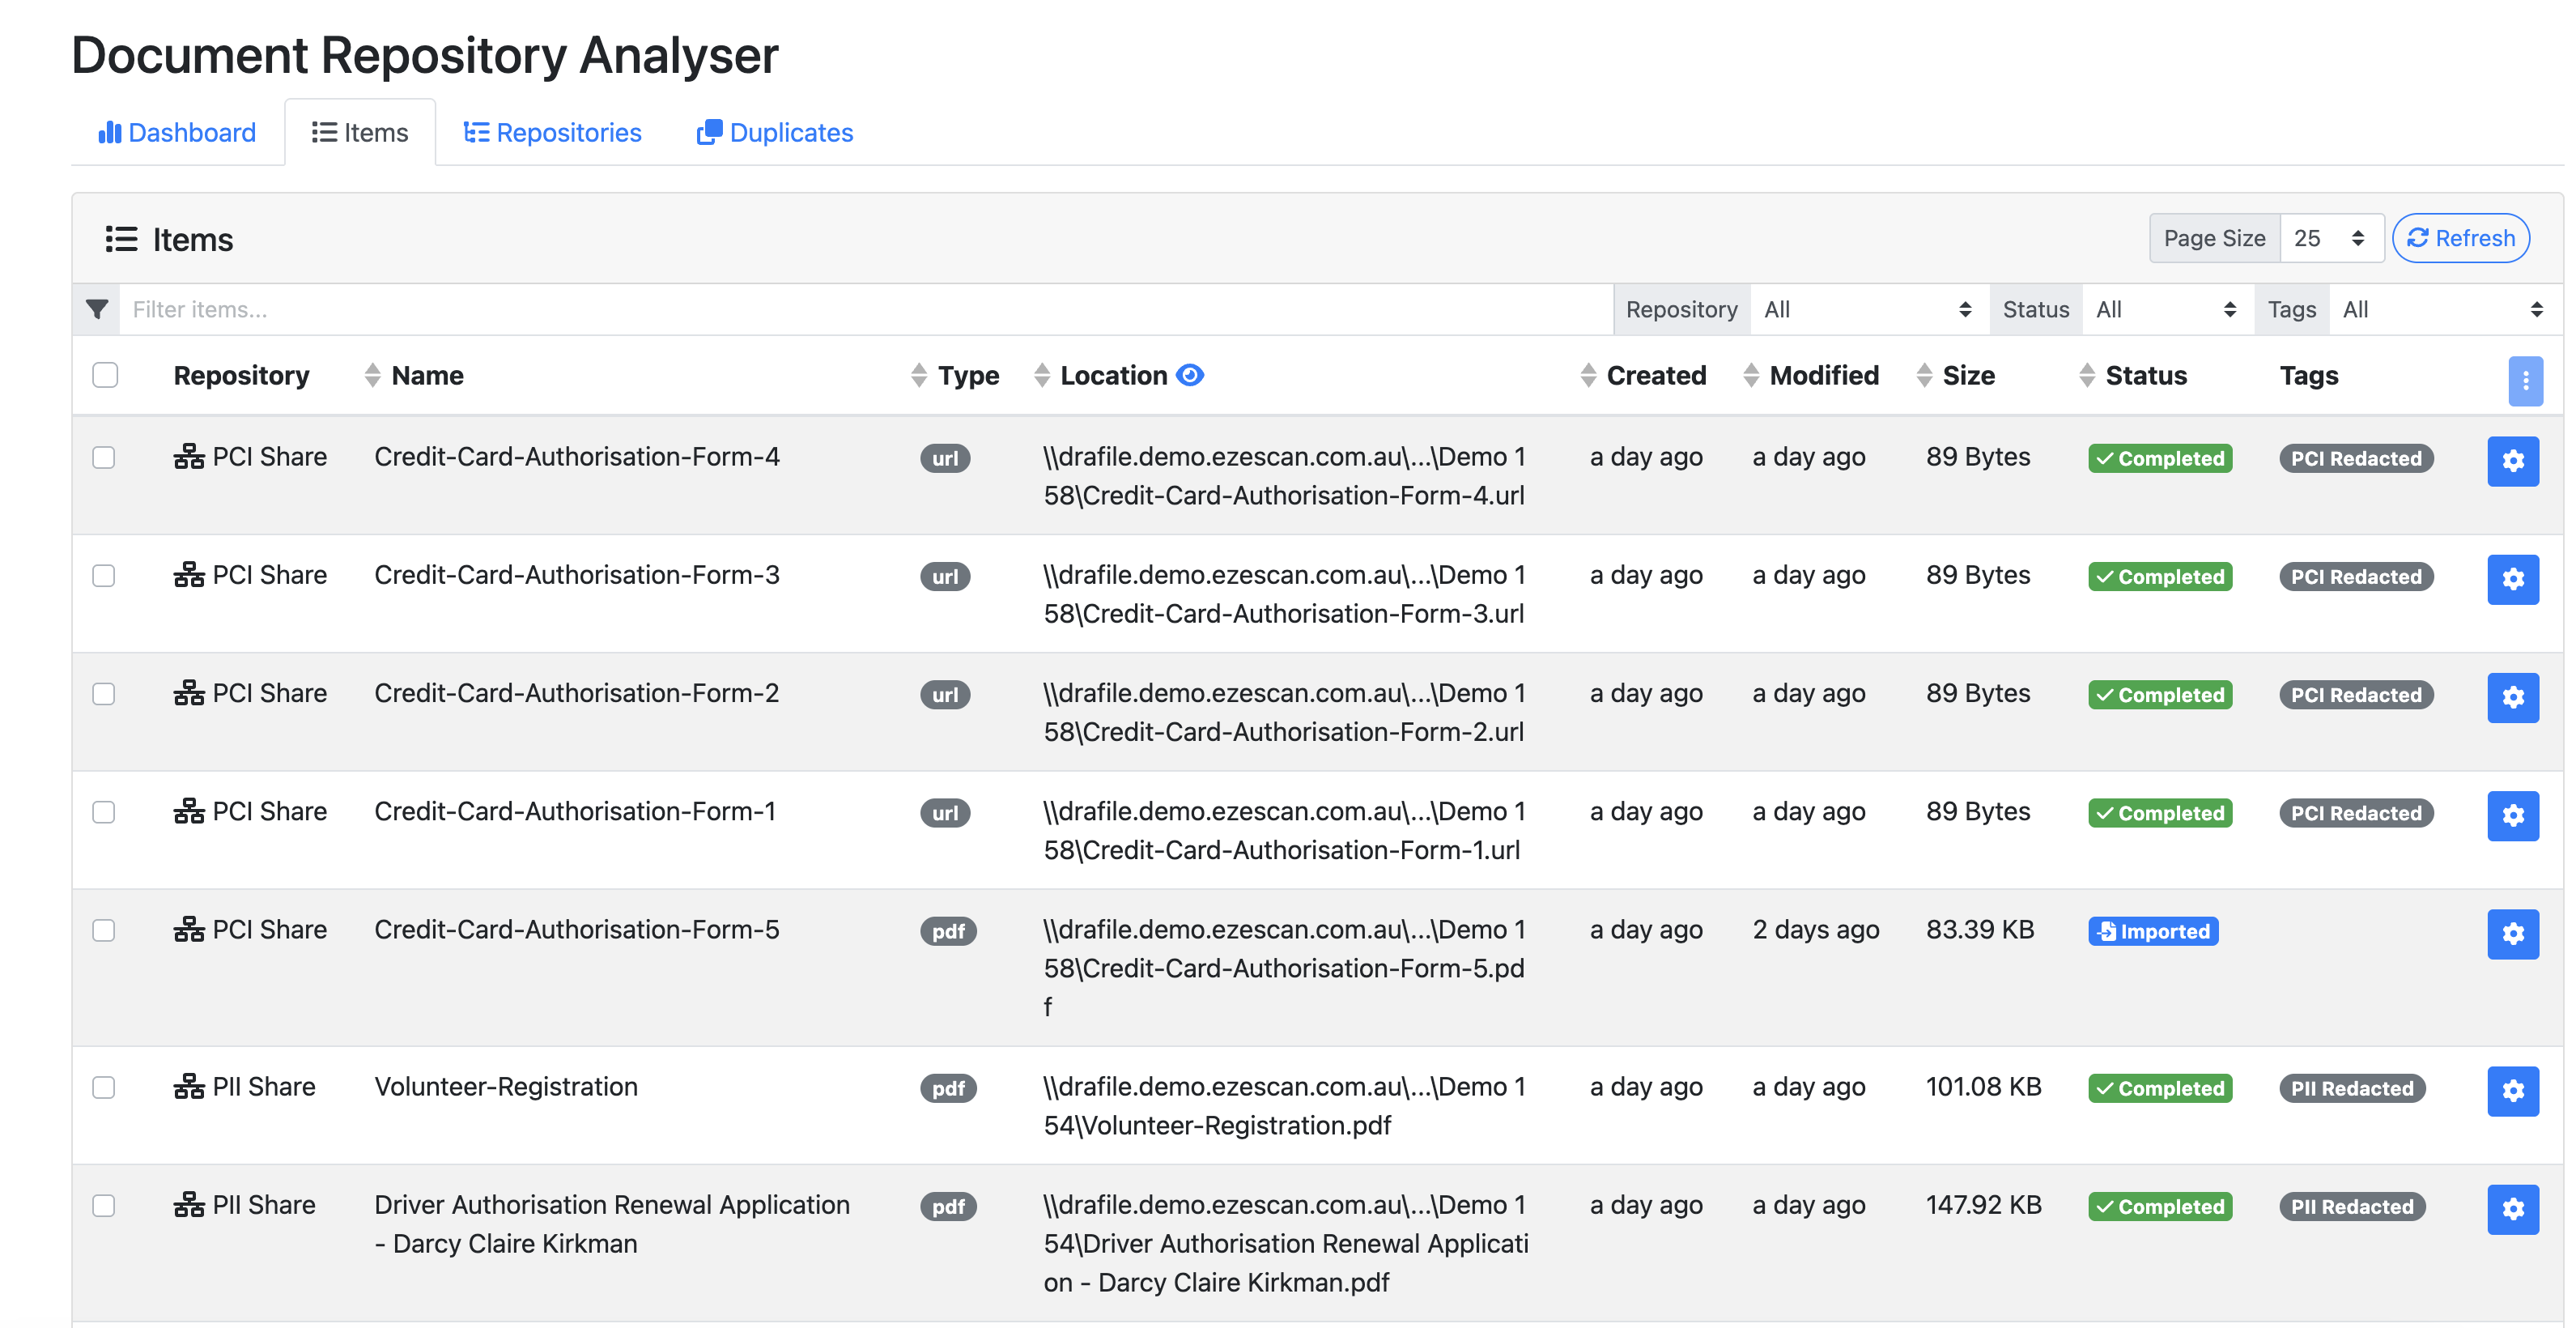
|
Column |
Description |
|---|---|
|
Repository |
Displays the repository name of where it came from. |
|
Items |
Displays the name of the file. |
|
Type |
Displays the file type. |
|
Location |
Displays the file path within the repository of where the item is located. |
|
Created |
The day the file was created. |
|
Modified |
The date the file was last modified. |
|
Size |
The size of the file. |
|
Status |
The status of the file. |
|
Tags |
Any workflow tags applied to the documents. |
|
Blue Cog |
Gives you the ability to manually add or delete a tag. |
Bulk Editing Items
Use the check boxes in the left hand column of the table to select one or more items to bulk action items. Once selected, click the Blue Action Items button in the top right hand corner of the table to select one of the following bulk actions.

|
Bulk Item Actions |
Description |
|---|---|
|
Add Tags from Items |
Ability to add tags to one or more items. |
|
Delete Tags from Items |
Ability to delete tags from one or more items. |
|
Reset Items |
Ability to reset one or more items. |
|
Delete Items |
Ability to delete one or more items. |
Repositories Tab
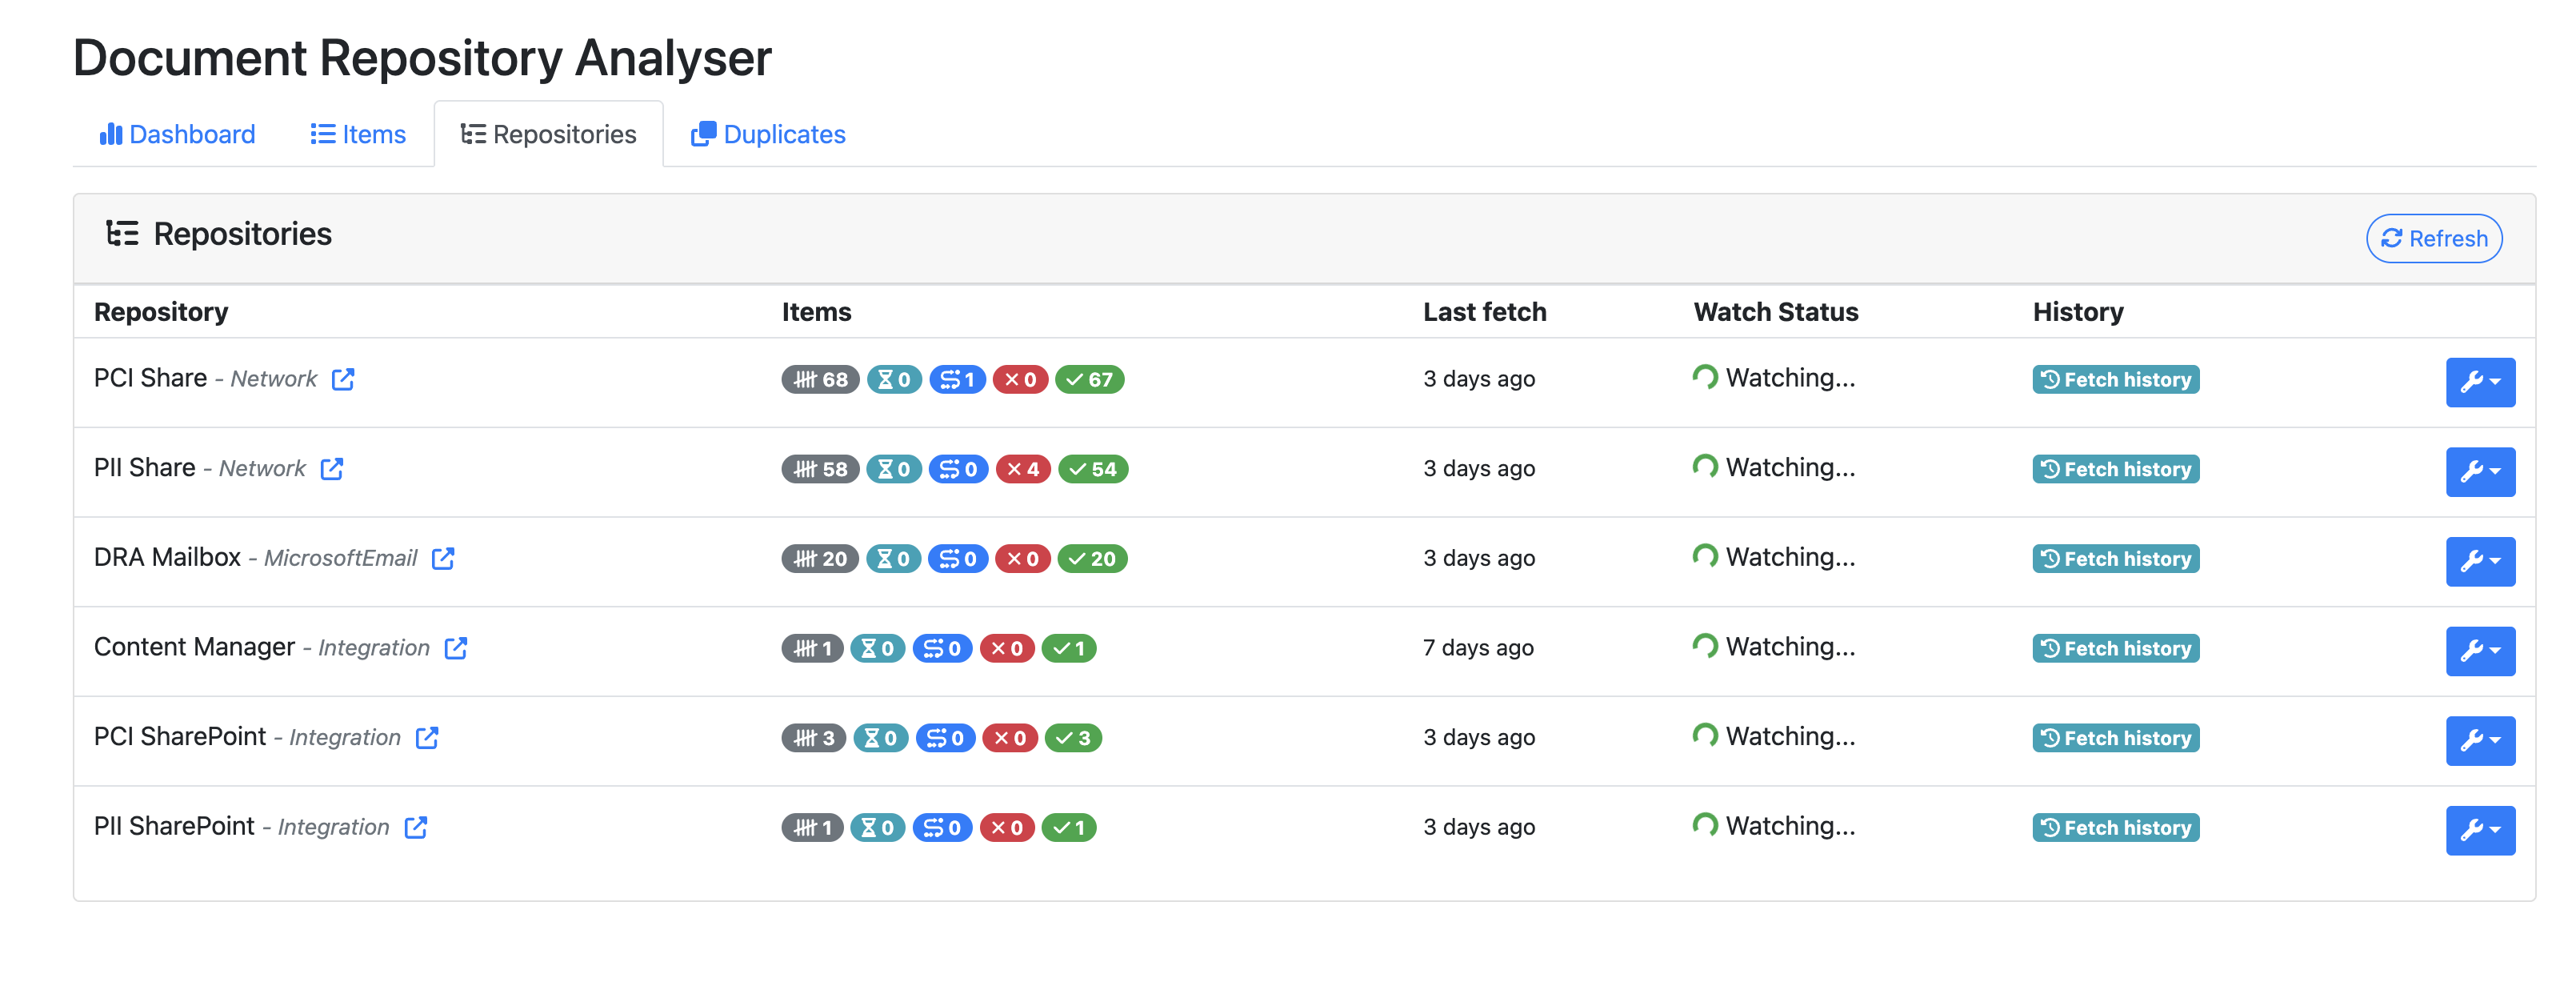
|
Column |
Description |
|---|---|
|
Repository |
Displays the repository name and its type. Users can click the blue box with an arrow ( |
|
Items |
Gives a total of the items in the different stages. |
|
Last Fetch |
Indicates the date and time of the most recent repository fetch. |
|
Watch Status |
Displays whether the repository is currently being monitored. |
|
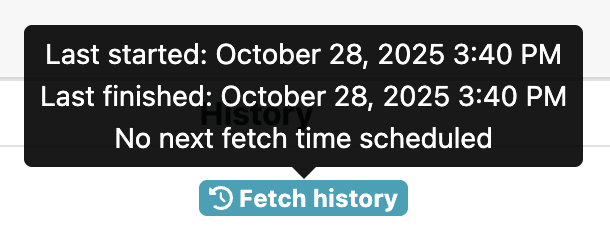
History |
Hover over the value in this column to view:
|
|
Blue Spanner |
Provides options to:
|
Duplicates Tab
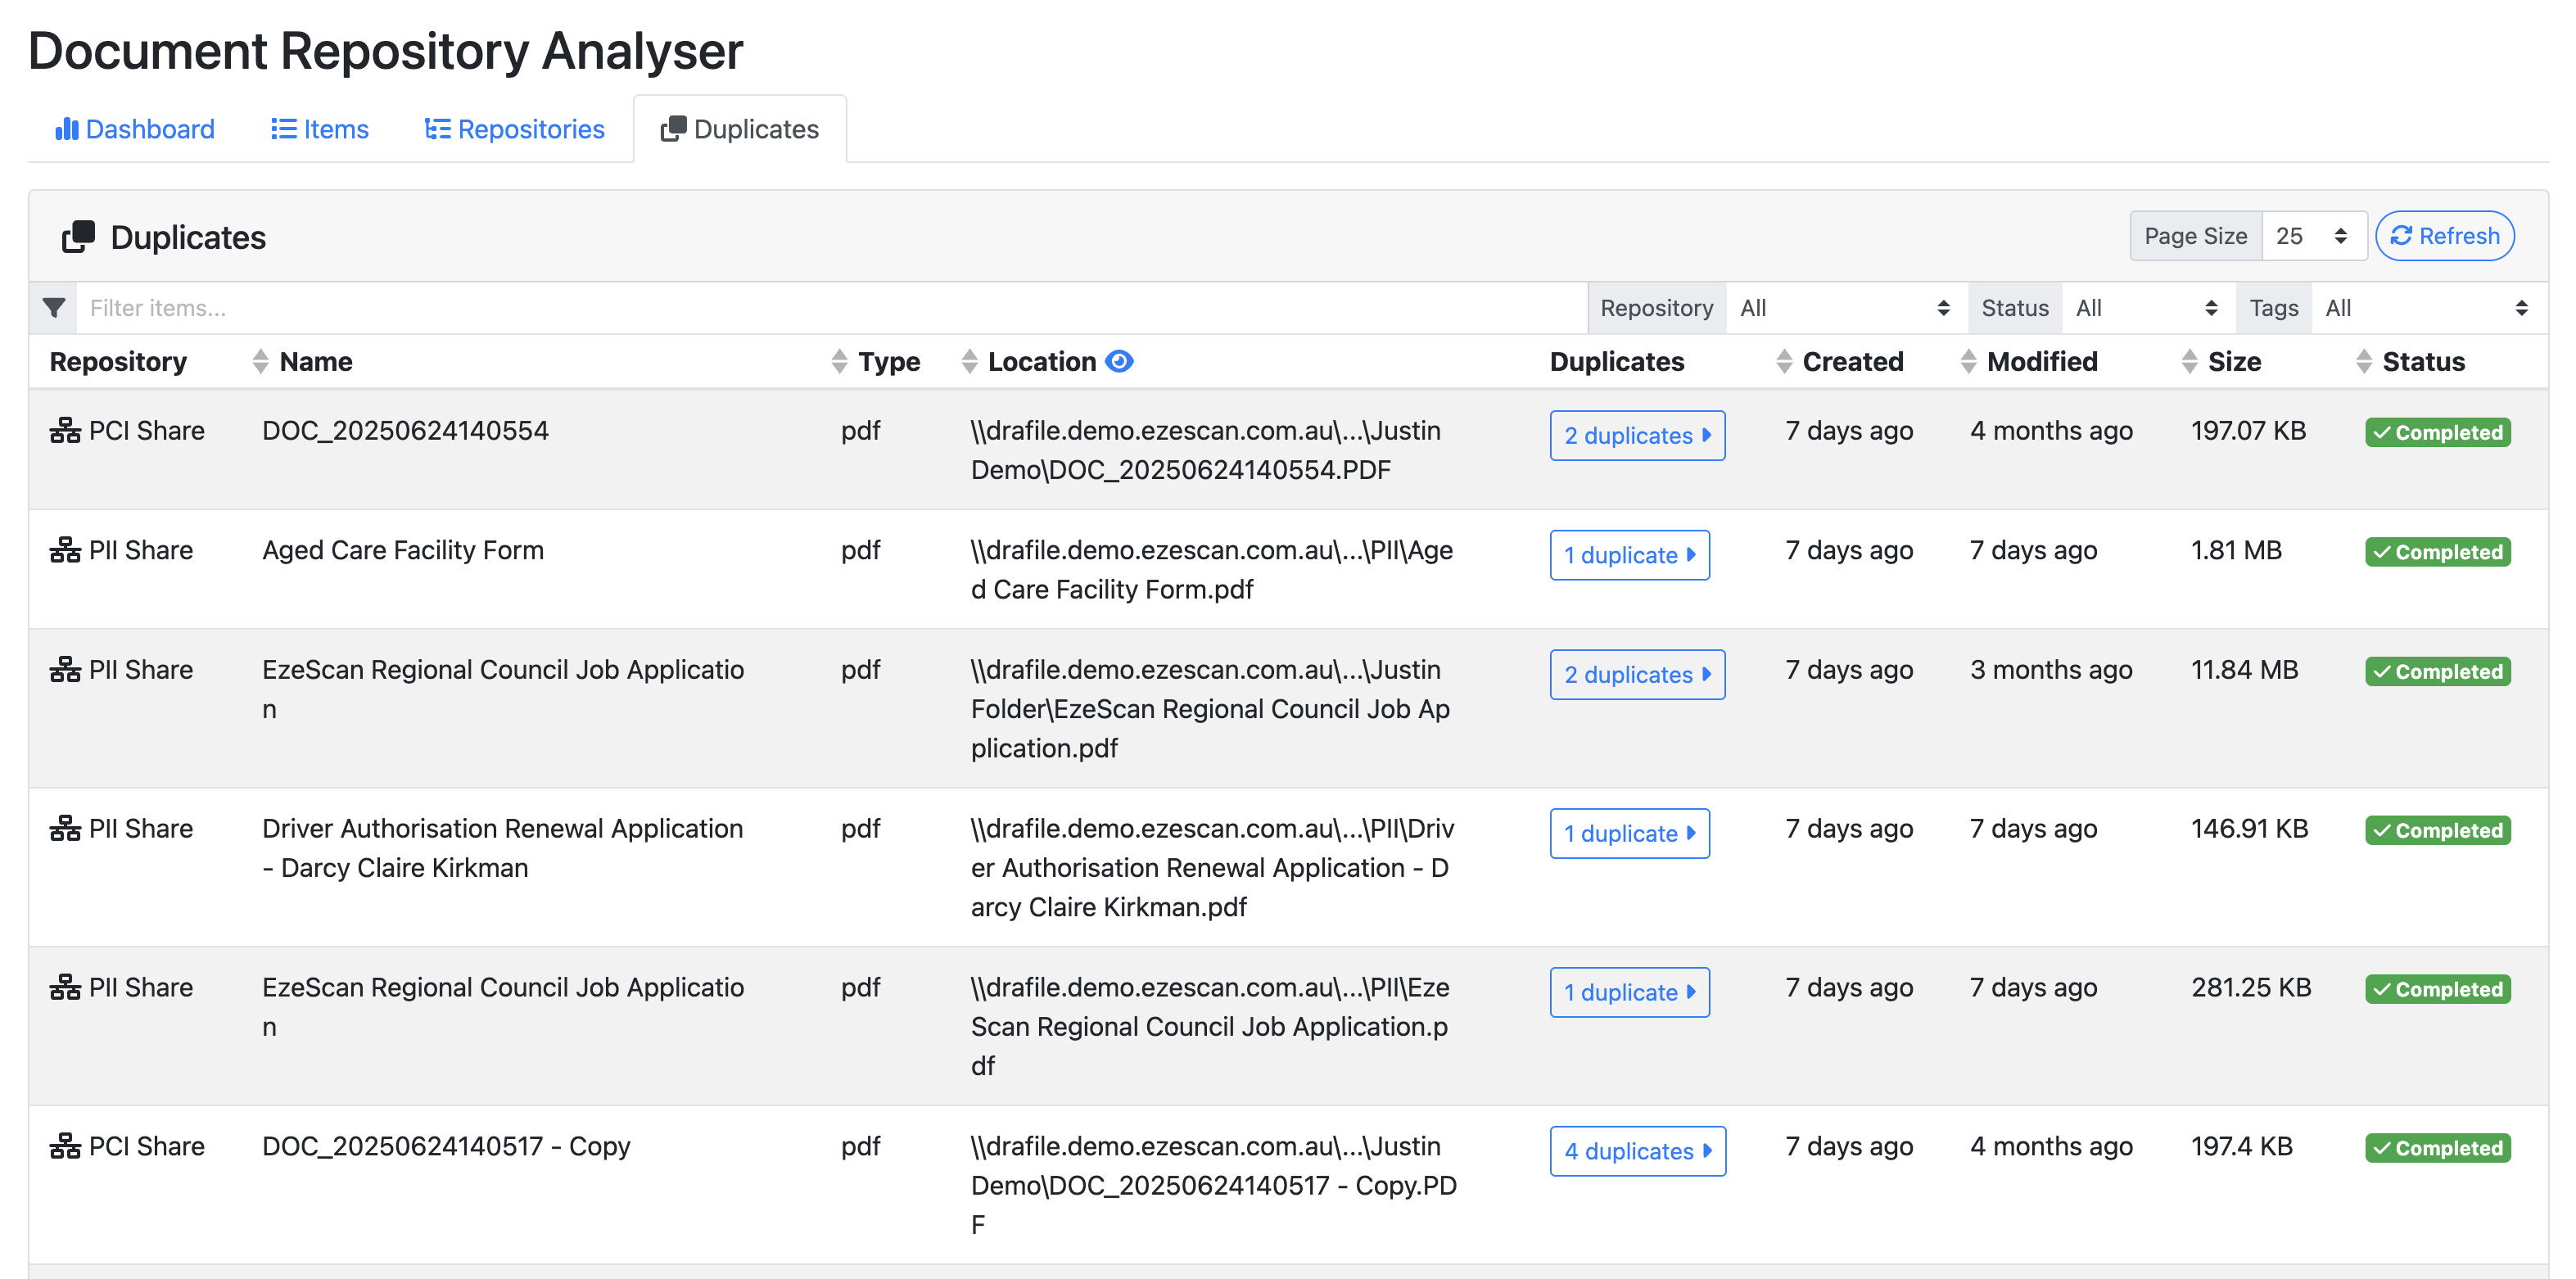
|
Column |
Description |
|---|---|
|
Repository |
Displays the repository name of where it came from. |
|
Name |
Displays the name of the file. |
|
Type |
Displays the file type. |
|
Location |
Displays the file path within the repository of where the item is located. |
|
Duplicates |
Indicates how many duplicates have been found of that file. When this button is pressed a table is displayed showing all the duplicates listed by the Repository and the Location they were found in. 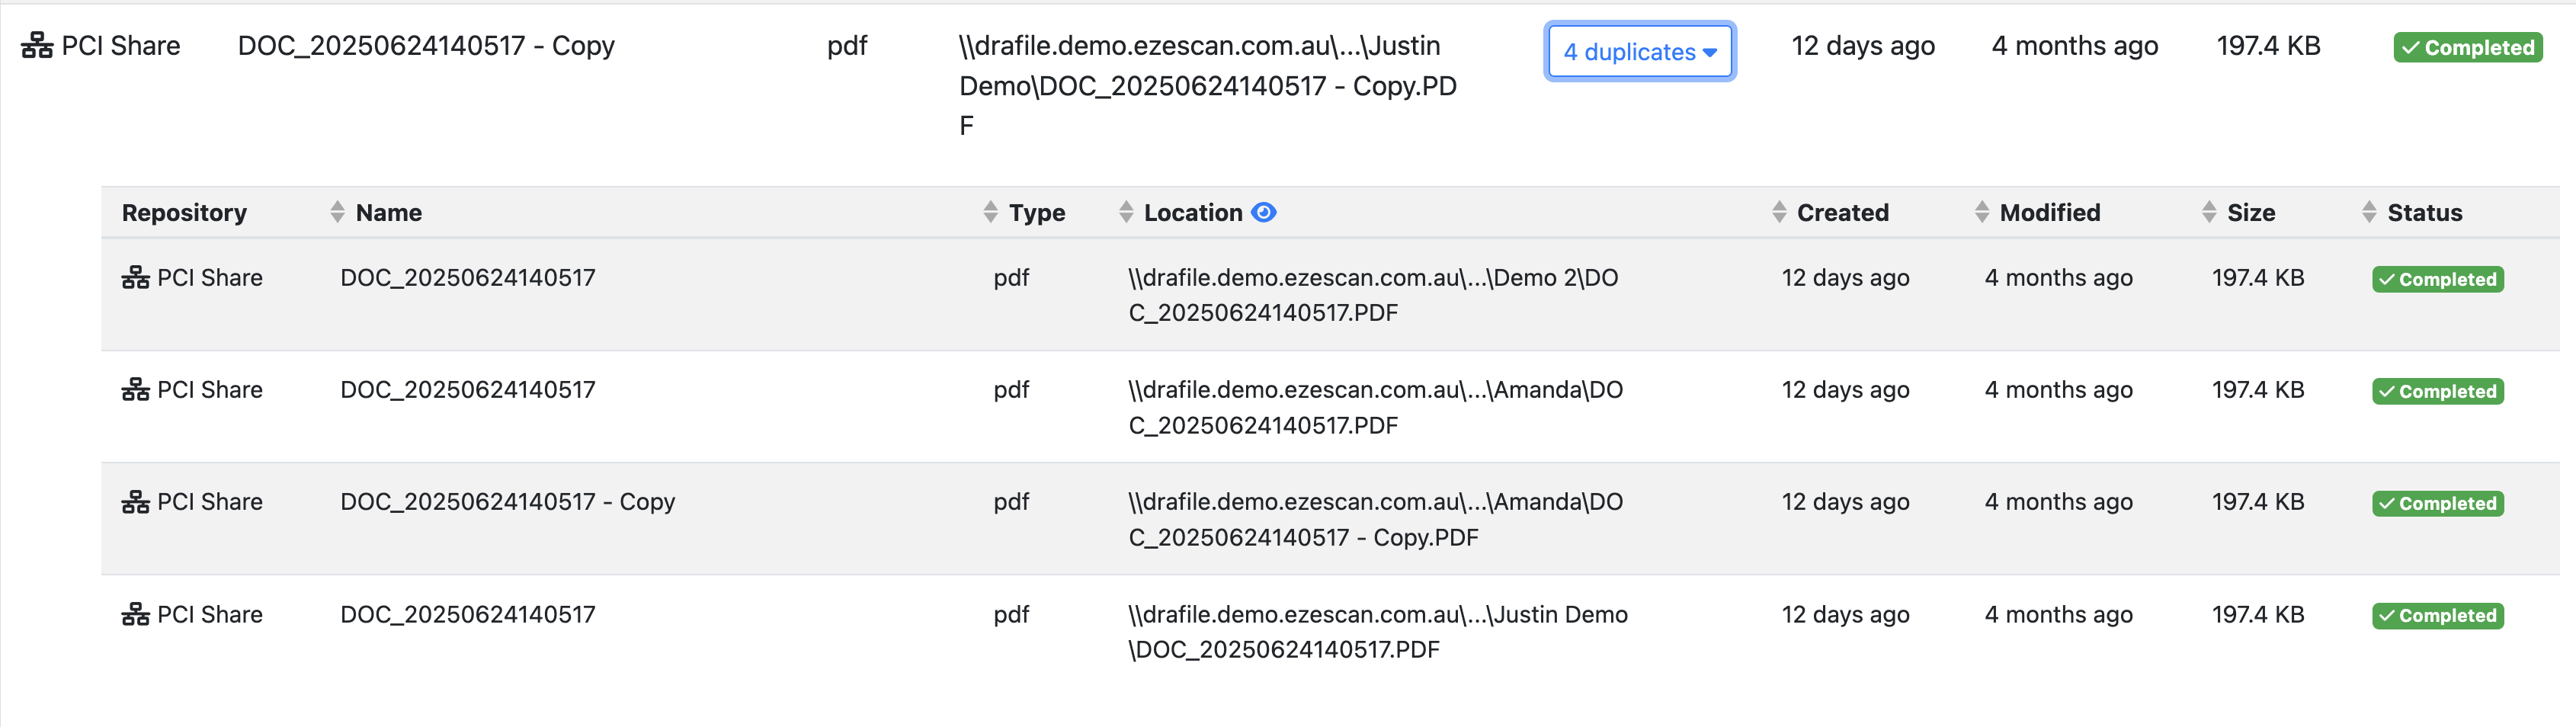
|
|
Created |
The day the file was created. |
|
Modified |
The date the file was last modified. |
|
Size |
The size of the file. |
|
Status |
The status of the file. |