
Purpose
The Integration Find field allows users to search and browse content within a supported integration. Available functionality depends on whether the integration provider supports searching, browsing or both.
Integration Tab Settings
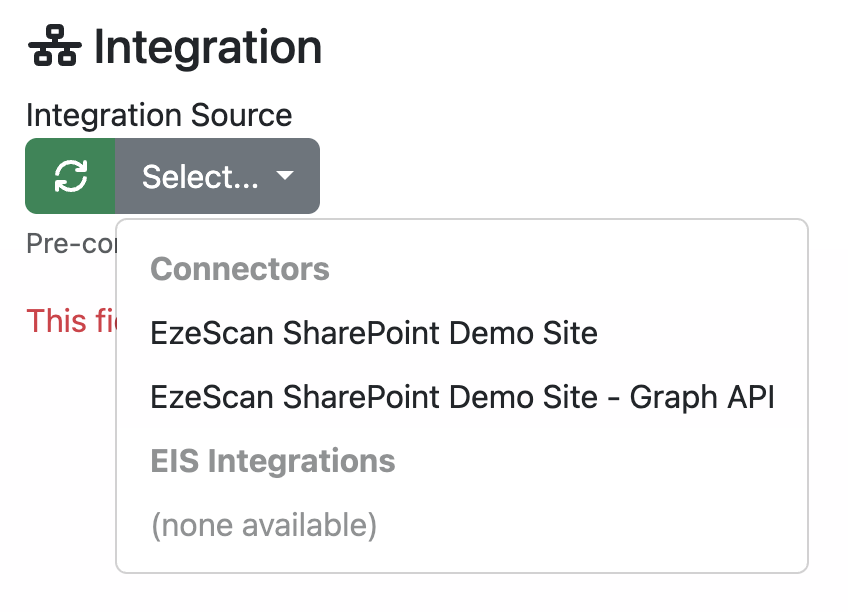
The Integration tab allows you to select the integration you want to search or browse using the Integration Source dropdown.
Only previously configured integrations are available for selection. If you have not yet configured an integration, refer to Configuring Integrations.
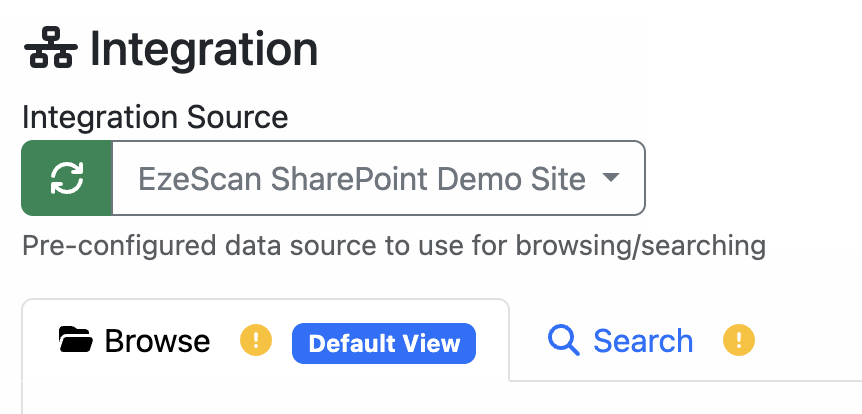
Browse and Search Settings Overview
The Integration Find field supports two main functions: Search and Browse.
Once an Integration Source has been selected, the available options are automatically loaded based on the capabilities supported by that integration.
For example, the SharePoint integration supports both searching and browsing, so both options are available. If an integration does not support one of these functions, the corresponding option will not be displayed.
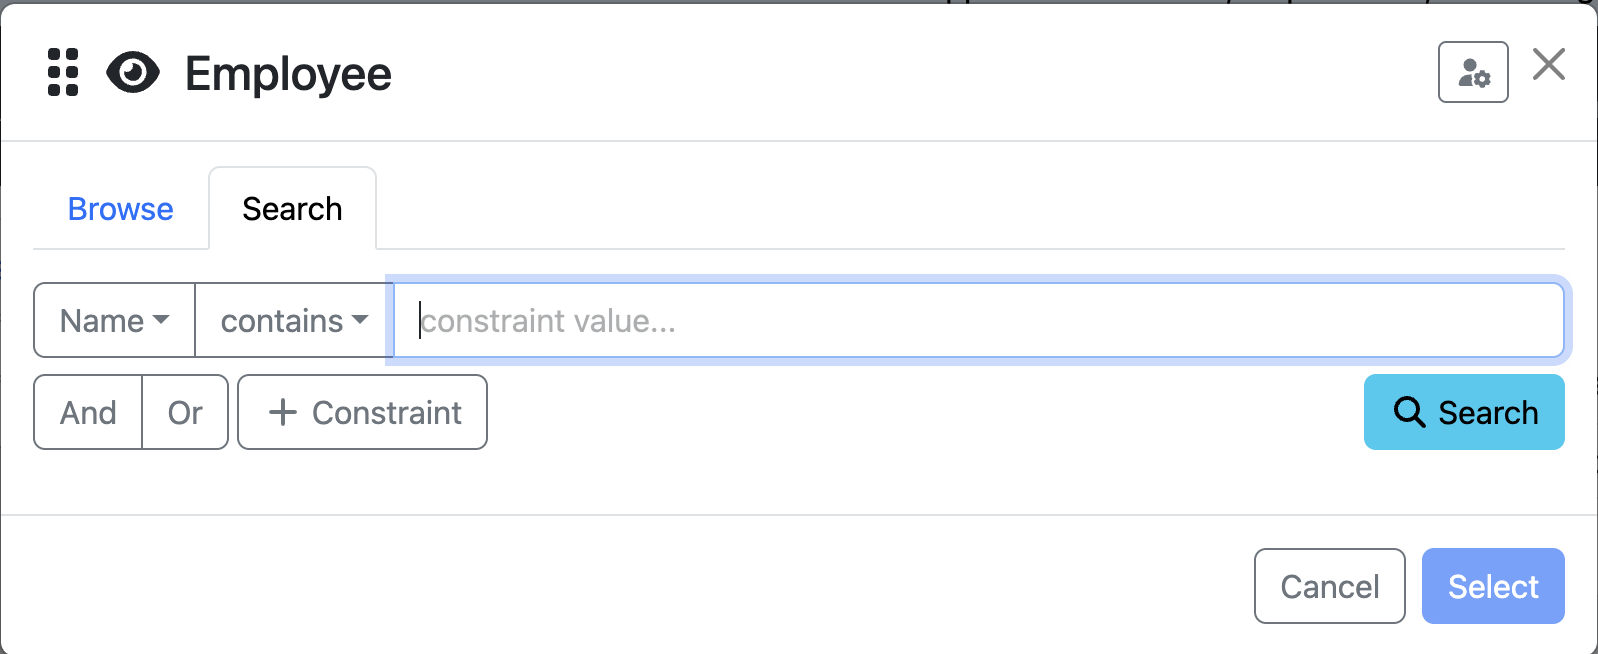
Search Mode: Displays a search dialog that allows users to locate content within the integration by entering a text value.
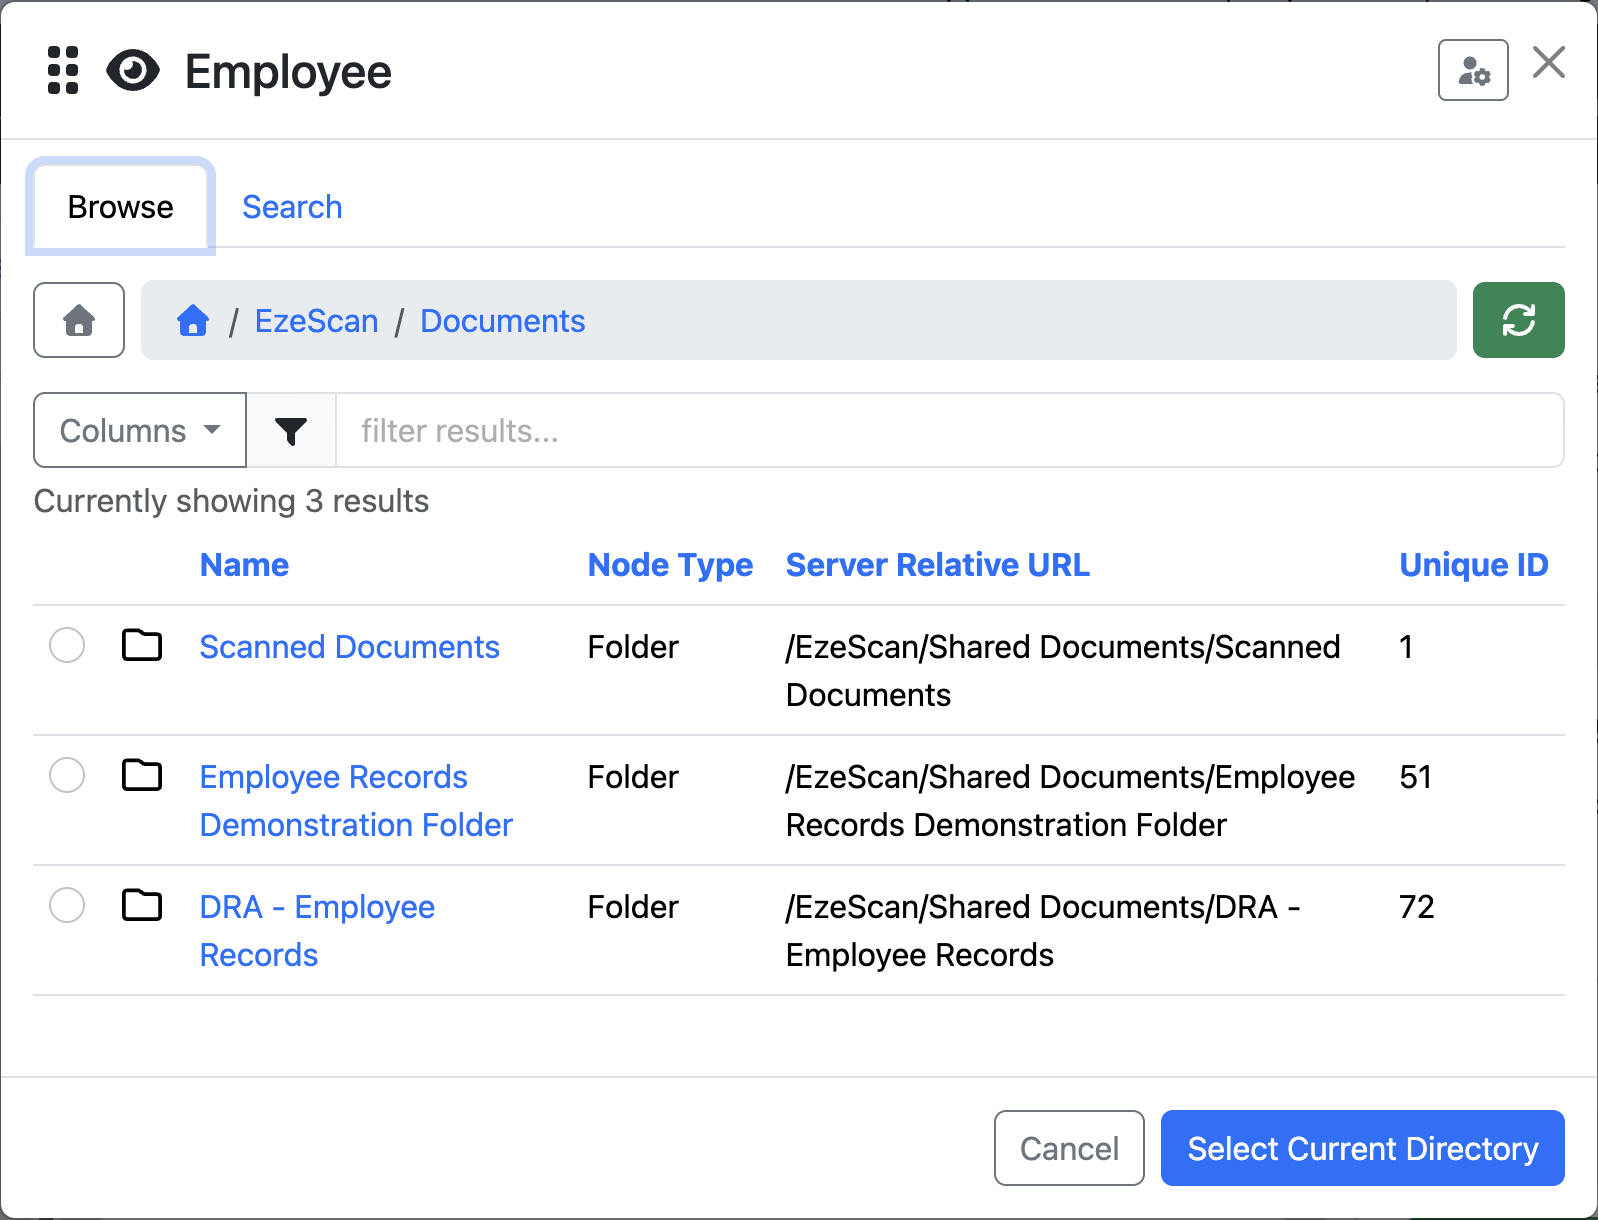
Browse Mode: Displays an Explorer-style dialog that allows users to navigate through the integration's folder hierarchy. By default, browsing begins at the root folder. However, you can configure a specific subfolder as the starting location to restrict where users begin browsing.
Enabling and Disabling Functions
Use the available toggles to enable or disable the Search and Browse functions.
You can also configure which mode is displayed by default when a user opens the Find dialog using the Default View setting.
Browse
Browsing allows a record, document or container to be selected using the integrations native structure. This usually follows in the style of a folder structure familiar to most, but may vary based on the integration. It allows selection, navigation, and displaying of properties at the discretion of both configuration, and users.
Settings
|
Setting Name |
Description |
|---|---|
|
Default container |
The root container that the browse should originate from. This forms the top of the tree structure, and when blank will return the default structure of the integration (usually a home direcotry, or the top of the system structure) |
|
Max Depth |
Number of depth levels to allow browsing into. Use |
|
Actions |
The browse action to perform. This is the type of browsing to perform against the integration. This will vary depending on the type of integration connected. |
|
Display Options |
Display options are configurable customisations to how the field dialogue will look to the end user. Restrict Shown: List (semicolon delimited) of properties that are available to a user. If not set, all properties are shown. Default Shown: List (semicolon delimited) of properties that are shown by default to a user. These may be toggled on or off, and when not set, all properties are shown. |
Search
Searching allows known record keywords, titles, or other properties to be queried using a set of conditions. These results often are agnostic of Integration content structure.
Settings
|
Setting Name |
Description |
|---|---|
|
Search Enabled |
Allows the integration search setting to be accessed by user. This is on by default. |
|
Default View |
This sets the Search window as the default when users access the field. Select this toggle to make search the default over browse. |
|
Actions |
This tab allows you to select an action from the drop-down list. The actions shown in the list will depend on the type of integration connected. |
|
Display Options |
Display options are configurable customisations to how the field dialogue will look to the end user. Restrict Shown: List (semicolon delimited) of properties that are available to a user. If not set, all properties are shown. Default Shown: List (semicolon delimited) of properties that are shown by default to a user. These may be toggled on or off, and when not set, all properties are shown. |
Constraints
Constraints allow you to refine search results by applying specific conditions to a search. They help narrow the results returned, making it easier to locate relevant information.
Constraints can be applied in two ways:
-
User-defined constraints: Entered by the user directly within the Search Dialogue when performing a search.
-
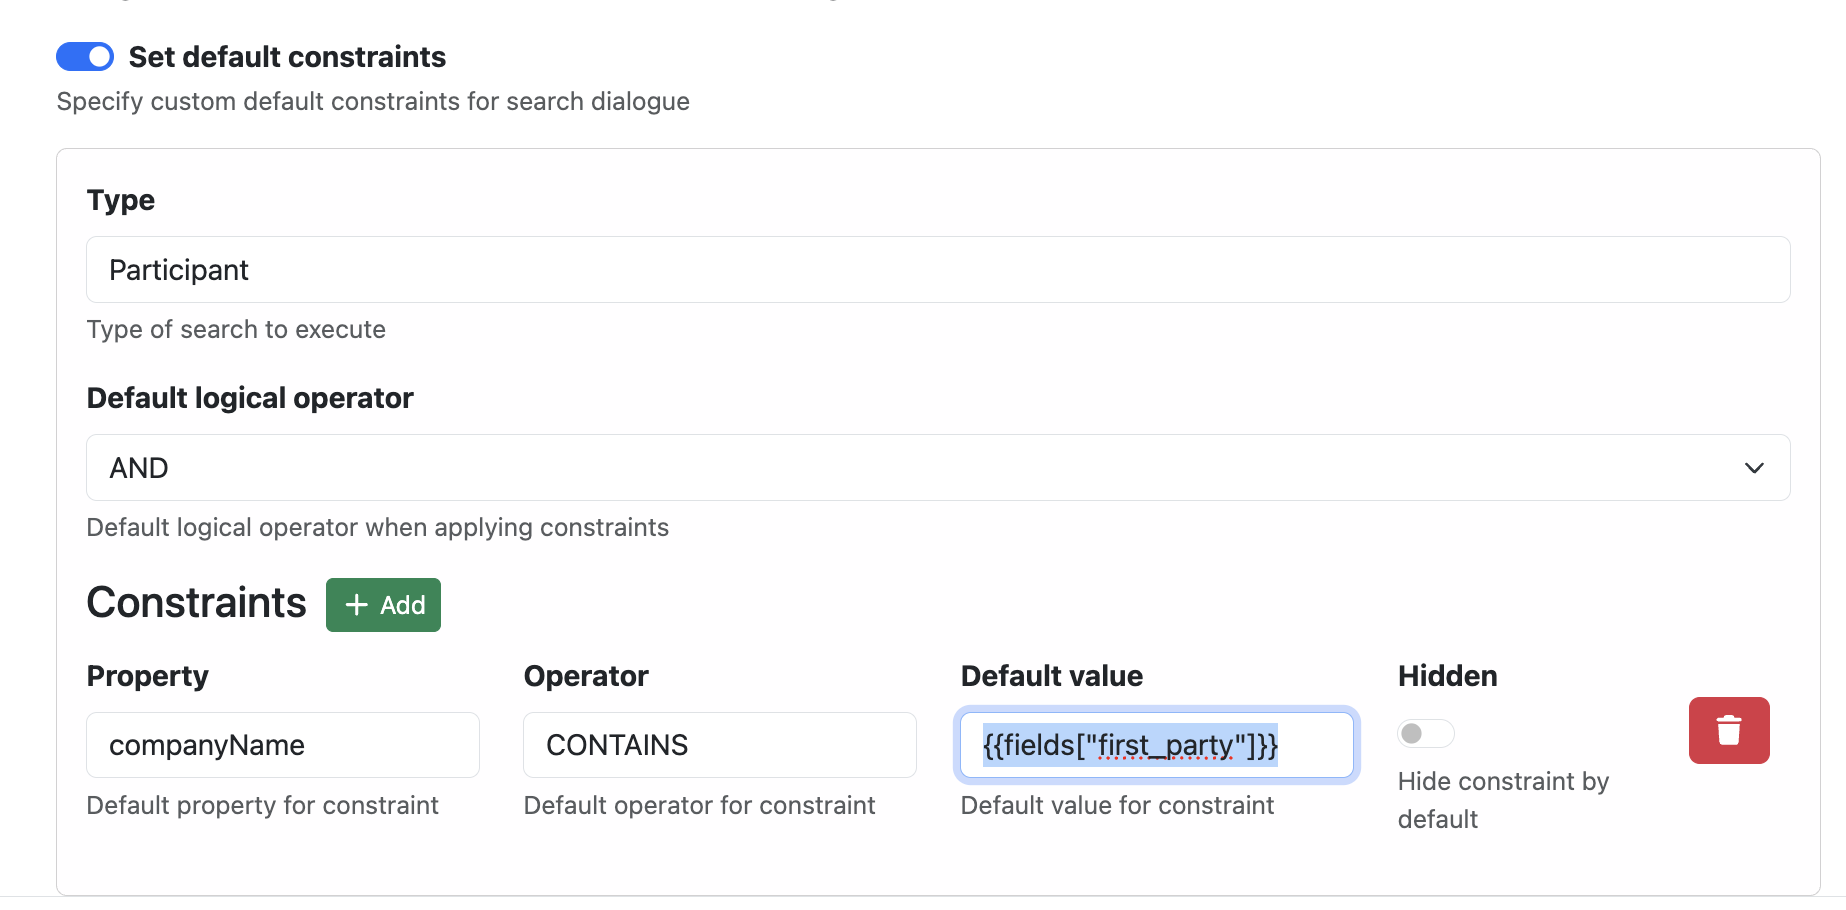
Default constraints: Preconfigured by an administrator using the Set Default Constraints setting. These can include fixed values or dynamic values retrieved from other fields using placeholders.
Contraint Settings
|
Setting Name |
Description |
|---|---|
|
Empty Searching |
Allows a search to be performed without specifying any search conditions. While useful in some configurations, this may result in slower searches or larger, less refined result sets. |
|
Trigger Search on Open |
Automatically executes a search when the Search Dialogue opens, provided the configured search conditions are valid. |
|
Auto Select Single Result |
Automatically selects a result when the search returns only one matching record. |
|
Auto Focus Select Button After Selection |
Automatically moves focus to the Select button when a single result is selected, allowing the user to confirm their selection by pressing Enter. |
|
Constraint Whitelist |
Defines which constraints users can select when performing a search. Leave this setting blank to allow all available constraints. |
|
Set Default Constraints |
Allows administrators to configure predefined search constraints. Default values can be fixed or dynamically populated using field placeholders. |
Setting Default Constraints
Default constraints allow you to preconfigure search conditions that are automatically applied when the Search Dialogue is opened.
This is particularly useful when you want to restrict search results to specific records or automatically populate search conditions using information already entered in other fields.
|
Setting Name |
Description |
|---|---|
|
Type |
Allows a search to be executed without any conditions. Some configurations may require this, but could offer lower search performance, or unrefined result sets |
|
Default logical operator |
Automatically perform a search when dialog is opened. Search conditions must be valid |
Constraints
|
When only one result is returned from the search then auto select it |
The easiest way to configure default constraints is to use the Search Dialogue to generate the required configuration details from the front end.
-
Open the Search Dialogue on the relevant page.
-
Enter the search constraints you want to apply by default.
-
Once the desired constraints have been entered, click the Admin Cog icon within the Search Dialogue.
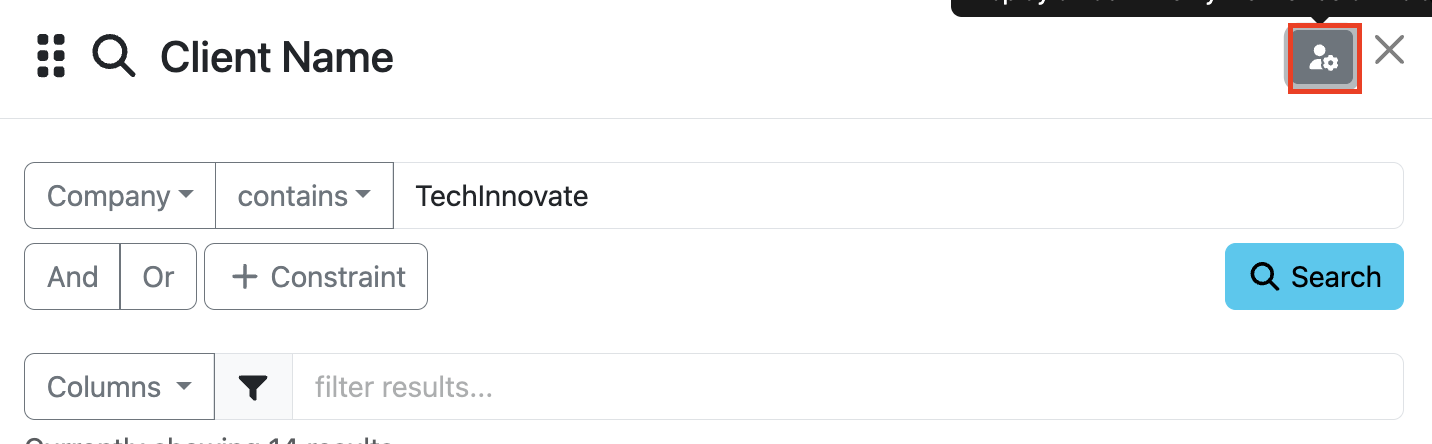
The system will display the corresponding search type and constraint details.
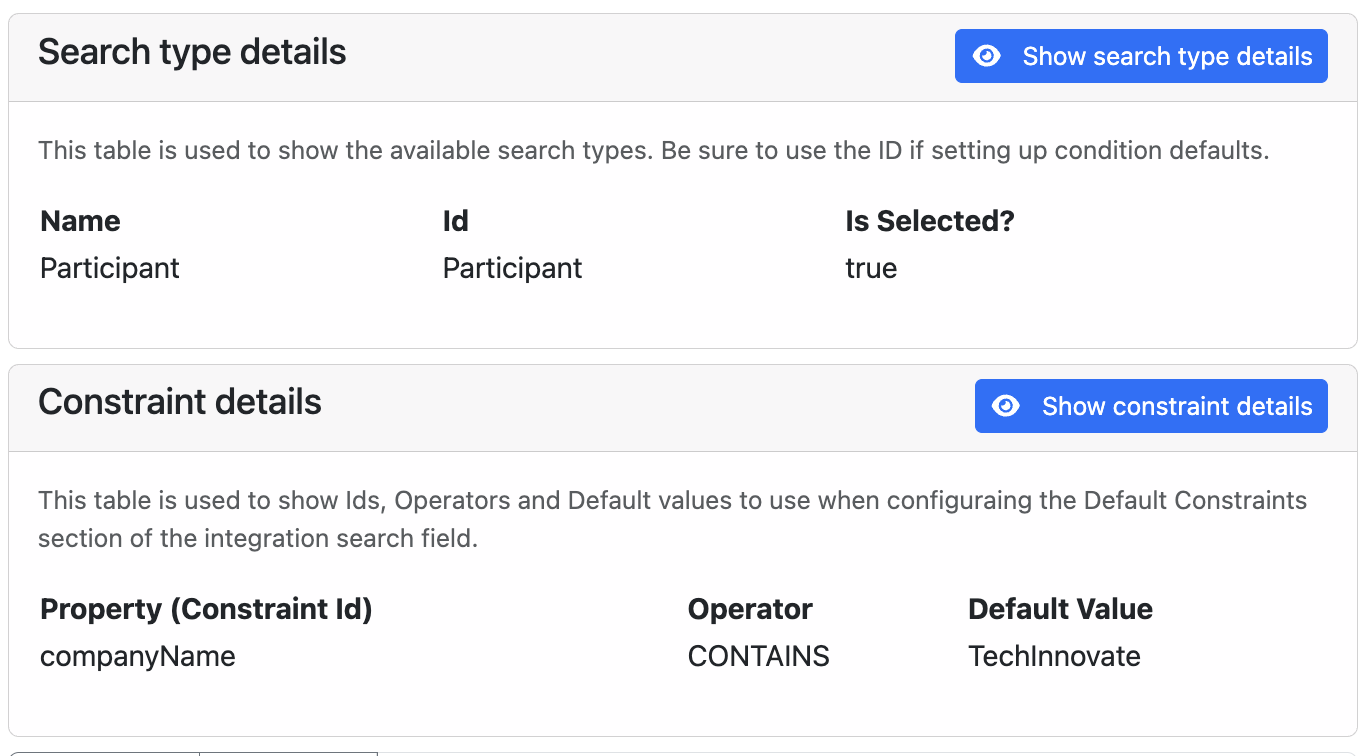
Use these details to configure the Set Default Constraints setting in the backend configuration. Default constraints can also use field placeholders to dynamically retrieve values from other fields as shown in the below example.
Values
When complex result operations are required downstream of the field in a configuration, more advanced and detailed result configuration can be used to include broader returned record data. This is configured on the values tab of the integration Find feild via the Type field.
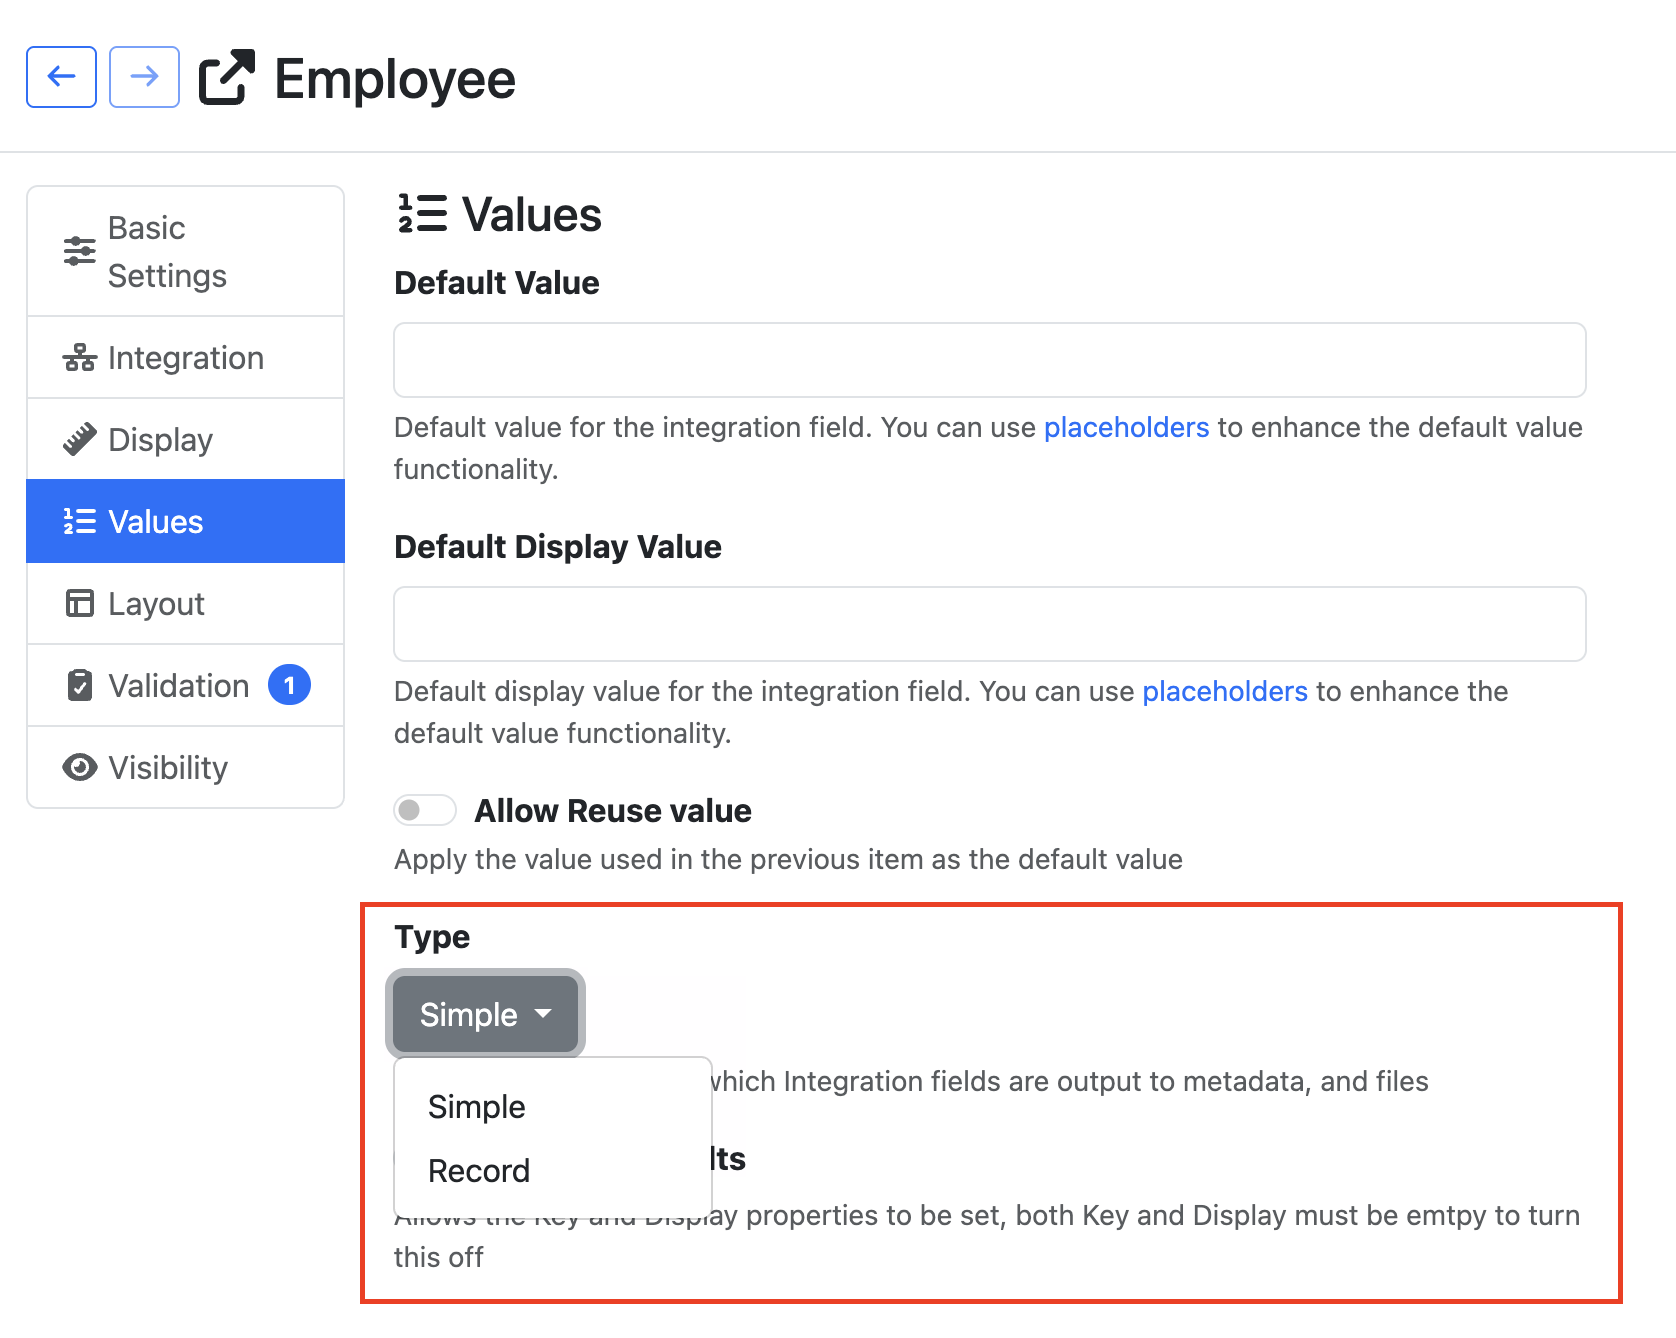
Simple
The simple value configuration returns key/value metadata, where the Key value is used to refer to the exact record, and Display is used to show a more sensical representation to users.
For example, consider the following object selected using the find field;
|
Property |
Value |
|---|---|
|
id |
123ABC |
|
name |
My Record |
|
property |
Some Property |
When the field is configured with;
|
Key |
|
|
Display |
|
The field will display as;
My Record | Some Property
Overide Defaults Setting
This field allows you to set the Key and Display properties.
Record
The record value configuration is used to return all, or a subset of properties using a proprietary key-value syntax used in EzeScan KFI Configurations, or by using pipe-delimited values.
When not using All Values, a delimited list of properties is required.
In addition to including properties you can use the built in values of $Id and $Name to return the raw values. This is sometimes required when referencing the value of this field in another integration field.
Output Format
Output format can either be piped, or in KFI format. When piped, each property value will be recorded in position, with a pipe splitting each value. KFI Format is a special output format where each key and value is recorded in a continuous text value, and can be split using an EzeScan Server, or EzeScan Workstation product.