
-
Navigate to the Azure Portal
-
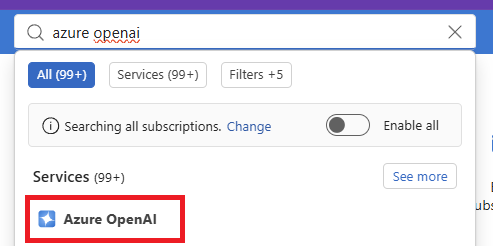
Search for Azure OpenAI
-
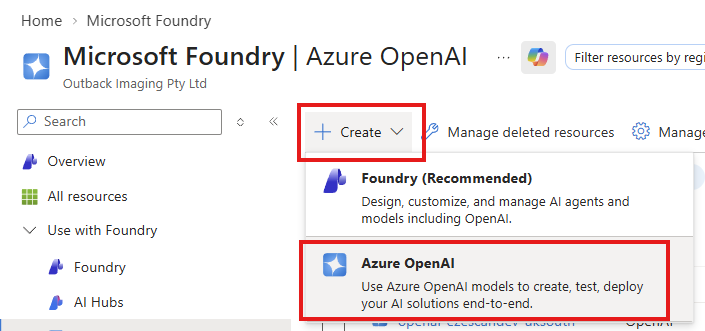
Click on Create > Azure OpenAI
-
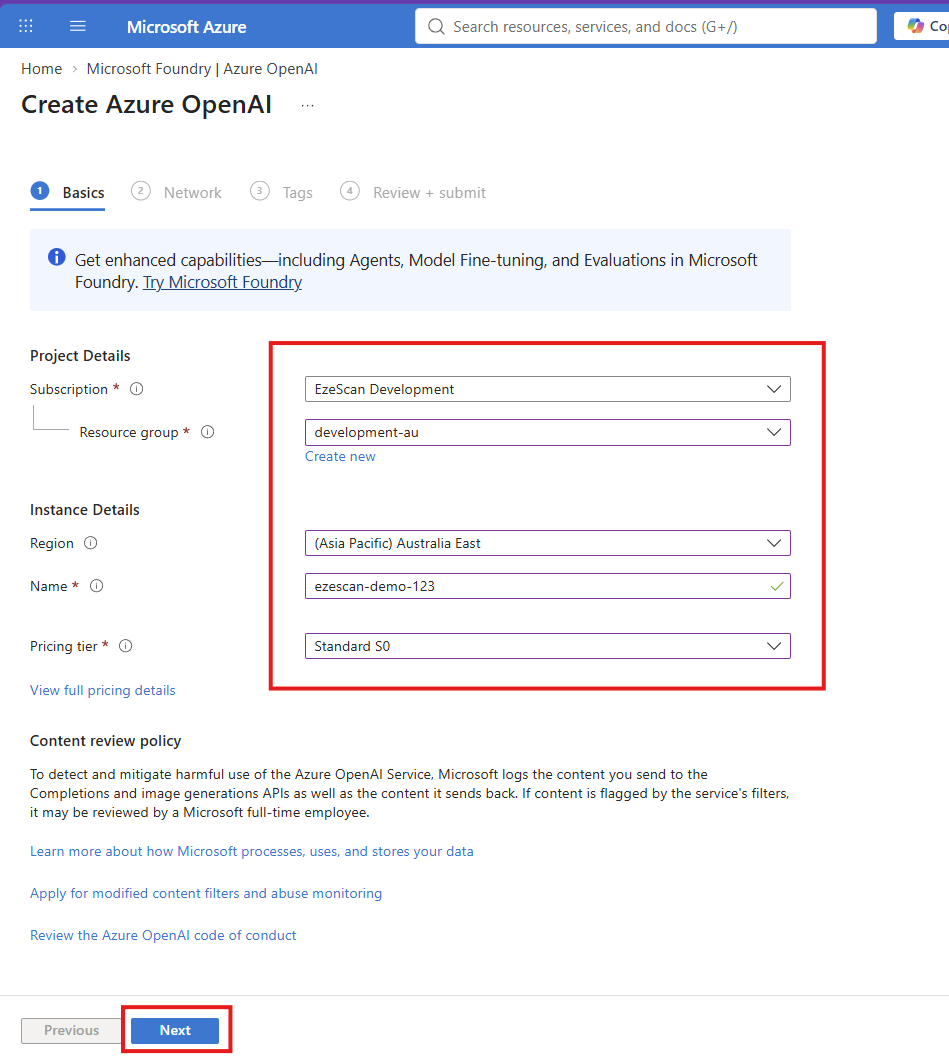
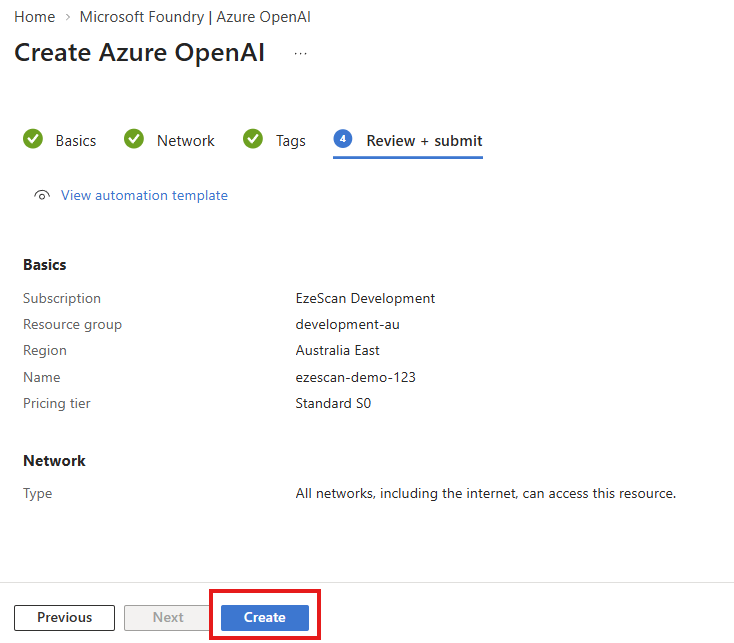
Select your subscription and resource group. Then specify a region, name and pricing tier.
-
Determine and configure your network settings and then click Next.
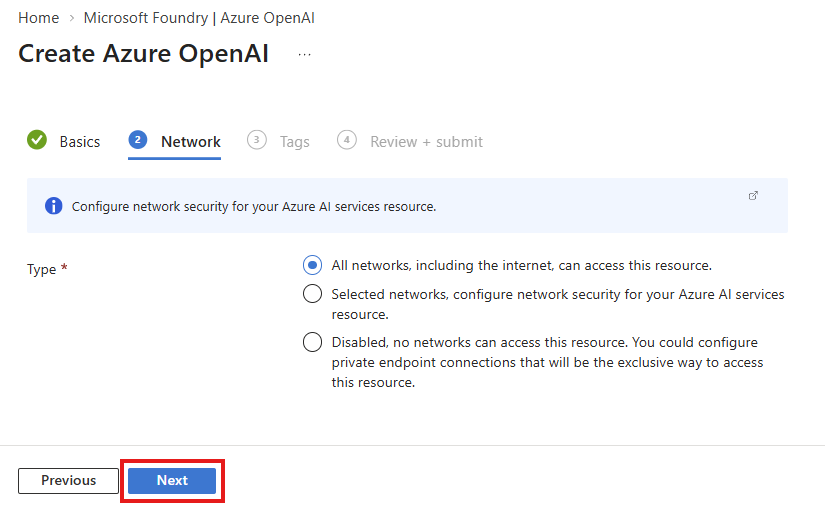
While the deployed endpoint is authenticated with an API Key we recommend restricting access at the network level for enhanced security. You can restrict this later after it's been deployed.
-
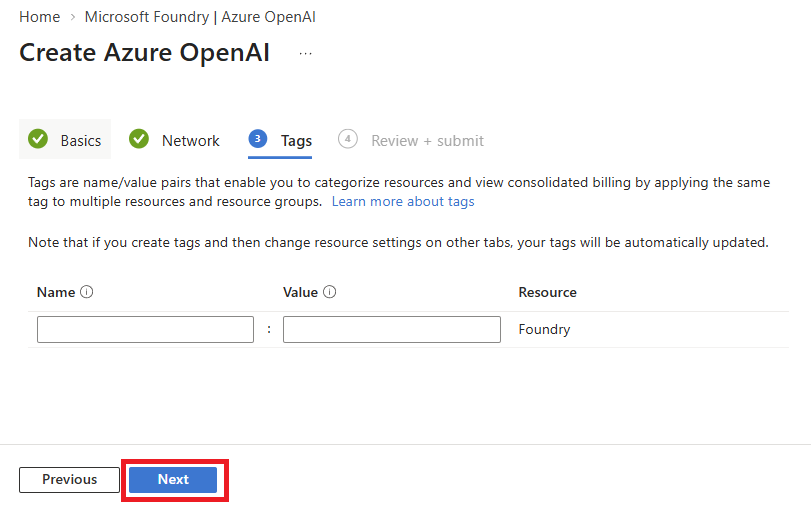
Add any tags you require and click Next.
-
Click the Create button.
-
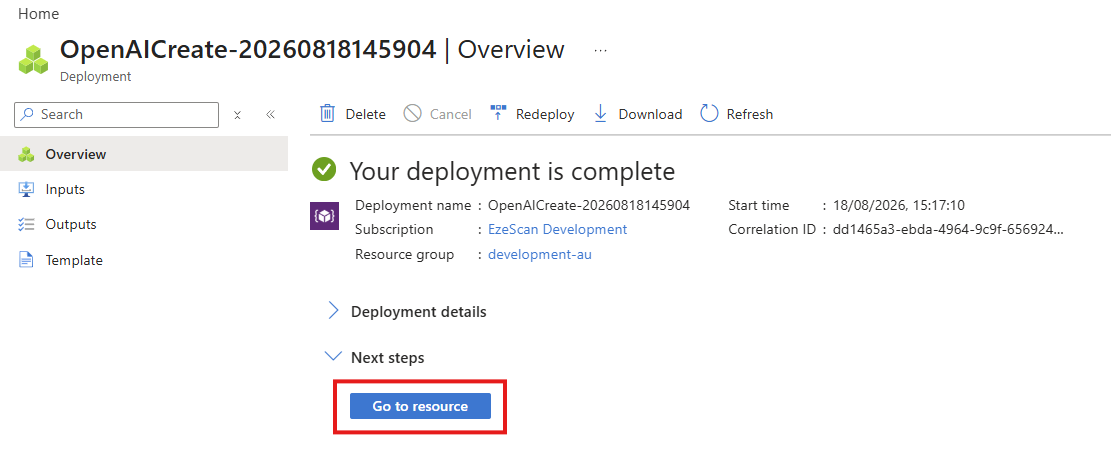
Once your deployment is complete click the Go to resource button
-
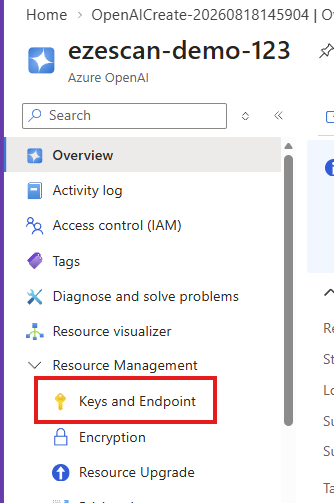
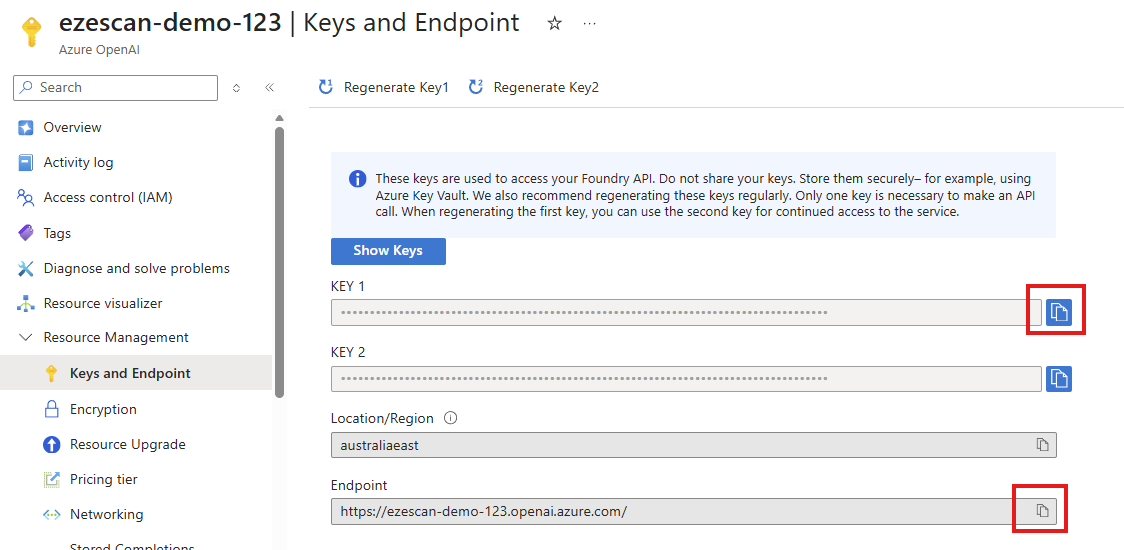
On the left menu click the Keys and Endpoint option
-
Copy down your Endpoint and Key 1 values as these are what get put into EzeScan WebApps.
-
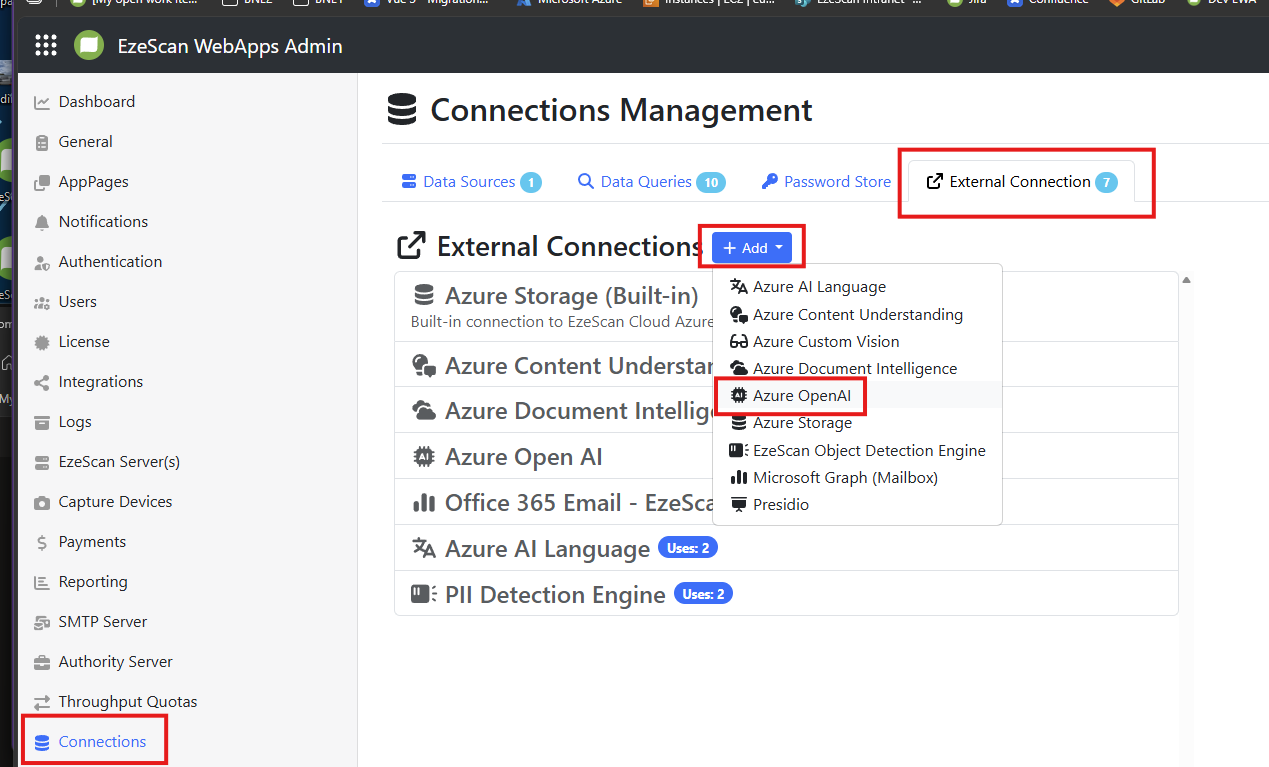
In EzeScan WebApps add an external connection to Azure OpenAI
-
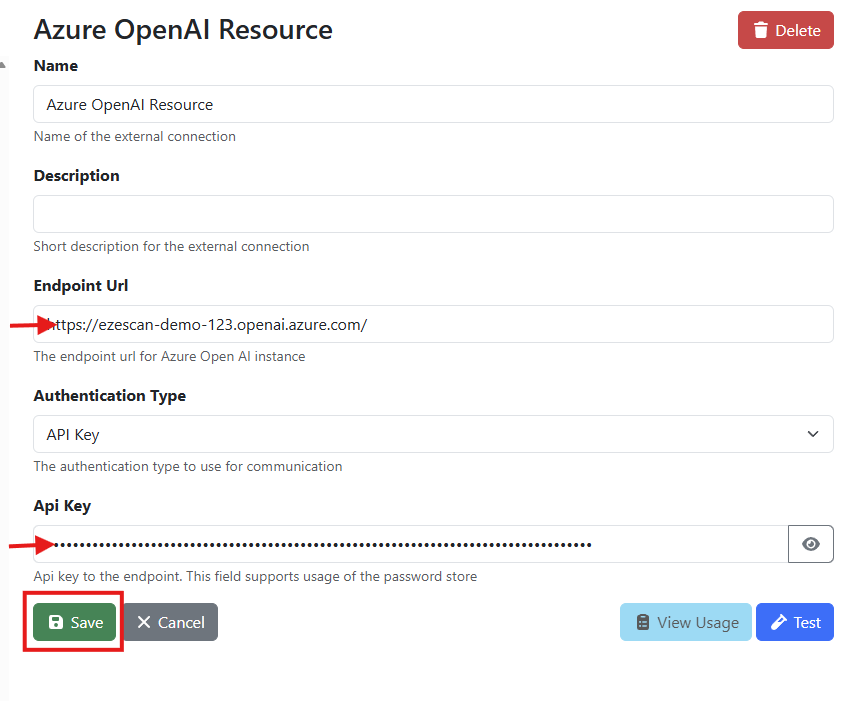
Populate the Endpoint Url and Api Key valued and click Save.
-
You can now configure an Azure OpenAI - Pre-processor