
The following information details the connectivity and functionality offered by the EzeScan integration with the M-Files ECM solution. It details the available options and how to configure an EzeScan job or Server workflow into the M-Files ECM.
For information on the M-Files ECM solution please refer to the M-Files website - https://www.m-files.com/
For information on EzeScan please refer to the EzeScan website - https://ezescan.com.au
The minimum requirements for M-Files integration with EzeScan are:
M-Files Desktop (2015.3 or above) is required to be installed on the EzeScan PC/Server.
M-Files Web Services (REST API)
Developed for EzeScan Release: 5.0

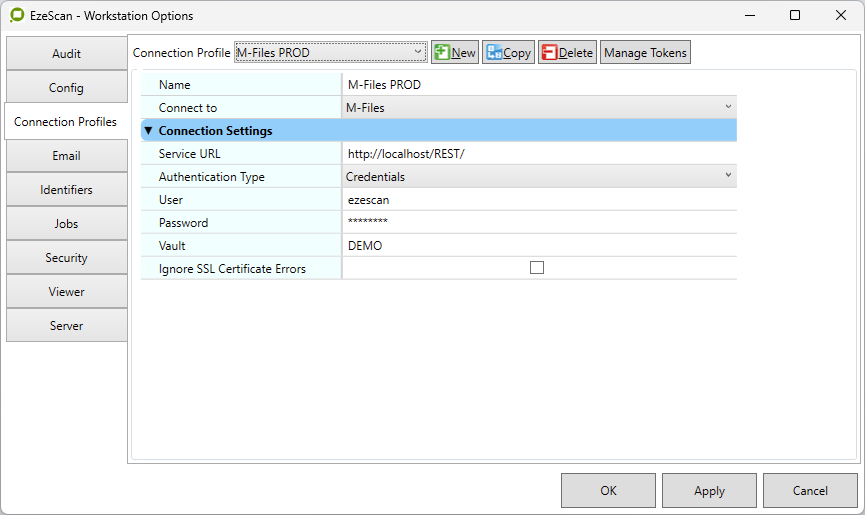
Configuring Connection Settings
When configuring a Job, KFI or Upload to use M-Files, connection settings panel must be filled in.
-
Click Admin menu, choose Workstation Options.
-
Select Connection Profiles tab and add a new profile.
-
Give the profile a name that will be referenced later in KFI & Upload modules.
-
Select M-Files in the Connect to list.
-
Enter the following information:
-
Service URL - Enter URL of M-Files Web Services (REST API).
-
Authentication Type - Select Credentials or Windows (SSO).
-
User – Enter user name used for M-Files if using Credentials authentication.
-
Password – Enter password for M-Files if using Credentials authentication.
-
Vault Name – Enter the M-Files Vault Name.
-
-
Click on Save button to complete and close the Workstation options screen.
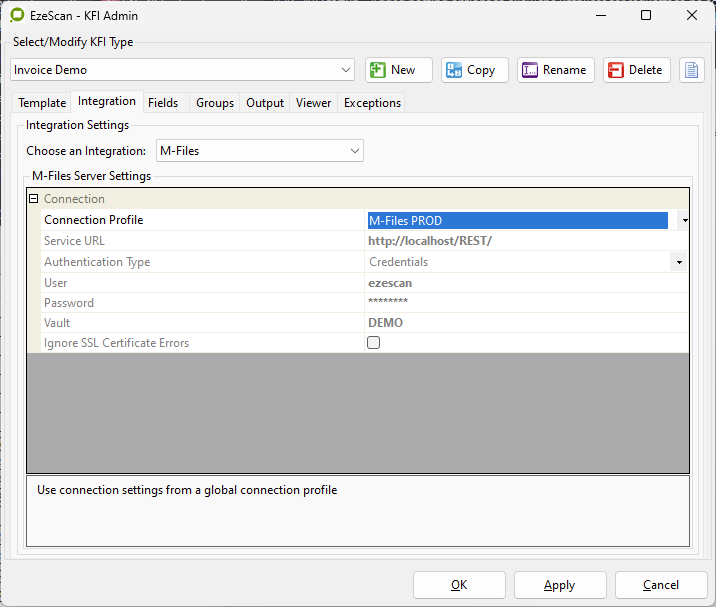
KFI Field Settings
The KFI Field Settings allow the operator to browse M-Files data during KFI indexing so the operator can select a value and other object types to be applied to the document.
Enabling browse options
The M-Files settings must be configured before a KFI field can use the browse functionality.
-
Open the respective KFI (press F7) form.
-
Click the Integrations tab.
-
Select the M-Files from the list of available integrations.
-
Select the connection profile that was configured in Workstation Options.
-
Click the fields tab.
-
To enable a field to access M-Files you need to:
-
Click the edit link under the Properties for the filed.
-
Click the M-Files tab.
-
Select the Enable M-Files Browse Button checkbox
The browse parameters will become active –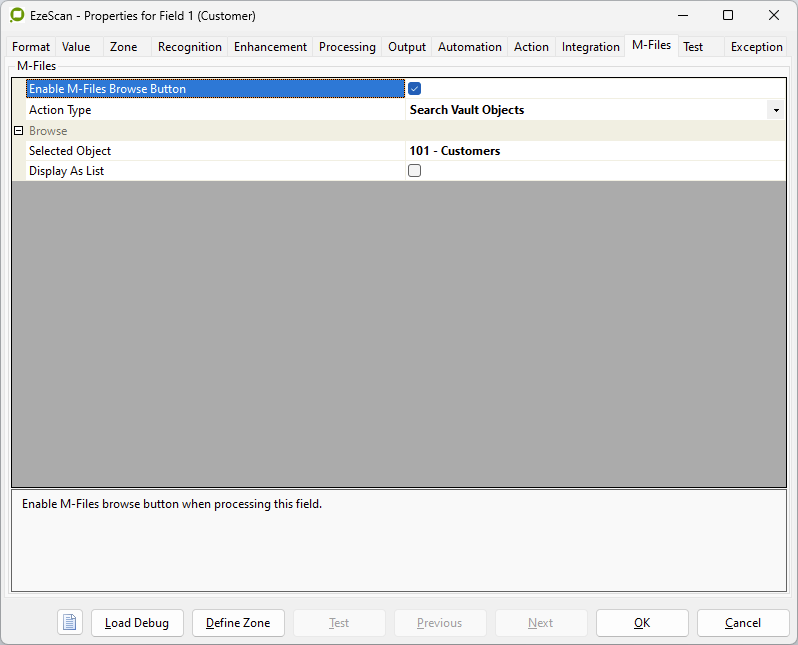
-
-
Select the Action Type.
Search Vault Objects
Searches the connected vault for objects of a specific type either using a search dialog, or as a drop down list.
|
Option |
Description |
|---|---|
|
Selected Object |
This option displays list of Vault Objects available for selection. Select an Object. Values of the selected object will either be available as list or search form on the KFI field. 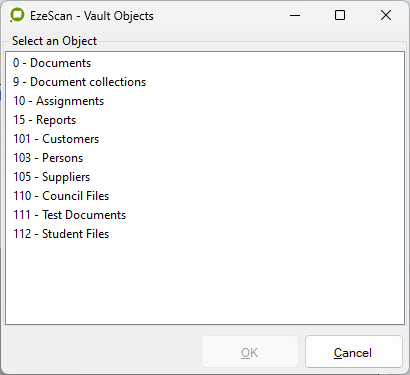
|
|
Display As List |
Check this option to display the lookup results as a list of values on the field (or cell in Line Items) for the operator to select from, otherwise leave unchecked to display a search form. |
Lookup Vault Object Properties
Search connected vault for objects using property conditions and return the results as a drop-down list.
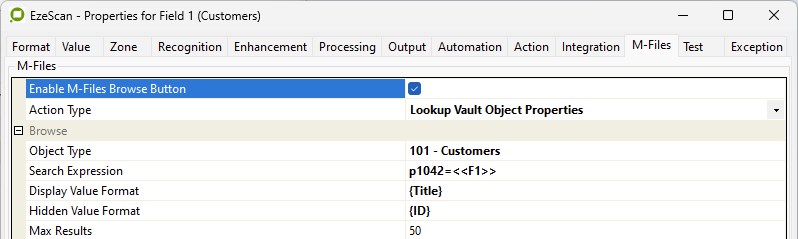
|
Option |
Description |
|---|---|
|
Object Type |
Select an object type to filter results to that type, or leave blank for any object type. 
|
|
Search Expression |
The property expressions to apply when searching the connected vault. M-Files does not support grouping conditions nor the OR operator. Property expressions are formatted as Use the browse button to pick from the available Property Definitions in the connected vault. 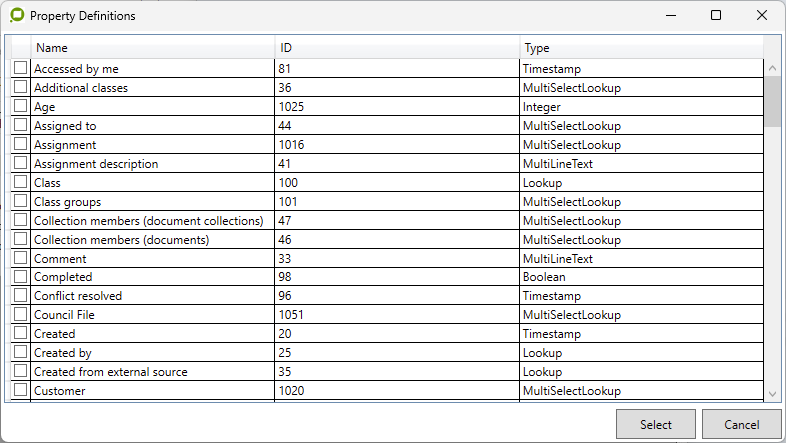
The operators supported M-Files search are listed below: |
|
Display Value Format |
Enter the placeholders to return for each search result optionally including static text. Use the browse button to insert placeholders from the connected vault’s property definitions, or manually enter any of the below built-in placeholders. For example, Built-in Placeholders
|
|
Hidden Value Format |
Enter the placeholders to return for each search result optionally including static text, or leave blank to not use hidden values. Use the browse button to insert placeholders from the connected vault’s property definitions, or manually enter any of the below built-in placeholders. For example, Built-in Placeholders
|
|
Max Results |
The maximum number of results that search can return. Default is 50. |
Upload Settings
The UPLOAD module will obtain the KFI output data to pass into M-Files saving the document into the respective location and applying the (KFI’s) metadata information.
Configuring connection and property parameters
-
Open the Upload Form (F8).
-
Select the M-Files from the list of available integrations.
-
Select the connection profile that was configured in Workstation Options.
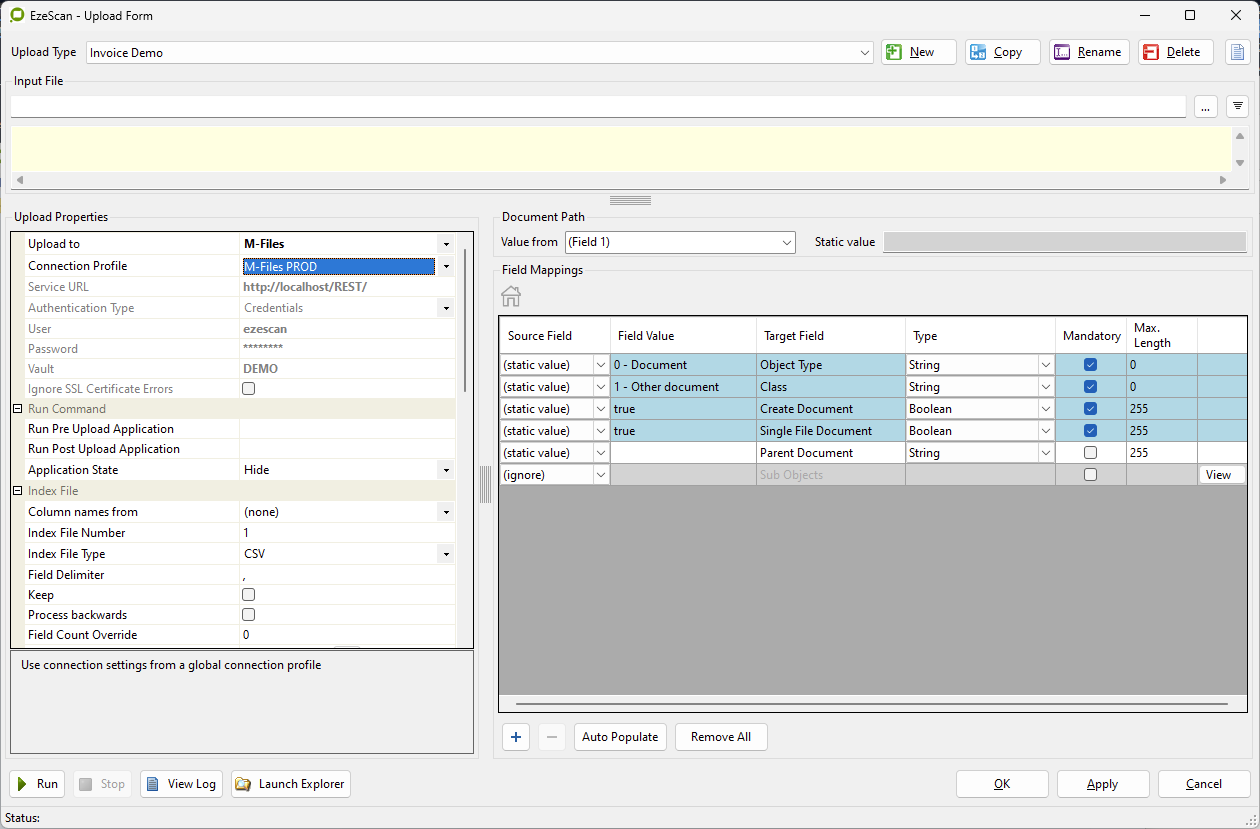
Configuring built-in fields
The common upload fields will appear after choosing the M-Files option in the Upload Properties pane (See screenshot below). To obtain the Class specific upload fields change the Field Value “1 – Other document” to required M-Files class and click Auto Populate button.
The Class upload fields are listed below. Each field can have its input set using the Source Field cell. Please refer to Applying KFI Output Data to the Target Field Data to see how this can be configured to allow data mapping.
Configuring custom fields
The M-Files connector can obtain all metadata fields from a M-Files Class object type.
NOTE
You must have the connection settings configured as well as the Class being used by the Upload.
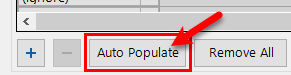
Click the Auto Populate button at the bottom of the screen.
This will result in the M-Files connector returning a list of custom fields that relate to the respective M-Files Class object type.
It is then a matter of setting the source values of those fields to the target values of the custom fields.
Applying KFI output data to target field data
To pass through the KFI output data into the Upload module the operator is required to set the source field data to the target field data.
-
In the Upload type, set the Column names from option to the name of the KFI job Type.
-
In the Field Mappings Grid, the operator can apply the Source Field settings to the Target Field settings.
In the example below the M-Files Target Field Customer is being populated by the KFI Source Field Customer ID. The M-Files Target Field Age is set to a static value of “15”.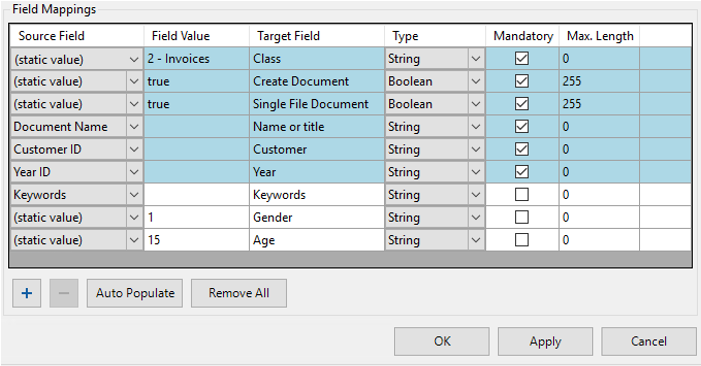
-
When all the mappings are complete, click Apply.
-
Click OK to save the changes.
Display Record Number After Saving Record
To enable this setting, please refer to the How to articles.