
EzeScan has an optional Upload module built into the EzeScan product. The EzeScan Upload option can be licensed as an option at purchase time, or at a later stage as a module upgrade.
The purpose of the Upload module is to take the output created by the KFI module (images and indexes) and Upload it to one of its supported systems.
Available Upload Connectors
The Upload module currently supports the following connector locations:
-
Aconex
-
Box
-
Civica Authority Purchases
-
CSV Creator
-
DocuShare and DocuShare Flex
-
DocuWare
-
Dropbox
-
EzeScan Archiver
-
File System
-
Financial Edge NXT
-
FTP
-
iManage Work
-
IMAP
-
Infor Pathway
-
InfoRouter (Active Innovations)
-
Laserfiche
-
MAGIQ Documents
-
M-Files
-
MicroFocus Content Manager (TRIM)
-
MicroSoft Office 365 Outlook
-
MicroSoft OneDrive
-
MYOB AccountRight 2013.5 and above
-
Purchases
-
Receive Money
-
Sales
-
Spend Money
-
-
Objective ECM
-
ODBC (Databases)
-
Open Text eDOCS 5 and eDocs 6
-
Open Text Content Server
-
PaperSave
-
Raiser's Edge (and NXT)
-
Constituent
-
Gift Batch
-
-
SFTP
-
SharePoint (Microsoft)
-
2013
-
2016
-
-
SMTP
-
TechnologyOne ECM (CMIS and DAS)
-
TechnologyOne Financials
-
Therefore
-
WebDAV (Compliant Systems)
-
Xero
The following sections take you through building a simple Upload definition using the Admin Tool and then running that Upload definition as a production job.
Note: You must be licensed to use the EzeScan Upload module.
Are you licensed to run EzeScan Upload?
First you'll need to check whether you are licensed to run the Upload option.
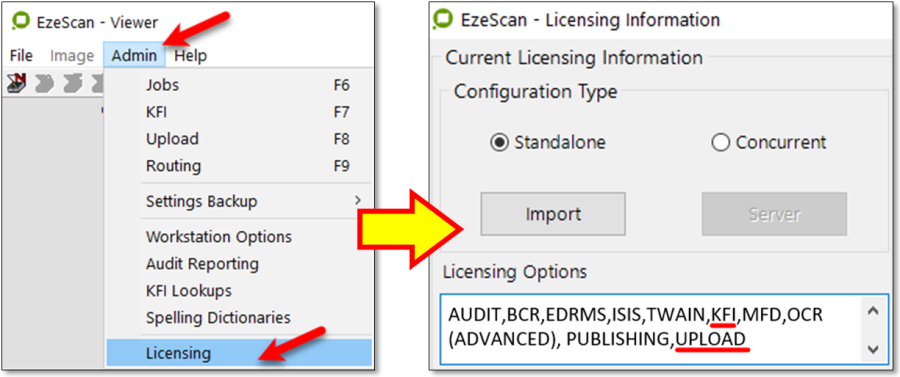
Figure 1 - Select Admin > Licensing then check that Upload & KFI appear in the Licensing Options window
-
If the Licensing Options say either "EzeScan PRO All (Eval Only)" or contains the words "KFI" and "Upload" then you may run the Upload option.
-
If your current production license is not licensed for Upload but you would like to evaluate the functionality please send an email to support@ezescan.com requesting a 15-day evaluation license with Upload enabled.
Prerequisites for running Upload
Before attempting to configure and run Upload you must have created:
-
A job type or Route type that is going to be used with the Upload type you are going to create.
-
A KFI type that is linked to that Job or Route type. The output indexes created by the KFI type will be used as the input indexes to the Upload module. It is possible to use Upload without KFI, but this is not how it was intended to be run.
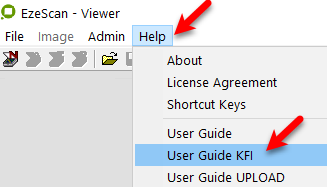
Tip: Refer to the separate EzeScan KFI User Guide document for details on configuring a KFI type (available on the Help Menu)
Upload Interface
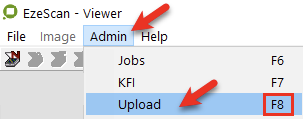
The Operator can select the Upload module from the EzeScan Admin menu by selecting Admin > Upload or by pressing the F8 Key.
Managing Upload Types
The Upload module may be accessed in either of the following means…
-
When the EzeScan image viewer is not displaying images, the Upload Admin form allows the operator to manage (create, edit, delete, rename) any of the available Upload types.
OR
-
When the image viewer is displaying images, the Upload Admin allows the operator to edit the settings of the current Upload only.
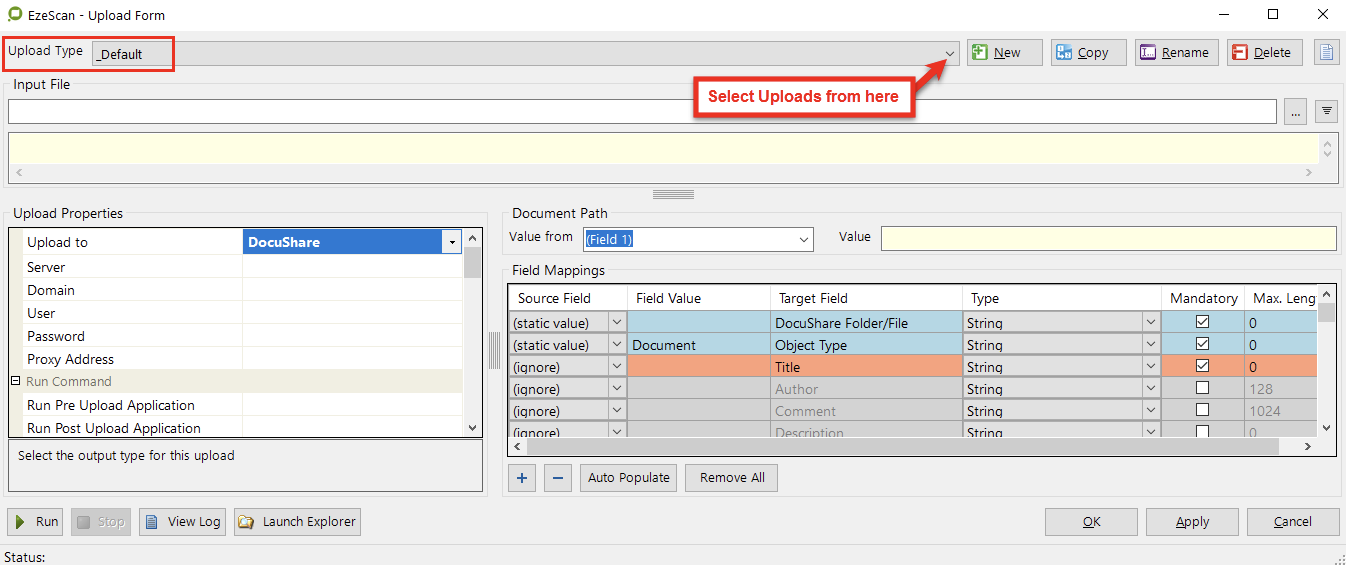
The following form is displayed…
Selecting an existing Upload type
Simply choose an Upload Type from the list of available types using the pull down shown in Figure 4.
Adding, renaming & removing Upload types
Upload types are managed by using the following lists and buttons:
|
|
Adding a new Upload type
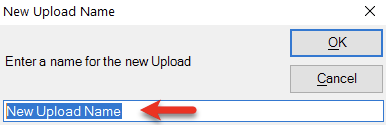
|
|
|
Copying a Upload Type
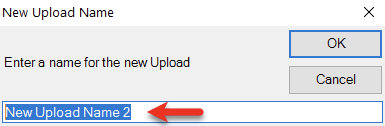
Overtype this to make it your own and click OK. |
|
|
Renaming a Upload Type
For example… 
|
|
|
Removing a Upload type
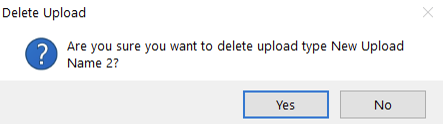
Note: _Default Upload type may not be removed from the list. |
|
|
Notes
|
Upload Properties
After a new Upload type is created the properties must be set.
This will allow the operator to define the Repository, Document, Index File and logging options etc.
The first thing to do is to select the system/application which you wish to Upload to refer to the Available Upload Connectors section on page for a list of supported connectors.
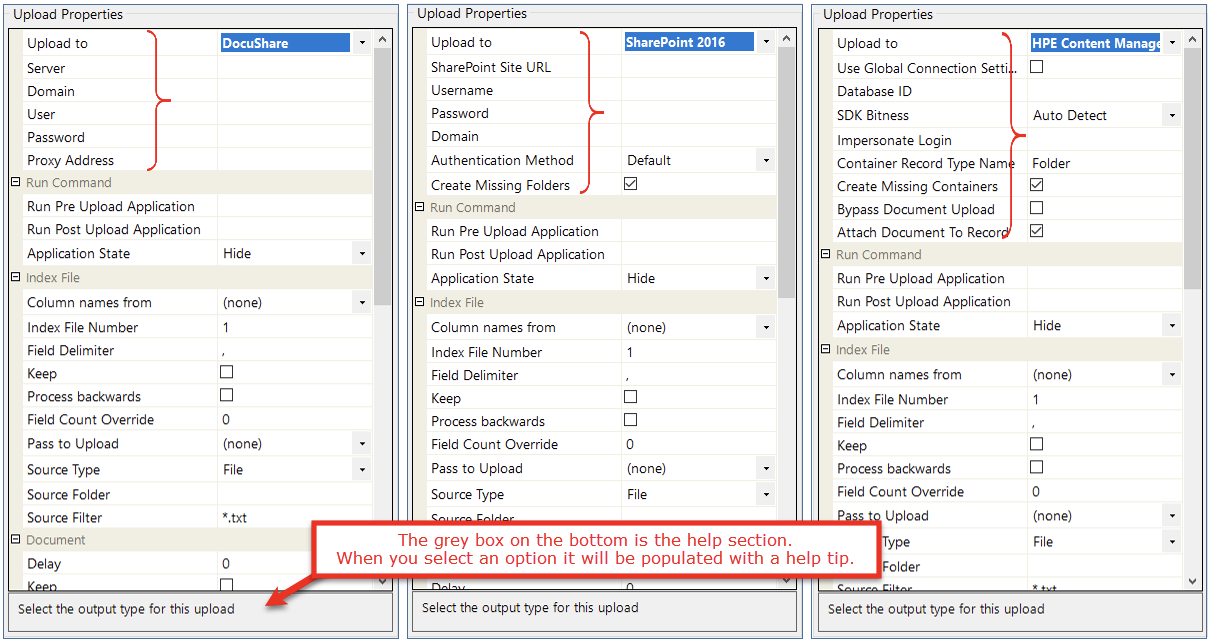
Upload to section
|
Upload to |
Select the drop down box to choose the repository to be Uploaded to.
|
|
Connector Settings |
This part of the Upload settings will change depending on the selected connector.
|
Run Command section
|
Run Pre Upload Application |
Default is blank (N/A)
|
|
Run Post Upload Application |
Default is blank (N/A)
|
|
Application State |
Default is Hide
|
Index File section
|
Column Names From |
Default is (none)
Firstly the operator will need to select the KFI that will be used. 
Then in the Source field a drop down list will appear showing the KFI fields. The operator can select the respective KFI field to map to the Upload field. In this case it is "Title" 
|
|
Index File Number |
Default is 1
|
|
Index File Type |
CSV (default)
The advantage of using this method is if KFI fields are moved then no remapping needs to be done. Static values can also be set but the node needs to be identified as <<IXN{{field_name}}>> The operator can also do a calculation on a numeric value. E.g. <<=IXX{{ezescan_kfi_indexes/file/Amount}} + 1>>
|
|
Field Delimiter |
Default is , (comma)
Tip: If using the Column Names From option, this does not need to be set. |
|
Keep |
Default is unticked
|
|
Process Backwards |
Default is unticked
|
|
Field Count Override |
Default is 0
|
|
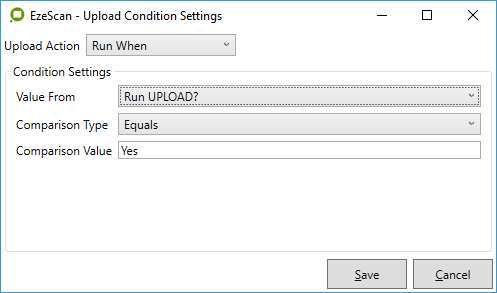
Upload Condition |
Default is Always Run
|
|
Pass to Upload |
Default is (none)
i.e. you may require to Upload to an EDRM system and also Upload to an ODBC database. You can also pass the 2nd Upload to a 3rd and so on |
|
Source Type |
Default is File
|
|
Source Folder |
Default is blank but must be set if the Folder option is selected. If the Source Type is set to Folder, the operator will need to set the Source Folder. This will be where the EzeScan job has saved the output images and index files. For example…
Click in the field and then click on the browse button … to set |
|
Source Filter |
Default is *.txt
For example if the job is outputting to text the filter would need to be set to "*.txt". The operator could also specify index filename options, e.g. if the Upload is only to process documents starting with the letter "A" the filter could be set to "A*.txt". |

Document section
|
Delay |
Default is 0 (no delay)
|
|
Keep |
Default is unticked
|
|
Convert File Format To |
Default is Ignore - Use Existing
Tip: If the Uploads are being run as a separate task (e.g. using EzeScan server) then it would be advisable to do the PDF conversions in Upload. This will save more time for the operator as they do not need to wait for each file to be converted at the job level The available formats are:
|
|
OCR Language |
Default is English
|
|
Use existing PDF Text |
This option will skip performing OCR on the page for if the source page is from a PDF with a text layer. For example a PDF that has been digitally created, e.g. from Word > PDF. |
|
PDF Import Resolution Min |
Default is 300 (DPI) If the output from the job level is saving as a PDF then this option allows EzeScan what minimum DPI to import the file at. If the job level is saving as a tiff this option is ignored. |
|
PDF Import Resolution Max |
Default is 300 (DPI) If the output from the job level is saving as a PDF then this option allows EzeScan what maximum DPI to import the file at. If the job level is saving as a tiff this option is ignored. |
|
PDF Format |
Default is PDF 1.4 Save PDFs using this format. We only recommend using the PDF/A options when long term archival is required. The available options are:
|
|
PDF JPEG Quality |
Default is 75 (range = 0 to 100) Applicable to greyscale and colour images. Sets the amount of JPEG compression to apply when producing the PDF. Higher values equal less compression, higher quality and larger file sizes. Use lower values to produce smaller and more compressed PDF files. |
|
Fast Open PDF |
Default is unticked Allows the output PDF to start displaying pages before the entire document has been downloaded. |
Log section
Logging will create a file which will write an entry when a document is Uploaded to its destination. It can assist with troubleshooting and list when an Upload has completed successfully.
This is a sample Upload log file…
2010/06/11 13:06:34,C:\Program Files\Outback Imaging\EzeScan 4.2\Output\Image_1.pdf - Upload completed
2010/06/11 13:06:59,C:\Program Files\Outback Imaging\EzeScan 4.2\Output\Image_2.pdf - Upload completed
|
Halt on Error |
Default is ticked (Yes) Upload will stop when an error occurs. |
|
Log to a single log file |
Default is ticked (Yes) Upload will log all information to one log file instead of logging a single log file per file. |
|
Log Folder |
Default is blank EzeScan will save the log file in the same folder as the KFI index file. This option will allow the operator to have the Upload log file to be saved into a specific folder.
|
|
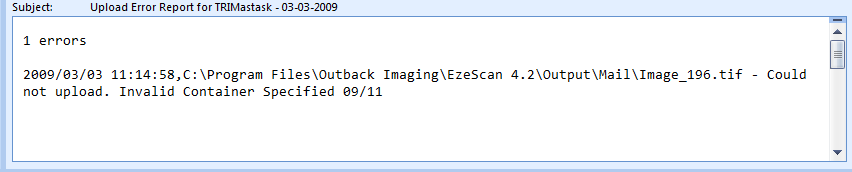
Email Error Report |
Default is unticked This will send an email notifying the operator that an Upload failure/s has occurred. This feature works when the Upload module is being run on its own. i.e. File -> Run Upload or Admin -> Upload or running Upload as a scheduled task. Below is a sample email of an error report.
|
|
Email Address |
Default is blank
Note: Ensure SMTP settings are configured via Workstation Options |
Markup section
The mark-up options allow the output document to have mark-up text applied to them. System and Upload placeholders can be used. E.g. <<S15>>, <<IF6>> etc.
|
Use Markup |
Default is unticked
|
|
Markup Text |
This is the text that will appear on the image. |
|
Font Name |
Default is Arial
|
|
Font Size |
Default is 11pt
|
|
Font Style |
Default is Regular
|
|
Text Colour |
Default is Black
Options are Black, Red, Green, Blue, Cyan, Yellow, Magenta, White |
|
Back Colour |
Default is Transparent This can be set to Transparent or White.
|
|
Page |
Default is 0
|
|
Horizontal Justification |
Default Left (corner of page)
|
|
Vertical Justification |
Default Top (section of the page)
|
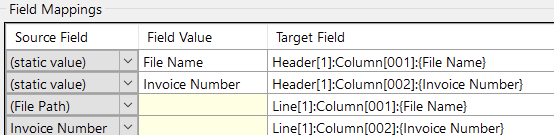
Field Mappings
This is the field Mappings Grid. This is where the source data (from KFI) is mapped to the Target Field for the respective Upload repository. More information on the Target Fields can be found in section 2.5.
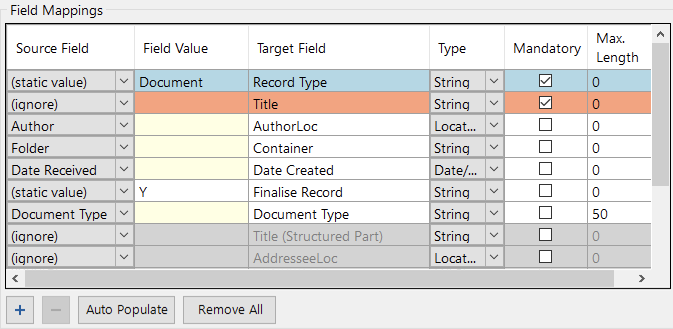
What do the colours mean?
|
Yellow |
The field value is related to the KFI Index File |
|
Light Red |
The field value is mandatory and not populated. |
|
Light Blue |
The field value is mandatory and populated |
|
White |
The field value is not mandatory |
|
Grey |
The field value is inactive (not used) |
|
Blue |
The field value is currently selected (user has clicked I the field) |
What are the columns and what do they do?
|
Source Field |
This is the value which will be "Uploaded" to the target system. There are 4 types of Source fields:
|
|
Field value |
A value must be added into this column when the respective field has it's source field set to (static value). Example are…
|
|
Target Field |
The field in the targeted system which the processed document and associated metadata is being Uploaded to; based on the mapping from the Source field |
|
Type |
The default type of metadata the target system will use for the Uploaded metadata. Generally left "as is" but may be changed if an option is available |
|
Mandatory |
The EzeScan connector plugin will tick these boxes by default depending on the "Upload to" option selected as these values are generally mandatory in the targeted system. NOTE: The Source field cannot be left set to (ignore) when Mandatory the box is ticked |
|
Max. Length |
Dictates the maximum length the Uploaded metadata will allow to be Uploaded to the target system. For example…
|
What are the buttons at bottom of the grid?
|
|
The plus button is to add another field |
|
|
The minus button is to remove a field. (Custom fields only) |
|
|
The Auto Populate button will connect to the respective system and obtain all the custom fields for it. Note: Please refer to the target mappings section for each system on how to use this option. |
|
|
The Remove All button will remove all custom field mappings in the grid |
Command Buttons
|
|
Use the Run button to start a manually initiated Upload of the currently selected Upload Type, using the currently selected Input File |
|
|
Use the Stop button to stop the Upload of the currently selected Upload Type. This is only used when input files with more than 1 input row are processed. When the program detects that the button has been pressed it will stop at the end of the processing the current row from the input file. |
|
|
Use the View Log button to view the results of the last Upload. The log shows whether the Upload worked or failed, and in case of failures may contain some useful error messages relating to the failure. |
|
|
The Launch Explorer button will launch the explorer screen.e.g. My Computer. |
|
|
The OK button will save the Upload type and then close the Upload form. |
|
|
Use the Apply button to save any changes made to the currently selected Upload type. |
|
|
Use the Cancel button to close the Upload Admin form, ignoring any changes made since the last time the Apply button was pressed. |
EzeScan Connector Target Field Mappings
The following connectors are available in the Upload module.
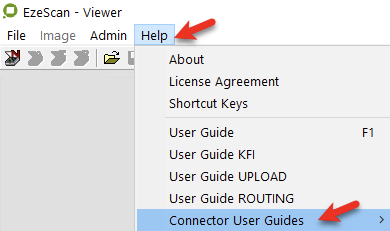
Please refer to the relevant user guide available from the Help menu to access all of the connector's Upload documentation.
-
Aconex
-
Alfresco
-
Civica Authority Purchases
-
CSV Creator
-
DocuShare
-
DocuWare
-
eDOCS 5 (Open Text)
-
eDOCS 6 (Open Text)
-
EzeScan Archiver
-
Financial Edge NXT
-
FTP
-
HPE Content Manager (TRIM)
-
iManage Work
-
Infor Pathway
-
InfoRouter (Active Innovations)
-
InfoXpert (Infovision)
-
Laserfiche
-
MYOB AccountRight 2013.5 and above
-
Purchases
-
Receive Money
-
Sales
-
Spend Money
-
-
Objective ECM
-
ODBC (Databases)
-
Open Text Content Server
-
Raiser's Edge
-
Constituent
-
Gift Batch
-
-
Sage 200
-
Accounts Payable
-
Accounts Receivable
-
Purchase Order
-
2016
-
-
Sage 300
-
Accounts Payable
-
Accounts Receivable
-
-
SFTP
-
SharePoint (Microsoft)
-
2013
-
2016
-
-
SMTP
-
TechnologyOne ECM
-
TechnologyOne Financials
-
Therefore
-
WebDAV (Compliant Systems)
-
Xero
EzeScan Target Mappings
CSV Creator
The CSV Creator allows for a TXT/CSV file to be created. This can be useful if needed to create a CSV after an EDRMS Upload. For example a system may require the document EDRMS number to be supplied after an Upload.
Upload Properties
|
Upload to |
Select CSV Creator |
|
Folder Path |
Default is blank
|
|
Base Filename |
Default is blank
|
|
File Extension |
Default is csv
|
|
Create Header Row |
Default is unticked
The header row/s can be created in the following syntax |
|
Append to Existing CSV |
Default is unticked
|
|
Copy Document |
Default is unticked
|
To create the columns for the CSV file…
-
Select the CSV Creator option in the "Upload to" field in Upload Properties section
-
Click the Remove All button and all of the current Field mappings will all be removed
-
Click the + button and the first field mapping will appear.
-
If creating header rows the following syntax is used…
Header[LineNo]:Column[ColumnNo]:{Header Name}
-
To create line rows the following syntax is used…
Line[LineNo]:Column[ColumnNo]:{Column Name}
Below is an example of a CSV file with a header row and line row.
Other Upload Properties
Please refer to previous sections.
FTP (File Transfer Protocol)
The File Transfer Protocol (FTP) is a standard network protocol used to transfer computer files between a client and server on a computer network. FTP is built on a client-server model architecture and uses separate control and data connections between the client and the server.
Upload Properties
|
Upload to |
Select FTP |
|
Server |
Enter the FTP server hostname OR IP address |
|
Port |
Default is 21
|
|
User |
Enter the FTP username |
|
Password |
Enter the FTP password |
|
Security Type |
Default is None
|
|
Connection Type |
Default is Passive
|
|
Connection Timeout |
Default is 30 (seconds)
|
|
Upload |
Default is Document and Index File
|
|
Use TMP Extension During Transfer |
Default is unticked
|
Other Upload Properties
Please refer to previous sections.
FTP (Secure File Transfer Protocol)
Secure File Transfer Protocol (SFTP) is a secure version of File Transfer Protocol (FTP), which facilitates data access and data transfer over a Secure Shell (SSH) data stream. It is part of the SSH Protocol. This term is also known as SSH File Transfer Protocol.
Upload Properties
|
Upload to |
Select SFTP |
|
Server |
This is the SFTP server hostname OR IP address |
|
Port |
Default is 22
|
|
User |
Enter the SFTP username |
|
Password |
Enter the SFTP password |
|
Key File |
Enter the SFTP server key file path |
|
Passphrase |
Enter the SFTP server passphrase |
|
Upload |
Default is Document and Index File
|
Other Upload Properties
Please refer to previous sections..
ODBC (Open Database Connectivity)
Open Database Connectivity (ODBC) is an open standard application programming interface (API) for accessing a database.
By using ODBC statements in a program, you can access files in a number of different databases, including Access, dBase, DB2, Excel, and Text.
The ODBC function provided by EzeScan Upload process allows the insertion of captured data into a SQL based database using ODBC.
Upload Properties
|
Upload To |
Select ODBC |
|
DSN |
This is the User or System DSN to be used to connect to the database. Click in the field and then on the browse button … to select the required ODBC DSN. This is configured in the "Data Sources (ODBC)" option in the Control Panel Tip: Further details about setting up ODBC settings are available in the KFI User Guide |
|
User |
This is the database username |
|
Password |
This is the database password |
|
Connection String Suffix |
Enter additional ODBC connection string settings. For example: "SUPPRESS_WARNINGS=1" |
|
Use Lookup |
Default is unticked
Tip: Further details about using Lookup Sets is available in the KFI User Guide Note: Ticking this option will grey out the DSN section (above) |
|
Connection Timeout |
Default is 100 (seconds)
|
|
Command Timeout |
Default is 100 (seconds)
|
|
Use Transaction |
Default is unticked
|
|
Copy To Folder |
Default is blank (will not copy the file) This is the folder where the document will be copied to. Placeholders can be used to derive the document path, e.g. M:\Storage\<<F1>>\<<F2>>\ Click in the field and then on the browse button … to browse for the folder to copy the file too. |
|
SQL Statement |
The SQL statement is entered in here. Click in the field and then on the browse button … and the following screen will display: 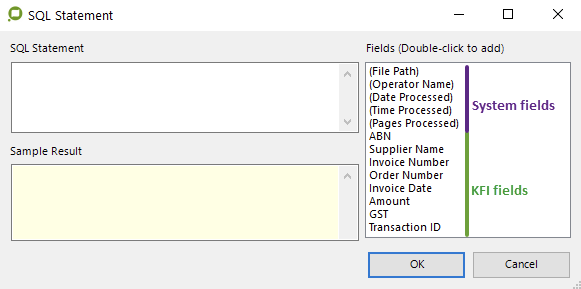
Note: If you have used the "Column Names From" option in the index file section the available Field Placeholder names from the KFI type will appear in the list. The column names from option is described in the Index File Section Of Upload Properties. When the operator fills in the statement, the sample result will display below. e.g. Load a test KFI output Index file to show the data. 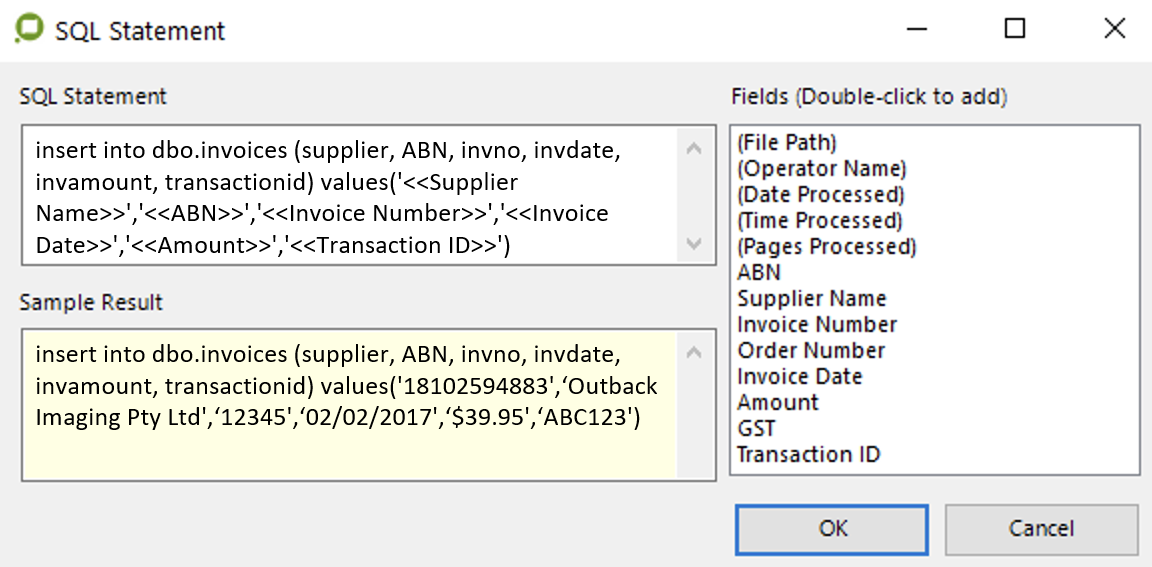
If the document is required to be Uploaded into the database as an image attachment/BLOB, two options can be used.
Please Note:
Please Note:
|
|
Run Pre Upload Application /
|
This will run an application and can be configured to run prior to the Upload of the document or after or can run both. Placeholder values can be used:
Tip: Please remember to use double quotes if the application or output values are to contain spaces. e.g. "C:\my app\run.exe" "<<FILE>>" "<<IF1>>" Note: The application must be completed (closed) before the ODBC command runs. |
|
Application State |
This can be set to Show or Hide.
|
Other Upload Properties
Please refer to previous sections.
SMTP (Simple Mail Transfer Protocol)
SMTP (pronounced as separate letters) is short for Simple Mail Transfer Protocol, a protocol for sending e-mail messages between servers.
Most e-mail systems that send mail over the Internet use SMTP to send messages from one server to another; the messages can then be retrieved with an e-mail client using either POP or IMAP
-
The SMTP function provided by EzeScan Upload process allows for sending an email to an SMTP recipient.
-
Generally used as a 2nd Upload process.
-
Once the 1st Upload is processed the 2nd Upload (set in the "pass to Upload" setting) runs and sends an email.
-
It could be an email advising that the document has been processed.
Note: The SMTP Mail Settings must be configured when generating emails from an Upload in either the EzeScan workstation options (SMTP tab)
Upload Properties
|
Upload to |
Select SMTP |
|
Server |
Enter the SMTP server hostname OR IP address |
|
Port |
Default is 25
|
|
User |
Enter the login name to access your SMTP mail server account |
|
Password |
Enter the password to access your SMTP mail server account |
|
Authentication Method |
Default is Auto
|
|
Security Type |
Default is None
|
|
Attach Document |
Default is Ticked (Yes)
|
Other Upload Properties
Please refer to previous sections.
Target Fields
The SMTP Upload configuration is detailed further in the "Setting up an SMTP Email Notification Upload" section on page .
|
Subject: |
This field will become the Email Subject
|
|
To |
This field will become the To Address
|
|
CC |
This field will become the CC Address
|
|
BCC |
This field will become the BCC Address
|
|
Message Body HTML |
This field will become the Message Body in HTML format.
Tip: Refer to the "Email Body Created using HTML" section on page for an example of creating a message body using HTML |
|
Message Body Text |
This field will become the Message Body in Plain Text format
Note: This can only be defined as a (static value) in Upload. For example - <<IF6>><<BR>><<IF7>> Tip: Refer to the "Email Body Created using Plain Text" section on page for an example of creating a message body using Plain Text |
|
From |
This field will become the From Address
|
|
Reply To |
This field will become the ReplyTo address Warning: Using this option will require the operator to have the ability to run this command on the mail server. It may be easier to just use the "From" field instead. |
|
Read Receipt |
This field will become the Read Receipt Value.
|
|
Attachments |
This field will allow you to specify other file attachments to be added to the email to be sent. Use the (static value) option
|
Creating an Upload
EDRMS Upload
Below we will show an example of creating an Upload into the HPE Content Manager EDRMS.
Tip: The same order of instructions can be applied when using any of the other ERDMS connectors. Specific details may be found in the relevant Connector user guides found under the EzeScan Help Menus.
Pre requisites
Create a Job and KFI
-
Create a Job, KFI and Upload
-
Open the jobs screen (press F6) and click on the new button
-
Give the job a name e.g. HPE Content Manager Upload Test
-
-
When prompted; select Yes to create a KFI
-
When prompted; select No to create the Upload (we will do this later)
-
Leave the job with the standard defaults and take note of the output folder's path
Edit the KFI - Add Fields
-
Create three fields - Title, Date Received and Folder using the standard processes as set out in the EzeScan KFI and HPE Content Manager User Guides (available via the Help menu)
Tip: The folder should be a valid container in your HPE Content Manager. e.g. 08/6
Run the job and process the KFI
-
Either scan a document or import one using the (above) job
-
Complete the 3 fields; for example…
-
Title Parking Fine INF00001
-
Date 06/02/2017
-
Folder PROP/12345
-
-
Click submit
-
Make sure that you have an output image and index file created from your Job / KFI.For example - Image_1.tif and Image_1.txt
Create the Upload
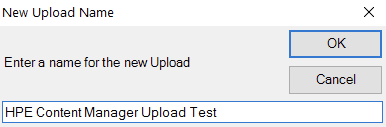
Name
-
Start the Upload Admin form by pressing F8 whilst in the EzeScan viewer window.
-
Following the steps outlined in the Create New Upload section on page
-
Press the Add button to create a new Upload Type
Tip: if you use the same name for the Upload Type, the KFI Type and the Job Type, it will make it much easier for you to manage the linkage between the these 3 types.
a. We have called our new Upload - HPE Content Manager Upload Test
Select the EDRMS to Upload to
-
Then from the Upload Admin form choose HPE Content Manager from the list of destination types.
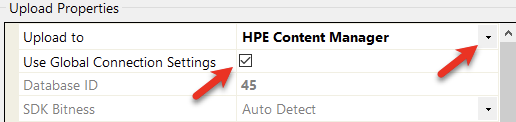
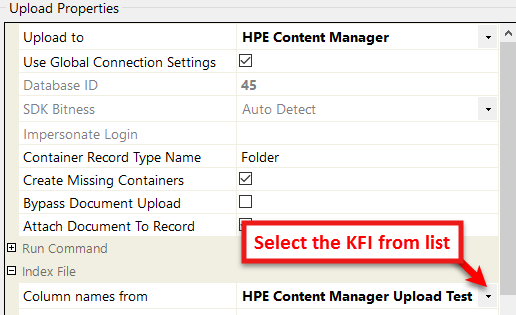
Select HPE Content Manager & tick the default box -
The next step is to select your HPE Content Manager Database.
-
Ticking the "Use Global Settings" box will use the default EDRMS as set in the Workstation Options. Generally the "Production" environment.
-
If you wish to use another environment (e.g. Test) then leave the box unticked and click in the Database ID field then click the browse button … and when prompted select your HPE Content Manager dataset.
-
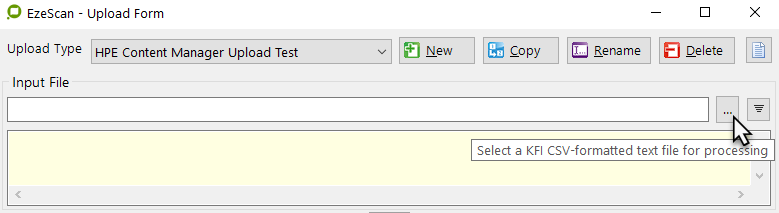
Select KFI Output File to test against
-
We need a KFI output index file test file (e.g. Image_1.txt) to use when testing the Upload
-
Browse and find the KFI output index file that you want to use with this Upload type.
-
The file is required because it is going to contain the KFI index field data that is going to be mapped across to HPE Content Manager properties as the file is Uploaded to HPE Content Manager.
-
-
Click on the browse button … and browse to the file…
Browse for the output file -
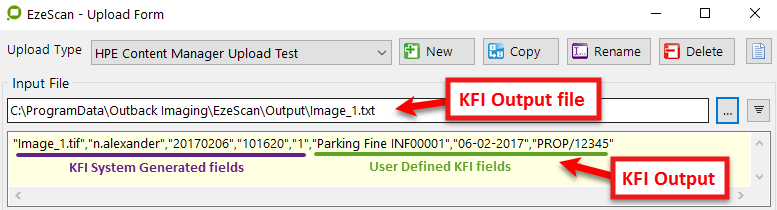
The KFI output should show in the pane below.
Output file displays it’s content
-
Column Names from
-
The next step is to select the KFI that was used.
-
In this instance the KFI is called HPE Content Manager KFI Test
-
Select your respective KFI option from the "Column names from" pulldown
-
Note: If your KFI is using a custom output your KFI will not show here. Therefore this option should be ignored. When a custom KFI output has been used the operator will be required to reference the index file to map to the respective EDRMS fields.
Tip: There are several key points to remember when choosing the Input Fields list box values that you want to map across to an Upload.
-
Each KFI output index file contains comma separated index field values.
-
When the KFI is using a Default CSV Output format…
-
the first 5 list fields (Field #1 to Field #5 - as shown in Figure 21) are system generated by the KFI processing code itself and contain the following…
-
filename field #1 e.g. image1_tif
-
scanned by field #2 e.g. n.alexander
-
date field #3 e.g. 20170206
-
time field #4 e.g. 101620
-
N° of pages in document field #5 e.g. 1
-
-
The following fields (Field #6 onwards) are the user defined KFI fields. For example (as shown in Figure 21)…
-
Title field #6 e.g. Parking Fine INF00001
-
Date Received field #7 e.g. 06-02-2017
-
Folder field #8 e.g. PROP/12345
-
-
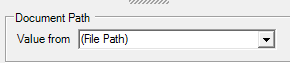
-
The Document Path is default set to the File Path as this contains the filename.
Note: If a custom KFI output is used this would need to be set to field #1.
Mapping the KFI fields
The next steps are to match the KFI fields against the HPE Content Manager Upload fields.
-
The mandatory Record Type should default to an existing record type.
-
To change this, click in the Database ID field then click the browse button … and select the required record type for the document
-
-
Match the Title Source (KFI) field to the corresponding mandatory (Title)Target field
-
Match the Folder Source (KFI) field to the corresponding (Container)Target field
-
Match the Date Received Source (KFI) field to the corresponding (Date Created) Target field

-
Configuration of the job type is complete.
-
Press the APPLY button to save the changes.
-
You may now press the Run button to manually test the Upload type mapping that you have just setup.
-
EzeScan should display an Upload Completed message, and the document is saved into HPE Content Manager.
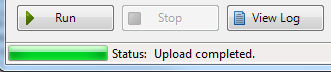
Run process is successful -
If the Upload shows a message Upload completed with errors.
-
This will usually mean that there is a mapping problem.
-
Click the View Log button to view more information on the error
-
-
-
Record in HPE Content Manager

EzeScan Archiver Upload
EzeScan Archiver is a simple web retrieval tool for storing documents and metadata. It provides a web interface to allow an operator to search and retrieve documents.
Warning: Please read the following…
-
EzeScan ARCHIVER does not replace an existing EDRMS (Electronic Document Records Management System).
-
It is designed for back scanning projects or low volume storage of documents.
-
The EzeScan Archiver is designed for up to 50,000 documents (with 5 metadata fields).
-
Anything over this will incur a decrease of performance.
-
-
It is also recommended to use the Firefox web browser for search and retrieval of documents.
-
Configuring EzeScan Archiver Properties
The properties for the EzeScan Archiver Database are required to be configured. When the first document is Uploaded, the database and supporting files are created in the Disc Path folder.
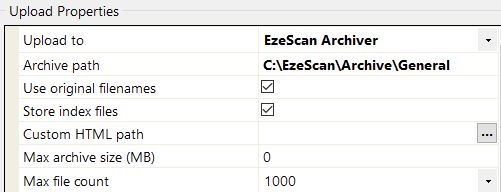
|
Upload to |
This is required to be set to EzeScan Archiver |
|
Archive Path |
The path of where the archive database is saved to. When first run EzeScan will create the database, it's supporting files and a documents folder. The Archive Path also supports placeholders. For example…
|
|
Use original filenames |
Note: Cannot be changed after archive creation |
|
Store index files |
|
|
Custom HTML path |
This option allows for the creation of a customized index.html search page.
Note: Only available when creating a new archive |
|
Maximum archive size (MB) |
This option allows the operator to set a maximum size (MB) of the documents store in the Archiver database. When the document limit is met the operator will be prompted with the following message… 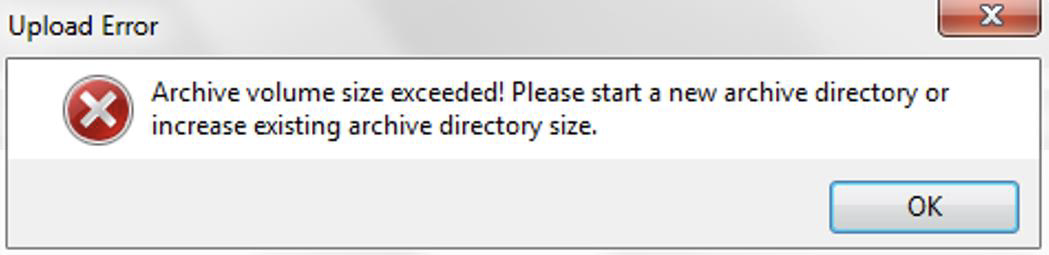
|
|
Max file count |
Limits the number of files in a single document directory and create new directories as required. Choose from…
This is recommended for larger size Archive stores as it will provide a small improvement on searching. |
Configuring EzeScan Archiver Upload Field Mappings
By default there are no target fields as there is no database to browse.
When the first document is Uploaded to EzeScan Archiver the database gets created.
Note: Once the EzeScan database is created the operator cannot make any changes to it (i.e. add or remove fields). If fields are required to be changed, a new database needs to be created.
-
To create the field mappings click the + button.
-
The following will display…

-
-
The Target Field is the name of the field that will appear in the web retrieval screen.
-
Click on where it says "Custom Field 1" and rename it to respective name that is required to be viewed by the search operator. (e.g. Title)
-
-
Use the Column Names From setting to set the name of the KFI that the Upload will be using. E.g. the KFI source field value Is Title so the Target Field will also be Title.
-
Refer to the Index File section on page for more information on these settings.

Figure 30 - rename Custom Field 1 to required name (e.g. Title) & map to KFI field
-
-
Click Apply to save the changes.
-
Repeat steps 1 to 4 for any additional Fields (e.g. Date Received, From etc)
-
When complete, click OK to close the Upload screen.
-
Refer to the Configuring a Job Type to use an Upload Type section on page for details on how to configure a job to use the Upload.
Viewing an EzeScan Archiver database
When a document is Uploaded into the Archive Path (e.g. C:\EzeScan\Archive\General) the following files are created…
-
Resources Folder
-
archiver.js
-
ezescan_logo.png
-
jquery.js
-
progress.gif
-
styles.css
-
-
Documents Folder
-
The Output images (e.g. Image_1.tif)
-
The Output text file (e.g. Image_1.txt)
-
-
index.html
-
store.xml
-
\Documents (folder) (if specified in the Upload set-up
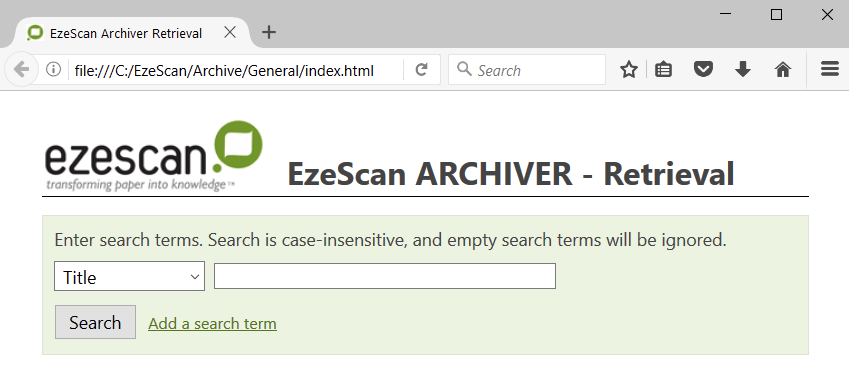
The operator can double click on index.html and the following will appear in the browser (if asked to run an ActiveX control select Yes).
Tip: The Archive database can be viewed as an http:// web link. This would require an administrator to host the above files on a web server. Please refer to your local administrator for more information.
The operator can then perform a search by selecting a metadata field and enter a value.
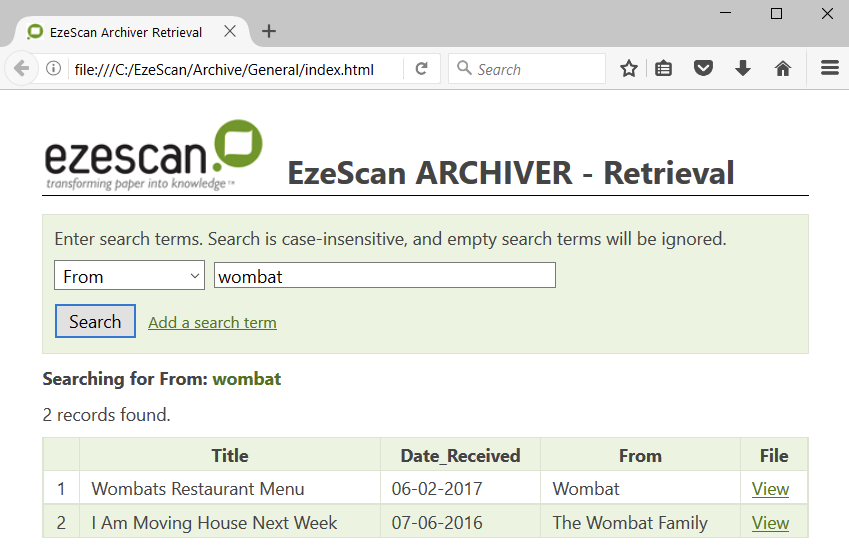
EzeScan Archiver will display the result/s.
The operator can click on the View link to view the document.
The operator can also add more search terms by clicking on the Add a search term link. e.g. this would allow to search on two or more fields.
ODBC Upload
Note: It is assumed that the operator undertaking the tasks below has access to an SQL database. An SQL database running in something like Microsoft SQL Server Management Studio will suffice. The operator must also have full rights in order the create and write to the database.
Pre requisites
Create an SQL Database to use
In order to facilitate an ODBC Upload we need to have an SQL database in which to Upload to
We will need the database to include the following:
-
Database name e.g. ezescandb
-
Table name e.g. suppliers
-
Table fields supplier_name; invoice_number & file_path
-
SQL login credentials. Username (e.g. sa) & Password (e.g. password)
SQL to create table in ezescandb
CREATE TABLE [ezescandb].[dbo].[Suppliers](
    [supplier_name] [varchar](100) NULL,
    [invoice_number] [varchar](100) NULL,
    [file_path] [varchar](100) NULL
) ON [PRIMARY]
Finally create an ODBC Connection (e.g. System DSN = Suppliers) to the database from the ODBC Data Source Administrator in the Control Panel. Note the Data source name.
Create a Job and KFI
-
Create a Job, KFI and Upload
-
Open the jobs screen (press F6) and click on the new button
-
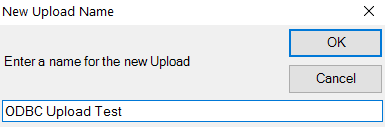
Give the job a name e.g. ODBC Upload Test
-
-
When prompted; select Yes to create a KFI
-
When prompted; select No to create the Upload (we will do this later)
-
Leave the job with the standard defaults and take note of the output folder's path
Edit the KFI - Add Fields
-
Create two fields - Supplier and Invoice Number using the standard processes as set out in the EzeScan KFI (available via the Help menu)
Run the job and process the KFI
-
Either scan a document or import one using the (above) job
-
Complete the 2 fields; for example…
-
Supplier Outback Imaging Pty Ltd
-
Invoice Number 123456
-
-
Click submit
-
Make sure that you have an output image and index file created from your Job / KFI.For example - Image_1.tif and Image_1.txt
Create the Upload
Name
-
Start the Upload Admin form by pressing F8 whilst in the EzeScan viewer window.
-
Following the steps outlined in the Create New Upload section on page
-
Press the Add button to create a new Upload Type
Tip: if you use the same name for the Upload Type, the KFI Type and the Job Type, it will make it much easier for you to manage the linkage between the these 3 types.
a. We have called our new Upload - ODBC Upload Test.
Select KFI Output File to test against
-
We need a KFI output index file test file (e.g. Image_1.txt) to use when testing the Upload
-
Browse and find the KFI output index file that you want to use with this Upload type.
-
The file is required because it is going to contain the KFI index field data that is going to be mapped across to the SQL database properties as the file is Uploaded.
-
-
Click on the browse button … and browse to the file…
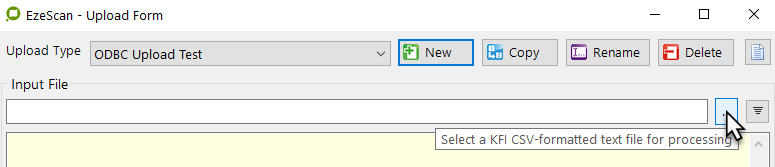
Figure 35 - Browse fro the output file -
The KFI output should show in the pane below.

Figure 36 - Output file displays it’s content
-
Column Names from
-
The next step is to select the KFI that was used.
-
In this instance the KFI is called ODBC Upload Test
-
Select your respective KFI option from the "Column names from" pulldown
-

Note: If your KFI is using a custom output your KFI will not show here. Therefore this option should be ignored.
Tip: There are several key points to remember when choosing the Input Fields list box values that you want to map across to an Upload.
-
Each KFI output index file contains comma separated index field values.
-
When the KFI is using a Default CSV Output format…
-
the first 5 list fields (Field #1 to Field #5 - as shown in Figure 36) are system generated by the KFI processing code itself and contain the following…
-
filename field #1 e.g. image1_tif
-
scanned by field #2 e.g. n.alexander
-
date field #3 e.g. 20170206
-
time field #4 e.g. 042554
-
N° of pages in document field #5 e.g. 1
-
-
The following fields (Field #6 onwards) are the user defined KFI fields. For example (as shown in Figure 36)…
-
Supplier field #6 e.g. Outback Imaging Pty Ltd
-
Invoice Number field #7 e.g. 123456
-
-
-
The Document Path is default set to the File Path as this contains the filename.
Note: If a custom KFI output is used this would need to be set to field #1.
Set-up the Upload Properties section
Complete the setting as set-out below…
|
Upload to |
ODBC |
|
DSN |
suppliers |
|
User |
sa |
|
Password |
password |
|
Copy to Folder |
C:\EzeScan\ODBC Upload Test\Invoices |
|
SQL Statement
|
SQL
NOTE: [Output File Path] is the path as set in the Job’s Output folder |
About the SQL Statement
The SQL Statement shown in the above table can be broken down to two components
-
The SQL commands:
insert into suppliers (supplier_name, invoice_number, file_path) values
-
The KFI fields:
('<<Supplier Name>>','<<Invoice Number>>','C:\ProgramData\Outback Imaging\EzeScan\Output\ODBC Upload Test\<<Supplier Name>>\<<(File Path)>>')
Creating the SQL Statement
-
The SQL Statement can be generated by clicking into the field and then the browse button … to display the screen shown in Figure 39.
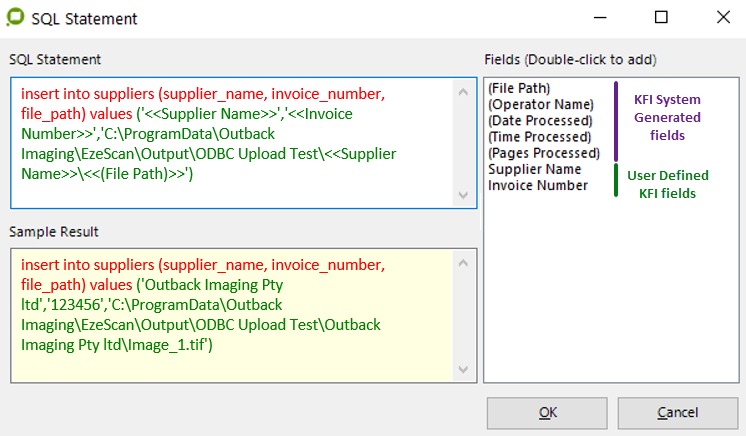
Figure 39 - Red text are SQL commands & Green text are KFI values (colour used for display purposes only) -
The end result we know want to achieve is this…
-
the Supplier Name KFI field gets Uploaded to the supplier_name SQL field.
-
the Invoice Number KFI field gets Uploaded to the invoice_number SQL field.
-
the output file path gets Uploaded to the file_path SQL field.
-
A sample result is shown above in Figure 39.
-
-
-
Click OK to save and close the SQL Statement screen
-
Click Apply.
Run a Test Upload
-
You may now press the Run button to manually test the Upload that you have just setup.

-
This screen will appear.

-
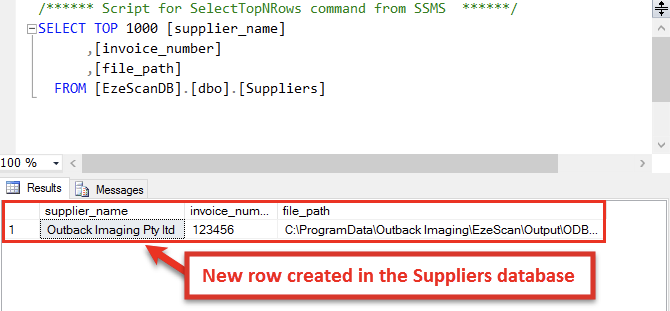
EzeScan should display an Upload Completed message, the data should be saved into the database and the file should be saved to the designated folder.

-
Running a query on the SQL database shows that a new record has been created in the Suppliers database.
Appendices
Configuring a Job Type to use an Upload Type
The Job Type used in this example is available for Download on the EzeScan web site.
-
Login to the EzeScan web site (www.ezescan.com.au) and navigate to…
-
Downloads > Software Downloads > Sample Jobs > EzeScan Archiver Jobs > Archiver - Zone OCR Job
-
Download the EzeScan Archive - Zone OCR Demo.zip file.
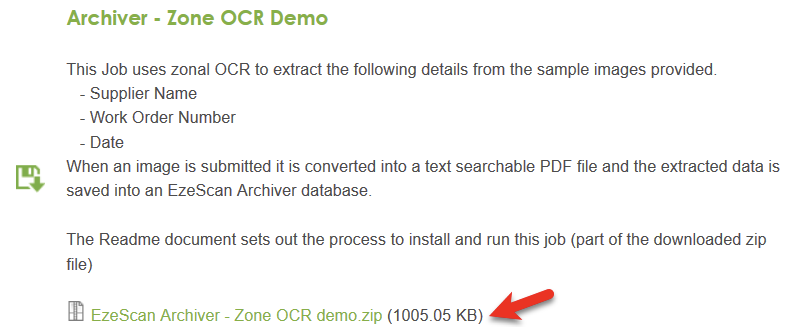
The Zip file contains the Job, KFI & Upload and "read me" document.
-
Unzip the downloaded file and import the EzeScan Archiver - Zone OCR demo.cfg file into EzeScan.
-
In EzeScan press F6 to launch the Jobs Form
-
Select the EzeScan Archiver - Zone OCR demo job type which we use in this use Upload
-
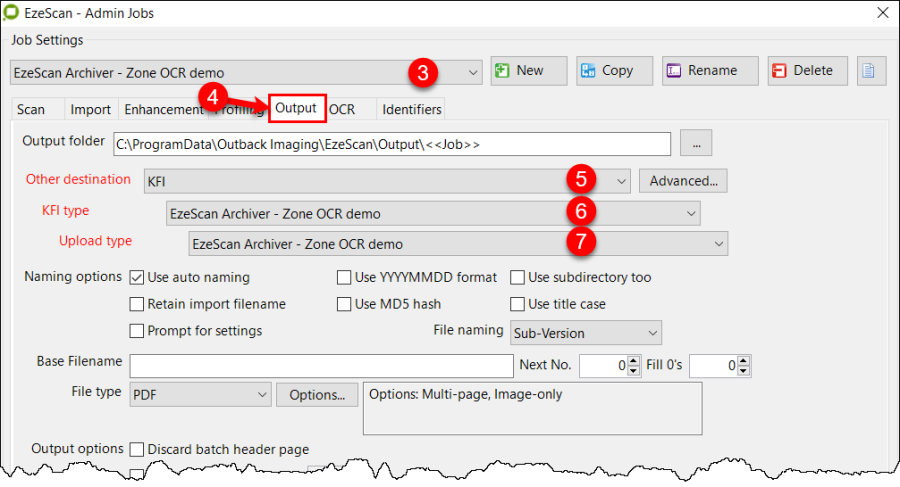
Select the Output tab
-
From the Other Destination list choose KFI.
-
From the Available KFI Types choose the EzeScan Archiver - Zone OCR demo type.
-
From the Available Upload Types choose the EzeScan Archiver - Zone OCR demo type.
-
Click the Save button to complete the setup. You are now ready to run the job.
Running the EzeScan KFI & Upload job
-
In EzeScan press F2 to launch the Operator Actions form.
-
Then select the job type that you have configured for use with KFI. In this case it's the EzeScan Archiver - Zone OCR demo job type.
-
Then press the File Import button to acquire a batch of documents for KFI processing.
-
In this example you need to select the file called EzeScan Archiver - Zone OCR demo.tif.
-
Open the selected file and it is displayed in the viewer.
-
This example consists of a batch of 3 documents.
-
-
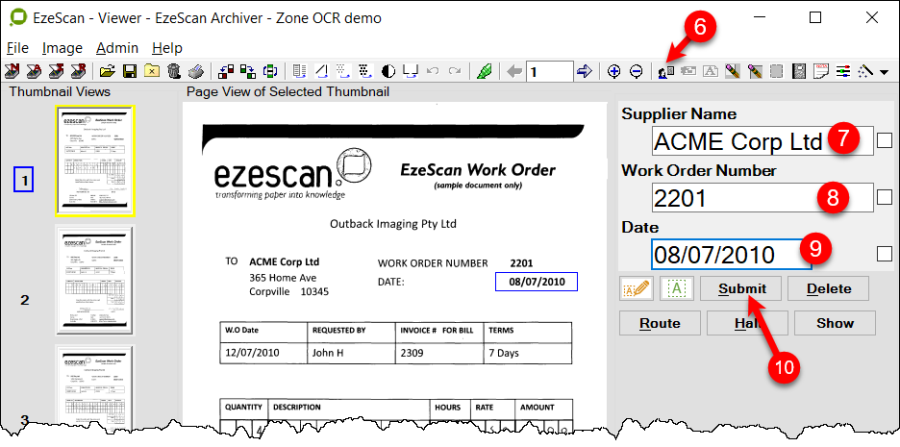
Press the F4 button or the profile button to profile the document, the KFI form is loaded into the viewer window panel as shown in Figure 45 below.
Tip: As the name indicates; this is an OCR job and EzeScan will use a KFI template to capture the fields from specific areas on each of the "structured" documents.
-
In this example the OCR has picked up the Supplier Name ACME Corp Ltd as the value.
-
Hit the Enter key and the Work Order Number 2201 will be captured
-
Hit the Enter key and the Date 08/07/2010 will be captured
-
Then the operator can either press Enter twice or click the Submit button.
-
In this example EzeScan converts the file from TIF to PDF and then writes the indexes out to the KFI output index file.
-
KFI then calls Upload which opens the KFI output index file and proceeds to connect to the Upload destination transferring the file and index fields as required.
-
If the transfer to the Upload destination worked okay, the document is removed from the viewer and the next document in the batch (if any) will be selected for processing.
-
If the Upload fails for any reason, the current document will remain selected in the viewer and an error message will be displayed to the operator.
-
The process is repeated for each document in the batch.
Running an Upload as a batch task
The Upload can be run as a separate task.
This is usually done if there is a bottleneck in the PDF OCR or Upload process.
Setting the Upload to be run as a separate task means that the PDF OCR and Uploading to the respective system can be scheduled to run outside of the operator scanning / index times. (e.g. outside of business hours)
Note: To run an Upload as a batch task it is recommend that the KFI output setting Use a single index file for all documents is enabled.
If the Upload module is planned to perform the OCR,
-
the job needs to be set to TIF
-
the Upload setting Convert File Format To needs to be set.
-
Please refer to the Run Command section on page for more information.
-
Split the JOB / KFI and Upload
To split the JOB / KFI and Upload job so Upload becomes it's own task is easily done.
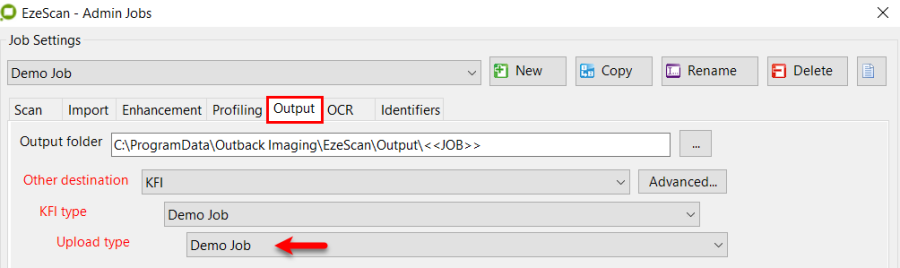
Is it shown below in our example job type EzeScan Invoice - Zone OCR
-
Firstly we select the Upload Type on the Output Tab.
-
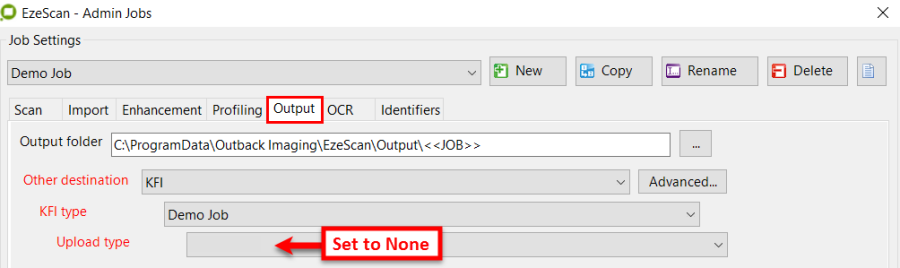
Then we set the Upload Type to None.
-
Click Save then Close.
Now when this job type is run, the output index file and images will be queued up in the job type output directory.
In the Upload module, the operator needs to set the index file to be used.
-
Select Admin then Upload and browse the output index file.
e.g. this is the Input File setting.

The Upload can now be run two ways…
-
Manually by running from the File Menu
-
Select File, Run Upload and then click the Run button.
OR -
Select Admin, Upload, select the Upload job from the dropdown list and click the Run button.
-
-
Run as a scheduled task
-
The task could also be automated by running as a scheduled task.
-
A batch file needs to be created and the following commands can be used in it.
-
|
Command |
Usage |
|---|---|
|
-Upload |
The Upload job name |
|
-Uploadindex (single index file) |
This is the name of the index file. This setting would need to have the Upload Source Type is set to file. |
|
-Uploadindex (index file per document) |
This is the name of the folder of where the documents and index files reside. This setting would need to have the Upload Source Type is set to folder and the Source Folder set to the same folder path. |
|
-closeafter |
This will close EzeScan after the Uploading has completed. |
|
-closeotherinstances |
This will close all other instances of EzeScan (if open) before the Upload task begins to run. |
This is a sample command with all the options used (for a single index file).
C:\Program Files\Outback Imaging\EzeScan 4.2\ezescan.exe -Upload “Upload Job Name” -Uploadindex “C:\folderpath\indexoutput.txt” -closeafter -closeotherinstances
3. Setting up an SMTP Email Notification Upload
Note: The processes and examples documented here have been provided to act as a guide only for setting up your own SMTP email notification Uploads.
If there is a requirement to send notification emails as part of the Upload process then the steps below need to be followed.
The first requirement is to have the SMTP component set-up on the EzeScan client and/or Server; depending on where the Uploads have been set to run.
SMTP mail settings on EzeScan Client
-
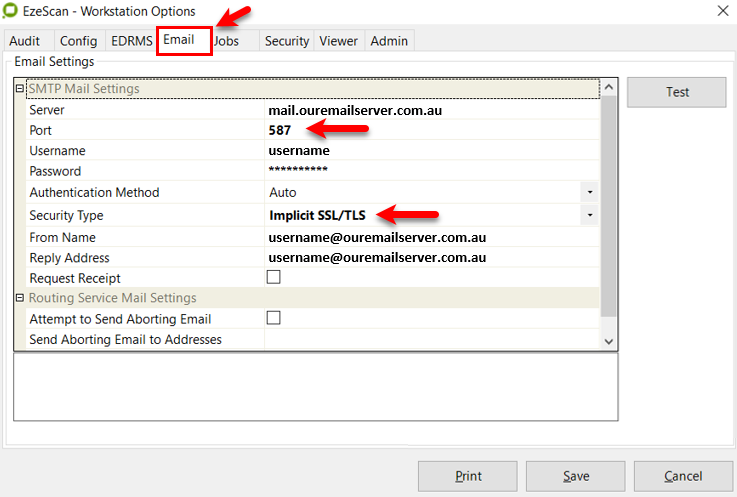
Select Admin > Workstation Options and click on the Email tab
-
Enter the hostname or IP address of the SMTP server
-
Enter the server port (default is 25)
-
Enter the login/username and password to access your SMTP mail server account
-
Select the Security Type to use when connecting to the SMTP server, default is None
-
Enter the "Senders (From)" name you want to use in the emails (e.g. John Smith)
-
Enter the "Reply" email address you want to use in the emails
Add the SMTP Email fields to your KFI
The email addresses used by the Upload to SMTP process can be configured in either the Upload or the associated KFI
-
Adding it to the Upload means that all processed documents will always be sent to the same email address
-
Adding it to the KFI means that the operator then has the flexibility to select who should receive the email - recommended option
-
There are 3 different methods which could be used for the operator to add/select an email address in the KFI field…
-
Operator manually types the email address into the field - can be an onerous task if this functionality is to be used a lot
-
A list of email addresses are added into the Display a list of values > List field of the Format tab (refer to the KFI User Guide for process to create a list)
-
Set up an "LDAP" connection on the KFI field which will provide the operator with a search function to select email addresses from your corporate email system.
-
-
Tip: Suggest using the LDAP function as there will be no ongoing maintenance required of the KFI field. This is the option used in the example below.
Note: Please refer to the "Use an LDAP Lookup Form" section in the KFI User Guide for details on how to create an LDAP Lookup Form in your associated KFI.
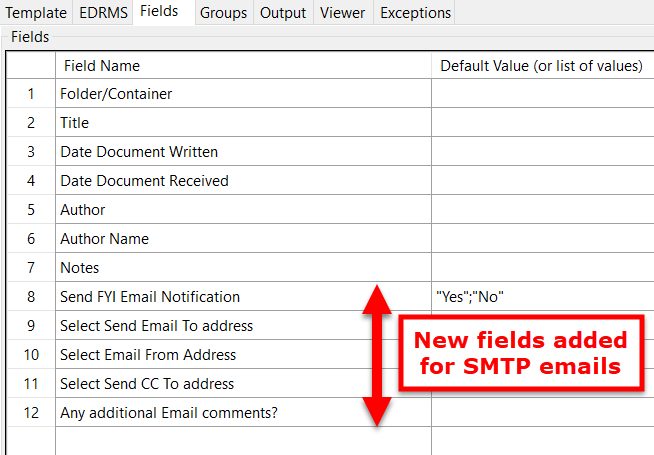
Add the following fields into your KFI…
|
Send FYI Email Notification |
|
|
Select Send Email To address |
|
|
Select Email From Address |
|
|
Select Send CC To address |
|
|
Any additional Email comments? |
|
Creating the SMTP Upload
Email body created using "Plain Text"
-
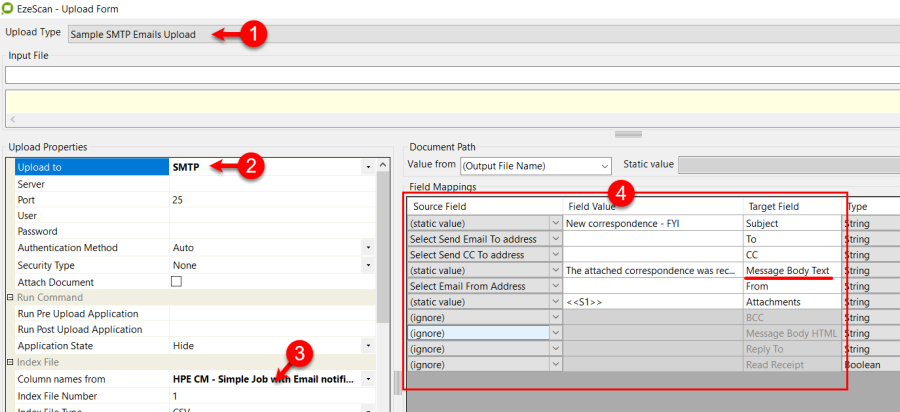
Create a new Upload (in this example it's called Sample SMTP Emails)
-
Select Upload to > SMTP
-
Select the KFI which the column names will get their "Source Field" values from
-
Map the Source Fields to the Target Fields (using either static or KFI field values):
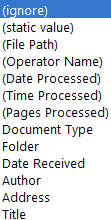
Source Field
Field Value
Target Field
Comments
(static value)
New Correspondence - FYI
Subject
See a) below
Select Send Email To address
To
See b) below
Select Send Email To address
CC
See b) below
(static value)
The attached corresponde…
Message Body Text
See c) below
Select from Email Address
From
See b) below
(static value)
<<S1>>
Attachments
See d) below
-
This text is what will appear in the email "Subject" line.
-
You could use free text as shown above or you could select a KFI field (e.g. Title)
-
You could also use multiple fields such as Title and Date Received (set as static value)
-
For example based on the KFI shown in Figure 50 it would be <<IF7>> received <<IF9>>
-
-
-
This will take the value from the KFI field.
-
If the KFI field is blank (e.g. "Select Send Email To address" and/or "Select from Email Address") then the Upload will then skip this part of the Upload.
-
-
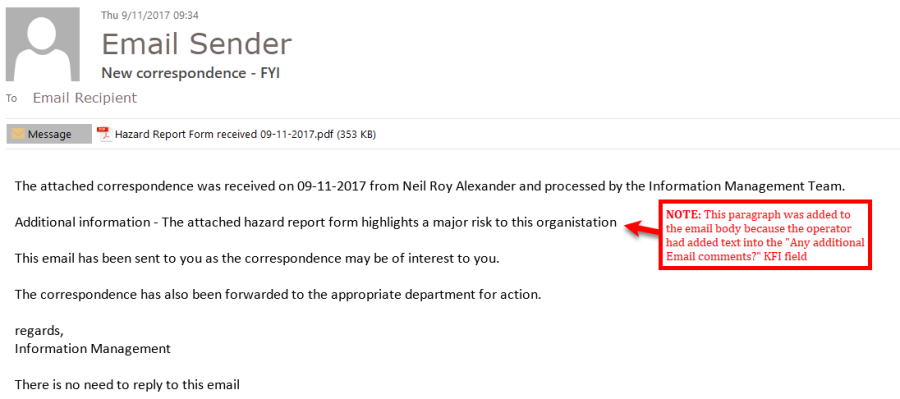
The message body needs to be constructed so it is easy to understand therefore consideration needs to be given in its development. It should be clear, concise and easy to understand (refer to Figure 52 for an example of the email).
-
-
It probably easier to create the email in MS Word or Notepad then paste it into the Upload field when finished editing.
-
This example is using the "Message Body Text" option which will create the email body with plain text. If you need to "format" the body with coloured fonts, document links, tables etc then you will need to use the "Message Body HTML" option as outlined on page .
-
-
To create a line break (new paragraph) you must use this value at the end of the line <<BR>>
-
Using 2 of these will give 2 line breaks <<BR>><<BR>> which was used in Figure 52.
-
-
To use a KFI field you must add 5 to the field number and use <<IFn>> instead of <<Fn>>
-
In this example
-
Date Received <<F4>> is <<IF9>>
-
Authors Name <<F6>> is <<IF11>>
-
Additional Information <<F12>> is <<IF17>>
-
-
The text used in the example used in Figure 52 is shown below
-
It is important that the text is one continuous string as shown in the 2nd box below…
How it looks in the editor (MS Word/Notepad)…
The attached correspondence was received on <<IF9>> from <<IF11>> and processed by the Information Management Team.<<IF17>>
<<br>><<br>>
This email has been sent to you as the correspondence may be of interest to you.
<<br>><<br>>
The correspondence has also been forwarded to the appropriate department for action.
<<br>><<br>>
regards,
<<br>>
Information Management
<<br>><<br>>
There is no need to reply to this email
How it needs to look before copy & paste into the Upload field…
The attached correspondence was received on <<IF9>> from <<IF11>> and processed by the Information Management Team.<<IF17>><<br>><<br>>This email has been sent to you as the correspondence may be of interest to you.<<br>><<br>>The correspondence has also been forwarded to the appropriate department for action.<<br>><<br>>regards,<<br>>Information Management<<br>><<br>>There is no need to reply to this email
-
-
-
-
<<S1>> is the filename created by the process and will attach it to the email.
-
As this email body is "plain text" you cannot use document (hyper)links but you can if using the Message Body HTML option (see below) instead of Message Body HTML as used in this example
-
-
Email body created using "HTML"
The process for creating the Upload is exactly the same as outlined in the previous section but the Upload Target field will be Email Body HTML instead of Email Body Text
-
Even though it may be nice to use the HTML option for the email body text you must have someone within your organisation who knows how to create and manage the HTML code.
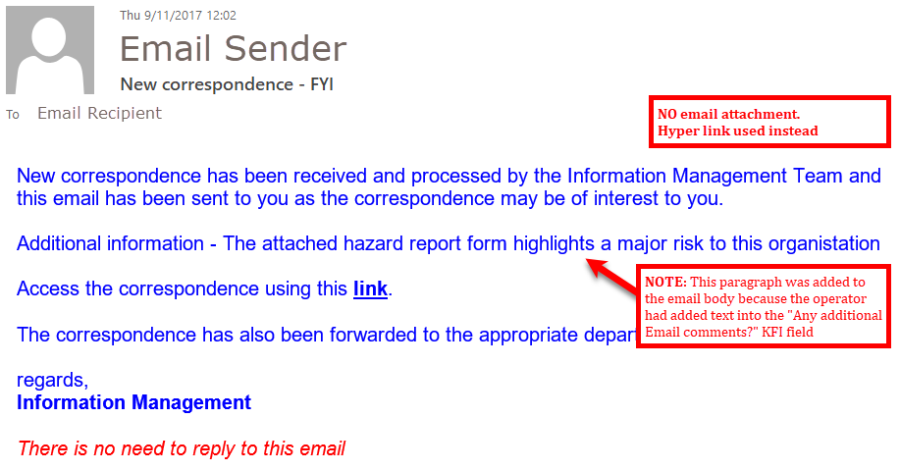
In this example we will use the same email body as used in the previous example but we will send the email with some formatting along with a document hyperlink and no attachment.
-
This would need to rely on the "output location" of the document
-
i.e. it is saved to a location where the receiver will also be able to access it
-
they have read access (at minimum) to the network folder where it is saved)
-
-
-
If the document is Uploaded to an EDRMS then a hyperlink to the document in the EDRMS could be sent - only if the EDRMS supports that functionality
The same KFI may be used but the Regex on the Output tab of the "Any additional email comments?" field must be changed to "^(.+)$","<p>Additional information - $1"</p>
HTML (Hypertext Markup Language) uses tags as a means to "mark-up" a web page. This example is using very basic HTML to create the text for the email body and has not used a CSS (Cascading Style Sheet). The HTML tags used in this example are:
|
<body> |
Start of the body of text |
</body> |
End of the body of text |
|
<span style="font-family:Arial"> |
Start of font used in the body |
</span> |
End of font style of text |
|
<span style="color:#0000ff"> |
Start of colour of specific text (text is blue) |
</span> |
End of colour of specific text |
|
<span style="color:#ff0000"> |
Start of colour of specific text (text is red) |
</span> |
End of colour of specific text |
|
<p> |
Start of a paragraph |
</p> |
End of a paragraph |
|
<br> |
Line break |
|
No </BR> is required here |
|
<strong> |
Start of bolded text |
</strong> |
End of bolded text |
|
<i> |
Turns text into italics |
</i> |
End of italics |
|
<a href="file location"> |
Web link - link to the field - <<S1>> used |
</a> |
End of web link |
-
Using an HTML editor to create your email body will make it easier to build and format the text to meet your corporate design standards but you cannot just copy and paste it into the Upload field you will need to do a bit more editing just like shown Table 4 on page (below).
How it looks in the editor …
<body>
<span style="font-family:Arial">
<span style="color:#0000ff">
<p>New correspondence has been received and processed by the Information Management Team and this email has been sent to you as the correspondence may be of interest to you.</p><<IF17>>
<p>Access the correspondence using this <a href="<<S1>>"><strong>link</strong></a>.</p>
<p>The correspondence has also been forwarded to the appropriate department for action.</p><p>regards,<br><strong>Information Management</strong></p>
<p><i><span style="color:#ff0000">There is no need to reply to this email</i></span></p>
</span>
</span>
</body>
How it needs to look before copy & paste into the Upload field…
<body><span style="font-family:Arial"><span style="color:#0000ff"><p>New correspondence has been received and processed by the Information Management Team and this email has been sent to you as the correspondence may be of interest to you.</p><<IF17>><p>Access the correspondence using this <a href="<<S1>>"><strong>link</strong></a>.</p><p>The correspondence has also been forwarded to the appropriate department for action.</p><p>regards,<br><strong>Information Management</strong></p><p><i><span style="color:#ff0000">There is no need to reply to this email</i></span></p></span></span></body>
-
The hyperlink shown in this example is using the file name & filepath <<S1>> of the processed document. This will naturally change if using a hyperlink to a document saved to an EDRMS (if the EDRMS has this functionality.
Upload Placeholders
An EzeScan Upload Placeholder is a value that is temporarily stored when EzeScan is processing a document.
Standard Placeholders
Below are the Placeholders that can be used in the Upload module.
|
<<FILE>> |
To pass the output file path use <<FILE>> |
|
<<UPLOADINDEXFILE>> |
To access the index file name. This can be utilised in the following ways.
|
|
<<IF>> |
|
|
<<DOCBLOBDATA>> |
The is the binary data used for when Uploading BLOB values into an ODBC database.
|
Calculated Placeholders
To add two numeric fields in Upload.
<span style="color: #0070c0"><strong><<=IF6+IF7>></strong></span>
Subtract ![]() , Multiply (×), and divide
, Multiply (×), and divide ![]() are also supported.
are also supported.
Prefix calculations with [0.00] to ensure always 2 decimal places.
<span style="color: #0070c0"><ac:structured-macro ac:name="unmigrated-wiki-markup" ac:schema-version="1" ac:macro-id="e2366e2d-9ef0-423c-ba03-549fcb5825f4"><ac:plain-text-body><![CDATA[<<=[0.00]F1*F2>>
]]>
-
Only numeric field values are supported and empty field values are treated as 0 in equations.
-
System placeholders can also be used. Please refer to the System Placeholders section in the Appendices of the EzeScan User Guide