
The following information details the connectivity and functionality offered by the EzeScan integration with the box cloud storage solution.
For information on BOX please refer to the BOX website - https://www.box.com/home
For information on EzeScan please refer to the EzeScan website - https://ezescan.com.au
For details on the minimum requirements for Box integration with EzeScan, please see below:
|
Connector |
|
|---|---|
|
BOX |
A suitable BOX account to enable connection with EzeScan. |
|
EzeScan License |
An EzeScan license including the BOX integration connector. |
|
EzeScan Version |
The latest version of EzeScan is recommended as additional functionality and updates are regularly added to EzeScan releases. |
Developed for Ezescan Release: 5.0.21

Configuring the Connection Settings
Check for Box integration
-
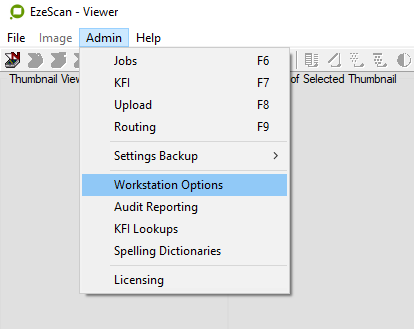
Enter the EzeScan Viewer.
-
Select the Admin menu then click Workstation Options.
-
Choose the EDRMS tab then confirm the BOX option is available in the dropdown.
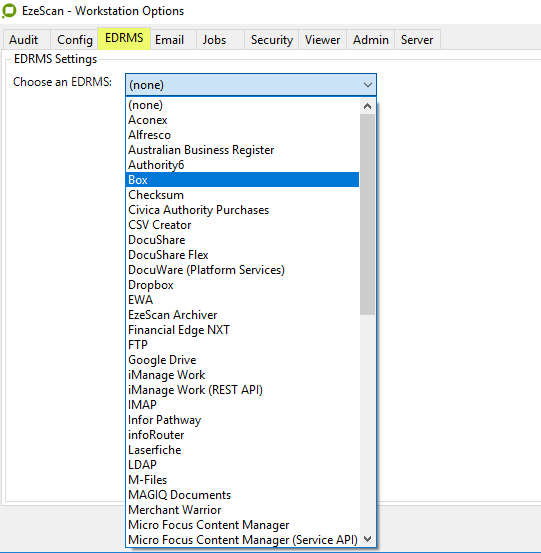
In EzeScan licensing the BOX connector will show in the UPLOAD options,
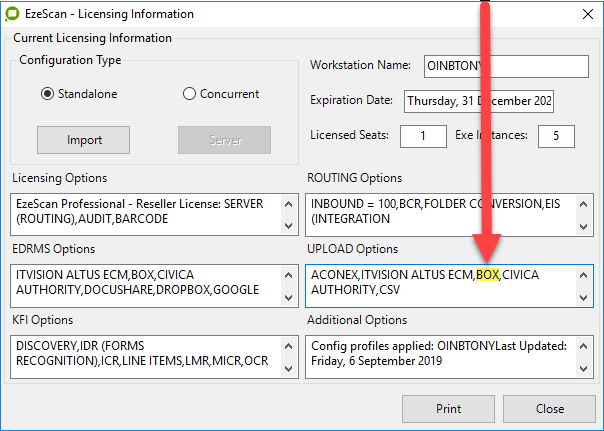
Should the BOX option not be available please contact your EzeScan representative, reseller or EzeScan directly for any required licensing update.
Checking version
Check the EzeScan version currently in use. The recommended version is the current release of EzeScan. The minimum recommended version is the version number defined in the release information.
Using OAuth configuration
BOX uses OAuth as their sign-in methodology and requires an application be registered with their service for authorisation purposes.
BOX also includes an optional Two Factor Authentication which is fully and transparently supported via the EzeScan redirection web login page.
A pre-configured Inbuilt BOX connector registration has been created for the EzeScan Client / Server to simplify the authentication configuration process for the EzeScan Windows Client or Server application.
-
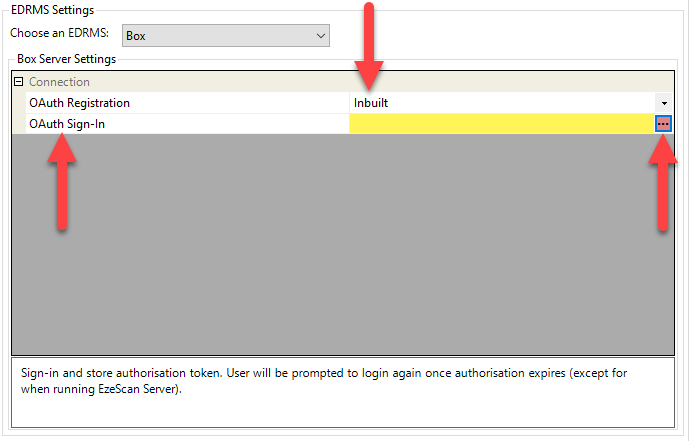
In either the Global or Local connection settings select Inbuilt to use the pre-configured EzeScan OAuth registration.
Configuring the Global connection settings is illustrated below.
-
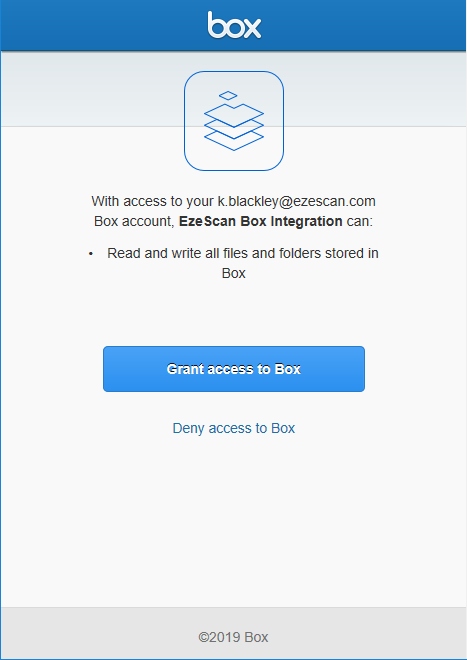
Then click OAuth Sign-In to authenticate and store the authentication token.
The EzeScan application has been preconfigured with the required OAuth registration thus simplifying the authorisation configuration for an organisation.
Additionally, there is also the option of choosing to use a Custom OAuth registration, should such a configuration be required. For example, EzeScan Web Apps (EWA) and EzeScan Integration Services (EIS) will require their own customised OAuth configuration.
TIP: Refer to the OAuth Advanced Configuration section for configuring Custom OAuth options.
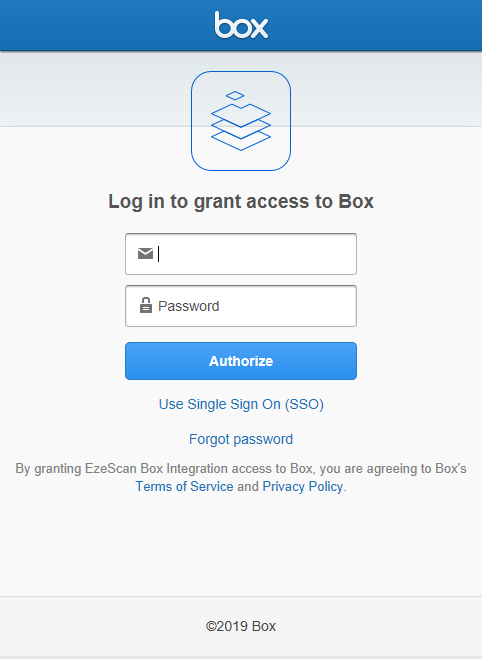
Entering Box OAuth credentials
Client users of BOX and EzeScan will be required to enter their BOX authentication credentials to initially establish an authentication token noting that when the token expires they will be prompted to re-enter their credentials in order to re-authenticate.
Please refer to your BOX administrator for any specifics regarding authentication requirements relating to your Organisation.
|
|
|
TIP: The EzeScan BOX authentication functionality transparently handles any Two Factor Authentication that may be enabled for the BOX account.
For EzeScan Server (as it runs as a Windows Service) the authentication token will auto refresh when expiry is reached.
Using OAuth advanced configuration
Although EzeScan has an inbuilt default OAuth Registration to BOX, there may be times where a custom configuration is required.
An example of this is when EzeScan Web Apps (EWA) and EzeScan Integration Services (EIS) are in use as these will require their own custom BOX authentication registration to function.
Accessing BOX Developer website
Configuring a customised OAuth registration option for EzeScan will require access to the BOX developer website associated with your organisation / login. Please follow the BOX links or refer to your BOX administrator for any applicable URLs.
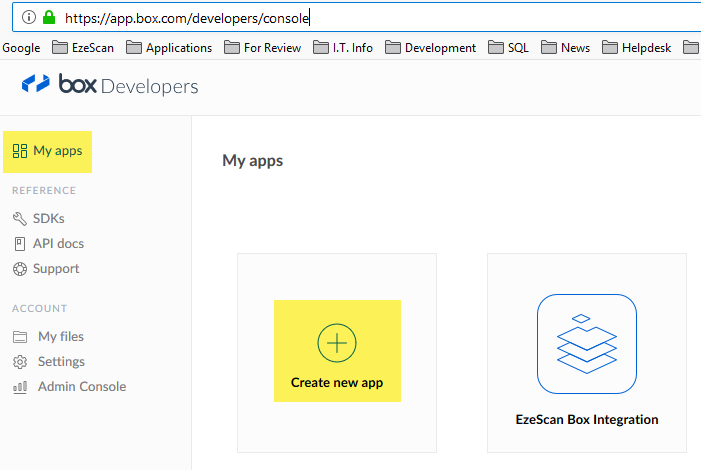
Typically the URL is https://app.box.com/developers/console
Once logged into the developer web URL there will be the opportunity to review existing apps and create new apps.
Configuring BOX App Registration
-
Navigate to My apps and click Create new app.
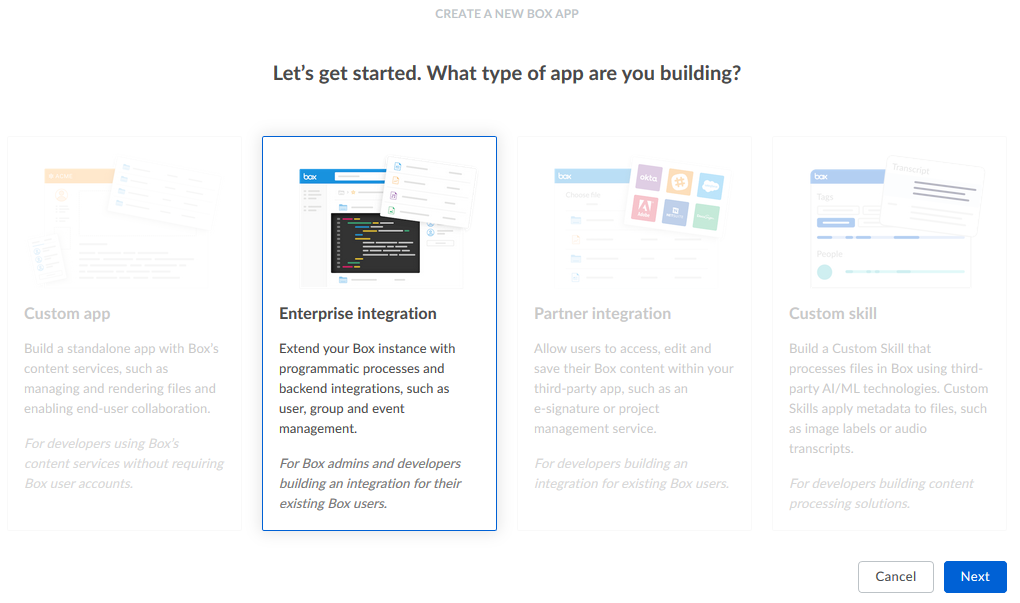
-
There will be a request for the type of app being built. Choose Enterprise integration, then click Next.
-
A prompt will appear asking for the Authentication method to be defined. Select the Standard OAuth 2.0 (User Authentication) as this is what is required for the EzeScan BOX connector.
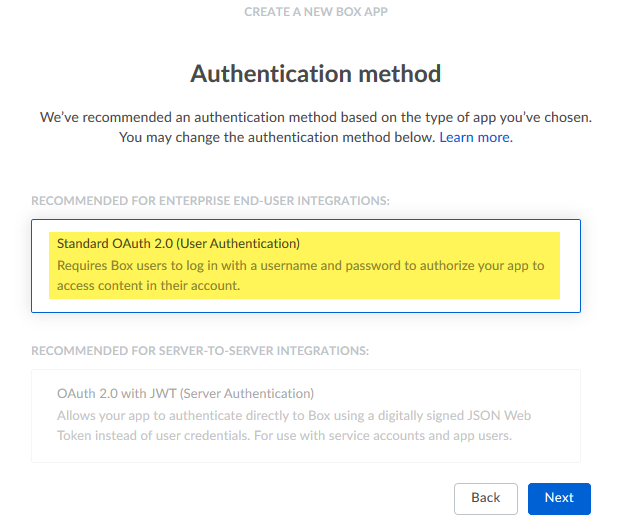
-
Click Next after selecting the correct OAuth method.
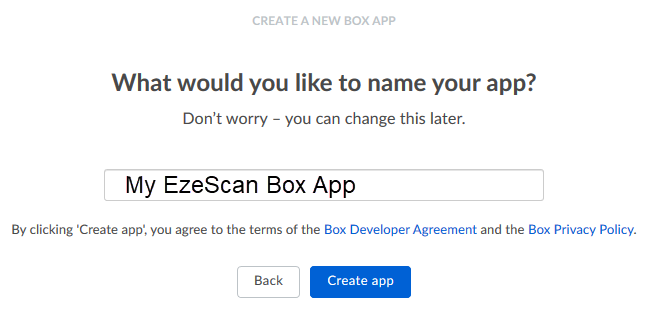
-
There will be a prompt for a unique name for the application. Once suitably uniquely named, click Create app.
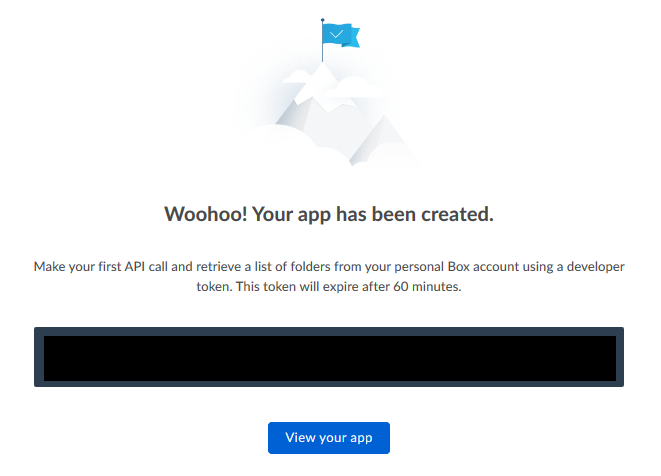
-
The creation of the app registration will include a developer token. The token will expire in 60 minutes or be revoked when you click on View your app.
-
At this point we are now ready to modify the app registration to suit EzeScan usage. Confirm the required Authentication method and copy the Client ID and Client secret as they will be required for EzeScan configuration.
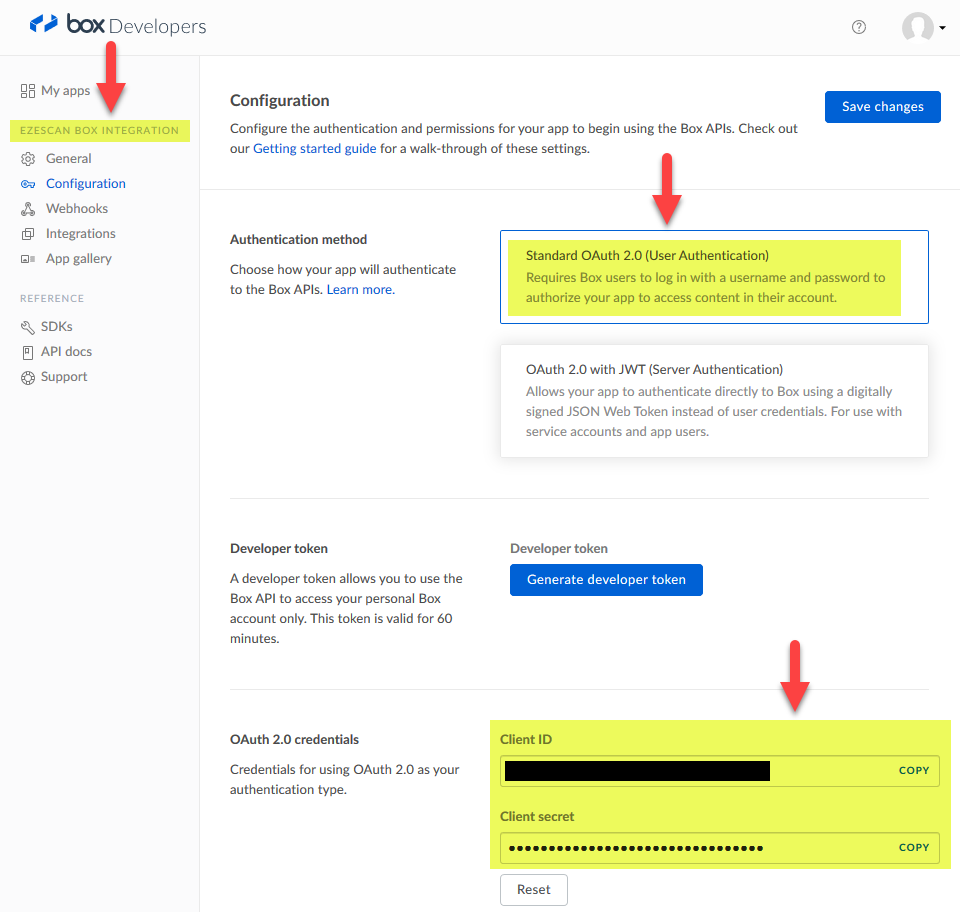
TIP: If the Client secret is reset after having been configured within EzeScan modules, the EzeScan modules will need to be updated to contain the new Client secret.
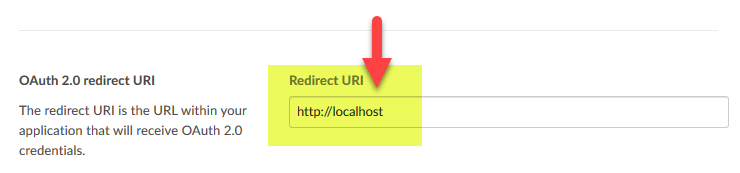
Redirect URI
The redirect URI is an important requirement and will differ depending on the EzeScan module in use.
|
EzeScan Module |
URI |
Example |
|---|---|---|
|
EzeScan Windows Client or Server |
|
|
|
EzeScan Web Apps (EWA) |
<EWA URL>/api/integrations/oAuthCallback |
Where <EWA URL> is the root URL used to access EWA (noting it may include an additional level):
https://ewa.ezescanlocal.com.au
https://ewa.ezescanlocal.com.au/api/integrations/oAuthCallback |
|
EzeScan Integration Services (EIS) |
<EIS URL>:<Port Number>/oAuthCallback.html |
Where <EIS URL>:<Port Number> is the root URL and port combo used to access EIS:
https://integration.ezescanlocal.com.au:32390
https://integration.ezescanlocal.com.au:32390/oAuthCallback.html |
Configuring Application Scope
Ensure that the box is ticked next to Read / Write all files and folders stored in BOX. 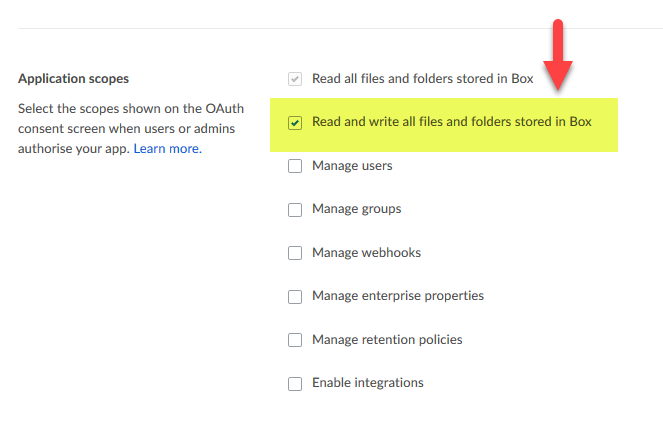
Final options
The remaining two options should be left unchanged from their defaults (that is to say disabled). 
Functionality of the Connector
Job Usage
Import a file
-
Import folder setting lets the user start their file browsing from a defined folder.
-
Delete on Import commands the connector to delete the file from BOX after import.
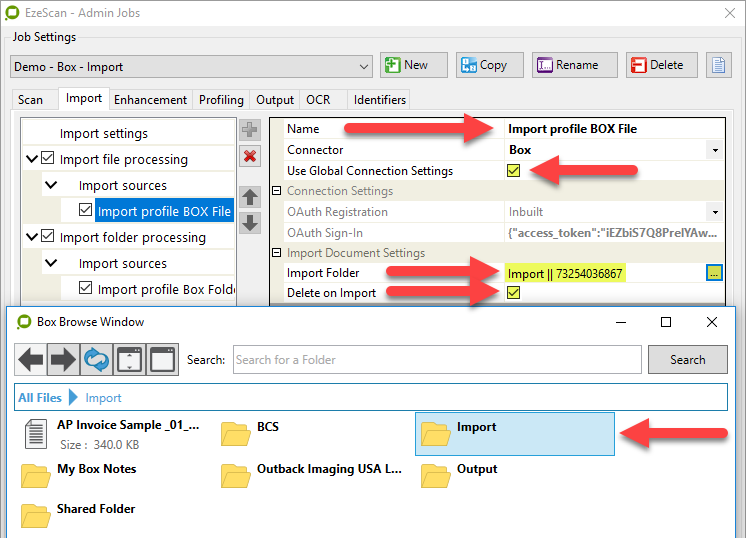
TIP: BOX allows only a single file at a time to be selected.
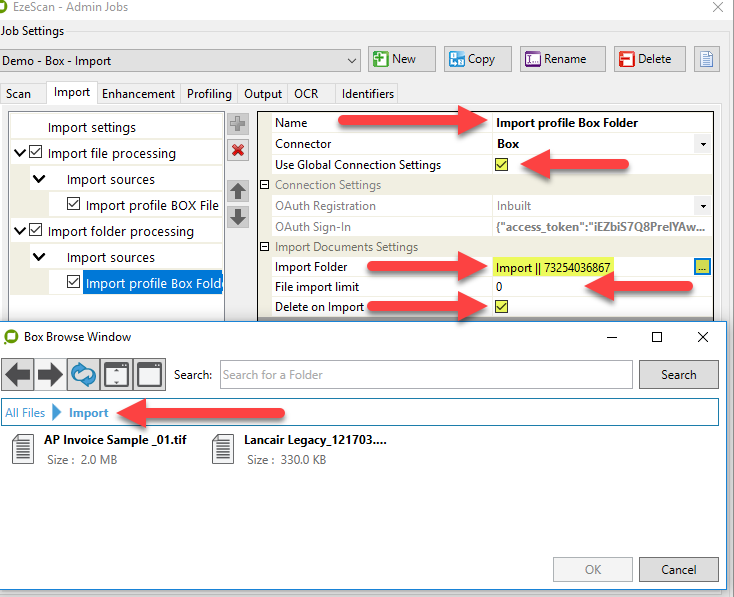
Import a folder
-
File Count Limit sets how many files will be imported during the operation (0 sets unlimited import).
-
Import folder setting defines the target folder from where to import documents.
-
Delete on Import commands the connector to delete the file from BOX after import.
Import from subfolders is not a currently supported item and the option of “Import Folder Processing -> Folder-settings -> Include sub-folders” should be unticked. 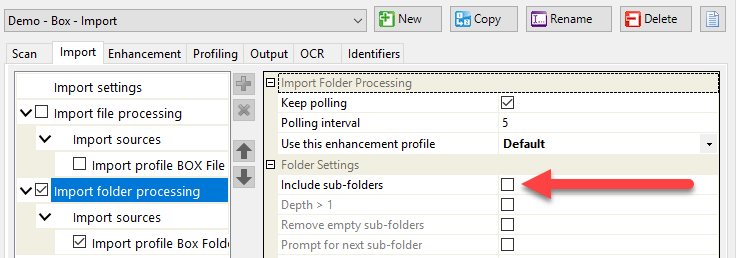
Applies to Routing functionality as well.
TIP: When importing from BOX (instead of a Windows file system) via “Import Folder Processing”, the Release function of the EzeScan client will not be able to release the downloaded document back to BOX and will instead release to the import folder specified in the EzeScan job. This is where it will be reloaded when “Import Folder Processing” is next called upon. 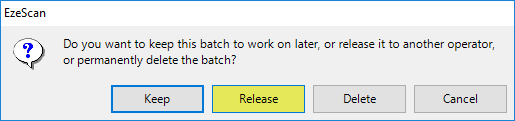
TIP: However if importing from BOX via “Import File Processing” a Release will leave the document located in the Job’s WorkFlow folders where it will remain only until the next document is imported. If using “Import File Processing” and a document is required to be stored as a pending item, instead of releasing, it should instead be routed to an EzeScan Job configured for holding pending items.
Output document
-
Output folder setting determines where the document will be output.
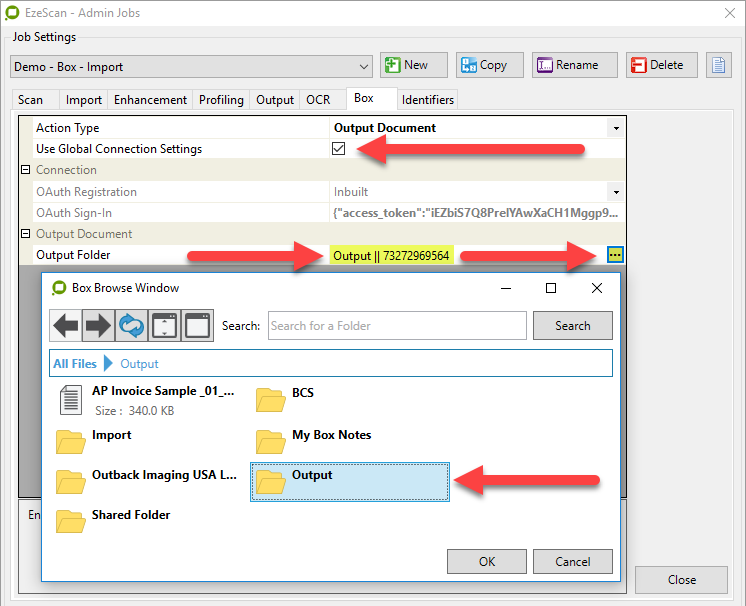
The BOX folder is displayed as the folder name and an ID number.
KFI Usage
Browse for a document
-
Root folder setting sets where the browsing will start.
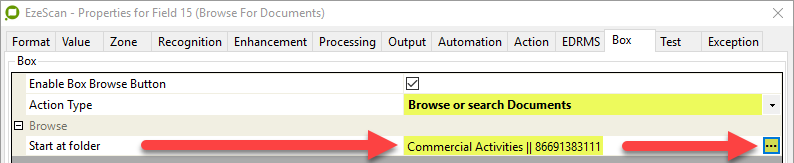
The BOX folder is displayed as the folder name and an ID number.
Browse for a folder
-
Root folder setting sets where the browsing will start.
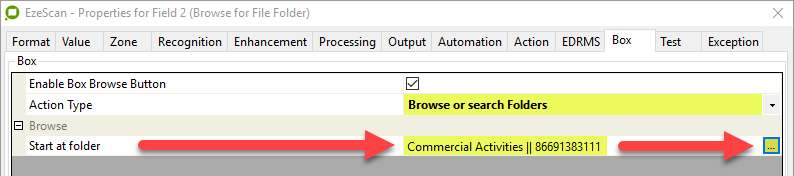
The BOX folder is displayed as the folder name and an ID number.
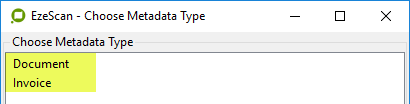
Browse metadata types
-
Allows a user to select a metadata type name where the metadata type will determine the metadata fields applicable.

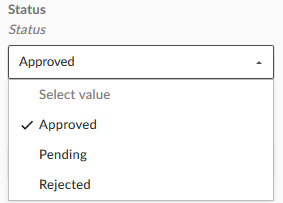
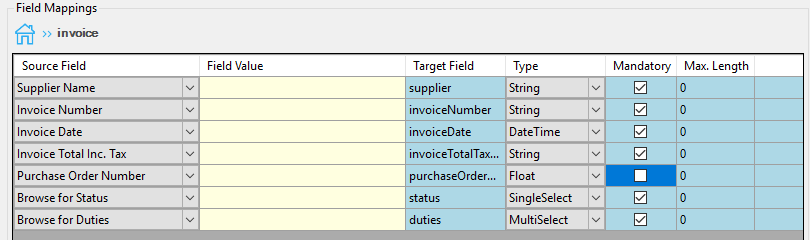
Multi and Single Selects
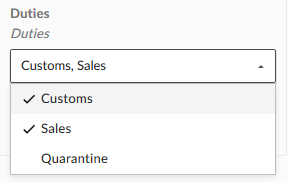
Multi and Single Selects are a type of BOX Metadata structure where a user would make a selection from a dropdown list.
-
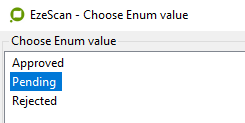
Single Selects are where the user can select just a single item from the BOX dropdown list.
-
Multi Selects are where the user can select multiple items from the BOX dropdown list.
In both instances the selection options will be tied to a predefined BOX Metadata Type as well as a predefined Attribute Type i.e. the name of the Select.
|
BOX Select Type |
Name |
Items selected |
|
|---|---|---|---|
|
Single Select |
Status |
Only one of the three items can be Selected |
|
|
Multi Select |
Duties |
Any number of the available items can be selected |
|
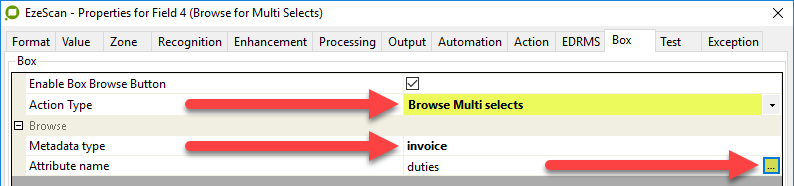
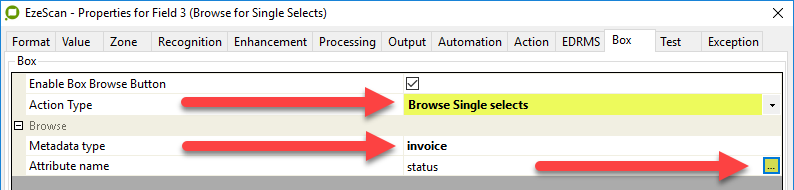
Both Multi and Single Select Types require a Metadata Type and Attribute Name defined within EzeScan.
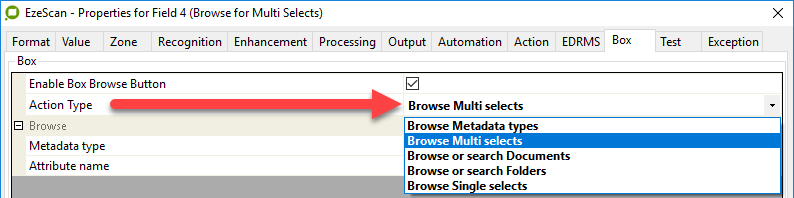
Browse Multi Selects
-
Allows a user to set a multiple item metadata Attribute using a defined Multi-Select.
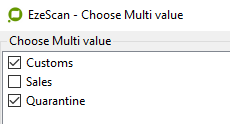
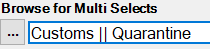
Additional Multi Select items are added to EzeScan KFI fields as Double Pipe Separated.
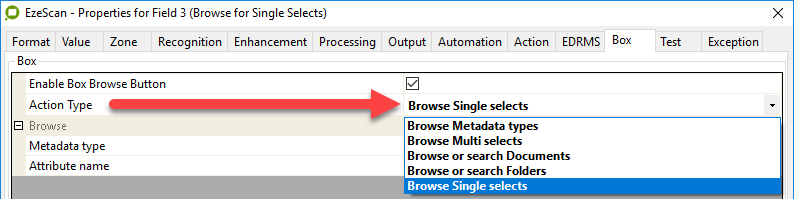
Browse Single Selects
-
Allows a user to set a Single-Select metadata attribute using a defined Single Select.
Routing Usage
Import
-
File Import Limit setting defines how many files will be imported during the operation (set to 0 for unlimited import).
-
Folder setting defines the target folder from where to import documents.
-
Delete on Download setting makes the connector delete the file from BOX after import.
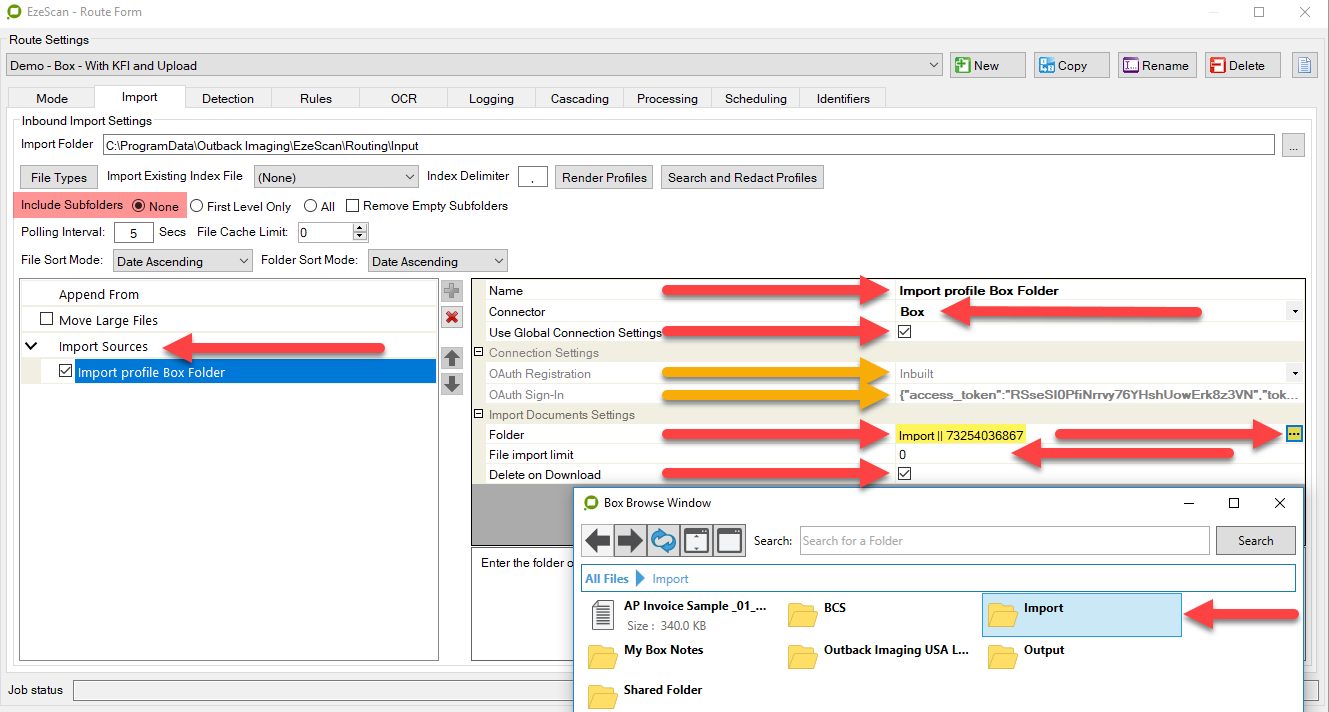
When configuring the connection settings Global is preferred (using the values defined in Workstation Options -> EDRMS). Alternatively a local configuration can be configured.
Ensure Include Subfolders is set to None (Subfolder import is not currently supported).
Output
-
Output folder setting determines where the document will be output to.
-
Exception handling should be configured to account for any exceptions that may occur.
-
Deletion of files in the source folder should be configured to avoid the Routing service trying to upload a pre-existing duplicate document and thus resulting in an exception.
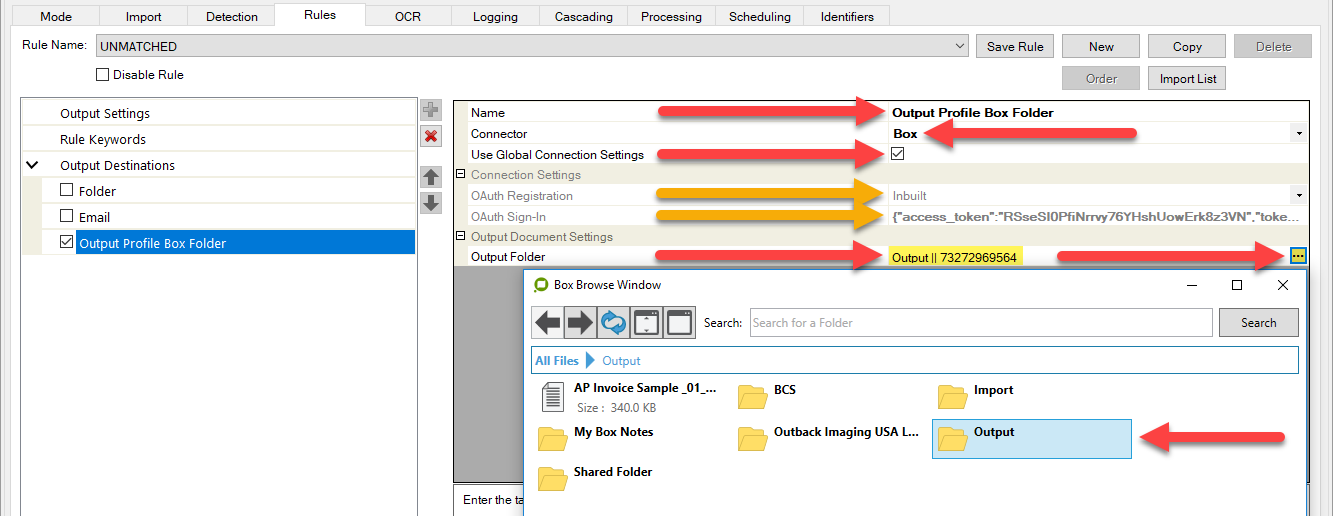
When configuring the connection settings Global is preferred (using the values defined in Workstation Options -> EDRMS). Alternatively a local configuration can be configured.
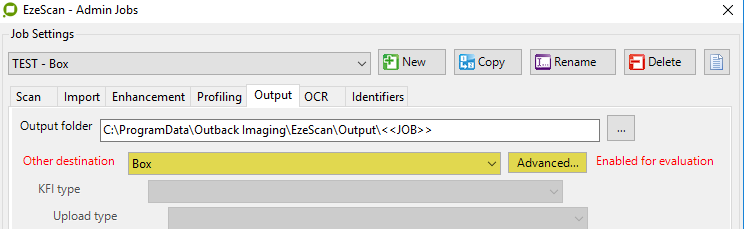
When the Routing Mode is set as below, a direct folder output into BOX can be performed. For example, using the Output Rule as shown above. 
Where folder paths, document naming and/or metadata will be added, the Route mode should be configured as below and include a KFI and Upload to enable the inclusion of metadata. 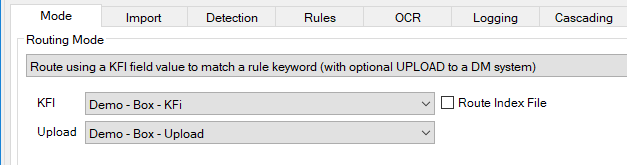
In this instance the configured Upload would be performing the Output to BOX instead of a direct Route folder output.
Upload Usage
-
Name and Folder are supported along with a single metadata type for uploading documents and attaching metadata.
-
Only new document operations are supported, no versioning or replacing is currently supported.
Uploads are configured using standard methodology and KFI field mapping. Refer to the Upload manual for details of standard usage.

When configuring the connection settings Global is preferred (using the values defined in Workstation Options -> EDRMS)/. Alternatively a local configuration can be configured.
Metadata fields are a little different for BOX in that they are based on a chosen Metadata Type and nested under the Home fields page.
The process below guides selection of the BOX connector and adding fields as assigned to a particular BOX Metadata Type:
-
Create a new Upload and provide it with a suitable name.
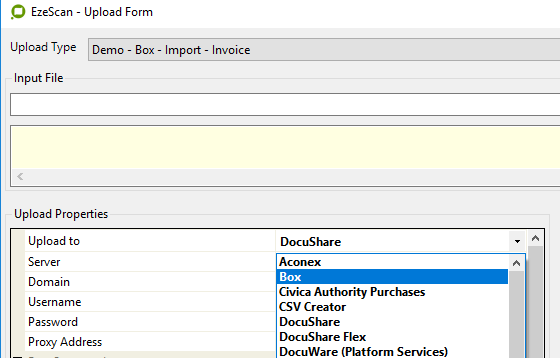
-
Select the BOX connector from the dropdown list.
-
Configure the connection settings, Global is the preferred option.

-
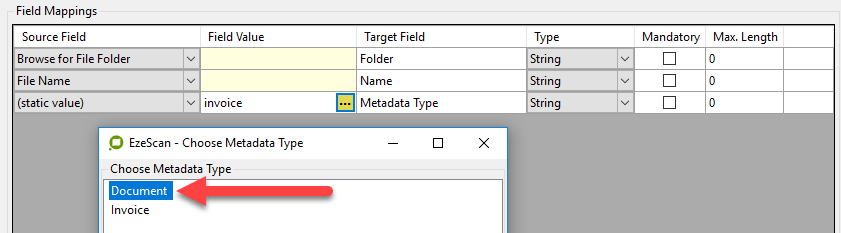
Select the BOX Metadata Type.
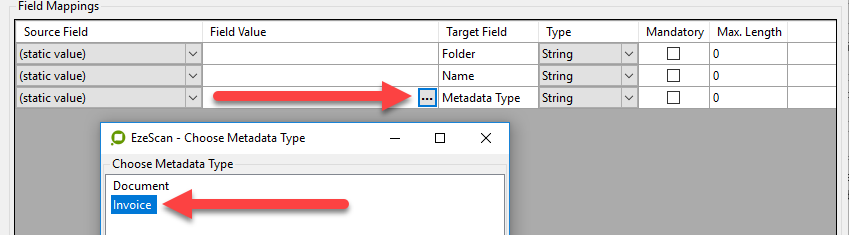
-
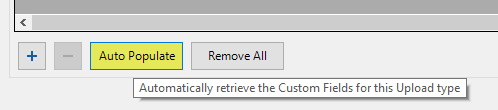
Click Auto Populate. An extra line will be added to the list of default fields.
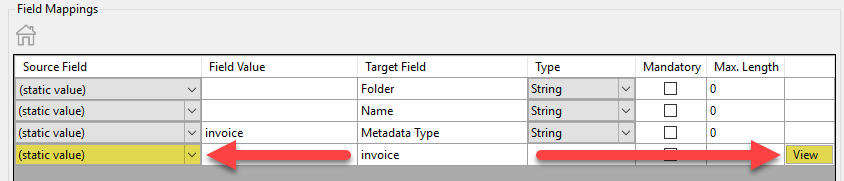
-
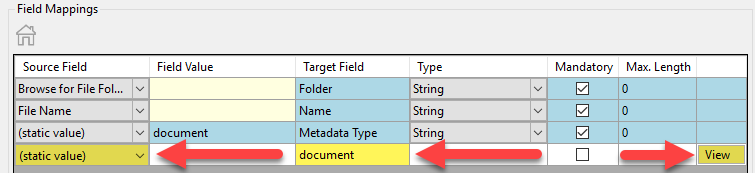
Once the new data row is added, ensure the “Source Field” value is set to static value and not ignore. Then click View on the far right of the newly added field.
-
The list of available fields will be displayed. Configure as required and map the KFI fields as required.
-
Use Home and View to move back and forth between the Home fields and the Metadata fields list pages.
-
To change to a different Metadata Type the previously added metadata fields must first be removed via Remove All on the Home page.

-
With the previous Metadata Type fields removed a different Metadata Type can be chosen and Auto Populate again used to import the Metadata Fields assigned to the Metadata Type.
-
With the new Metadata Type chosen and its assigned fields imported, configuration of the new metadata fields can be performed.
Box Number Metadata Field
Specifically this section will discuss the use of the BOX number field format, as well as recommended use and limitations.
When BOX creates a Number metadata field, the datatype used is that of Float.
A float is a floating-point number, which means it is a number with a decimal place. A float datatype can store a number like 123.456 as well as numbers such as 123, thus making the float datatype versatile for a wide variety of numbering.
However there are limitations within the BOX API (Application Programmers Interface) relating to the length of the number uploaded and a BOX automatic function applied to round a float value.
These limitations apply when metadata is uploaded via the BOX API (and may not apply when directly editing a value via the BOX webpage metadata edit tool).
The BOX API service uses a floating point schema supporting a maximum of 14 digits. Beyond that, BOX will round to the least significant digit, meaning 1234567890123.98 (15 digits) is rounded to become 1234567890124 when EzeScan uploads the number.
Whereas 123456789012.99 (14 digits) is uploaded into the BOX field as it is.
TIP: We recommend where a number has more digits than 14, or requires specific formatting and/or characters, that the BOX metadata field should be configured as a String.
EzeScan Integration Server (EIS)
EIS is a Windows Service configured on the first installed server instance of EzeScan and allows for HTTP/HTTPS connections between EzeScan Web Apps (EWA) and the BOX connector.
EIS provide for integration between the BOX connector and EWA and provides the following functionality to EWA:
-
Browse for Documents and Folders.
-
Download a Document:
-
Delete on Download setting commands the connector to delete the file from the server after download.
-
-
Upload:
-
Inclusion of metadata with the upload.
-
As OAuth is used for BOX, a custom BOX app registration will need to be created.
See OAuth Advanced Configuration for details on how a custom application is configured.
See the EWA (EzeScan Web Apps) section for further configuration and usage.
EzeScan Web Apps (EWA)
As OAuth is used for BOX a custom BOX app registration will need to be created.
See OAuth Advanced Configuration for details on how a custom BOX application should be configured.
EWA will require the following:
-
Custom BOX OAuth app registration to suit EWA.
-
EzeScan Integration Services EndPoint configuration (both in EzeScan and EWA).
-
A configured BOX integration in EWA.
-
Custom pages in EWA configured.
-
Specific EWA metadata requirements configured.
Configuring EWA BOX Integration
-
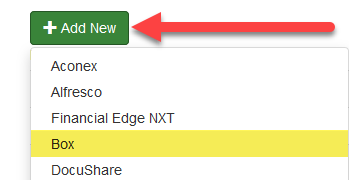
In Admin/Integrations, click Add New and select the BOX option from the list.
-
Configure the fields:
-
Provide a suitable name and description.
-
Enter the previously created custom app registration ID and Client secret.
-
Enter the custom Redirect URL.
-
Save the configuration.
-
Refer to OAuth Advanced Configuration for custom OAuth app registration details. 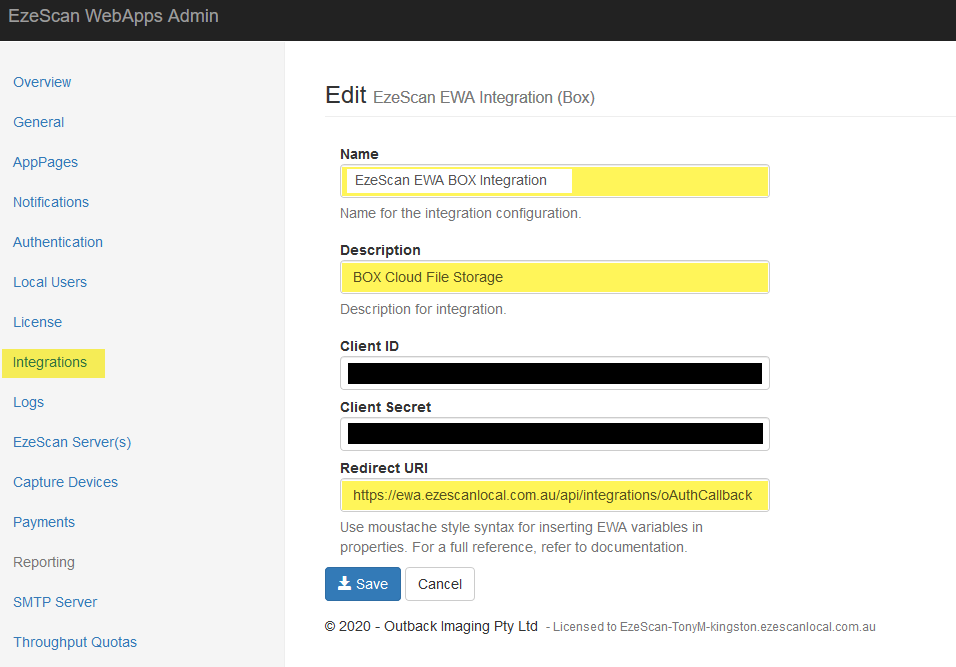
RIA Actions Configuration Example
The below is a short example of the specific BOX configuration items of an RIA Actions page for output to BOX via EIS.
Built-in settings
-
Select the previously configured BOX integration from the dropdown list.
-
Choose the Action - Upload Document is the only current choice at time of writing.
-
Fill in the field values.
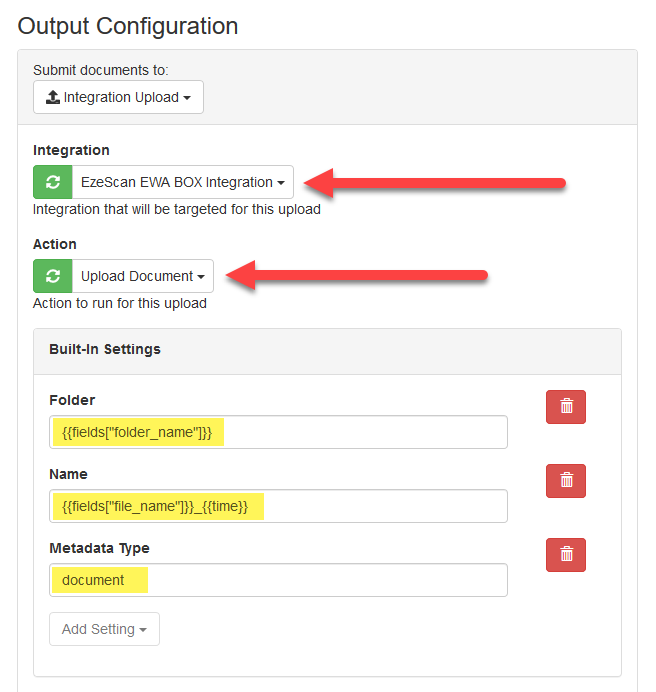
FOLDER
Where the value is coming from a field named "folder_name":
{{fields["folder_name"]}}
NAME
Where the value is coming from a field named "file_name":
{{fields["file_name"]}}_{{time}}
In this configuration we are also adding an underscore and time value to ensure each file name has a unique name at time of writing as the connector can only upload a new document.
METADATA TYPE
Use the name of the Metadata Type in Box with the metadata fields to be uploaded:
document
Custom settings
Custom Settings are where the metadata field values are assigned. 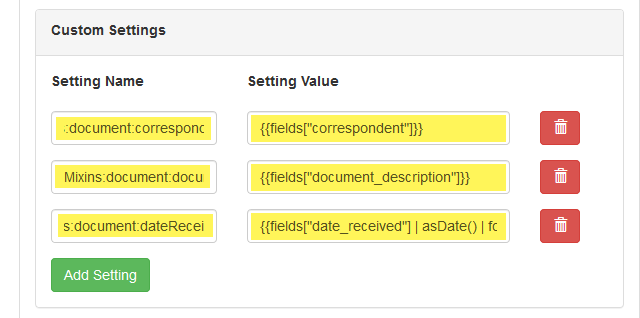
Each field will need to be added via the Add Setting button until all fields required for the Metadata Type have been added. 
The Add Setting button just adds an empty field row where the fields will need to be filled appropriately.
Setting Name
The setting name for BOX is defined as follows:
Mixins:[Metadata Type]:[BOX metadata field name]
For our three “document” Metadata Type fields we’ll have the following configured:
Mixins:document:correspondent
Mixins:document:documentDescription
Mixins:document:dateReceived
TIP: Be sure to keep the correct Case format.
Setting value
Out setting values will reflect the EWA RIA page field ID name with any specific formatting also applied:
{{fields["correspondent"]}}
{{fields["document_description"]}}
{{fields["date_received"] | asDate() | format("{0:yyyy-MM-dd}")}}{{time | asDate() | format("{0:THH:mm:ssZ}")}}
Note the date_received formatting, BOX has a requirement for an ISO format date/time and is completely unforgiving in this regard.
The EWA Required field format for BOX is:
The below structure will take a date (just the date), format it and allow upload as metadata to BOX:
{{fields["date_received"] | asDate() | format("{0:yyyy-MM-ddTHH:mm:ssZ}")}}
If there is a need to include a current time with the date the following structure will cater:
{{fields["date_received"] | asDate() | format("{0:yyyy-MM-dd}")}}{{time | asDate() | format("{0:THH:mm:ssZ}")}}
Time appears irrelevant as the BOX metadata field shows only the date. That said the value is likely stored in a datetime database column and may prove useful for future operations.