The EzeScan integration server provides communication between EzeScan Web Apps (EWA) and our connected Document Management Systems. This guide outlines how to configure the server.
Step-by-step guide
Installing the windows service
On the first instance of EzeScan (as installed on a server) install and enable the EzeScan Integration service.
In an administrative command prompt run the following commands (any running EzeScan services should be first stopped).
CD C:\Program Files (x86)\Outback Imaging\Ezescan\
EzeScan -InstallService integration
Uninstalling the Integration service is via the below commands.
CD C:\Program Files (x86)\Outback Imaging\Ezescan\
EzeScan -Uninstallservice integration
Refer to the Routing User Guide for further details on installing the Integration Windows service.
Configuring the EzeScan Endpoint (in EzeScan)
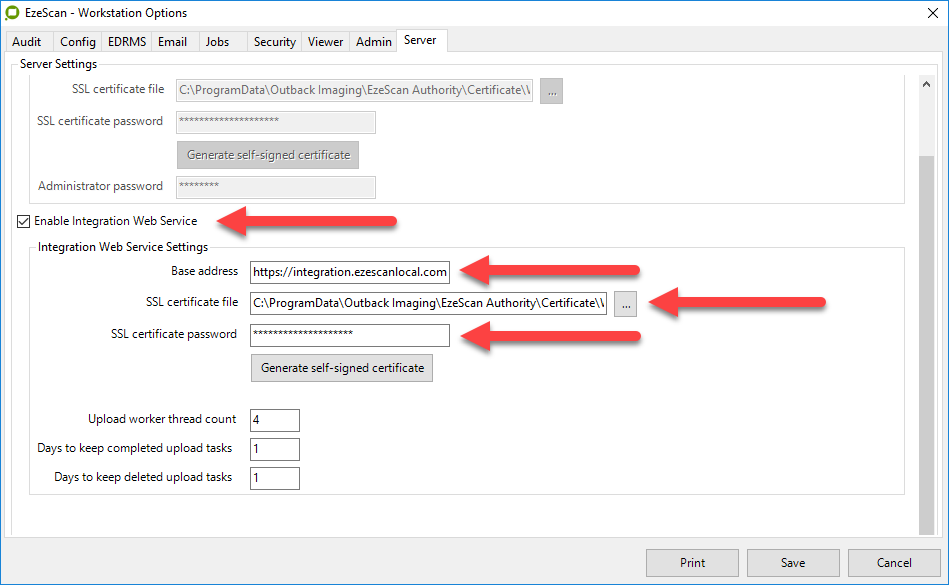
Configuration is performed in the “Workstation Options -> Server” Tab.
A URL is defined along with an SSL certificate. For SSL certificates a pfx format is the required format.
TIP: There may be additional DNS configuration required depending on the certificate SAN and what names are available on the certificate itself.
It is possible to generate a self-signed certificate from within EzeScan, however such certificates are not recommended for production use as the certificate would need to be rolled out into the Trusted Root Certification Authorities local computer repository for all machines where a Trust Relationship would need to be established with the EzeScan Integration Endpoint.
Additionally most web browsers have depreciated, or are in the process of depreciating self-signed certificates, meaning specific web browser configuration may also be required.
SSL certificates do expire and and are the responsibility of the local Organisation to manage as part of the Organisation’s general I.T. management processes. Please be aware EzeScan will be unable to assist with certificate renewal.
Configuring the EzeScan Endpoint (in EWA)
-
Login as an EWA admin
-
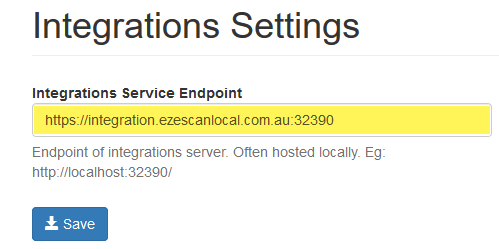
Navigate to Admin/Integrations.
-
In Integration Settings add the EzeScan Integration URL as defined in the EzeScan Endpoint.
-
Click Save.