
Our solution allows connectivity to Microsoft 365 mailboxes via the Graph API which is part of the Office suite of applications.
There are ultimately two pathways for enabling the connection of EzeScan Cloud to a mailbox and you must select one of them:
-
-
Next steps please follow: Allowing our Inbuilt Application Registration in Azure
-
-
-
Next steps please follow: Setting up Custom Application Registration in Azure
-
Inbuilt vs Custom Authentication Type
EzeScan WebApps has the ability to use a preconfigured Application Registration or allows you to create your own.
Inbuilt
The inbuilt OAuth registration is the quickest way to start importing emails from an Exchange Online mailbox.
In order to configure this mode, you will need to get a domain administrator to provide consent for our application registration to read and write data in your tenancy.
The Inbuilt OAuth registration is only able to use the Authorization Code grant type and is hidden from display.
Custom
A custom OAuth registration provides more granular configuration options around security as your administrator is able to manage all of the settings of the Application Registration in Azure.
In order to configure this mode, you will need a domain administrator to create a Custom Application Registration in the azure portal as well as provide you with the associated details to connect to that registration. They will also need to provide consent for your application registration to read and write data in your tenancy.
The Custom OAuth registration is able to use the Authorization Code and Client Credentials grant types.
Determining which Grant Type should be used
The connection to Exchange Online is utilising OAuth2 for authentication.
It is important to determine which grant type is going to be suitable given the level of functionality that will be required.
This integration supports the following grant types:
Authorization Code
In Authorization Code mode the application redirects to Microsoft for the user to login to their Office 365 account.
The user will see the very familiar Microsoft Login screen and after they login they will be redirected back to our application.
This process can also prompt users for MFA or block risky sign ins based on organisational settings in Microsoft Entra.
If the user is already logged in, or the browser has been configured with SSO then they are automatically redirected back to our application.
This grant type should be selected when:
-
The user account has access to the mailbox you wish to import emails from.
Client Credentials
In Client Credentials mode the application is authenticated using a client Id and corresponding secret.
Generally used for server-to-server or background communication.
The end user is never asked to directly Authenticate with Office 365.
This grant type should be selected when:
-
Multiple mailboxes need to be accessed using a single app registration.
-
Administrators want to enforce strict application-level permissions.
-
Only provide access to shared mailbox without also giving access to other personal mailboxes.
-
Remove the dependency on a specific user account which is better for server-to-server communication.
Allowing our Inbuilt Application Registration in Azure
Depending on the level of access provided to you a support engineer may need to grant you access to this configuration screen.
|
1 |
Select the Authentication Type of Inbuilt and then click the Authorize button. 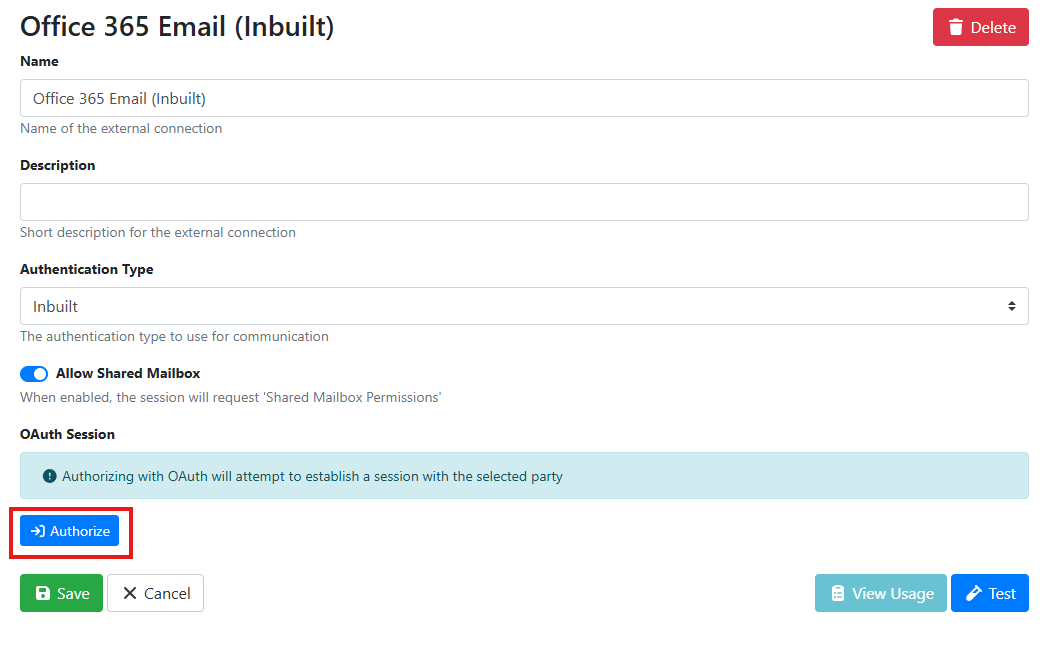
|
|
2 |
You will then be presented with a Microsoft 365 login window. 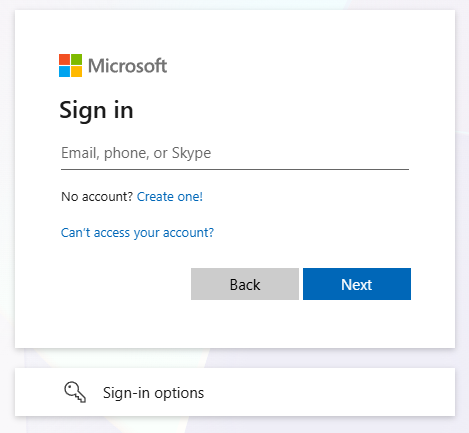
|
|
3 |
After logging in you will be presented with a screen saying Approval is required. Enter the reason for the access and click request approval. 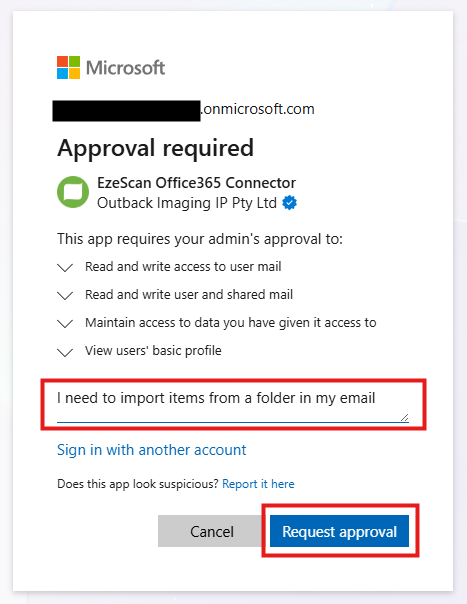
|
|
4 |
You will then need to contact your administrator and have them action the request. 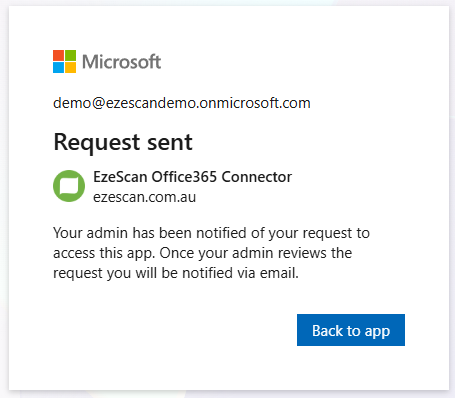
|
|
5 |
They will need to navigate to the Azure Portal > Enterprise Applications > Admin consent requests and then click on the request for “EzeScan Office365 Connector”. 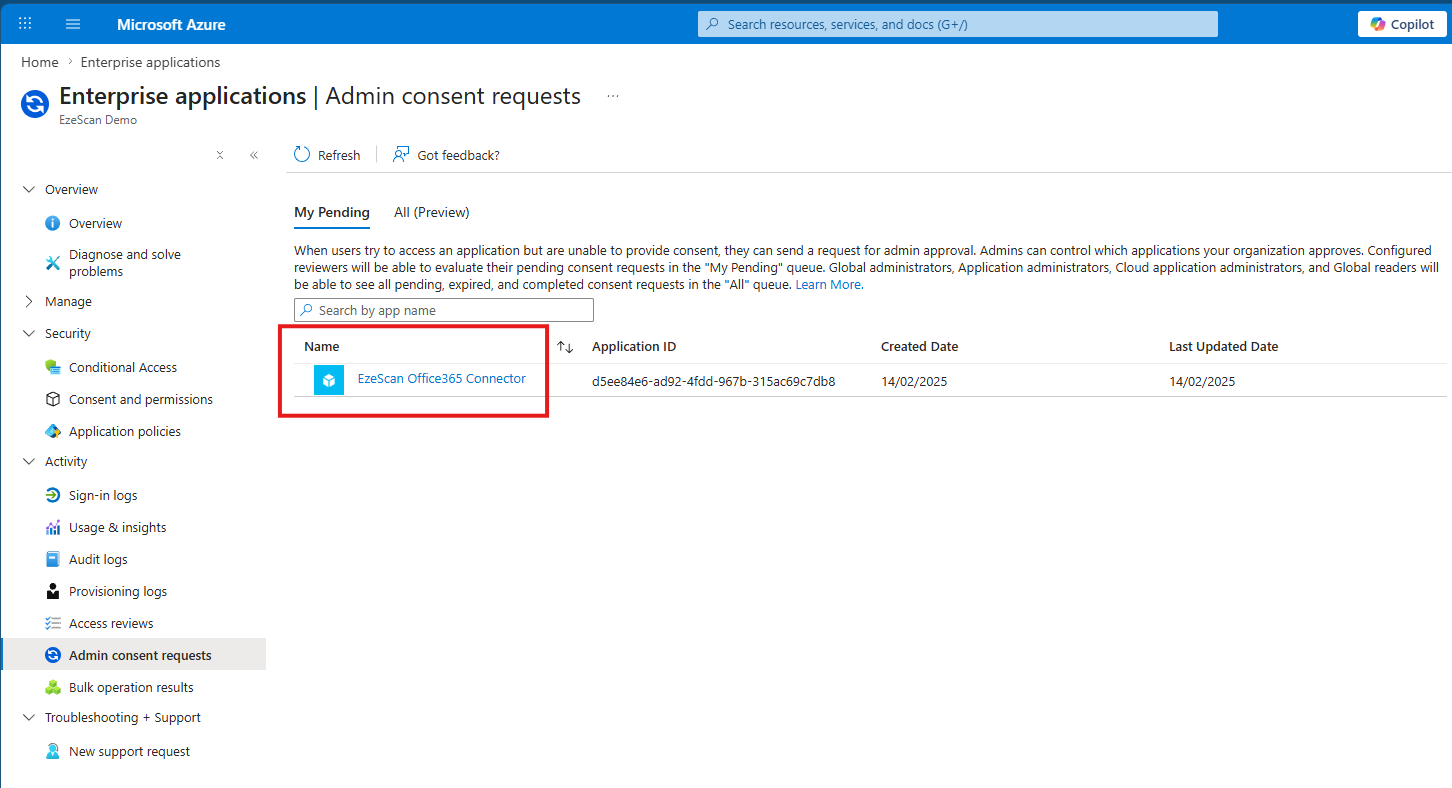
|
|
6 |
Once the request has been approved you will be able to retry the authorize button and then see the status of Authenticated. 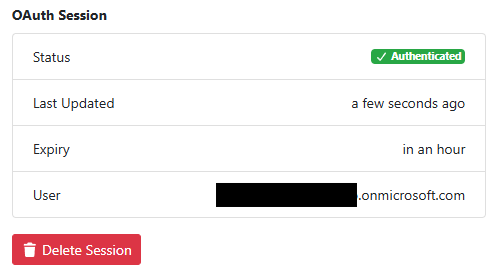
|
Setting up Custom Application Registration in Azure
|
1 |
Navigate to the Azure Portal and select App registrations. 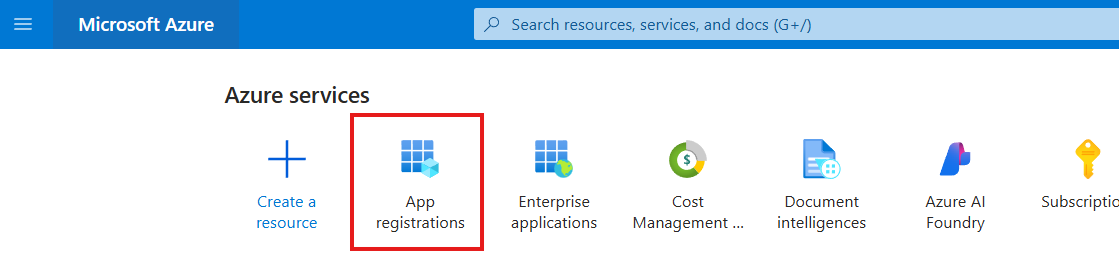
|
||||||||
|
2 |
Click the New registration button in the top menu. 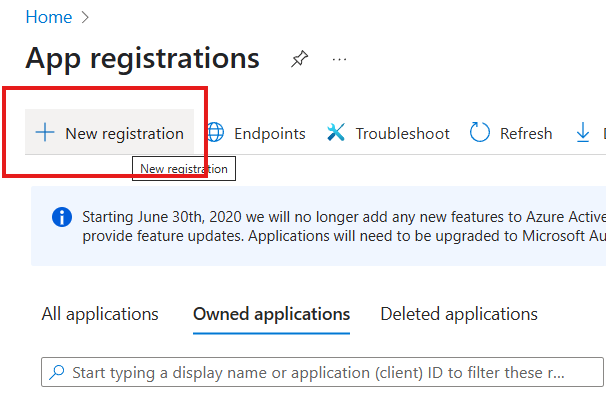
|
||||||||
|
3 |
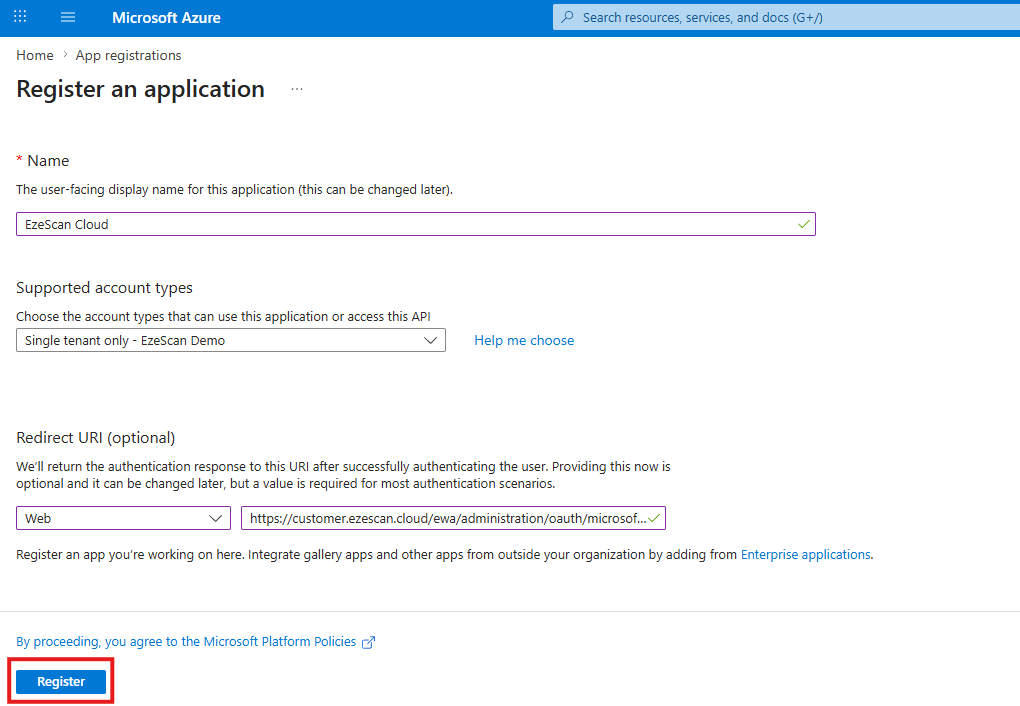
Enter the following details and then click the Register button:
|
||||||||
|
4 |
On the left menu click on the Authentication option. 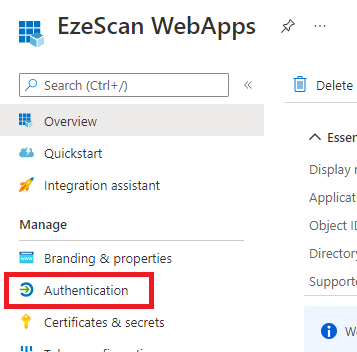
|
||||||||
|
5 |
On the left menu select the API Permissions option. 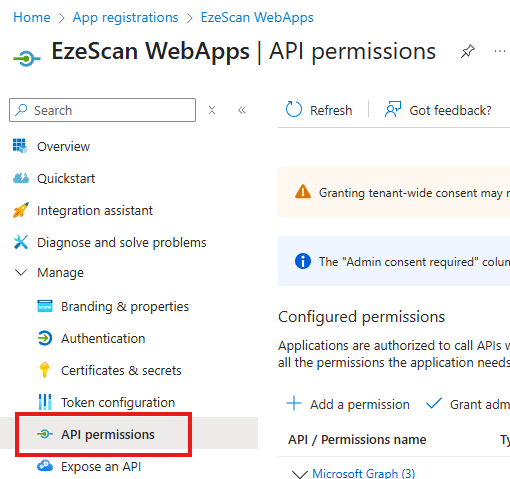
|
||||||||
|
6 |
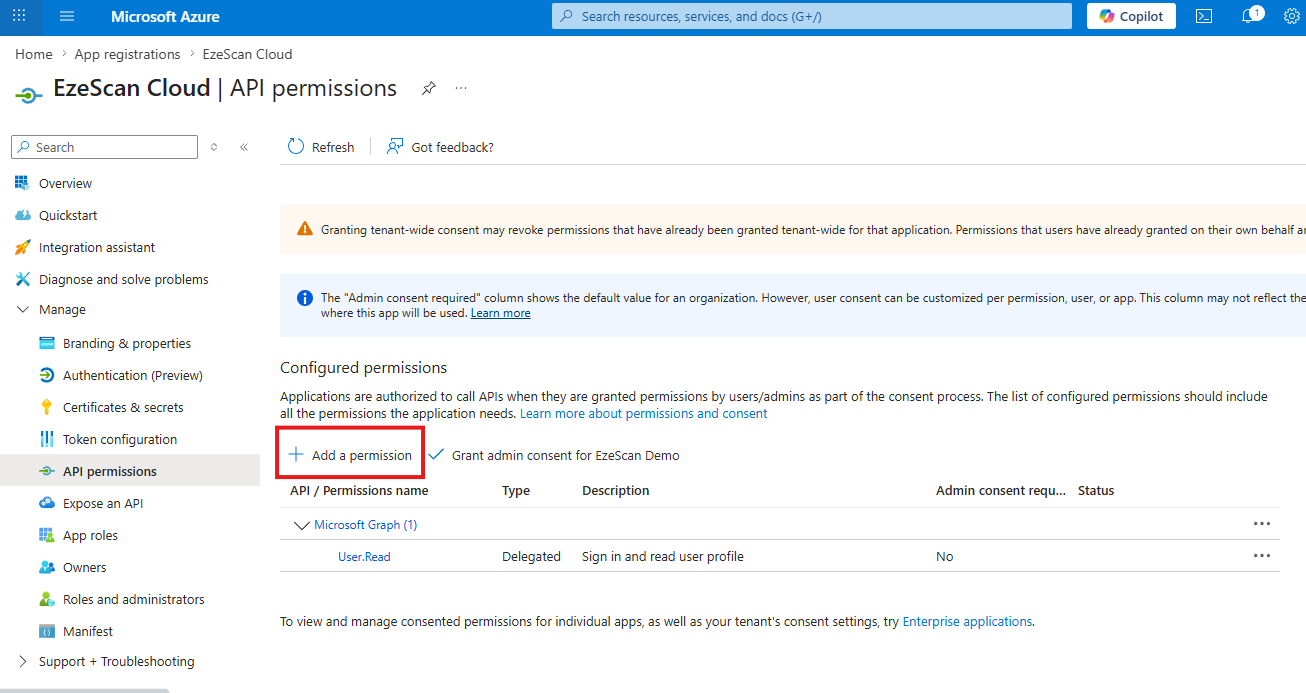
Click the Add a permission button
|
||||||||
|
7 |
Select the Microsoft Graph option 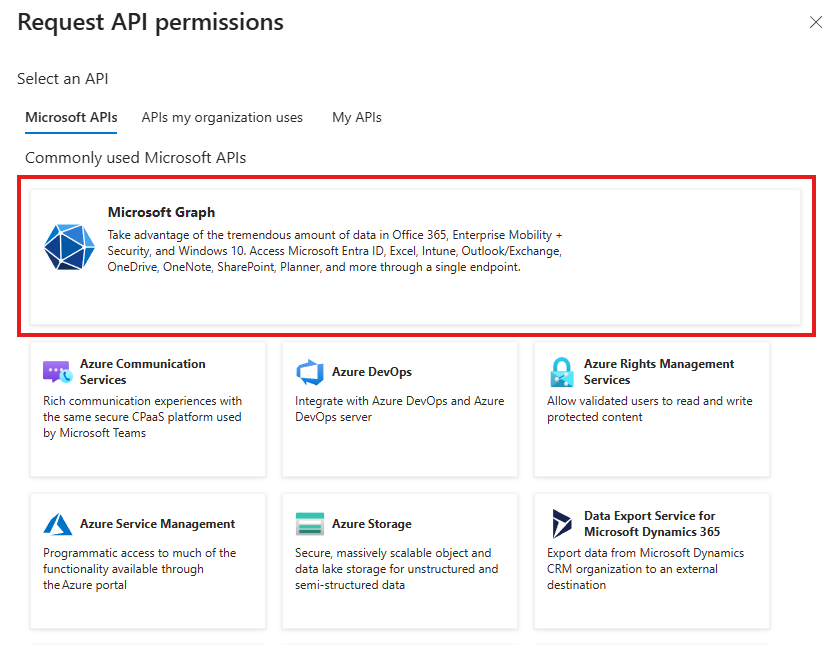
|
||||||||
|
8 |
Select the Application permissions option 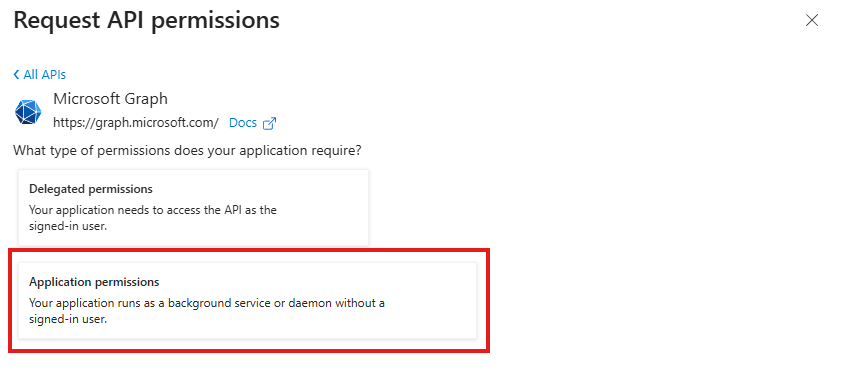
|
||||||||
|
9 |
Find and tick the Mail.ReadWrite permission and click the Add permission button. 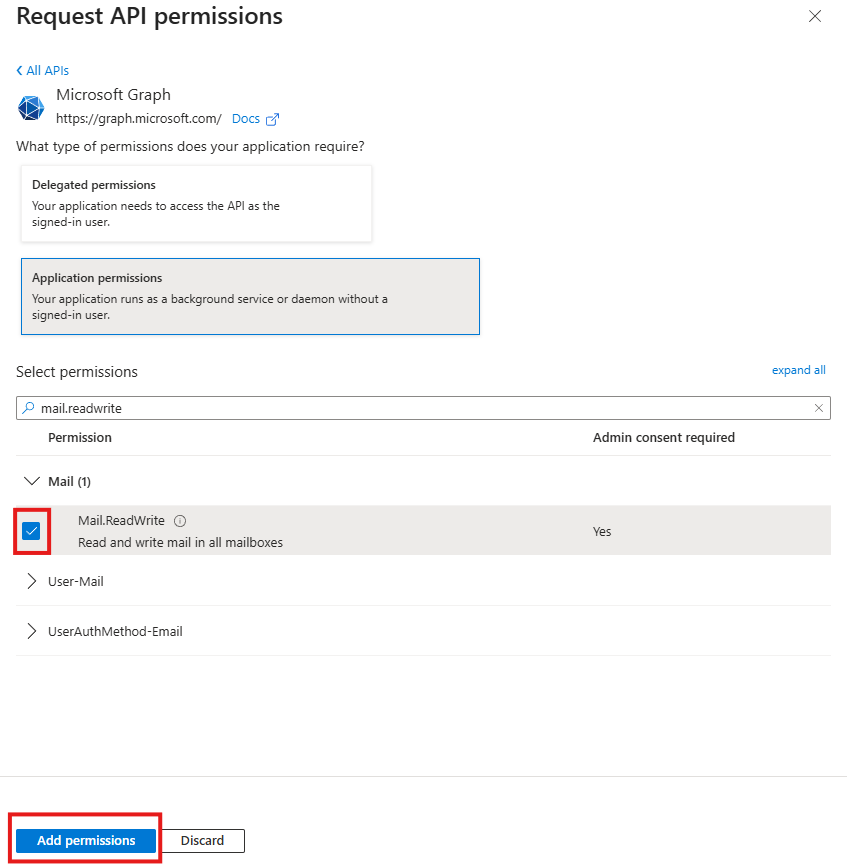
Note: Microsoft Entra ID application permissions grant tenant-wide access by default. To restrict an app with the |
||||||||
|
10 |
Click the Grant consent for [Tenant Name here] button. 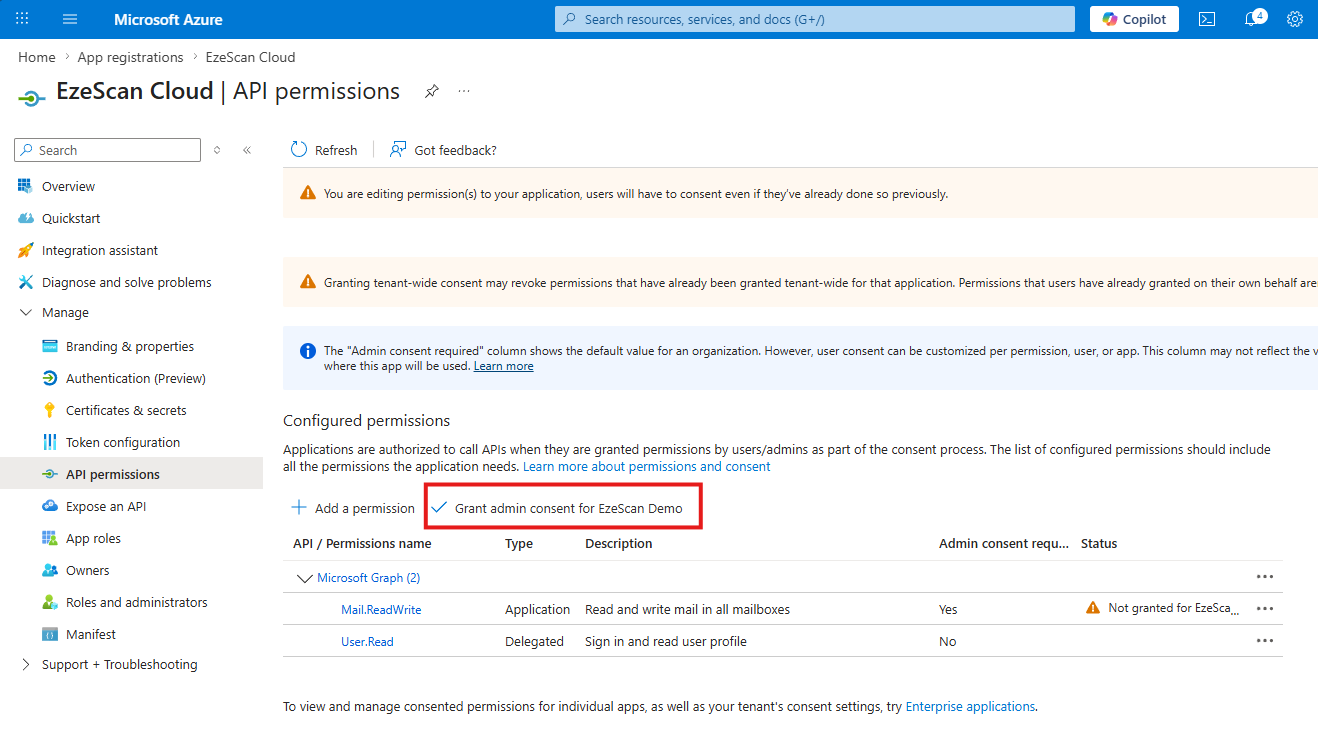
|
||||||||
|
11 |
Click the yes button on the window that appears. 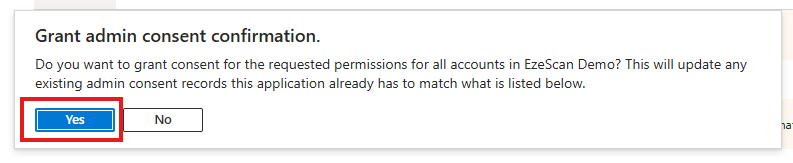
|
||||||||
|
12 |
Click on the Certificates & secrets menu option on the left. 
|
||||||||
|
13 |
Give the secret a name and set the expiration period then click the Add button. 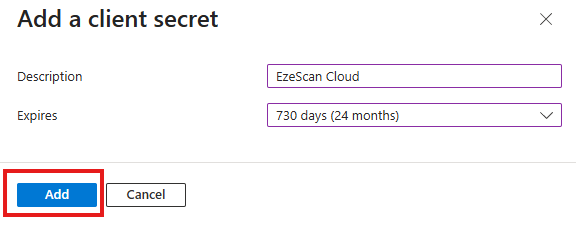
|
||||||||
|
14 |
Copy the secret into and record it into a safe location as once you navigate away from this page it will no longer be visible. 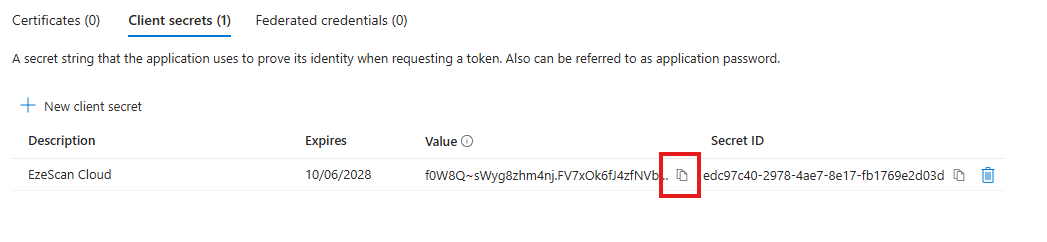
|
||||||||
|
15 |
Navigate back to the Overview option. 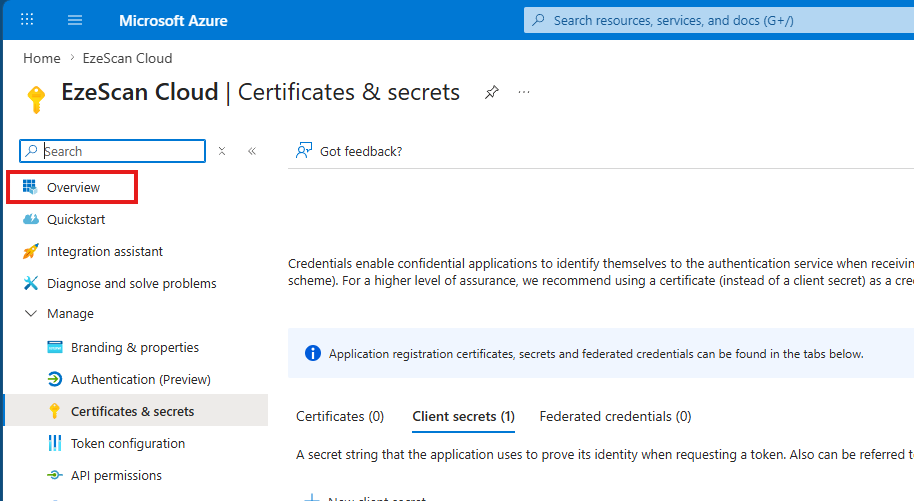
|
||||||||
|
16 |
Copy the Application (Client) ID and the Directory (Tenant) and save them into the safe location used above. 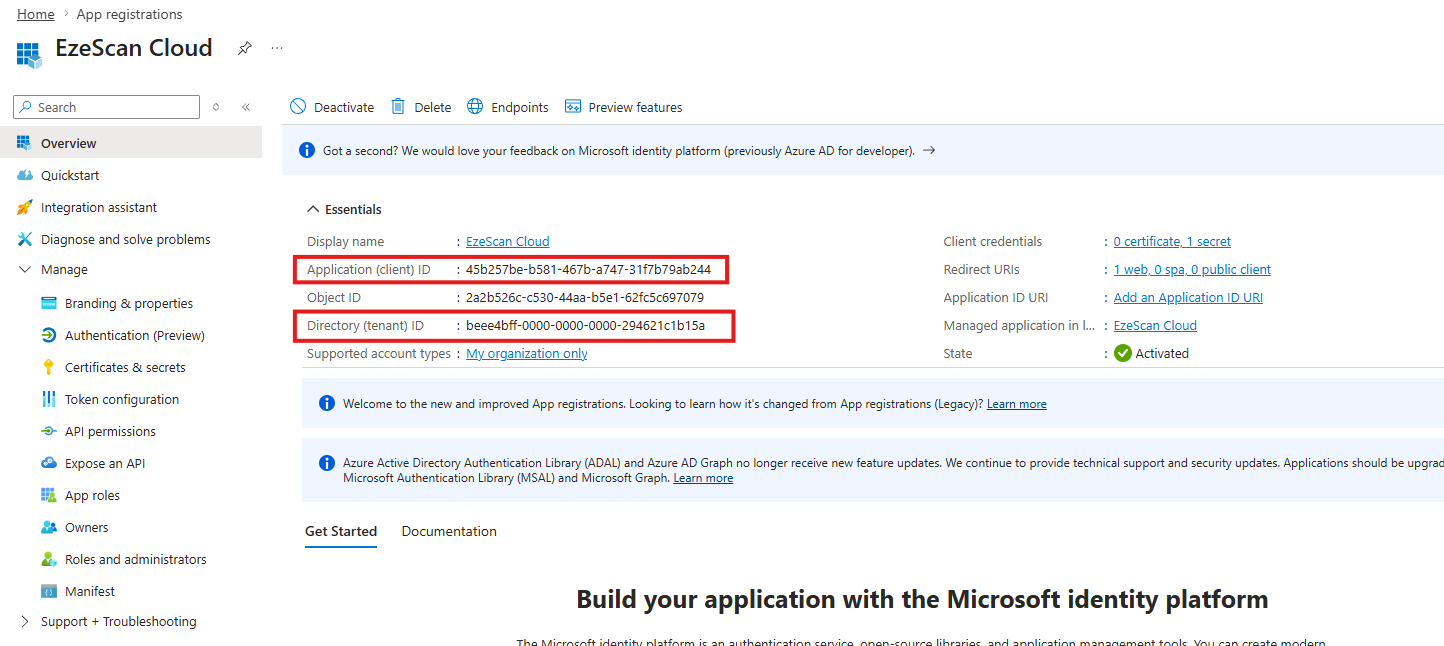
|
||||||||
|
17 |
You should now have the 3 respective values saved out ready to send to our team. 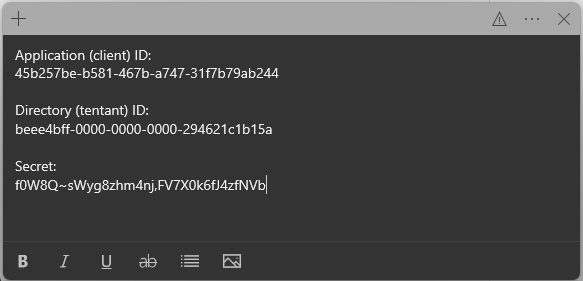
|
||||||||
|
18 |
Send these 3 values to our team via a secure method of your choice. For example:
|