There are two parts to the configuration below:
|
|
|
Setting up App Registration in Azure Portal
|
1 |
Navigate to the Azure Portal and select App registrations. 
|
||||||||||
|
2 |
Click the New registration button in the top menu. 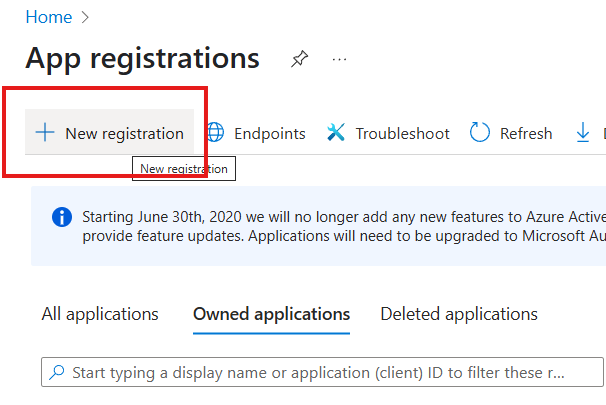
|
||||||||||
|
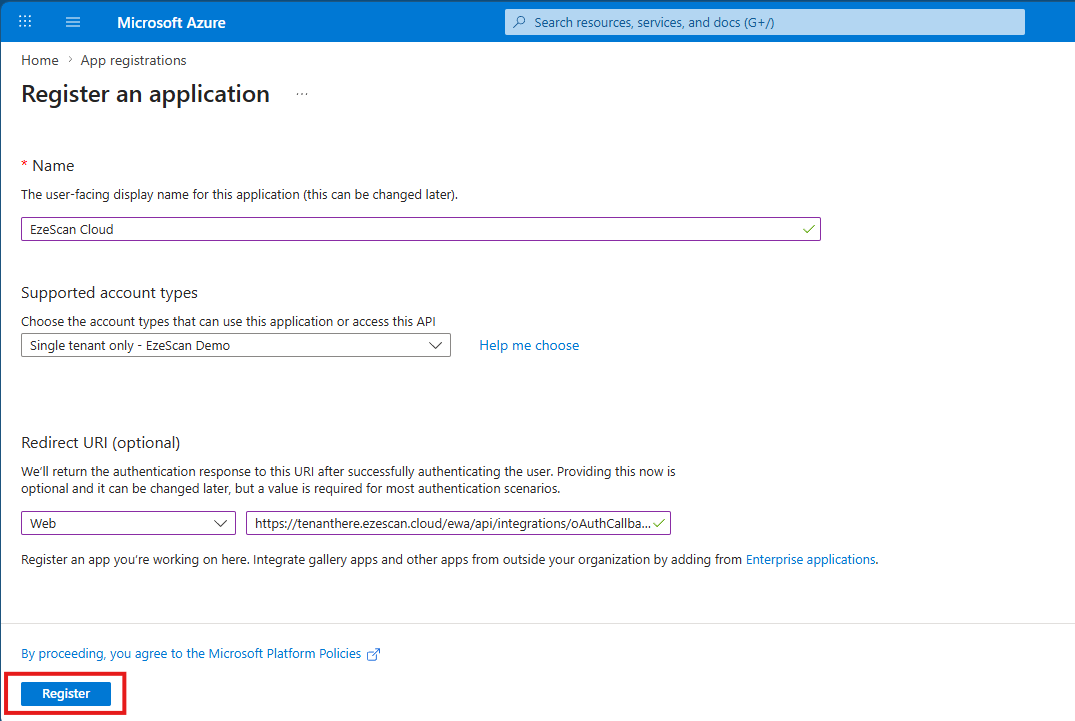
3 |
Enter the following details and then click the Register button:
|
||||||||||
|
4 |
On the left menu click on the Authentication option. 
|
||||||||||
|
5 |
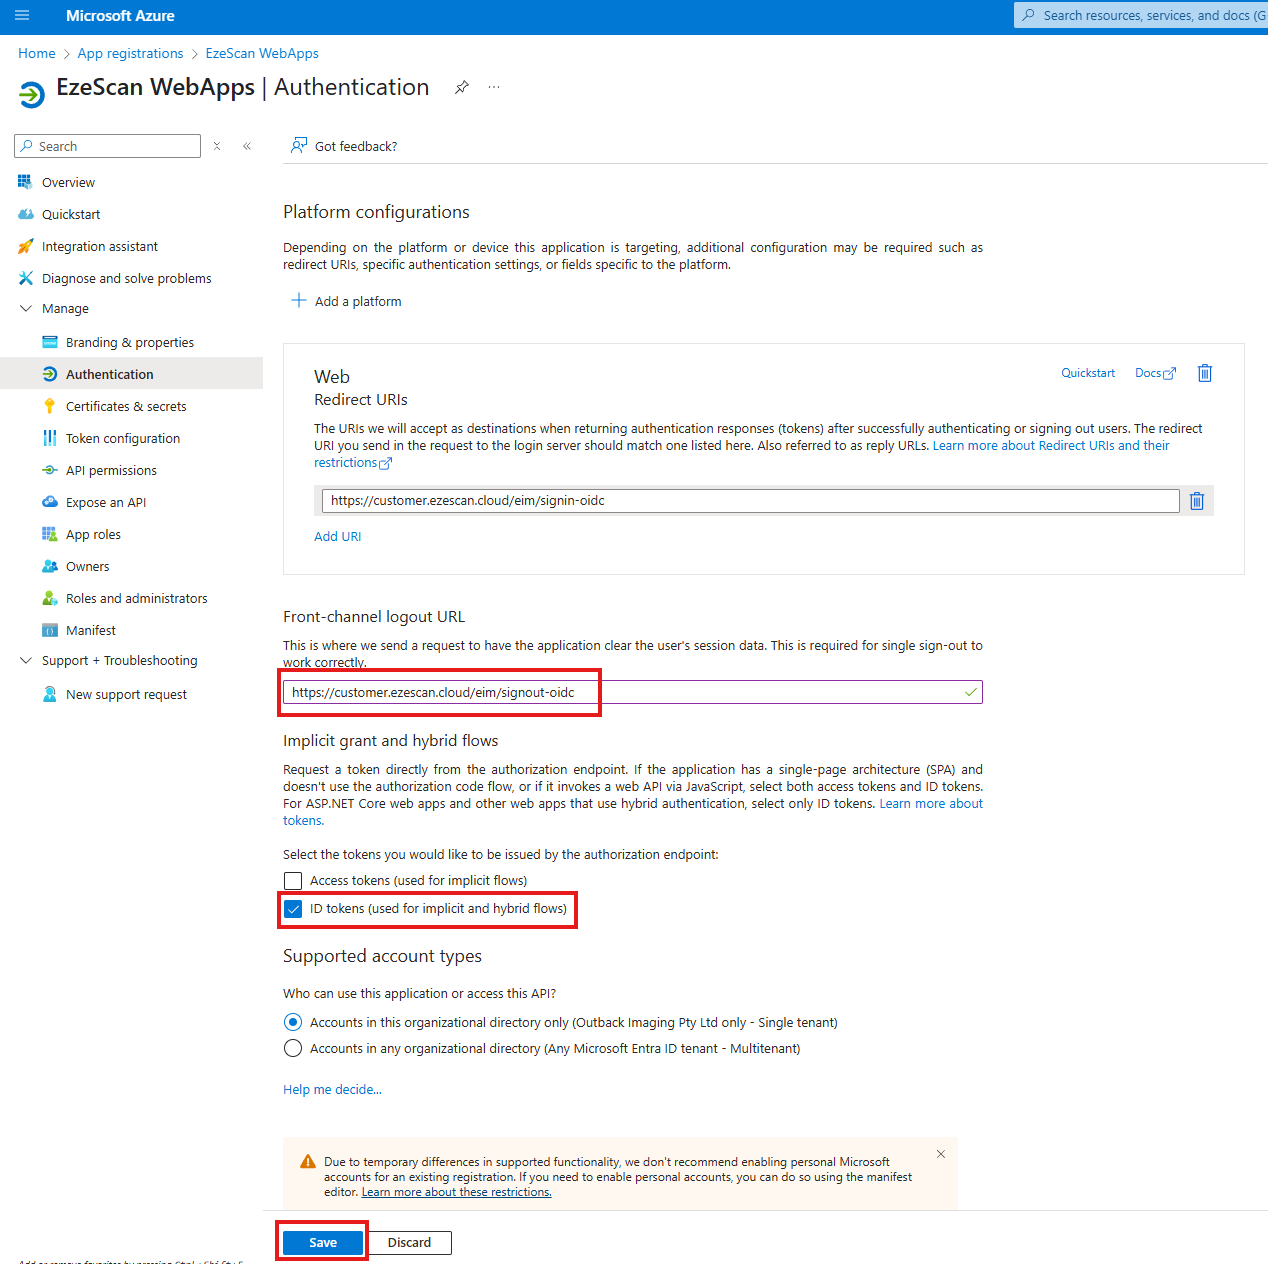
Set the following options and then click Save:
|
||||||||||
|
6 |
Navigate to Token configuration and click Add optional claim 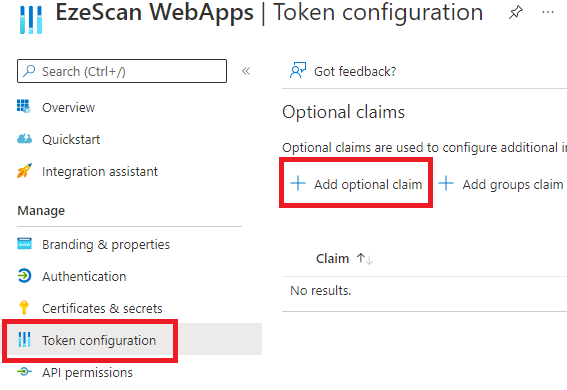
|
||||||||||
|
7 |
Select the Token Type: ID, then tick the options to enable email, upn, family_name and given_name. Click the Add button. 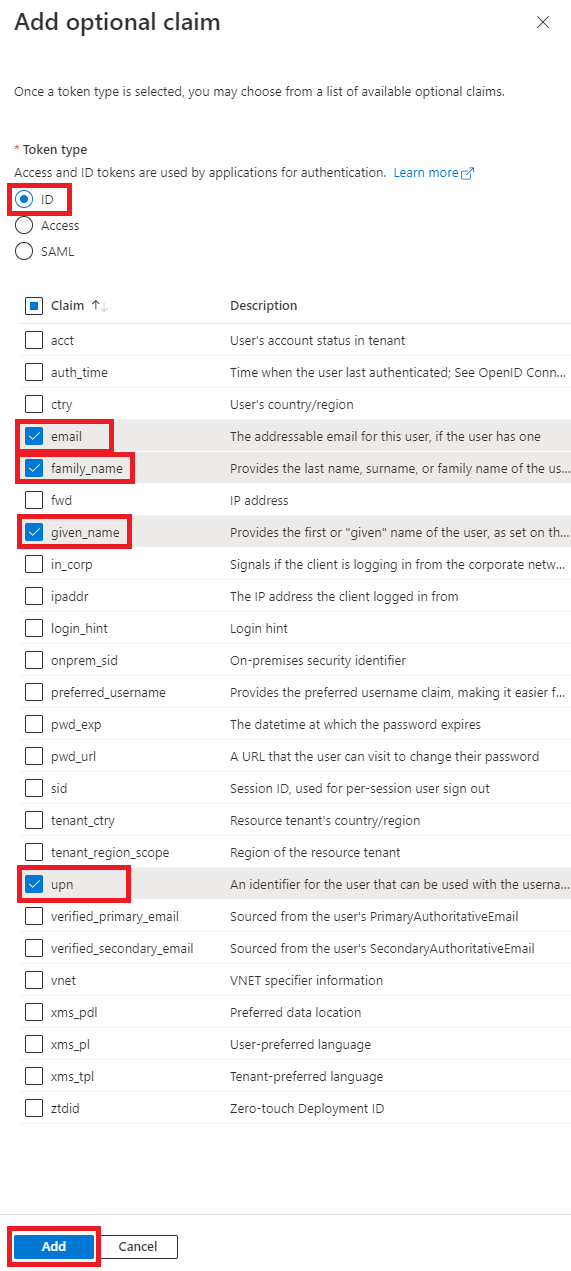
|
||||||||||
|
8 |
If asked then tick the "Turn on the Microsoft Graph email, profile permissions" option and click Add. 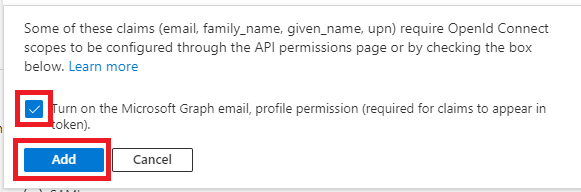
|
||||||||||
|
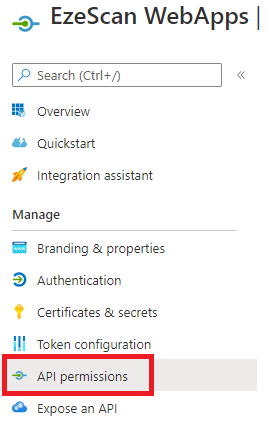
9 |
On the left menu select the API Permissions option. 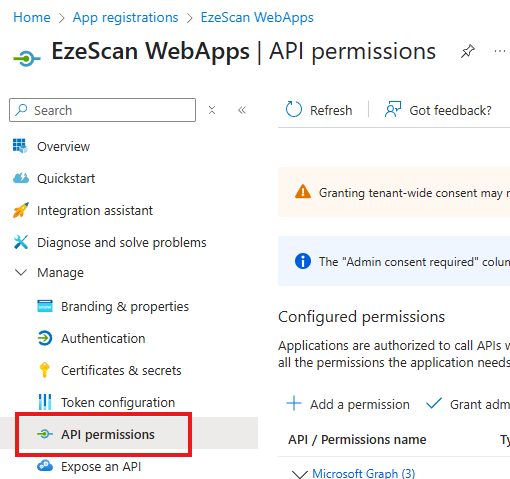
|
||||||||||
|
10 |
Click Grant admin consent for [Organisation Name here] link. 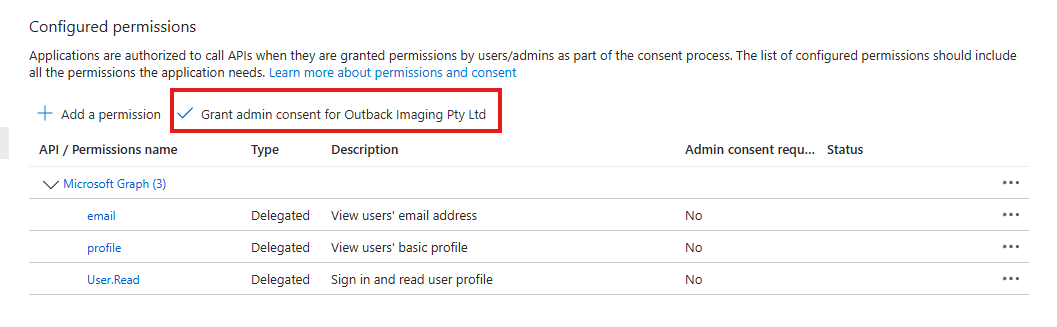
|
||||||||||
|
11 |
Click Yes on the confirmation window. 
|
||||||||||
|
12 |
Confirm the consent has now been granted. 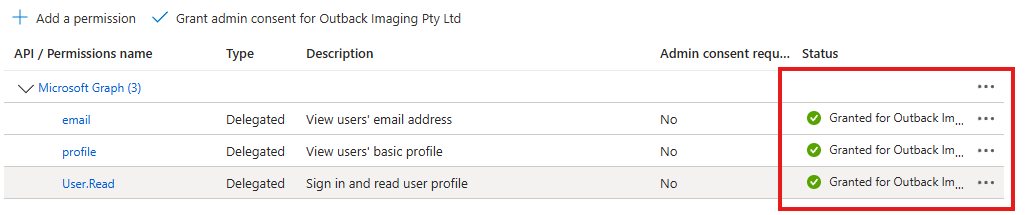
|
||||||||||
|
13 |
On the left menu select the Overview option. 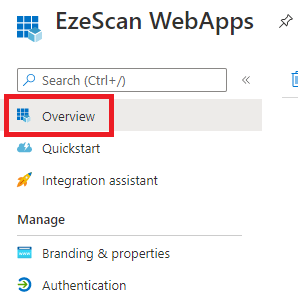
|
||||||||||
|
14 |
Take note of the Application (client) ID and the Directory (tenant) ID by mousing over then clicking the copy to clipboard button and saving them somewhere safe for later use. 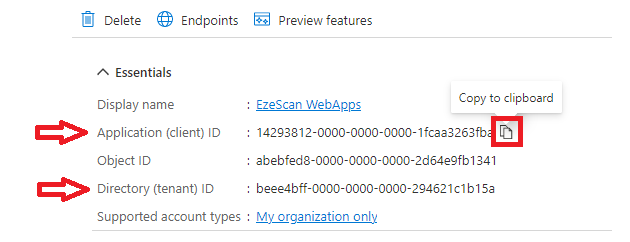
|
||||||||||
|
15 |
Click on the Endpoints option in the upper menu. 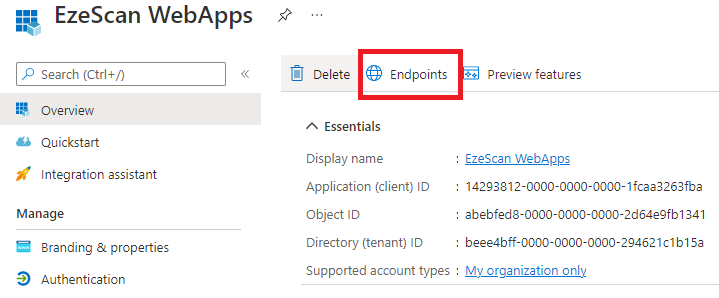
|
||||||||||
|
16 |
Take note of the Authority URL (Accounts in this organizational directory only) by clicking the copy to clipboard button and saving it somewhere safe for later use. 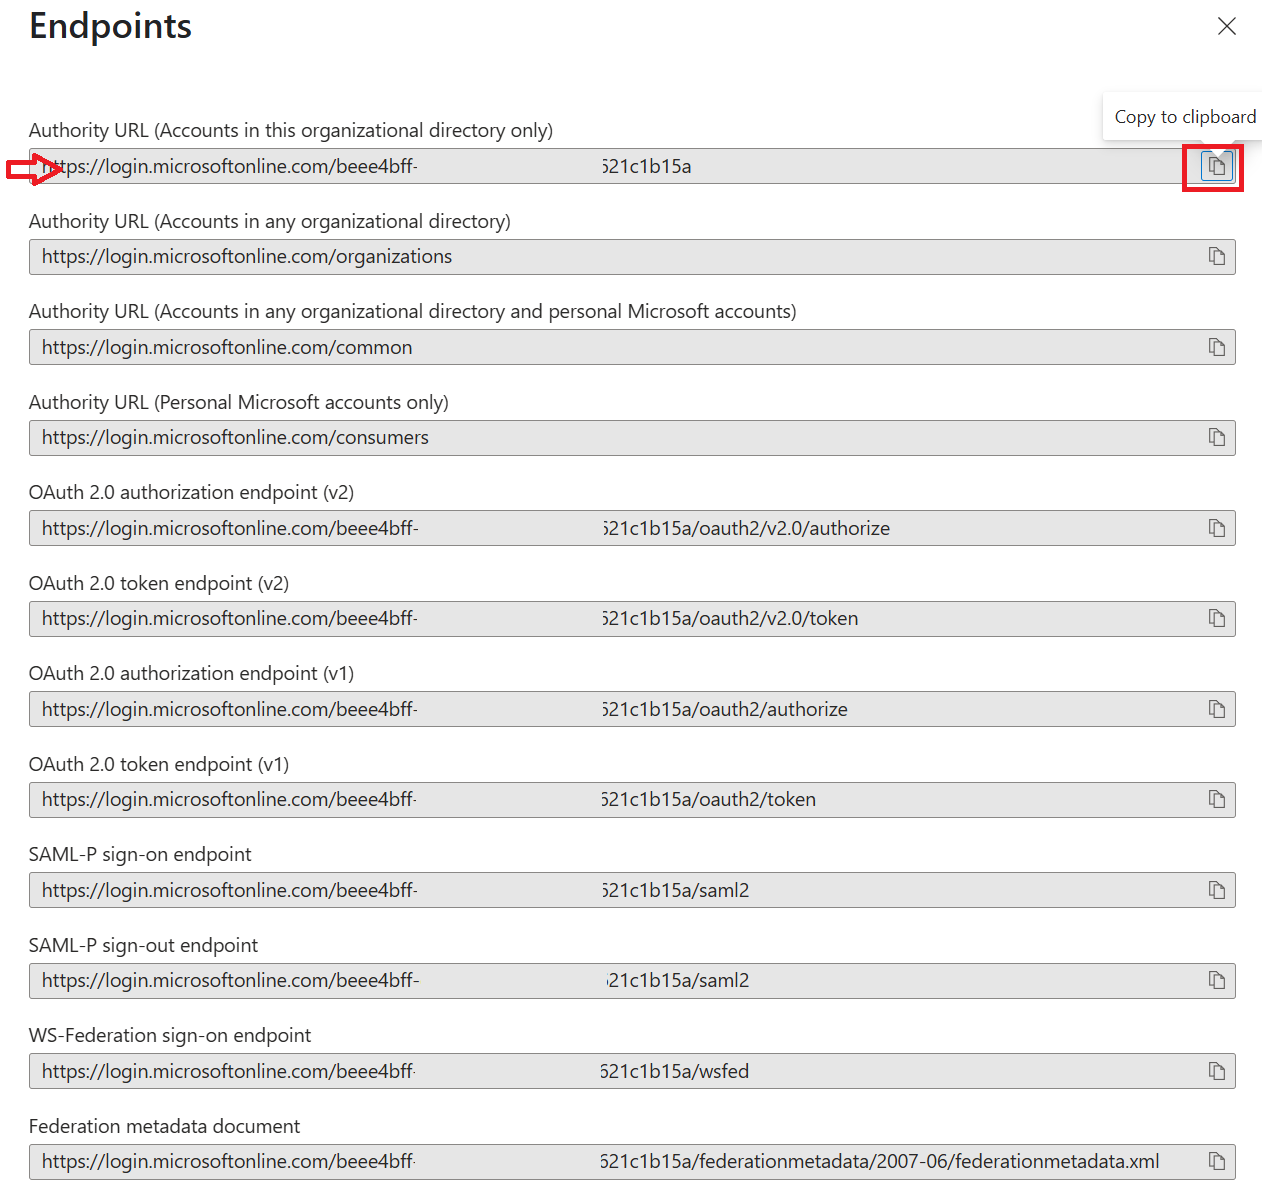
|
||||||||||
|
17 |
You should now have the 3 respective values saved out ready to send to our team. 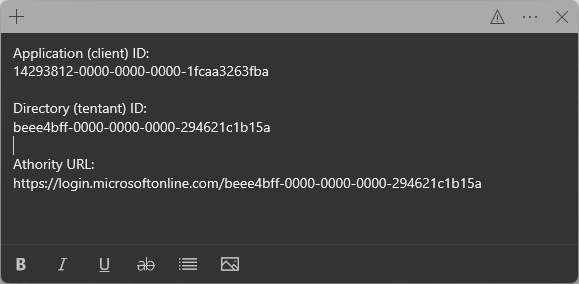
|
||||||||||
|
18 |
Send these 3 values to our team via a secure method of your choice. For example:
|
Granting GraphAPI access to users and groups
|
1 |
In the Azure Portal navigate to App Registrations and select the Application that EWA is using. (You can check the application Id to confirm) |
||||||
|
2 |
|
||||||
|
3 |
Click the Add a permission link. 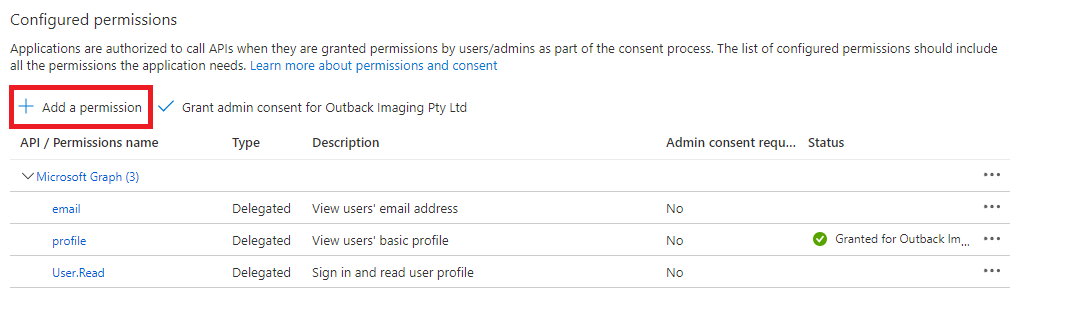
|
||||||
|
4 |
Select the Microsoft Graph option. 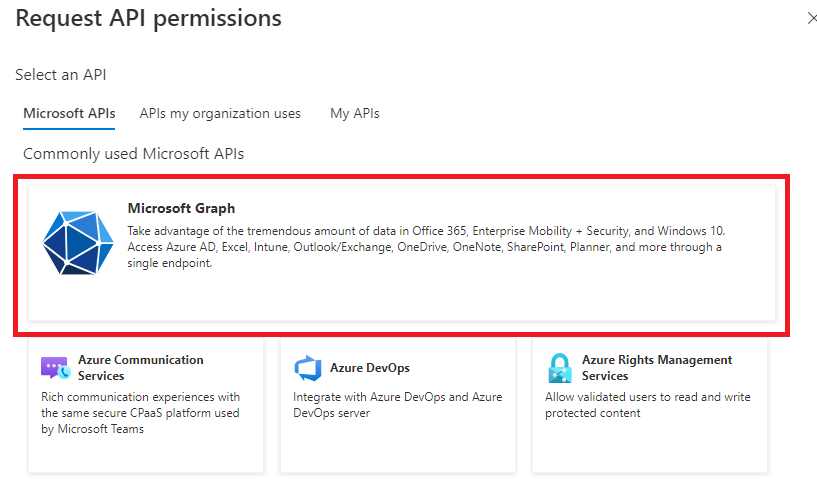
|
||||||
|
5 |
Select Application permissions. 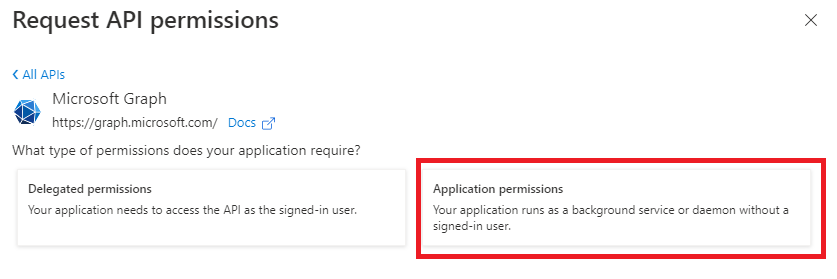
|
||||||
|
6 |
Find and then tick the Group.Read.All permission. 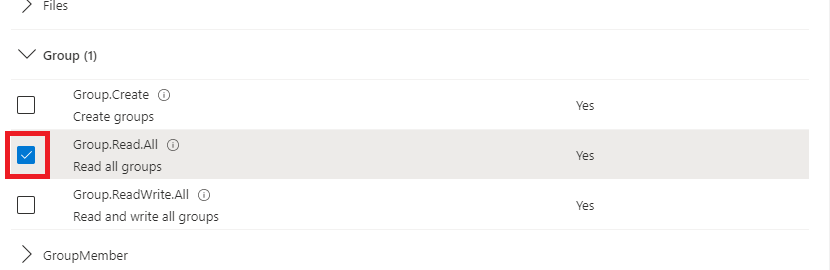
|
||||||
|
7 |
Find and then tick the User.Read.All permission and then click the Add Permission button. 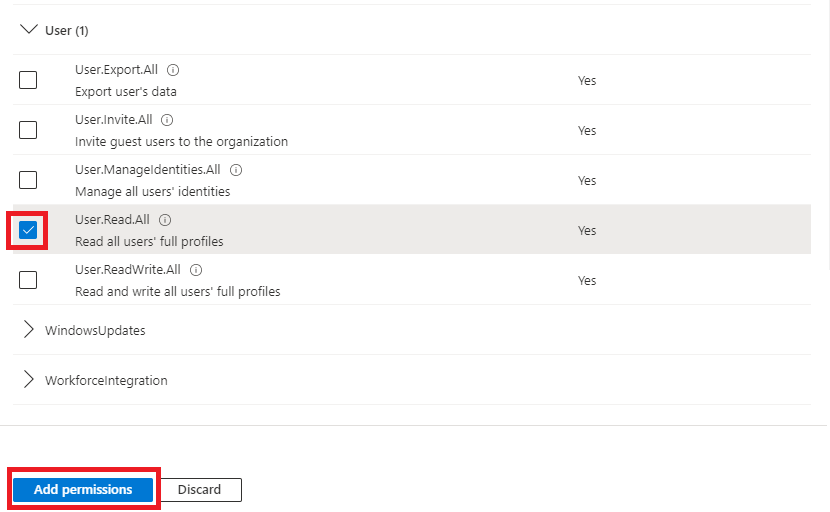
|
||||||
|
8 |
Notice that the newly added permissions have not been granted consent yet. Click the Grant admin consent for COMPANY NAME option. 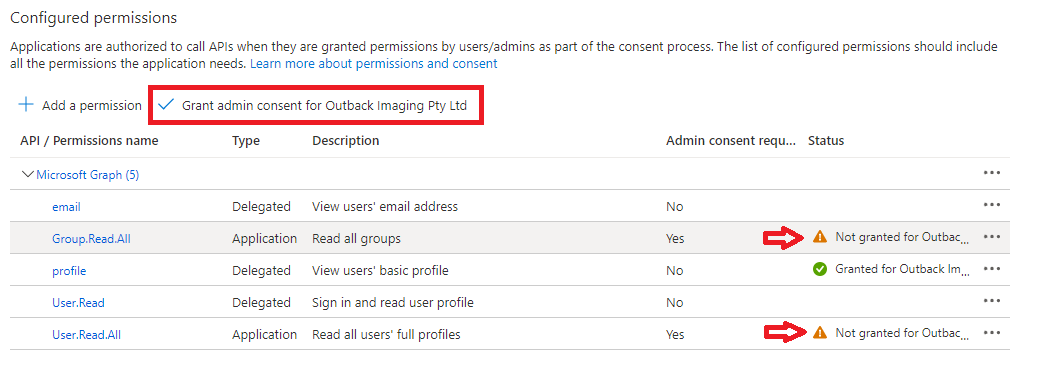
|
||||||
|
9 |
Select the Yes, add other granted permissions to the configured permissions option and click Save and Continue. 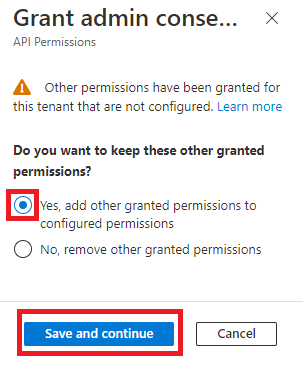
|
||||||
|
10 |
Click the Grant admin consent button. 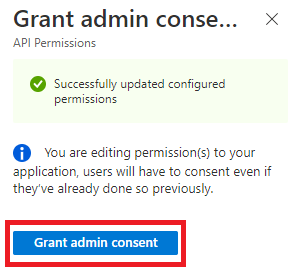
|
||||||
|
11 |
Click Yes on the confirmation. 
|
||||||
|
12 |
Confirm that the consent has been added for the Group.Read.All and User.Read.All permissions. 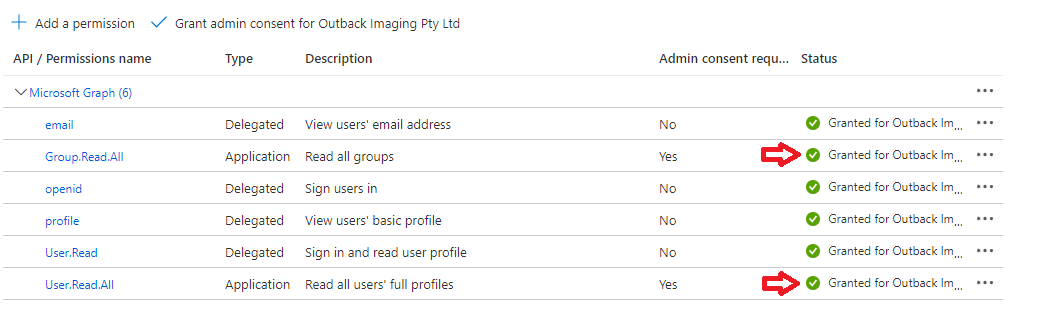
|
||||||
|
13 |
On the left menu select the Overview option.
|
||||||
|
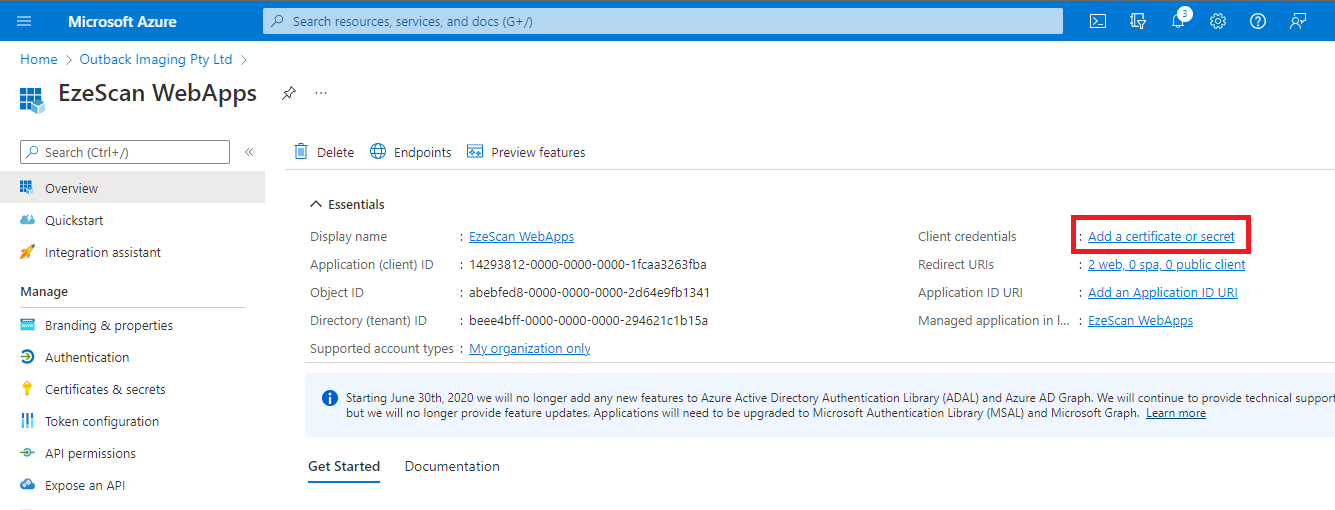
14 |
Click Add a certificate or secret.
|
||||||
|
15 |
Click New client secret. 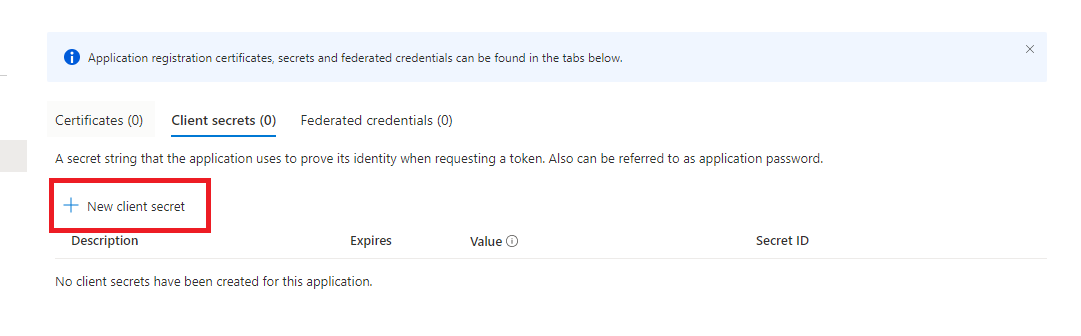
|
||||||
|
16 |
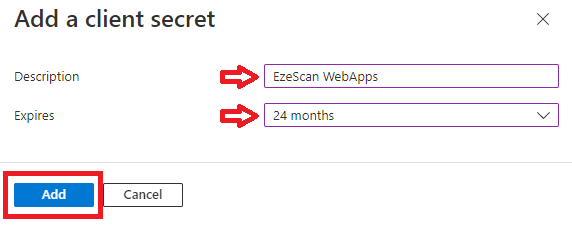
Set the following values and click Add.
|
||||||
|
17 |
Take note of the Value of the client secret by clicking the copy to clipboard button and saving it somewhere safe for later use.
Client secret values cannot be viewed, except for immediately after creation. Be sure to save the secret when created before leaving the page. |
||||||
|
18 |
Send the client secret value to our team via a secure method of your choice. For example:
|