
Over the course of time the EzeScan Authority Service will be updated with newer versions released, as well there may be times when an organisation will want to move (migrate) the service to a new Windows Server instance.
Both updating and migrating the EzeScan Authority services are quite easily achieved with minimal effort and outage requirements.
The below assumes I.T. knowledge and competency are available within the organisation, however should an organisation request a vendor migration and update, EzeScan can provision a quotation for such services.
Downloading the Current Release
-
Login to the EzeScan customer website and download the latest release of the Authority server installer package. https://ezescan.com.au/downloads/software-downloads
-
A site will need to be in maintenance and have their login details at hand to download the latest EzeScan updates. Feel free to contact us at
support@ezescan.com.au
should there be any questions arising.
-

-
Placing the EzeScan website into the Windows "Trusted Sites Zone" will prevent files being downloaded from EzeScan with a "Blocked" attribute set.
-
Review any release notes and confirm any requirement changes, e.g. changes to the .Net requirements, or any additional preparation that may be specified for the newer release.
Updating an existing install
The processes are as follows.
-
Snapshot/backup the server instance to provision rollback/recovery options.
-
Install any specific requirements for the new release (.Net 4.7.1 for example).
-
Stop the EzeScan Authority Windows service.

-
Confirm if a custom settings or client configurations location has been defined in an override.ini and/or Authority.cfg,
Refer to here for information on the Authority.cfg and the override.ini
-
Make a backup copy of the settings and configurations folder "C:\ProgramData\Outback Imaging\EzeScan Authority".
-
Run the Authority installer (e.g. setup.exe noting admin rights will be required and requested)
-
If the Authority service happens to be running the installer will automatically stop the Authority service if it is running and update the existing install.
-
When the installer has completed start the EzeScan Authority Server Windows Service. At this point the service will check the settings and run an update/migration process to bring the settings up to the current release requirements.
-
To confirm the update has completed successfully, open the Authority.cfg file in notepad (or a similar text editor) and review the MigrationNumber= value, it should be the same number as the build number of the new install.
For example if the Authority version was 4.3.119.1073, the build number will be the last four digits – 1073, therefore MigrationNumber=1073 indicates a successful settings migration.
The Authority Log located in the Logs folder should also be reviewed and any errors or warnings should be actioned or contact EzeScan Support at support@ezescan.com.au for further advice.
-
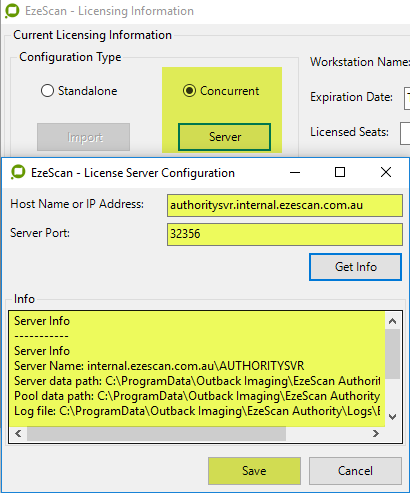
Login to the Authority website and confirm operations.
Migrating an existing Install to a new server
To keep things simple and as trouble free as possible, the ideal process is to keep the original Windows server NETBOIS/fully qualified name (FQN) for use as the new Windows server name.
This ensures existing workstations will find the new server (as the new server name is the same) and ensures any existing concurrent licensing issued will continue to function. Essentially, by keeping the NETBIOS and FQN the same, the client machines should not require any configuration updates to connect to the new Ezescan Authority server and any existing concurrent licensing will continue to function without needing new licensing issued.
Performing the migration
-
Build the new Windows server with required roles and features, including any required .Net framework. Note firewall port exceptions are created by the EzeScan Authority installer, see here for further info.
-
The server name can be different to the original server, noting any concurrent licensing in use will require re-issuing as the machine NETBIOS name is tied to the license, also any EzeScan instances and override.ini will need to be updated with the new server naming references.
If the same server NETBIOS name is not intended to be re-used it is recommended contacting EzeScan prior to migration for replacement licensing.
Alternatively the new server can be renamed to that of the original once the original has been taken offline and is covered further in this guide.
-
On the original server stop and disable the EzeScan Authority Server Windows service.
-
Confirm if a custom override.ini file is in use and copy the contents of either the default (e.g. "C:\ProgramData\Outback Imaging\EzeScan Authority") or the defined settings folder to the same path locations on the new server.
An important check for where an existing server is to be pressed into usage, is to ensure there is no existing EzeScan Authority install and that no EzeScan Authority settings folders/files exist on the new server.
Any existing install or settings on the new server should be cleared by uninstalling and removing the settings folders/files prior to copying the folder/files from the original server.
-
On the new server install the current EzeScan Authority version.
-
-
Start the EzeScan Authority Windows service on the new server.
The Authority Service will read the configuration files to determine what version of the Authority service they came from and update accordingly.
-
To confirm an update has completed successfully, open the Authority.cfg file in notepad (or a similar text editor) and review the MigrationNumber= value, it should be the same number as the build number of the new install.
For example if the Authority version was 4.3.119.1073, the build number will be the last four digits – 1073, therefore MigrationNumber=1073 indicates a successful settings migration.
-
The MigrationNumber holds the Authority server version number and is what defines and triggers the update process. For example a value of 1063, if less than the current installed build number, will trigger just the update migrations required to bring the settings up to the current installed version – build 1073 for example. Likewise a value of zero would trigger all migrations and the table creation processes will also run overwriting any existing data, noting that a value of zero would never actually be utilised.
-
Login to the Authority website and confirm operations, it is also recommended to confirm the Authority server logs for any errors or warning present (C:\ProgramData\Outback Imaging\EzeScan Authority\Logs).
-
Shutdown the original server.
-
Rename the new server using the same name as the original server and restart the machine.
-
Confirm the Authority website is operational, again a review of the Authority server logs is recommended.
-
Restart the local workstation if it is already up and running.
-
Start EzeScan on a client machine and confirm operations.
-
Concurrent licensing troubleshooting can be found here
-
Start EzeScan on a client machine and confirm operations.
-
If IP addresses were used on the local machine to reference the EzeScan Authority server, either the local EzeScan instances will require their Authority Server references updated (including local machine Override.ini files), or the IP address on the server will need to be changed to that of the original server. Refer to the appropriate sections of this document for details.
-
The use of fully qualified DNS names instead of IP addresses will help maintain easy updatability.