Microsoft SharePoint Online
Provides connectivity to SharePoint Online which is part of the Office suite of applications.
This page is currently being updated. Please contact our support team for any SharePoint Online queries.
Configuration
Inbuilt vs Custom OAuth Registration
EzeScan WebApps has the ability to use a preconfigured Application Registration or allows you to create your own.
Inbuilt
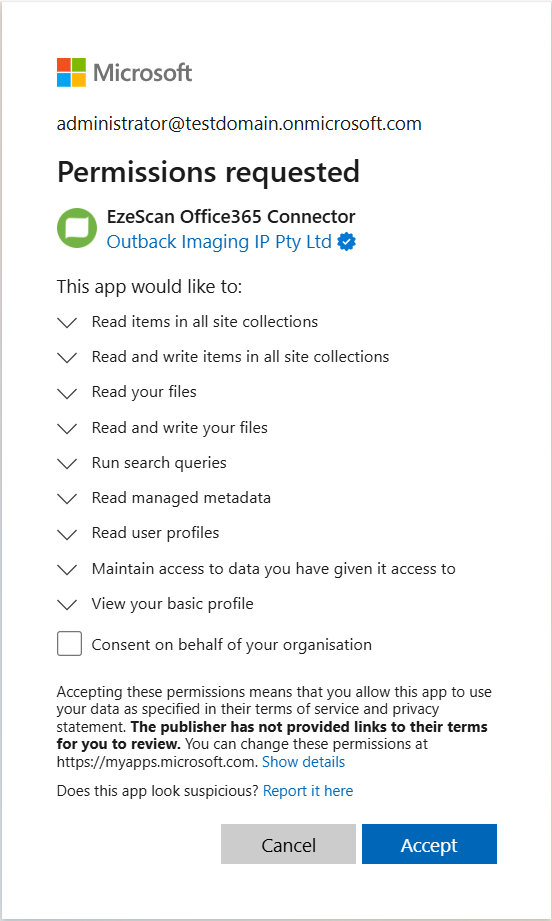
The inbuilt OAuth registration is the quickest way to start uploading files into SharePoint Online.
In order to configure this mode, you will need to get a domain administrator to provide consent for our application registration to read and write data in your SharePoint online instance.
The Inbuilt OAuth registration is only able to use the Authorization Code grant type.
Custom
A custom OAuth registration provides more granualuar configuration options around security as your administrator is able to manage the settings of the Application Registration in Azure.
In order to configure this mode, you will need a domain administrator to create a Custom Application Registration in the azure portal as well as provide you with the associated details to connect to that registration. They will also need to provide consent for your application registration to read and write data in your SharePoint online instance.
The Custom OAuth registration is able to use the Authorization Code and Client Credentials grant types.
Determining which Grant Type should be used
The connection to SharePoint Online is utilising OAuth2 for authentication.
It is important to determine which grant type is going to be suitable given the level of functionality that will be required.
This integration supports the following grant types:
Authorization Code
In Authorization Code mode the application redirects to Microsoft for the user to login to their Office 365 account.
The user will see the very familiar Microsoft Login screen and after they login they will be redirected back to our application.
This process can also prompt users for MFA or block risky sign ins based on organisational settings in Microsoft Entra.
If the user is already logged in, or the browser has been configured with SSO then they are automatically redirected back to our application.
This grant type should be selected when:
The search, browse or lookup field should only be able to access the data only the logged in user has permissions for.
No background automation is required as part of the solution. (e.g, a staff member needs to QA every document and approve its contents).
The file that gets uploaded needs to be uploaded as the logged in user.
Files should only be able to be uploaded into destinations the logged in user has access to.
Client Credentials
In Client Credentials mode the application is authenticated using a client Id and corresponding secret.
Generally used for server-to-server or background communication.
The end user is never asked to directly Authenticate with Office 365.
This grant type should be selected when:
Files should be uploaded as a “service account” rather than a particular user.
Need to be able to search, browse, lookup or upload into a site that the end user doesn’t necessarily have access to when they login to SharePoint.
Files need to be uploaded without user interaction (aka background processing).
In some instances, it can make sense to use a hybrid approach and configure 2 separate integrations to SharePoint using the two different grant types.
For example, you may want background processing of documents where possible which requires client credentials. This integration would then be used to upload the documents.
When documents are exceptioned during background processing and require manual intervention users may then need to go in and fix any fields that were not valid. If one of these fields was to browse to SharePoint and select a folder in a document library, then it’s important we can only see folders in the document library that the user has access to. This field would be configured to use the integration that has been configured with authorization code grant type.
Setting up Custom Application Registration in Azure
Login to the Azure Portal with an account that has permissions to manage Application Registrations and click the App Registrations option
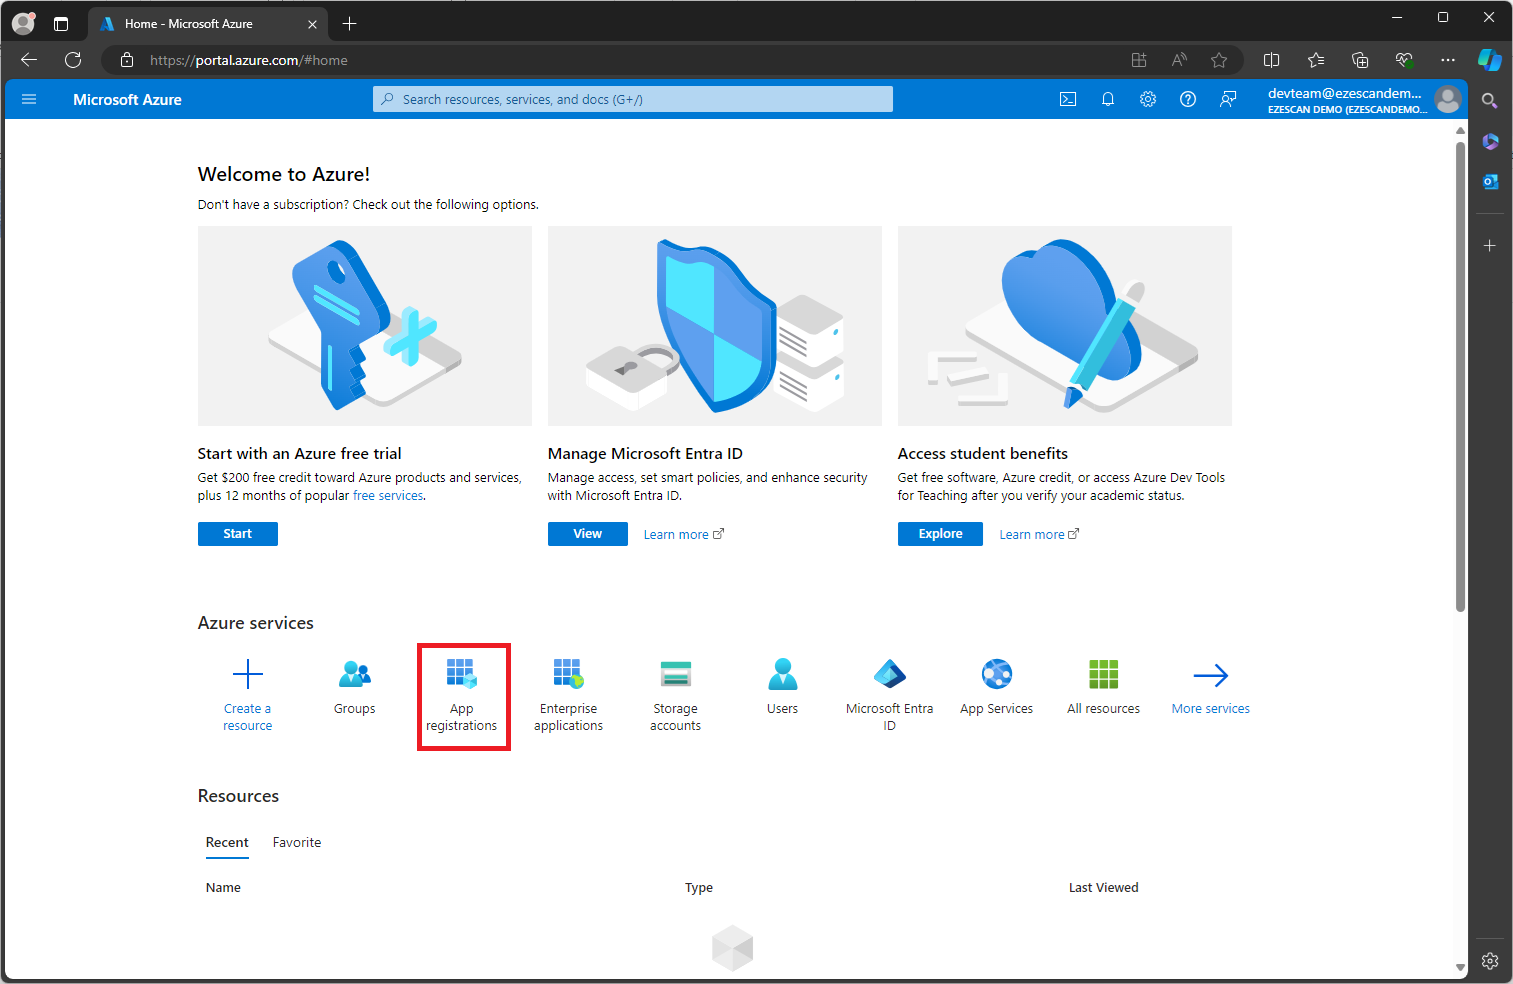
Click the New registration button

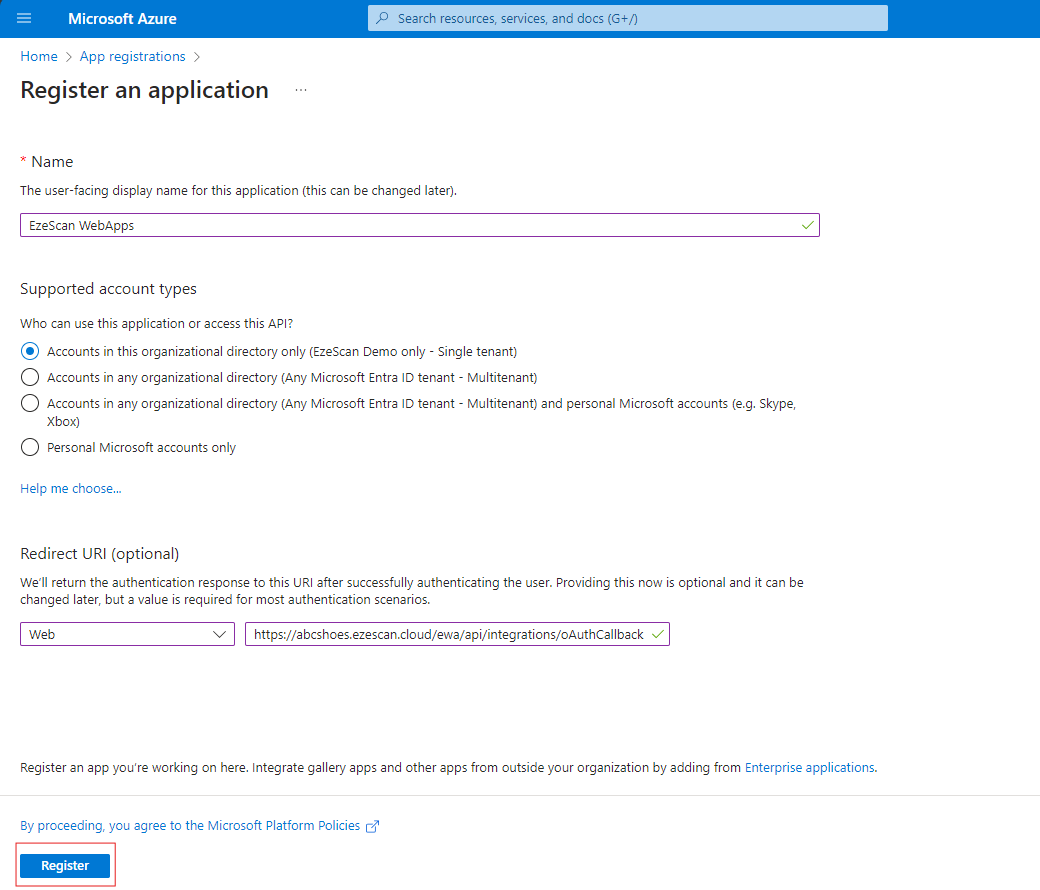
Enter the following information and then click the Register button
Option | Value |
|---|---|
Name | EzeScan WebApps |
Supported Account Types | Accounts in this organizational directory only ([Your tenant name here] only - Single tenant) |
Redirect URI | Web - https://{hostname_for_ewa_installation}/api/integrations/oAuthCallback For EzeScan Cloud the redirect URI would be: https://{tenant}.ezescan.cloud/ewa/api/integrations/oAuthCallback where you would replace {tenant} with your tenant name. |
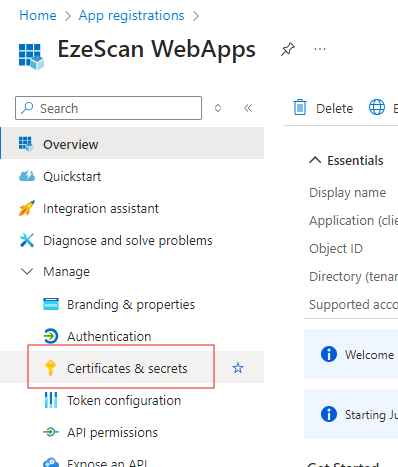
On the left menu select the Manage > Certificates & secrets option
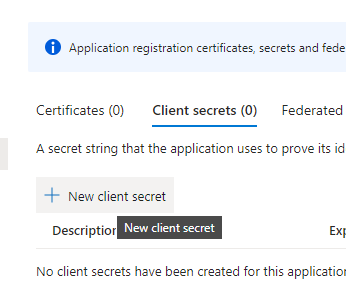
Click the Create client secret link
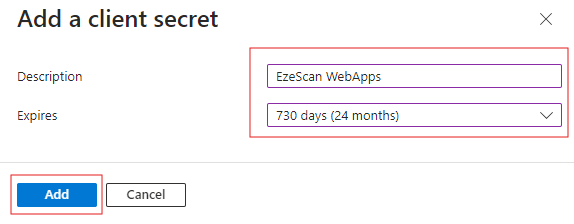
Enter a description and select 24 months expirary and then click the Add button
The value for the secret will now be displayed, use the copy button and then paste this secret somewhere safe for use later on

You are unable to view the value of the secret again after you navigate away from this page!
Apply the following API Permissions
Permissions required for Authorization Code (Delegated):
AllSites.ReadAllSites.WriteMyFiles.ReadMyFiles.WriteSites.Search.AllTermStore.Read.AllUser.Read.All
Permissions Required for Client Credentials (Application):
Sites.FullControl.All- this will grant full control of all sites
or
Sites.Selected- only selected sites will be granted full control
In order to use application permissions you will need to generate a certificate using the following page: https://docs.ezescan.com.au/ezescan-desktop-server/5.0/how-to-configure-azure-ad-app-only-authentication-
Configuring the Integration
The following settings are common:
Property | Description | Example |
|---|---|---|
Name | Name for the integration configuration. |
|
Description | Description for integration. |
|
SharePoint Site URL | The URL of the SharePoint site to connect to. | This can be a top-level site (which can be narrowed down later): Or can be a specific SharePoint site:
|
Tenant ID | Tenant ID of the OAuth application registered in Azure AD. | You can specify the GUID of your tenant as found in the Azure Portal:
Or you can also specify your tenants primary domain:
|
OAuth Registration | OAuth Registration for the connection to use. A custom registration is required if a different Redirect Uri is needed. Inbuilt uses our pre-registered application and will only support the Authorization Code grant type. Custom allows for more granular configuration and supports both Authorization Code and Client Credentials grant types. |
Inbuilt OAuth Registration
When using Inbuilt option all other settings are ignored.
Custom OAuth Registration
When using the Custom option the following settings need to be completed:
Property | Description | Example |
|---|---|---|
Client ID | ||
Client Secret | ||
SharePoint Site URL | ||
Tenant ID | ||
OAuth Registration |
Supported Functions
Different integrations provide different levels of functionality.
Upload
This Integration supports uploading.
Search
This Integration supports searching.
Browse
This Integration supports browsing.
Lookup
This Integration supports lookups.
Validators
No validators are supported at this time.
Tips
Best way to find URL for a folder within a document library
Sometimes it can be challenging to find the exact URL for a document library when configuring the integration.
Using the URL displayed in the navigation bar of a web browser often has other values in it that will break the integration.
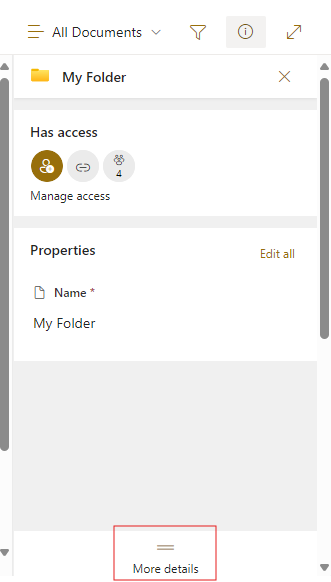
While looking at the folder in SharePoint click the button in the top right to open the details pane.

In the details pain then click the More details link at the bottom
Look at the Path and click the Copy button to the right of the heading
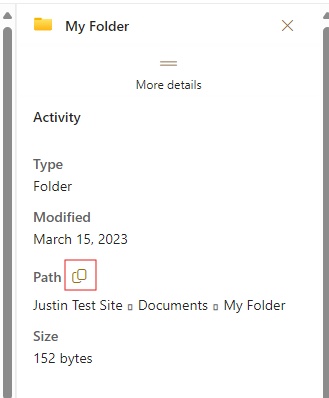
This path will then be correctly formatted for use in EzeScan.
The URL in the navigation address of the browser was:https://companyname.sharepoint.com/sites/JustinTestSite/Shared%20Documents/Forms/AllItems.aspx?id=%2Fsites%2FJustinTestSite%2FShared%20Documents%2FMy%20Folder&viewid=33375e4d%2D4be4%2D4405%2D96f8%2D2cbb99681621
Using the details page it correctly returns as:https://companyname.sharepoint.com/sites/JustinTestSite/Shared%20Documents/My%20Folder
