
Requirements
-
EzeScan 5.0.74 or higher
-
Azure AD app registration
-
SharePoint Online
Signing Certificate
A certificate is required to sign authentication requests to Azure AD and verify the application is valid.
The below script can be used to create a self signed certificate:
.\Create-SelfSignedCertificate.ps1 -CommonName "MyCompanyName" -StartDate 2023-02-01 -EndDate 2025-02-01
Create-SelfSignedCertificate.ps1
Azure AD App Registration
An app registration is required in the same Azure AD tenant as SharePoint Online.
-
Open Azure Portal and search for app registrations page.
-
Add a new app registration.
-
Account types must be
Accounts in organizational directory only.

-
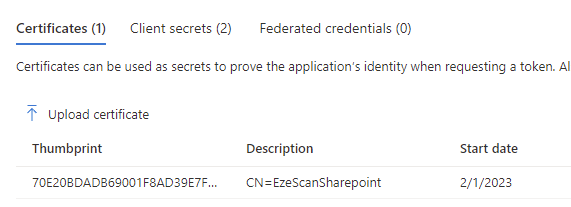
Navigate to Certificates & Secrets page.
-
Upload the public certificate (.cer) under the certificate tab.
-
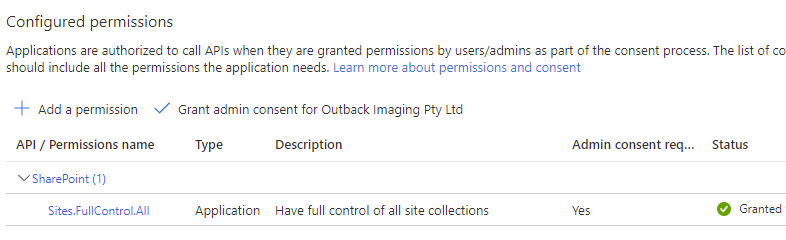
Navigate to the API permissions page.
-
Click Add a permission and select the
SharePointcategory. -
Select one of the following:
-
Sites.FullControl.All- this will grant full control of all sites -
Sites.Selected- only selected sites will be granted full control
-
-
Click Grant admin consent to allow the application to use this permission.
Selected Sites Permissions
If using the Sites.Selected permission you must manually grant the application access to sites. This cannot be done using the web admin page and instead must be completed using PnP.PowerShell cmdlets.
https://pnp.github.io/powershell/cmdlets/Grant-PnPAzureADAppSitePermission.html
The below Powershell script can be used as a template for completing this operation. You must update the $siteUrl, $appId, $certThumbprint, and $tenant variables with their corresponding values before running the script.
FullContolAzureADAppSitePermission.ps1
SharePoint Online Connection Settings
-
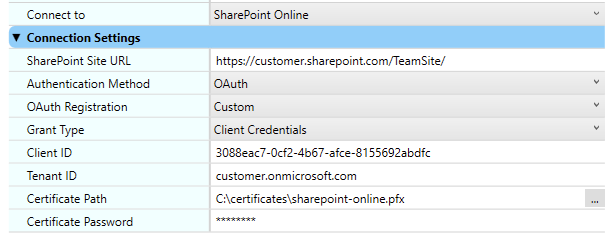
Open Admin menu → Workstation Options
-
Navigate to the Connection Profiles tab
-
Select the existing SharePoint Online profile (or add a new one if required)
-
Select Authentication Method
OAuth. -
Select Grant Type
Client Credentials. -
Enter the Client ID of the app registration (also known as Application ID).
-
Enter the Tenant ID (either the GUID or user-friendly name).
-
Select the certificate file (.pfx)
The file will be opened from this location so you must ensure it is not deleted. -
Enter the password’s certificate if applicable.
-
Click the Test button to confirm authentication for the configure Site.