Windows Server Step-by-step guide
Prerequisites
-
Please ensure your server has the minimum requirements installed.
-
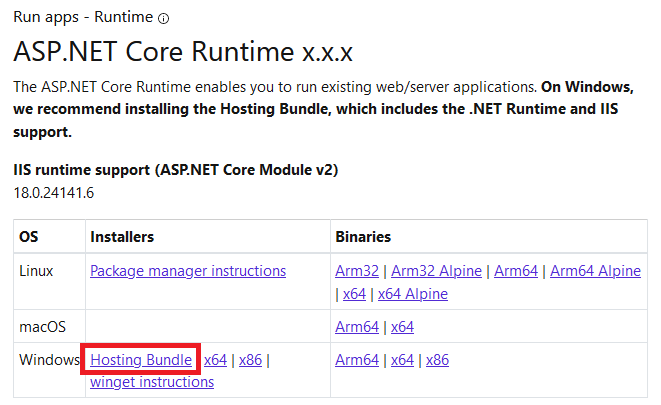
Please ensure you have the ASP.NET Core Runtime Hosting Bundle installed.
-
For EzeScan WebApps versions 3.10.x or higher, please ensure you have the ASP.NET Core Runtime Hosting Bundle 8.0.x installed.
-
For EzeScan WebApps versions 3.9.x or lower, please ensure you have the ASP.NET Core Runtime Hosting Bundle 6.0.x installed.
-
Make sure you select the "Hosting Bundle" option for your respective version
-
.
-
The ASP.NET Core Runtime hosing bundle must be installed after the IIS components.
If you have installed the hosting bundle before installing IIS then please rerun the ASP.NET Core Runtime hosting bundle installer.
If you don't then you will see an error messaging from IIS saying it doesn't understand the sites web.config file.
Installation files
-
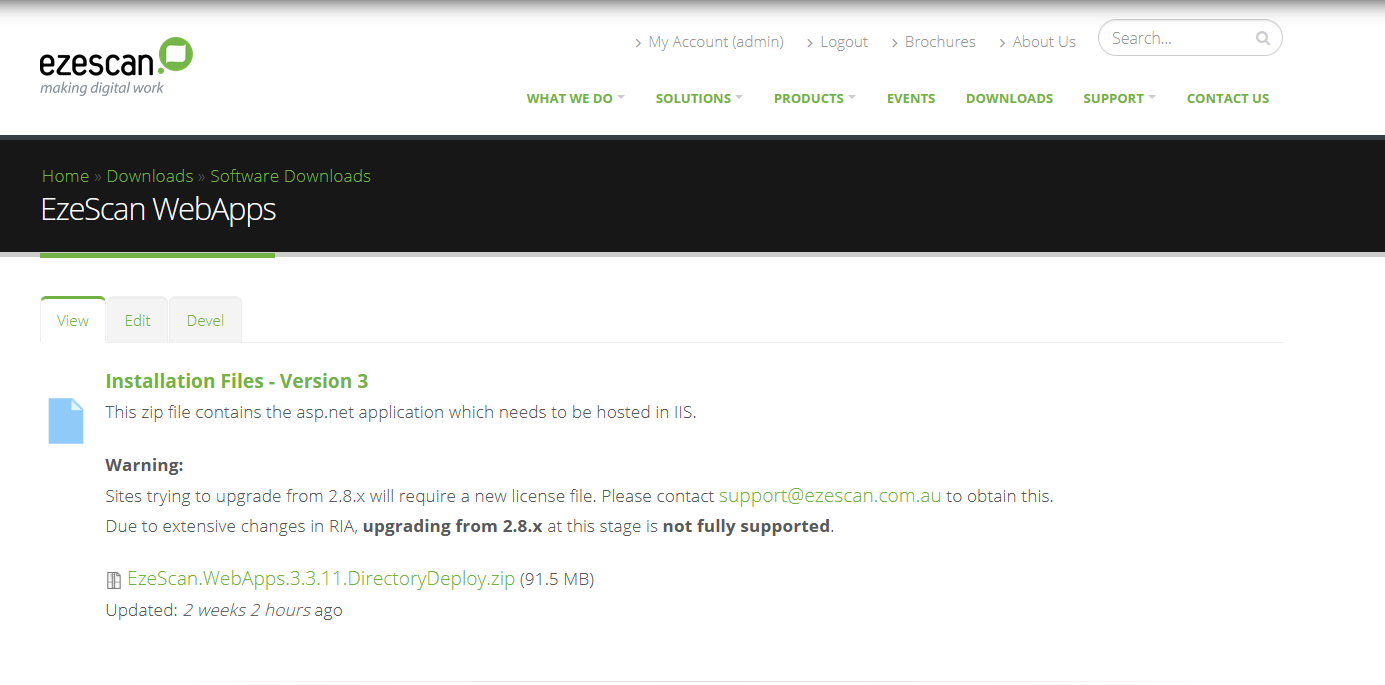
Go to the EzeScan website www.ezescan.com.au
-
Logon using your User ID & Password
-
Contact support@ezescan.com.au if you are unsure as to what this is.
-
-
Go to Downloads > Software Downloads > EzeScan Webapps
-
Download and then extract the installation files to the Downloads folder.
-
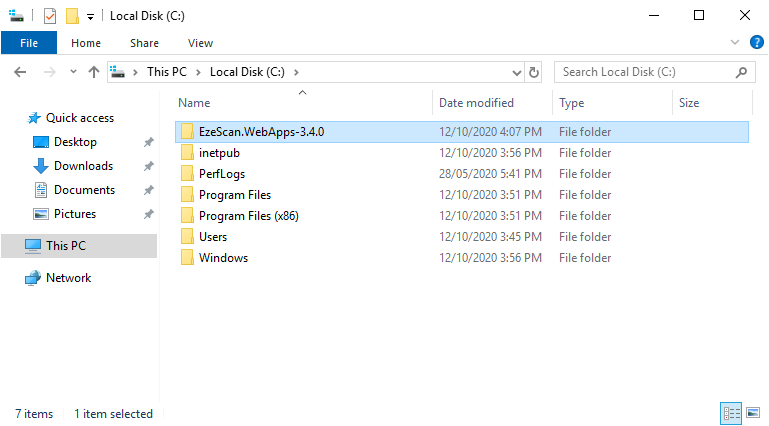
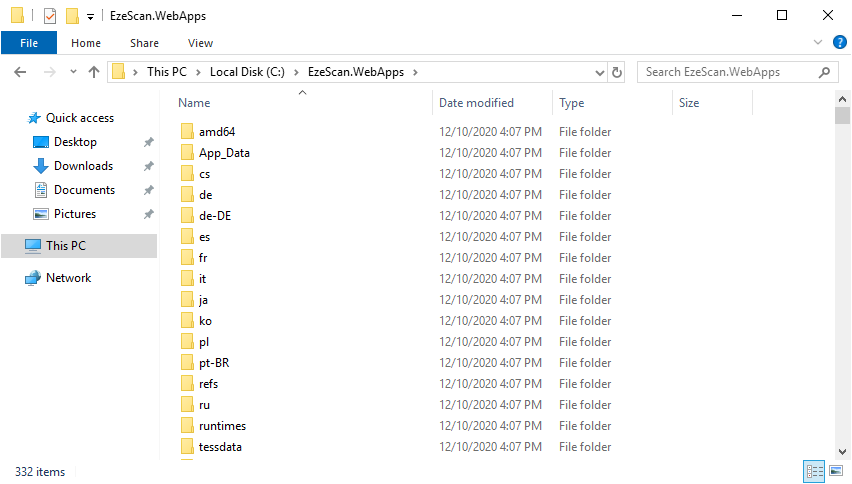
Copy the extracted folder to C:\ or whichever drive or folder to your liking.
-
-
Rename the folder to EzeScan.WebApps to remove the version number.
-
Check the folder contains the application files
-
.
Create Application Pool in IIS
-
Open Internet Information Services (IIS) Manager.
-
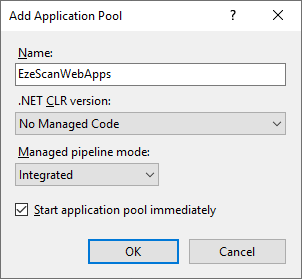
Right click Application Pools > select Add Application Pool.
-
Set the following options and click OK:
Name
EzeScanWebApps
.NET CLR Version
No Managed Code
Managed pipeline mode
Integrated
-
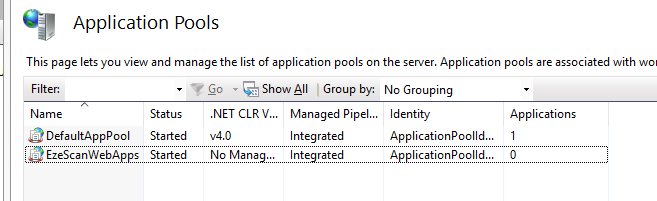
Confirm your application pool appears in the list.
Set Application Pool settings
-
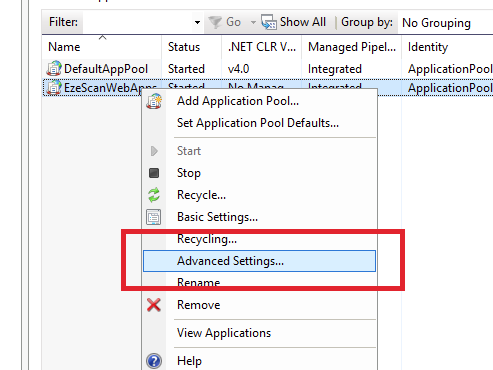
Right click EzeScanWebApps > select Advanced Settings...
-
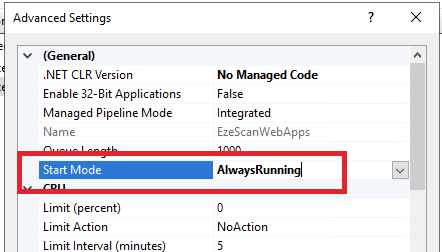
Set the Start Mode to AlwaysRunning.
-
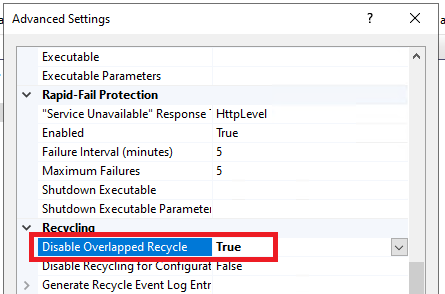
Set the Disable Overlapped Recycle to True.
-
Click the OK button to save the settings.
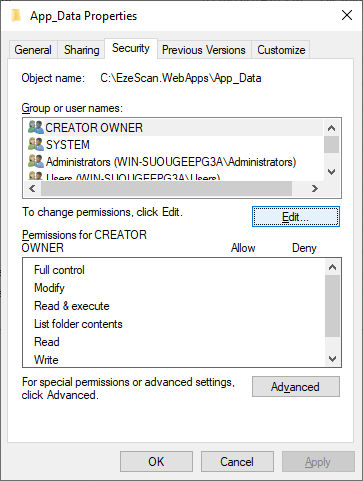
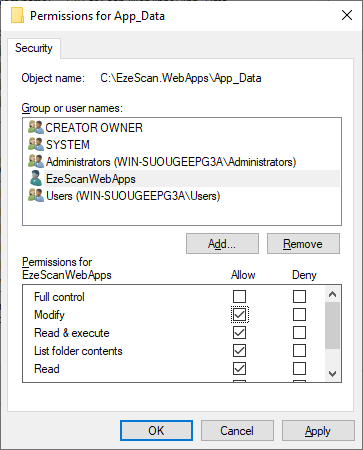
Set Permissions
EzeScan WebApps application pool’s identity needs to have read/write access to the App_Data folder in order to move files around and function correctly.
-
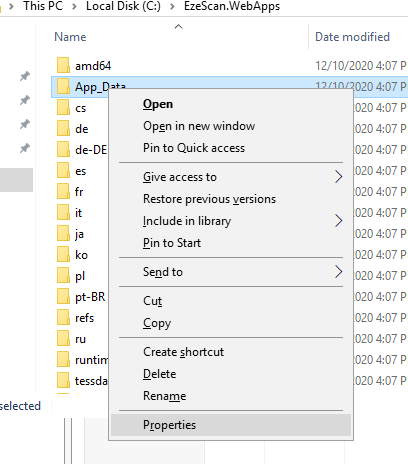
Navigate to the c:\EzeScan.WebApps directory.
-
Right click the App_Data folder and select Properties.
-
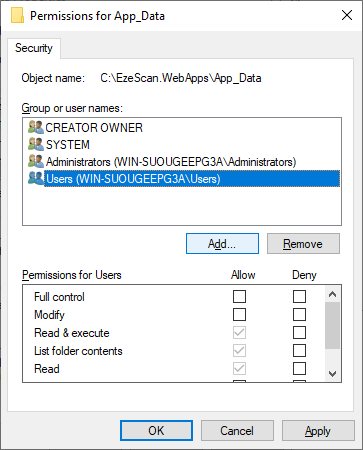
Select the Security Tab and then click the Edit button.
-
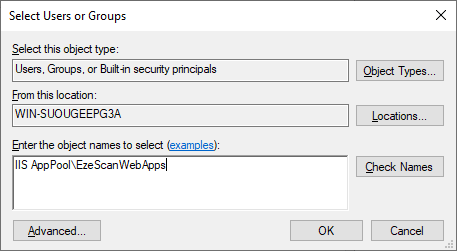
Click the Add button.
-
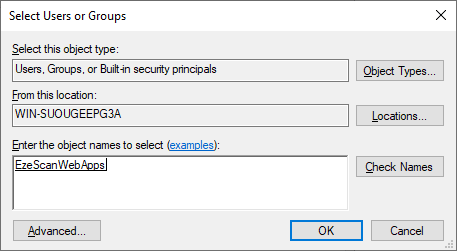
Enter IIS AppPool\EzeScanWebApps and click the Check Names button.
Make sure the "From this location" is set to the local machine and not the domain.
-
Confirm the name is changed to EzeScanWebApps and click the OK button.
7. Tick the Modify checkbox and then click the OK button.
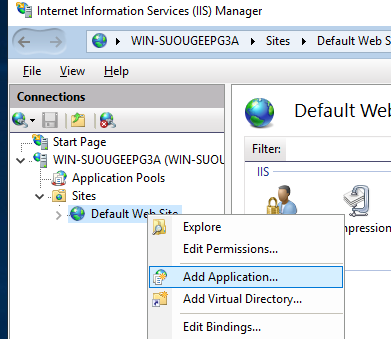
Setup IIS
-
Open Internet Information Services (IIS) Manager.
-
Right click Default Web Site and then click Add Application.
Set the following values:
|
Site Alias |
ewa |
|
Application Pool |
EzeScanWebApps (click Select button) |
|
Physical Path |
C:\EzeScan.WebApps (click ... to navigate) |
|
Enable Preload |
Ticked |
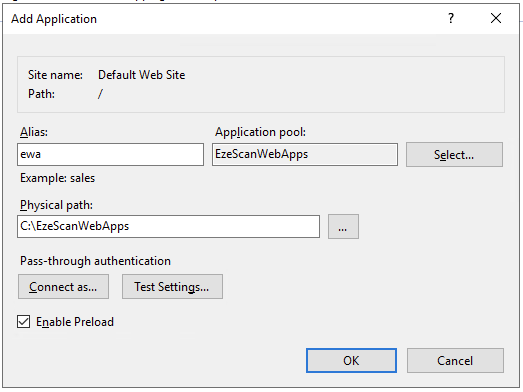
-
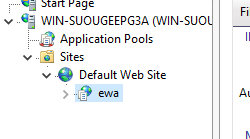
Click OK to finish and confirm your application is shown under Default Web Site.
Testing the site
-
Right click on ewa > Manage Application > Browse.

If page load fails with an error 500. One possible cause could be that in Prerequisites section, you did not check that IIS was installed and enabled before you installed the ASP.NET Core Runtime Hosting Bundle 6.0.x bundle.
If you had installed and enabled IIS only after you had installed the ASP.NET Core Runtime Hosting Bundle 6.0.x bundle, you will need to go back and reinstall the ASP.NET Core Runtime Hosting Bundle 6.0 again, and choose to 'Repair' it's prior install.
Once its repaired, stop and start the IIS site and retry step 1 above to retest the site.
If page load still fails, another possible cause is the slow execution of the EWA initialisation routines after a fresh software install. When the first browse to an EWA web site occurs,, the EWA startup code actually performs the initialisation of the SQLite databases files.
As each database file written out, a virus scanner may cause the creation of each file to pause whilst it is scanned. Only when each of the 8 databases files and the connectors.json file are created will the EWA website respond with the EWA home page.
Once that has happened. Stop and start the IIS site and retry step 1 above to retest the site.
-
If the page loads, then installation is complete.