
A remote indexing page can have any number of configurable action buttons.
Create an action by clicking the "Create New" button.
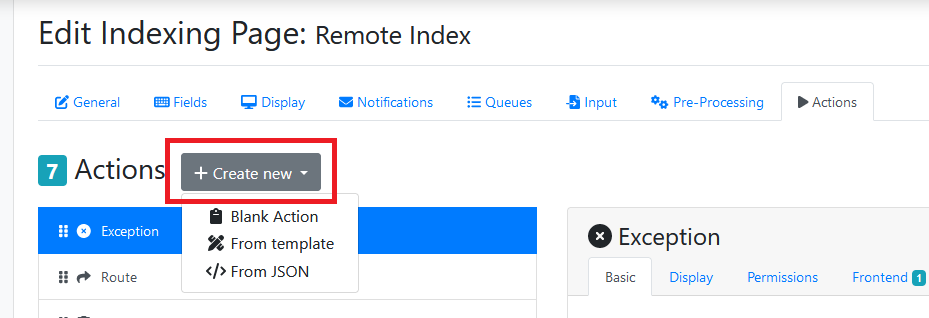
When creating an action you have the following options:
|
Option |
Description |
|---|---|
|
Blank Action |
Creates a completely blank action that contains no frontends or stages. |
|
From template |
Creates a preconfigured action from a built in template. These can provide a good base that can then be modified. |
|
From JSON |
Use this option to paste an action from another page. |
Action Settings
Basic
|
Option |
Description |
|---|---|
|
Action Name |
Name used to identify action |
|
Alias |
The alias is used in placeholders to return values |
|
Enabled |
When togged off it prevents users from accessing the action without deleting it |
|
Require Validation |
Enabling this option forces validation to run on the fields when the action button is clicked. |
|
Automatically fault |
If one of the stages fails then the processor will be cancelled and the item will be accessible again. Only use this option in configurations where running stages multiple times will have no adverse effects. |
|
Clear non-sticky notes |
When the action button is clicked notes that are not "sticky" will be removed from the item. |
|
Bulk Action |
Enabling this option will allow users to perform this action in bulk on the List Items page when in Table view. This option is not available when require validation is toggled on. 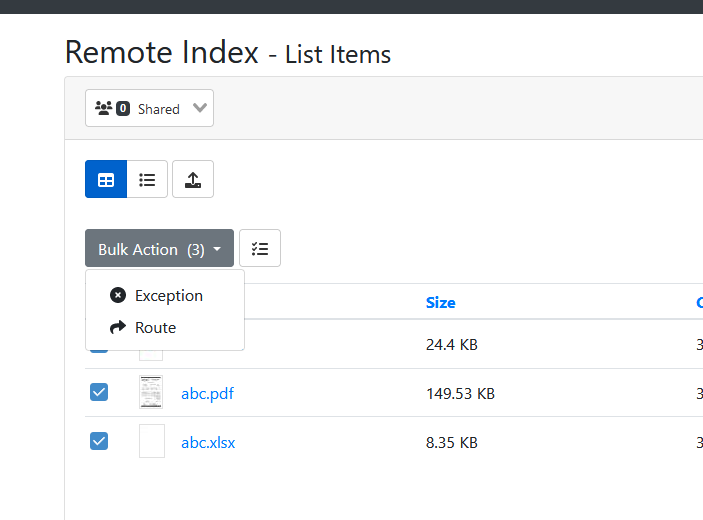
|
|
Post Action Redirect |
Once the action is performed this will dictate how the user is redirected. Page default Use the Auto-open next file setting configured on the Display tab of the indexing page. 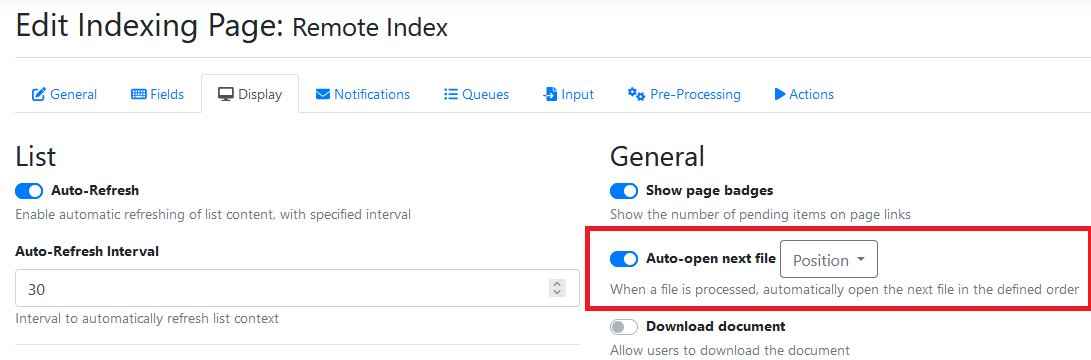
Reload same item After clicking the button a user will be redirected to a processing screen that will display the processing status and then redirect the user back to the item once processing is complete. If the item is no longer available (because it has been indexed or moved to a queue the user doesn't have access to) then they user is redirected back to the list of items. Back to queue After clicking the button the user will be redirected back to the list of items in the queue. |
Display
The display tab provides all of the settings for changing how the action button looks to the end user.
|
Option |
Description |
|---|---|
|
Button Text |
Use this setting to override the text that will be displayed to the user on the button. This allows you to have an action called "Submit to Accounts Team for approval" but then the button just display "Submit". This is useful because the full action name gets saved into the history of the item and button space can sometimes be limited. |
|
Colour |
The colour the action button will be when rendered on the page. |
|
Use button outline |
If enabled then the colour will only be applied to the outline and text on the button. |
|
Icon |
Select from the predefined list of icons. Or click the advanced button to enable manual entry. (Icons can be found at the following link https://fontawesome.com/v6/search) 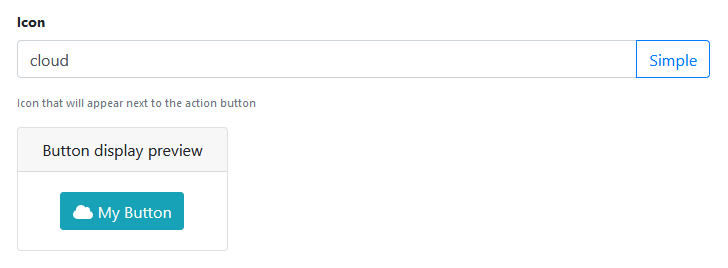
|
Permissions
The permissions tab allows you to select who should be able to see the action button and therefor perform the configured action.
There is two permissions modes:
Simple
Simple permissions mode provides a simple dropdown to select "Everyone", "Managers & Administrators" or "Administrators".
Advanced
Advanced mode allows you to select specific Users or Groups that will have access to the action.

If you have Bult Action enabled on the action then you will see additional permission settings related to bulk actions.
Frontend
Frontends allow you to collect additional metadata using a popup window that can then be used in the processing stages.
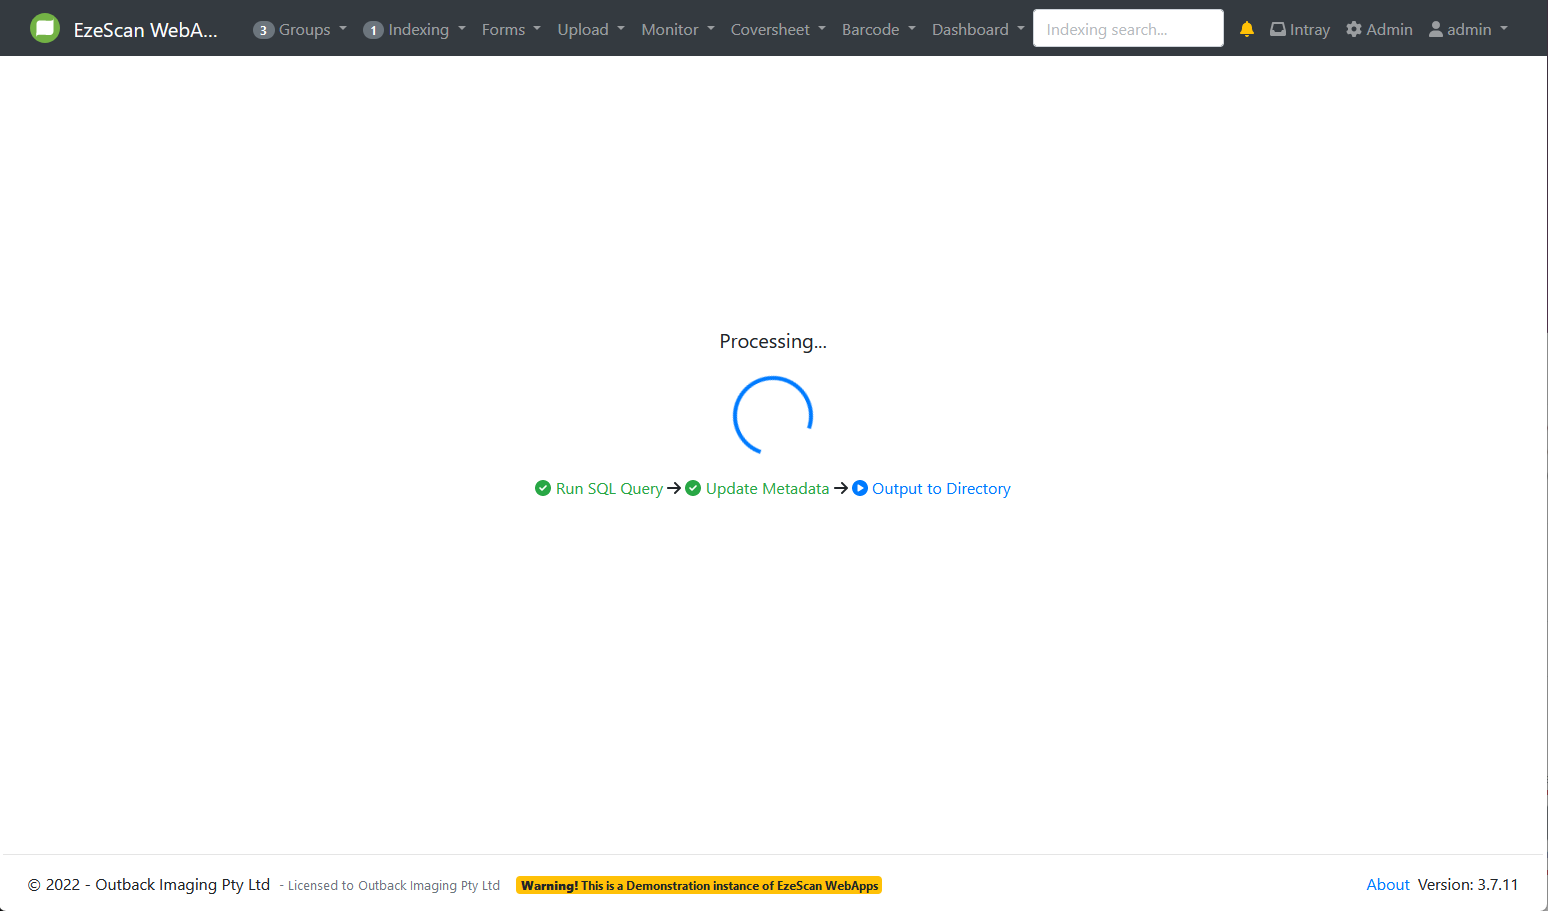
Stages
Stages are the actual output operations that will be performed when the action button is clicked.
Stages execute sequentially and the output process is not completed until all of the configured stages have been successfully executed.
Post Action
The post action tab lets you configure what happens after the action has successfully been run.
|
Option |
Description |
|---|---|
|
Post Action Redirect |
Once the action has been performed this option dictates how the use is redirected. Page default Use the settings provided in the Display > General > Auto-open next file option. 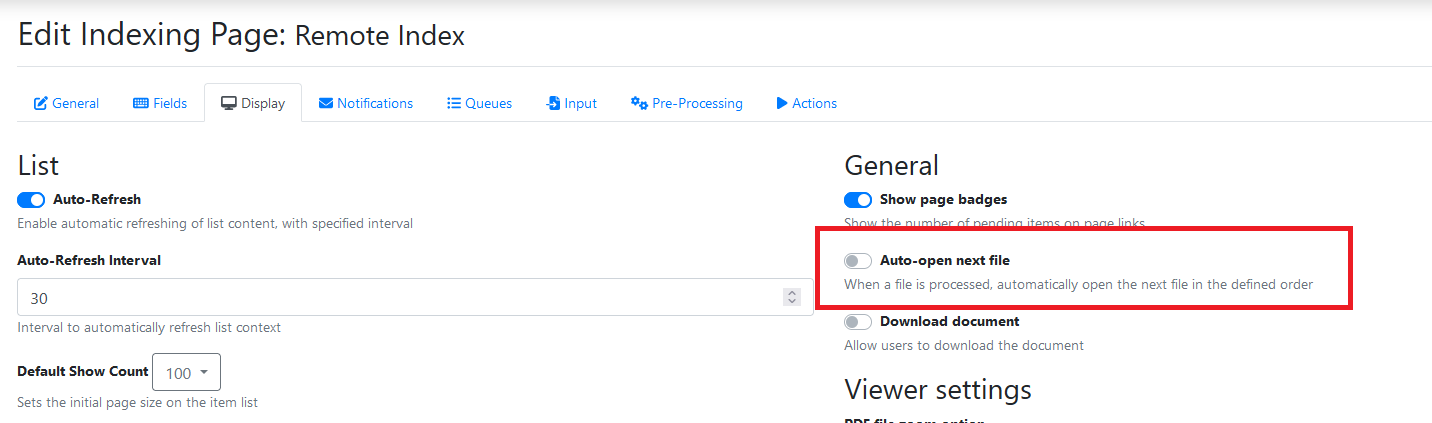
Reload same item On submission the user will see a loading screen and then if the item hasn’t been indexed and is still accessible then they will be redirected to the item in its new destination. 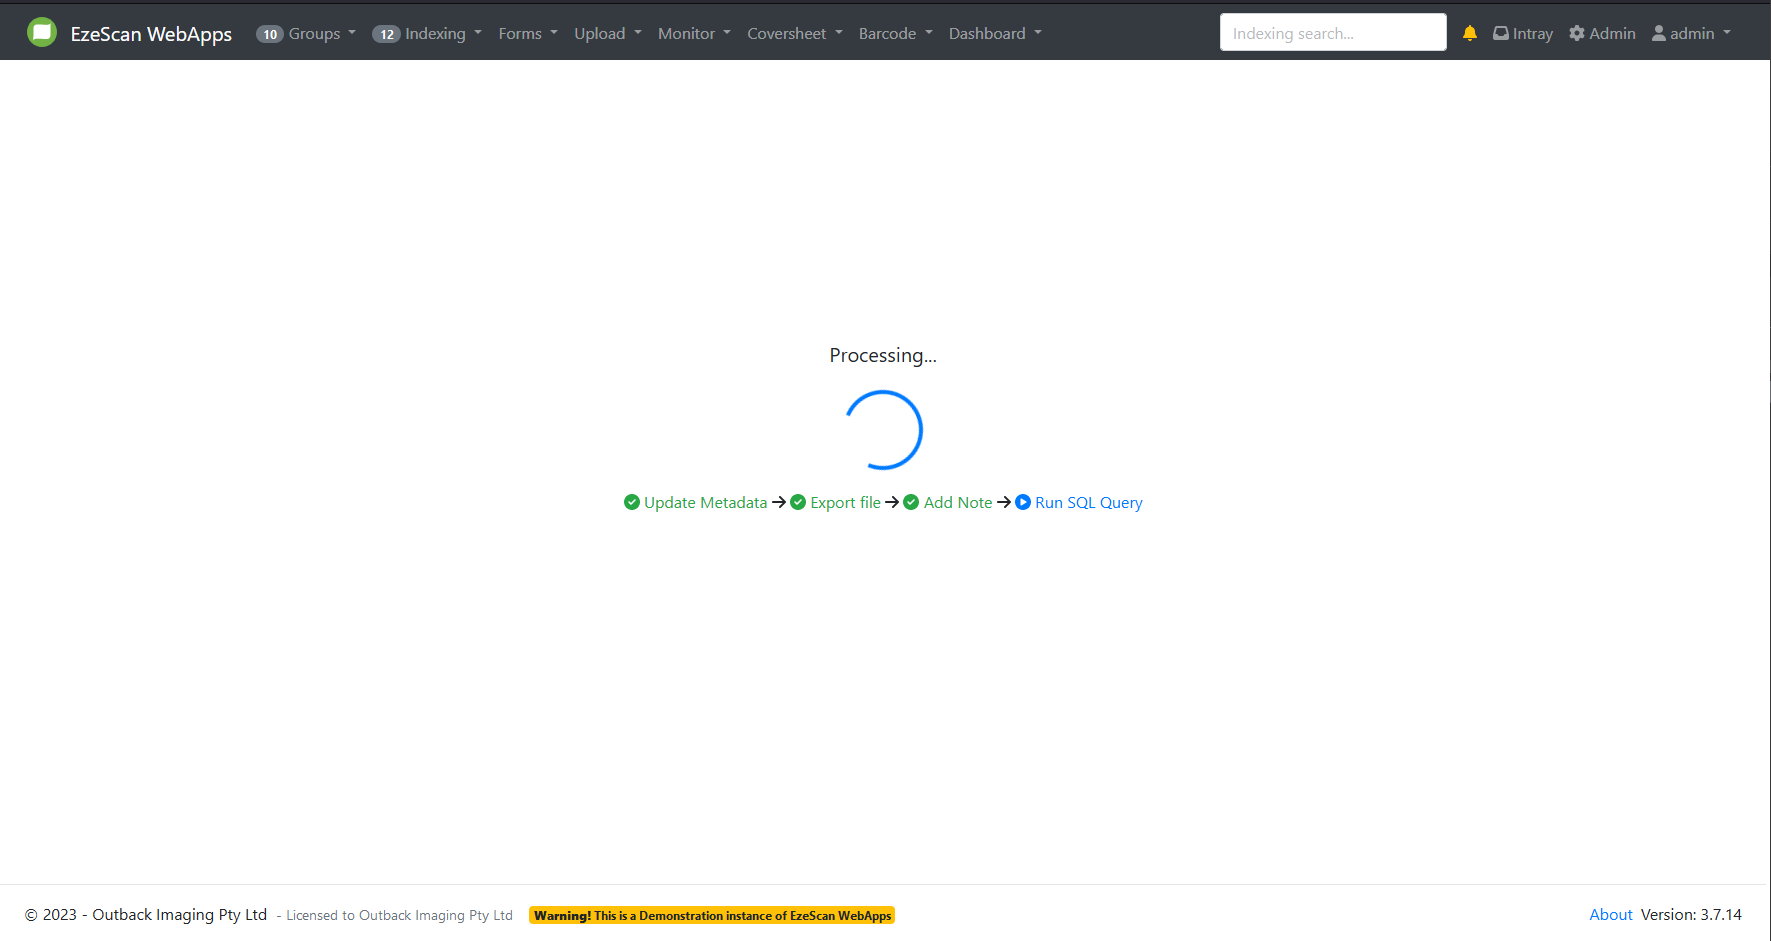
If you select this option and the item is no longer available after processing then the user will be redirect back to the queue. Back to queue The user will be redirected back to the list of items in the queue. |
|
Run pre-processors |
Enabling this will trigger the item to run the pre-processors that have been configured for the page the indexing item is currently located in. |