
The ID counters are great for multi seat implementations. They allow for centralised separate counters to be used for a specific purpose, for example…
-
A Batch number for scan batches
-
A document number for each document processed
Setup an ID counter
-
Select the ID Counters tab on the Authority site.
-
Click + Add a new counter
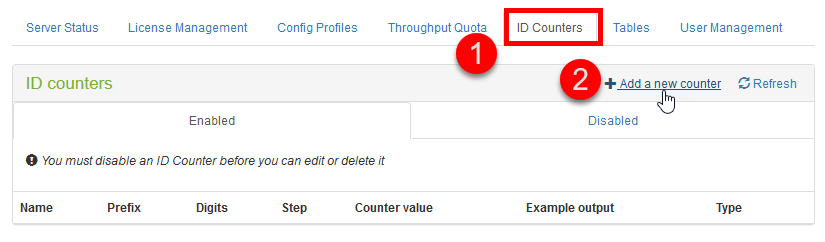
Figure 21
-
-
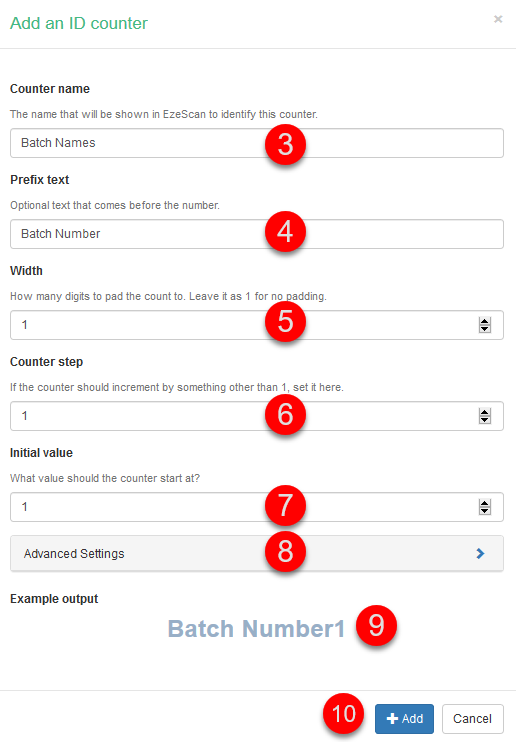
An optional prefix can be applied e.g. Batch Number
-
Set the width (padding) may be applied e.g. 3 will make the number look like 001
-
If the counter needs to increment by more than one then change the value default is 1
-
Set the initial vale (what the counter should start at) default is 1
-
Advanced settings refer to Advanced ID Counter Settings section below
-
An example of what the output looks like is presented. Now is the time to make changes if it is unsuitable
-
Once you are happy with the settings click the + Add button
Advanced ID Counter Settings
The Advanced settings option provides the flexibility to set the ID Counter to have a "timed reset" so that the numbering can be reset at a pre-determined time; such as the start of a New Year or month.
Selecting the Advanced Settings option when creating a new ID Counter will display additional fields which need to be completed.
-
Select Advanced settings
-
Click the pull down
-
Select Timed Reset
-
Select how often the counter will be reset e.g. Yearly
-
Select when it should be reset e.g. 1st of January
-
If required, set a specific numbersuggest leave at 0
-
Click the + Add button to complete the set-up
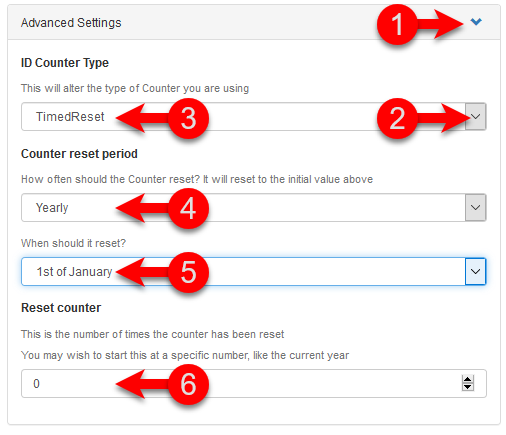
Figure 22 - setting a timed reset on a batch
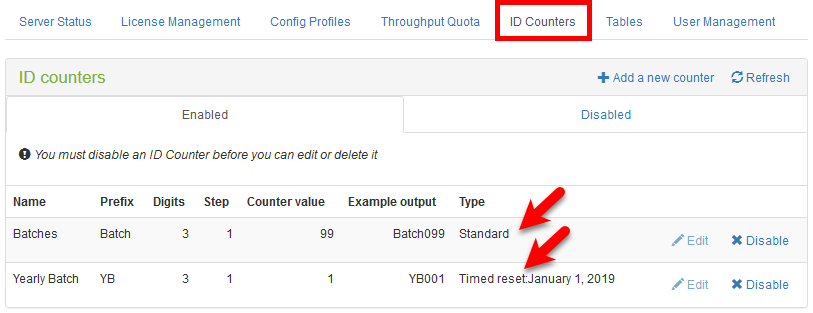
Figure 23 - The "Type" column indicates the type of batch
Disabling an ID Counter
To "hide" a counter from use it must be disabled. Follow the steps below:
-
Click the X Disable link on the ID counter to be disabled
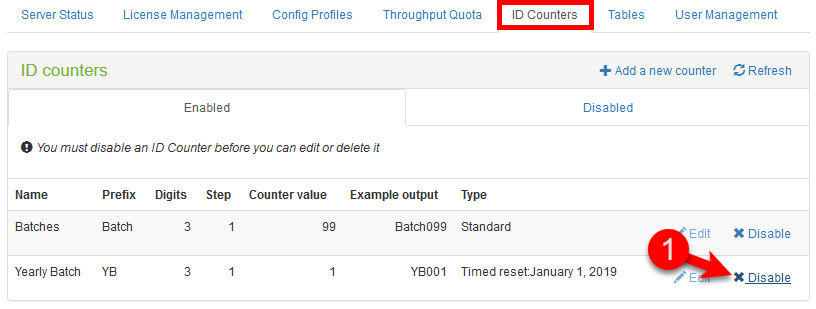
Figure 24 -Disabling an ID Counter
-
Confirm the disable by clicking on the red Disable button when it appears
-
Disabling an ID Counter will impact on any EzeScan jobs using it
Enabling a Disabled ID Counter
-
Go to the Disabled tab, select the ID Counter to be re-enabled and click on the

-
Confirm by clicking the Green Enable button
Editing an Existing ID Counter
-
Disable the existing counter to be edited (a counter must be disabled to be edited).
-
Click the Edit link and perform required changes.
-
When changes have been completed click the Save button at the bottom of the page.
-
Click the Enable link and then the subsequent Green Enable button.
-
Existing counters can only be edited within the confines of their original creation, for example a Timed Reset counter cannot be added to an existing Standard counter.
Deleting an ID Counter
-
An ID counter must be made inactive before it can be deleted (follow the steps above).
-
Go to the Disabled tab, select the ID Counter to be deleted and click on the

-
Confirm by clicking the red Delete button
-
The ID Counter will now be permanently removed from the database
-
Deleting an ID Counter will have an impact on any EzeScan jobs are been using it
Configuring the EzeScan client to use an ID counter
Please refer to the Configuring the EzeScan client to use an ID counter section on page for details on setting up a scan to batch folders using the Authority Server.
The appendices also contain a set-up guide for a Batch Job and KFI set-up…
-
Set up in an EzeScan Job
see page of appendices
-
Set up in an EzeScan KFI
see page of appendices