
How To Implement Dynamic KFI's
A feature called Dynamic KFI lets users switch to a different KFI during processing, and this FAQ shows you how to set it up.
As with previous versions of EzeScan DESKTOP, create each working Job+KFI+Upload combination using the same steps that are documented in our KFI and UPLOAD user guide addenda. Then, for each KFI that will be used as a Dynamic KFI, complete the following steps.
-
In the Job Admin form on the Output tab, set the Upload type for the job to None/Blank.
-
On the Output tab set the KFI type to KFI
-
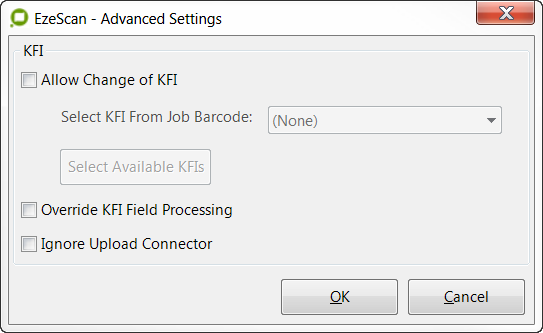
Click Advanced… button on right side of KFI type to display the following menu
Advanced KFI dialog online help
-
Tick Allow Change of KFI to enable and click the Select Available KFIs button
-
In the list of all KFIs displayed tick next to each KFI to be selected dynamically during Profiling
-
Go to the KFI Admin form's Output tab, where you can link this KFI to the required UPLOAD type (as below). Apply your changes.
-
(Optional) You may also have some index fields that you want to share between each KFI. In this case you can assign a field to load/save its field value from/to a Global variable (as below). There are 10
numbered locations that you can save field values into. Once you have chosen a Global variable for the field, click OK to save your changes.
Once you have completed the steps 1-5 above for each KFI involved in the job processing, test by running the job and loading a document into the viewer.
-
Press F4 to bring up the KFI Indexing Panel. The KFI type that is displayed initially is the one that is assigned to the Job on the Job Admin form's Output tab, in the KFI Type list. A new KFI button and
label tell you which KFI is currently in use. -
To change the KFI associated with this document, click the KFI name displayed in the Profile using drop down list above Field 1. Select any KFI from the list to profile with its specified field settings.
-
The KFI indexing panel gets reloaded with the new KFI's first index and the KFI commences processing the field:
-
When you click the Submit button, the code checks to see which Upload type has been linked to the currently selected KFI. It then runs that Upload type and loads the document and metadata in the backend system. The next document is then displayed to the operator, who can either use the existing KFI or choose another one.
Steps 7-10 will repeat until no more documents are available to display.