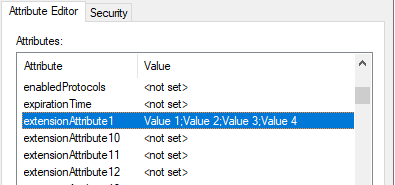
Some organisations make use of the extensionAttrbutes in Active Directory.
In order to make use of these attributes in EzeScan WebApps there is some configuration that must be completed.
Sync the attributes to Azure AD
-
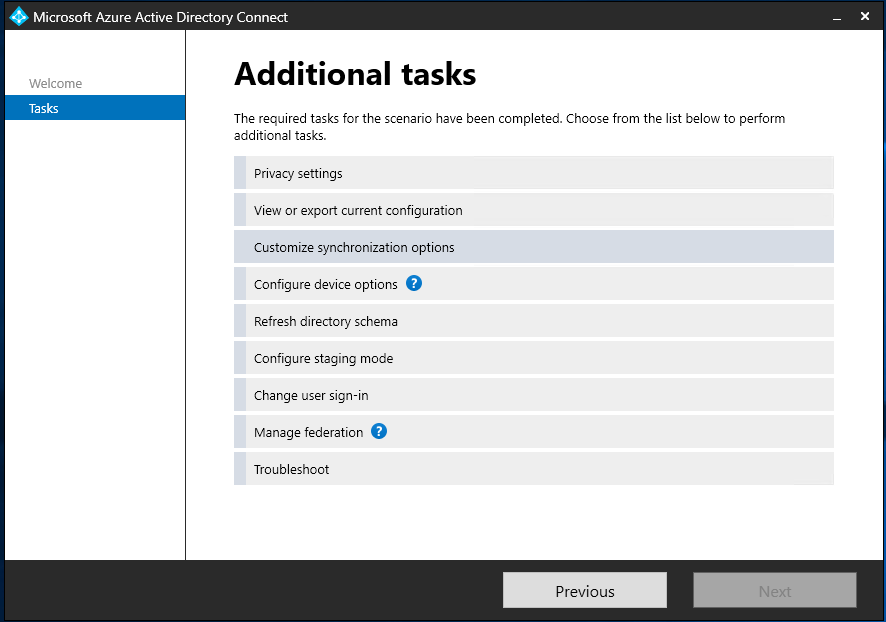
In Microsoft Azure Active Directory Connect select the “Customize synchronization options” option.
-
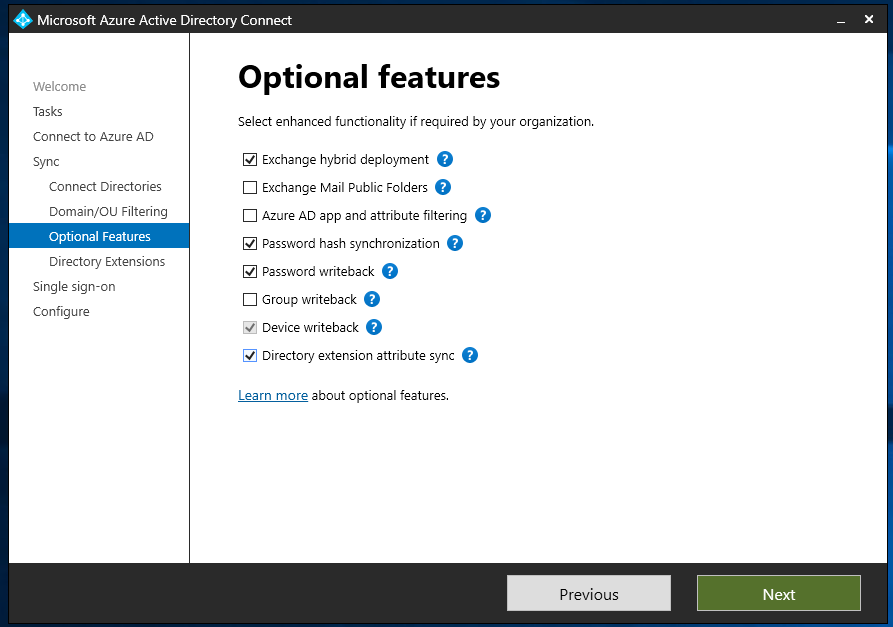
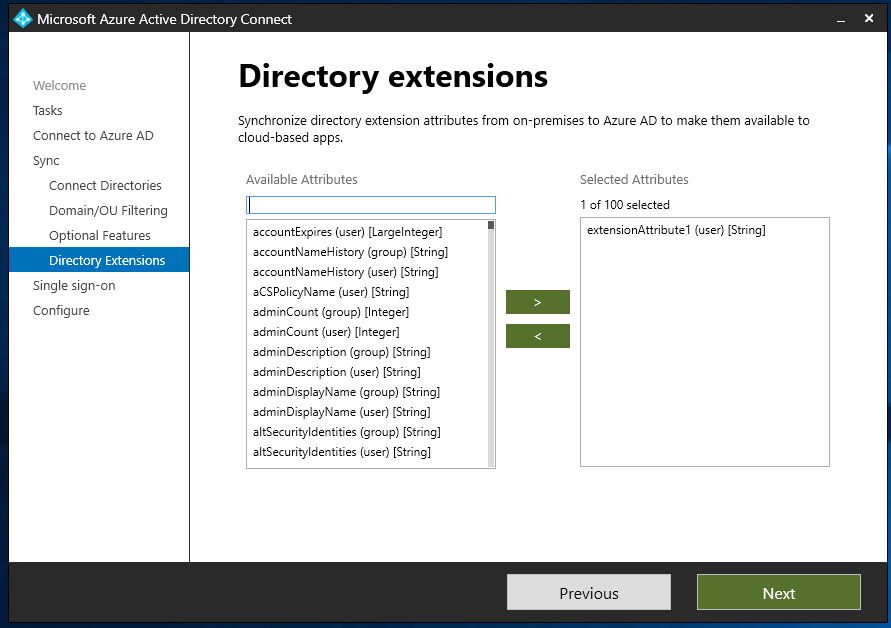
In the Optional Features section ensure you have enabled “Directory extension attribute sync”.
-
On the Directory Extensions screen select the attributes you wish to sync.
-
Save this setting and then on the next sync interval the attributes should be synced to Azure AD.
Configure a Custom Claims Mapping policy
-
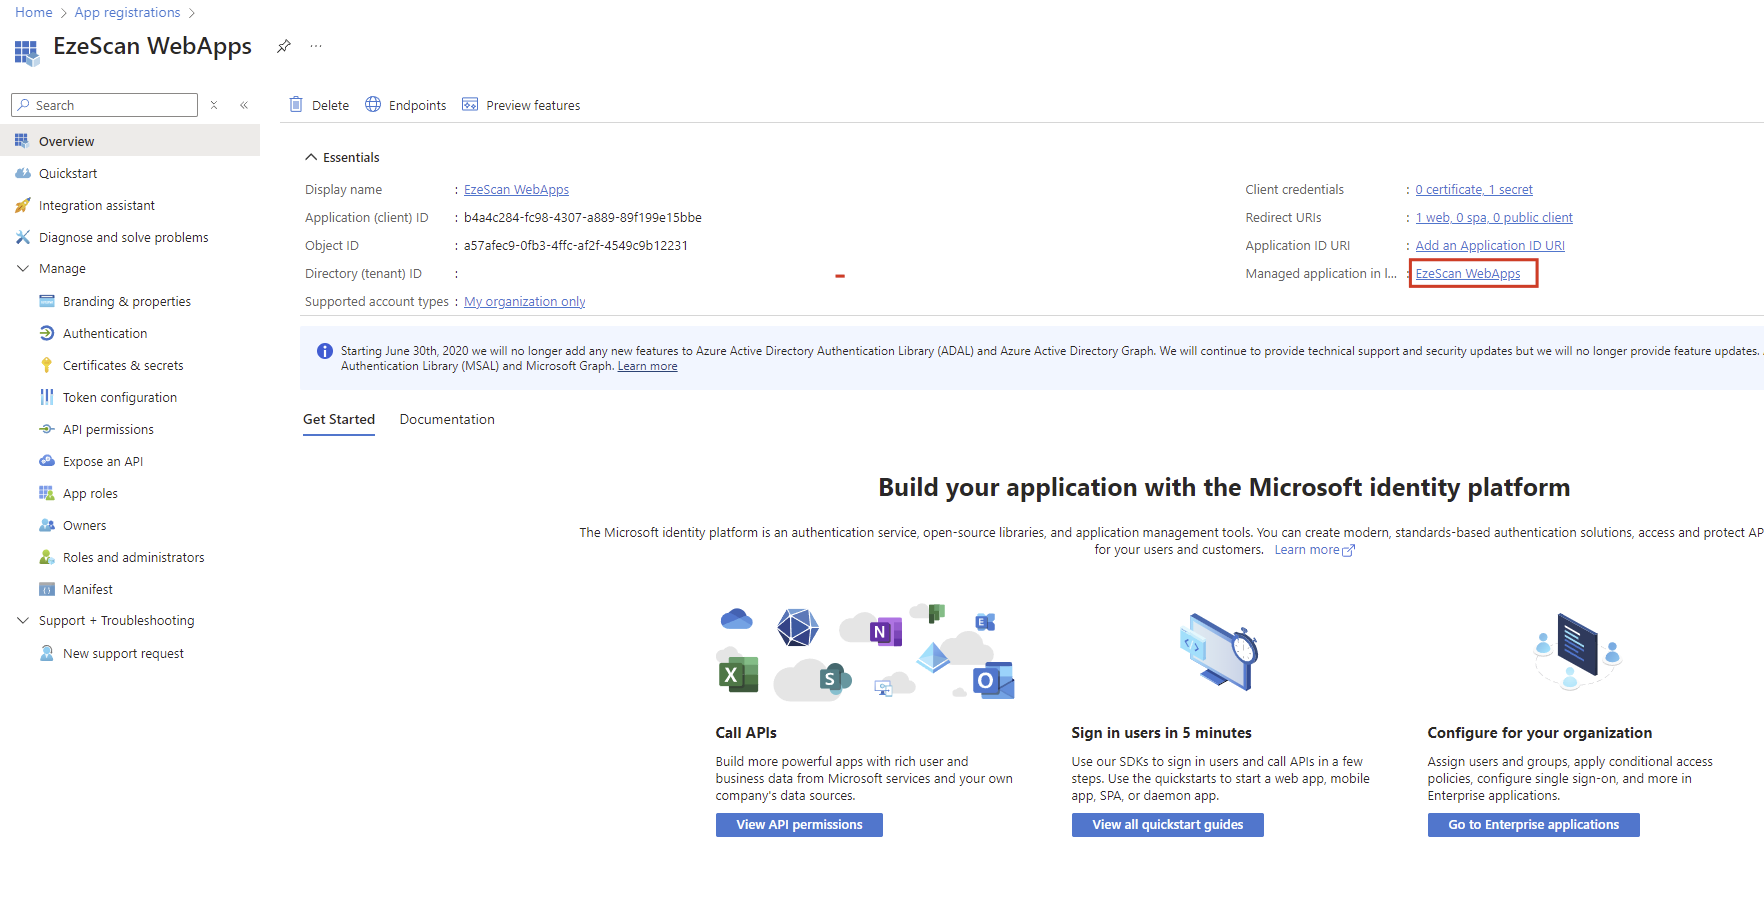
Open the existing app registration and then click the link next to the “Managed application in local directory” option.
-
This will take you to the Enterprise Application for the App Registration.
Select the Manage > Single sign-on option on the left menu.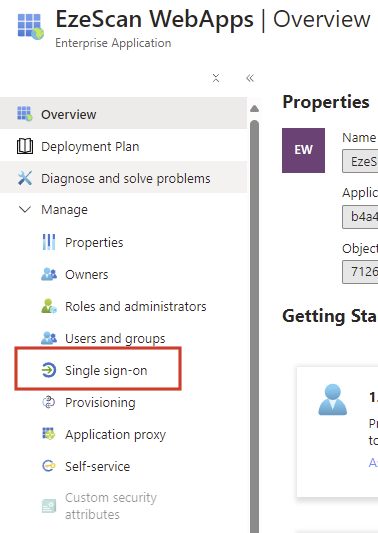
-
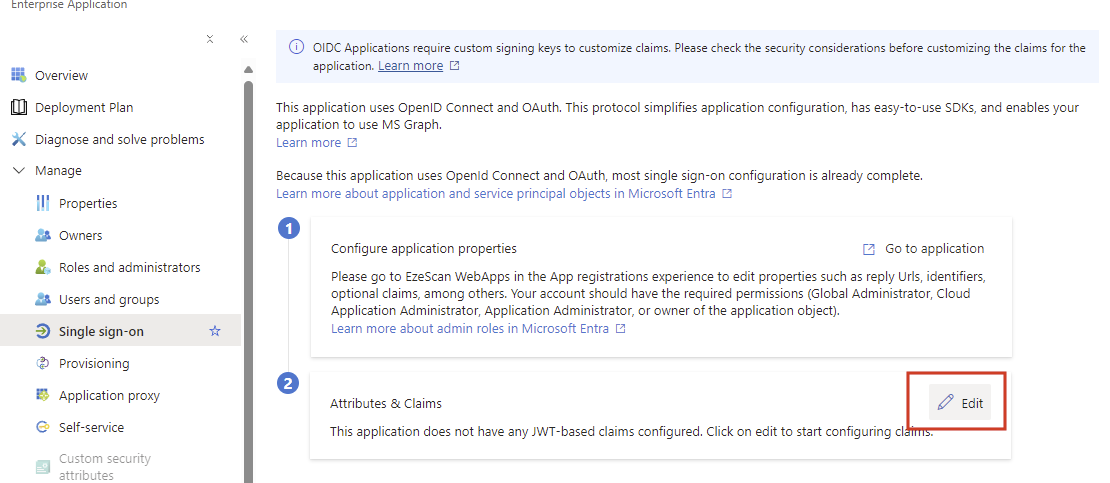
Click on the Edit button in the Attribute & Claims area.
-
Click the Add new claim button

-
Enter a name for the claim when it is sent to the application. eg extensionAttribute1
Select the appropriate source attribute from the dropdown list. eg user.extensionattribute1
Then click the Save button.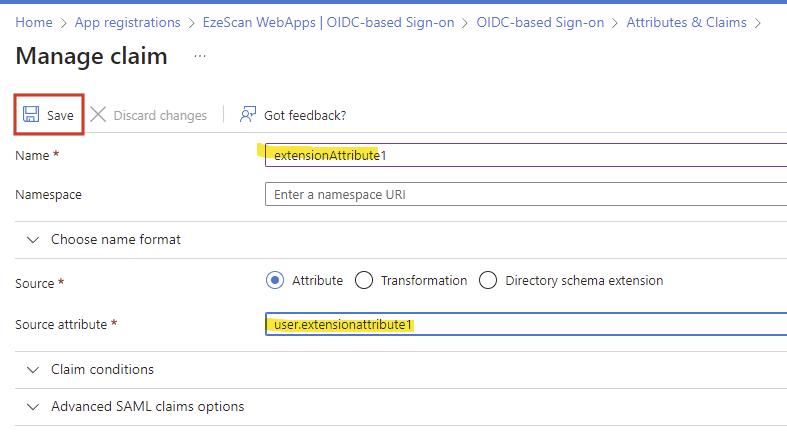
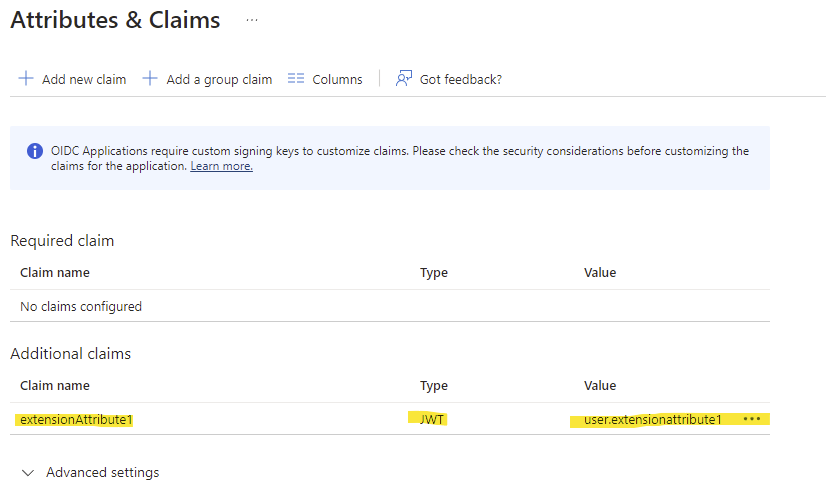
Repeat this step for any additional claims you wish to map. eg “title”, “department” etc
-
Confirm all of your required mappings are now visible.
-
Navigate back to your App Registration and select the Manage > Manifest option on the left menu.
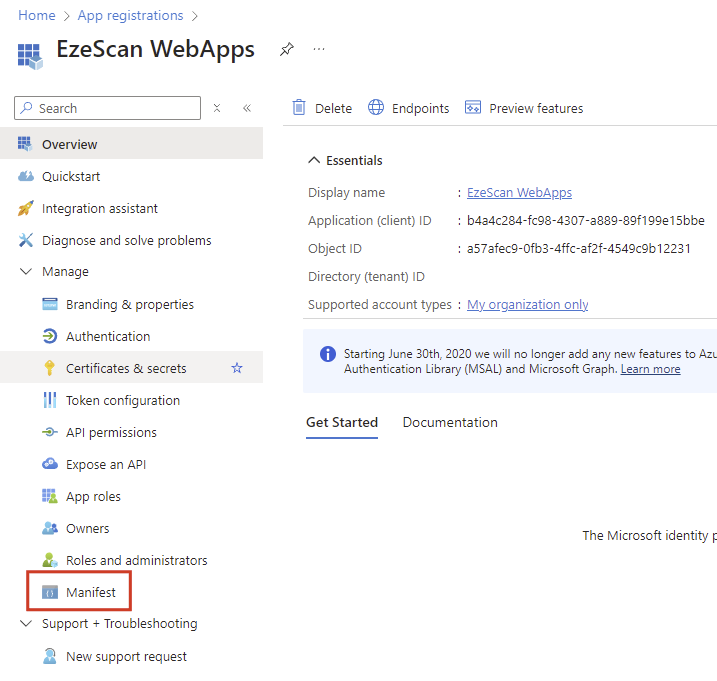
-
Find the line that says
"acceptMappedClaims": null,and change to"acceptMappedClaims": true,
Click the Save button.
Test the Claim Mapping Policy
-
Log into EzeScan WebApps using Azure AD
In the top right corner click the users display name and select Settings.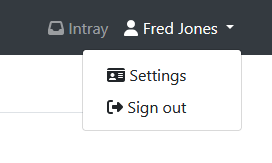
-
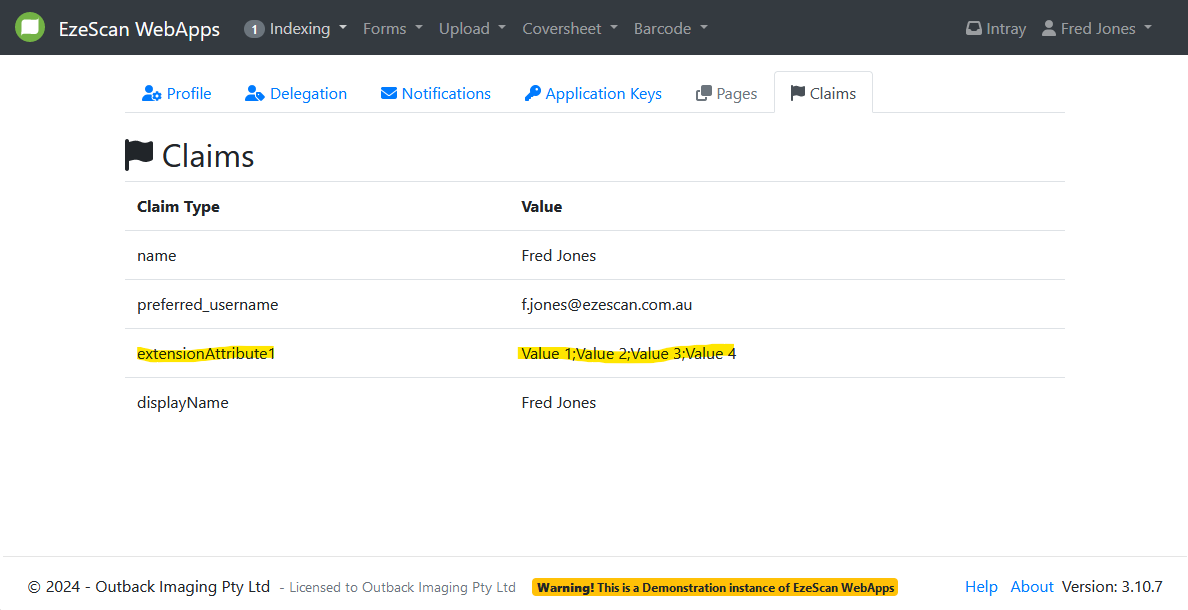
Click on the Claims tab and then look for the newly configured claim