
Setting up Authentication
-
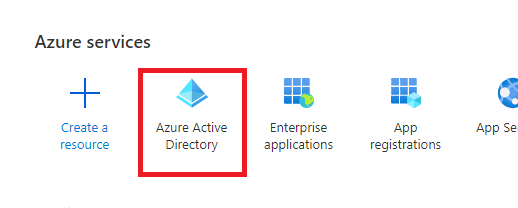
Navigate to the Azure Portal and select Azure Active Directory.
-
-
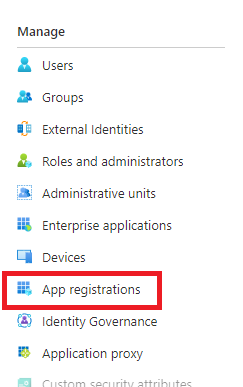
On the left menu select App Registrations.
-
-
Enter the following details and then click the Register button:
Option
Value
Name
EzeScan WebApps
Supported account types
Accounts in this organizational directory only ([Your tenant name here] only - Single tenant)
Redirect URI
Web -
https://ewa.domain.com.au/signin-oidc
(Sub in the URL of your EWA install).

-
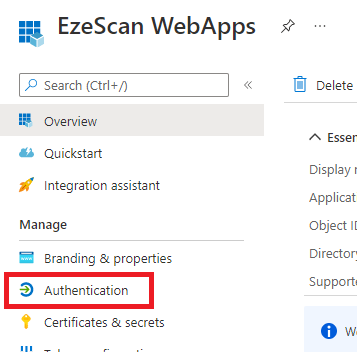
On the left menu click on the Authentication option.
-
-
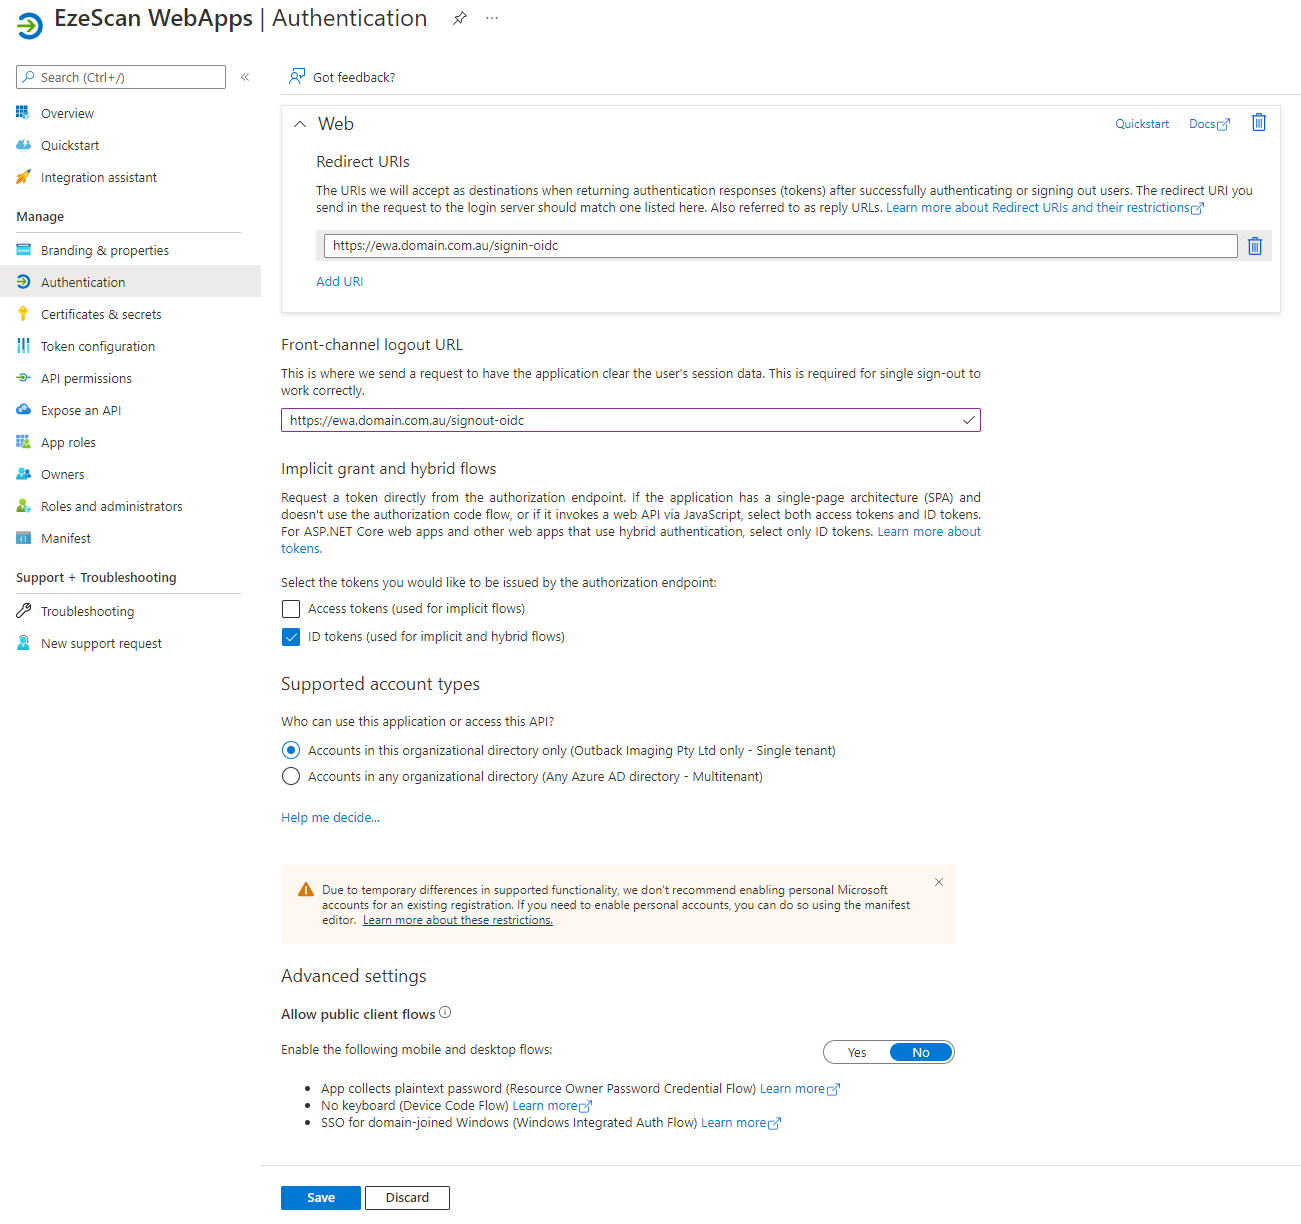
Set the following options and then click Save:
Option
Value
Logout Url
https://ewa.domain.com/signout-oidc
(Sub in the URL of your EWA install).
Implicit Grant
ID tokens
Supported Account Types > Who can use this application or access this API?
Accounts in this organizational directory only ([Your tenant name here] only - Single tenant)
Advanced Settings > Allow public client flows
No
-
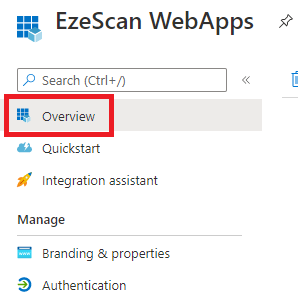
On the left menu select the Overview option.
-
-
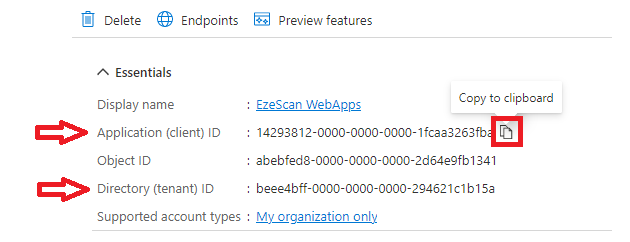
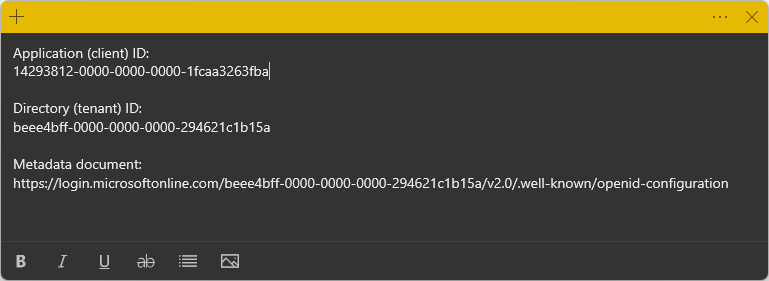
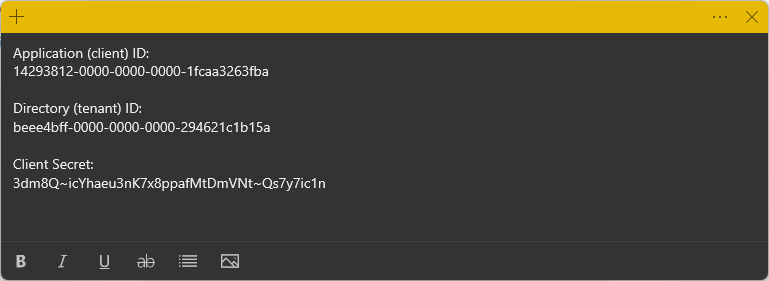
Take note of the Application (client) ID and the Directory (tenant) ID by mousing over then clicking the copy to clipboard button and saving them somewhere safe for later use.
-
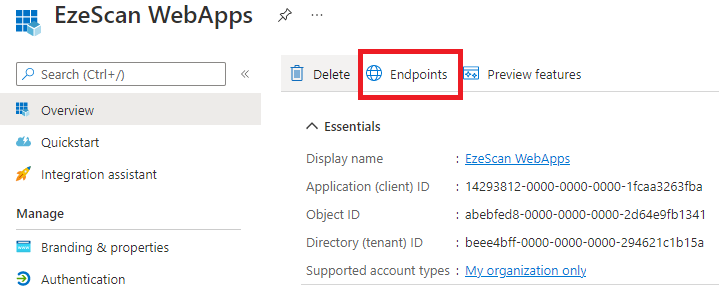
Click on the Endpoints option in the top menu.
-
-
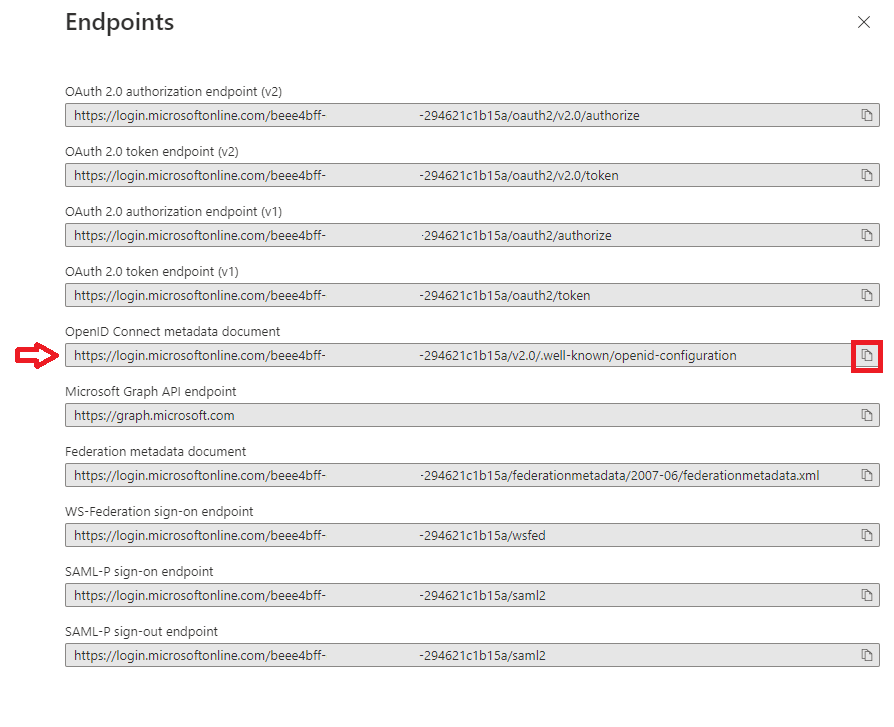
Take note of the OpenID Connect metadata document URL by clicking the copy to clipboard button and saving it somewhere safe for later use.
-
You should now have the 3 respective values saved out ready to put into EzeScan WebApps appsettings.json file.
-
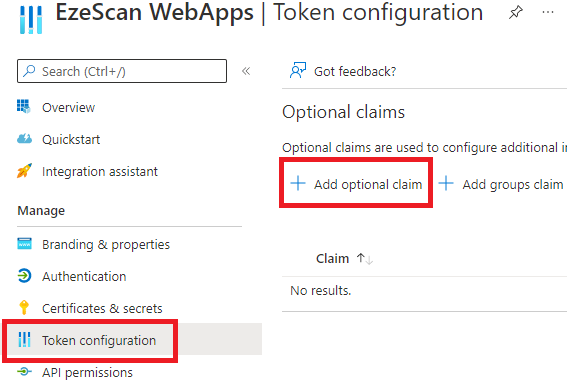
Navigate to Token configuration and click Add optional claim
-
-
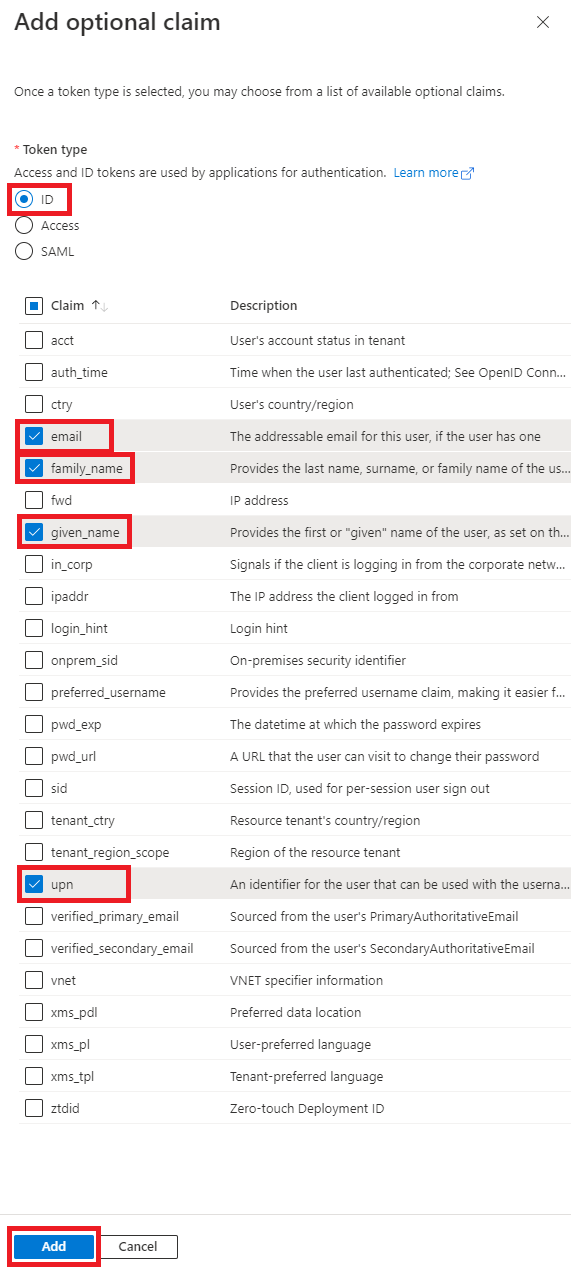
Select the Token Type: ID, then tick the options to enable email, upn, family_name and given_name. Click the Add button.
-
-
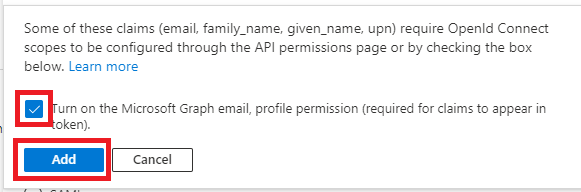
If asked then tick the "Turn on the Microsoft Graph email, profile permissions" option and click Add.
-
Edit your appsettings.json files Authentication section to contain the following:
appsettings.json
JavaScript"Authentication": { "EnableApiKey": true, "Providers": { "OpenIdConnect": { "Authority": "https://login.microsoftonline.com/[Directory (tenant) ID]/v2.0", "ClientId": "[Application (client) ID]", "MetadataAddress": "[OpenID Connect metadata document]", "TokenValidationParameters": { "NameClaimType": "name" } } } }Confirm your Authentcation section now looks like the following and save the file.
appsettings.json
JavaScript"Authentication": { "EnableApiKey": true, "Providers": { "OpenIdConnect": { "Authority": "https://login.microsoftonline.com/81270000-0000-0000-0000-0000f000b68b/v2.0", "ClientId": "3523c7b7-0000-0000-0000-9463c2bffbf2", "MetadataAddress": "https://login.microsoftonline.com/81270000-0000-0000-0000-0000f000b68b/v2.0/.well-known/openid-configuration", "TokenValidationParameters": { "NameClaimType": "name" } } } } -
Restart the IIS App Pool that runs EzeScan WebApps.
-
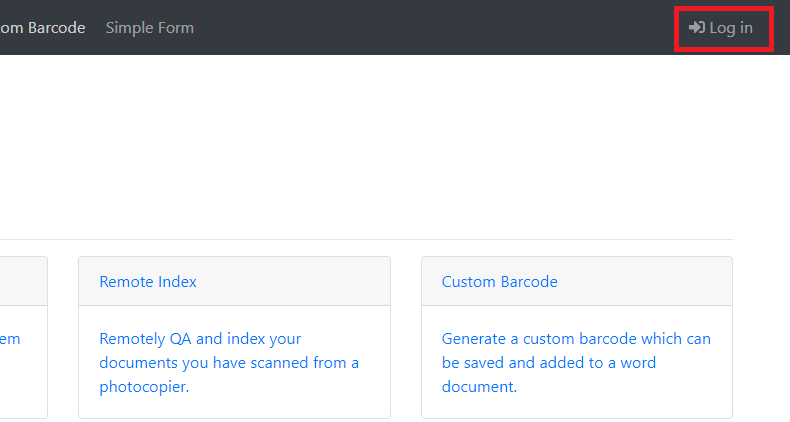
Navigate to your EzeScan WebApps site and click the Login button.
-
-
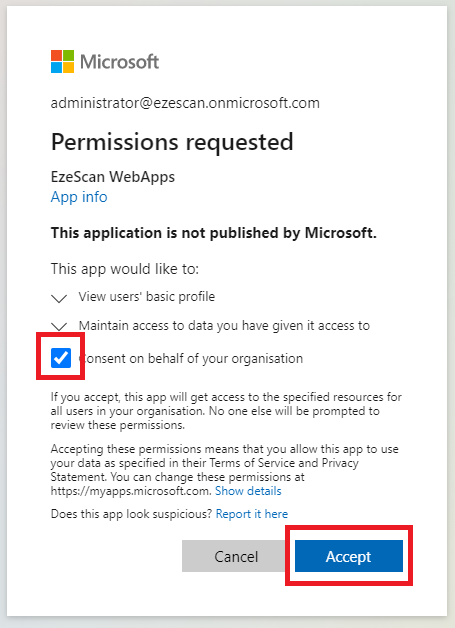
Login as an Azure AD Administrator, tick the Consent box and then click Accept.
-
Note: When users click on the Login button in the top right of the application they will be redirected to the OpenId provider for login.
In order to login as the local built in admin account you must navigate to the forms authentication page via: https://ewa.domain.com/Account/LoginForms
Setting up Graph API access
-
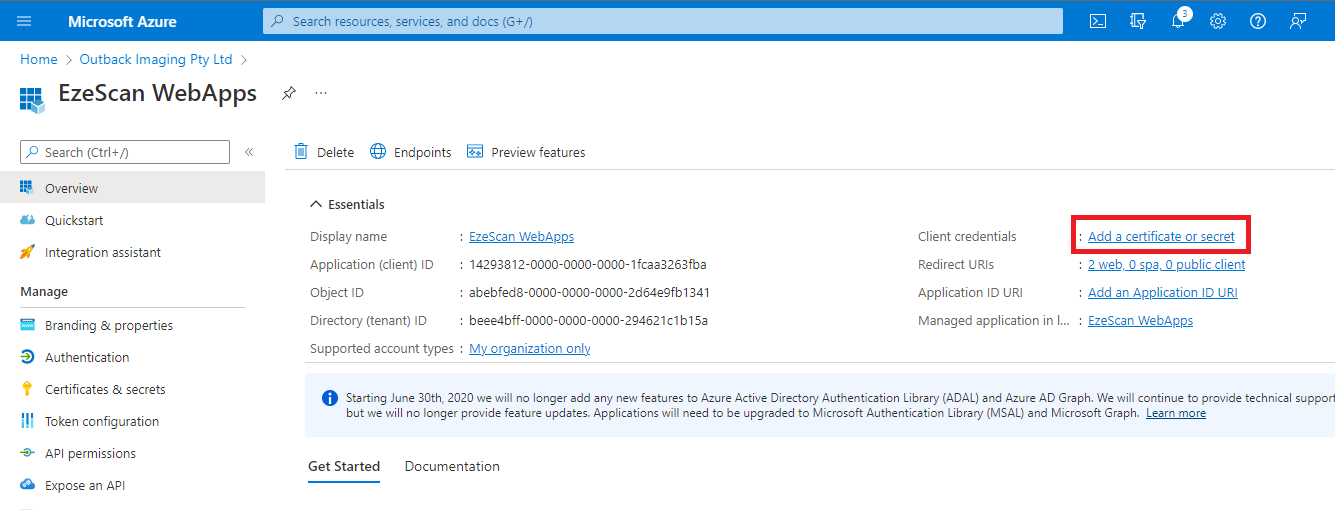
In the Azure Portal navigate to App Registrations and select the Application that EWA is using. (You can check the application Id to confirm)
-
Take note of the Application (client) ID and the Directory (tenant) ID by mousing over then clicking the copy to clipboard button and saving them somewhere safe for later use.
-
Click Add a certificate or secret.
-
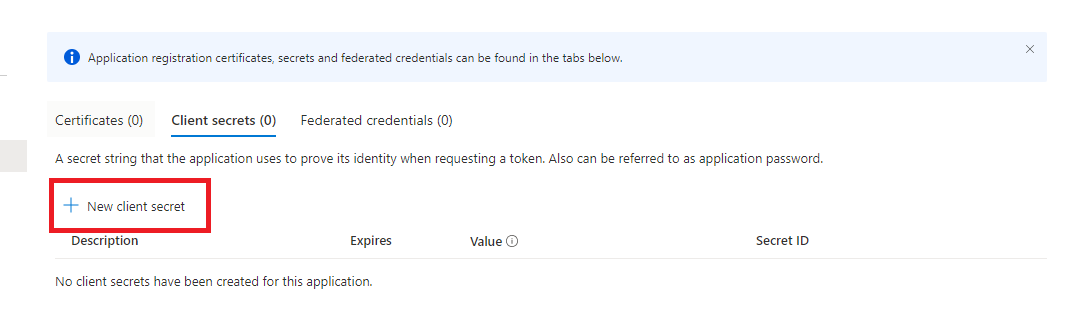
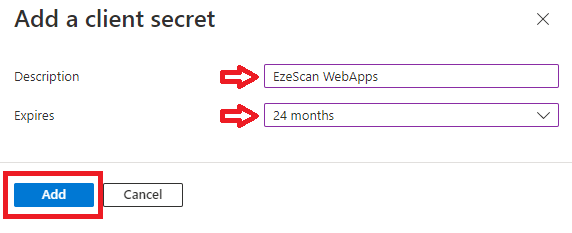
Click New client secret.
-
Set the following values and click Add.
Option
Value
Description
EzeScan WebApps
Expires
24 months
-
Take note of the Value of the client secret by clicking the copy to clipboard button and saving it somewhere safe for later use.
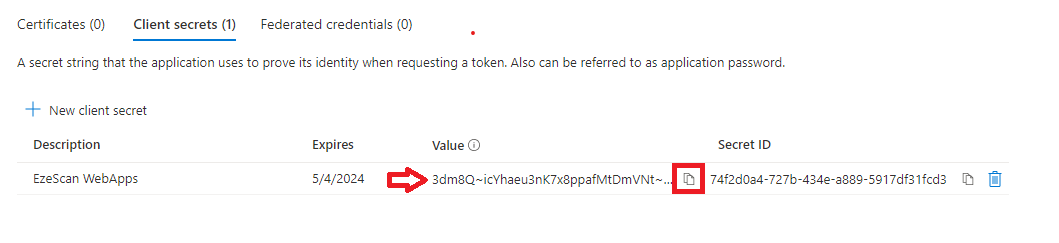
Client secret values cannot be viewed, except for immediately after creation. Be sure to save the secret when created before leaving the page.
-
You should now have the 3 respective values saved out ready to use later on.
-
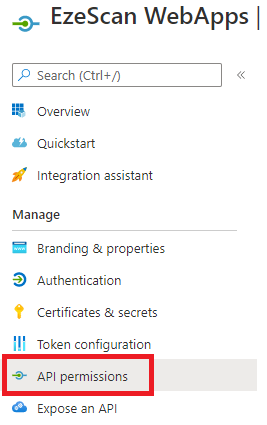
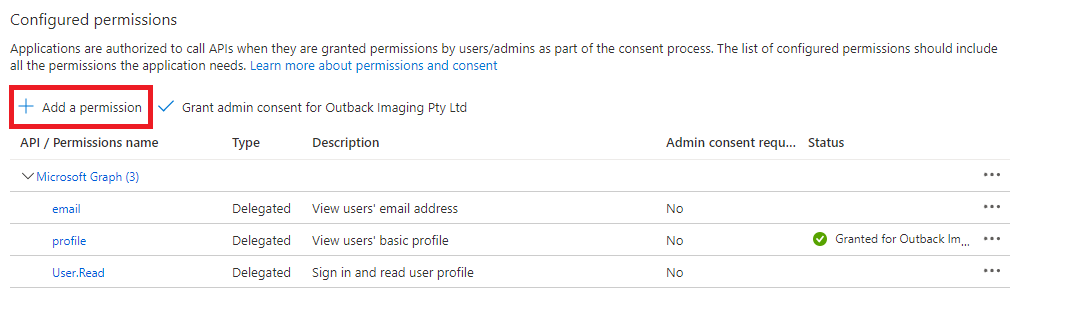
Click API permissions on the left menu
. 
-
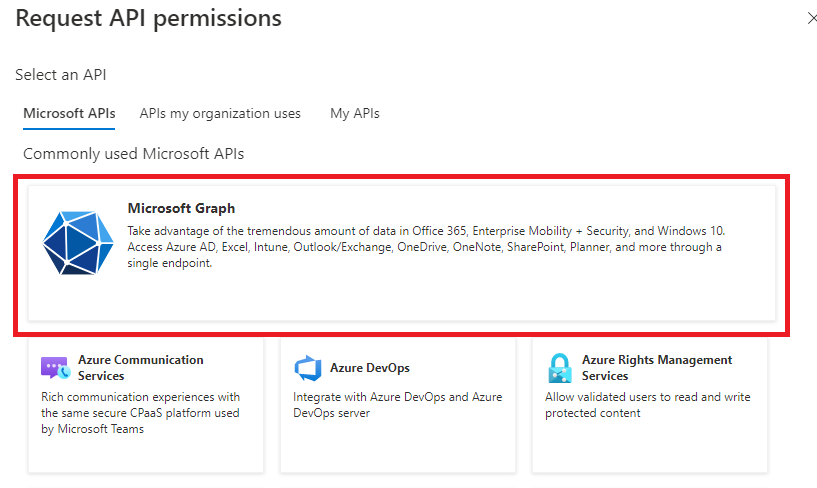
Click the Add a permission link.
-
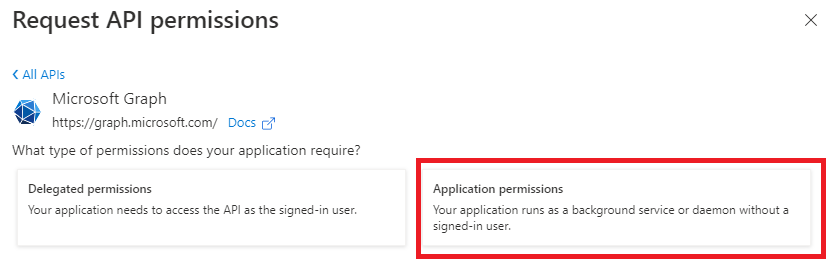
Select the Microsoft Graph option.
11. Select Application permissions.
-
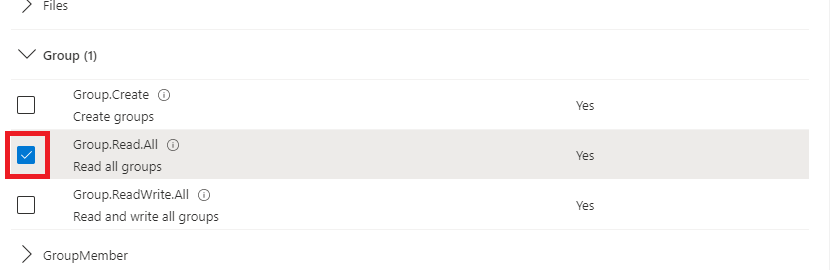
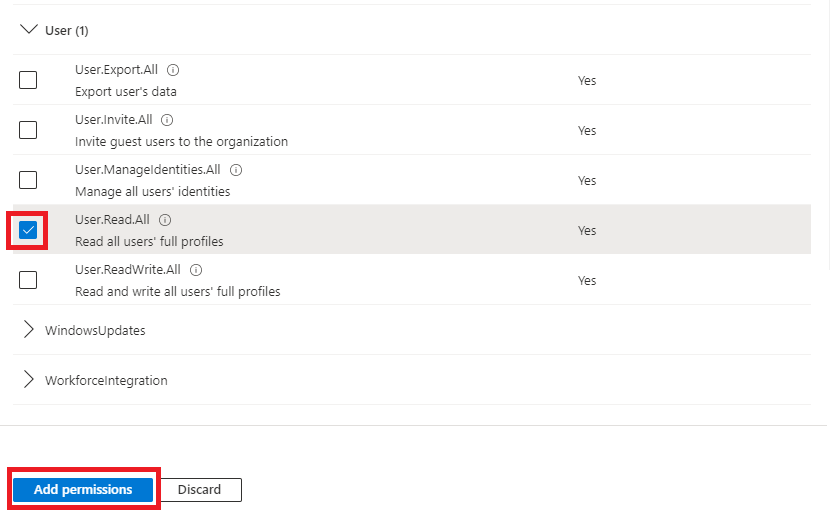
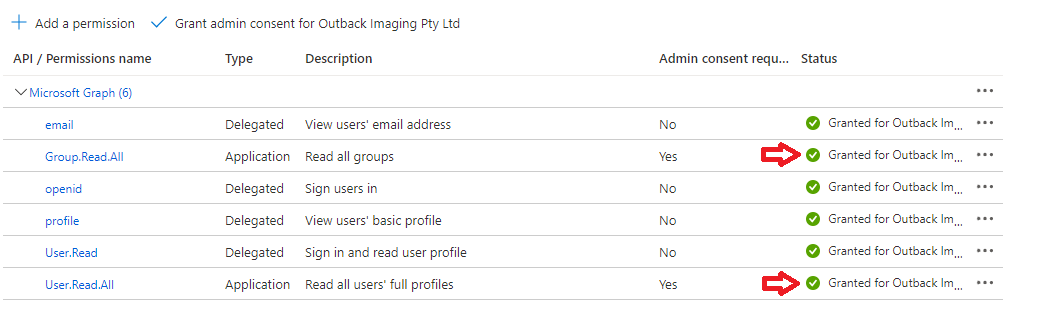
Find and then tick the Group.Read.All permission.
-
Find and then tick the User.Read.All permission and then click the Add Permission button.
-
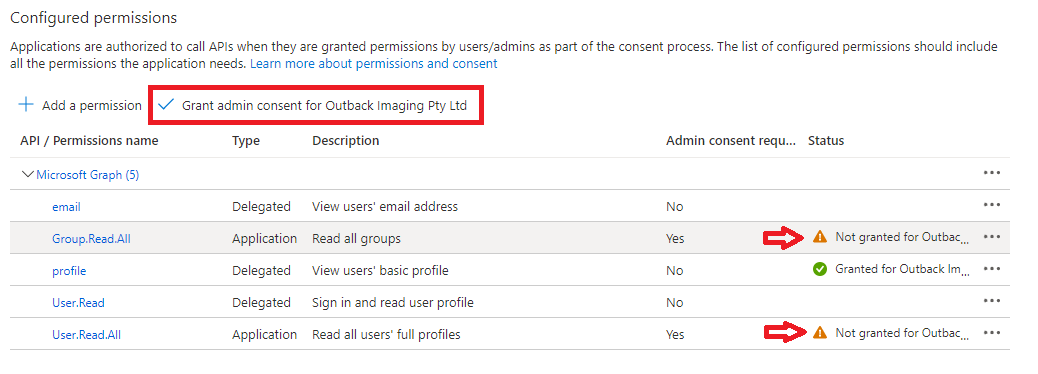
Notice that the newly added permissions have not been granted consent yet. Click the Grant admin consent for COMPANY NAME option.
-
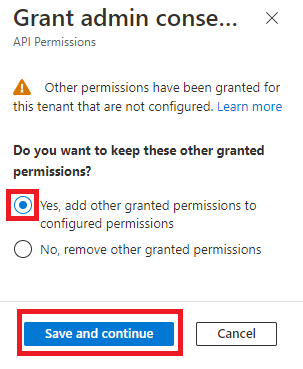
Select the Yes, add other granted permissions to the configured permissions option and click Save and Continue.
-
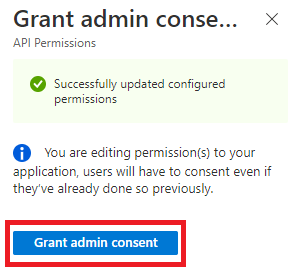
Click the Grant admin consent button.
-
Click Yes on the confirmation.

-
Confirm that the consent has been added for the Group.Read.All and User.Read.All permissions.
-
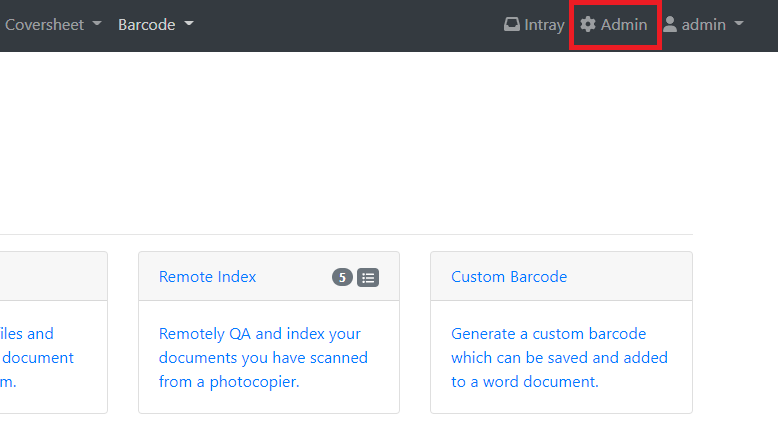
Navigate back to EzeScan WebApps and Login as a user with admin access and navigate to the Admin panel.
-
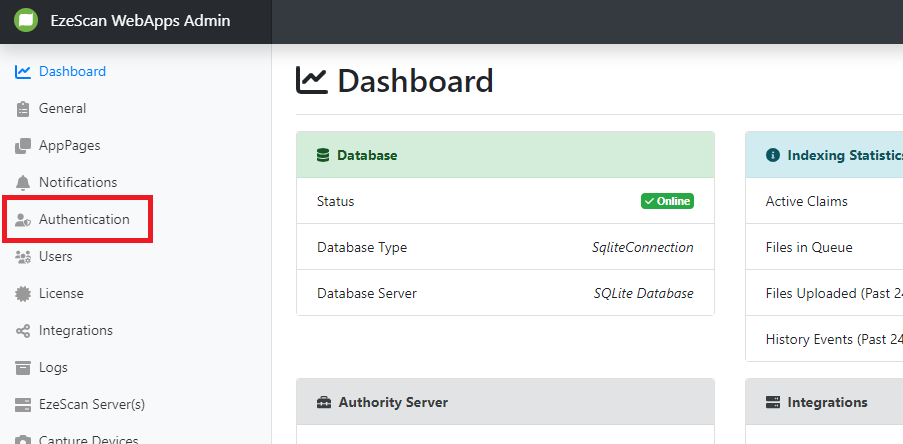
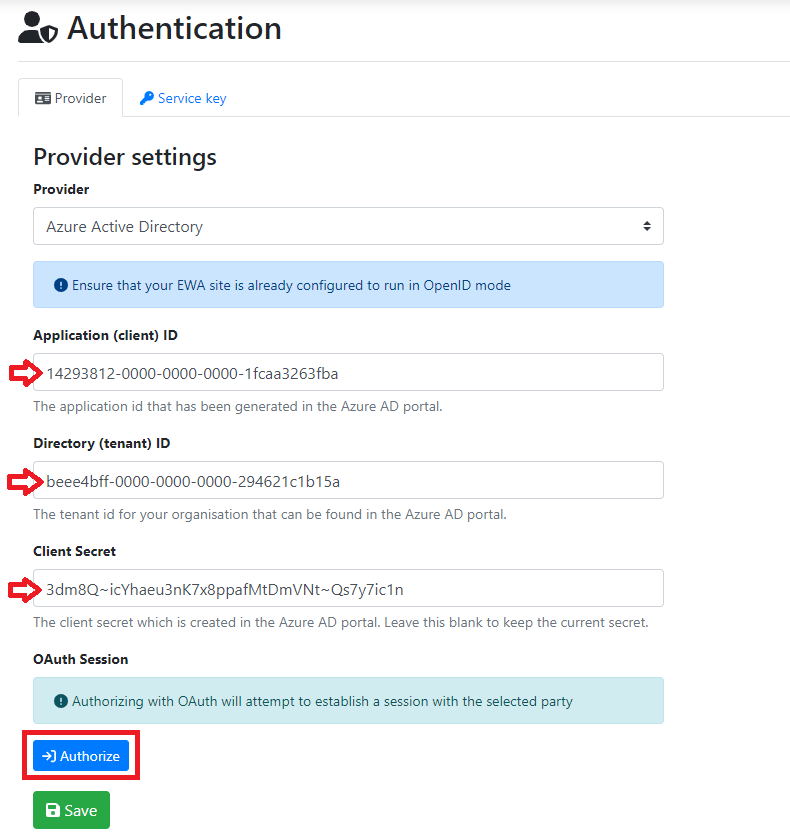
Select the Authentication option on the left menu.
-
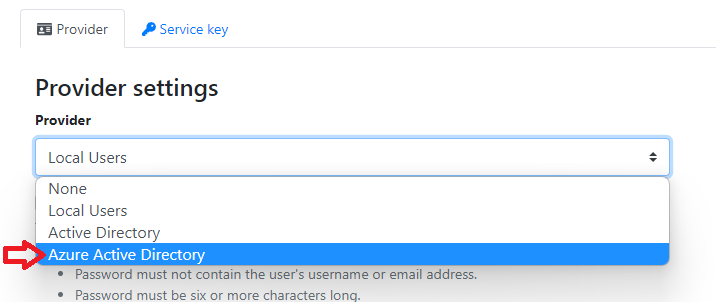
Change the provider to Azure Active Directory
-
Populate the following values from your notes and click the Authorize button.
-
Option
Value
Application (client) ID
The application id that has been generated in the Azure AD portal.
Directory (tenant) ID
The tenant id for your organisation that can be found in the Azure AD portal.
Client Secret
The client secret which is created in the Azure AD portal. Leave this blank to keep the current secret.
-
You should then see the token information with an Authenticated status. Click the Save button to save the settings.

-
The configuration is complete, so now its time to check everything is working by trying to sync the groups from Azure AD using the Graph API.
-
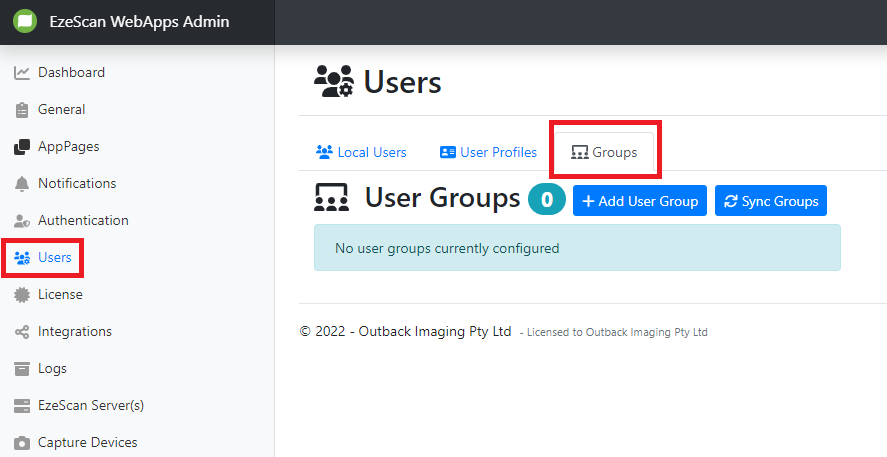
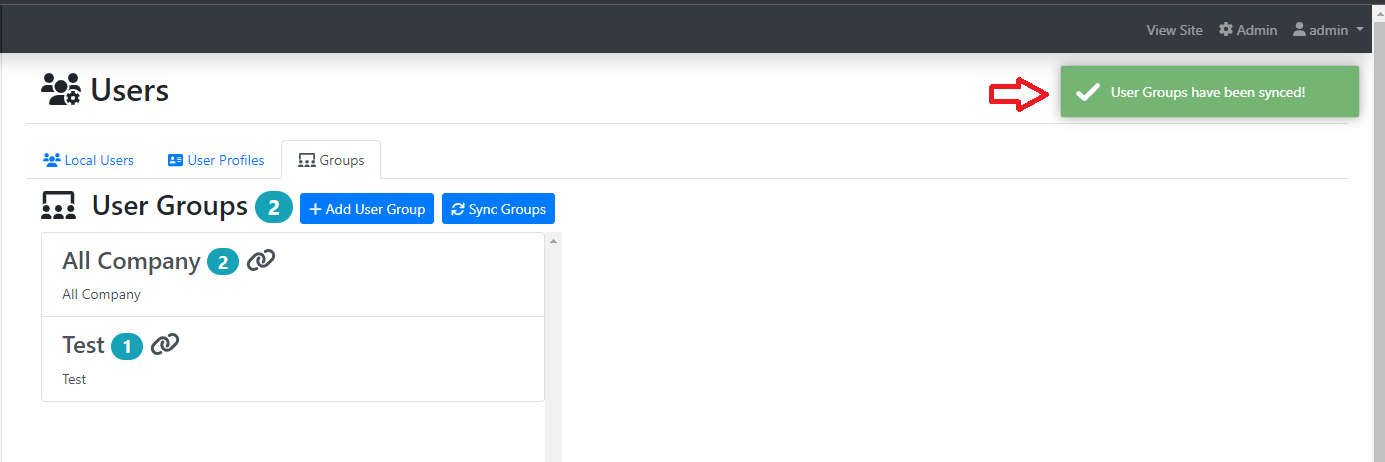
Navigate to the Users link in the left menu of the admin panel and then select the Groups tab.
-
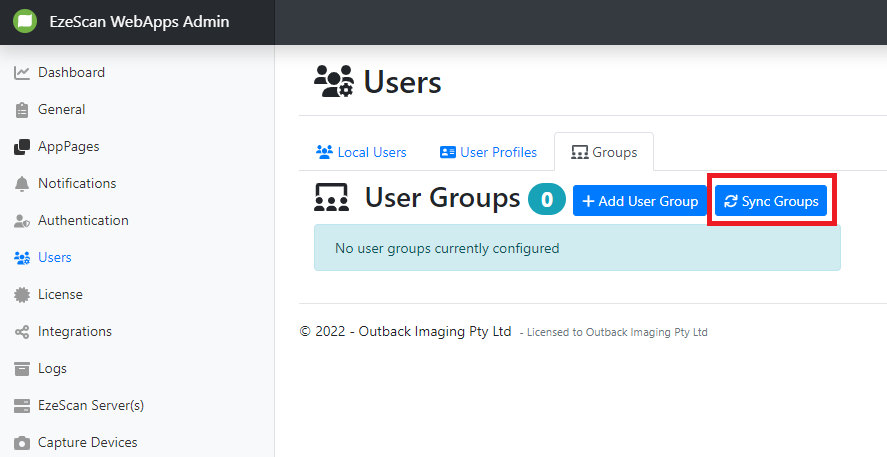
Click the Sync Groups button.
-
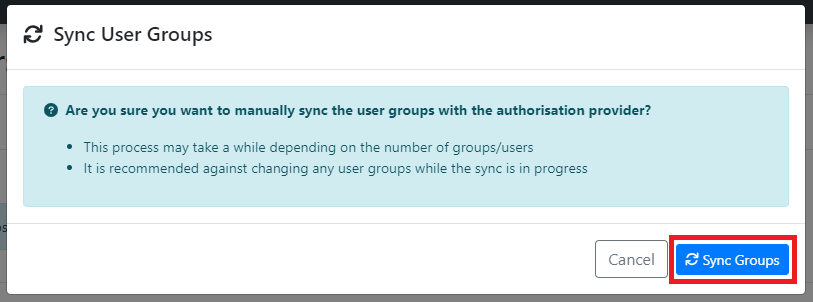
Click the Sync Groups button on the modal.
-
If the sync was successful you will get a green toast notification in the top right of the screen.
Groups will sync automatically every 3 hours. You can manually trigger a sync using the Sync Groups button.