System Requirements
Local instance of MYOB AccountRight 2013.3+ or higher (up to 2015.3) with API services installed and configured. Refer to section 4.5 MYOB API Configuration for details on how to configure the API service to be accessed from other devices on the network.
Or,
MYOB AccountRight Live account with developer key and secret obtained from registering EzeScan as an application under the Developer Dashboard of the MYOB website.
MYOB AccountRight 19 is not supported by this connector. However similar functionality can be implemented in KFI and Upload using the MYOB ODBC driver.
 Configuring Connection Settings
To configure a KFI Field to use the MYOB AccountRight connector, the connector should be selected in the KFI Form -> EDRMS tab, or alternatively in the KFI Field Form -> Alternative EDRMS tab, and the connection settings filled in.
To configure an Upload to use the MYOB AccountRight connector, the connector should be selected in the Upload To option and the connection settings filled in.
The MYOB AccountRight connection settings are as follows –
|
Field |
Description |
|
Service URL |
Enter the service URL of the MYOB AccountRight server to connect to. For a local instance this URL should be formatted as follows –http://<hostname>:<port>/accountright. For MYOB AccountRight Live enter the following URL - https://api.myob.com/accountright |
|
Username |
Enter the username that will be used by to login to the Company File |
|
Password |
Enter the password corresponding to the username entered above |
|
Company File |
Click the […] button to display the available MYOB AccountRight Company Files. Select the Company File to be used with EzeScan and then click OK. If there are multiple Company Files with the same name check the path to select the correct one. The name of the company will display in the Company File field. |
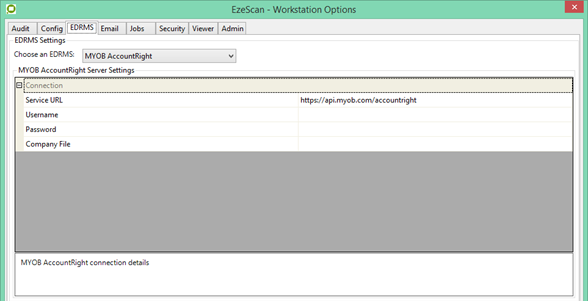
If only connecting to the one Company File, it is recommended that the MYOB connection settings be configured globally. To configure the connection settings globally:
-
Click the Admin menu, choose Workstation Options.
-
Click the EDRMS tab and choose the MYOB AccountRight option from the drop down list that appears.
When the connection settings are configured globally a Use Global Connection Settings option will appear on the connection settings in KFI and Upload. Check this option to use the global settings instead of the existing settings.
KFI Field Settings
The KFI Field Settings allow the operator to browse/search the MYOB AccountRight Company File for an Account, Category, Supplier, etc. during KFI indexing.
The following functionality requires that the EzeScan workstation be licensed for the EDRMS as well as KFI and UPLOAD modules.
Enabling Browse Options
The MYOB AccountRight settings must be configured before a KFI field can use the MYOB AccountRight browse functionality.
-
Press F7 to display the KFI form.
-
Click the EDRMS
-
Select the MYOB AccountRight from the list of available EDRMS’.
-
Enter the connection settings as per the instructions in section 2 Configuring the Connection Settings.
-
Click the Fields
-
To enable a field to access MYOB AccountRight you need to:
-
Click the edit link under Properties for the field.
-
Click the MYOB AccountRight
-
Select the Enable MYOB AccountRight Browse Button checkbox
-
The browse parameters will become active – 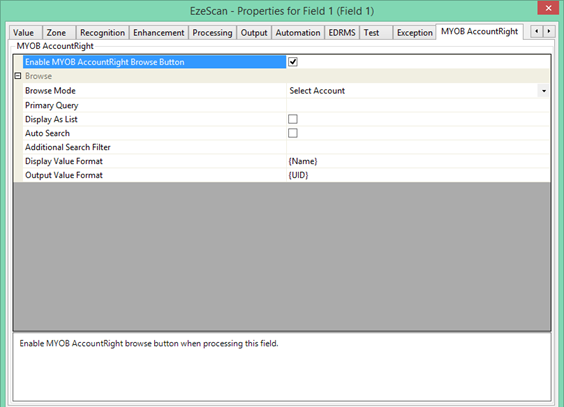
Configuring Browse parameters
Choose from one of the following options:
|
Option |
Description |
|
Browse Mode |
This option determines the lookup type to perform when the Browse button (F3) is pressed during indexing. The options are: Select Account; Select Category; Select Inventory Item; Select Job; Select Supplier; and Select Tax Code. |
|
Primary Query |
Specify an OData filter query (refer to section 4.7 for more details) to be used to find an object of the specified lookup type, the first match found will be returned directly to the field. If no match is found the search will fall back to either displaying a list of available items or a search form for manual selection (functionality may vary based on below settings). Refer to section 4.6 for more details regarding lookup type properties. For example, the below query can be used to find a Supplier by ABN where the field placeholder <<F1>> is the ABN formatted as 99 999 999 999: BuyingDetails/ABN eq ‘<<F1>>’ |
|
Display As List |
Check this option to display the lookup results as a list of values on the field (or cell in Line Items) for the operator to select from, otherwise leave unchecked to display a search form. If the list returned has only 1 item this item will be automatically selected by EzeScan. |
|
Auto Search |
Check this to automatically start a search when the search form opens, otherwise leave unchecked for the operator to manually initiate a search. This option is recommended when the operator is to choose from a list of all available items, such as Accounts, and no search intervention is required. |
|
Additional Search Filter |
Specify an OData filter query (refer to section 4.7 for more details) to use when: - Performing a search on the search form whether it be automatically or manually started - Searching for items to be displayed as a list on the KFI field or Line Items cell If the operator manually initiates a search on the search form, this filter will be suffixed to their search query. Refer to section 4.6 for more details regarding lookup type properties. Example: The following filter could be used to limit the Account results to those with a DisplayID starting with ‘2-‘. startswith(DisplayID,’2-‘) |
|
Display Value Format |
Specify the format to use for the display value to be returned from the selected item using static text and parenthesised property names. Refer to section 4.6 for more details regarding lookup type properties. For example, the below format would return the text starting with ‘AccNo:’ followed by the selected Account’s number value. AccNo:{Number} |
|
Hidden Value Format |
Specify the format to use for the hidden value to be returned from the selected item using static text and parenthesised property names. Refer to section 4.6 for more details regarding lookup type properties. This option is recommended when wanting to display a user friendly value such as DisplayID to the operator, but also return the UID (32 character unique identifier) of the selected item without the operator having to see it. Please note: Using this option in KFI will result in a partner field being created by EzeScan for the sole purpose of holding the associated hidden value during indexing. |
Select Account Browse Mode
Use this browse mode to lookup or browse for an Account to assign to the invoice line at upload. The default functionality is for the Search for Account form (shown below) to be displayed when the Browse button (F3) is pressed. However, when the Primary Query option is specified this will be executed first and if successful the matched item(s) will be returned and the search form is bypassed. If the Display As List option is enabled all results will be returned as a list to the field or cell. 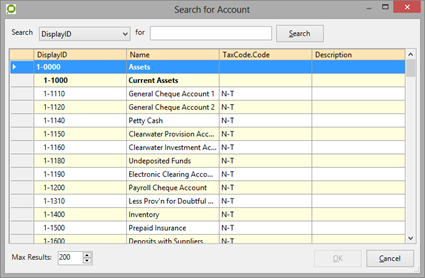
The bold fields cannot be selected as they are MYOB header accounts. They are included to keep the display consistent with MYOB and to make it easier for an operator to find the account required
Select Category Browse Mode
Use this browse mode to lookup or browse for a Category to assign to the invoice at upload. The default functionality is for the Search for Category form (shown below) to be displayed when the Browse button (F3) is pressed. However, when the Primary Query option is specified this will be executed first and if successful the matched item(s) will be returned and the search form is bypassed. If the Display As List option is enabled all results will be returned as a list to the field or cell.
Select Inventory Item Browse Mode
Use this browse mode to lookup or browse for an Inventory Item to assign to the invoice line at upload. The default functionality is for the Search for Inventory Item form (shown below) to be displayed when the Browse button (F3) is pressed. However, when the Primary Query option is specified this will be executed first and if successful the matched item(s) will be returned and the search form is bypassed. If the Display As List option is enabled all results will be returned as a list to the field or cell. 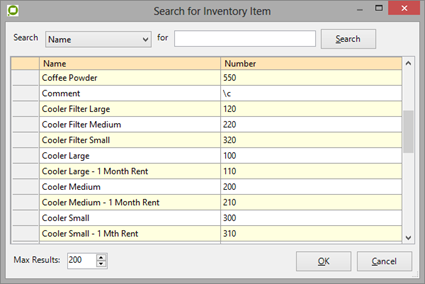
Select Job Browse Mode
Use this browse mode to lookup or browse for a Job to assign to the invoice line at upload. The default functionality is for the Search for Job form (shown below) to be displayed when the Browse button (F3) is pressed. However, when the Primary Query option is specified this will be executed first and if successful the matched item(s) will be returned and the search form is bypassed. If the Display As List option is enabled all results will be returned as a list to the field or cell. 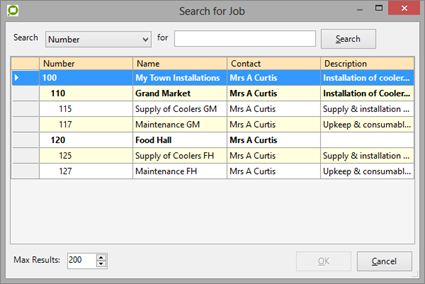
Select Supplier Browse Mode
Use this browse mode to lookup or browse for a Supplier to assign to the invoice at upload. The default functionality is for the Search for Job form (shown below) to be displayed when the Browse button (F3) is pressed. However, when the Primary Query option is specified this will be executed first and if successful the matched item(s) will be returned and the search form is bypassed. If the Display As List option is enabled all results will be returned as a list to the field or cell. 
Select Tax Code Browse Mode
Use this browse mode to lookup or browse for a Tax Code to assign to the invoice line at upload. The default functionality is for the Search for Tax Code form (shown below) to be displayed when the Browse button (F3) is pressed. However, when the Primary Query option is specified this will be executed first and if successful the matched item(s) will be returned and the search form is bypassed. If the Display As List option is enabled all results will be returned as a list to the field or cell.
Upload Settings
The UPLOAD module will obtain the KFI output data to pass into MYOB AccountRight.
Configuring the Connection and Property Parameters
-
Open the Upload Form (F8).
-
Choose the Upload Type you want to configure.
-
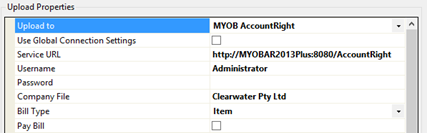
On the left hand side in the Upload Properties pane choose MYOB AccountRight in the Upload To list.
-
Enter the connection settings as per the instructions in section 2 Configuring the Connection Settings.
-
Fill in additional properties:
|
Property |
Description |
|
Bill Type |
Select the bill type from the four options: Service, Item, Professional, or Miscellaneous. These options correspond to the MYOB Purchase types. |
|
Pay Bill |
Select this option to indicate the bill has been paid. It will be uploaded as paid to MYOB and will use MYOB defaults for the transactions. Please note MYOB processes the payment using its defaults, no other information for the payment can be passed from outside MYOB. |
Connection Settings (IMAP/POP3)
The common invoice header and line item upload fields will appear after choosing the MYOB AccountRight option in the Upload Properties pane (See screenshot below). To obtain the bill type specific upload fields refer to section 4.3 for more details. 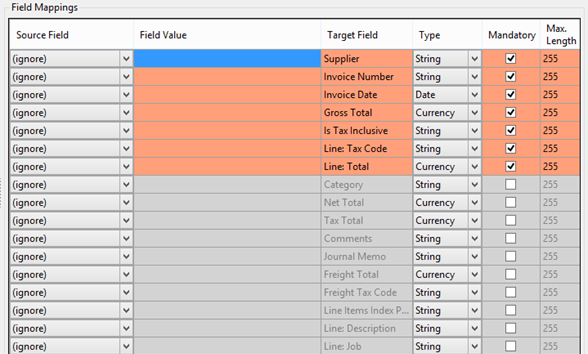
The invoice header fields are listed below. Each field can have its input set using the Source Field cell. Please refer to section 4.4 Applying KFI Output Data to the Target Field Data to see how this can be configured to allow ease of use data mapping.
|
Target Field |
Description |
|
Category |
This field requires the UID of a valid MYOB Category. |
|
Comments |
The comments to assign to the invoice. |
|
Freight Tax Code |
This field requires the UID or Code (i.e. “GST”) of a valid MYOB Tax Code (optional). |
|
Freight Total |
The tax inclusive freight amount applicable to this invoice. |
|
Gross Total |
The total amount applicable to this invoice. |
|
Invoice Number |
The supplier invoice number. |
|
Invoice Date |
The invoice date. Recommended format is YYYY-MM-DD. |
|
Is Tax Inclusive |
Enter Y if the line item totals are tax inclusive. |
|
Journal Memo |
Journal memo text describing the purchase. |
|
Line Items Index Path |
Enter the path of the CSV file that will be used to populate line item fields, otherwise leave blank to populate a single line with static or input field data. |
|
Net Total |
The sum of all line item totals. |
|
Supplier |
This field requires the UID of a valid MYOB Supplier. |
|
Tax Total |
The total of all tax amounts applicable to this invoice. |
The below upload fields support two modes for populating the invoice line items:
-
Invoices with single line item – static values or input fields are mapped directly into line item fields. The ‘Line Items Index Path’ field must be blank to use this mode.
-
Invoices with multiple line items – CSV column names are mapped into line item fields and values are read in from a Line Items CSV file at upload. The ‘Line Items Index Path’ field must be populated with a valid path to use this mode.
|
Target Field |
Description |
|
Line: Account |
This field requires the UID or DisplayID of a valid MYOB Account. Applies to: Miscellaneous, Professional, and Service bill types. |
|
Line: Bill Quantity |
The quantity of goods shipped for this line. Applies to: Item bill type only. |
|
Line: Date |
The date of the line. Recommended format is YYYY-MM-DD. Applies to: Professional bill type only. |
|
Line: Description |
The description of the line. |
|
Line: Discount percent |
The discount rate applicable to the line. Applies to: Item bill type only. |
|
Line: Inventory Item |
This field requires the UID of a valid MYOB Item. Applies to: Item bill type only. |
|
Line: Job |
This field requires the UID or DisplayID of a valid MYOB Job. |
|
Line: Received Quantity |
The quantity of goods received. Applies to: Item bill type only. |
|
Line: Tax Code |
This field requires the UID or Code of a valid MYOB Tax Code. |
|
Line: Total |
The total amount for this line item. |
|
Line: Unit Price |
The unit price of the goods. Applies to: Item bill type only. |
Configuring the Bill Type Fields
When configuring an upload for MYOB AccountRight a number of built-in fields will be shown automatically, these are all common to each of the available bill types. There are also a number of custom fields that vary for each bill type.
To obtain the custom upload fields for the selected bill type:
-
Click the Remove All button (this will remove the current custom fields)
-
Click the Auto Populate button

This should be done when creating a new upload or changing the bill type on an existing upload.
Applying KFI Output Data to Target Field Data
To pass through the KFI output data into the Upload module the operator is required to set the source field data to the target field data.
-
In the Upload type, set the Column names from option to the name of the KFI job Type.

-
In the Field Mappings Grid the operator can apply the Source Field settings to the Target Field settings. In the example below the MYOB AccountRight Target Field Supplier is being populated by the KFI Source Field Supplier ID. The MYOB AccountRight Target Field Invoice Number is set to a static value of “1234”.

-
When all the mappings are complete, click Apply.
-
Click OK to save the changes.
MYOB API Configuration
The MYOB API when first installed can only be accessed on the local host. To access it from other devices on the network the following needs to be done:
-
Open the Local Services panel (run services.msc).
-
Right click on the ‘MYOB AccountRight API Service’ service and select Stop.
-
Open the below file in a text editor. C:\Program Files (x86)\MYOB\API\<VersionNumber>\MYOB.AccountRight.API.WindowsServiceHost.exe.config
-
Update the PublicAddressServer key with the correct value. This is usually the host name (i.e. “Myob2013Server”).
-
Update the PublicAddressPort key with the correct value. The default value is 8080. When deciding on a port number ensure that the port is not already in use and is not blocked by a firewall.
-
Update the InstallationAddress key with the correct value. This will be the combination of the PublicAddressServer and PublicAddressPort (i.e. http://Myob2013Server:8080)
-
Save the changes.
-
Go back into the Local Services panel.
-
Right click on the ‘MYOB AccountRight API Service’ service and select Start.
The service should now be responding to requests externally. To test, open the service URL in a web browser – it should display a list of company files.
The URL is formatted as http://<PublicAddressServer>:<PublicAddressPort>/<HomeName> (i.e. “http://MyobDemo:8080/AccountRight”).
Lookup Type Properties
The following links can be used to check what properties are supported by each of the available lookup types.
OData
The MYOB AccountRight API uses the OData [Open Data Protocol] to access the MYOB data.
For more information on retrieving data using the MYOB API go to their developer web page:
http://developer.myob.com/api/accountright/api-overview/retrieving-data/
You can find more information on OData from the OData web page:
http://www.odata.org/documentation/odata-version-2-0/uri-conventions/
Appendix
Troubleshooting after a MYOB update
Encountered a communication error when browsing to MYOB.
To fix this issue please follow the steps in section 4.5 MYOB API Configuration. It is possible when updates are applied that these settings need to be reconfigured.
Please ensure that the company file is also on the same version as the MYOB software version.
Company file not found.
The company file link in EzeScan may no longer be valid after the company file is archived, renamed, or upgraded.
For example: 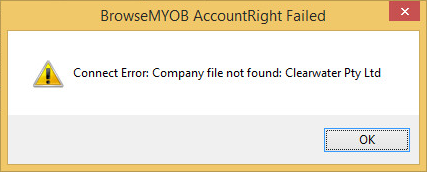
To resolve this, the company file must be reselected in the MYOB AccountRight connection settings.
The connection settings are typically configured at the workstation level via Admin menu -> Workstation Options, or at the KFI and Upload levels.
Registering for Developer Access (AccountRight Live)
Customer Requires Developer Access.
The customer needs to be registered for Developer Access, to do this click the link and perform steps 1 & 2 (Get API Access & Get your API Keys)
http://developer.myob.com/api/accountright/api-overview/getting-started/
Registering EzeScan for Key & Secret.
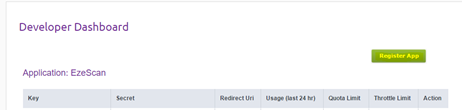
Here are the steps to obtain an API Key for MYOB AccountRight.
-
Select the Developer tab

-
Click Register App
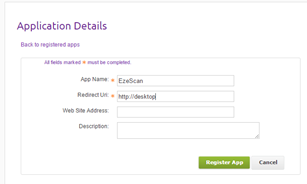
-
Fill in the details and then click Register
-
Obtain details from Application table, make note of the Key, Secret and Redirect URL