
The following information details the connectivity and functionality offered by the EzeScan integration with the iManage Work solution. It details the available options and how to configure an EzeScan job into iManage Work.
For information on iManage Work please refer to the iManage website - https://imanage.com/products/work/
For information on EzeScan please refer to the EzeScan website - https://ezescan.com.au
Requirements
EzeScan 5.0.108 or higher.
iManage Hosted in iManage Cloud
-
iManage Work Cloud account
-
Network access to https://oauth.services.ezescan.net for OAuth redirects
iManage Hosted On-Premise
-
iManage Work server (on-premise), version 10.1 or higher
Configuring Connection Settings
When configuring a Job, KFI or Upload to use the iManage Work connector the connection settings must be filled in.
It is recommended that iManage Work connection settings are configured globally.
To configure these settings globally:
-
Click the Admin menu, choose Workstation Options.
-
Click the Connection Profiles tab and then click New
-
Select iManage Work (REST API) option from the drop down list next to Connect to.
-
Enter the field information from the table below.
-
Click the Save button to save the entered settings.
Connection Options for iManage Cloud
|
Setting |
Description |
|---|---|
|
Connector API Version |
Select the |
|
Service URL |
If you are using a custom subdomain please enter the URL (e.g. |
|
Authentication Type |
Select the The cloud platform does not support legacy credential based authentication. |
|
Customer ID |
The customer ID assigned to your organisation in iManage Cloud (e.g. This can be found by logging into the iManage cloud in a web browser and then navigating to https://cloudimanage.com/work/web/startup/session-info. 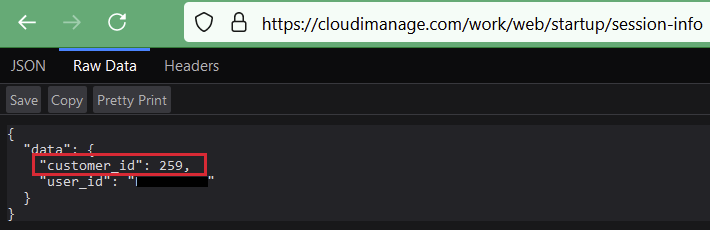
|
|
Library ID |
The database to connect to (e.g. This can be found in iManage Work Cloud web page as per below. 
|
|
Access Level |
Type of access level:
|
|
Desktop Redirect URI |
The URL used for callback to obtain the login result when the browser navigates away from the login web page (e.g. This URI should not exist as an actual URI on the workstation. |
|
Authorisation Type |
Select the |
Connection Options for iManage On-Premise
|
Setting |
Description |
|---|---|
|
Connector API Version |
Select the The Work v1 REST API was retired on December 30, 2022. Supported for V1 has since been removed from this integration. |
|
Service URL |
Specify the Service URL of the organisation’s iManage Work Server (e.g. |
|
Authentication Type |
Select the The Login option is deprecated due to requiring the now unsupported Work V1 REST API and will be removed in a future release. |
|
Customer ID |
The customer ID assigned to your organisation in iManage Work Server. This should be 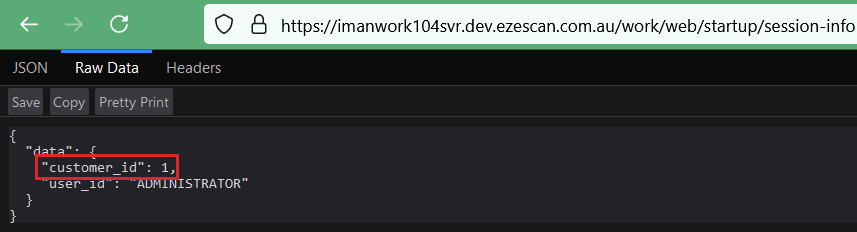
|
|
Library ID |
The database to connect to (e.g. This can be found in iManage Work Cloud web page as per below. 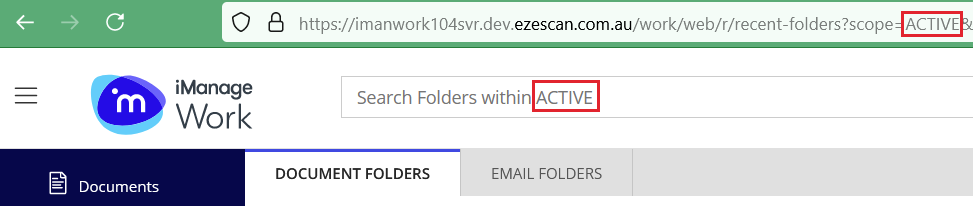
|
|
Access Level |
Type of access level:
|
|
Client ID |
The Client ID of the application registered in iManage Control Center (e.g. Refer to How to register application in iManage Control Center. |
|
Client Secret |
The Client Secret of the application registered in iManage Control Centre. Refer to How to register application in iManage Control Center. |
|
Username |
Username of named account to connect as when using Login authentication type. This option is deprecated due to requiring the now unsupported Work V1 REST API and will be removed in a future release. |
|
Password |
Password of named account to connect as when using Login authentication type. This option is deprecated due to requiring the now unsupported Work V1 REST API and will be removed in a future release. |
|
Desktop Redirect URI |
The URL used for callback to obtain the login result when the browser navigates away from the login web page (e.g. This URI should not exist as an actual URI on the workstation. |
|
Authorisation Type |
Select the The Implicit authorisation type is not recommended due to possible security vulnerabilities and should be used with caution. |
Application Registration in iManage Cloud Control Center
This integration requires an application be added in iManage Control Center.
To add the application:
-
Open iManage Control Center in a web browser (e.g. https://cloudimanage.com/work/cc)
-
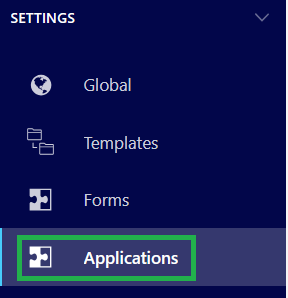
Navigate to Settings → Applications as shown below.
-
Click
Add Applicationto choose from the available applications.
-
Select the
EzeScan - Serverapplication.

If the application does not appear in the list, it may have already been installed and no further steps are required.
-
Click
Authentication

-
Ensure
Allow Refresh Tokenis enabled and configure the expiry options as desired. -
Click
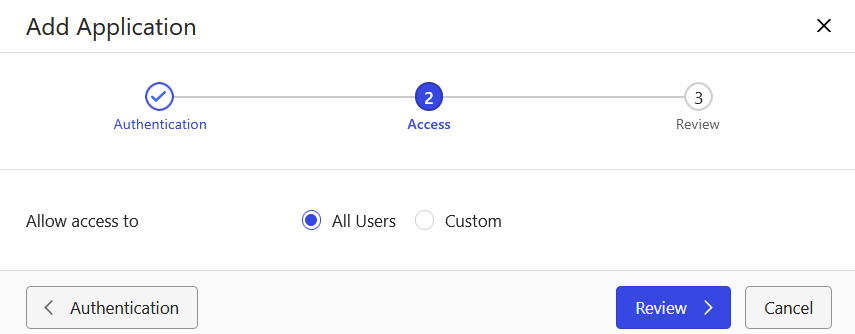
Access
-
Select
All Usersif any user should be allowed to sign-in using this integration, otherwise selectCustomand choose the desired users. -
Click
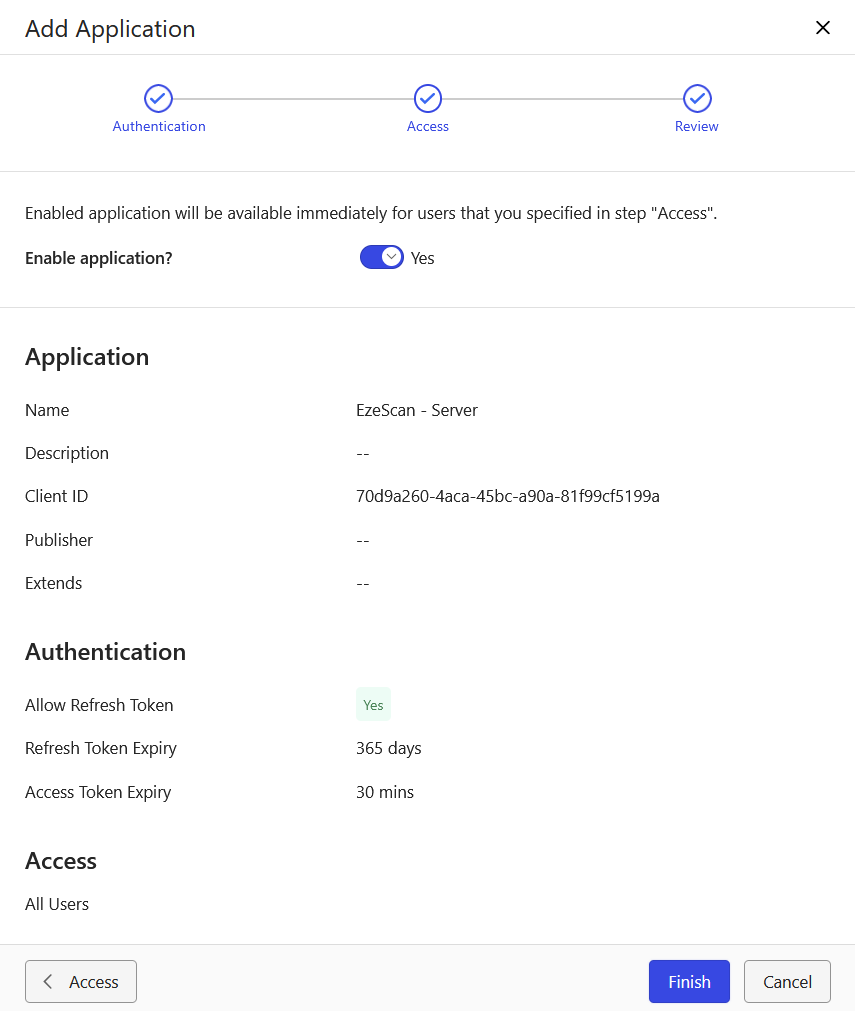
Review
-
Ensure
Enable Applicationis on. -
Finally click
Finish
Application Registration in iManage On-Premise Control Center
The following only applies to on-premise installations of iManage Work.
This integration requires an application be registered in iManage Control Center in order for user’s to sign-in using the OAuth authentication.
To register an application open in iManage Control Center in a web browser (e.g. https://imanage.company.com.au/work/cc)
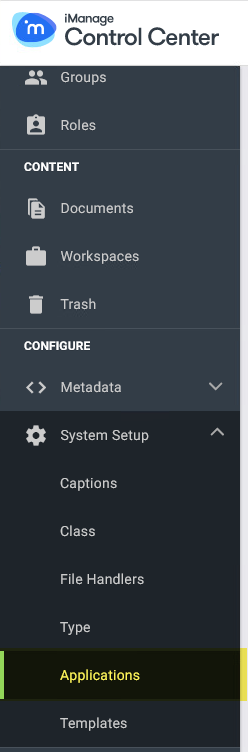
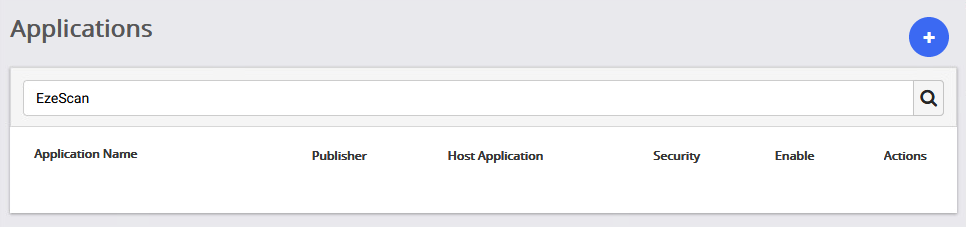
Navigate to System Setup → Applications as show below.
Search the list of available applications for EzeScan to ensure if has not already been configured.
Click the Blue circle with the Plus symbol to add a new application registration.
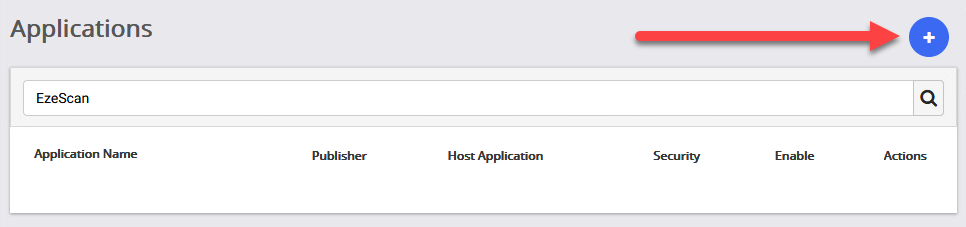
The Blue Button will open the Add Application modal.
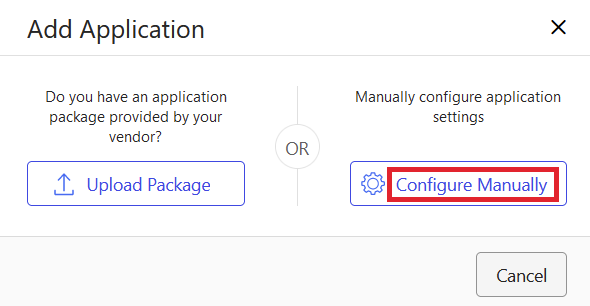
Click on Configure Manually
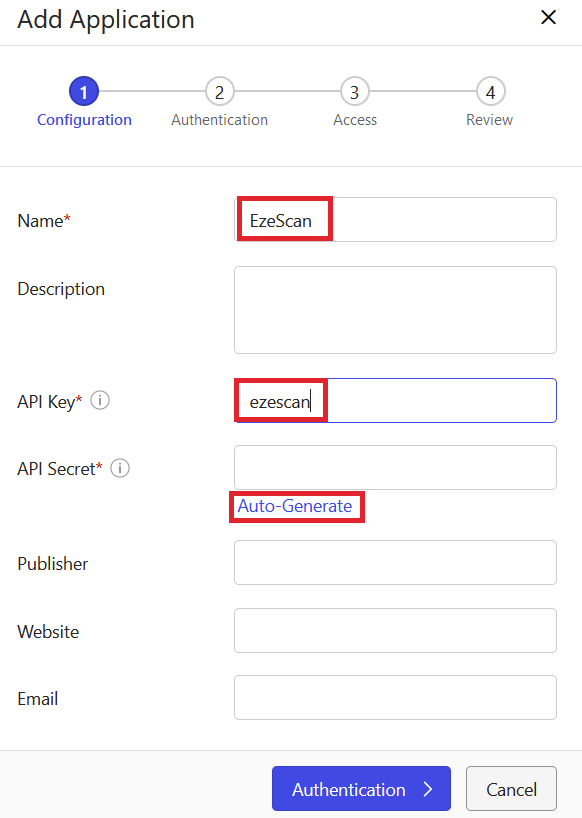
Enter a name, API Key, and auto generate an API Secret.
We recommend using ezescan as the API Key.
Click in Authentication
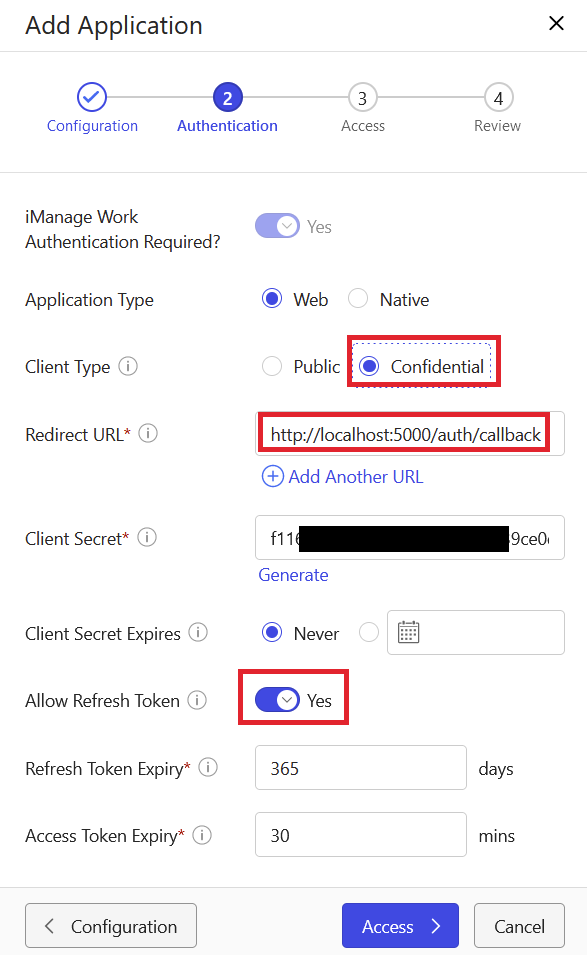
Configure the options highlighted above.
Confidential and Allow Refresh Token are required for background processing in EzeScan Server.
Without these options the access token would expire every 30 minutes and require a user manually sign-in again.
Click on Access
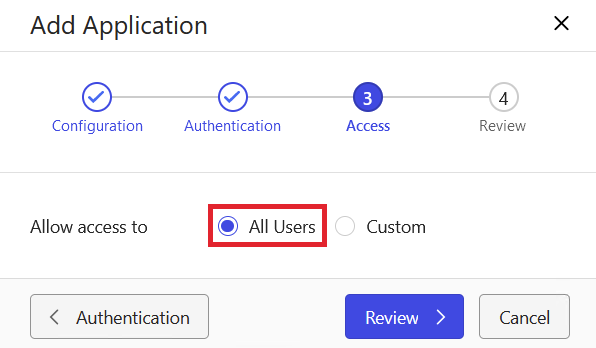
Select All users
Click on Review
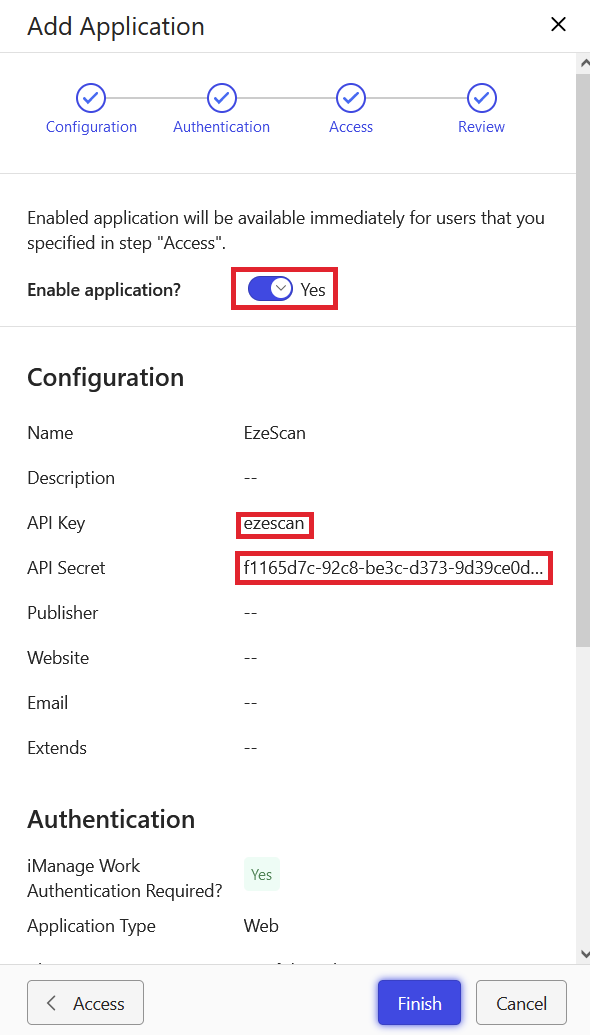
Ensure application is enabled.
Store the API Key and Secret somewhere safe - these will be needed when configuring the connection in EzeScan.
Job Settings
There are two ways the EzeScan connector can integrate with iManage Work.
-
Using a simple output to iManage Work profile form.
-
This can be created with a Job only, commonly used for low volume or ad hoc type scanning.
-
-
Using the KFI and UPLOAD modules.
-
These are detailed further in KFI Field Settings and Upload Settings.
-
This would be used for specific workflows that utilise EzeScan KFI to assist in minimal data entry, reusing data, forms extraction and setting workflow defaults.
-
NOTE
The EzeScan to iManage Work Profile Form functionality requires that the EzeScan Workstation be licensed with the EDRMS module.
Output documents using profile form
To enable iManage Work output functionality on an EzeScan Job, without using a KFI and Upload:
-
Click Admin and choose Jobs (F6).
-
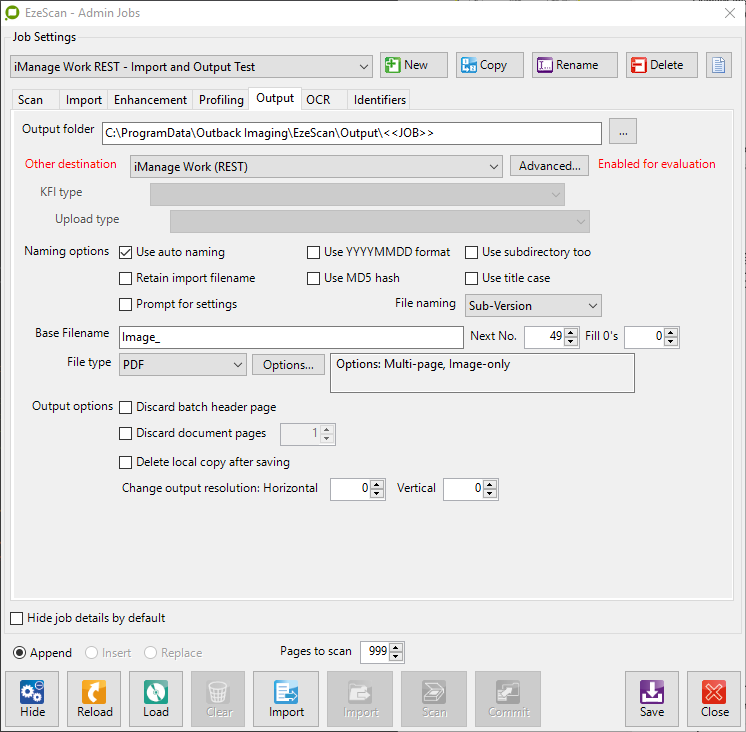
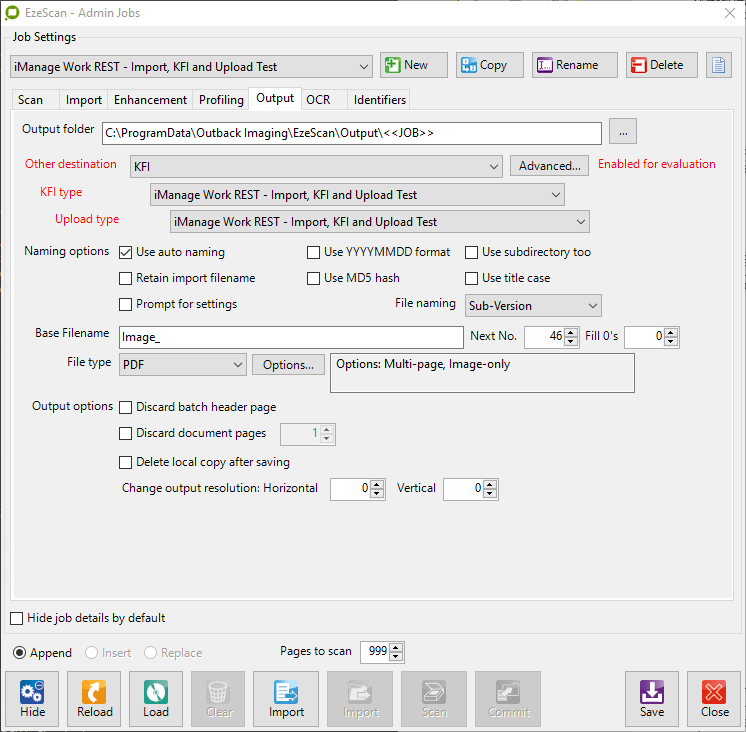
Click the Output tab and then choose the iManage Work Interface option from the Other Destination dropdown.
-
Click the Advanced button.

-
After modifying these settings click the Save button, otherwise the changes will be lost.
-
The Job is now configured to save scanned documents into iManage Work.
Import documents using work browser
If there is a requirement to import documents from iManage Work into EzeScan, (e.g. for mark-up/redaction purposes) an EzeScan job can be configured to do this.
This would usually be a separate EzeScan job - one job to scan and save to iManage Work, then another to import from iManage Work, mark-up/redact and save back to iManage Work as a new revision or document.
NOTE
The “Import documents” functionality on a Job is only available when Output to iManage Work is configured - please refer to Job Settings on how to enable this.
To enable Import File functionality on a Job:
-
Click Admin and choose Jobs (F6).
-
Select the Job you want to modify OR click on the New button and save the job as (for example) Create new Revision or Fix a document in iManage Work.
-
Click the Import tab and select Import file processing option.
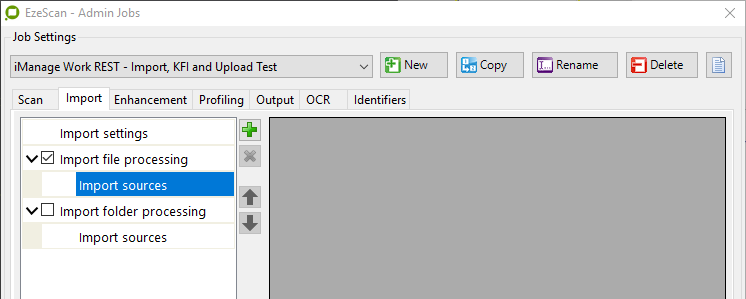
-
Click on Import sources and then the plus

button to add a new Import Profile.
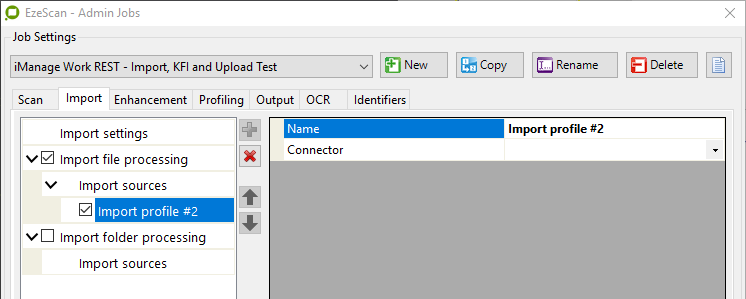
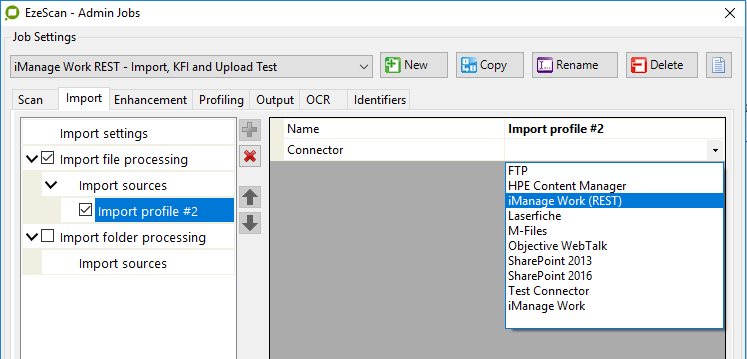
-
Select the new Profile and then click on the Connector dropdown, selecting the iManage Work (REST) option.
-
After modifying these settings click the Save button, otherwise the changes will be lost.
KFI Field Settings
The KFI Field Settings allow the operator to browse into iManage Work during KFI indexing so the operator can select a document, folder and other metadata to be applied to the document.
NOTE
The following functionality requires that the EzeScan workstation be licensed for the EDRMS as well as KFI and UPLOAD modules.
Enabling KFI to use an EDRMS connection to iManage.
The iManage Work settings must be configured before a KFI field can use the iManage Work browse functionality.
-
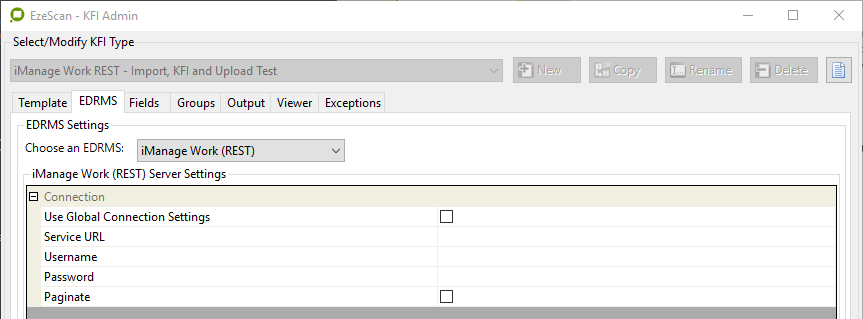
Open the respective KFI (press F7) form.
-
Click the EDRMS tab.
-
Specify the connection settings by either:
-
Clicking the Use Global Connection Settings checkbox; or
-
Manually filling in alternative settings that differ from the Global settings.
-
Configuring iManage browse parameters on a KFI field
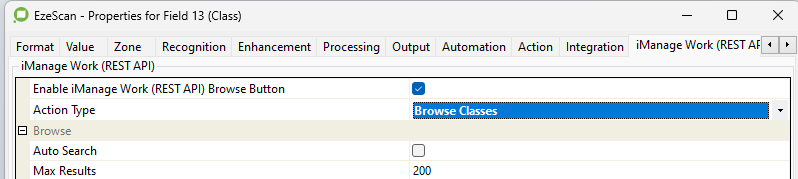
Open the KFI field form and edit the field.
On the iManage Work (REST API) tab set the Action Type to one of:
-
Browse Classes
-
Browse Sub Classes
-
Browse or Search Files
-
Browse or Search Folders
-
Browse Users
-
Lookup Queries
So the Browse button can be configured as followsr:
When Action Type = Browse Classes
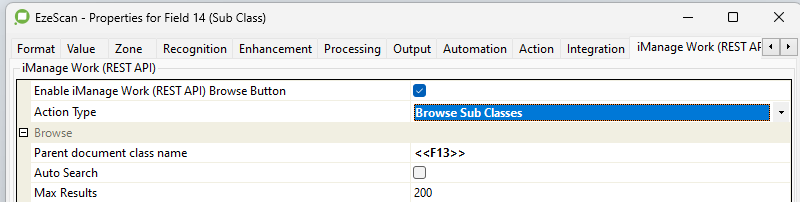
When Action Type = Browse Sub Classes
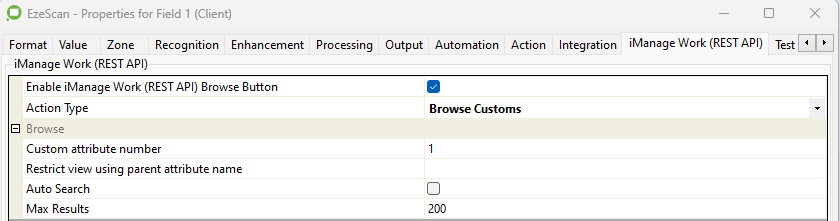
When Action Type = Browse Customs
Can be used to browse clients:
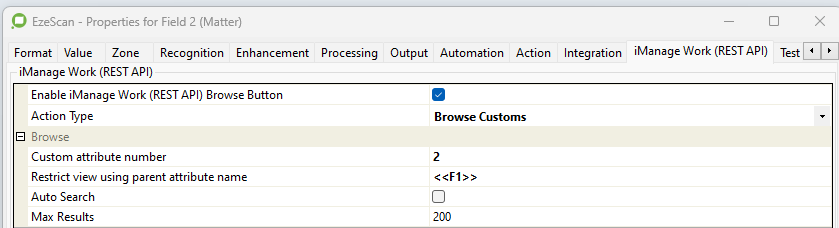
Can be used to browse matters for the selected client:
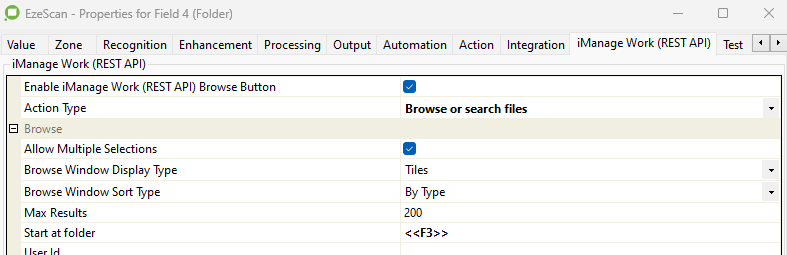
When Action Type = Browse Or Search Files
Can be used to browse or search for file only:
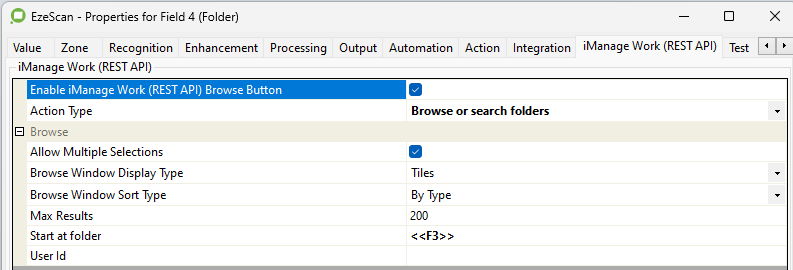
When Action Type = Browse Or Search Folders
Can be used to browse or search for folders only:
When Action Type = Lookup Queries
Can be used to lookup objects (e.g. workspaces) and return the object ID, Name, Description.
To lookup a workspace ID based on the currently selected client and matter:
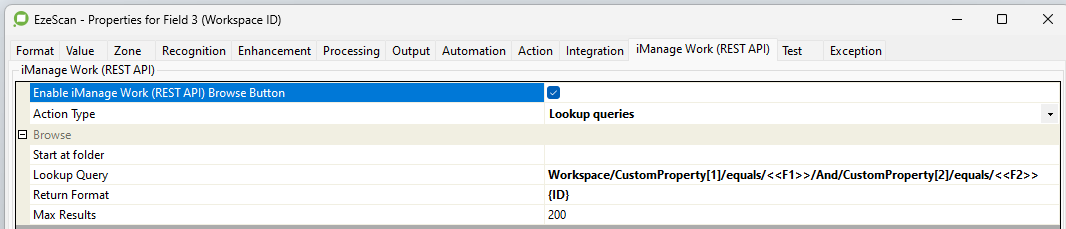
Typically used with iManage to perform a workspace lookup to return the folder ID of the workspace based on the value of the Custom1 and Custom2 field values.
Lets assume there are 4 KFI fields:
-
KFI Field 1 - Will contains the iManage Client value, typically found using a Browse Customs action type using iManage ‘Custom attribute number’ = 1.
-
KFI Field 2 - Contains the iManage Matter, typically found using a Browse Custom actions type using iManage ‘Custom attribute number' = 2, with ‘Restricted view using parent attribute name’ = placeholder value of field 1 (i.e. <<F1>>)
-
KFI Field 3 - Will be used to perform an iManage Lookup to return the {ID} of the workspace based on the first KFI field (Client) and 2nd KFI field (Matter) values. The lookup query in the above example is:
Workspace/CustomProperty[1]/equals/<<F1>>/And/CustomProperty[2]/equals/<<F2>>
-
KFI Field 4 - Will be used to perform an iManage Folder Browse, with the ‘Starts at Folder value set to the value of the 3rd KFI Field placeholder (i.e. <<F3>>).
The above Action Types share some or all of these settings show below.
|
Option |
Description |
|---|---|
|
Folders |
When selected this option enables the iManage Work Folder Browse button on the EzeScan Viewer KFI indexing panel. This will allow the KFI operator to choose which iManage Work folder to attach the document to. |
|
Files |
When selected this option enables the iManage Work Folder Browse button on the EzeScan Viewer KFI indexing panel. This will allow the KFI operator to choose a iManage Work document to be updated as a new version or replaced. |
|
Custom Attribute Number |
When selected this option enables the iManage Work Custom Attribute Browse button on the EzeScan Viewer KFI indexing panel. This will allow the KFI verify operator to choose iManage Work custom attributes values to apply to the document.
(e.g. The Client Code and Matter Number fields are custom attributes). For Example, if the Client Code was to be a KFI field it could be custom field 1.
If a Matter Number was to be a KFI field it could be custom field 2 with a restrict view using parent attribute number 1
NOTE
The iManage Work Administrator should be able to obtain the custom class fields for your respective iManage Work server.
|
|
Classes |
When selected this option enables the iManage Work Classes Browse button on the EzeScan Viewer KFI indexing panel. This will allow the KFI verify operator to choose which iManage Work Class to apply to the document. |
|
Subclasses |
When selected this option enables the iManage Work Sub Classes Browse button. This will allow the EzeScan operator to specify a Sub Class of the Document Type selected in the Classes KFI field. NOTE
The Classes KFI field must be determined before a Sub Class is determined.
|
|
Users |
When selected this option enables the iManage Work User Browse button on the EzeScan Viewer KFI indexing panel. This will allow the KFI verify operator to choose which iManage Work User to apply to the document. |
|
Start At Folder |
This option is to be used in conjunction with the Browse Folders option. When selected this option allows the user to select the workspace/folder to start at when browsing for a folder. |
|
Restrict view using parent attribute name |
When selected, this option determines if the search results returned belong to a parent attribute (E.g. searching for a matter from a client ID), if the parent name is equal to that specified, the result will be shown, if not it will be omitted. NOTE
KFI Field Placeholders are accepted in this field. E.g. <<F1>> |
|
Parent document class name |
This option is to be used in conjunction with the Browse Subclass option; this will allow the operator to define the Parent Class Type, therefore omitting any sub class results that do not relate to that Parent type. NOTE
Field Placeholders are accepted in this field. <<F1>> |
|
Auto Search |
When selected, this option will cause a blank search to be automatically performed when a search window is launched. |
|
Allow Multiple Selections |
When selected, this option allows for multiple files or folders to be specified in this KFI field. |
|
Lookup Query |
The Lookup query to run. e.g. Workspace/CustomProperty[1]/equals/<<F1>>/And/CustomProperty[2]/equals/<<F2>> Where: <<F1>> is the KFI field placeholder for the KFI field containing the Client ID, and <<F2>> is the KFI field placeholder for the KFI field containing the Matter ID
|
|
Return Format |
An expression representing the properties of objects, such as their Description or Name. For a workspace query we would want to return the workspace ID value by specifying e.g {ID} |
|
Max Results |
A number to control how many objects the iManage Server will return on queries. The higher this number, the longer searches will take. |
Upload Settings
The UPLOAD module will obtain the KFI output data to pass into iManage Work saving the document into the respective folder and applying the (KFI’s) metadata information.
NOTE
The following functionality requires that the EzeScan Workstation be licensed for the EDRMS and KFI and UPLOAD modules.
Configuring connection and parameters
-
Open the Upload Form (F8).
-
Choose the Upload Type you want to configure.
-
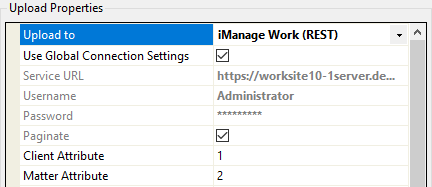
On the left hand side in the Upload Properties pane choose iManage Work (REST) in the Upload To list.
-
Specify the connection settings by either:
-
Clicking the Use Global Connection Settings checkbox; or
-
Manually filling in alternative settings that differ from the Global settings.
-
About the Upload Parameters
|
Property |
Description |
|---|---|
|
Client Attribute |
This is the Custom field number being used for the Client field on the iManage Work server. If using the Populate Client Using Matter mapping this setting must be correctly applied. |
|
Matter Attribute |
This is the Custom field number being used for the Matter field on the iManage Work server. If using the Populate Client Using Matter mapping this setting must be correctly applied. |
Configuring built-in upload fields
The following fields will appear after choosing Upload to iManage Work Context option in the Upload Properties pane. These are the default iManage Work fields. 
Each field can have its input set using the Source Field cell.
|
Target Field |
Description |
|---|---|
|
Class |
Use this field to set the class field. E.g. doc, email, contract, scanned. This is a usually a mandatory field. If a class has been pre-set on the folder that the document is being uploaded to, EzeScan can inherit the value. To do this set the Class source field to a static value and set to “INHERIT_FROM_FOLDER”. |
|
Description |
Use this field to name the document. This is a mandatory field. |
|
Author |
Use this field to set the author field. |
|
Comments |
Use this field to set the comments on the upload document. |
|
Database |
Use this field to specify the database where the document will be created in the iManage Work Server. |
|
Declare As Record |
Use this field to specify whether to Declare the document as a record. Set to True to activate, False to not activate or leave the field source value set to ignore. |
|
Folder |
Use this field to specify the folder path where the document will be saved into. |
|
Operator |
Use this field to set the operator field. This is a mandatory field. |
|
Parent Document New Version |
With a iManage Work document number populated in this field, EzeScan will create a new version of this document. |
|
Parent Document Replace Version |
With a iManage Work document number populated in this field, EzeScan will replace the latest version. |
|
Populate Client Using Matter |
A iManage Work Matter value is required to be supplied into this target mapping, EzeScan will perform a search and return the Client ID. For this option to work correctly there would only be a single result for the search. e.g. a Specific matter number can only have one client. |
|
Private Search Folder |
With the value populated in this field, EzeScan will search for a iManage Work folder that is set to Private access. (e.g. owned by the current IManage Work login username). NOTE
EzeScan assumes only 1 folder of that name will exist, otherwise if multiple folders exist with the same name EzeScan uses the first result returned (which may not be the one you wanted!) |
|
Public Search Folder |
With the value populated in this field, EzeScan will search for a iManage Work folder that is set to Public access. (e.g. owned by any username). NOTE
EzeScan assumes only 1 folder of that name will exist, otherwise if multiple folders exist with the same name EzeScan uses the first result returned (which may not be the one you wanted!) |
|
Default Security Visibility |
This option is to set the default security on the uploaded image. The options are Public, Private or View. |
|
Security Include External Users |
This can be set to either True or False. If set to true it will allow access to the document externally and display the message “Shared to External Users” on the properties page of the saved image into the IManage Work Client. |
|
Security Inherited |
This can be set to either True or False. If set to true the image will inherit the permissions from the parent folder that the image is being saved into. |
|
Security User ACL |
This option can apply permissions on a User/s on the uploaded image. The syntax required (per user) is The security options available are ALL, READ, READWRITE and NONE So for example |
|
Security Group ACL |
This option can apply permissions on a Group/s on the uploaded image. The syntax required (per group) is The security options available are ALL, READ, READWRITE and NONE. So for example |
|
Sub Class |
This is the iManage Work Sub Class field, this is the child of the Class field. e.g. Inward Email, Outward Email. If a subclass has been pre-set on the folder that the document is being uploaded to, EzeScan can inherit the value. To do this set the SubClass source field to a static value and set to “INHERIT_FROM_FOLDER”. |
|
Sub Folder |
This is the subfolder of a Workspace or another folder. If a Workspace the operator would also use the Workspace by Name or Workspace By Custom Property. EzeScan would then search for the workspace and then when found will place the image in the Sub Folder Specified. EzeScan can store into a sub folder one or multi levels deep
NOTE
EzeScan assumes only 1 sub folder of that name will exist, otherwise if multiple sub folders exist with the same name EzeScan uses the first result returned (which may not be the one you wanted) |
|
Workspace Tab |
This is a Tab immediately underneath a Workspace. The Workspace is selected by either Workspace by Name or Workspace By Custom Property fields. Sub Folders, if specified, will be used underneath the Workspace Tab. |
|
Workspace By Custom Property |
With the value populated in this field, EzeScan will search for the Workspace using a Custom property. e.g. if the property is Custom1 in the iManage Work database, the operator will need to put a “1:” in the prefix for the respective KFI field. If a workspace is found EzeScan will store the image specified by the Sub Folder Target Field value. In this example we are looking for a workspace where the Custom1 value is 108000 If the operator is required to search for a workspace by supplying two or more properties, e.g. Custom1 and Custom2 the following syntax is required. In this example we are looking for a workspace where the Custom1 value is 108000 and Custom2 value is 1000 The two pipe values notify EzeScan of the next custom field to search with. NOTE
EzeScan assumes only 1 Workspace with the respective Workspace Custom property/s value will exist, otherwise if multiple workspaces exist with the same custom property/s EzeScan will use the first result returned (which may not be the one you wanted) |
|
Workspace By Name |
With the value populated in this field, EzeScan will perform an exact search for the Workspace by its name. If a workspace is found EzeScan will store the image specified by the Sub Folder upload value. NOTE
EzeScan assumes only 1 Workspace with the respective workspace name will exist, otherwise if multiple Workspaces exist with the same name EzeScan uses the first result returned (which may not be the one you wanted) |
|
Workspace By Description |
With the value populated in this field, EzeScan will perform an exact search on the Workspace Description field. If a workspace is found EzeScan will store the image specified by the Sub Folder upload value. NOTE
EzeScan assumes only 1 Workspace with the respective Workspace description will exist, otherwise if multiple Workspaces exist with the same description EzeScan uses the first result returned (which may not be the one you wanted) |
|
Custom1 to 30 |
These are the default custom fields on the iManage Work server. You will need to check with your iManage Work Administrator to see if any fields are mapped to these. For example, Custom1 could be mapped to “Client” and Custom2 could be mapped to “Matter”. Some documents on iManage Work servers could also be configured to inherit properties from its parent folder. If loading documents into these folders from EzeScan and you require the fields to be inherited, set the CustomX field value to “INHERIT_FROM_FOLDER”. EzeScan will then obtain the field information from the folder and apply it to the document. |
|
Additional Properties |
EzeScan supports populating additional iManage Work properties (these may be used for other integrating applications e.g. workflow engines). The add an additional field, click the |

Applying KFI output data to target field data
To pass through the KFI output data into the Upload module the operator is required to set the source field data to the target field data.
-
In the Upload type, set the Column names from option to the name of the KFI job Type.

-
In the Field Mappings Grid the operator can apply the Source Field settings to the Target Field settings.
In the example below the iManage Work Target Field Description is being populated by the KFI Source Field Name
-
When all the mappings are complete, click Apply.
-
Click OK to save the changes.
Running a Job Using the Profile Form
-
To run a job to iManage Work with the profile form, confirm that the Other Destination is set to iManage Work. Please refer to Job Settings section for how to set this up.
-
Click the scan/import or job button to load the image into the EzeScan viewer.
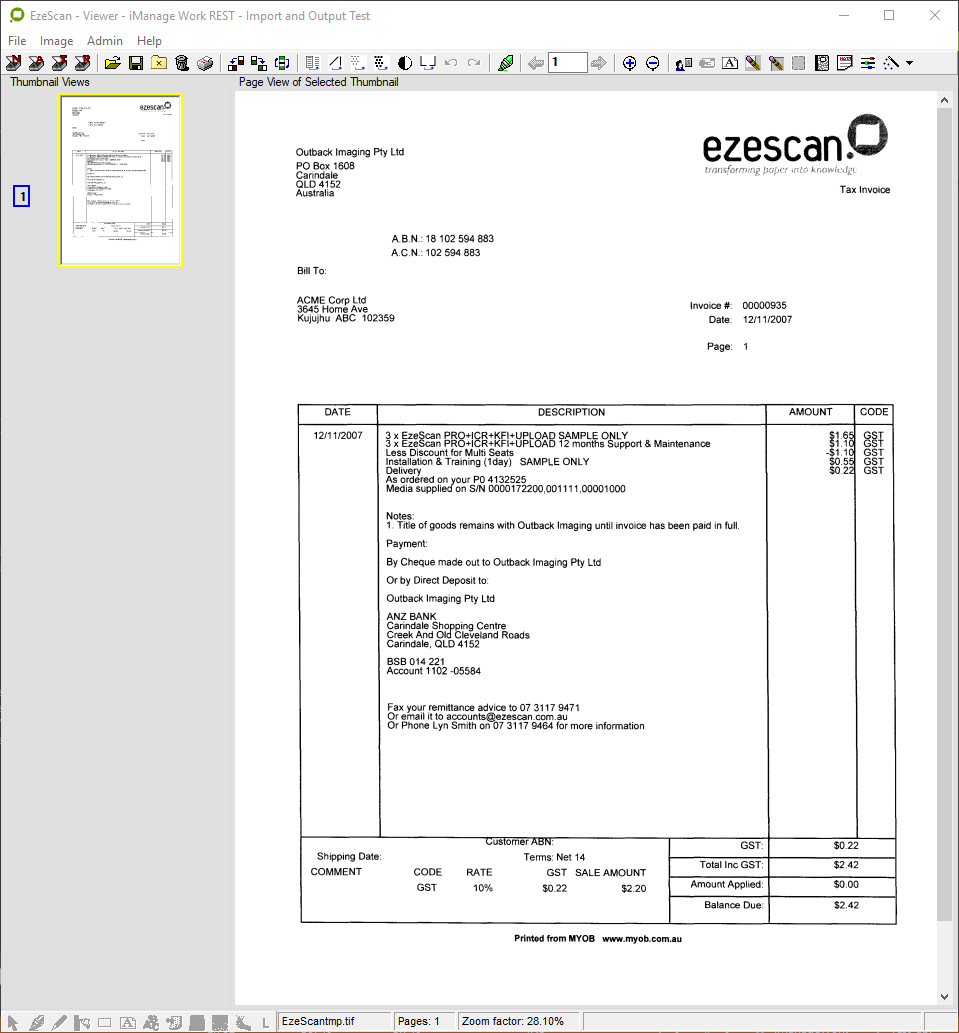
-
Press the F4 key or click the Profile button
to index the document.
-
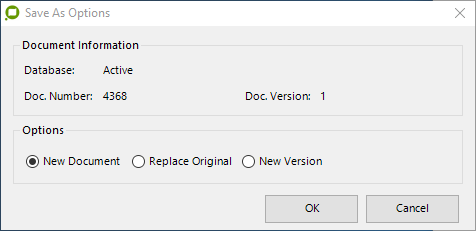
In the Save As Options window the operator can select to either:
-
Create a New Document
-
Replace the Original Document
-
Create a New Version of an existing Document
-
-
Click OK. If the New Document option was selected, a folder selection dialog will be shown. The document will then be saved into iManage Work.
There is a sample IManage Work profile form job in the downloads section on the EzeScan web site.
Running a Simple Job Using KFI and Upload
To run a job to iManage Work using the KFI and UPLOAD modules, confirm that the Other Destination is set to KFI and the respective KFI and UPLOAD Types are selected.
Please refer to the KFI Field Settings and Upload Settings for details on setting this up.
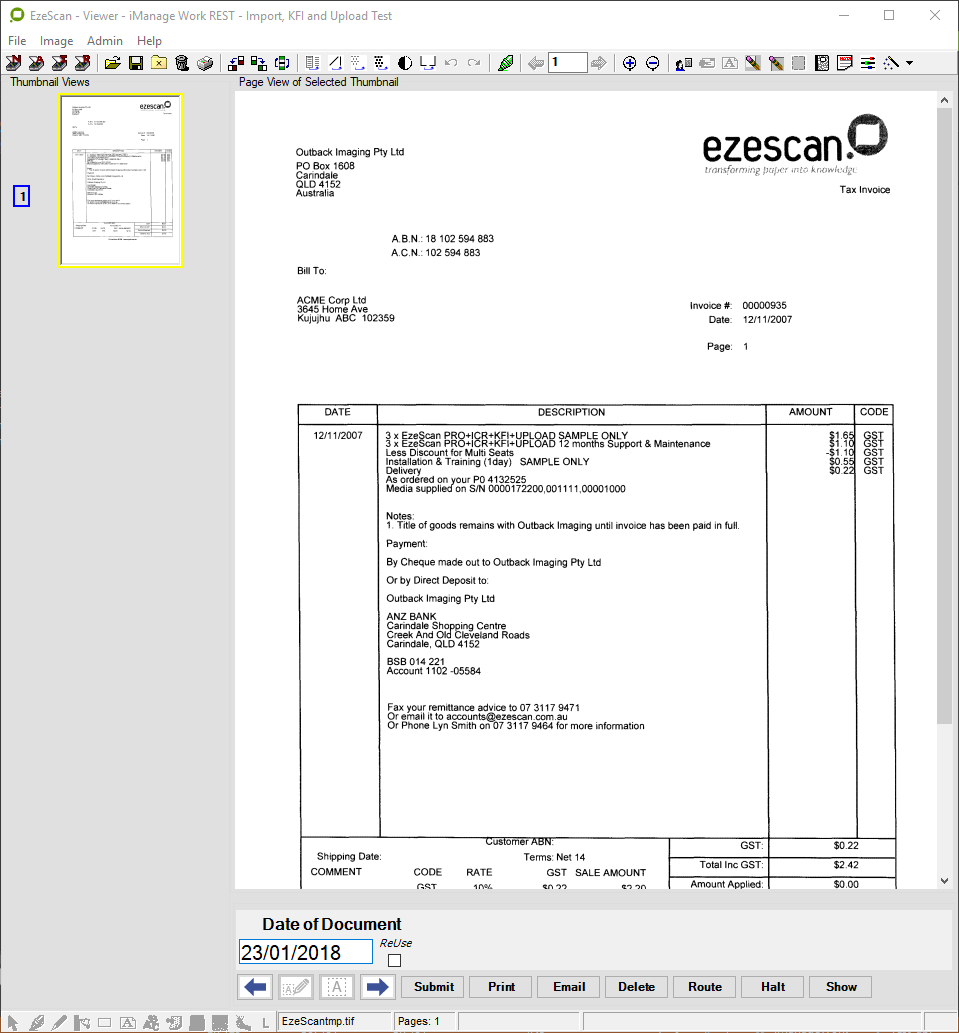
In the example below the KFI\UPLOAD types have been configured for the following values:
-
Document Name (Name of document)
-
Folder (Folder in Enterprise workspace)
-
Date of Document (Attribute in the Catalogue)
The image below shows a job using the KFI and upload modules.
To run a job to iManage Work using the KFI and UPLOAD modules:
-
Click the scan/import or job button to load the image into the EzeScan viewer.

-
Press the F4 key or click the Profile button
to index the document. The KFI screen will appear below the page view.
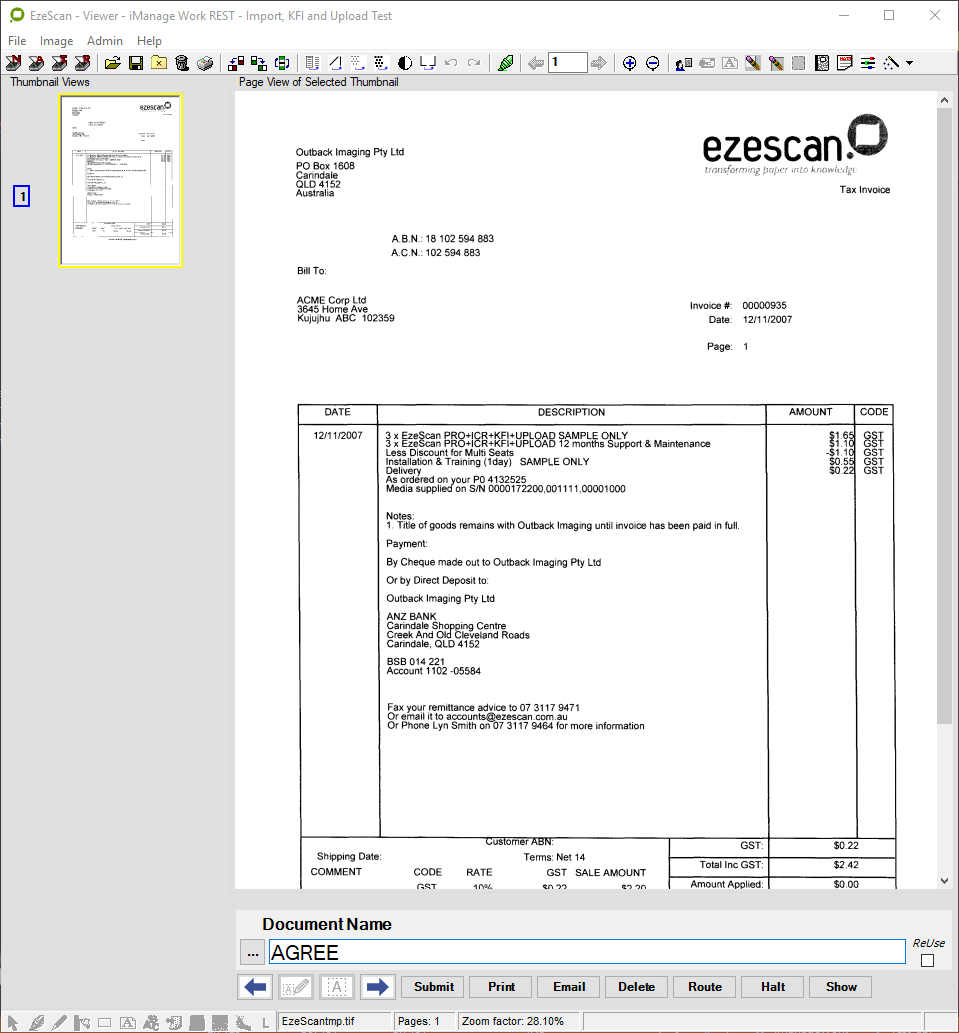
-
The operator can enter the Document Name.
-
When complete the operator can press Enter or click the
to move to the next field.
-
The operator will be prompted to select a folder.
-
When complete the operator can press Enter or click the
to move to the next field.
-
The operator will be prompted to enter a date.
-
When complete, press Enter and the submit button will highlight.
-
Press Enter or click Submit.
-
The document will be saved into the respective iManage Work folder and metadata applied.
Display Record Number After Saving Record
To enable this setting, please refer to the How to articles.