
Automation Tab
This tab allows for automation processing on a field. For example:
-
A field can automatically process if the is no validation rules
-
A field can automatically press the F3 browse button to launch the search screen (if configured)
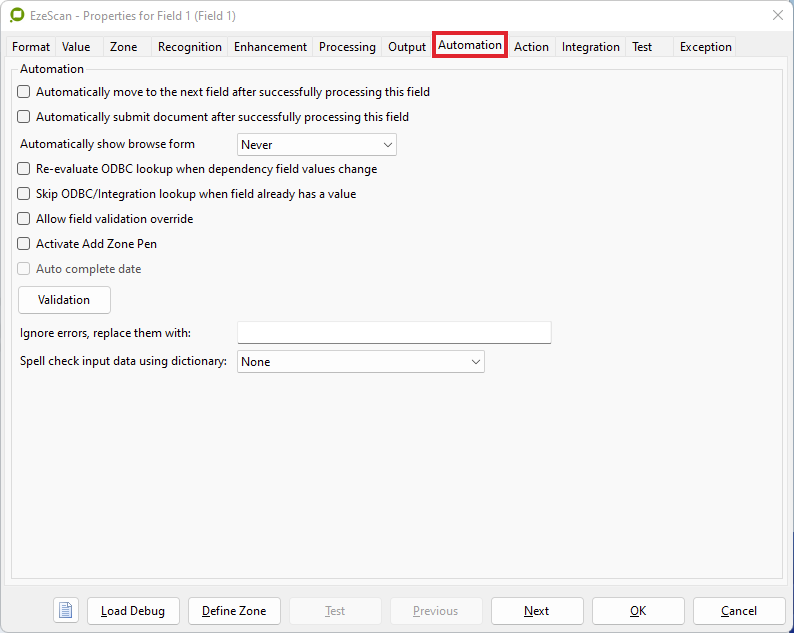
Figure 89 - the field's Automation tab
|
Automatically move to the next field after successfully processing this field |
When ticked, this option will automatically press the KFI form Next (field) button to move the viewer to the next field during KFI processing.
|
|
Automatically submit document after successfully processing this field |
When ticked, this option will automatically press the KFI form Submit button to move the viewer to the next document during KFI processing.
|
|
Automatically show browse form |
When ticked, this option will automatically press the KFI Field browse button
|
|
Re-evaluate ODBC lookup when dependency field values change
|
Always re-evaluate the ODBC lookup when any fields referenced by placeholders change, otherwise only when field is processed. |
|
Skip ODBC/Integration lookup when field already has a value
|
Skips the ODBC/Integration lookup in field processing if a value has already been populated from another input source such as Recognition or Custom Extract. |
|
Activate Add Zone Pen |
This option will automatically activate the zone pen during KFI profiling.
|
|
Allow field validation override |
If a field does not meet the requirements, (e.g. database lookup failed or number of characters not met) the operator can tick this option to allow the message to be overridden.
|
|
Ignore Field Validation Error |
This option is designed for automated jobs where the operator does not want EzeScan to stop or halt processing.
|
|
Validation |
This option allows the operator to validate the value in a KFI field against an ODBC compliant database or can validate data from another field using the comparison option.
|
|
Ignore errors, replace them with: |
If a KFI zone contains a field validation error, EzeScan will ignore the error and replace it with the value specified |
|
Spell check the input data using the dictionary |
When the spell check option is selected…
|


Setting up the Validation Rules on a field
To create a validation rule on a KFI field; which alerts the operator that the field has met the required criteria is set up on the field's Automation tab.
There are two types of validation which may be employed…
-
ODBC
-
Comparison
-
Only one of these types may be used.
ODBC Tab - Validate the Input Data Using an Internal ODBC Lookup
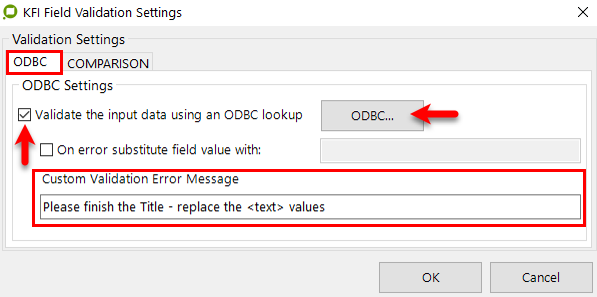
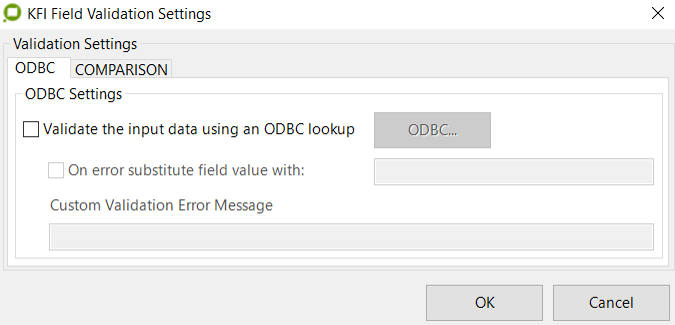
Figure 90 - Field Validation Settings - ODBC tab - tick the box to begin
This option does not require you to set-up an ODBC DSN. It utilises an inbuilt EzeScan function which will validate a field's value.
In this example we will be validating a Document Title which has been created via the EzeScan Profiling Spreadsheet. Clicking the ODBC button display the following screen. This will allow the operator to input a SQL select statement to validate the data against an ODBC compliant database.
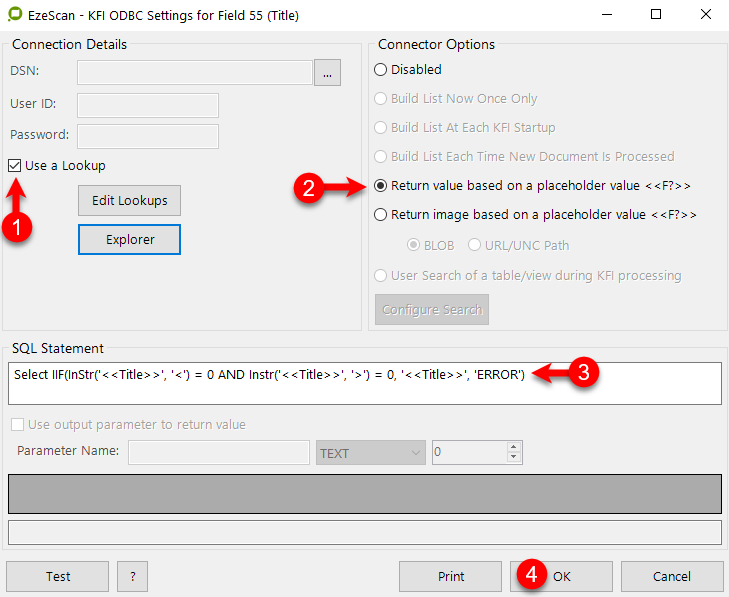
Figure 91 - follow the steps below to do your Validation rule
-
Tick the Use Lookup box
-
Select the Return value based on a placeholder value option
-
Add your SQL string (see below)
-
Click the OK button
The SQL string
In this example we are looking for a particular value in the Title field which should not be there and if it is will create an error.
Select IIF(InStr('<<Title>>', '<') = 0 AND Instr('<<Title>>', '>') = 0, '<<Title>>', 'ERROR')
-
The string begins with Select IIF
-
We are checking the field called Title '<<Title>>'
-
Looking for a '<' AND a '>' (the things which should not be there)
-
If they do then an 'ERROR' will occurand then provide the operator with a message when the field has an error; due to the < > values being present.
-
Copy the above string for use in your own validation script. It must be in the same format, just change the field name to suit.
Custom Validation Error Message
Add a meaningful message here so that the operator will understand what the error is as shown in Figure 90 on page .
An example of the error message the operator would receive is shown below; due to the <type> text being drawn into the Title field from the EzeScan Profiling spreadsheet.

Figure 92 - The error message is shown in brackets. The operator cannot proceed until the < > are removed.
ODBC Tab - Validate the Input Data Using a DSN Based ODBC Lookup
Please refer to the ODBC Settings section on page for details on creating a DSN based ODBC Lookup. The same functionality would be used here to perform a validation of the field value.
Comparison Tab
This screen allows to validate the current field value against another field value or static text. For example the operator may need to compare two numerical or date values.
A comparison operator and custom error message can also be defined.
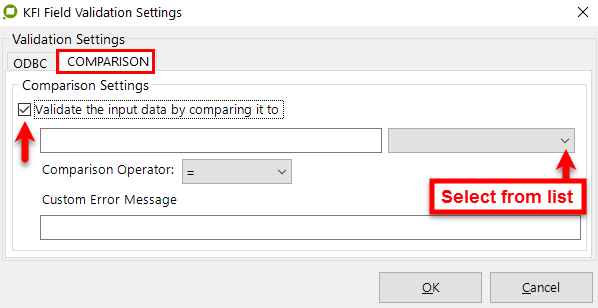
Figure 93 - Field Validation Settings - COMPARISON tab - tick the box to begin
Action Tab
The field Action allows the operator to set rules based whether a previous or current field is blank, not blank or a specific static value. The rule can be set to Process or Skip based on the previous / current field condition.
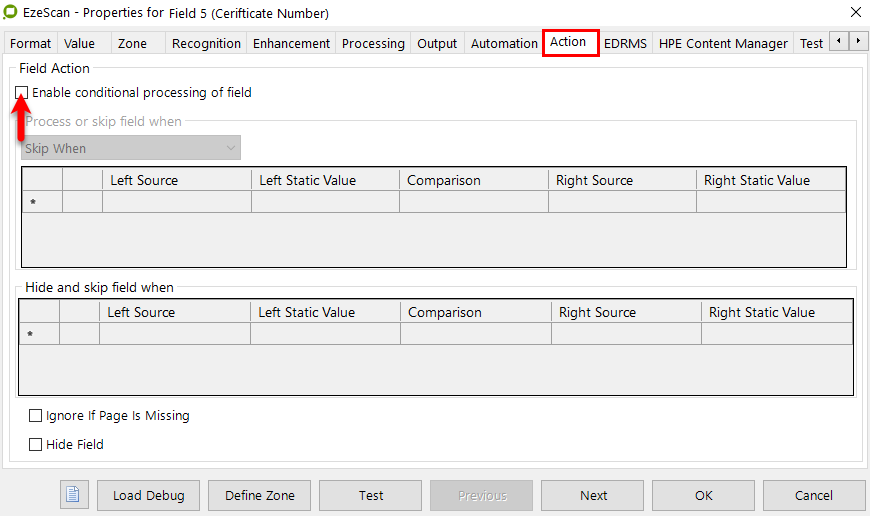
Figure 94 - the field's Action tab - tick the box to initiate
e.g. if the operator wanted to skip Field 10 because Field 5 had a Blank value the following would be set.
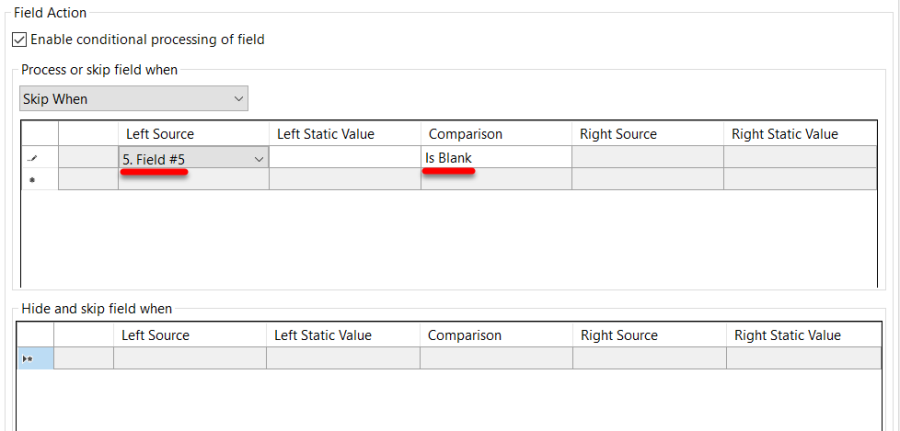
Figure 95 - set to skip a blank field
If the operator wanted to have Field 10 Hidden because Field 5 had a value of NO the following would be set…
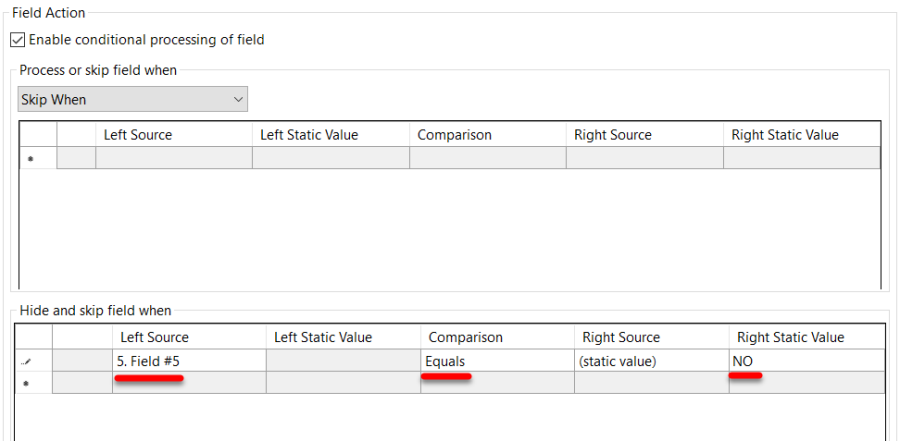
Figure 96 - set to skip a field with a value of NO
-
In this instance field 5 will remain hidden until it has been processed and if field 5 does not have a value of "No" then field 10 would display.
-
The option (on the automation tab) "Automatically move to the next field after successfully processing this field" must also be ticked.
Ignore if page missing

This option will ignore the field if the page is missing.
This option is recommended for jobs that have variable data only.
Hide Field

Sometimes with KFI a field value may be default or it may be looking up information from another source. By using the Hide Field option, the field will automatically captured as the value, without the KFI operator having to verify that zone.
During KFI processing hidden fields can be unhidden at any time by simply pressing the KFI Show button.
-
The option (on the automation tab) "Automatically move to the next field after successfully processing this field" must also be ticked.