
A bit of history first…
Over time many EzeScan clients have made use of the EzeScan Profiler spreadsheet like the Objective EDRMS one shown below.
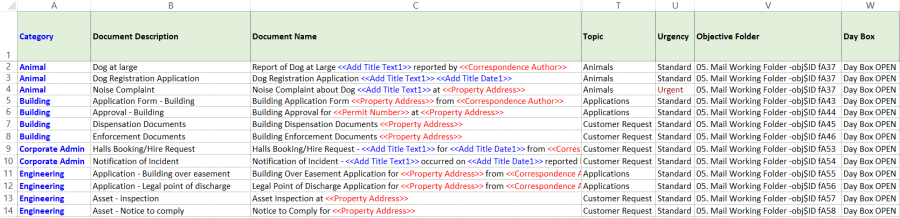
Figure 25 - Example of an Objective EDRMS EzeScan Profiler spreadsheet
-
The concept is to build up a spreadsheet with the details of various document types and include metadata values to speed up document capture process in the KFI profiling stage of documents.
-
Each PC client using the EzeScan Profiler spreadsheet requires an ODBC connection to the spreadsheet.
-
Each time a new PC was set-up to use EzeScan it required an I.T. Admin person to create the ODBC settings.
-
-
If the spreadsheet requires updating then the users are unable to do any profiling of documents which utilise it.
-
If a large number of users were accessing it at once it would occasionally "lock up" with an ODBC error being indicated.
Now for the future…
The EzeScan Authority Server now has the ability to replace the EzeScan Profiler spreadsheet with the Authority Tables facility.
The tables are created on the EzeScan Authority Server by an EzeScan administrator and then (going forward) may be either maintained via the EzeScan PC client Admin > KFI Lookups (the easiest way) or via the tables tab in EzeScan Authority Server or can be maintained in a spreadsheet outside of the Authority Tables and uploaded with new changes.
Authority Tables uses a SQLite database to hold the table data.
-
Please refer to the KFI User Guide for details on maintaining the tables via the KFI Lookups function. This section will only deal with the Authority Tables set-up on the server.
-
This functionality could replace the KFI Lookups currently used across your organisation as it will centralise them into one place - far more easier to create and maintain!
One example is the Batch Names used when by the batch scan process.
Creating a new Authority Lookup Table - using the "Automatic" method
-
This is the quickest and by far the easiest way to create your Authority Lookup tables, especially if you have an existing Profiler Spreadsheet. It simply becomes a conversion process.Prior to commencing this process take time to consider a naming convention for the tables about to be created.
Either use your existing Profiler spreadsheet or create a new one. You may need assistance if creating a new one - please contact EzeScan Support or your reseller for details.
-
The spreadsheet column headings will become the column names and you cannot have any spaces in the names.
For example Document Description
must be now be
Document_Description
Allowed column name characters are A to Z (upper or lower case), 0 to 9, _ (an underscore), $ and ' (an Apostrophe).
EzeScan general design recommendations are to use A to Z (upper or lower case), 0 to 9, _ (an underscore) only when naming columns.
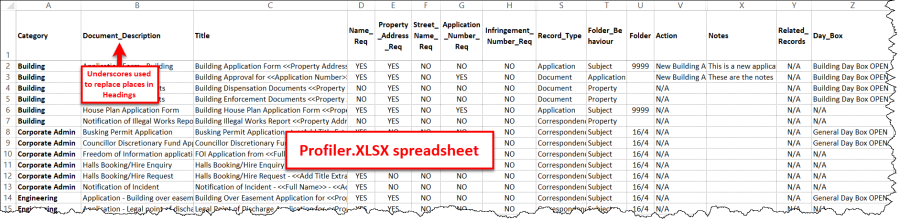
Figure 26 - Example of a Profiler spreadsheet (for HPE Content Manager)
-
Run a spell check on the file and sort the columns once completed.
Once the spreadsheet has been completed, save it as a CSV file (e.g. Profiler.CSV)
Creating the new table
-
Click on the Tables tab
-
Select the + Add a table option
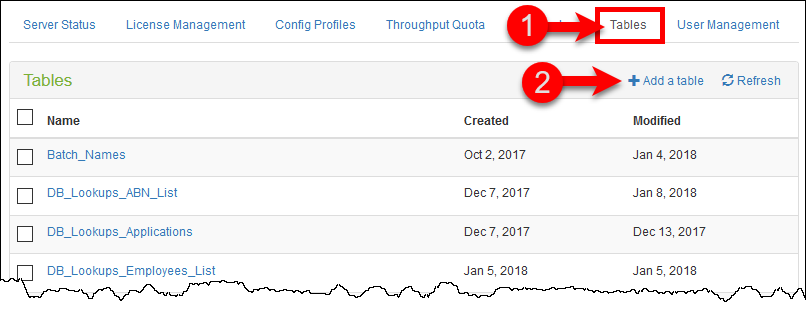
Figure 27 - Creating a new Authority Lookup table (several have already been created)
-
Give the new table a name (use those naming conventions suggested earlier)
-
Click the Browse button and browse for the CSV file created earlier
-
Once the CSV file has been selected; click + Create Table button
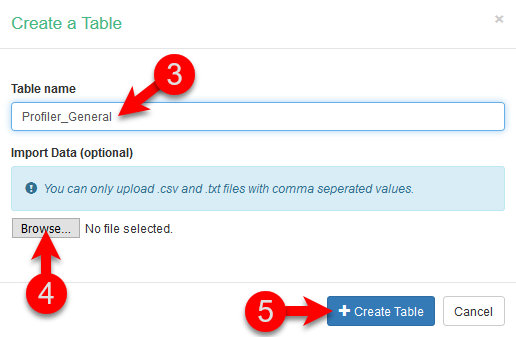
Figure 28 - Creating a table using an existing CSV - browse for the CSV file
-

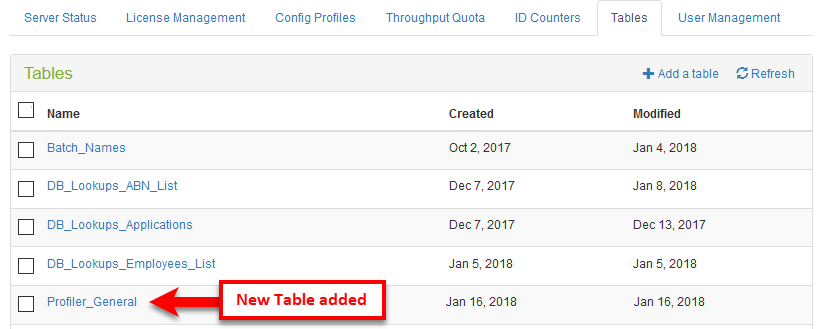
Figure 29 - new Authority Lookup Table added to the list
-
Clicking on the table link (e.g. Profiler_General) will open the table. Available options are…
-
-

Edit Table allows for: adding additional columns editing column names deleting columns
-
-
Warning - may affect any KFI's using this table
-
-
-
-

-

-

-
Creating a new Authority Lookup Table - using the "Manual" method
-
Prior to commencing this process take time to consider a naming convention for the tables about to be created.
The manual creation process is excellent for creating small lookup tables such as Batch Names.
Creating the new table
-
Click on the Tables tab
-
Select the + Add a table option
Figure 30 - Creating a new Authority Lookup table (several have already been created)
-
Give the new table a name (use those naming conventions suggested earlier)
-
Click + Create Table button
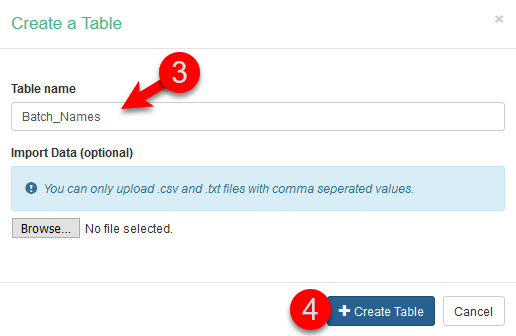
Figure 31 - Creating a table using the "manual method"
-
Once the table is created it will be added to the Tables list
-
Tick the box next to the new table name
-
Click on the table link
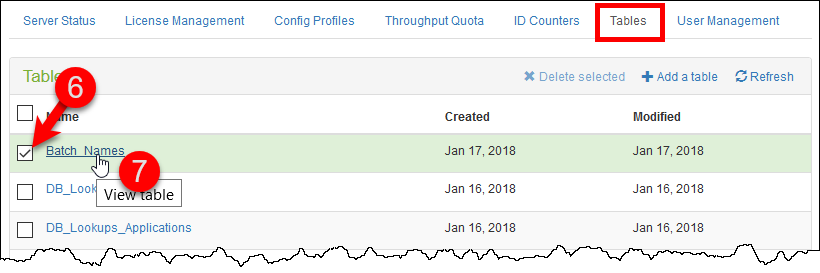
Figure 32 - Select the table and click on link to open
-
Click on the Edit table link
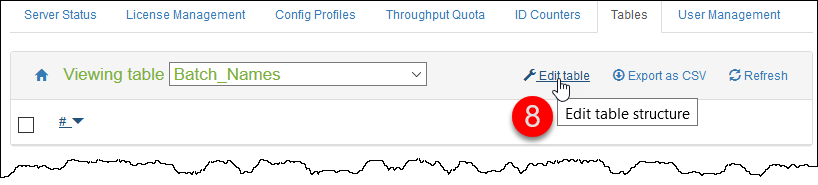
Figure 33 - select the Edit table function
-
Complete the four items to create the new column names in the table
-
Enter a column namee.g. Batch_Name
-
Select Typee.g. String
-
Tick the box for mandatory or leave box unticked for non-mandatory
-
Click the + Add button to add the column
-
-
Add more column names if required OR click the Close button to complete
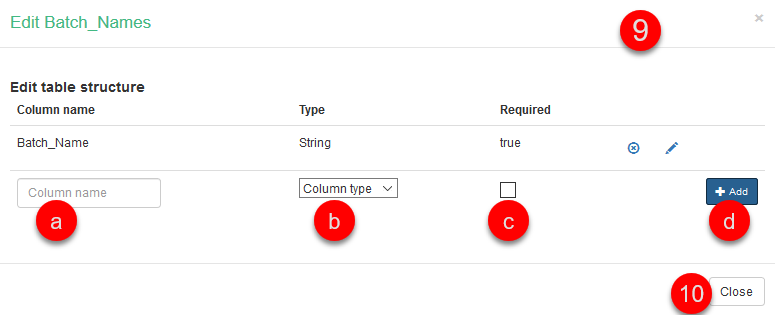
Figure 34 - Creating a column in the table
Adding Table Data (rows)
Once the table columns have been created it is now time to add the row values
-
Tick the box next to the table name
-
Click on the table link
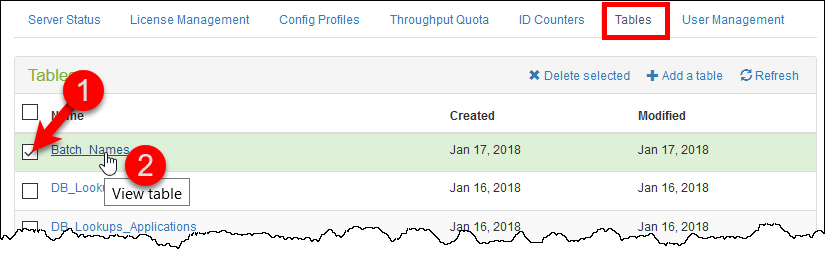
Figure 35 - opening the table to add some data (rows)
-
Select the + Add data link
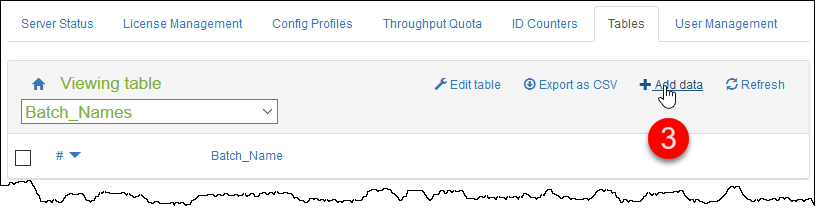
Figure 36 - click the add data link to begin adding new rows
-
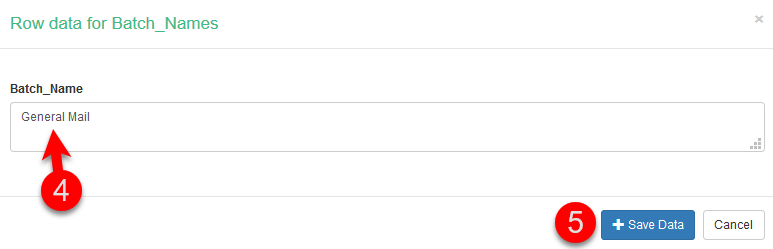
Add the name into the field
-
Click the + Save Data button
-
Repeat the above steps to add additional rows
Editing Table Data (rows)
Use the 
Deleting Table Data (rows)
Tick the row name box and then use the 
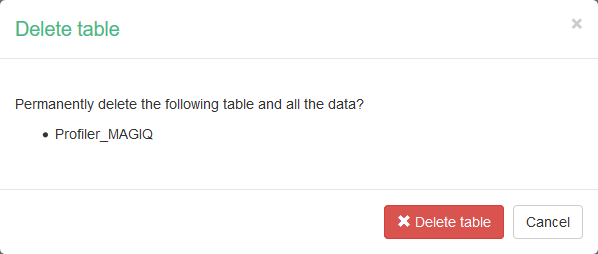
Deleting a table
Tables can be deleted from the Authority Service by following the below procedure.
Select the table to be deleted, making sure its checkbox is ticked.

Choose the "Delete selected" option as shown below.

There will be a confirmation dialog and as long as all is correct and the intended table is listed, choose the "Delete table" button and the table will be deleted fully.
Exporting the table and editing in Microsoft Excel
An option included with the current release of the Authority service is the ability to download a table as a csv file. Once downloaded the table can be edited in Excel and the table in the Authority service can then be replaced with the edited csv file.
To Export:
Select the table to be exported by clicking on the table name.
When the table opens, choose the Export as CSV option.

Save the file to a suitable location.
To Edit the CSV file:
-
Although CSV files do open in Excel by simply double clicking on the icon, this process should not be used for editing CSV as the Excel defaults can have unanticipated results.
For example Folder/Container IDs like 03/06/17 will be converted to a date format.
-
To safely edit a CSV file it should be imported as Text into Excel with the field types configured as Text.3.
-
Open Excel with a blank workbook.
-
Choose the Data Tab and then the "Get Data From Text" ribbon item, browse to the CSV file and open.
-
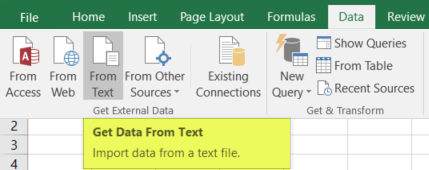
Figure 37
4. The Text Import Wizard will open at step 1, be sure the highlighted items are chosen prior to clicking the Next button

Figure 38
5. In Step 2 of the Wizard, set the delimiter to Comma making sure no other delimiter is ticked, no other changes should be required.
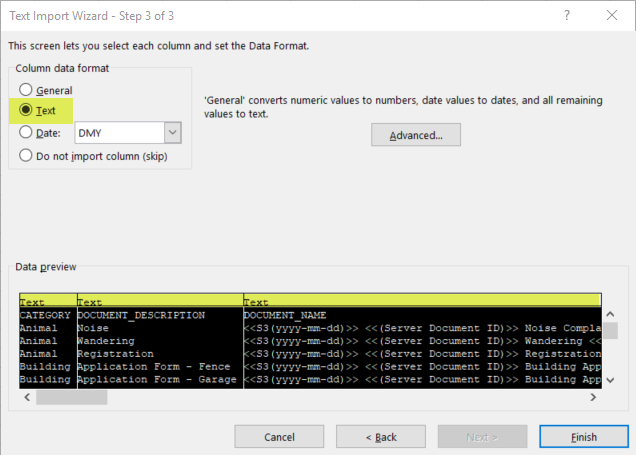
Figure 39
6. In Step 3 we need to set the columns from "General" to "Text".
Select the first field and then scroll the fields all the way to the right and using the Shift key, select all the fields and change the "Column data format" to "Text".
When all fields have been set with a column data format of "Text" the Finish button can be clicked to load the CSV file into Excel.
Figure 40
7. Excel will ask if you'd like to place the data in an Existing or New Worksheet, the existing worksheet will be fine.
When editing has been completed choose to save the file as a CSV file and upload into the EzeScan Authority service by following the Delete/Create new table process