
Accessing App Pages
-
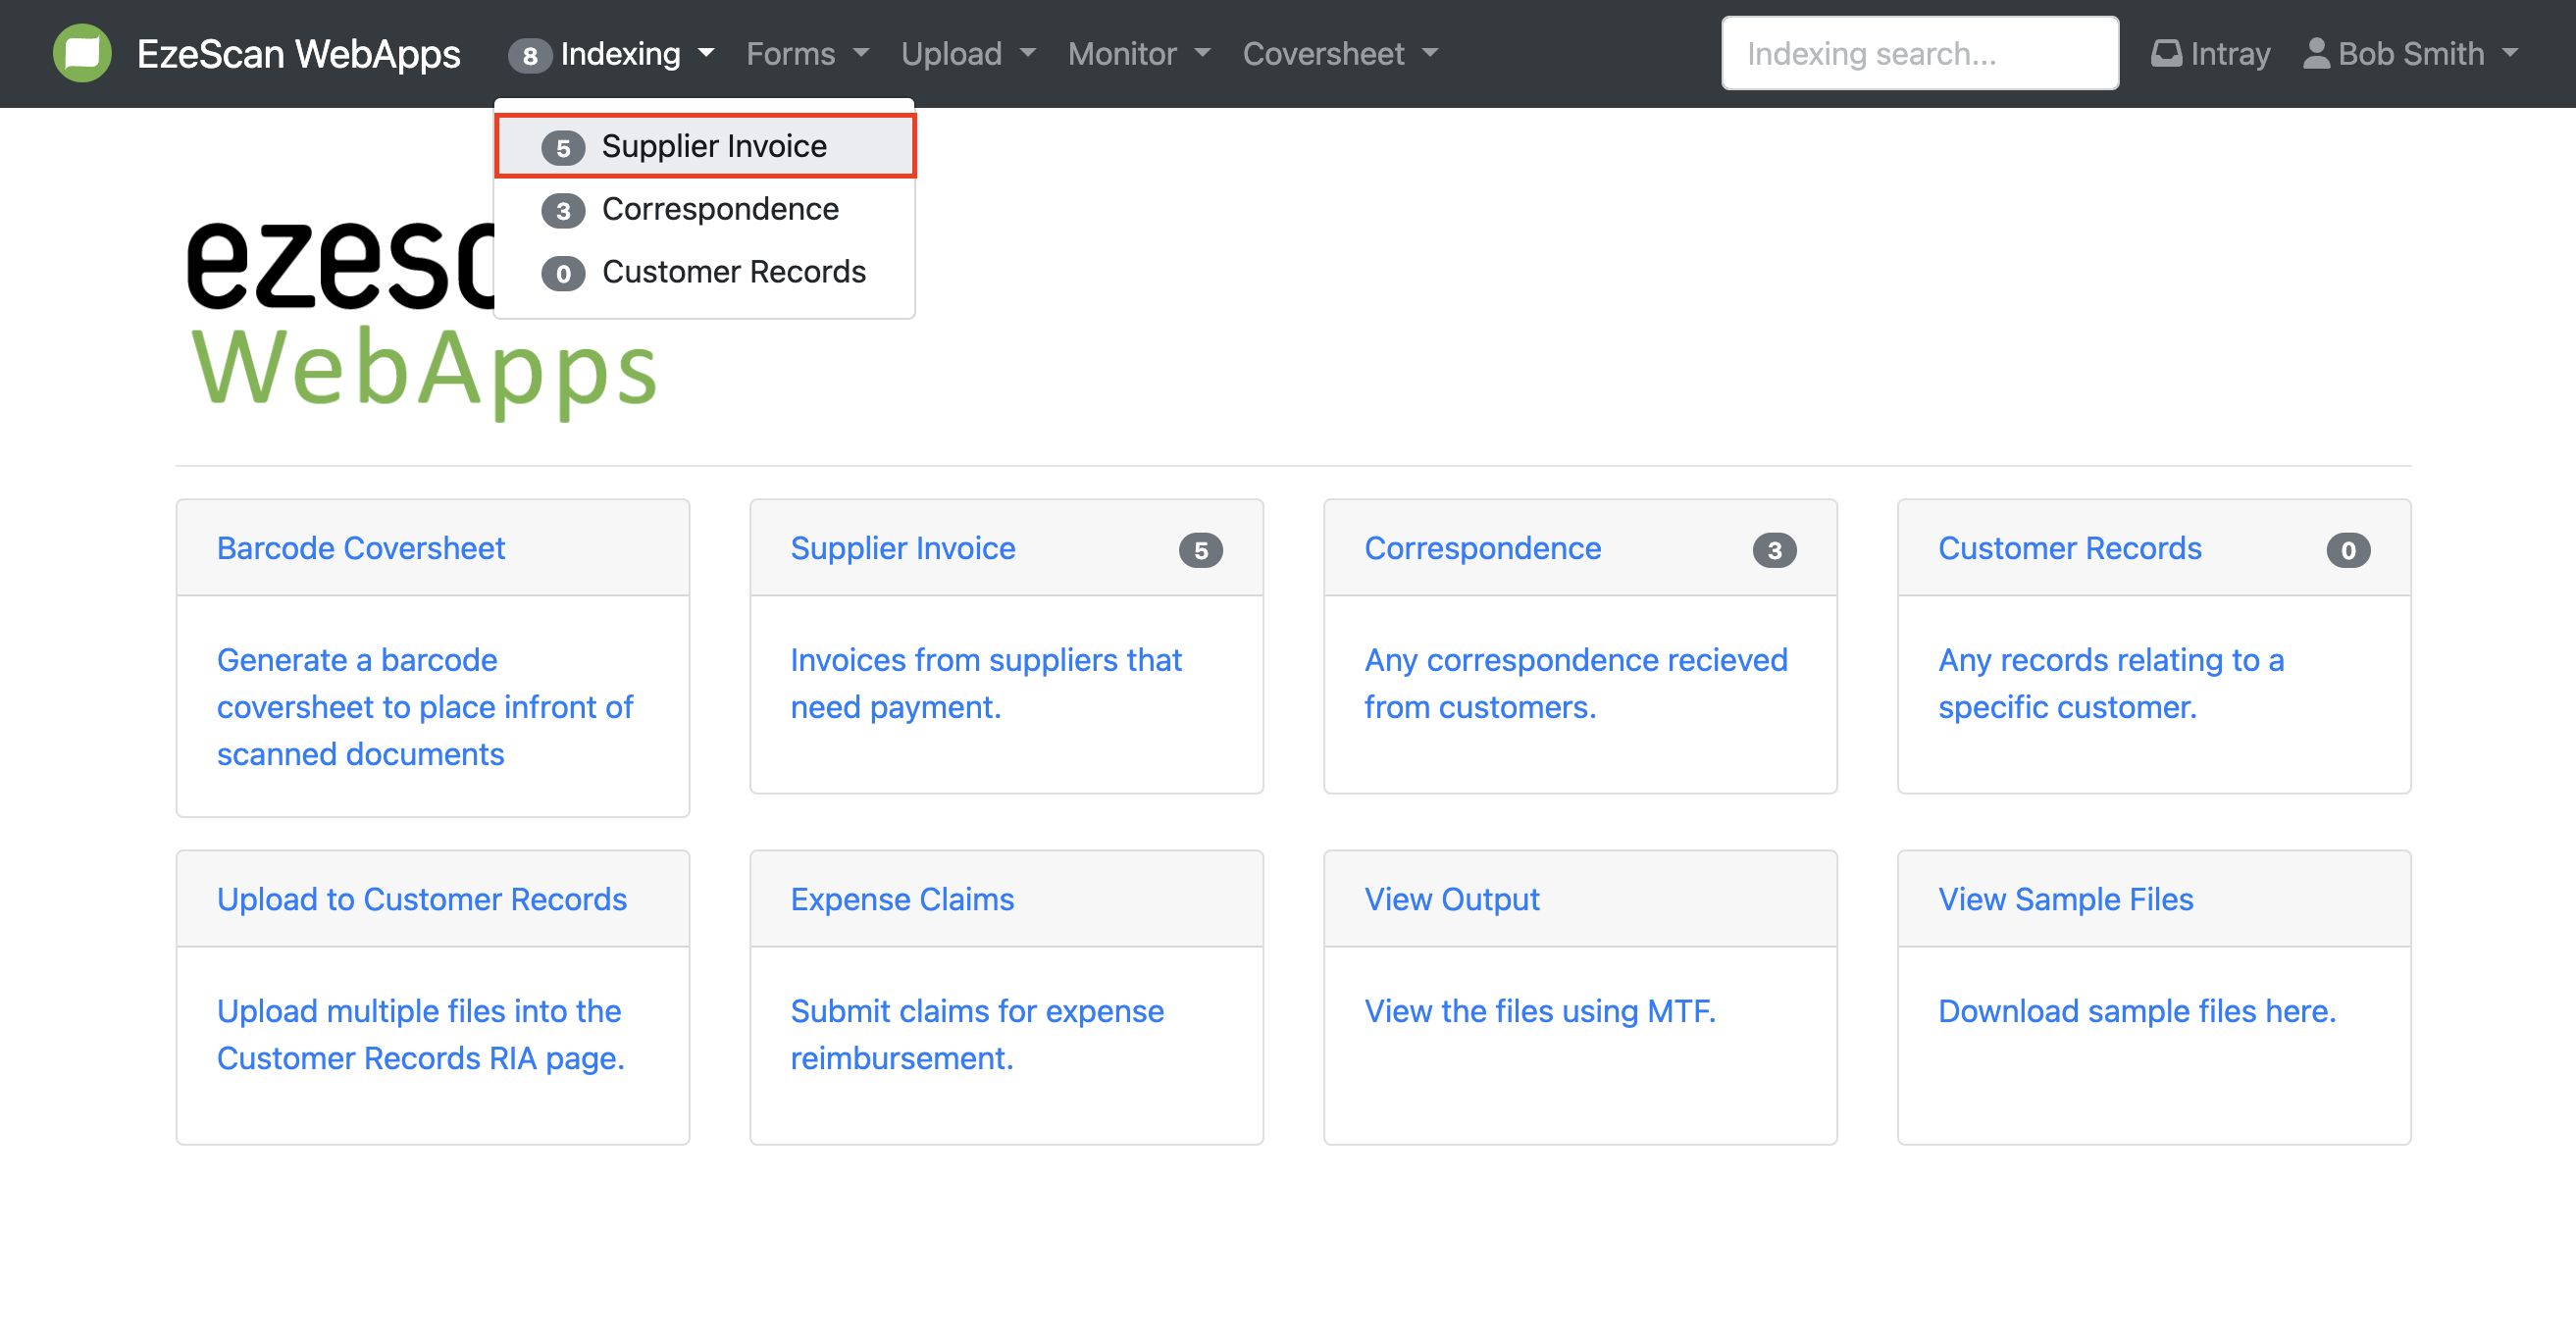
To access an app page, go to the indexing tab drop-down menu. The number next to the app page name indicates the number of documents awaiting processing in that queue. Please note that the queue names and numbers may vary based on your organisation's configuration and your user role.
-
When you select a queue, EzeScan will display a list of documents within that queue or workflow that require processing. Each document will display a selection of configured fields such as a pdf thumbnail, name of document, size, and date created. Please note: these fields will vary depending on your selected workflow or organisation's configuration.
Changing Between Table and List View
-
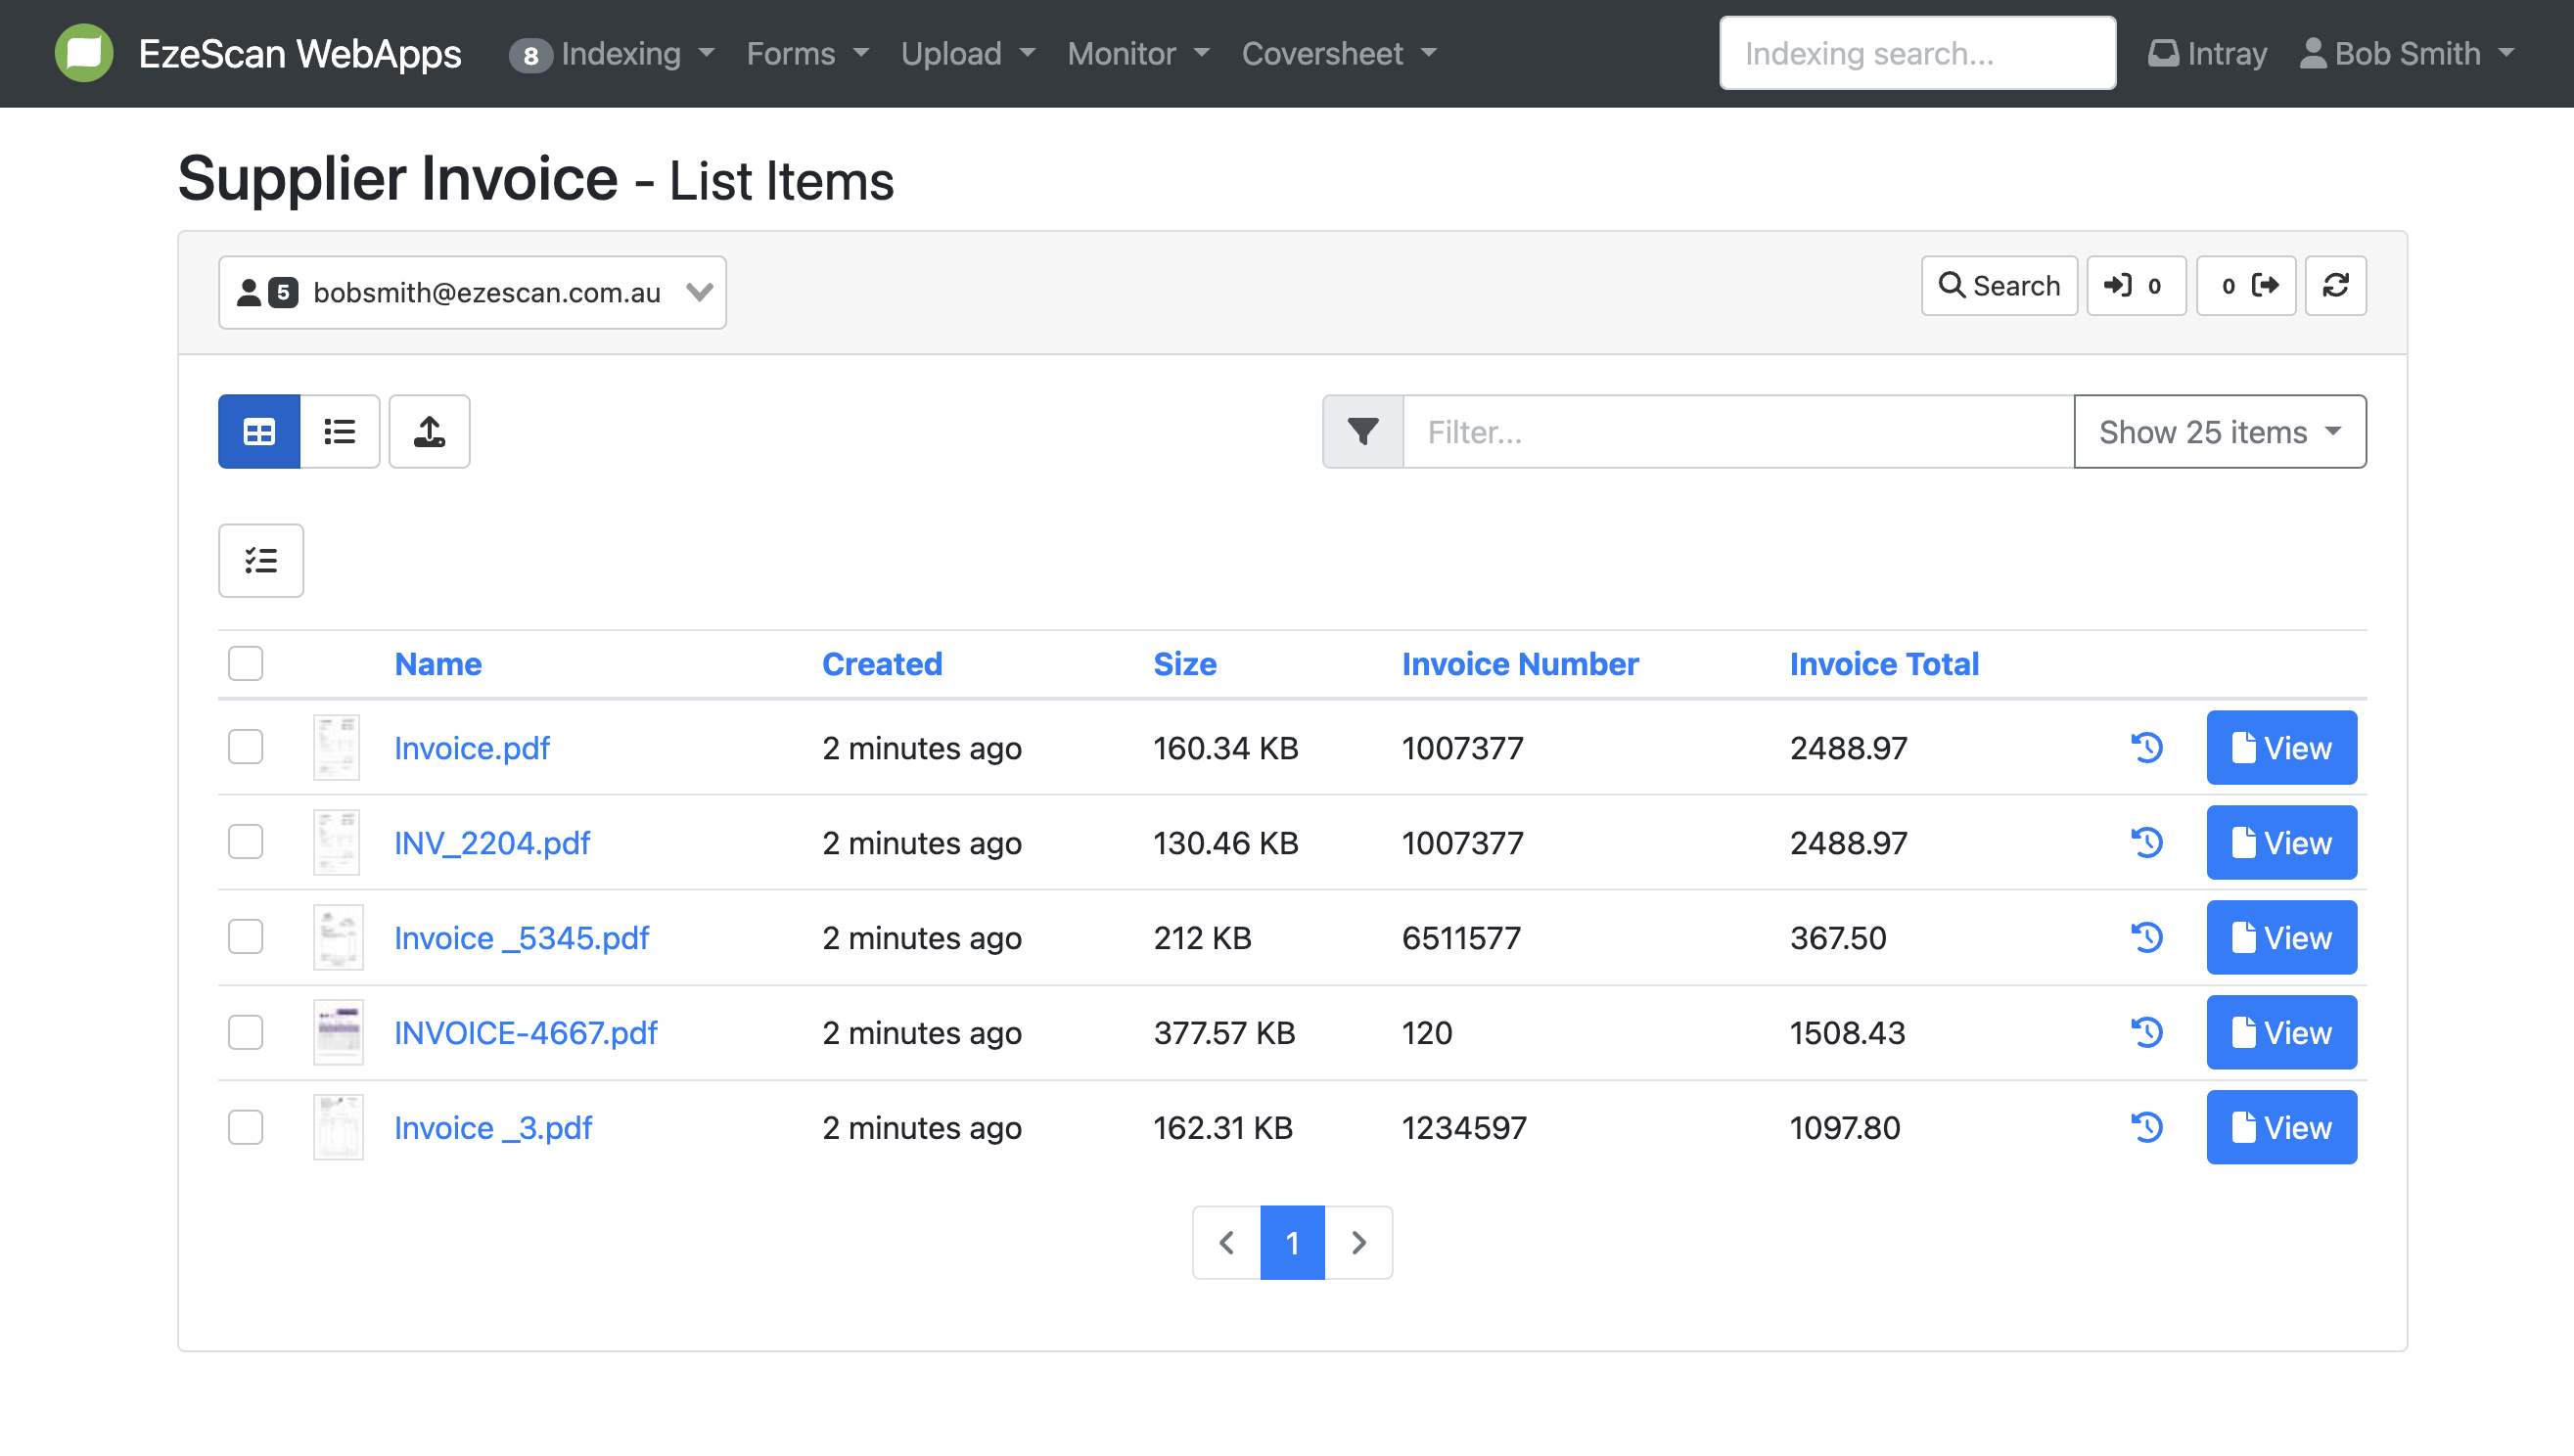
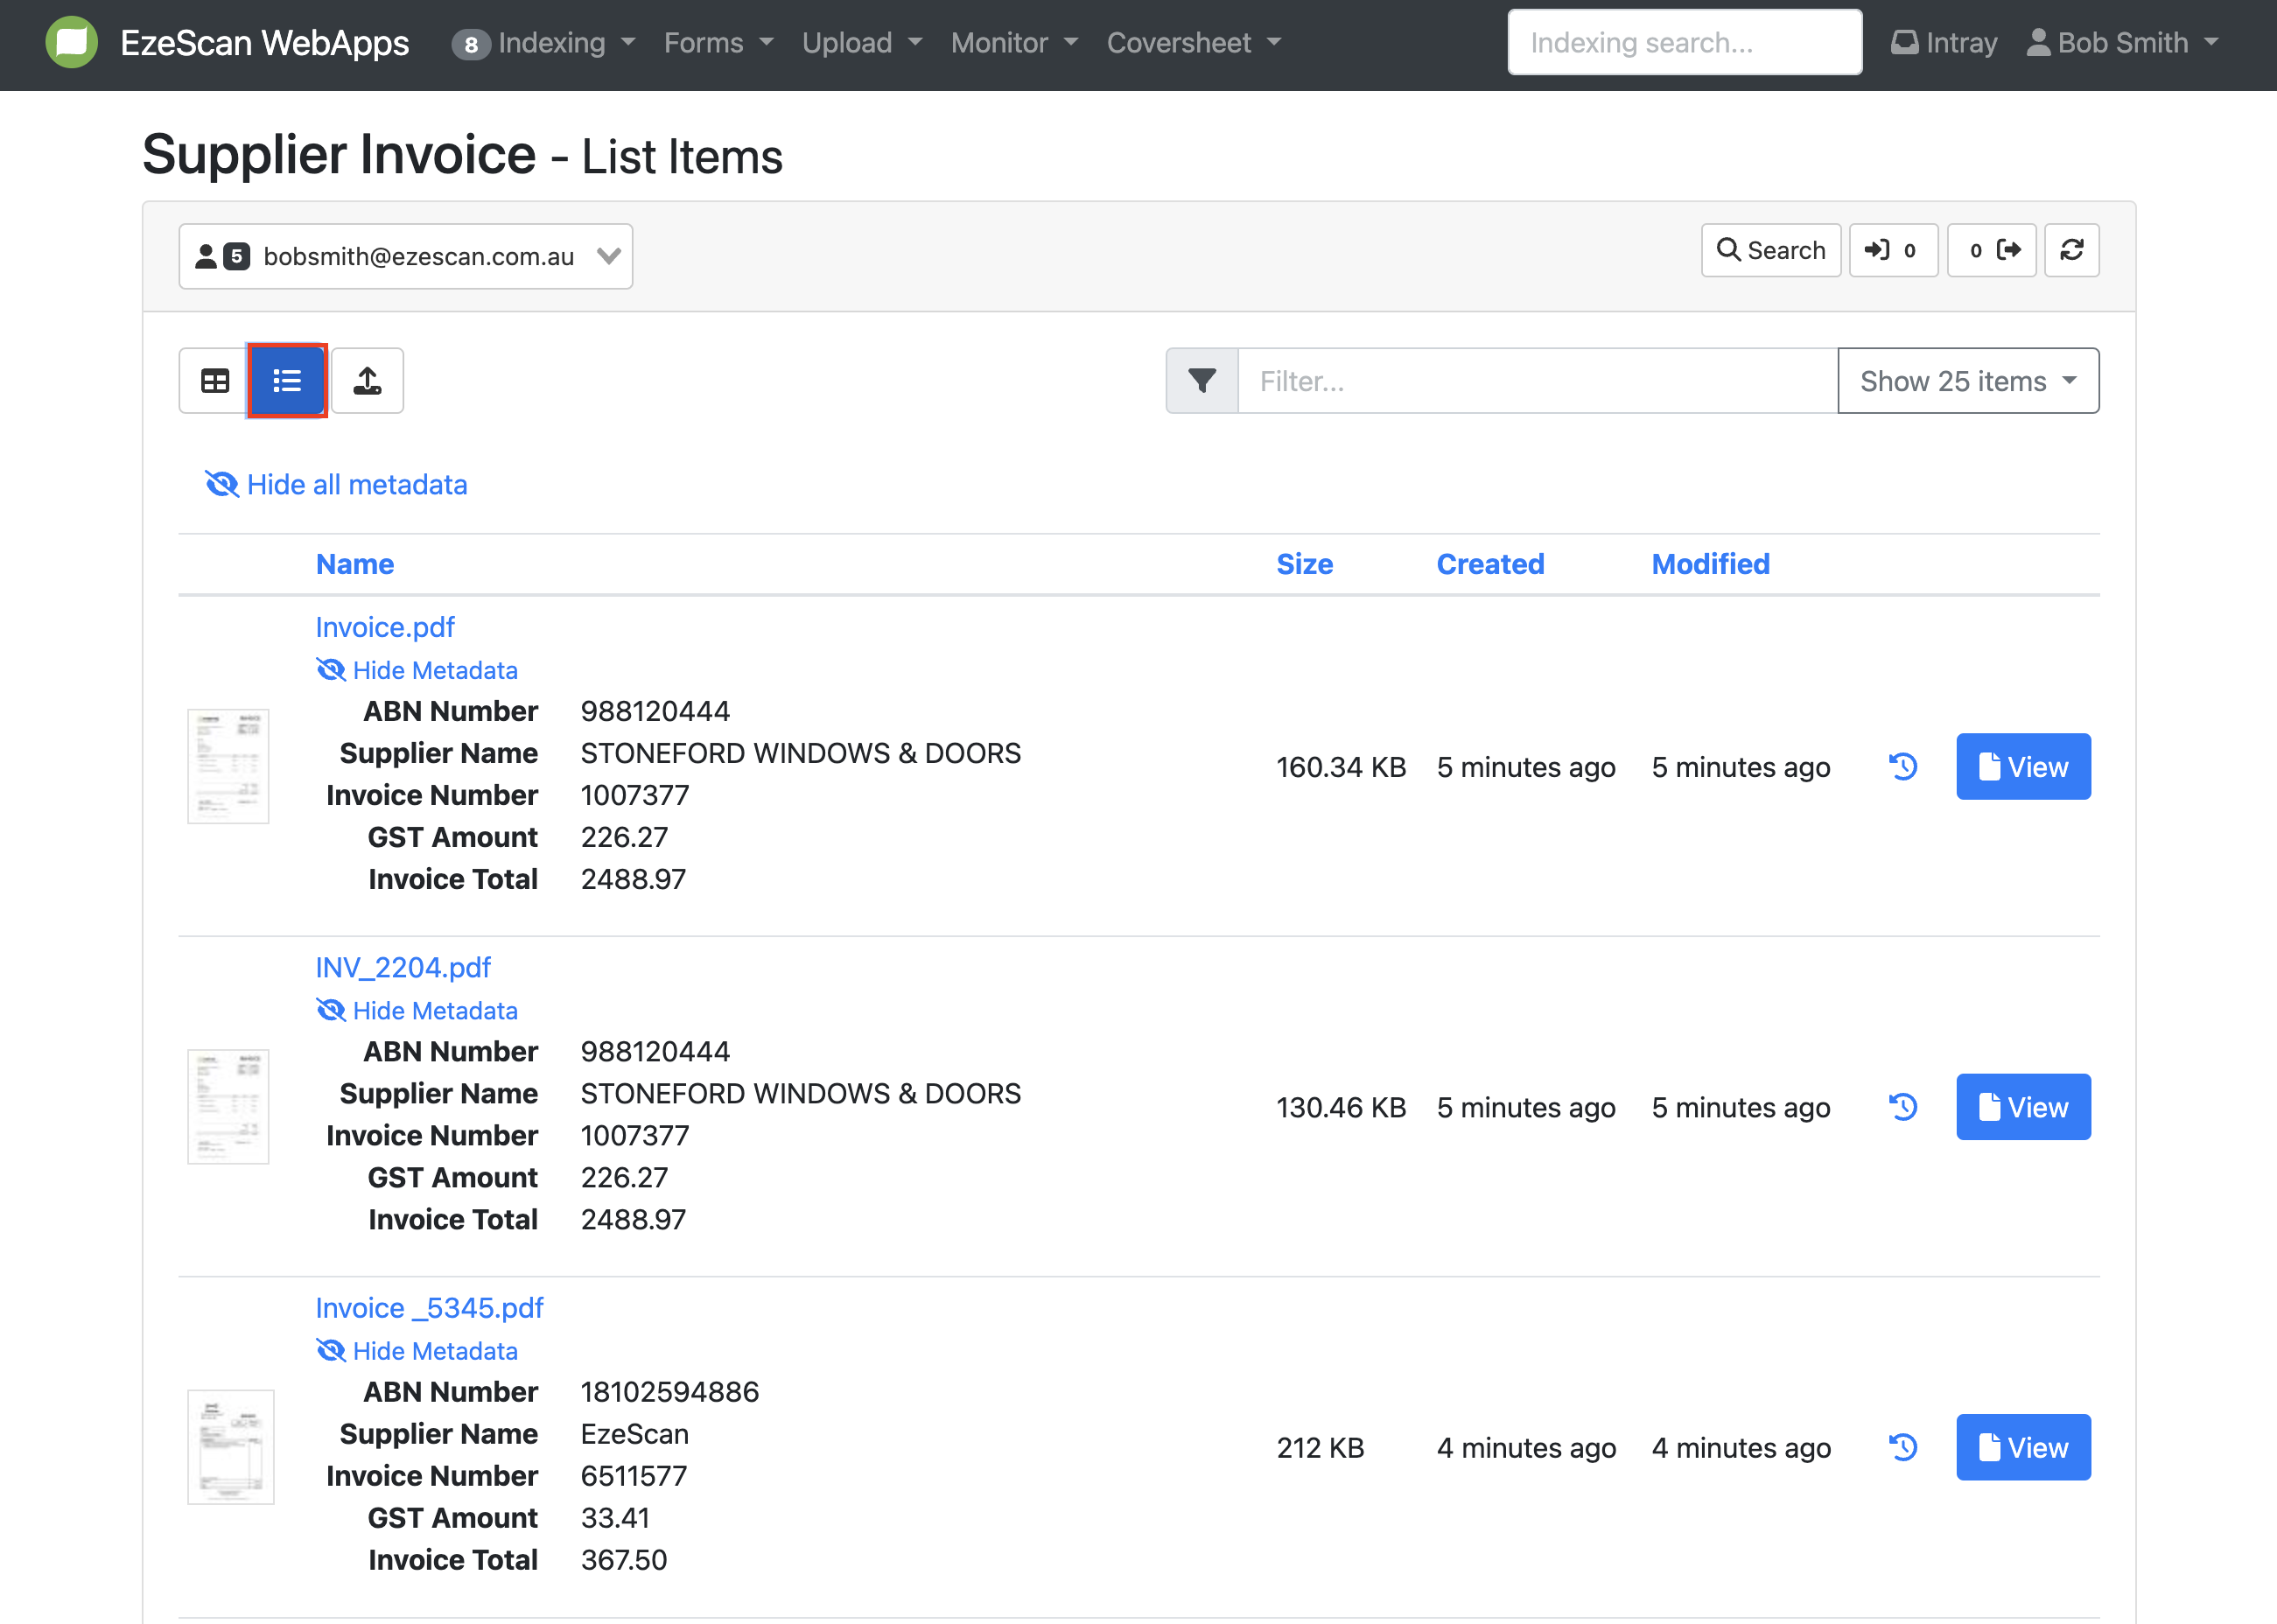
Within each queue, the table and list square icon buttons towards the top left of the table give you two view options to swap between. The list view shown below provides a larger thumbnail and can display metadata for each document. This view is particularly useful when processing invoices with pre-extracted metadata.
-
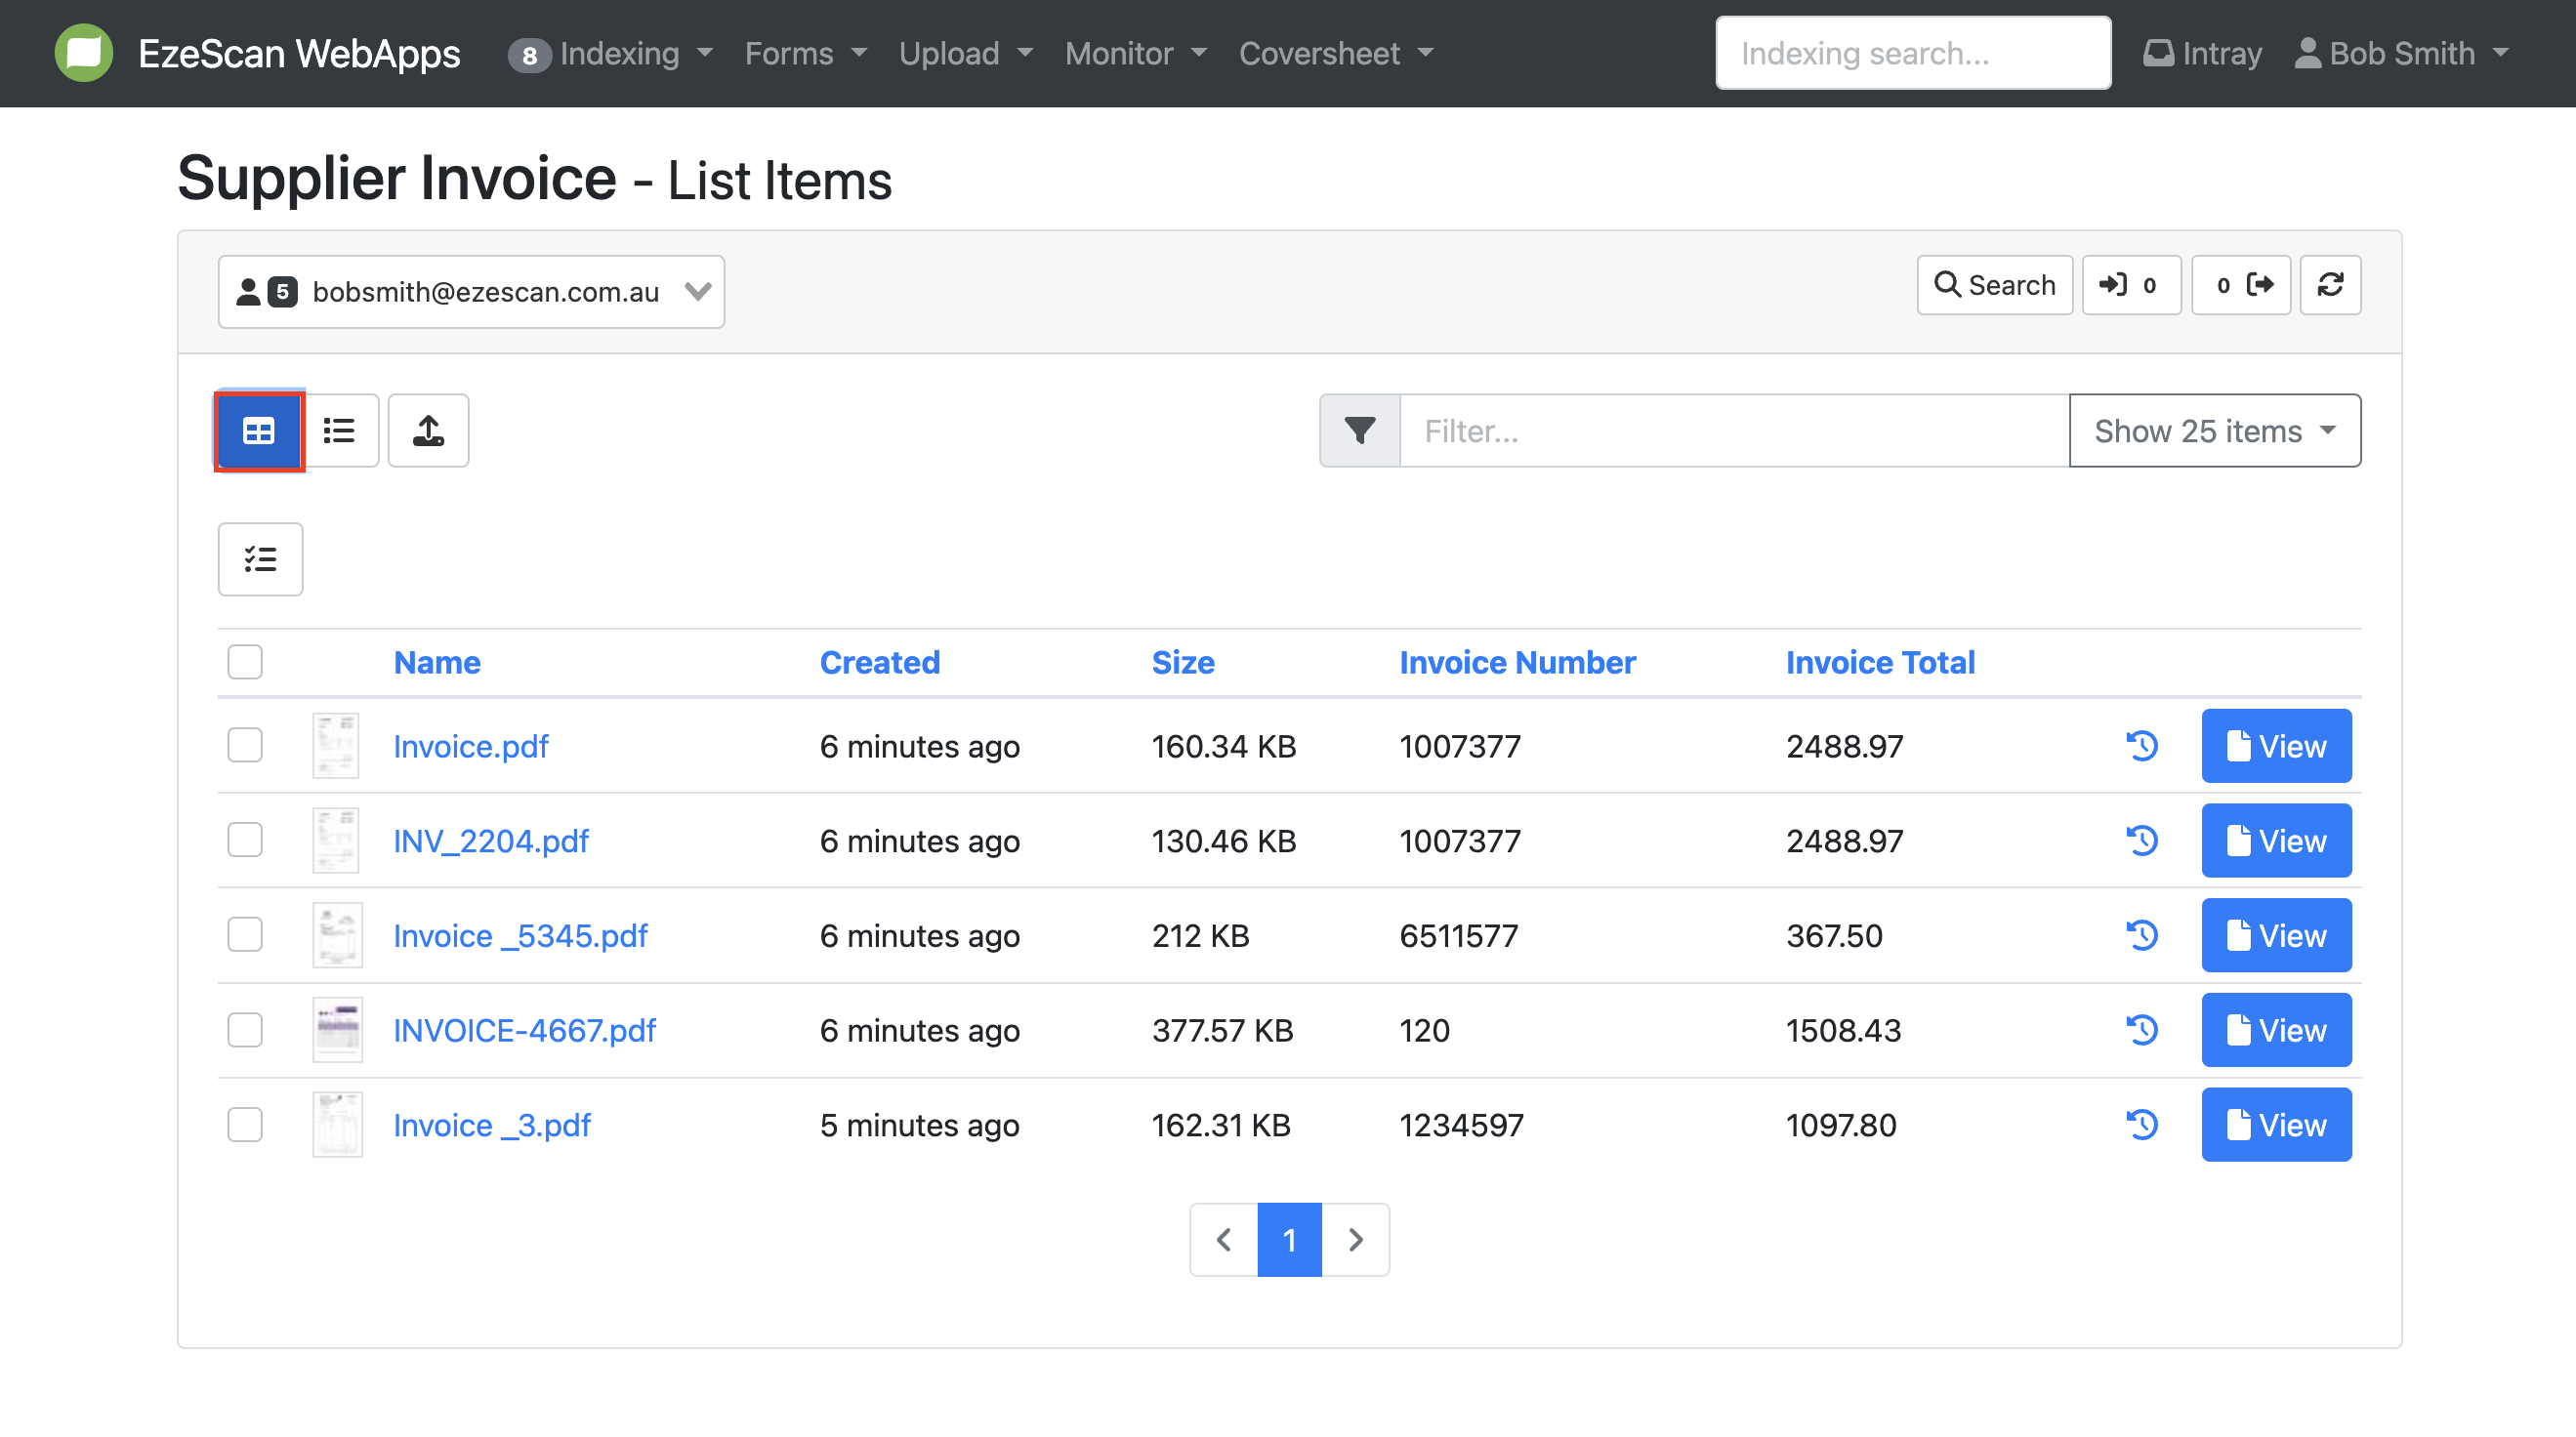
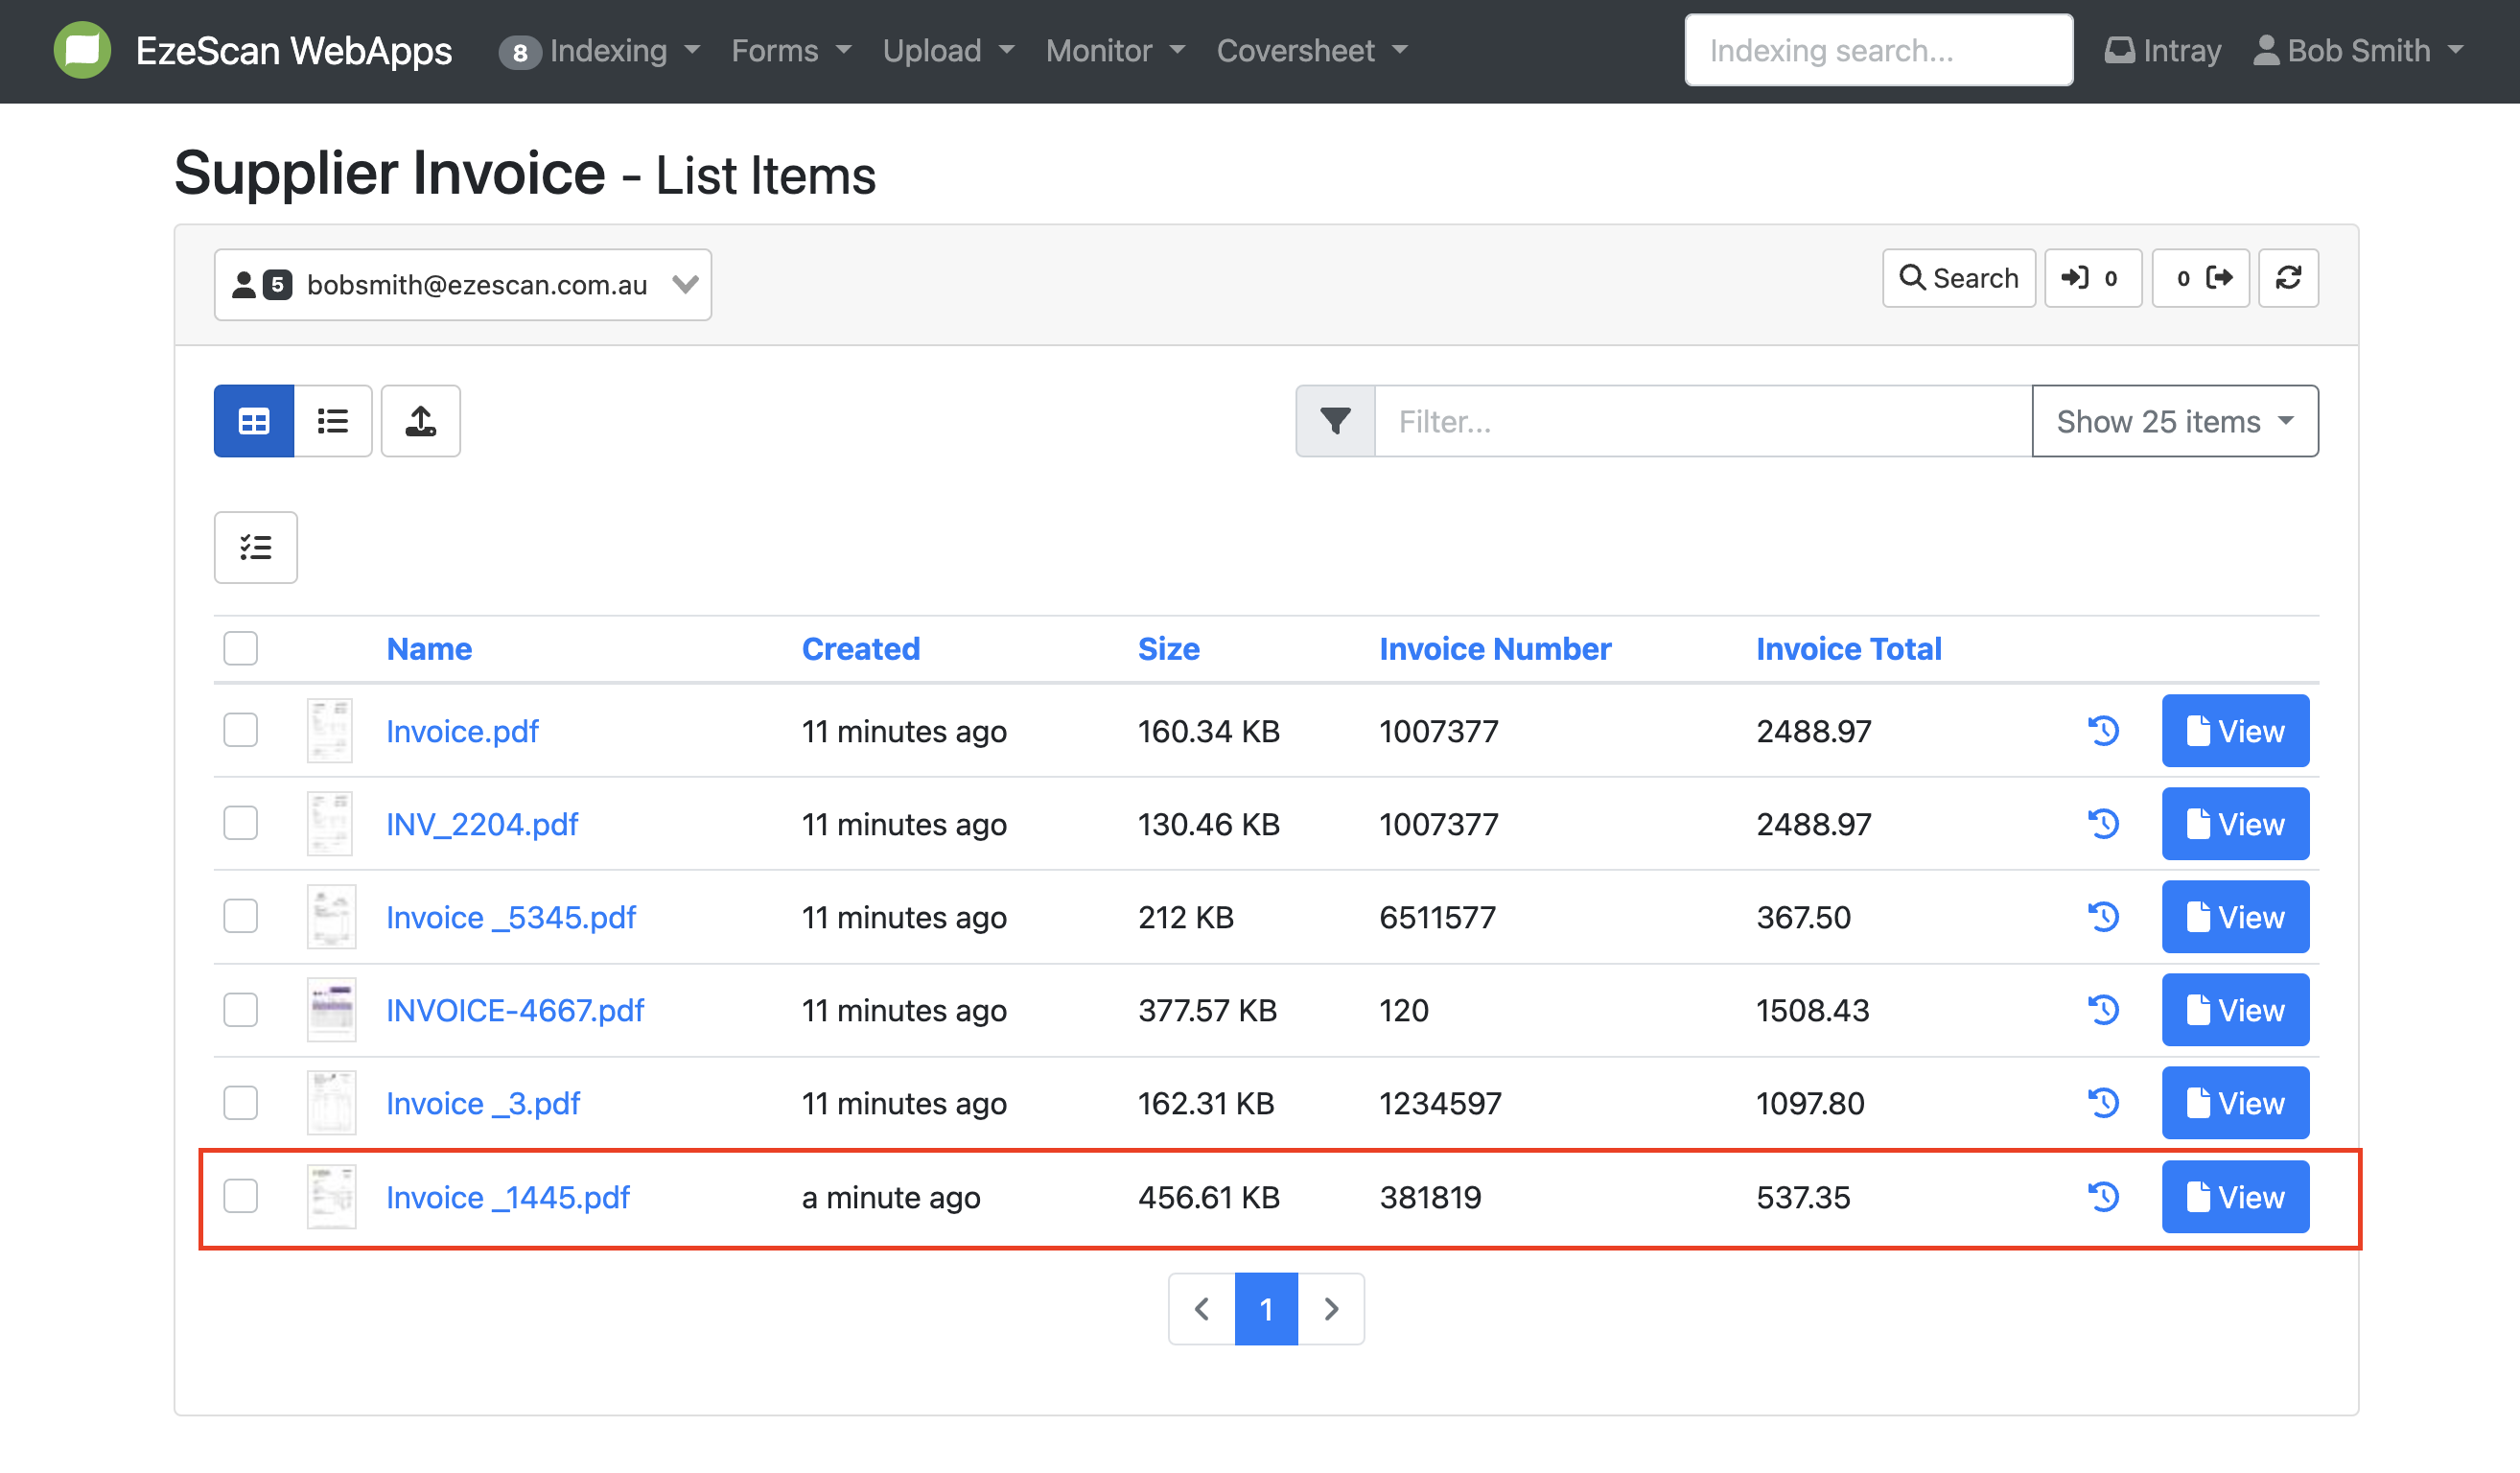
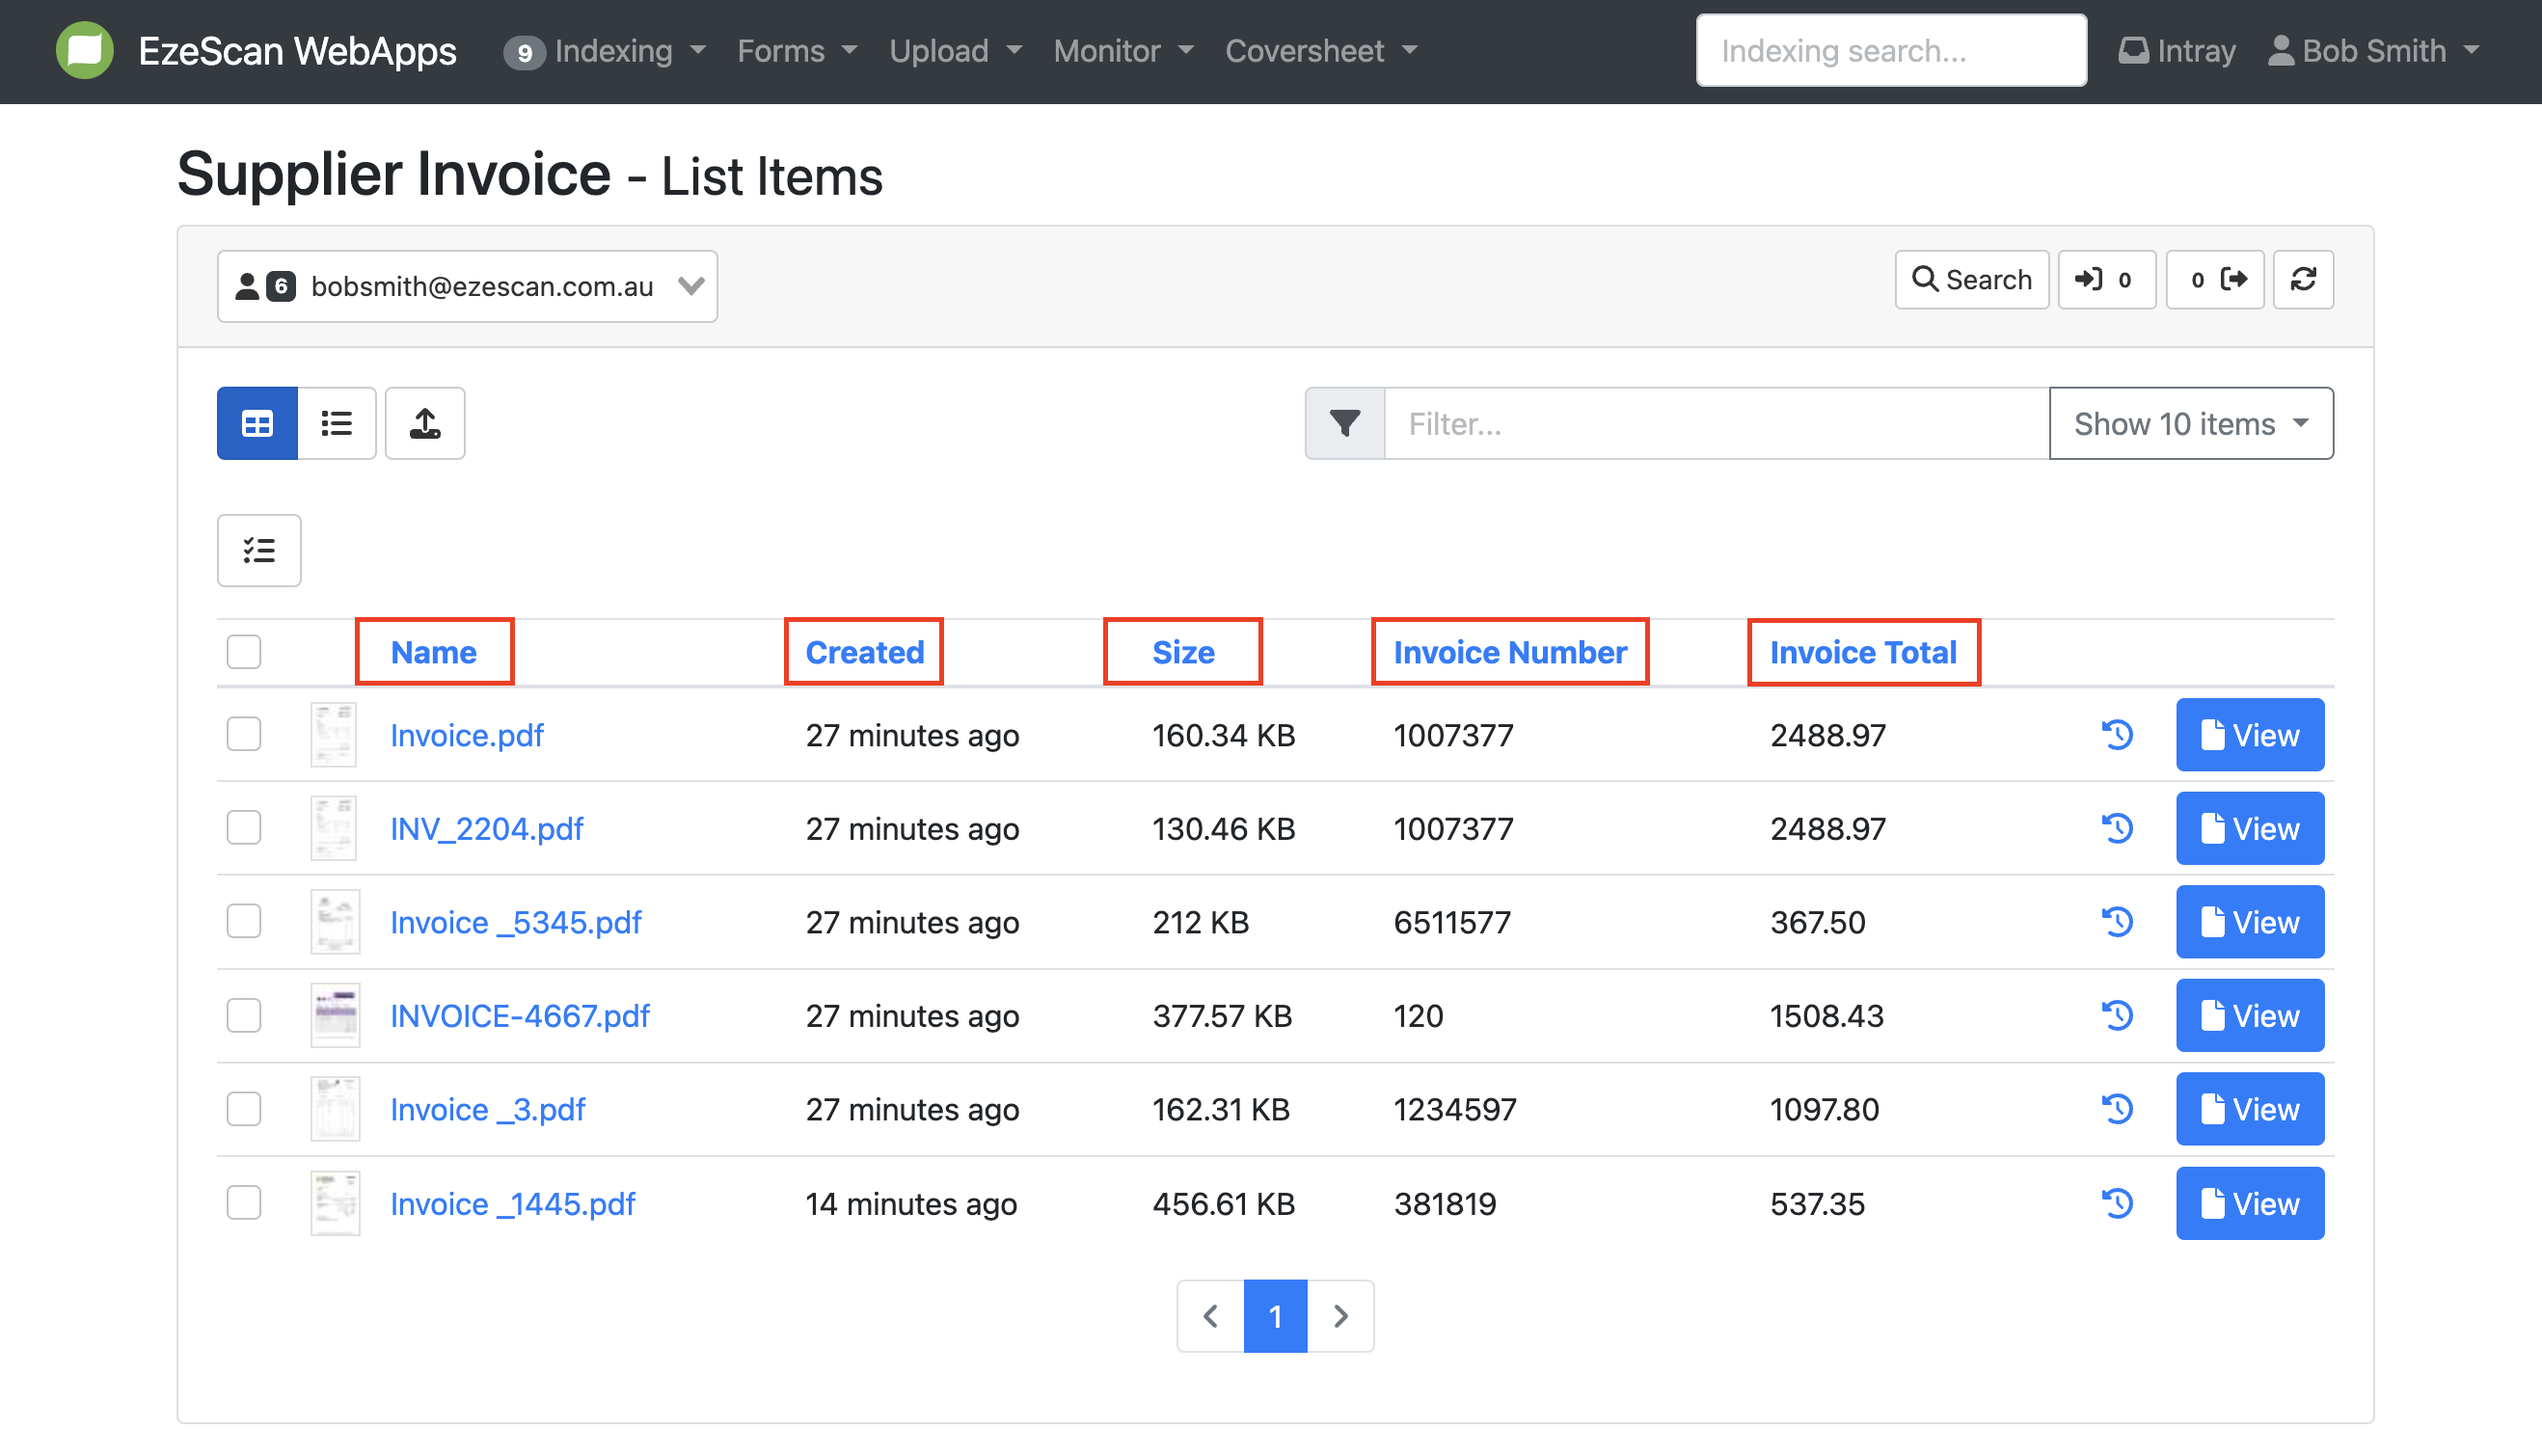
The table view shown below is more grid like, with one document per row and uses columns to display metadata.
Video Tutorial: https://youtu.be/-O0S7PXfFik
Uploading Documents to a queue
-
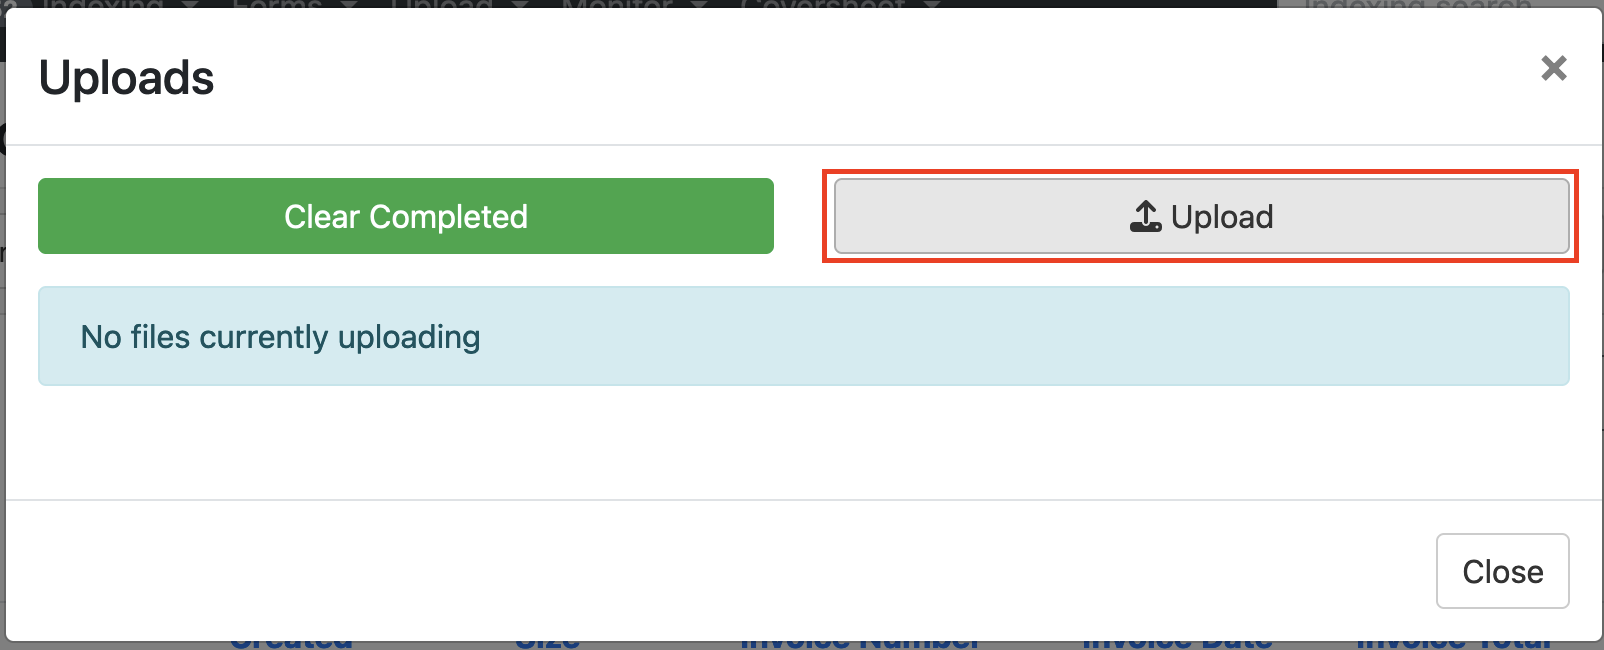
The “Uploads” button gives you the ability to upload directly upload a document from your browser to that queue for processing.

-
Click the “Upload” button in the pop-up window, select the file you want to upload from your browser, and click “Open”.
-
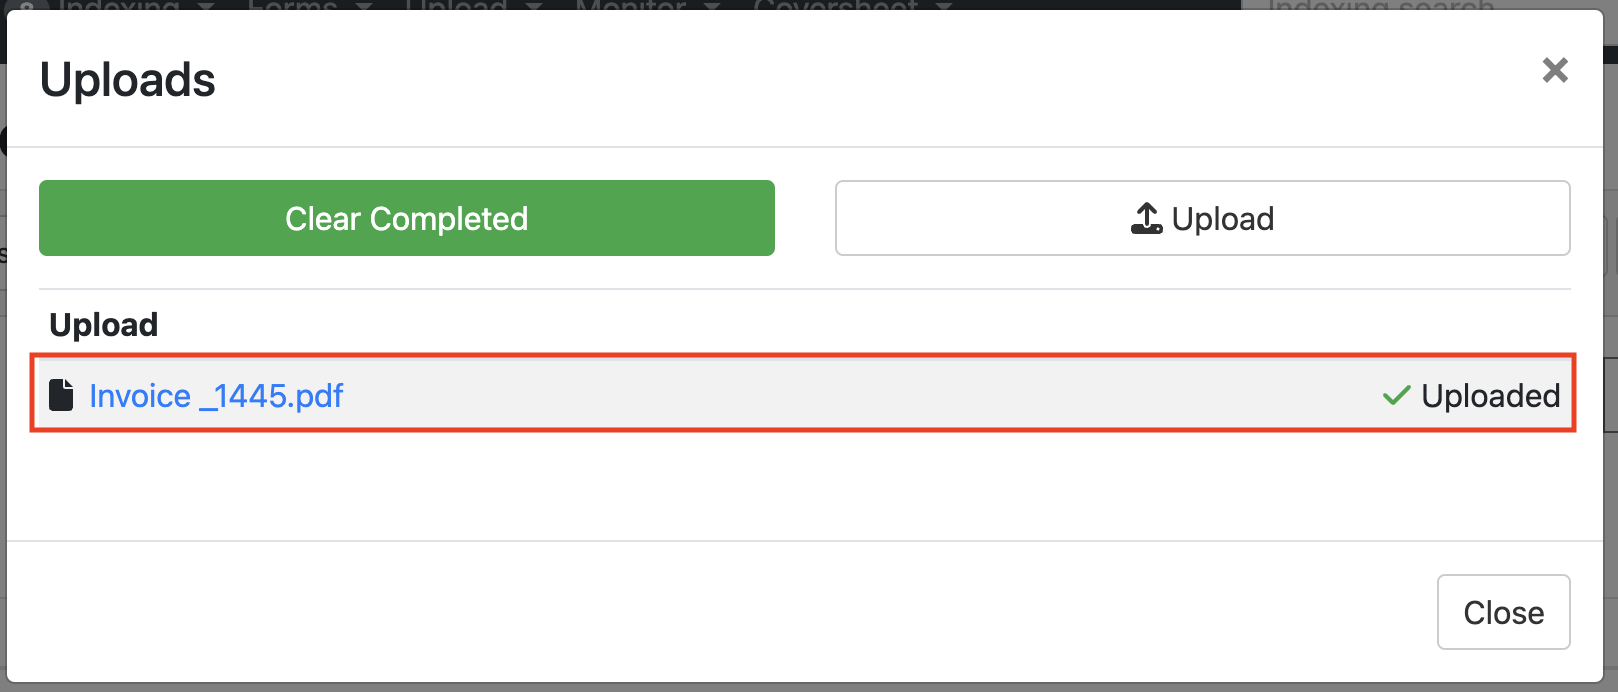
Documents that have been uploaded successfully will appear with a green tick. To remove uploaded documents, click the “Clear Completed” button. You can upload as many documents as you like before closing the window using the "x" or “close” button.
-
The newly uploaded documents will appear at the end of the list as the list displays older documents first by default.
Video Tutorial: https://youtu.be/VfNUn8ZiXxY
Filtering Documents in a Queue
-
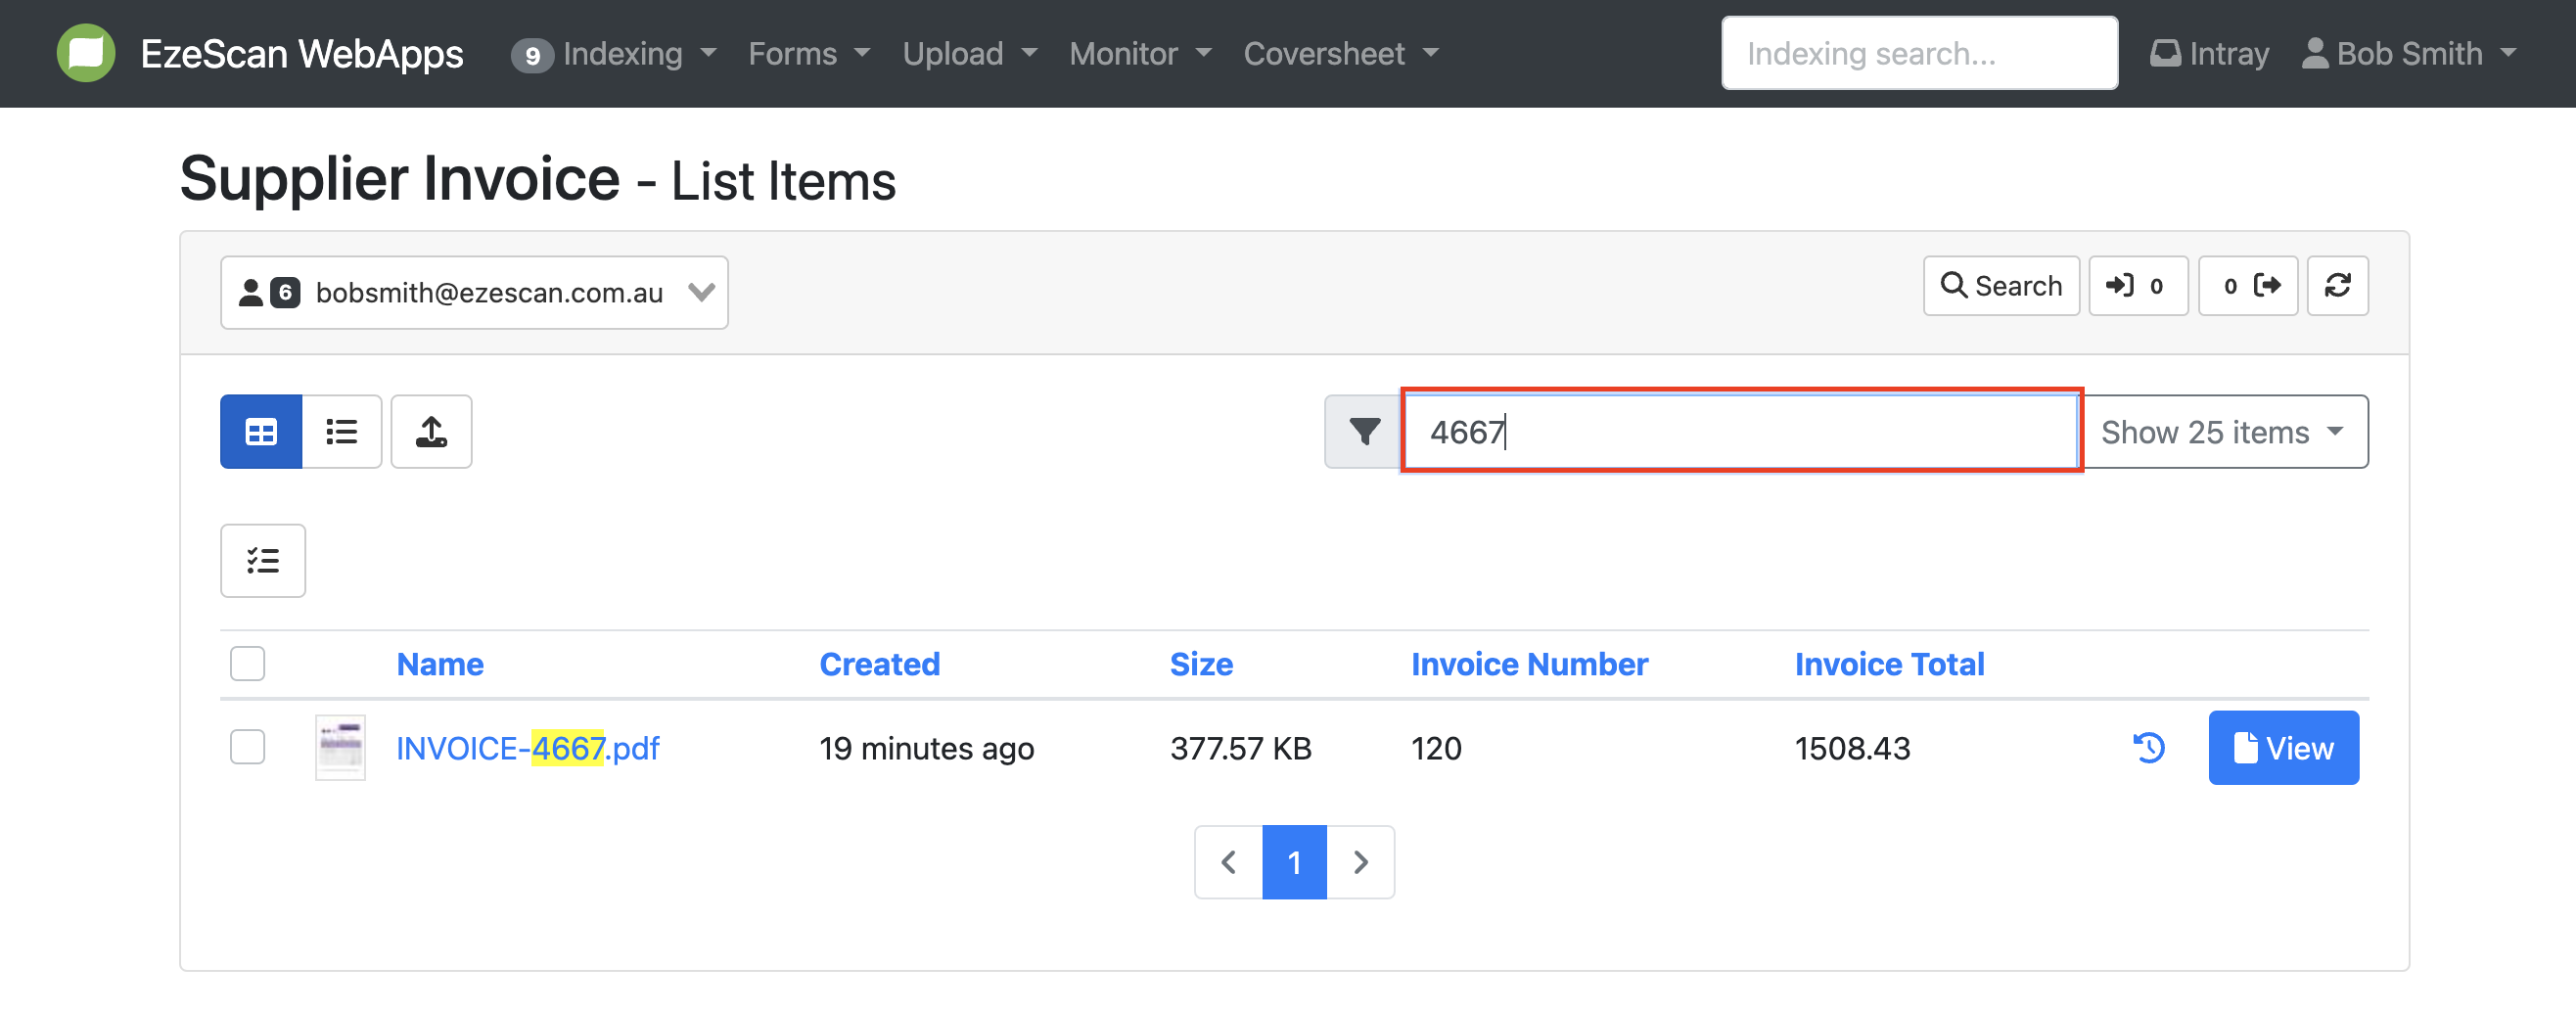
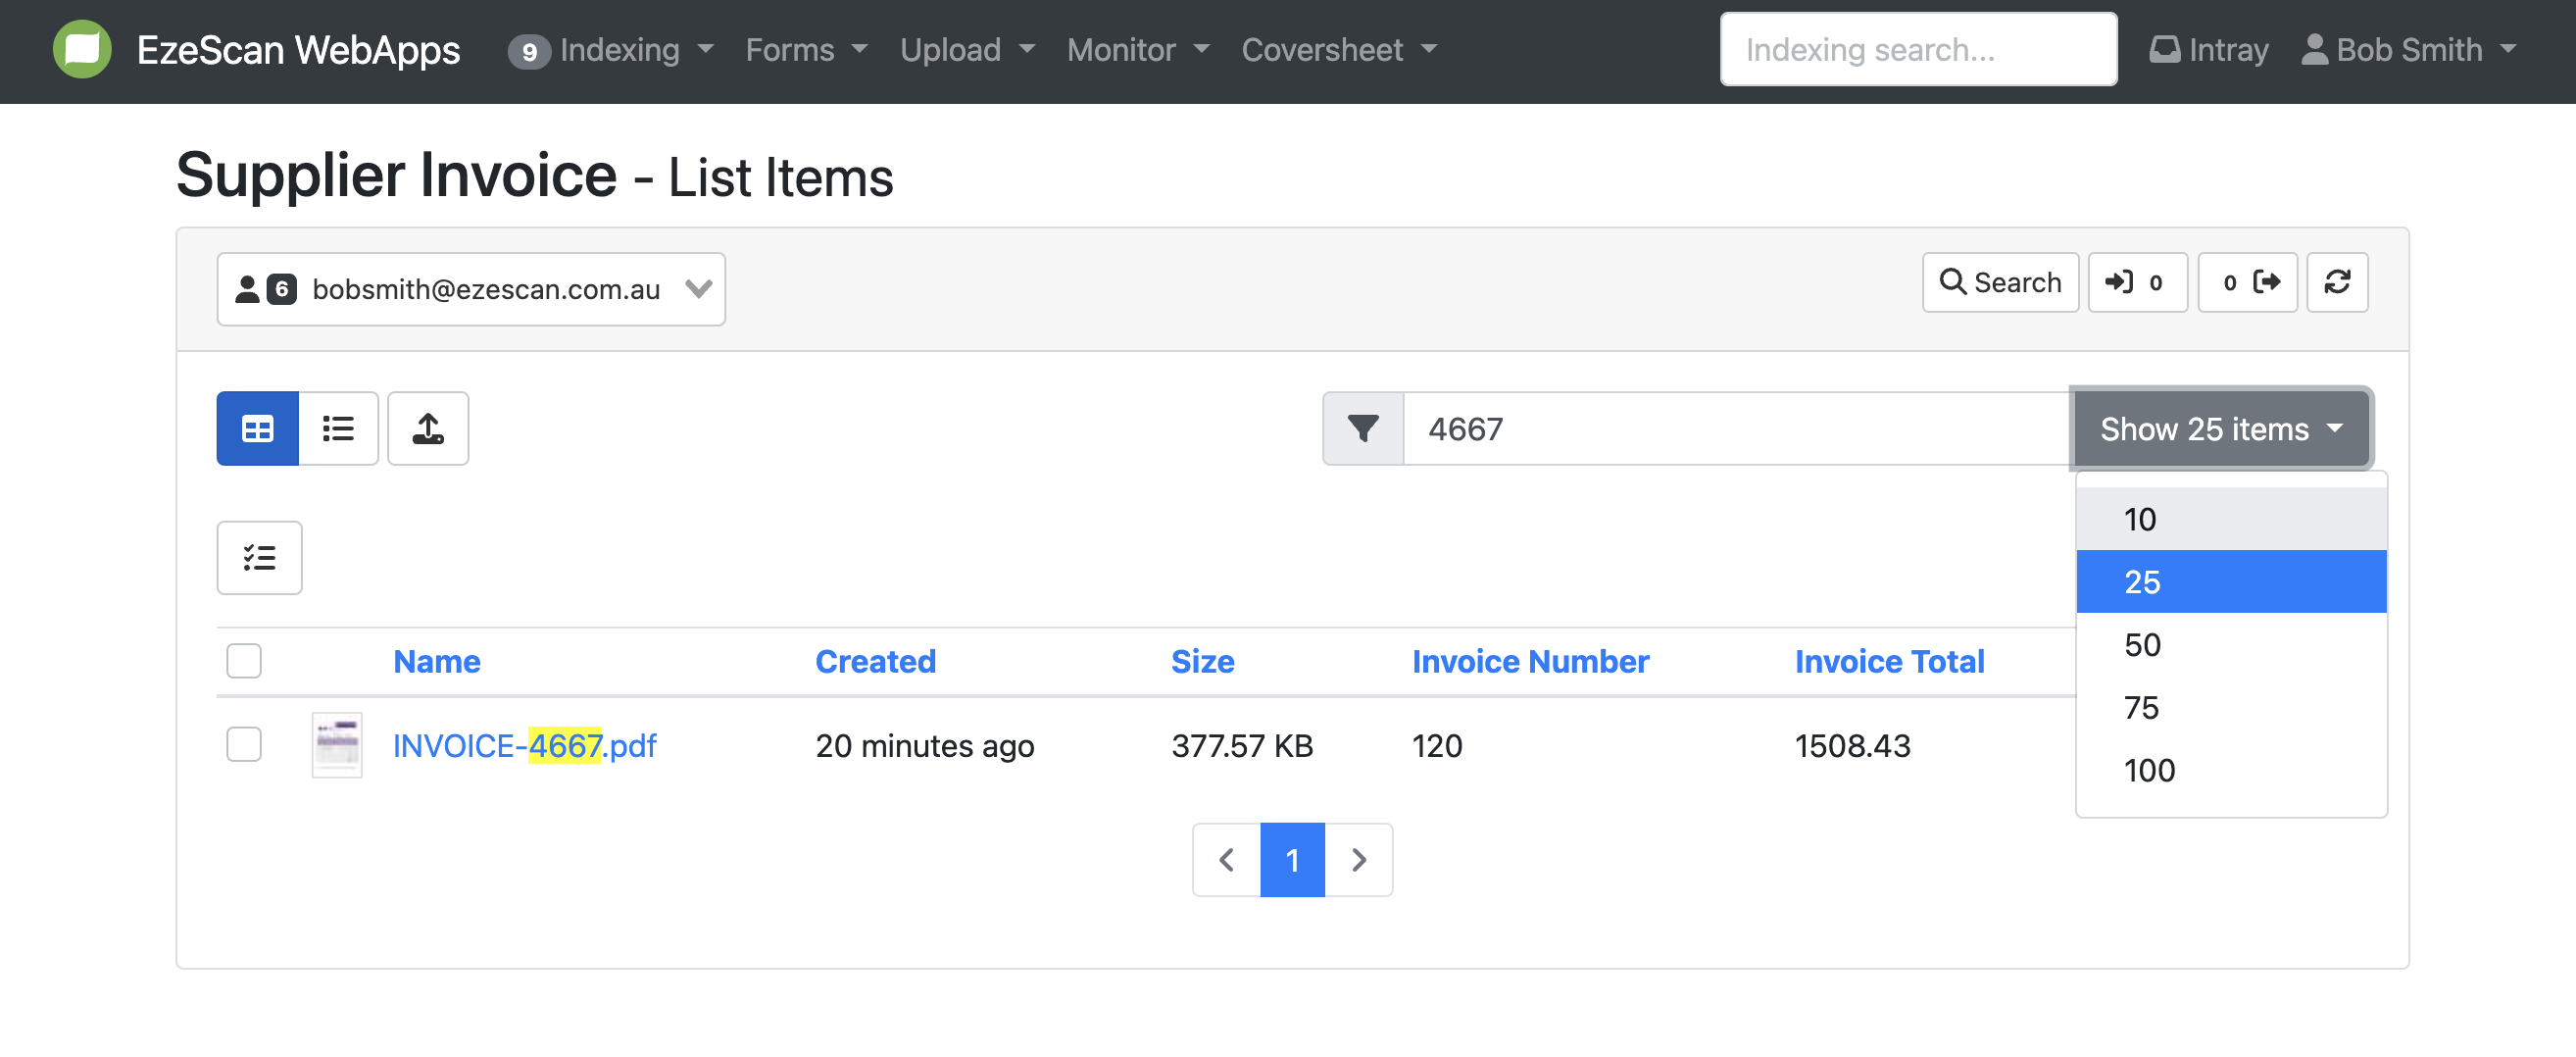
To search for specific documents in a queue, enter a search term into the filter search bar. EzeScan will display only the items that have that term in any of their metadata fields in that queue. To remove a filter, delete the text from the search box.
-
To change the number of results displayed in the queue on the screen, select the “Show 25 Items” drop-down menu. You can select from the following values: 10, 25, 50, 75 or 100.
-
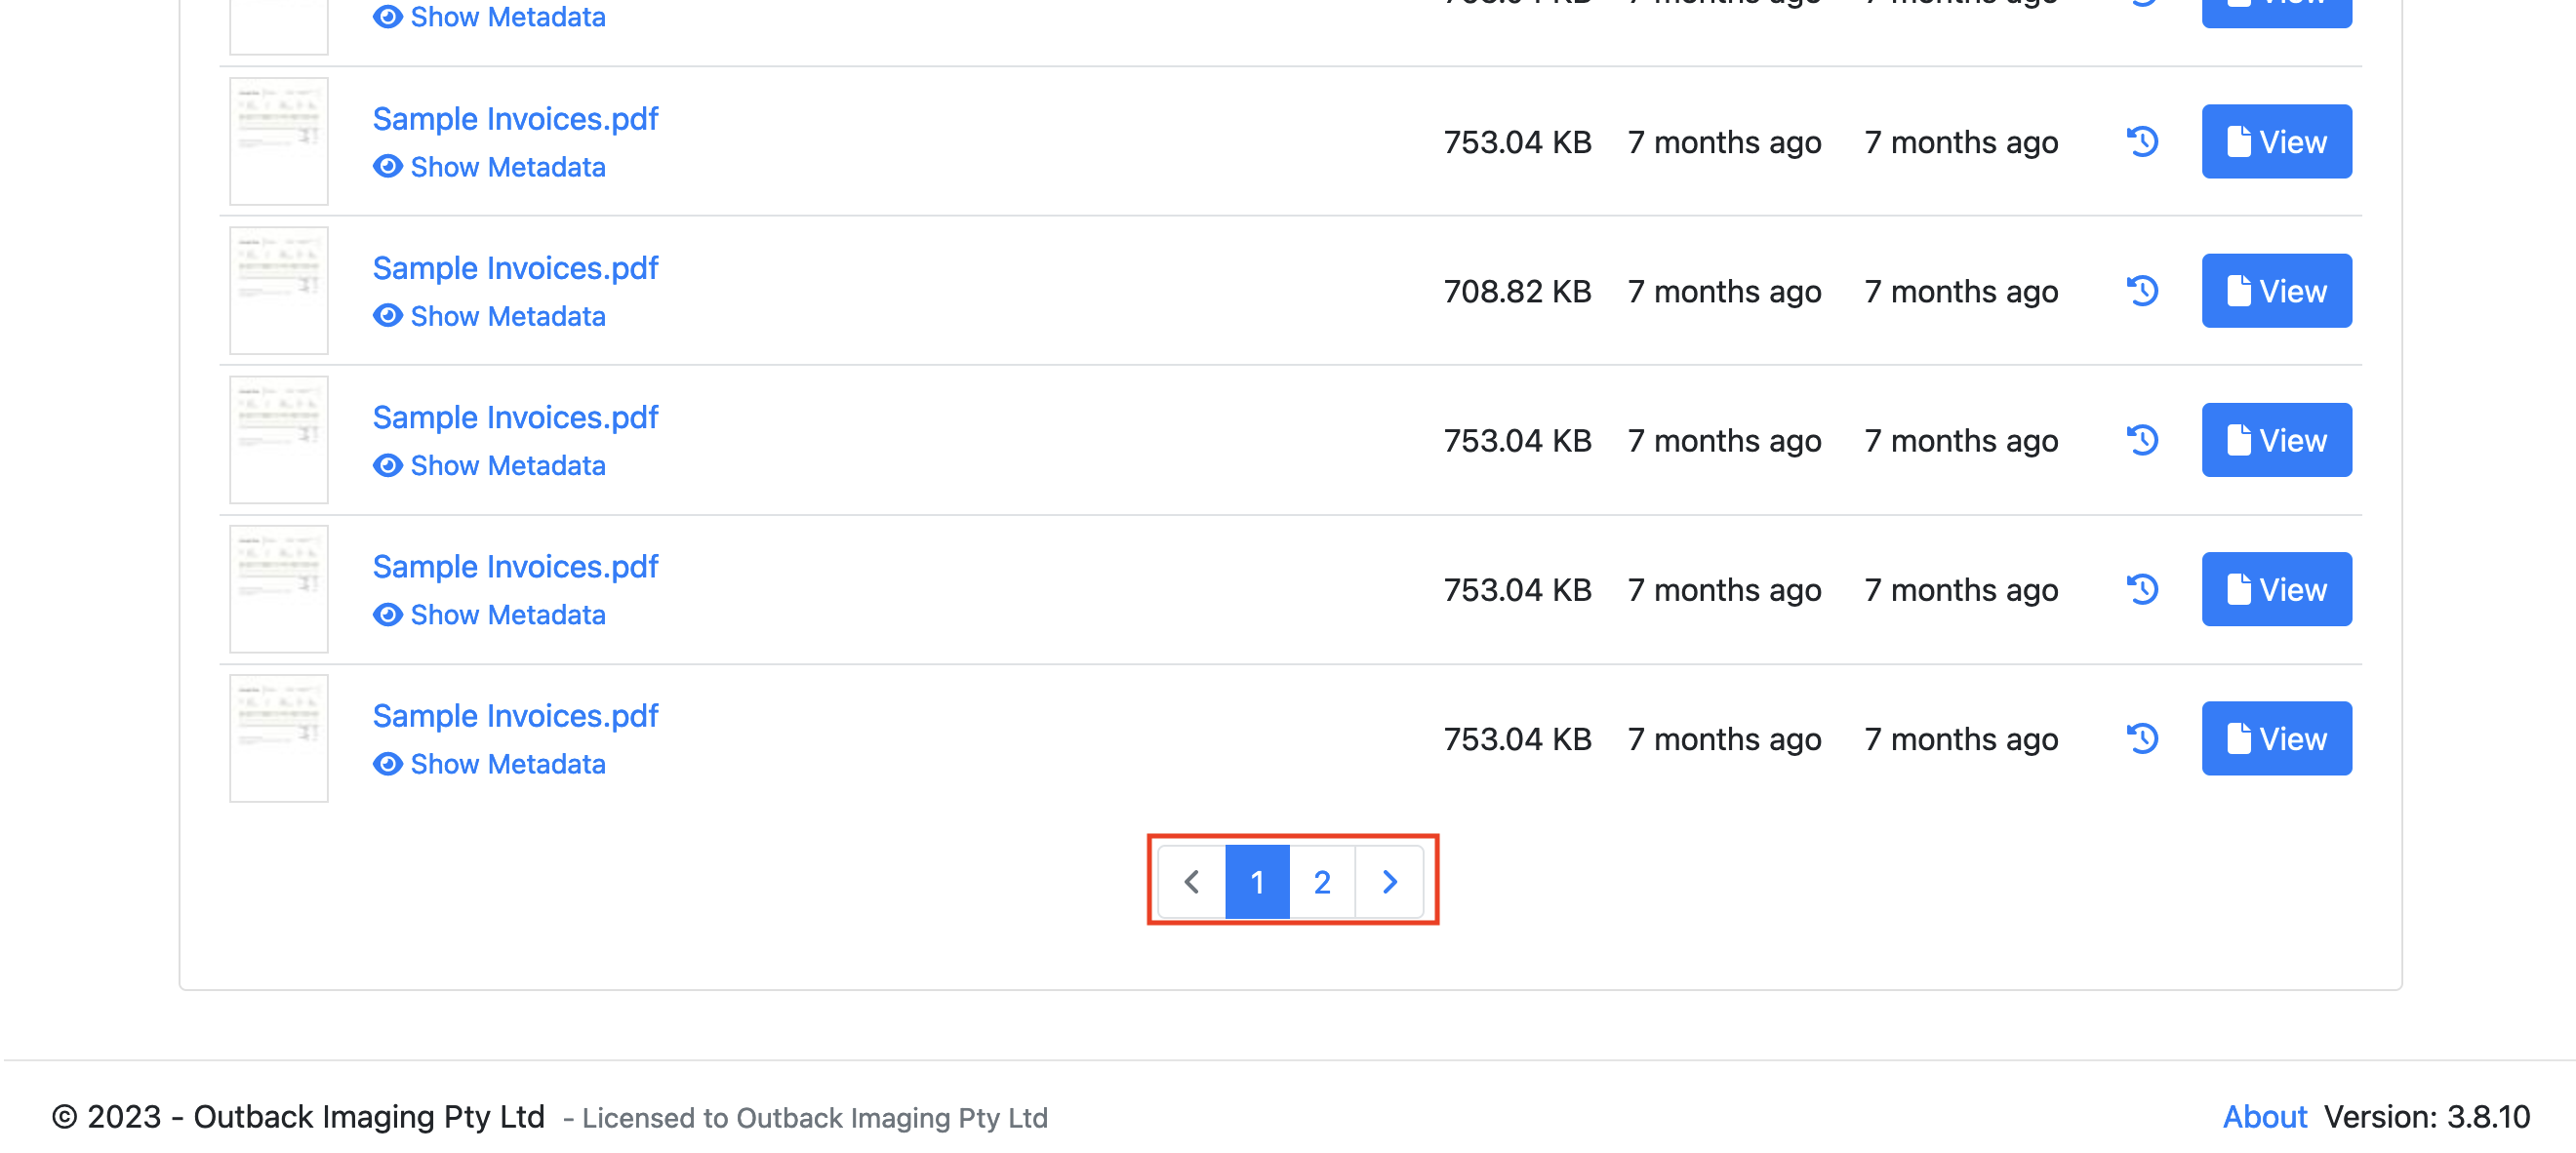
If the number of items in the queue exceeds the filtered limit, a pager will appear at the end of the queue for navigation. Use the arrows in the pager to navigate through the pages. The page that you are currently on will be highlighted in blue.
Video Tutorial: https://youtu.be/51jDUUw6LHo
Showing Document Metadata
-
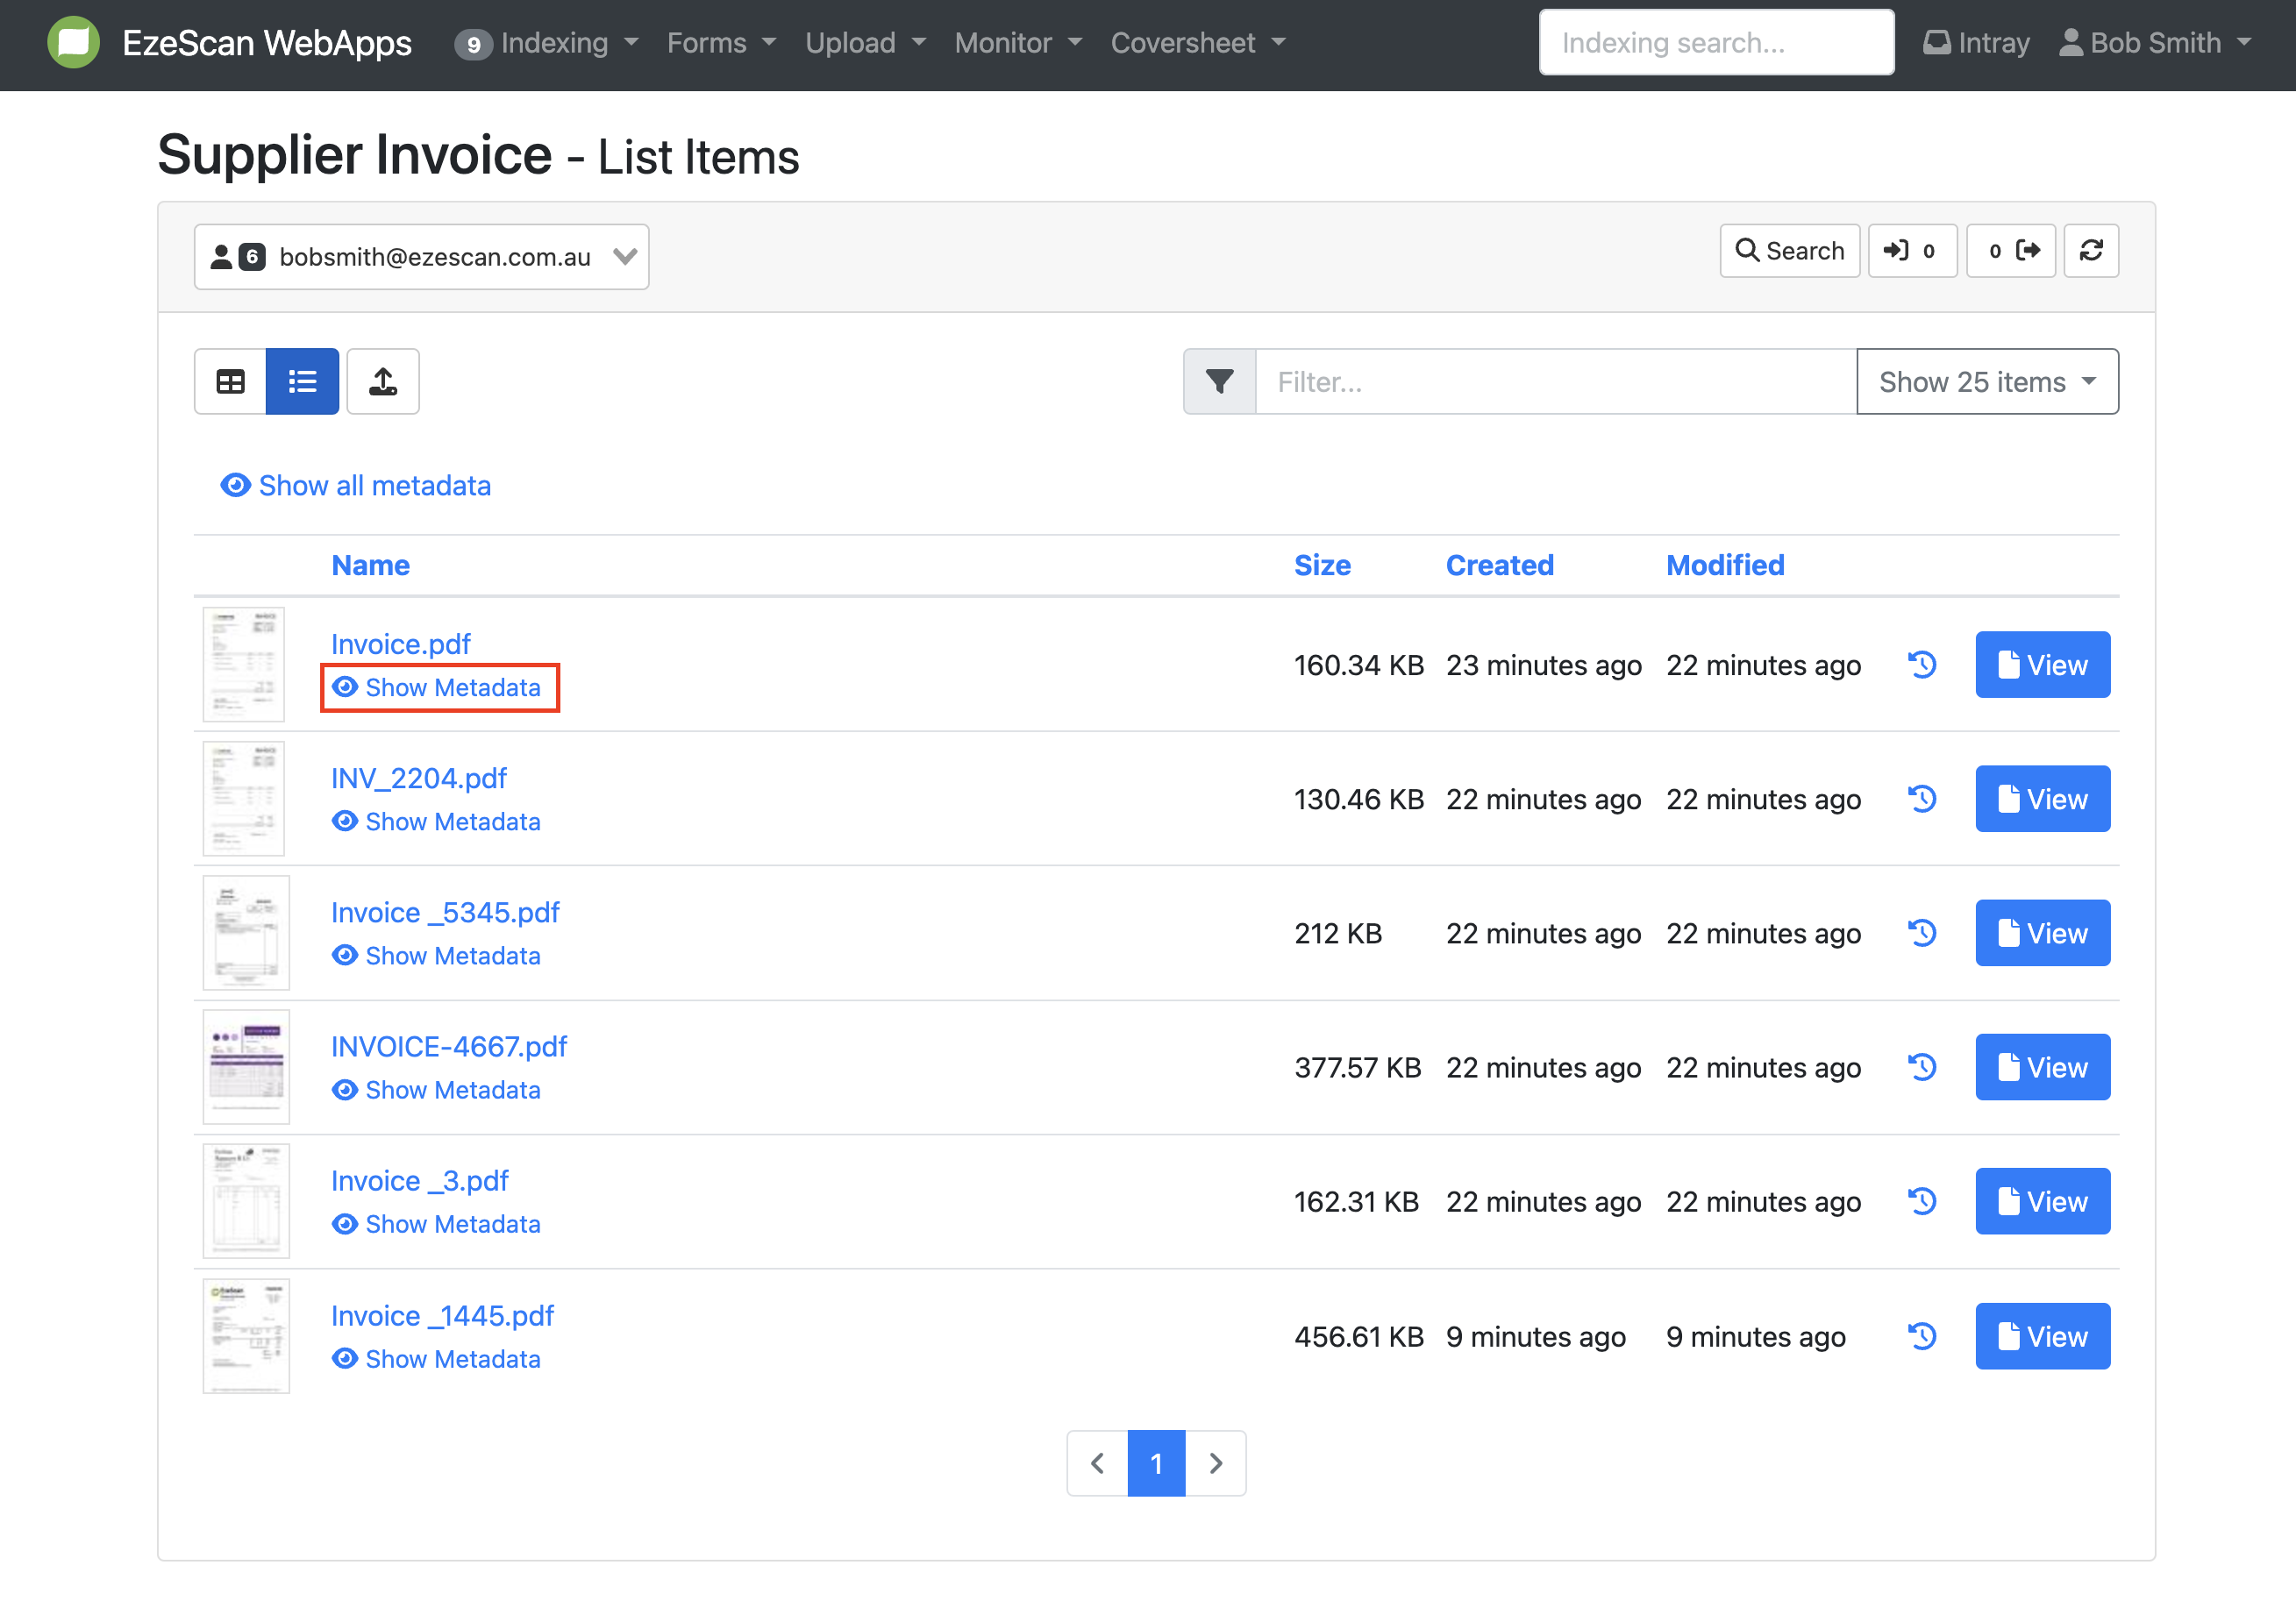
In the list view, you can show metadata for an individual document or for all documents. To show metadata for an individual document, click on the "Show Metadata" text located below the document's name.
-
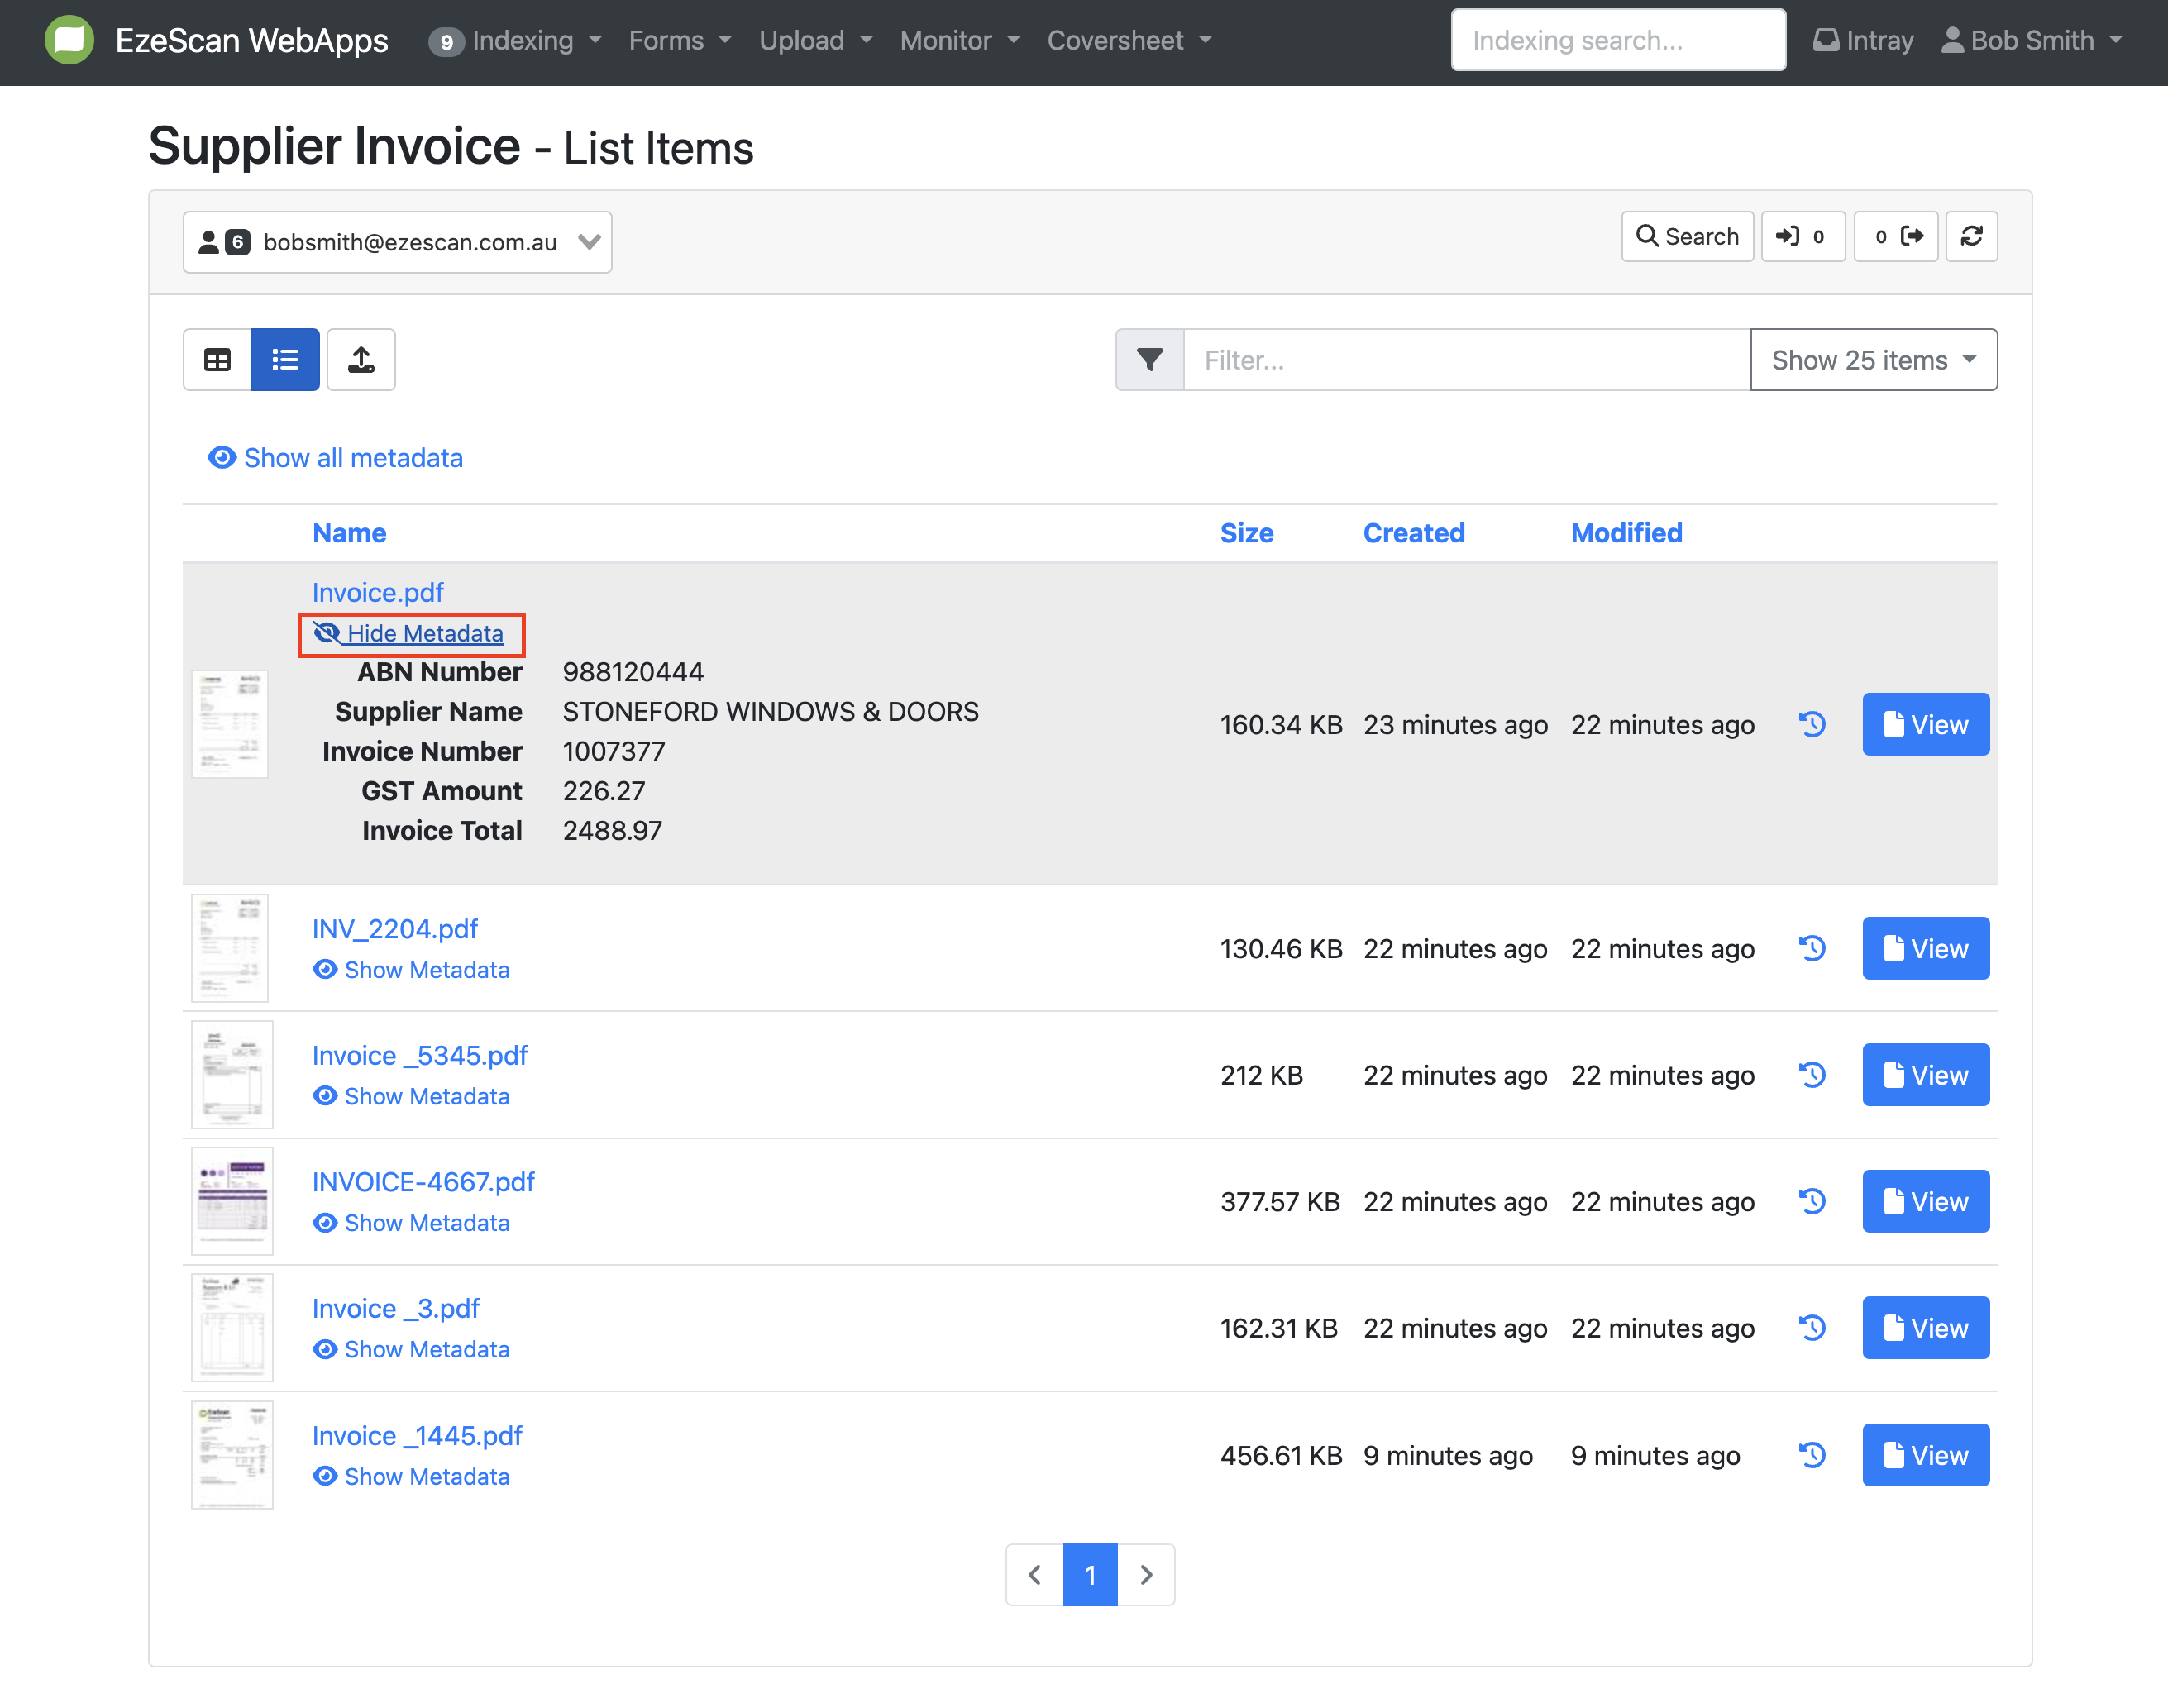
EzeScan will display the extracted metadata specifically for that document. To hide this metadata, click the "Hide Metadata" text.
-
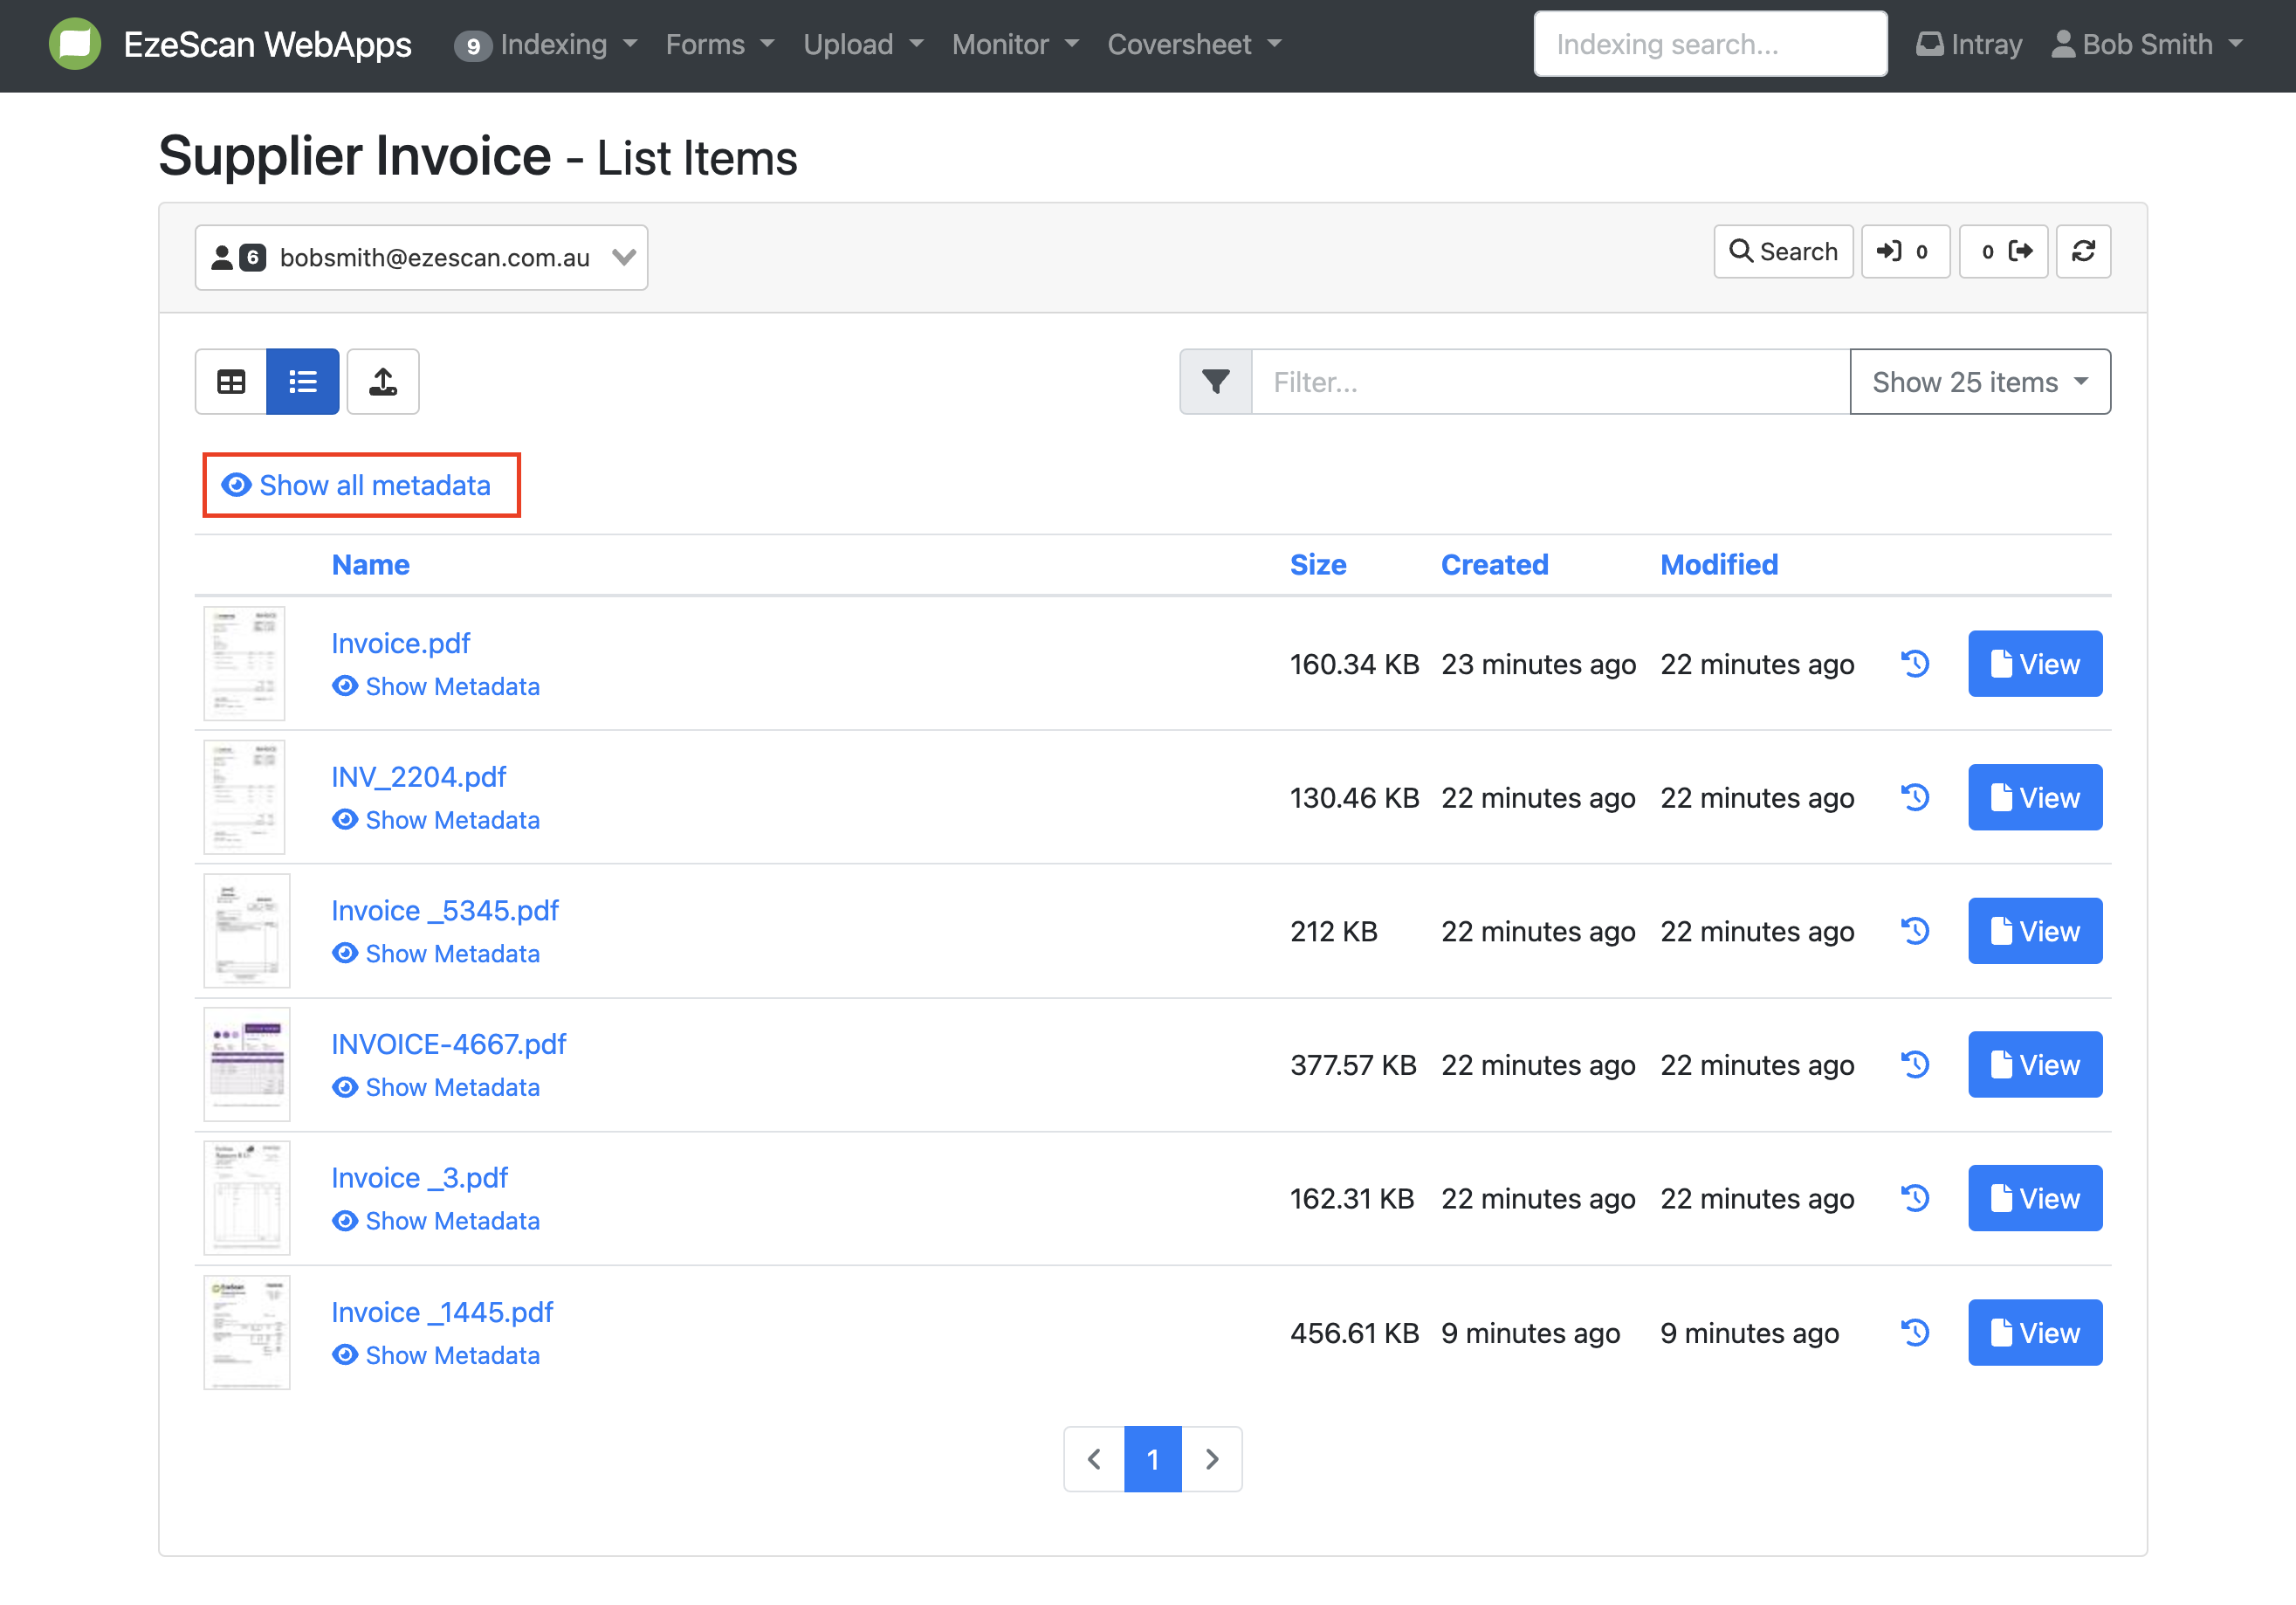
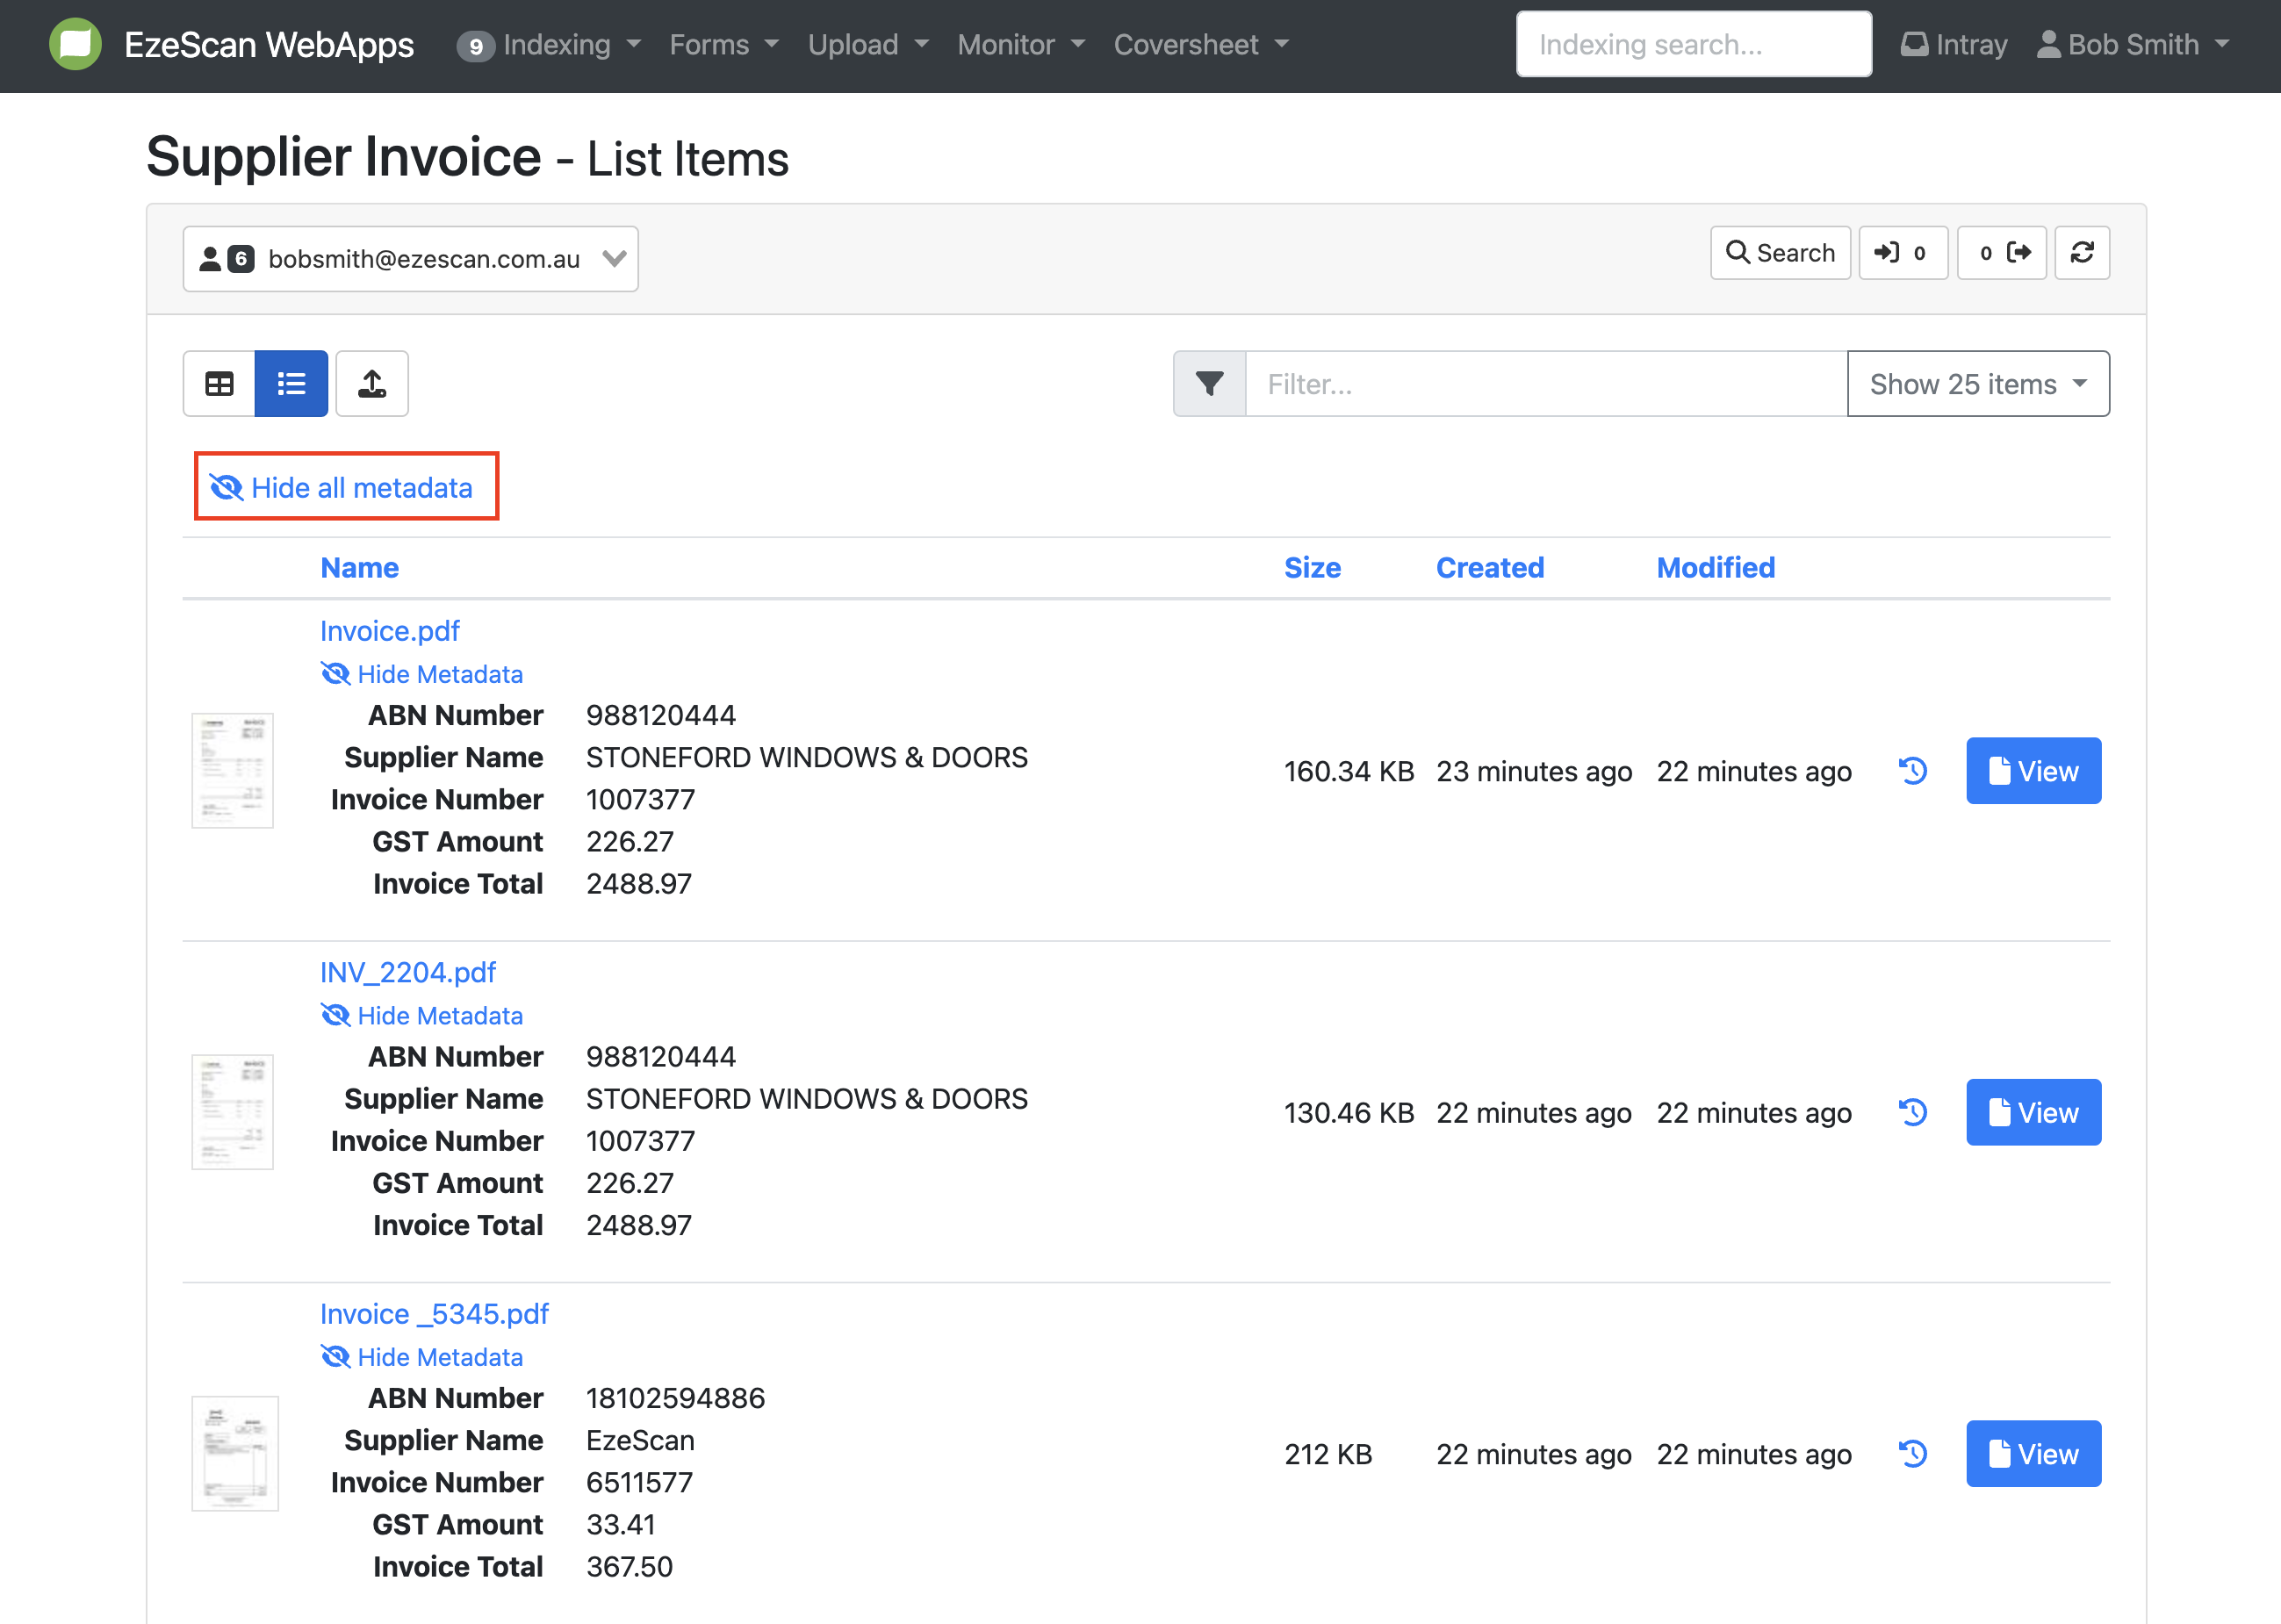
To show metadata for all documents, click the "Show All Metadata" button.
-
The extracted metadata will now be shown for all documents in the queue. To hide this metadata, click the "Hide all metadata" text.
Video Tutorial: https://youtu.be/b7rrMh1I_zo
Arranging Documents in a queue by criteria
-
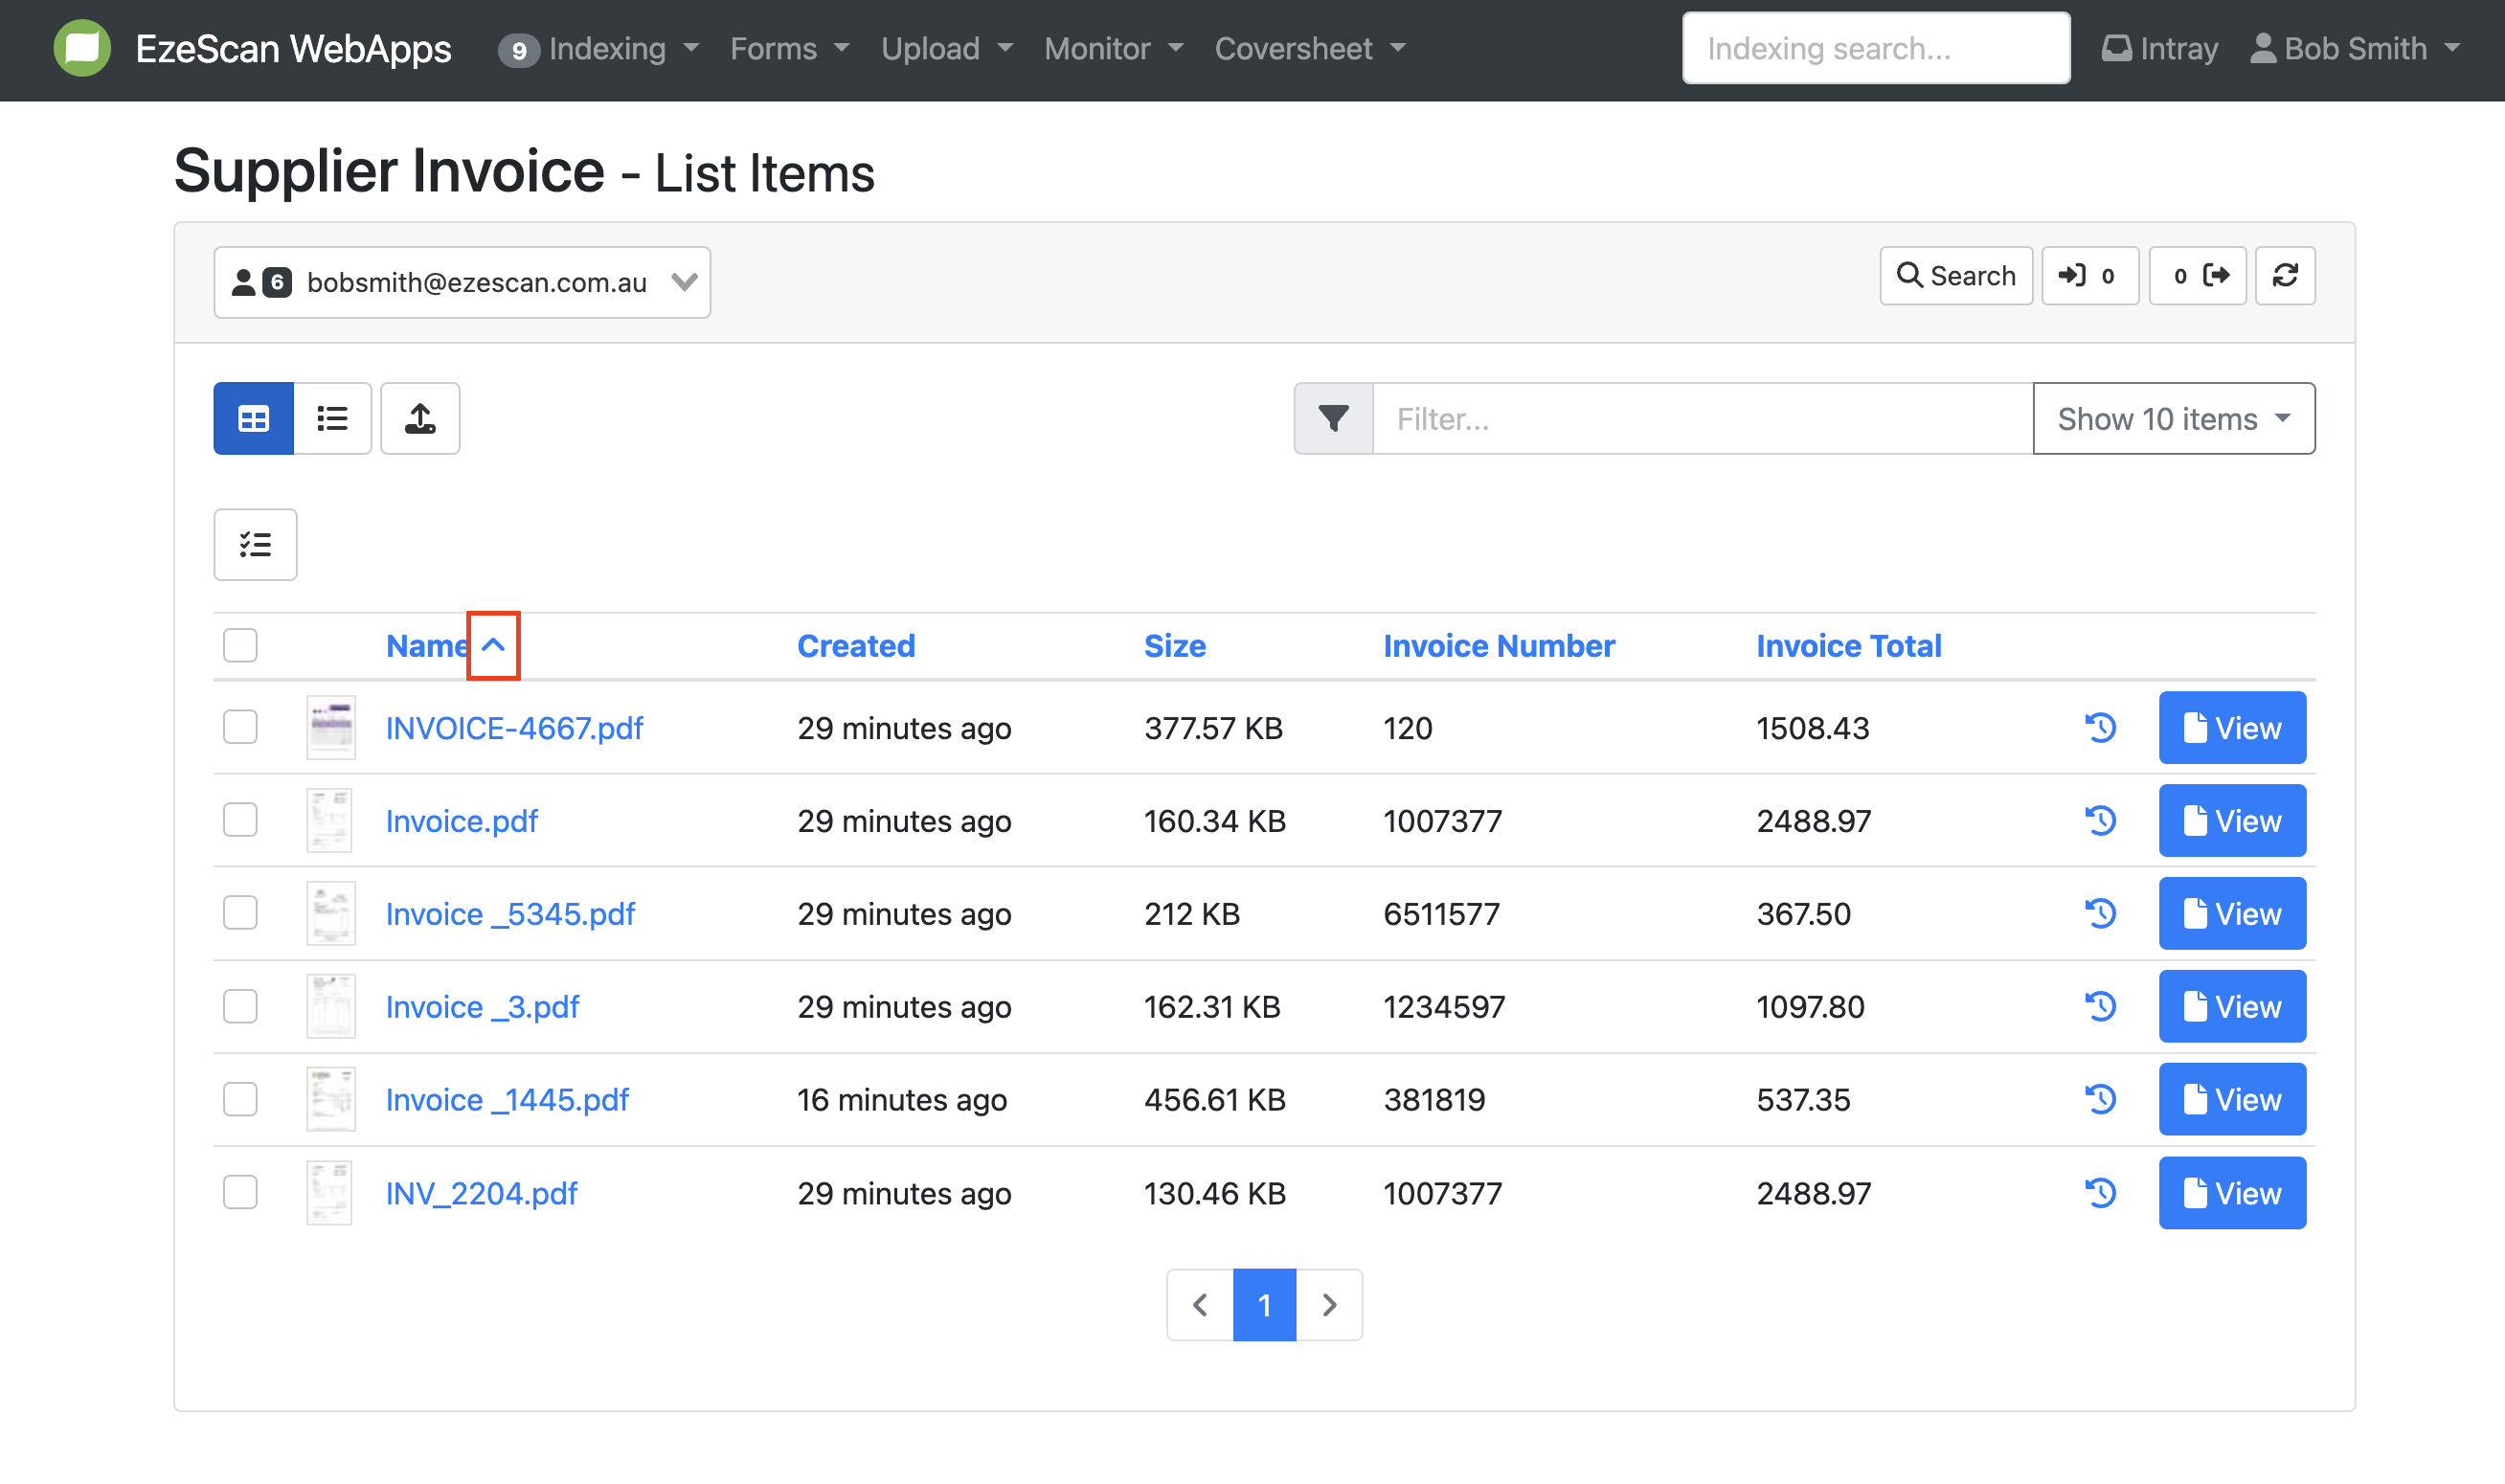
Documents are always displayed in queues from the oldest date of ingestion to the most recent. o arrange documents based on different criteria, click on the menu item for the desired criterion. For example, to arrange by name, click the name menu item.
-
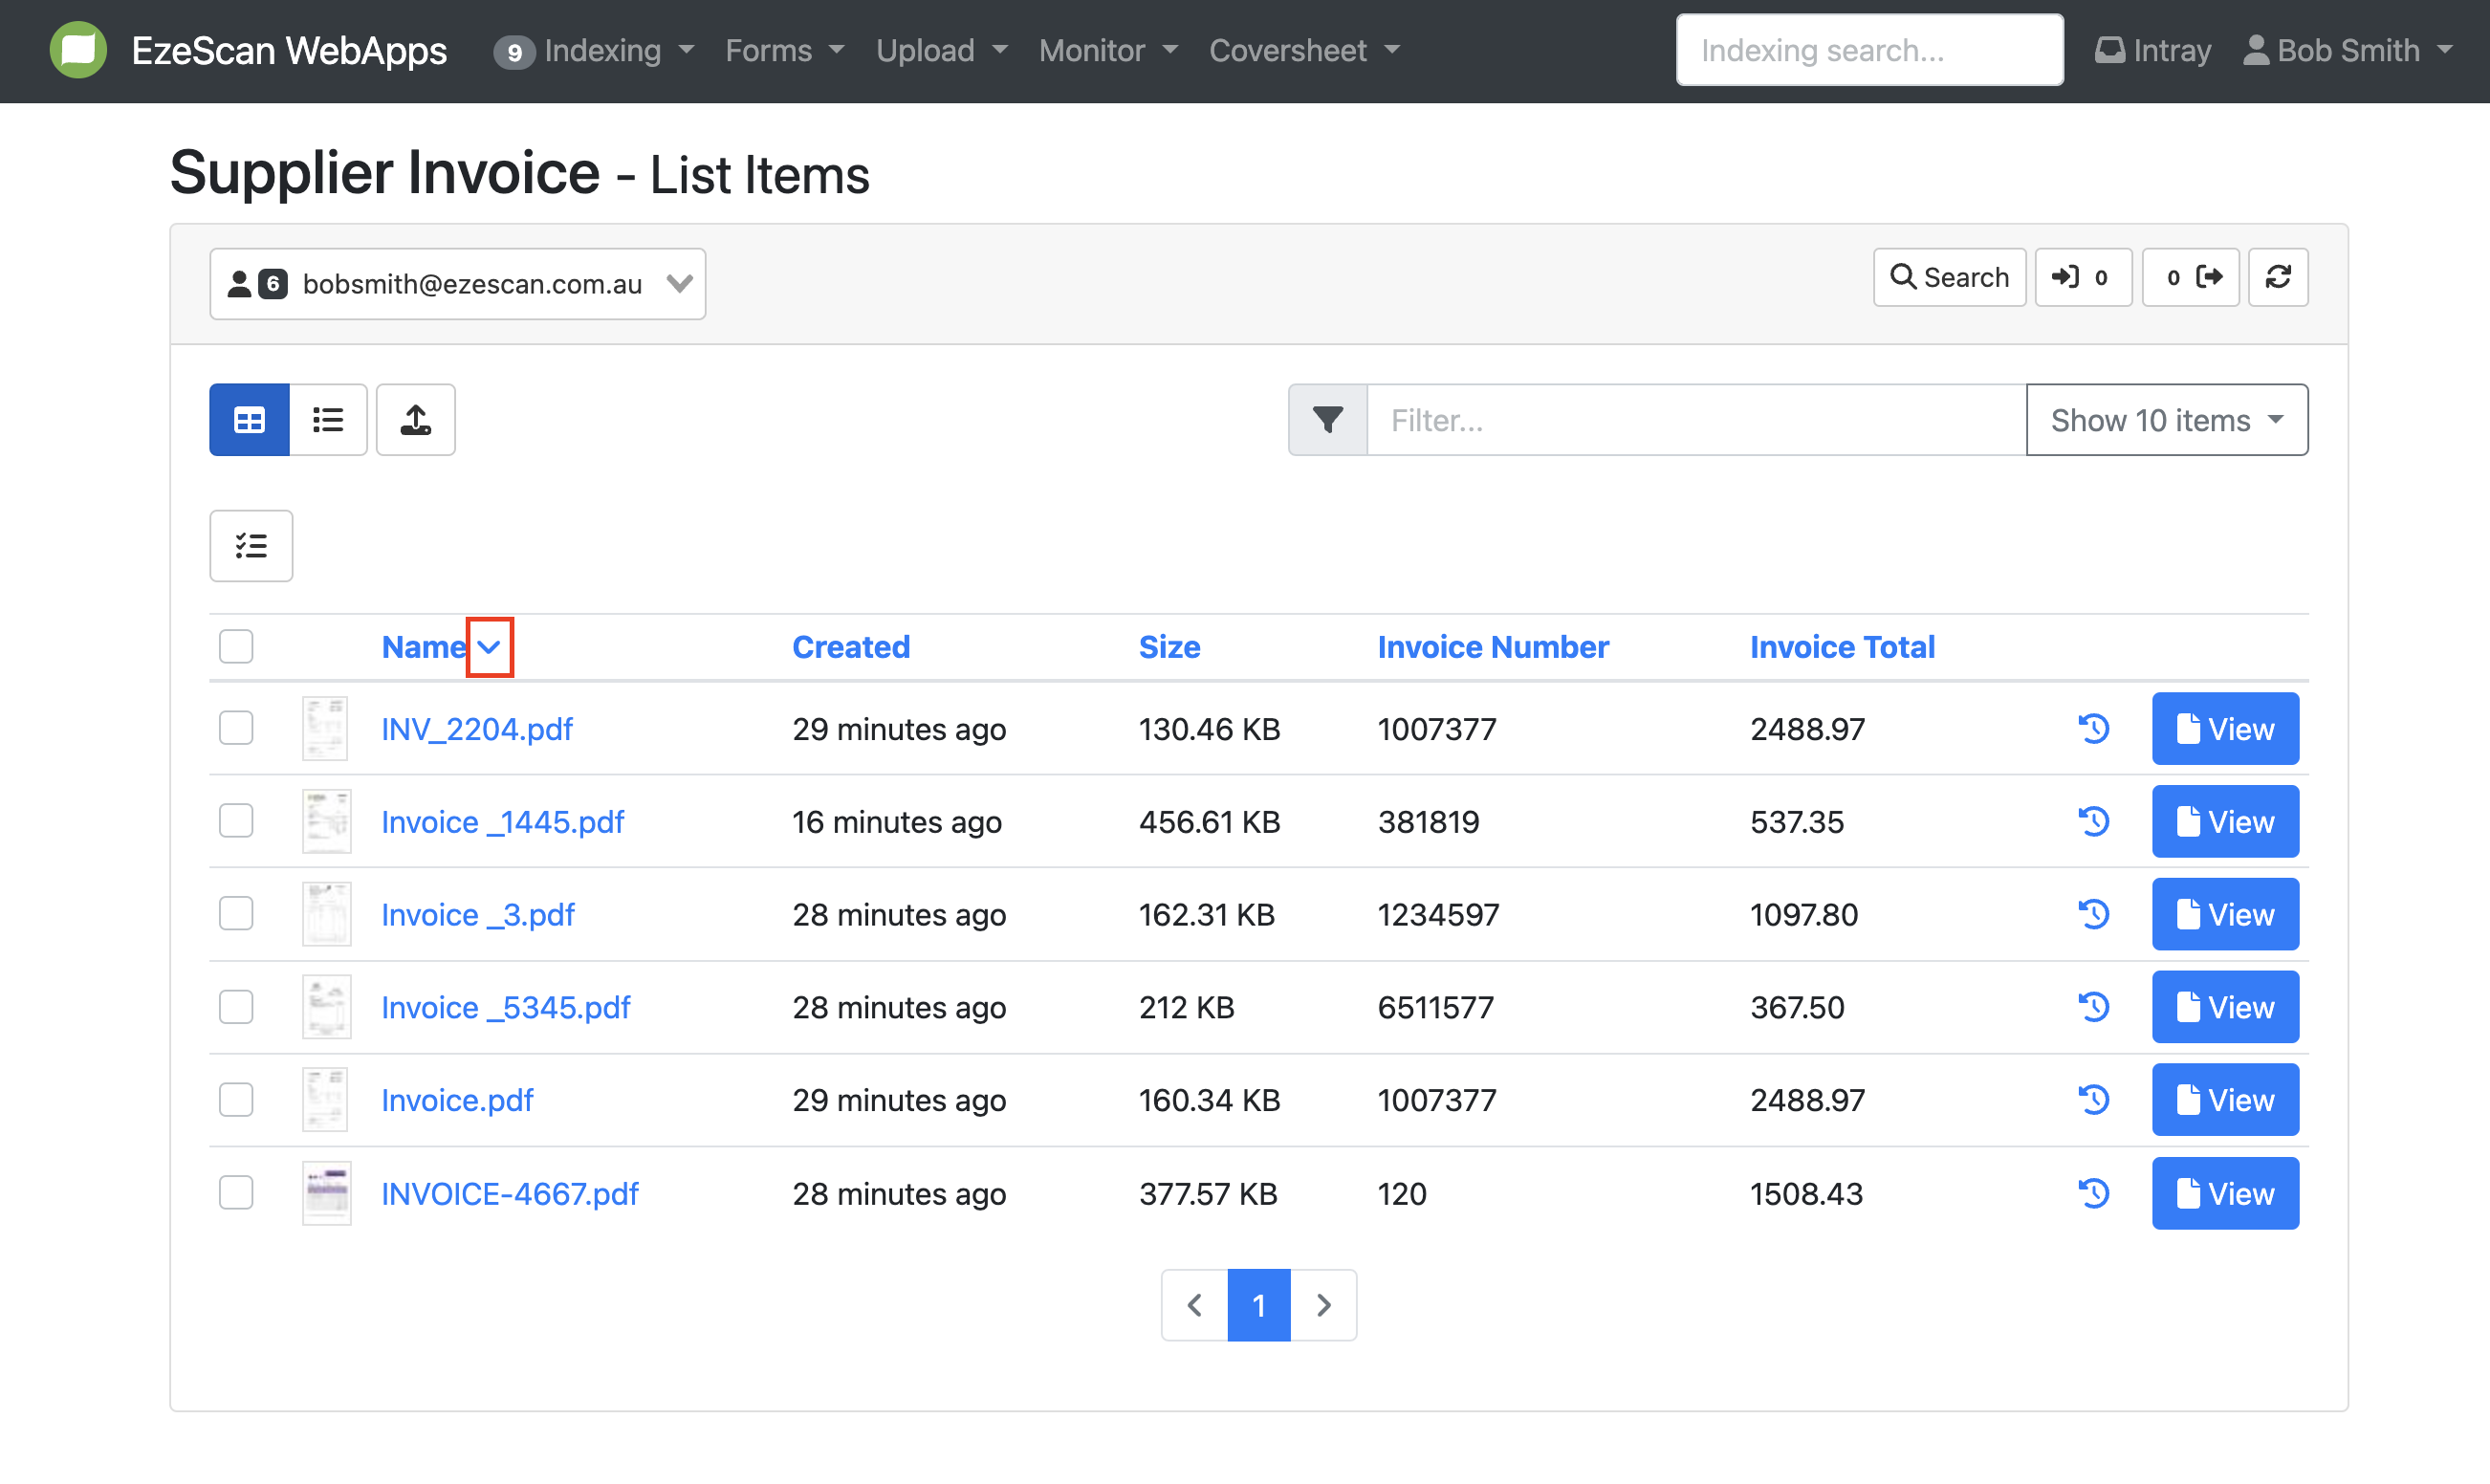
The first click will sort the list in descending alphabetic order (A-Z), as indicated by the down arrow next to the name menu item.
-
To reverse the sorting order (Z-A), click the menu item again. An up arrow will now replace the down arrow.
-
To remove the filter, click the menu item for a third time, and the arrows will disappear. The documents will be arranged from oldest to most recent. Repeat the same actions to sort by size (biggest to smallest) and date (most recent to oldest).
Video Tutorial: https://youtu.be/FhBUwCNsp9g
Merging Documents in a queue
-
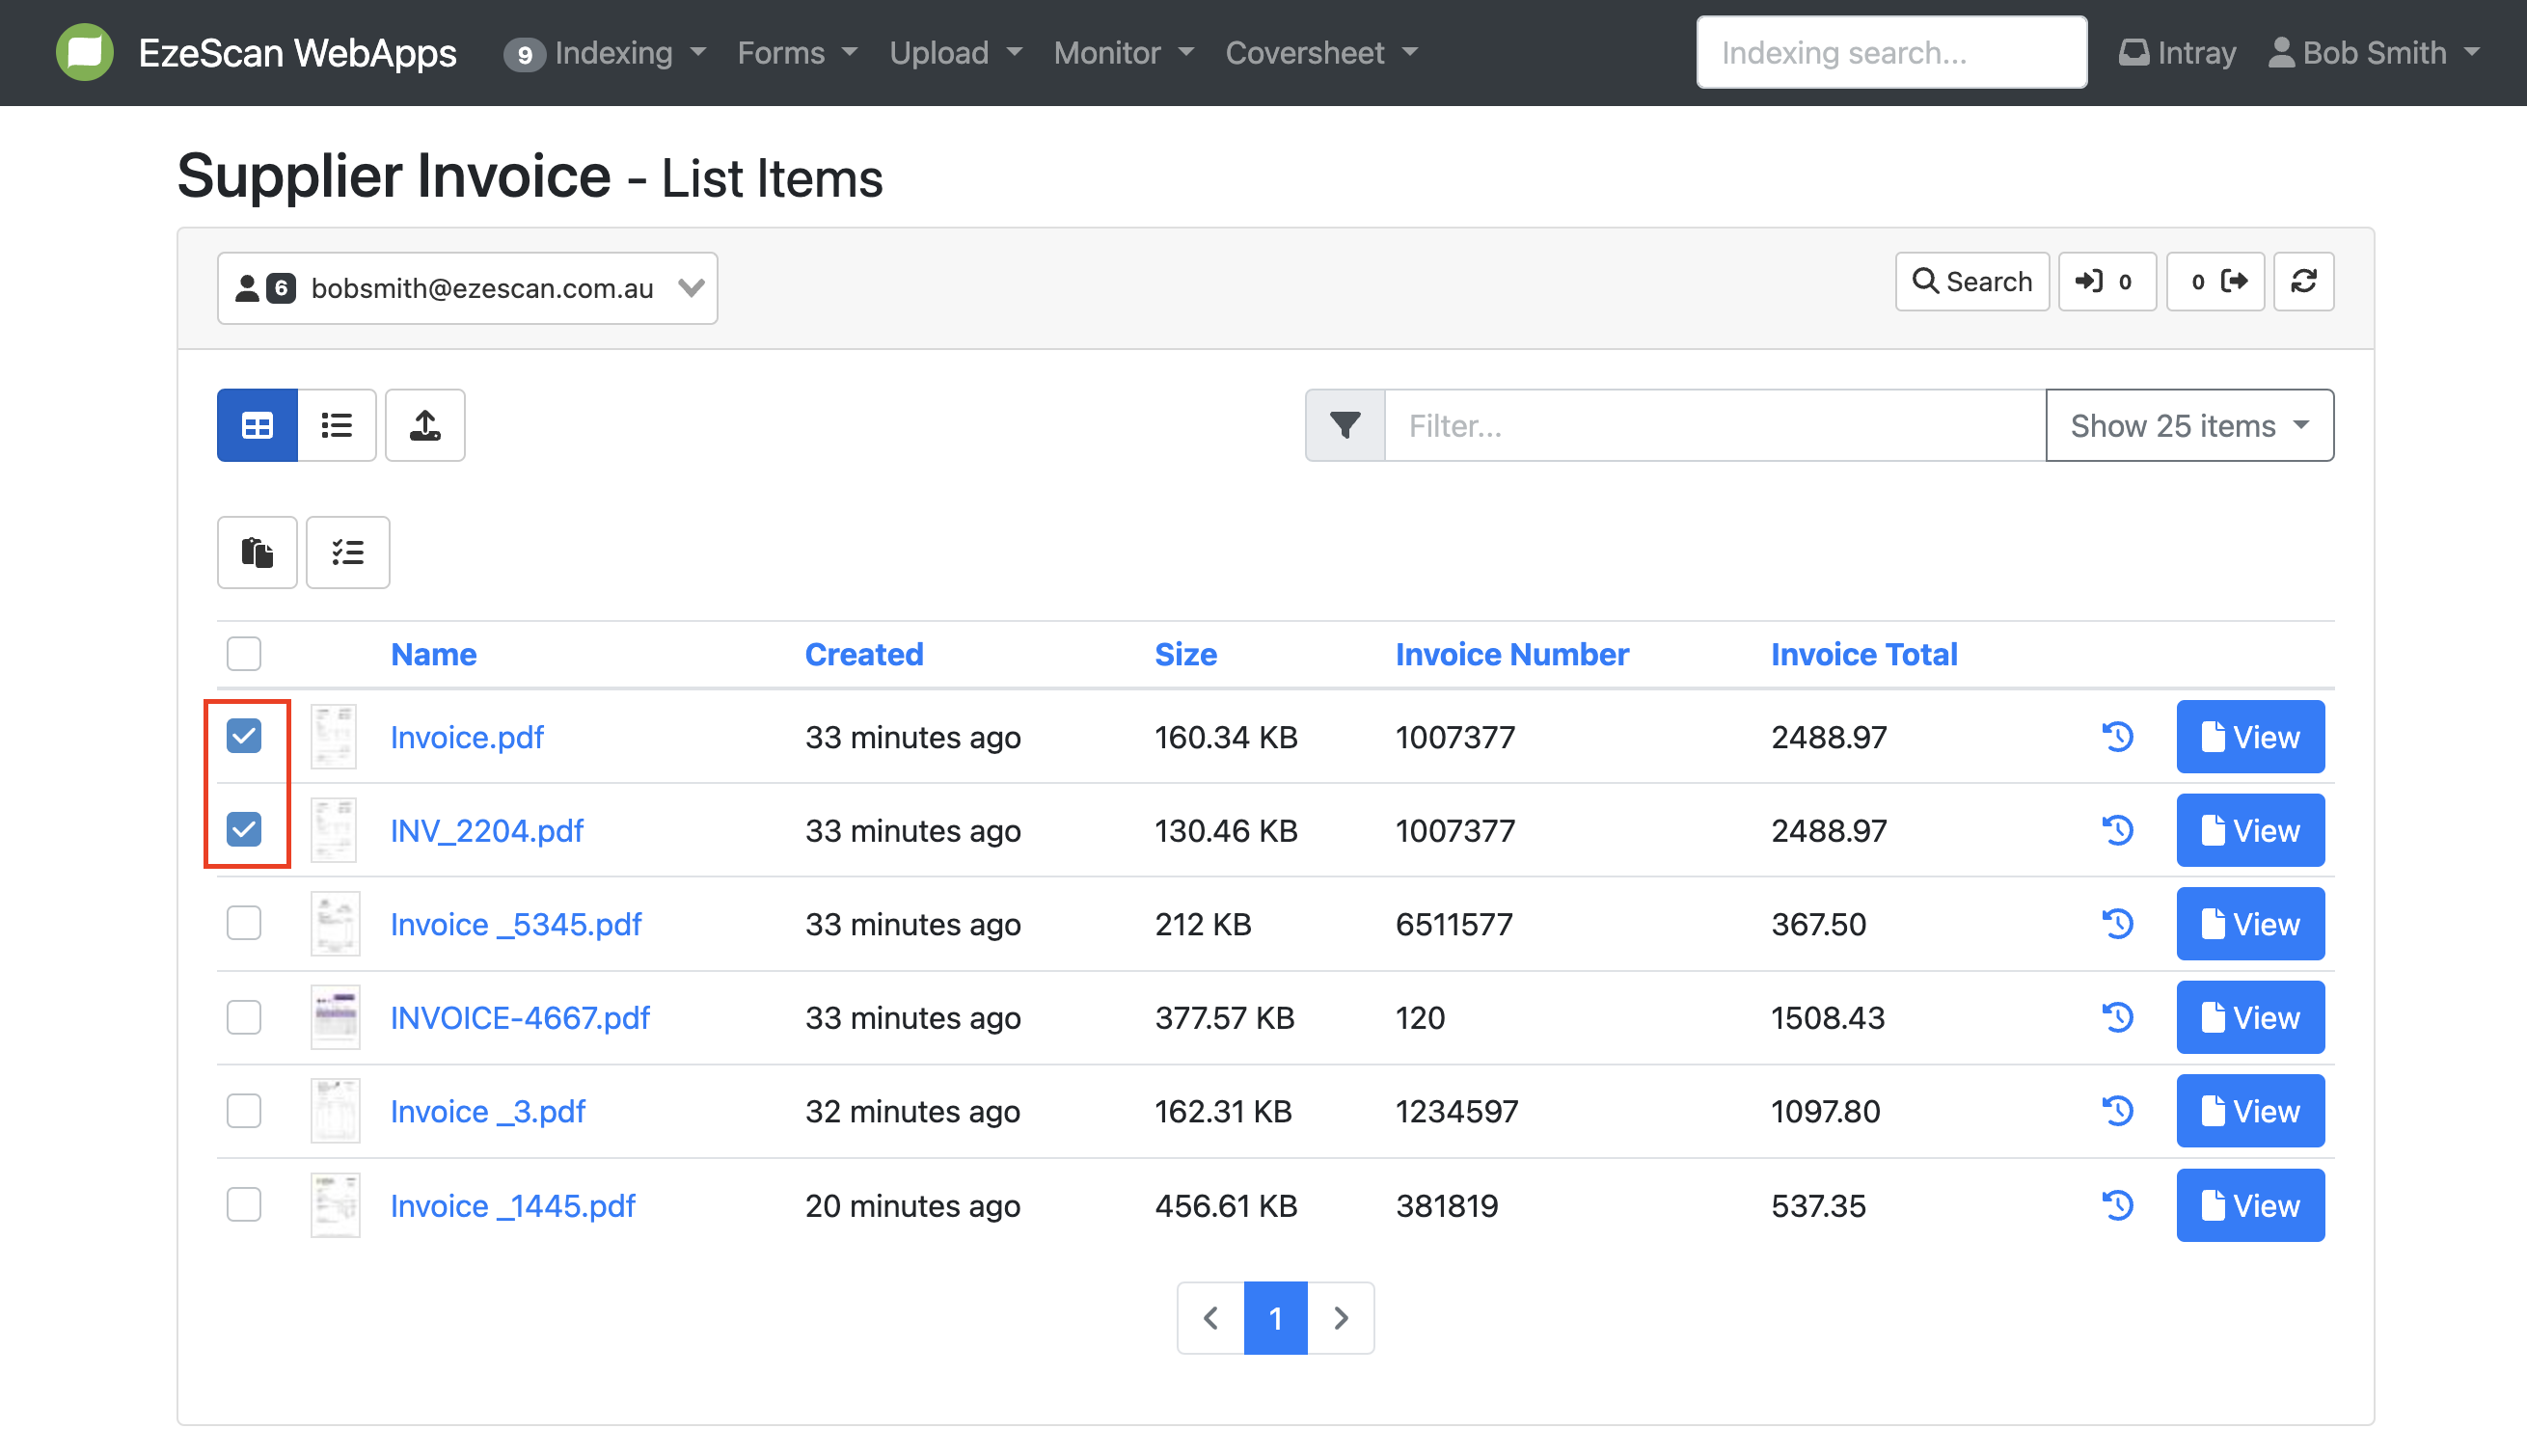
To merge document/s, select the checkbox of two or more documents that you want to merge.
-
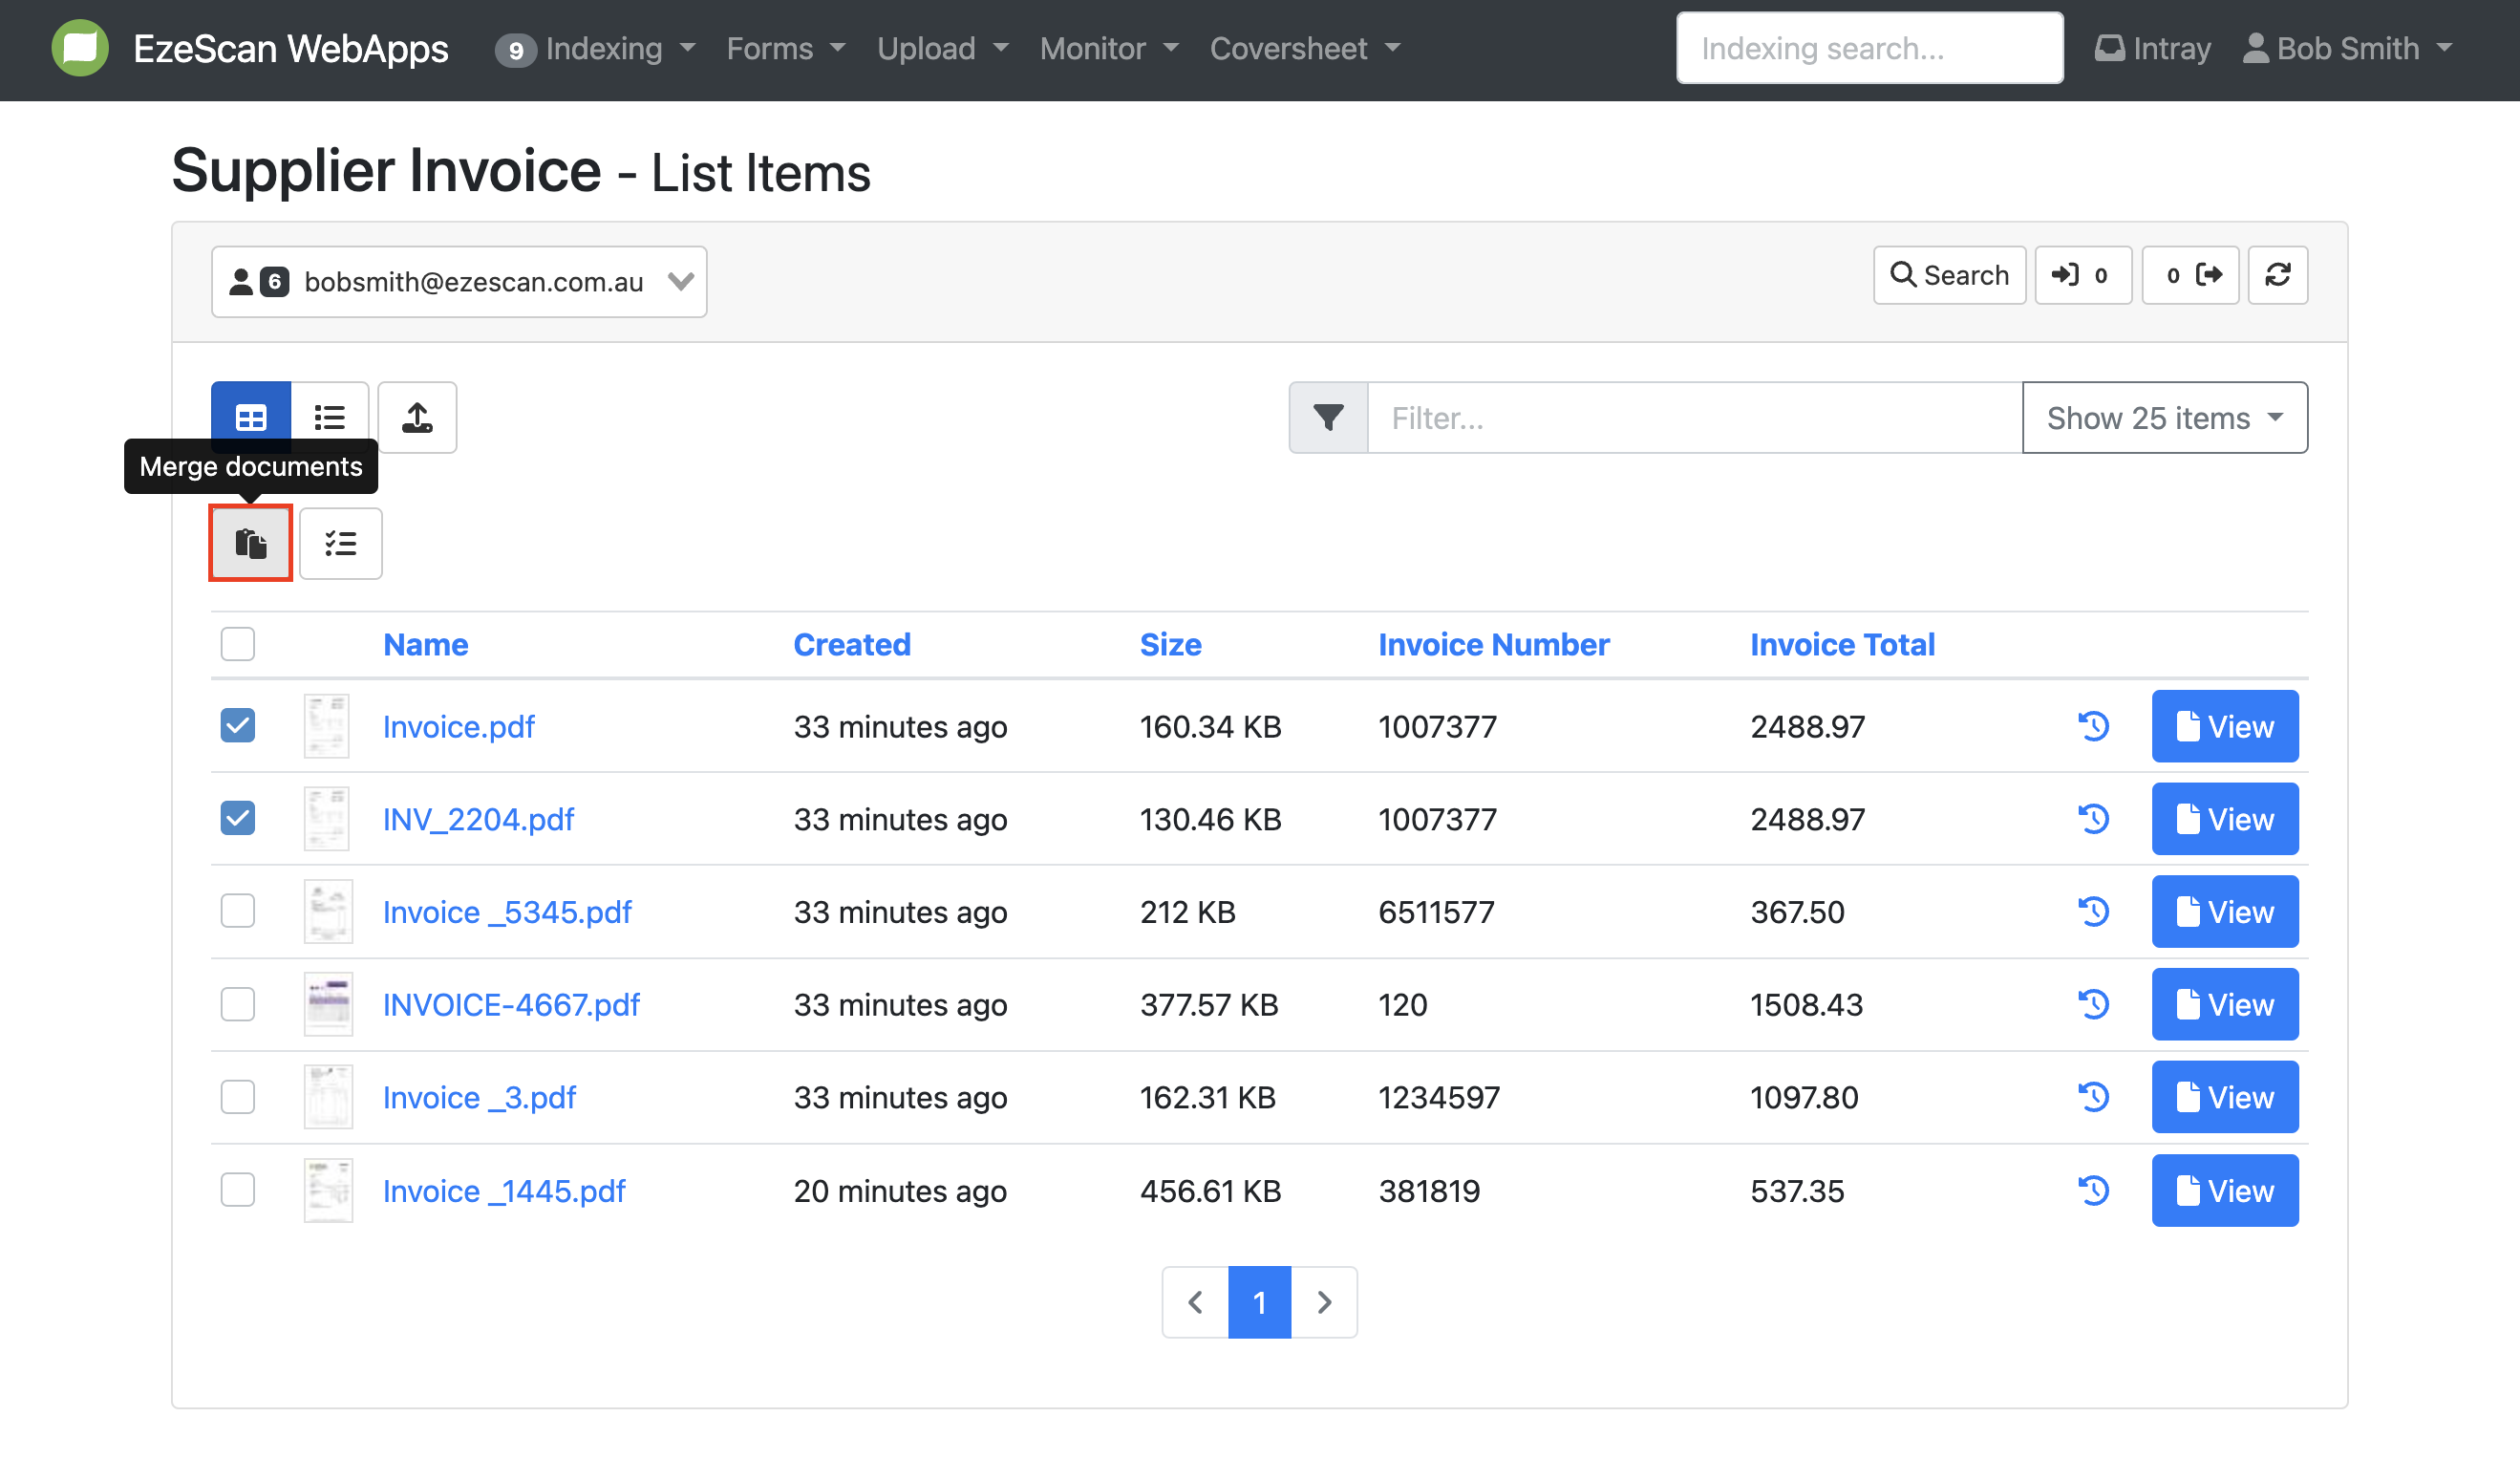
Click the "Merge Documents" button.
-
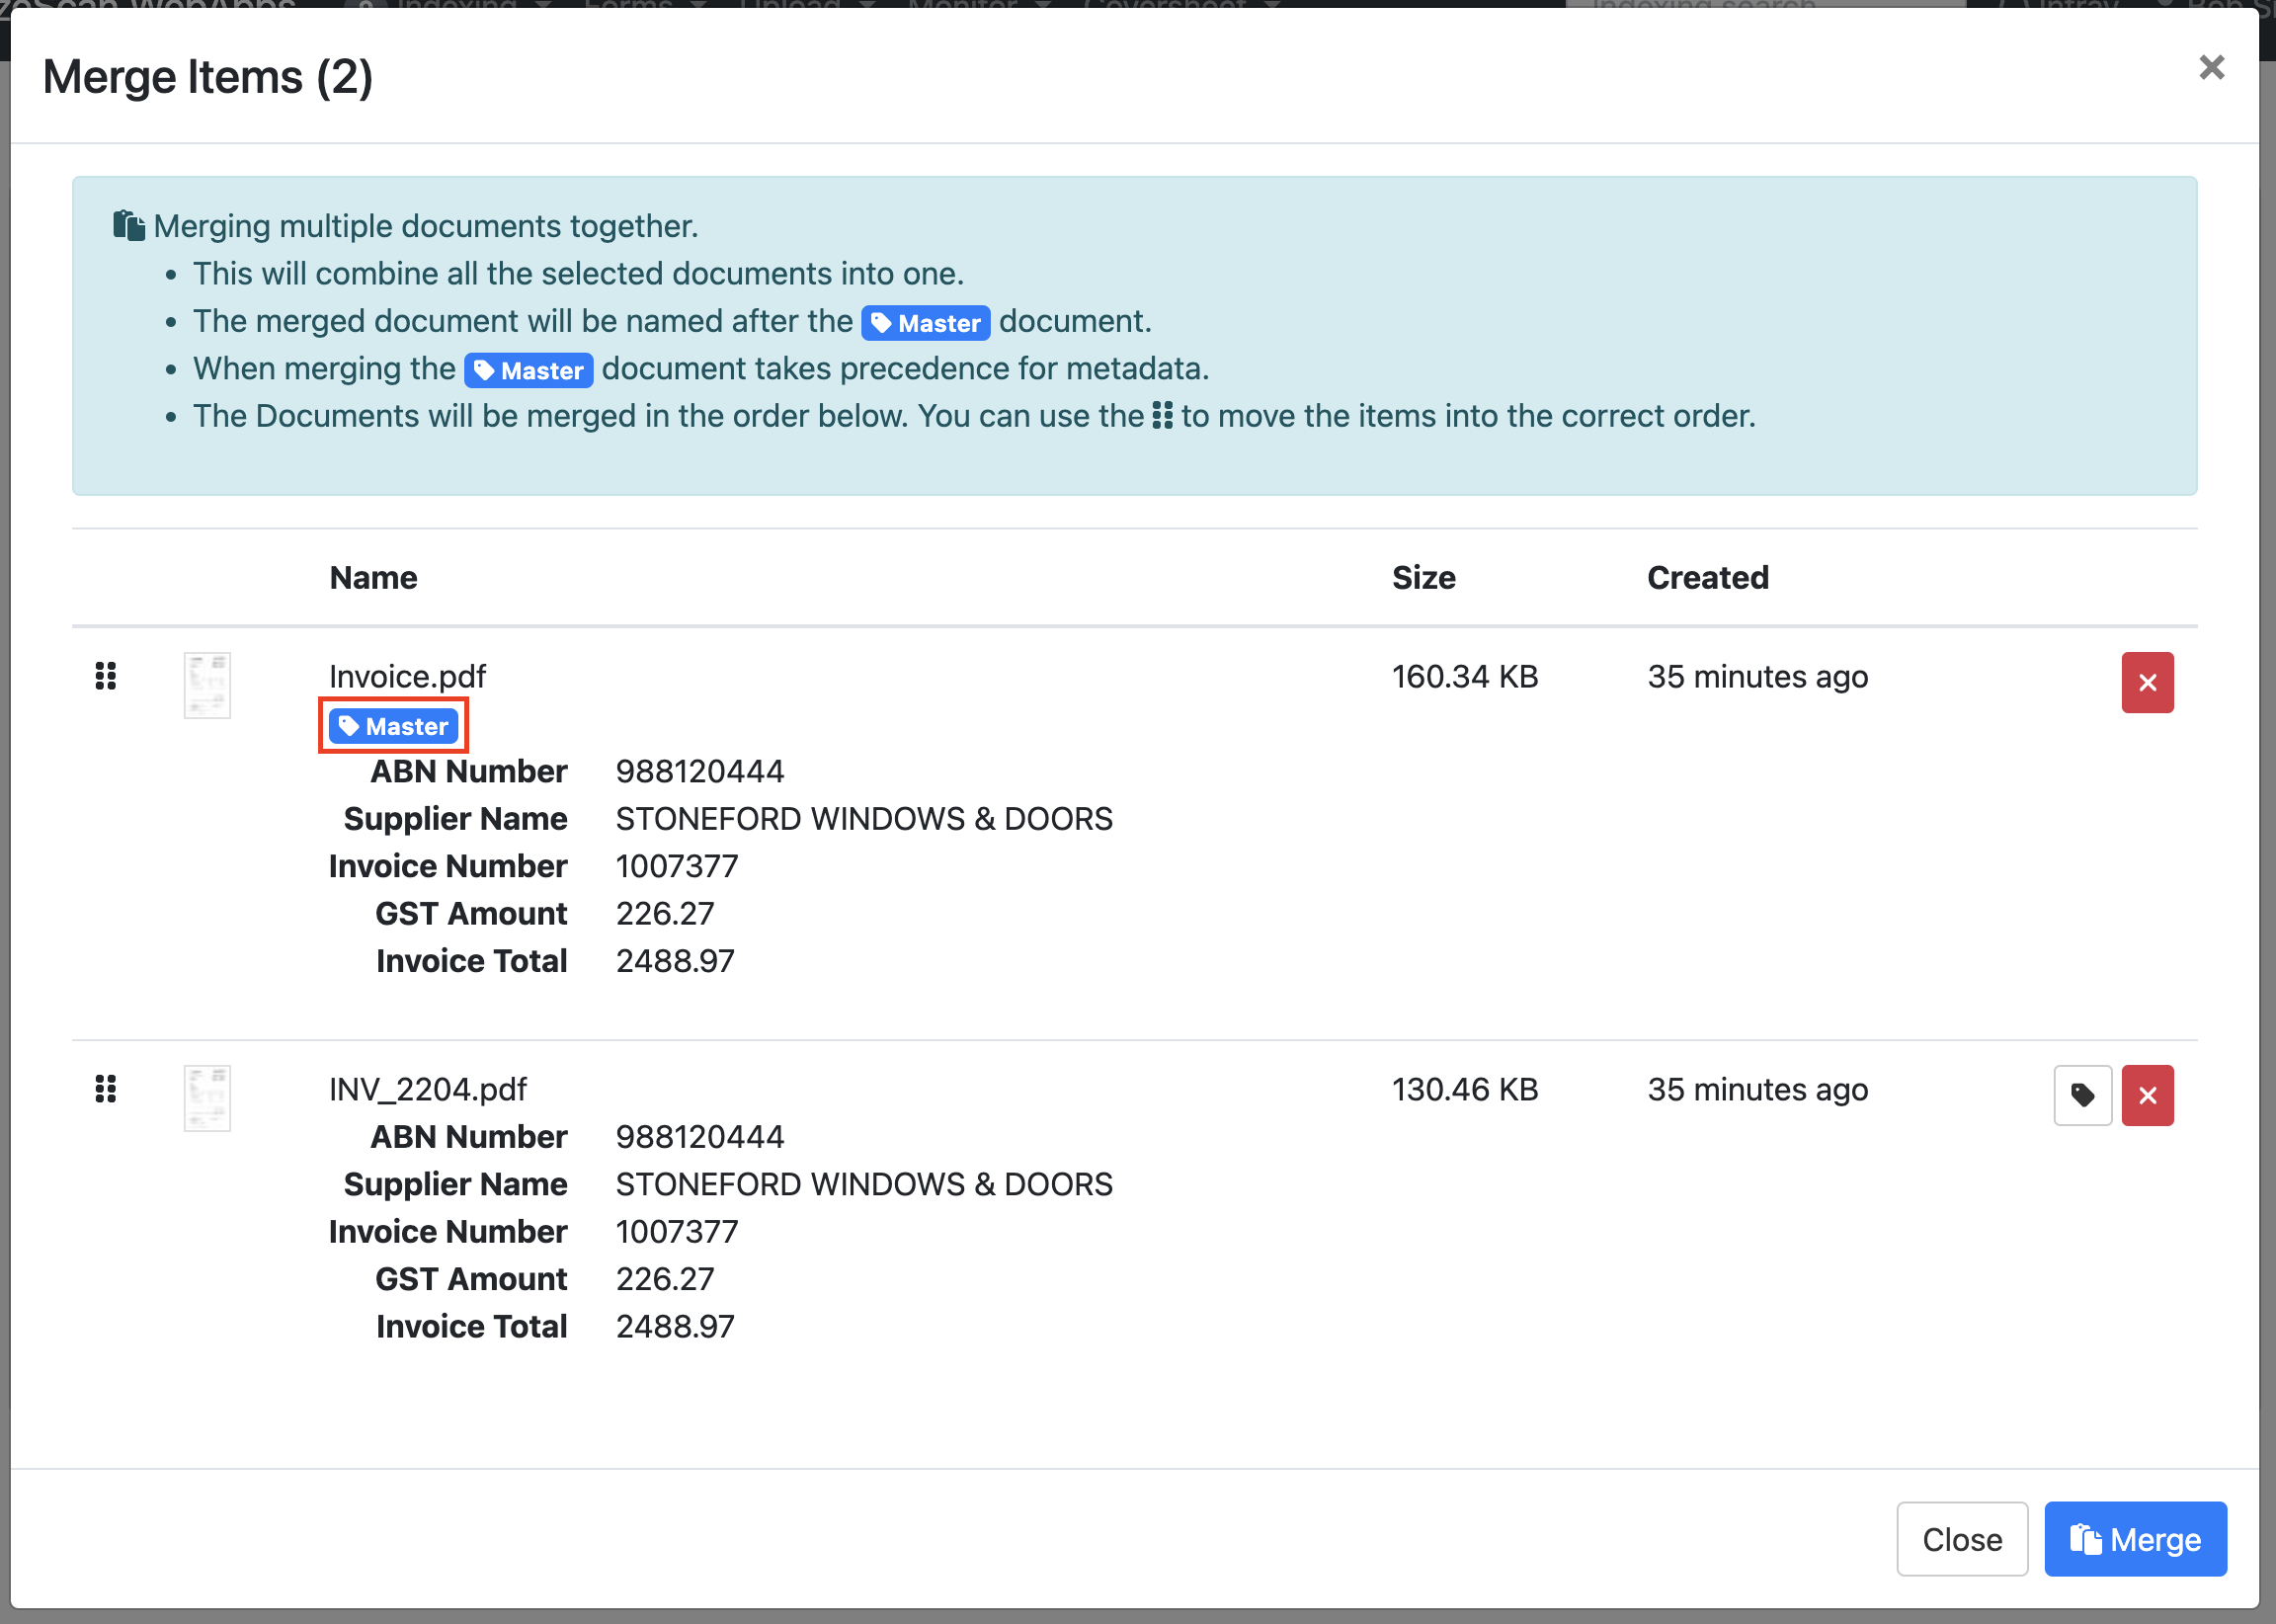
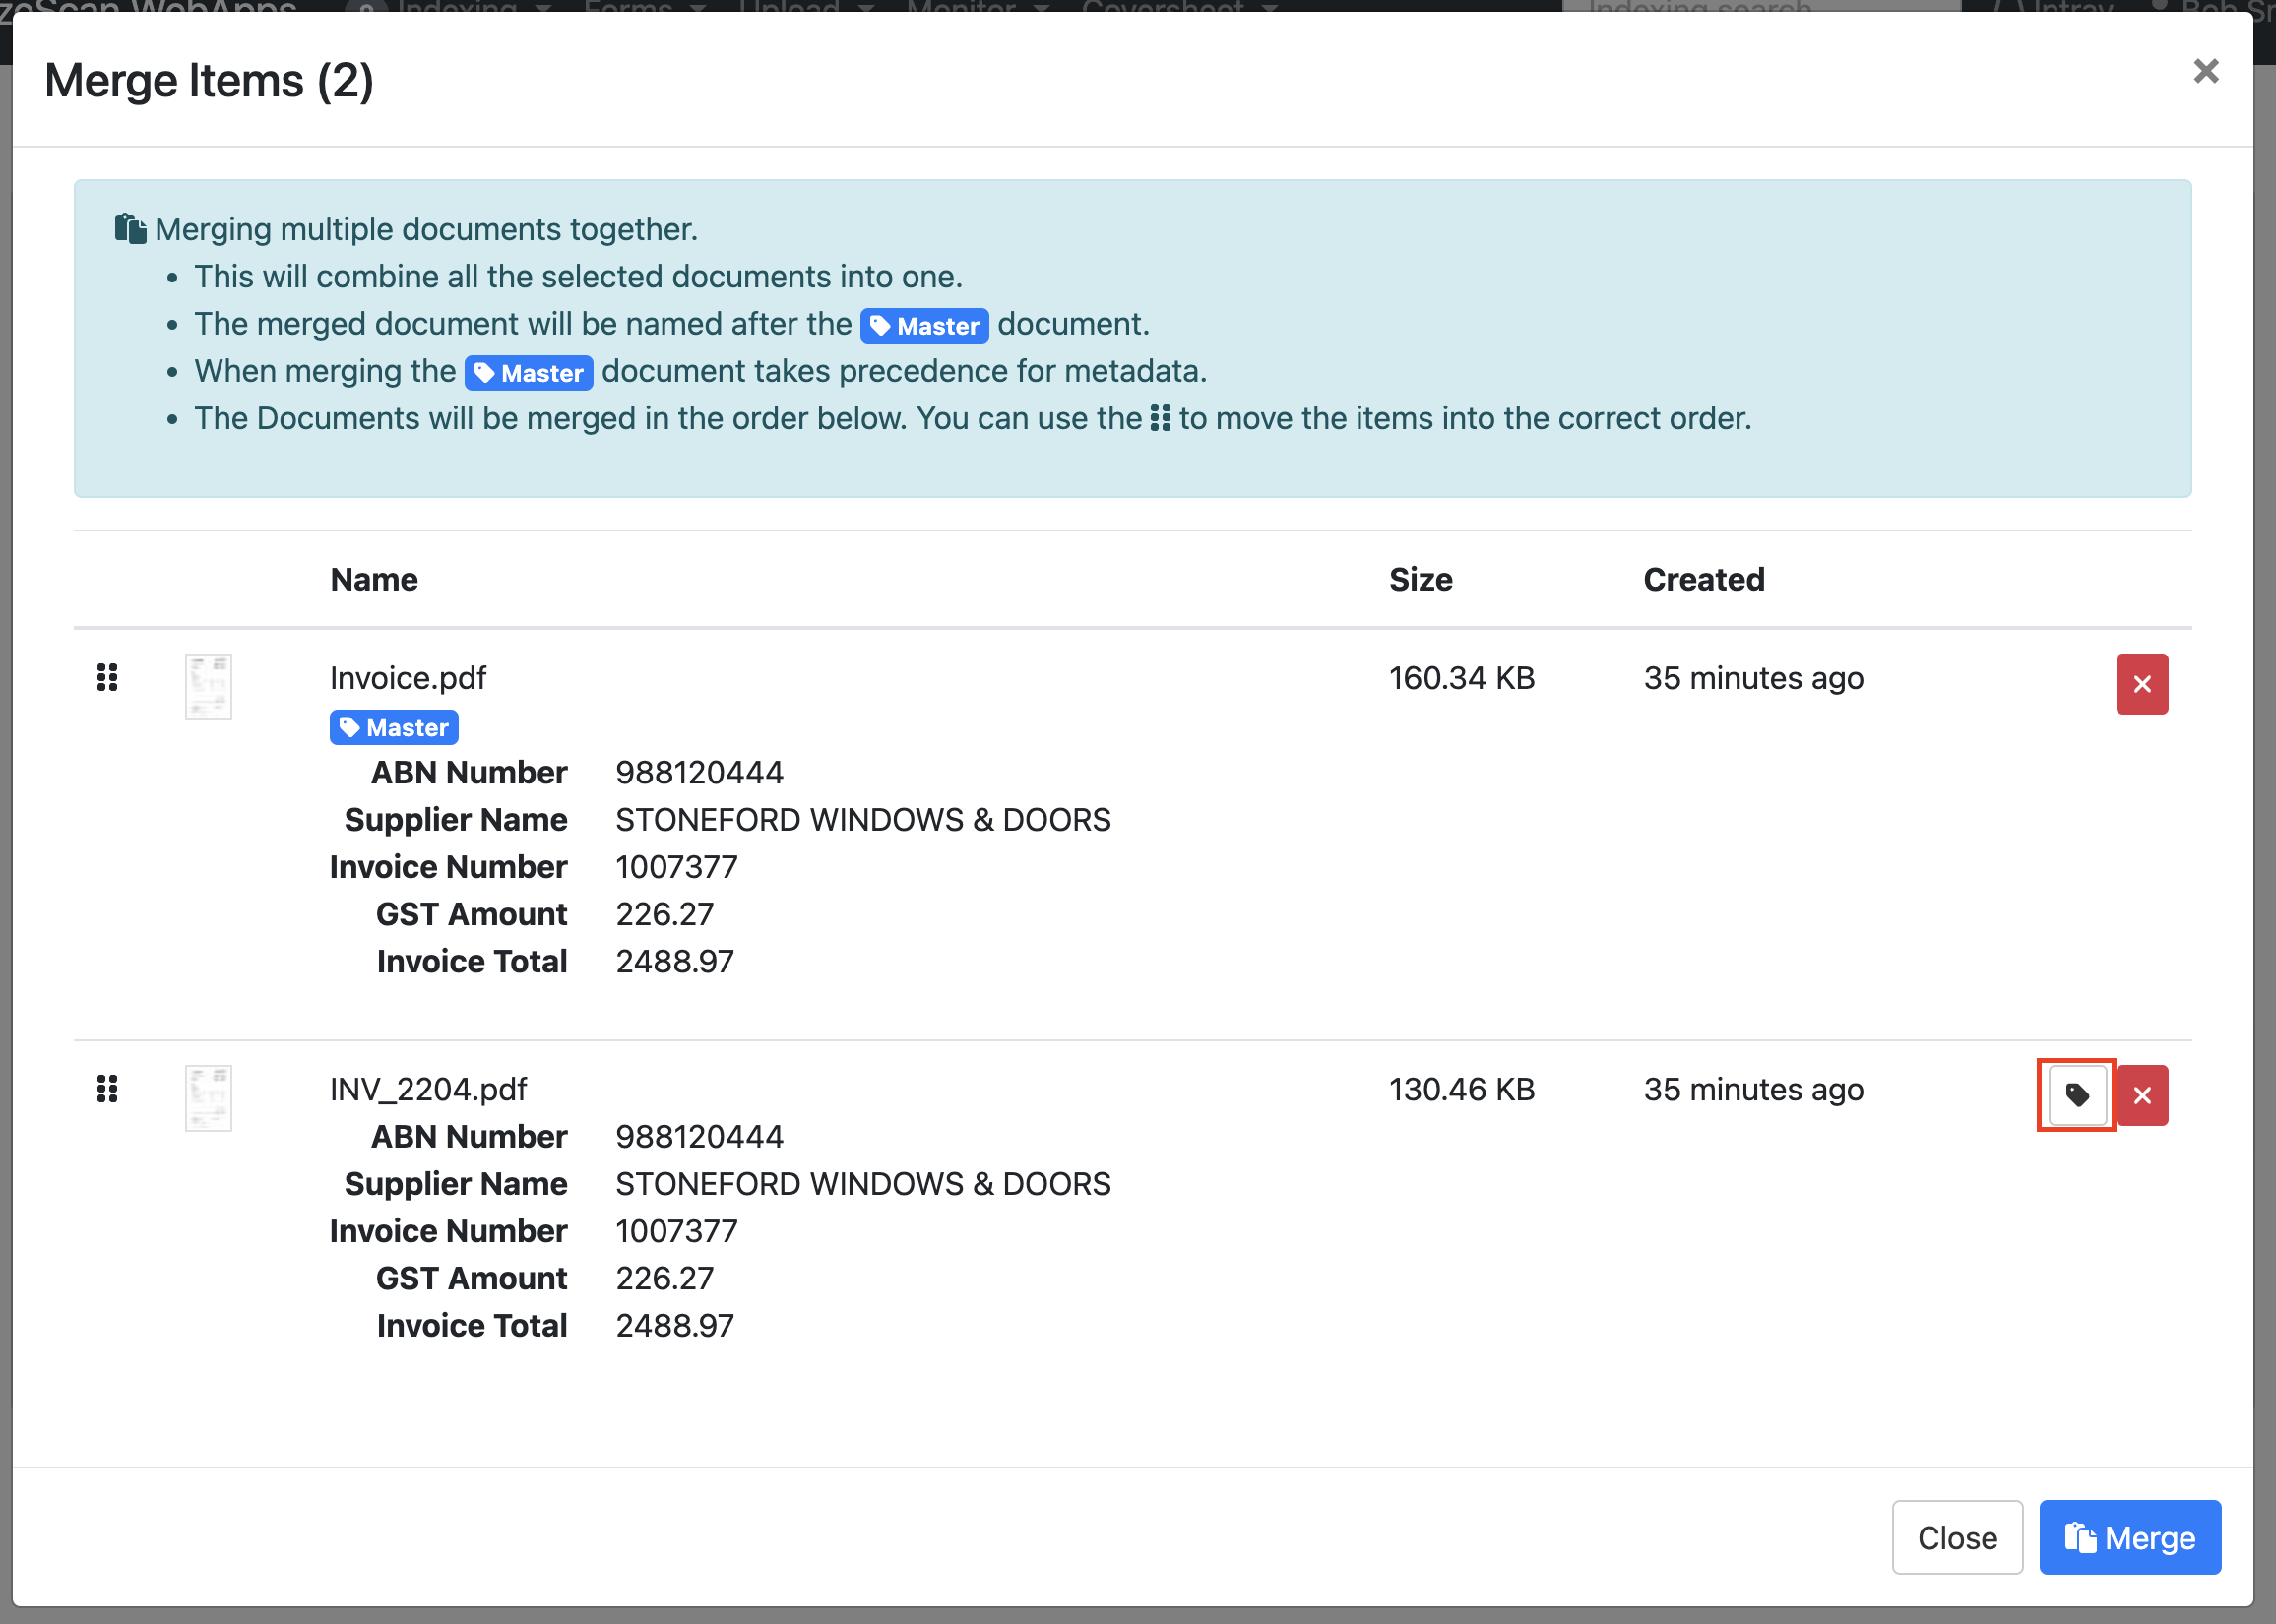
A browser will open, indicating the documents you are about to merge. A master tag will appear on the document selected as the master, from which the metadata and name will be taken.
-
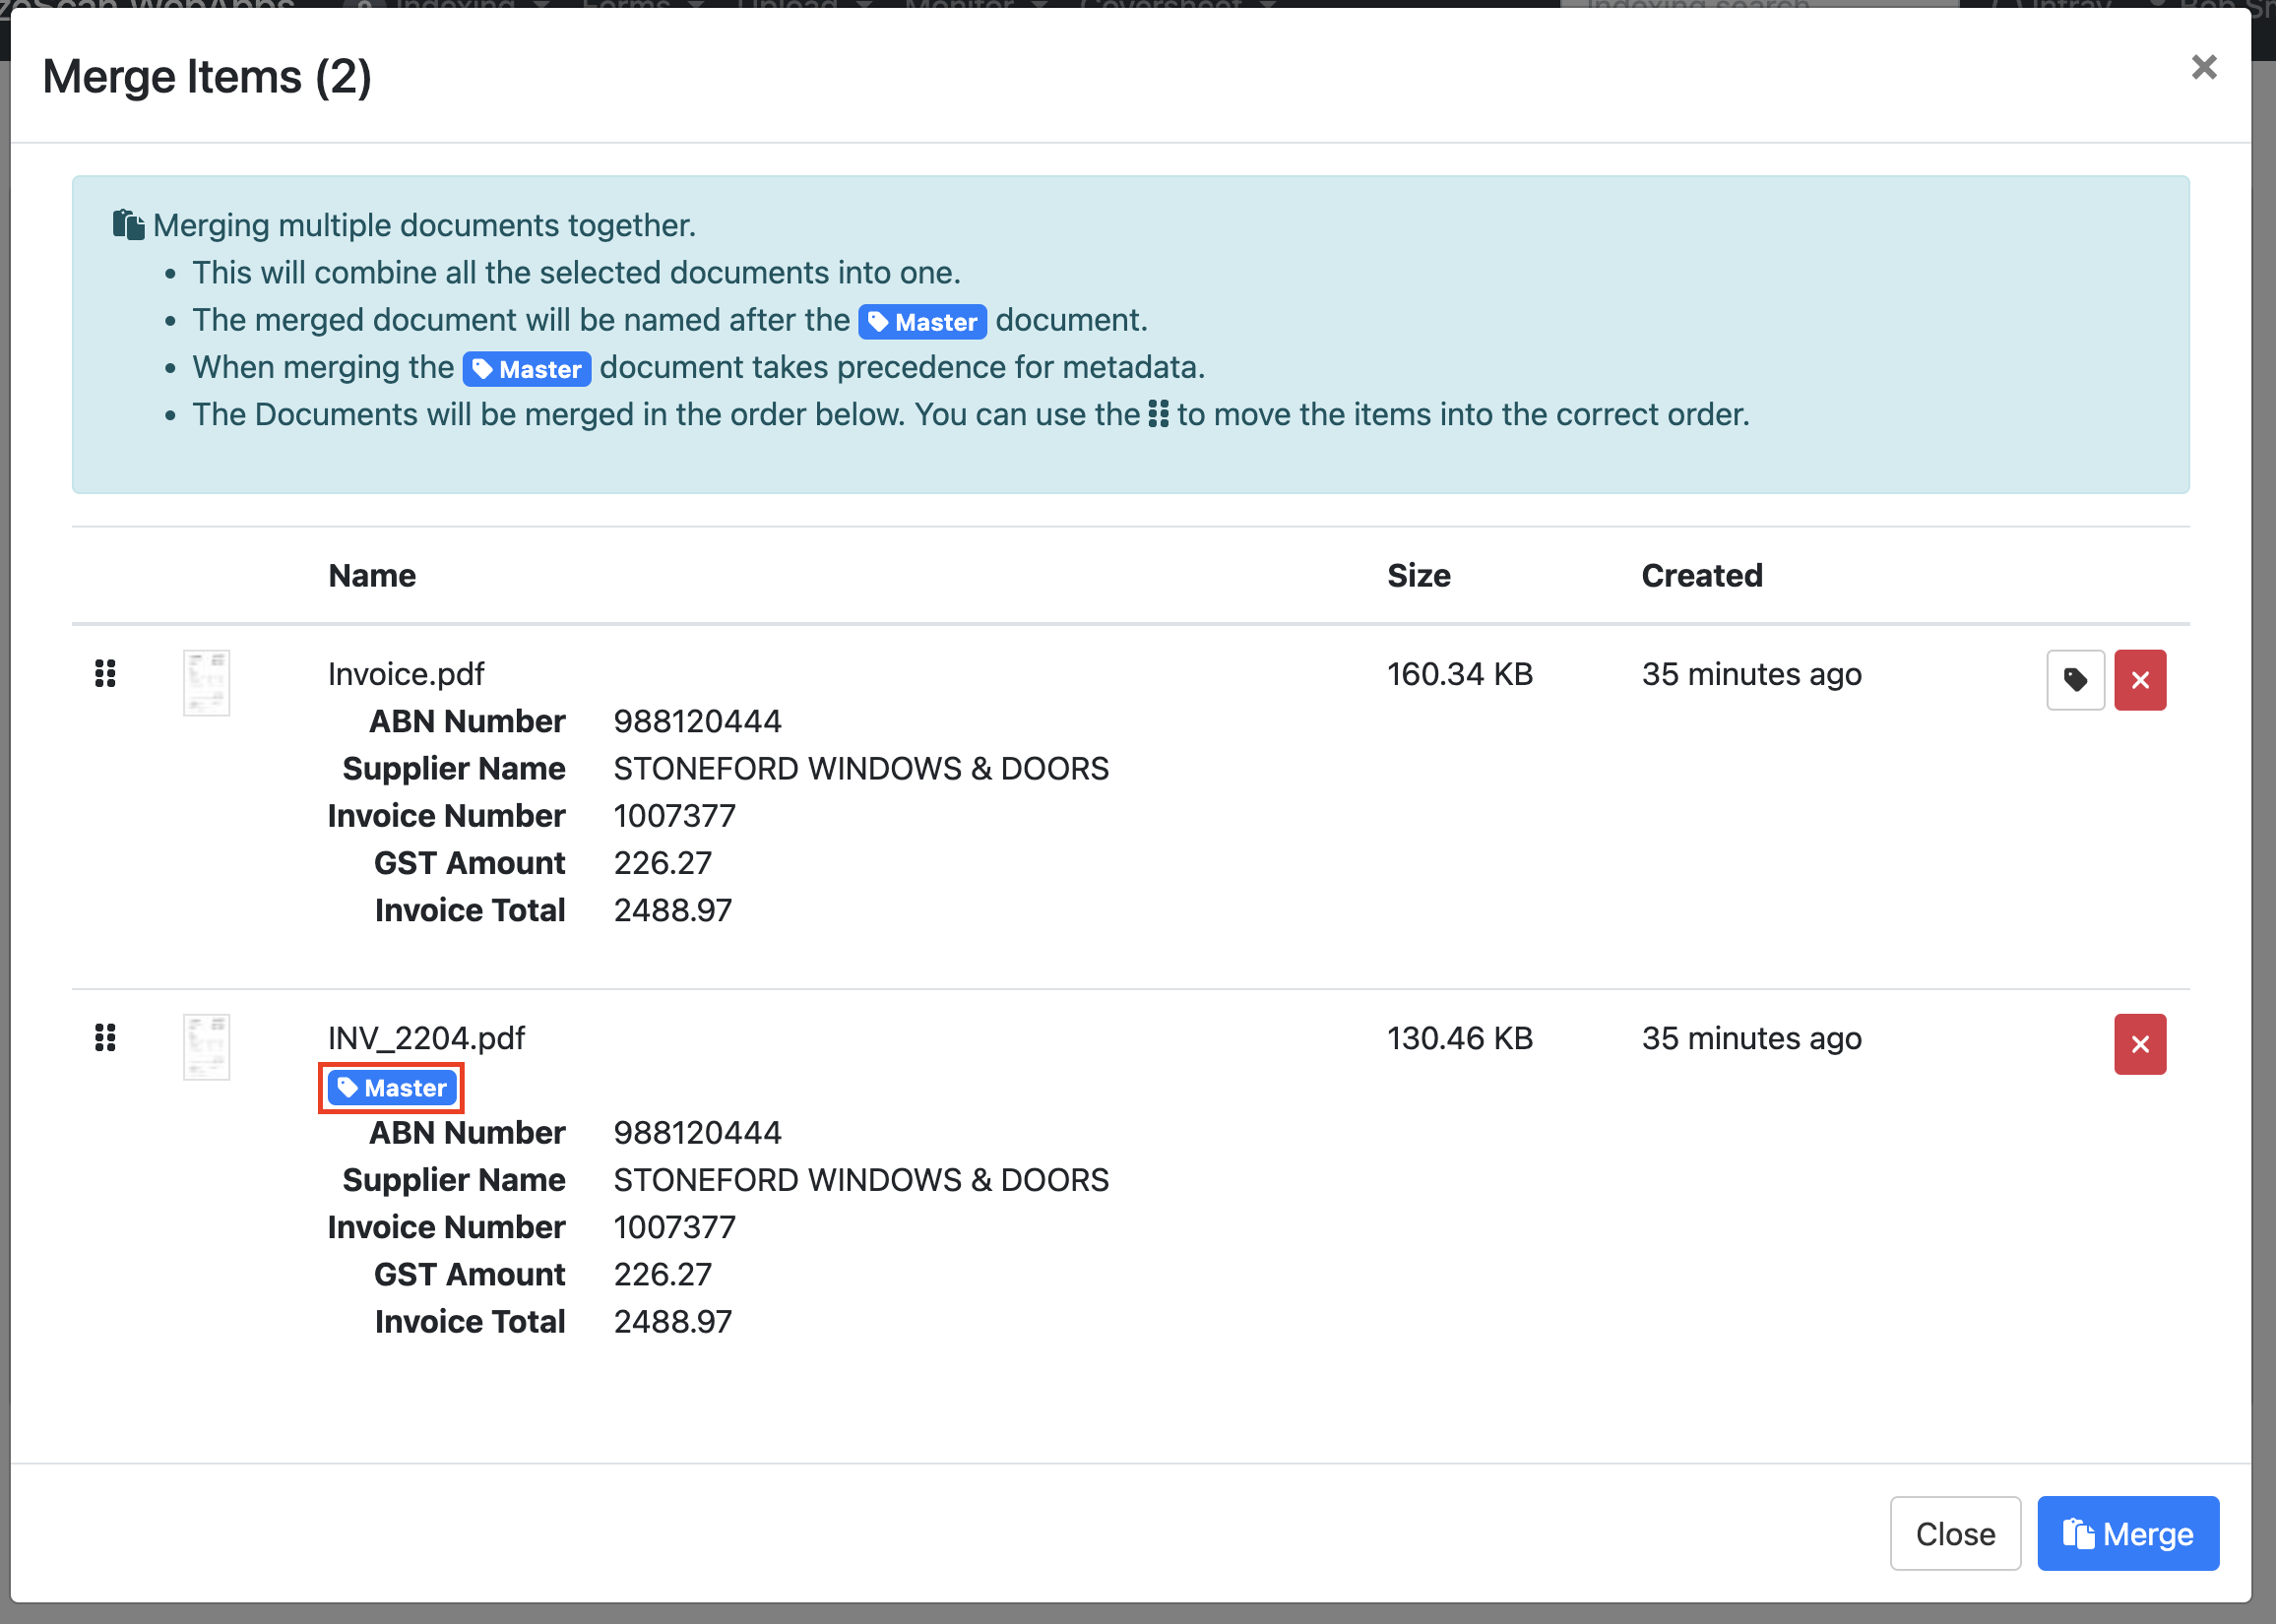
To change the master document, select the tag icon on the document you would like to make the master.
-
The master tag will now appear on the other document.
-
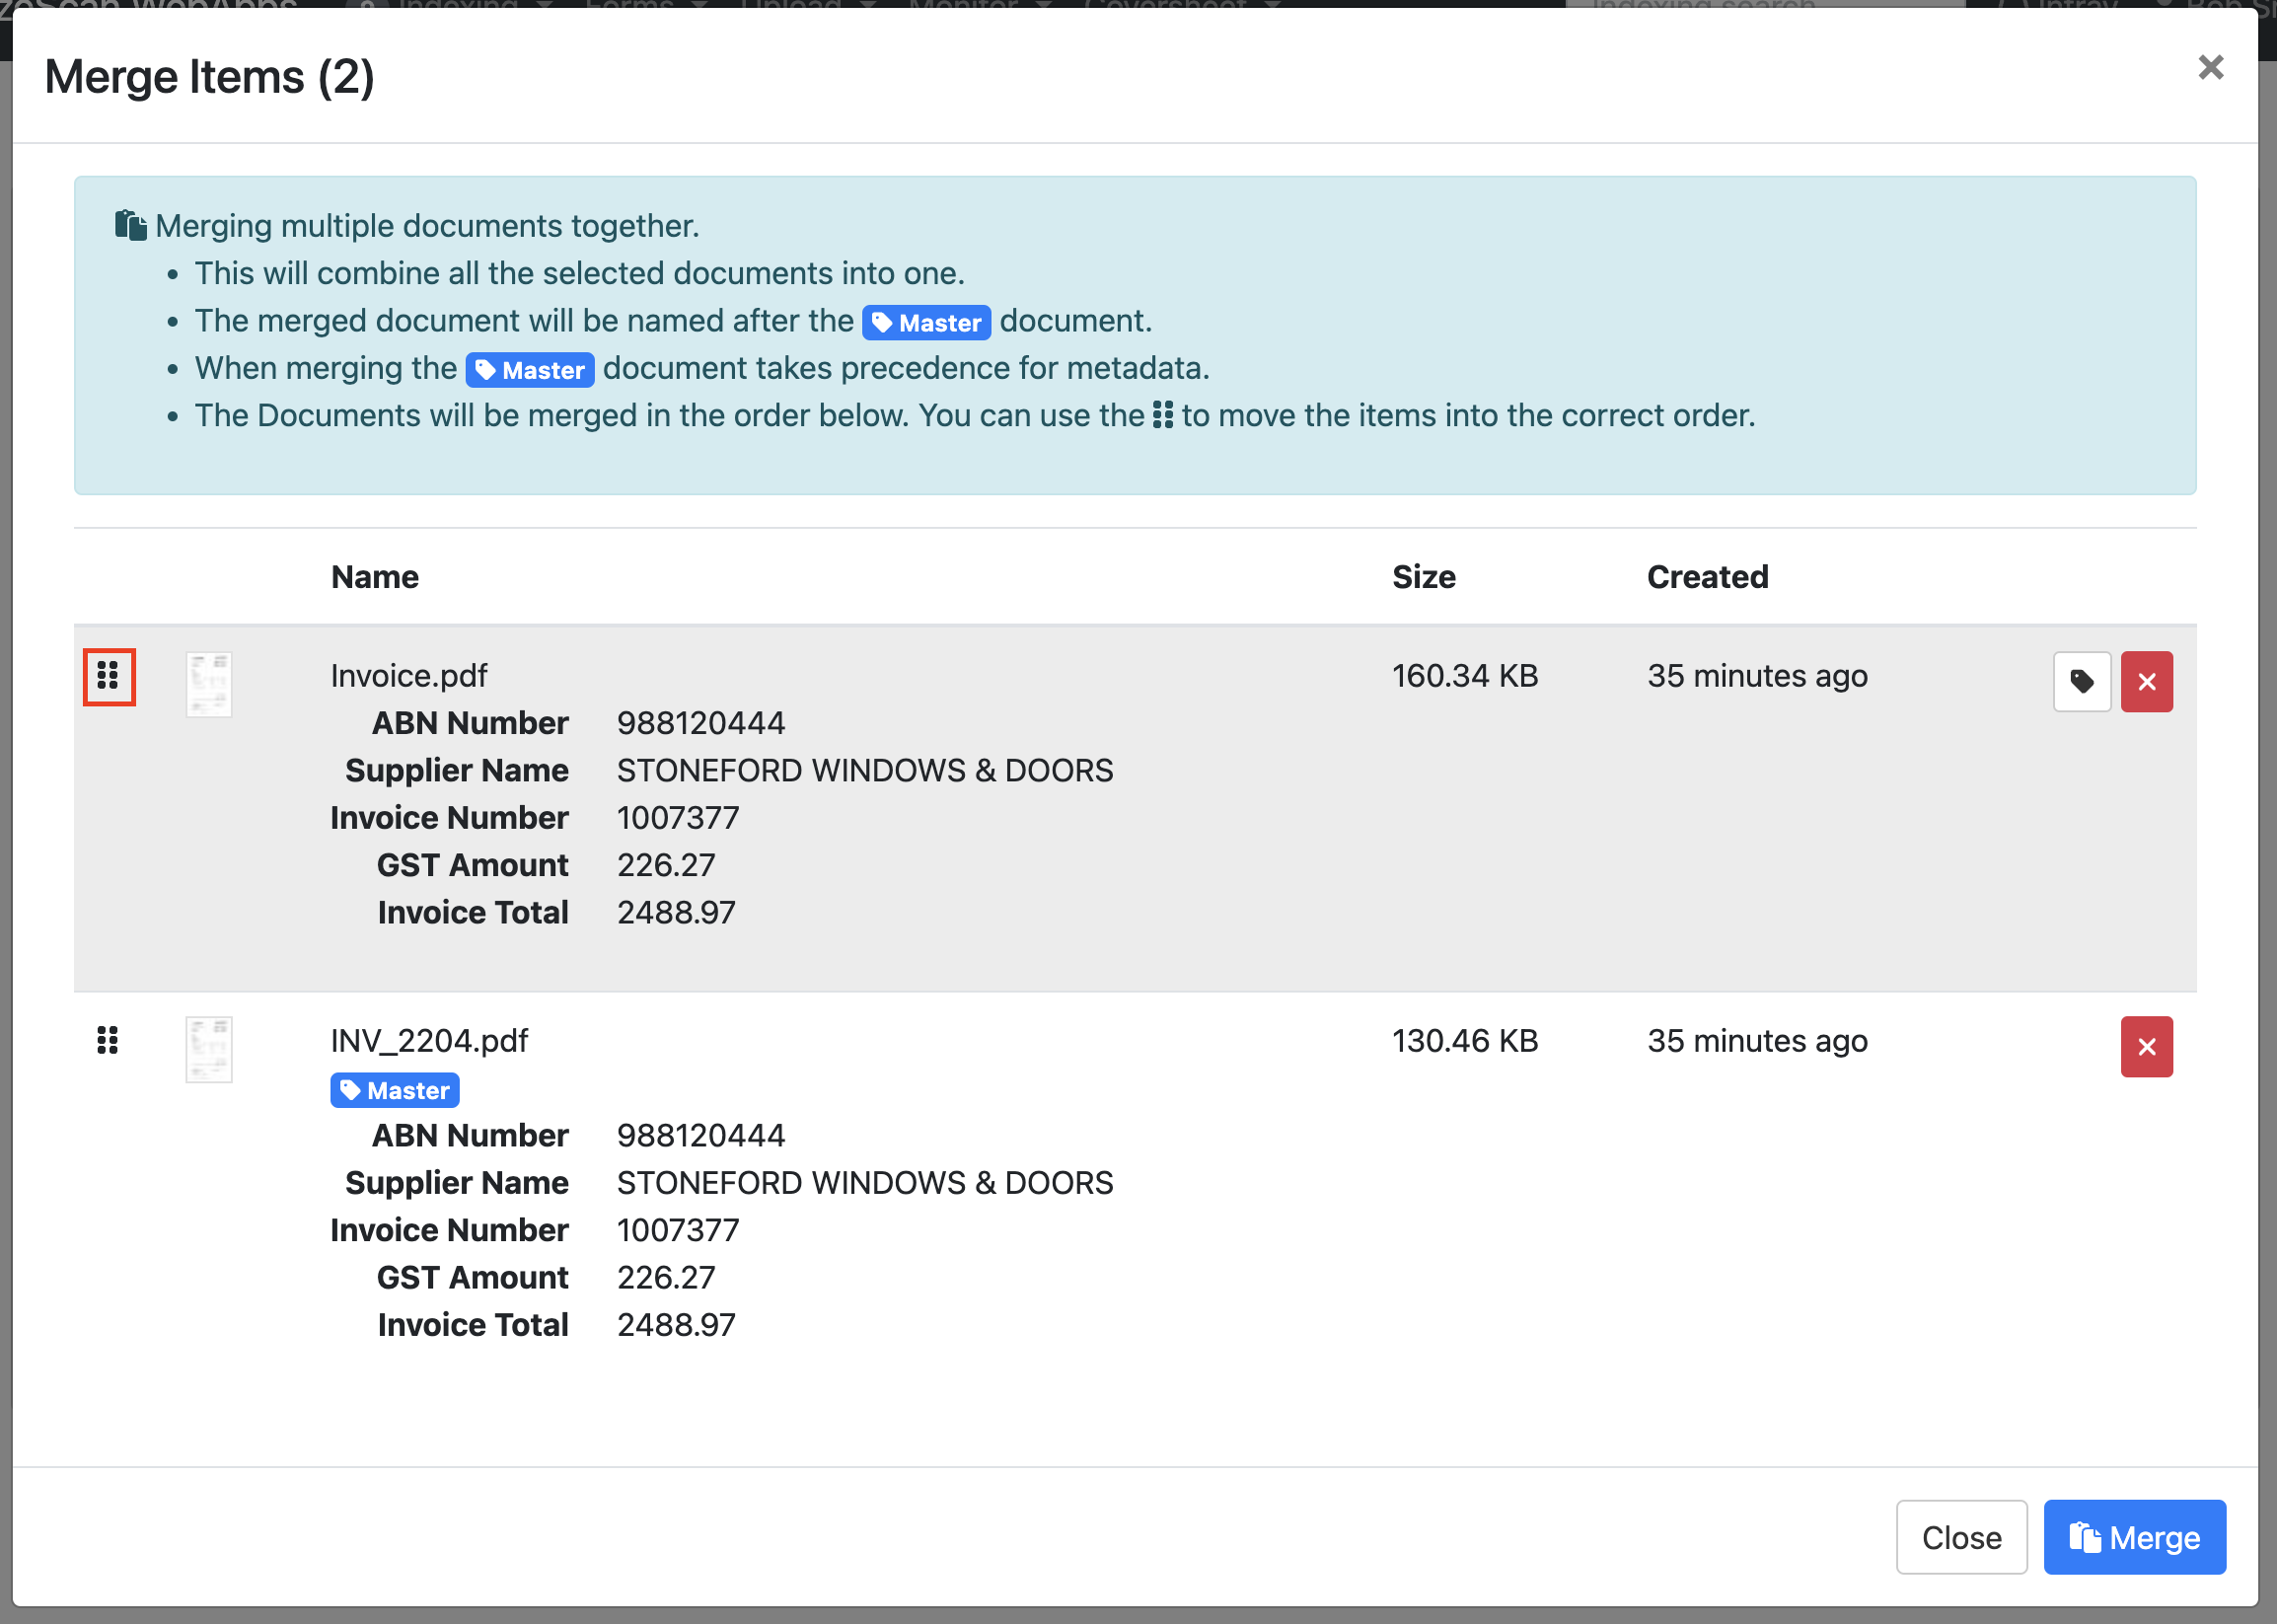
To adjust the order of the documents, use the icon on the left of the thumbnail and drag the document to the desired position.
-
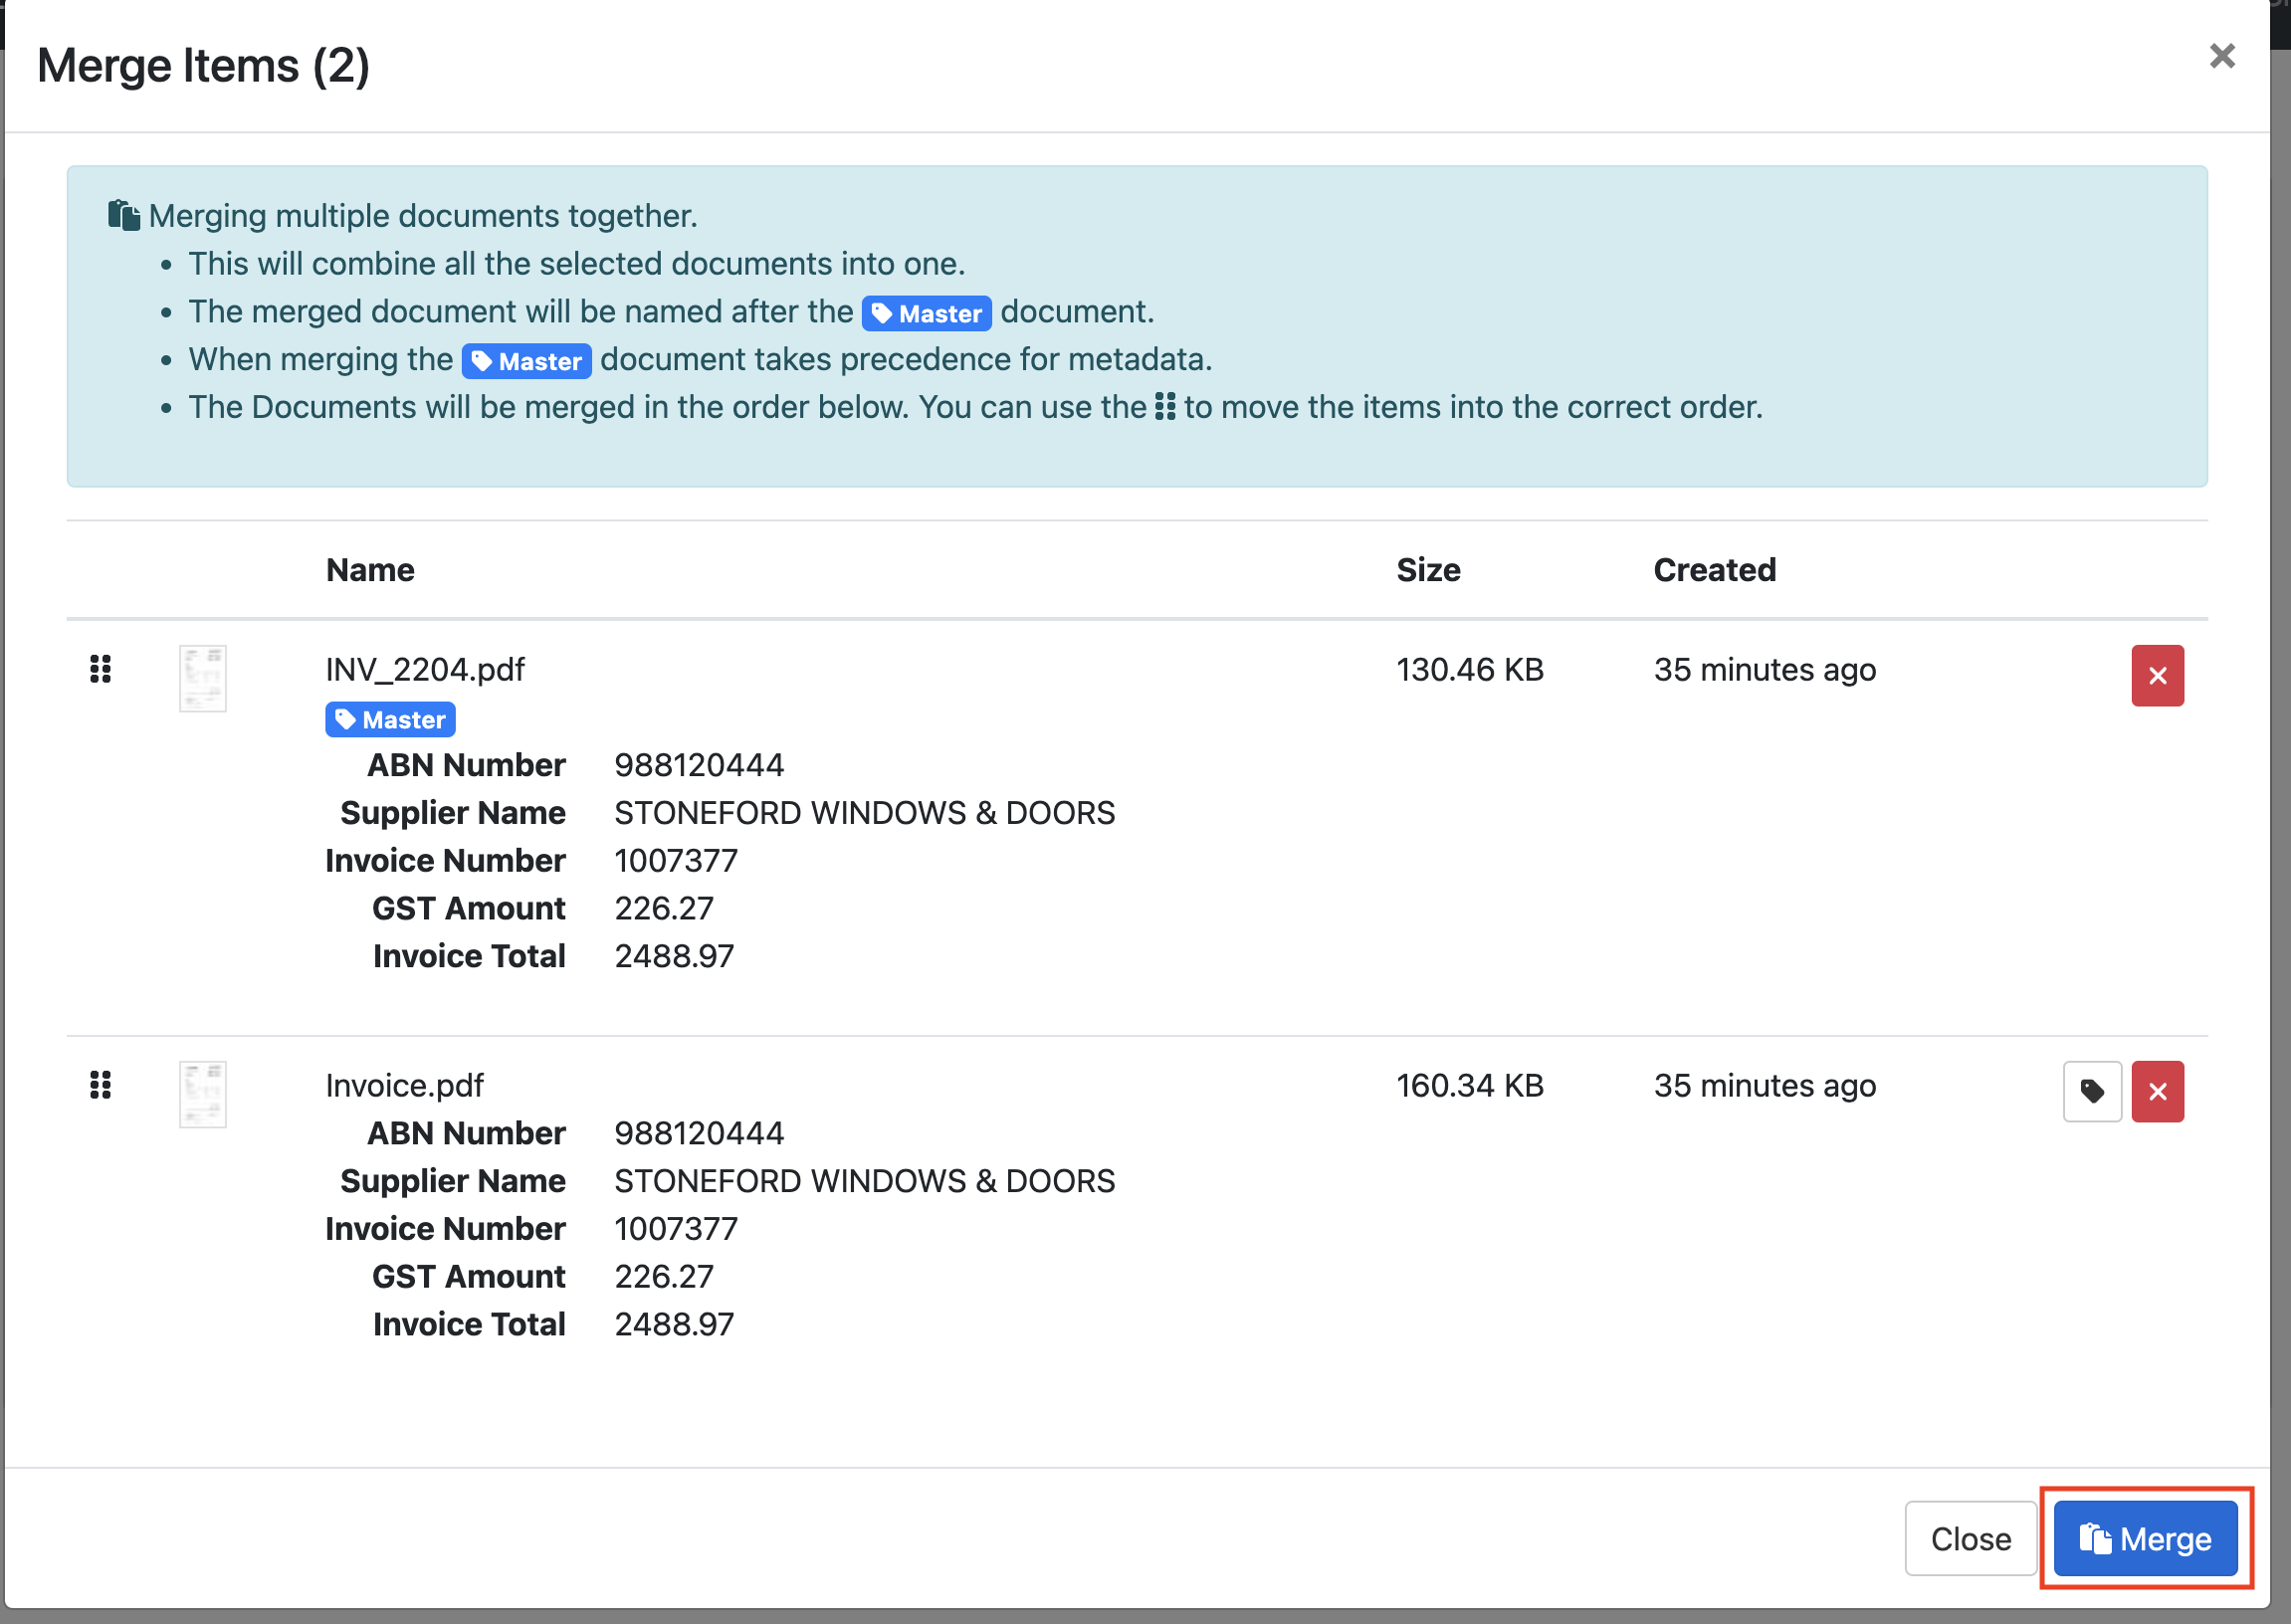
Once you're satisfied with the order and master document, click the "Merge" button.
Video Tutorial: https://youtu.be/ta77Z74hH-E
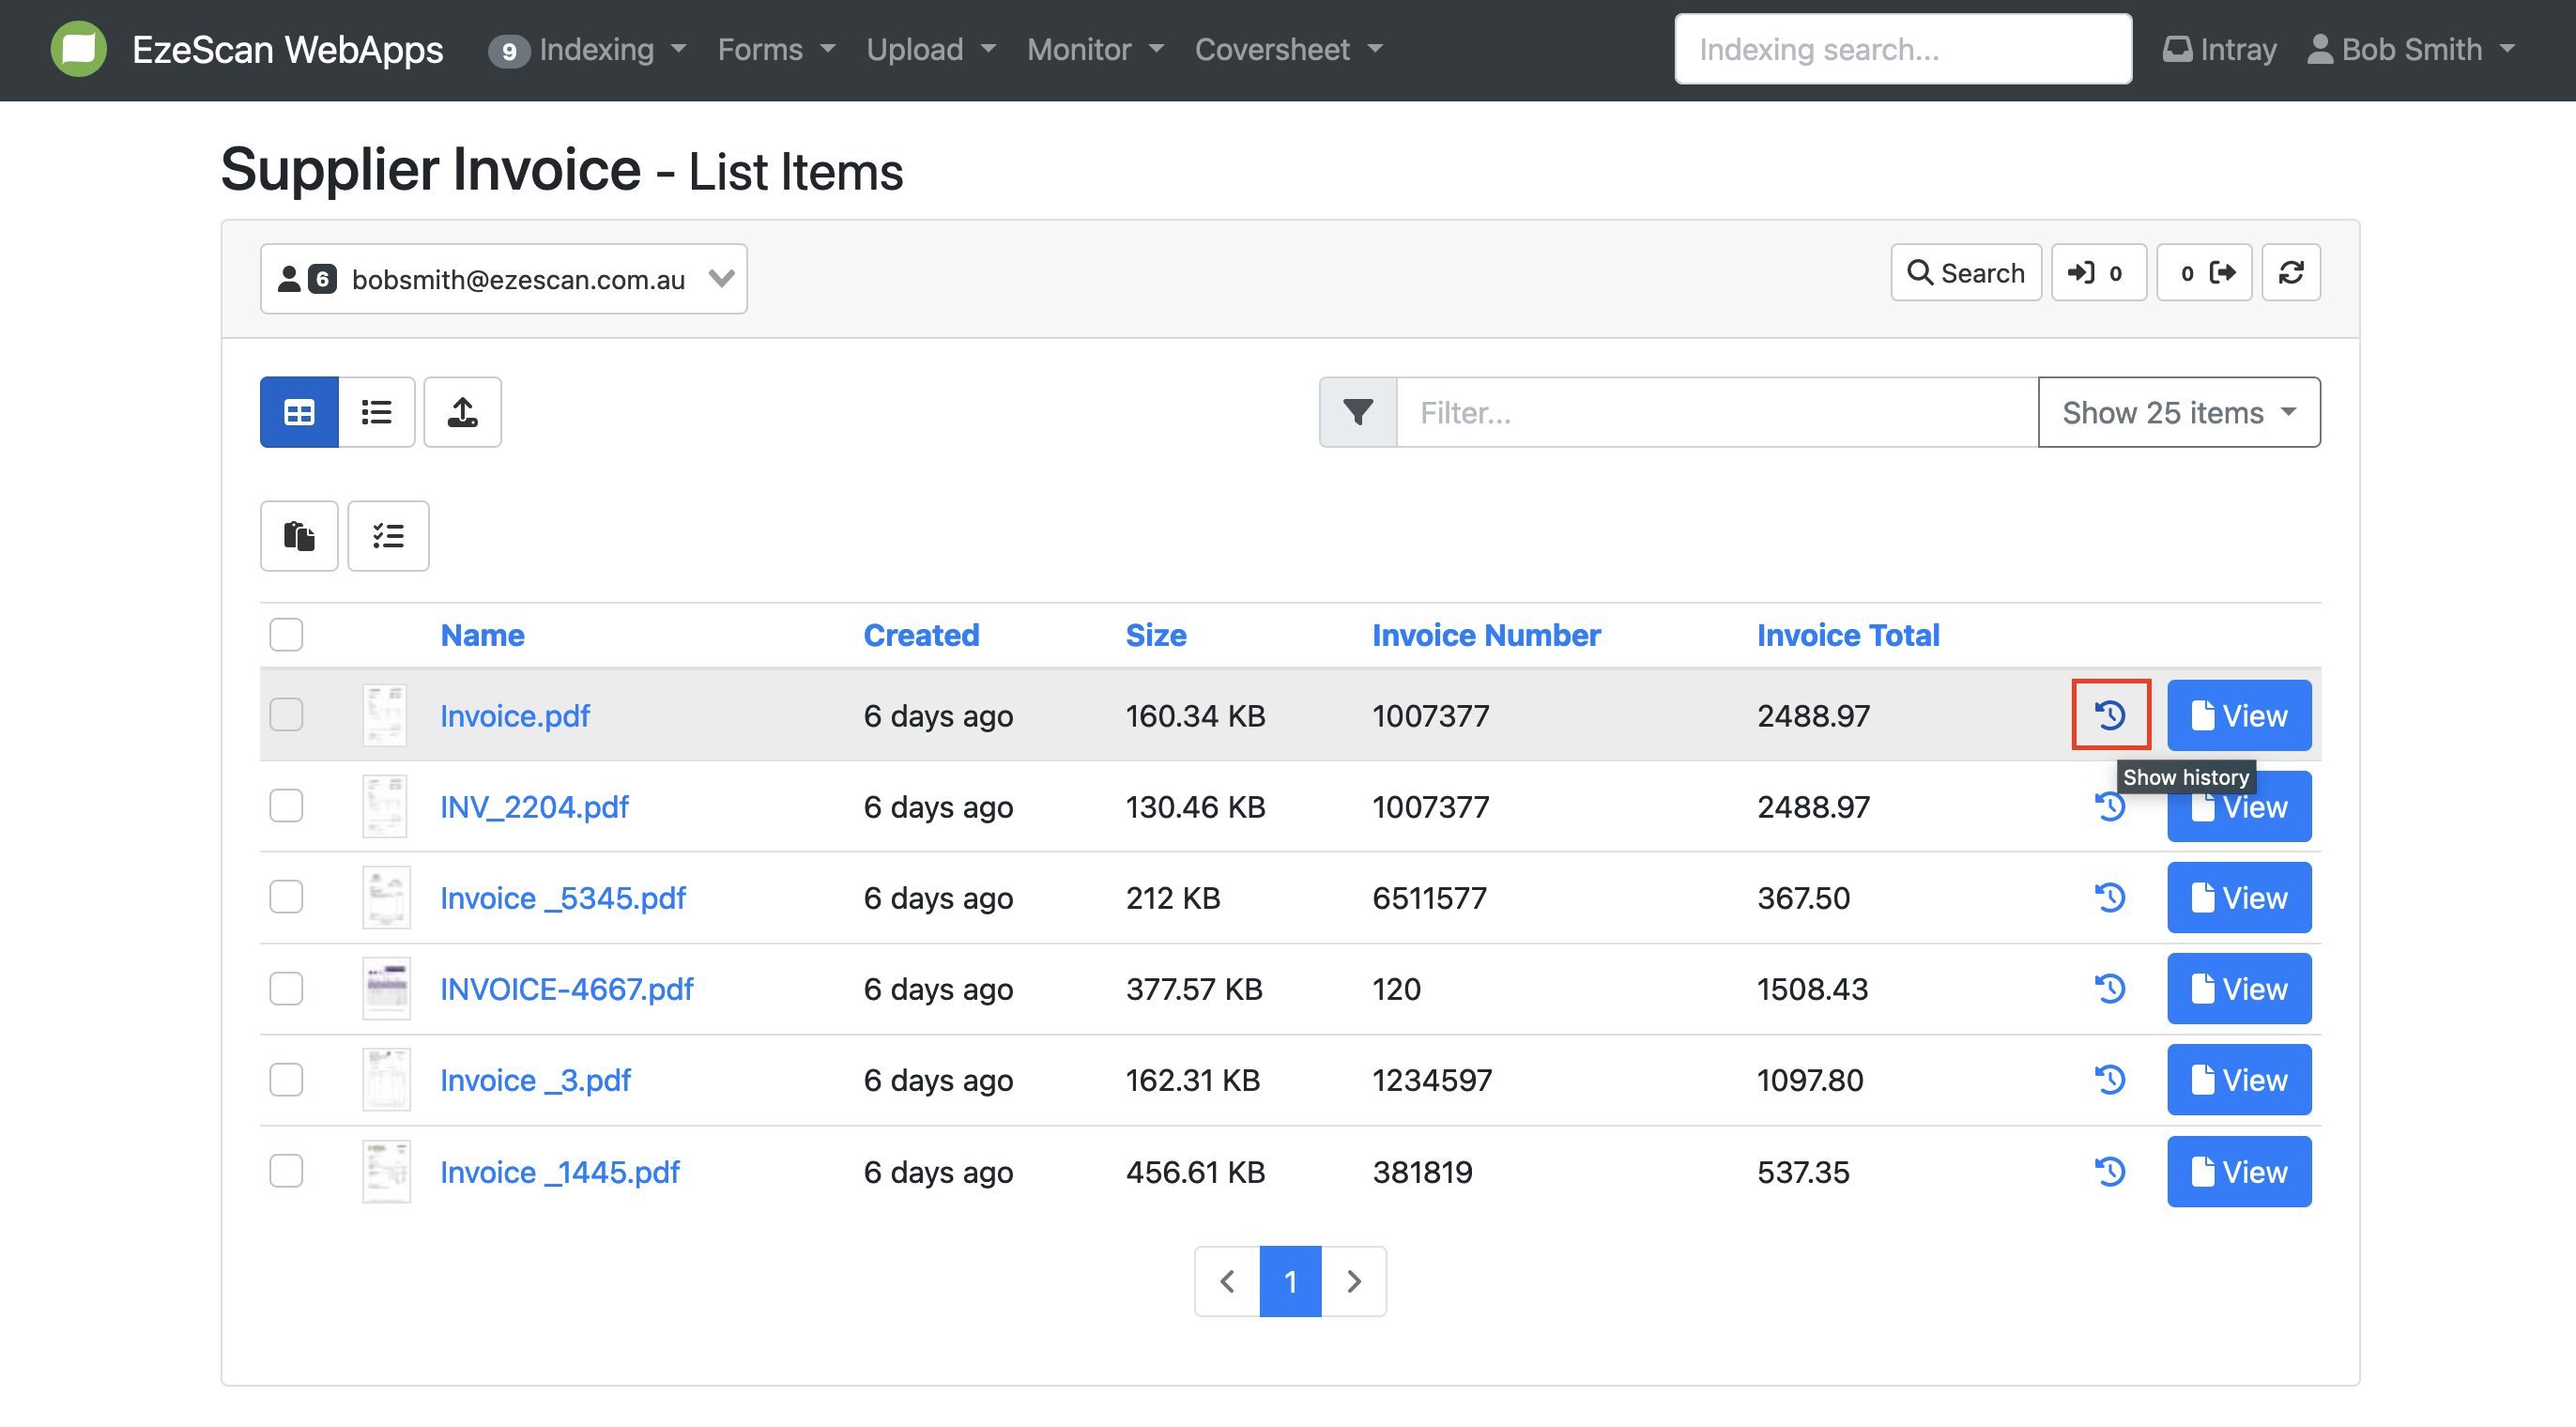
Viewing document history and metadata
-
To view the history of a document, select the clock arrow button next to the view button.
-
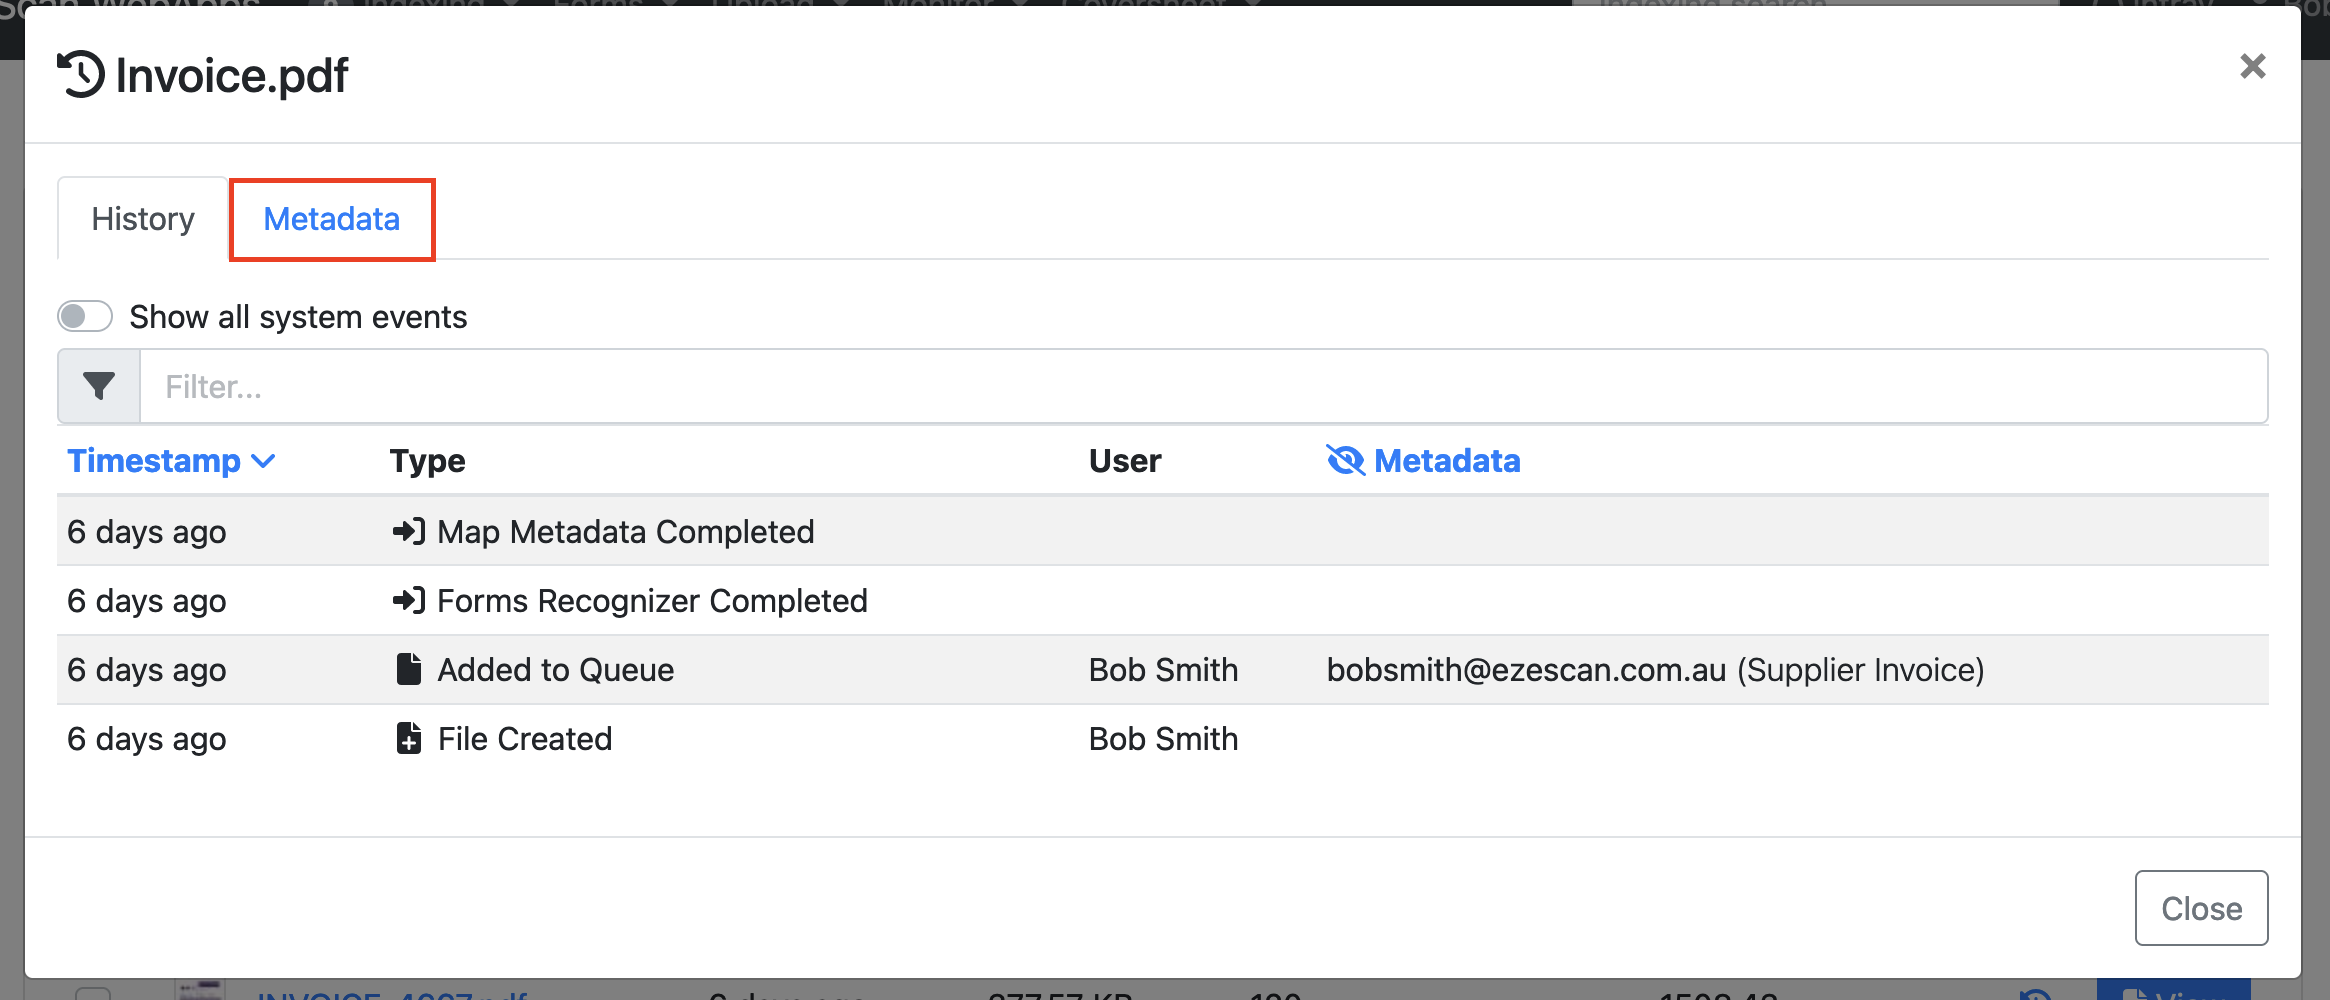
A pop-up window will appear, listing the actions taken on that document since entering Webapps and by which user. You can search this history by typing your search term into the search bar.

-
To view the metadata of a document, click the "Metadata" tab.
-
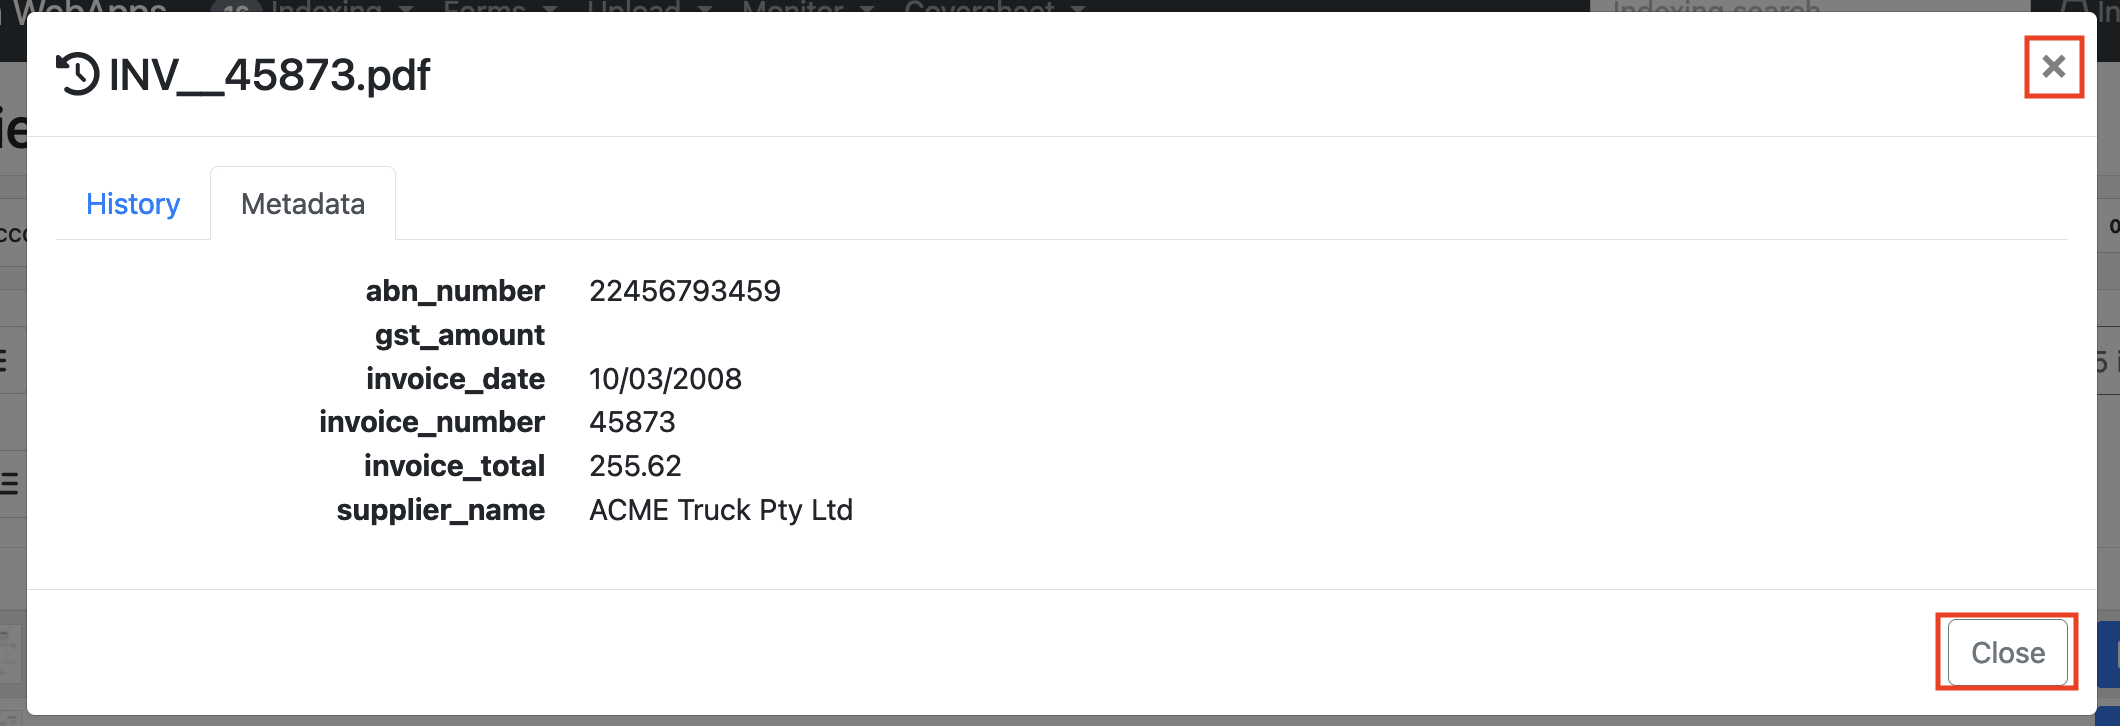
The window will display any extracted document metadata, with blank fields indicating that the document currently has no extracted metadata. Please note that this data is for display purposes only and cannot be modified within this window.
-
To return to the app page, click the “close” button or the "x" located in the right-hand corner of the window.
Video Tutorial: https://youtu.be/DYKw_Jpiu-M
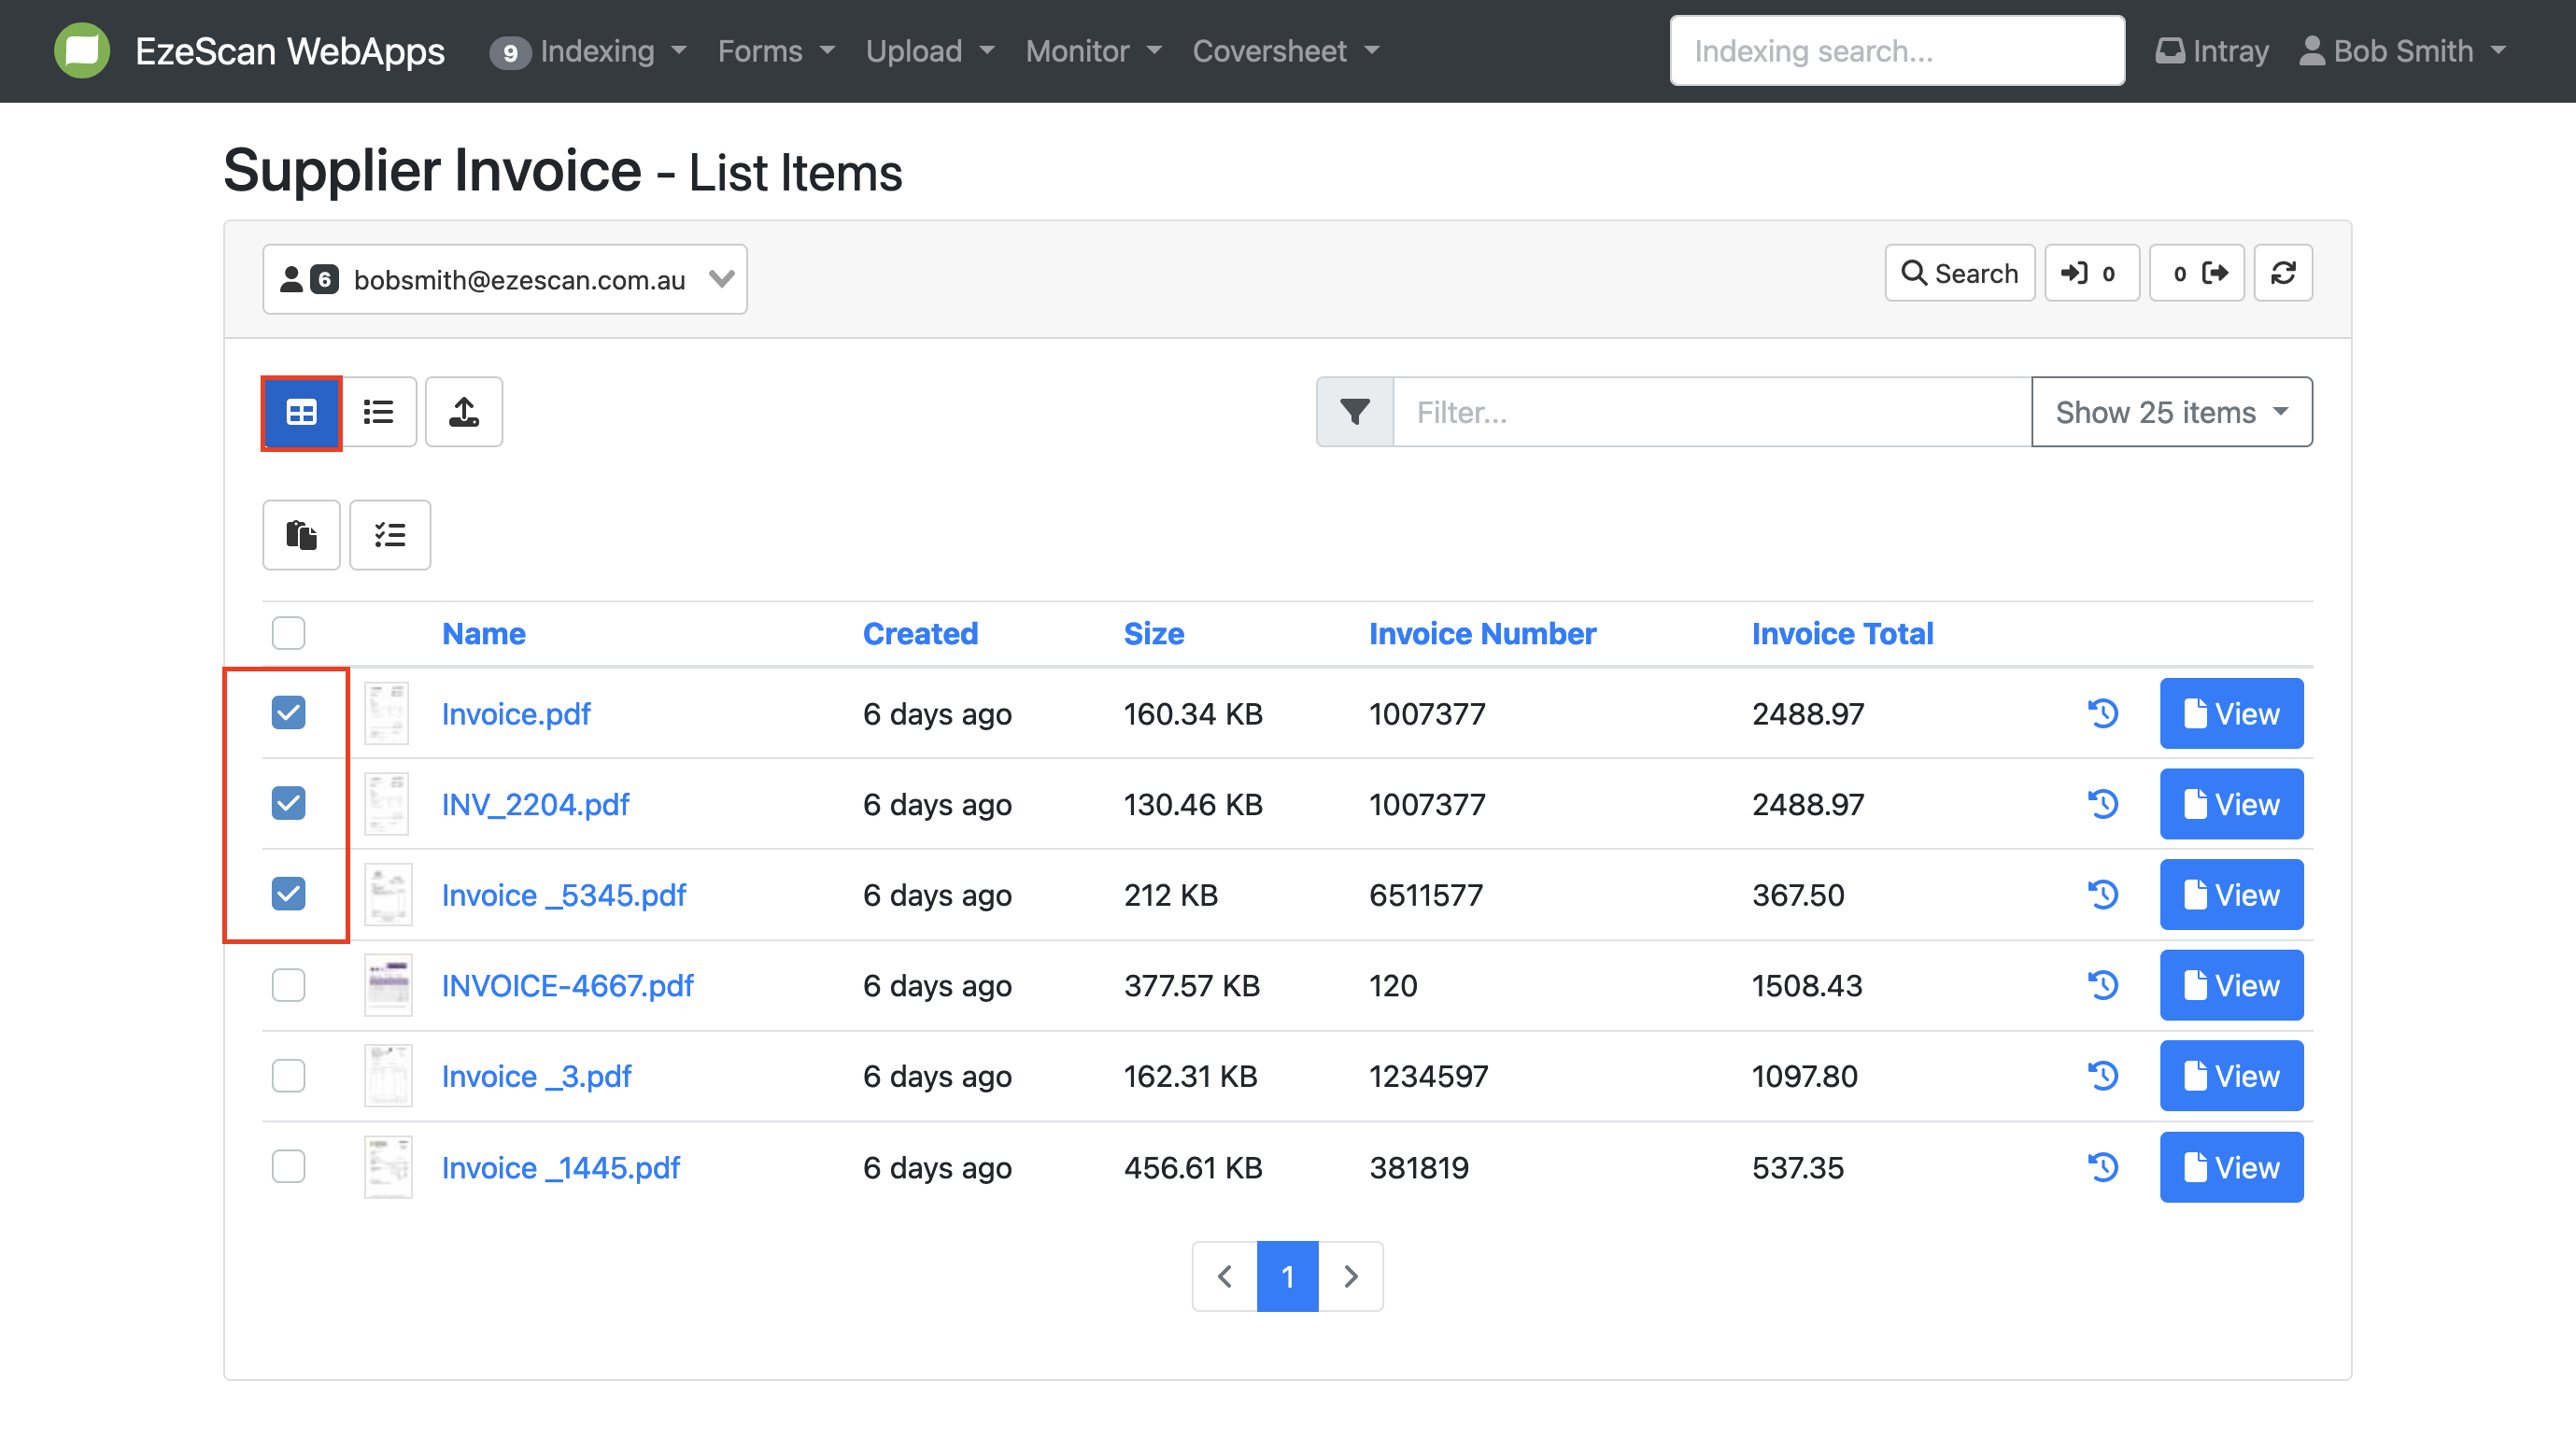
Performing Bulk Actions
-
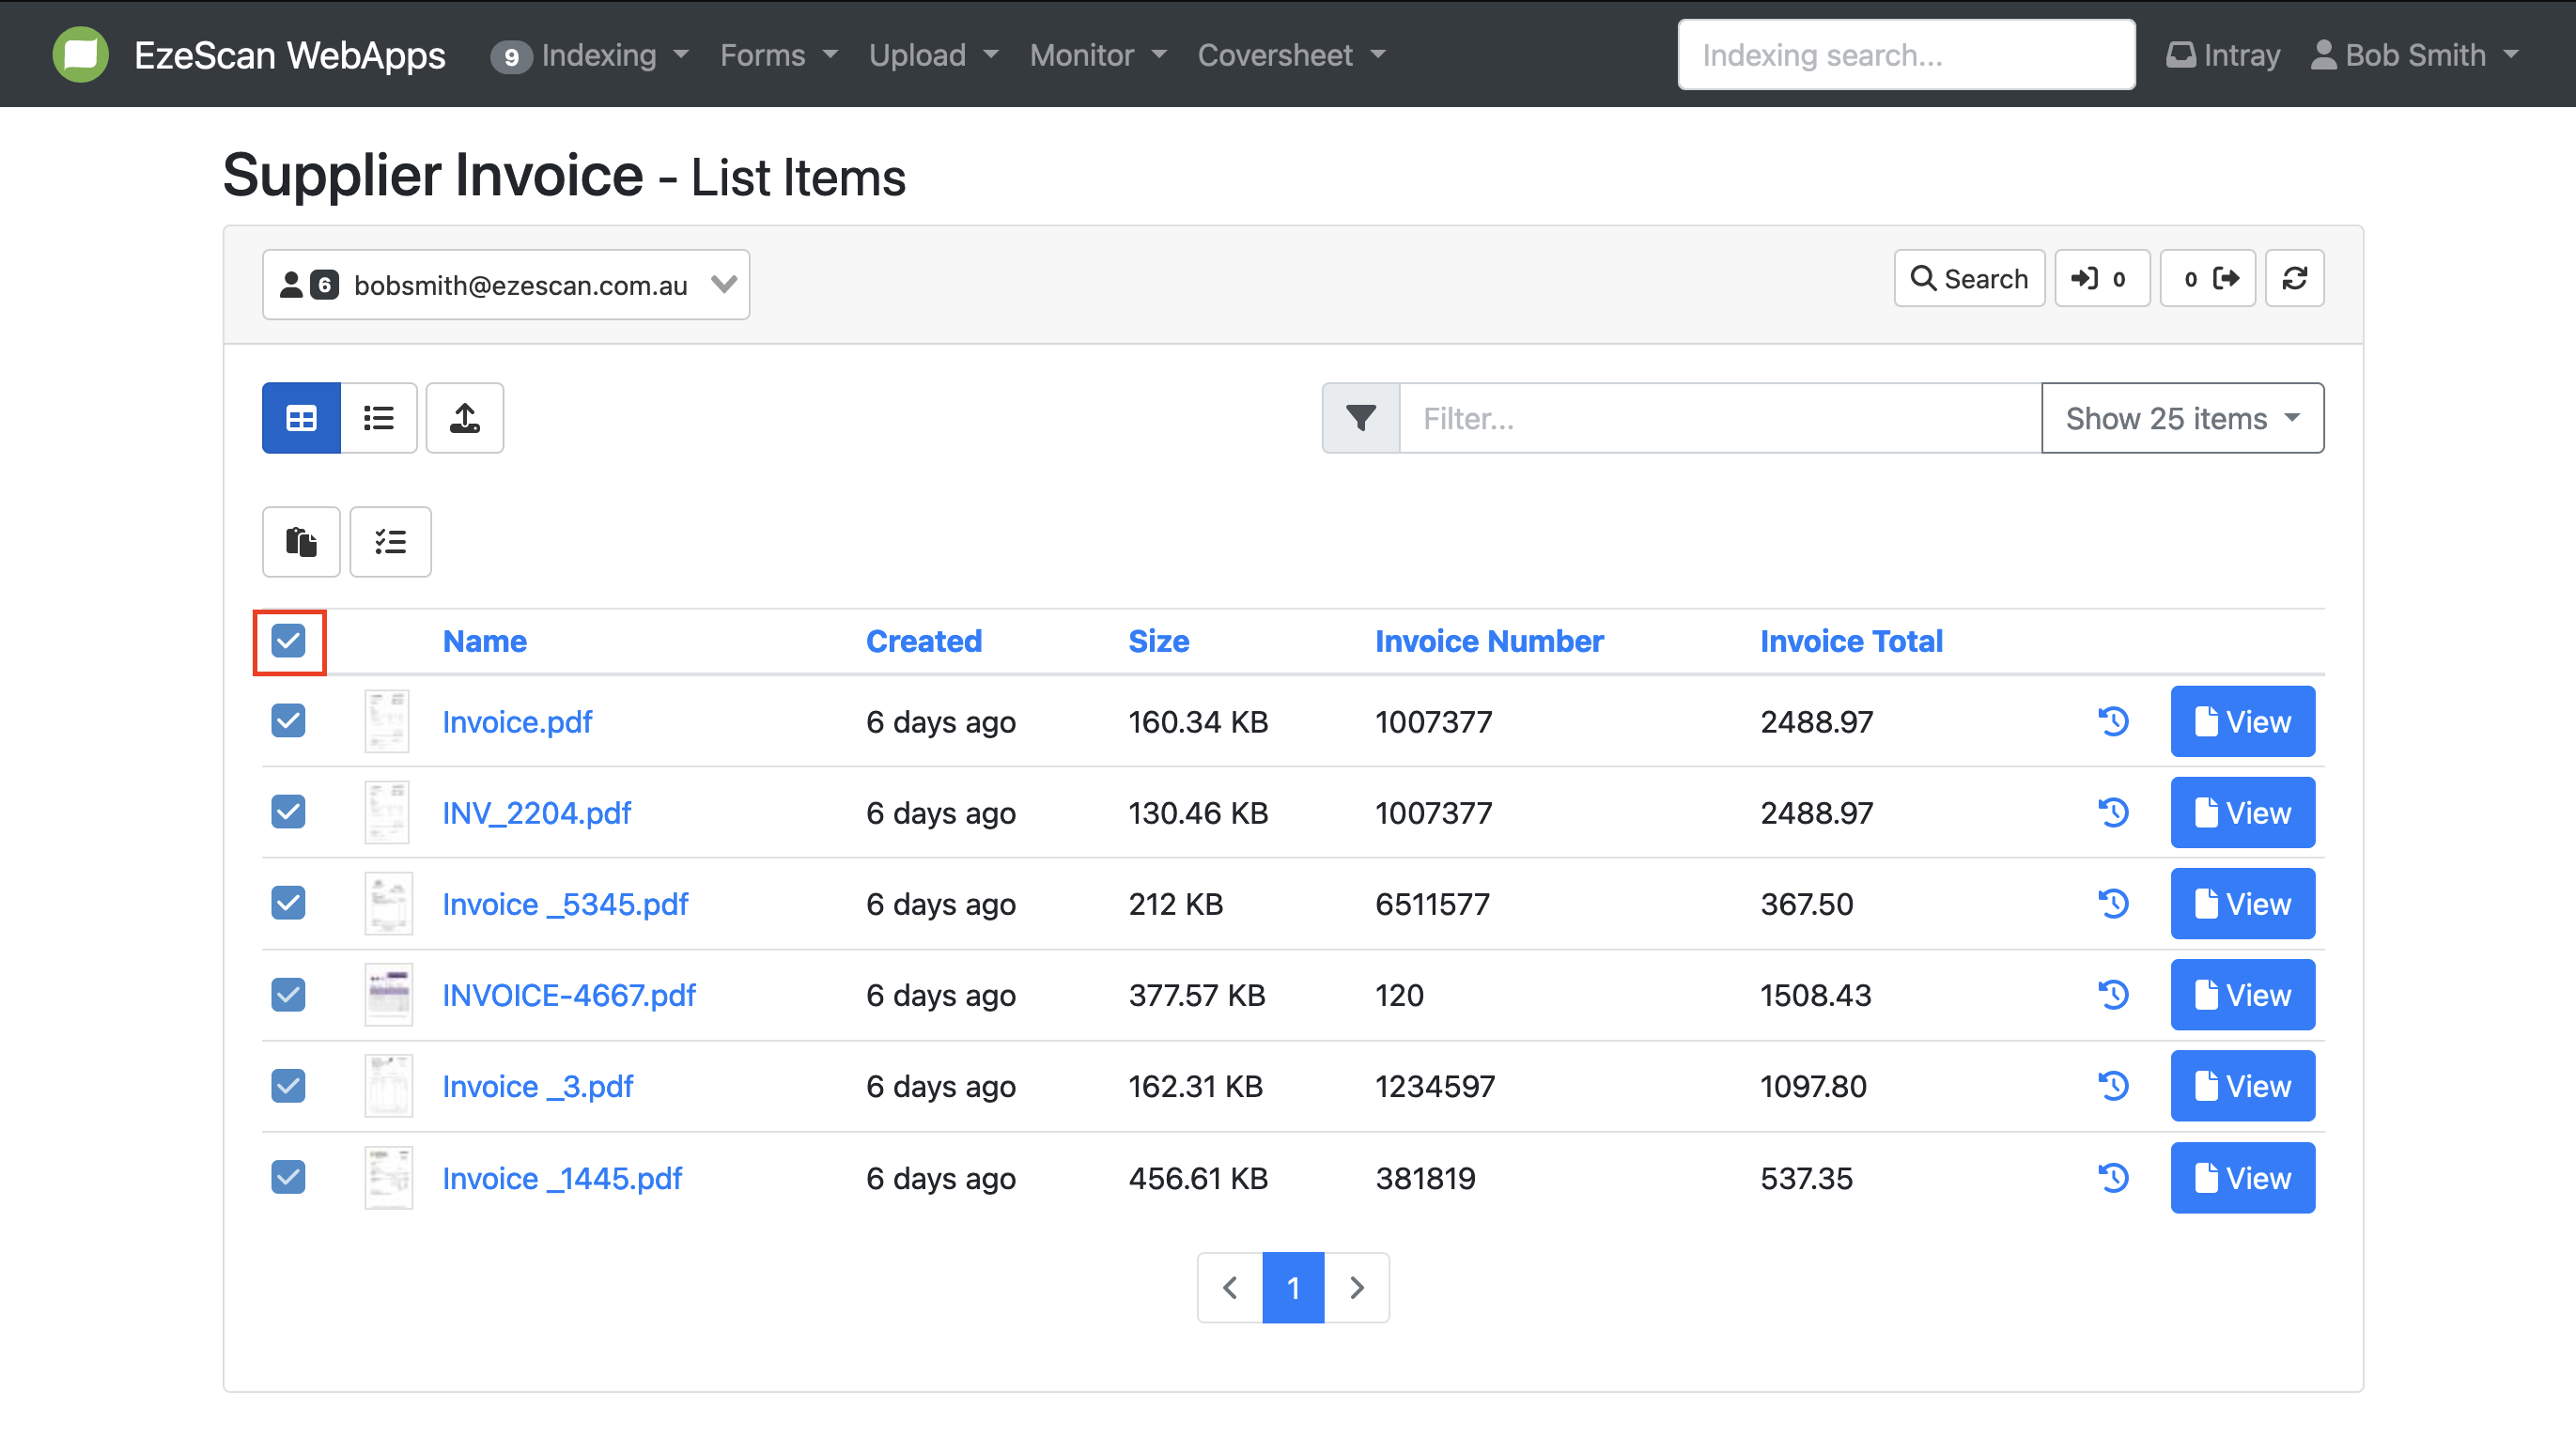
Bulk actions allow you to perform actions on multiple documents simultaneously. To do this, make sure you are in table view, where checkboxes are available next to each document. Simply select the checkbox next to the documents on which you wish to perform the action.
-
To select all documents in the queue, select the checkbox in the menu item.
-
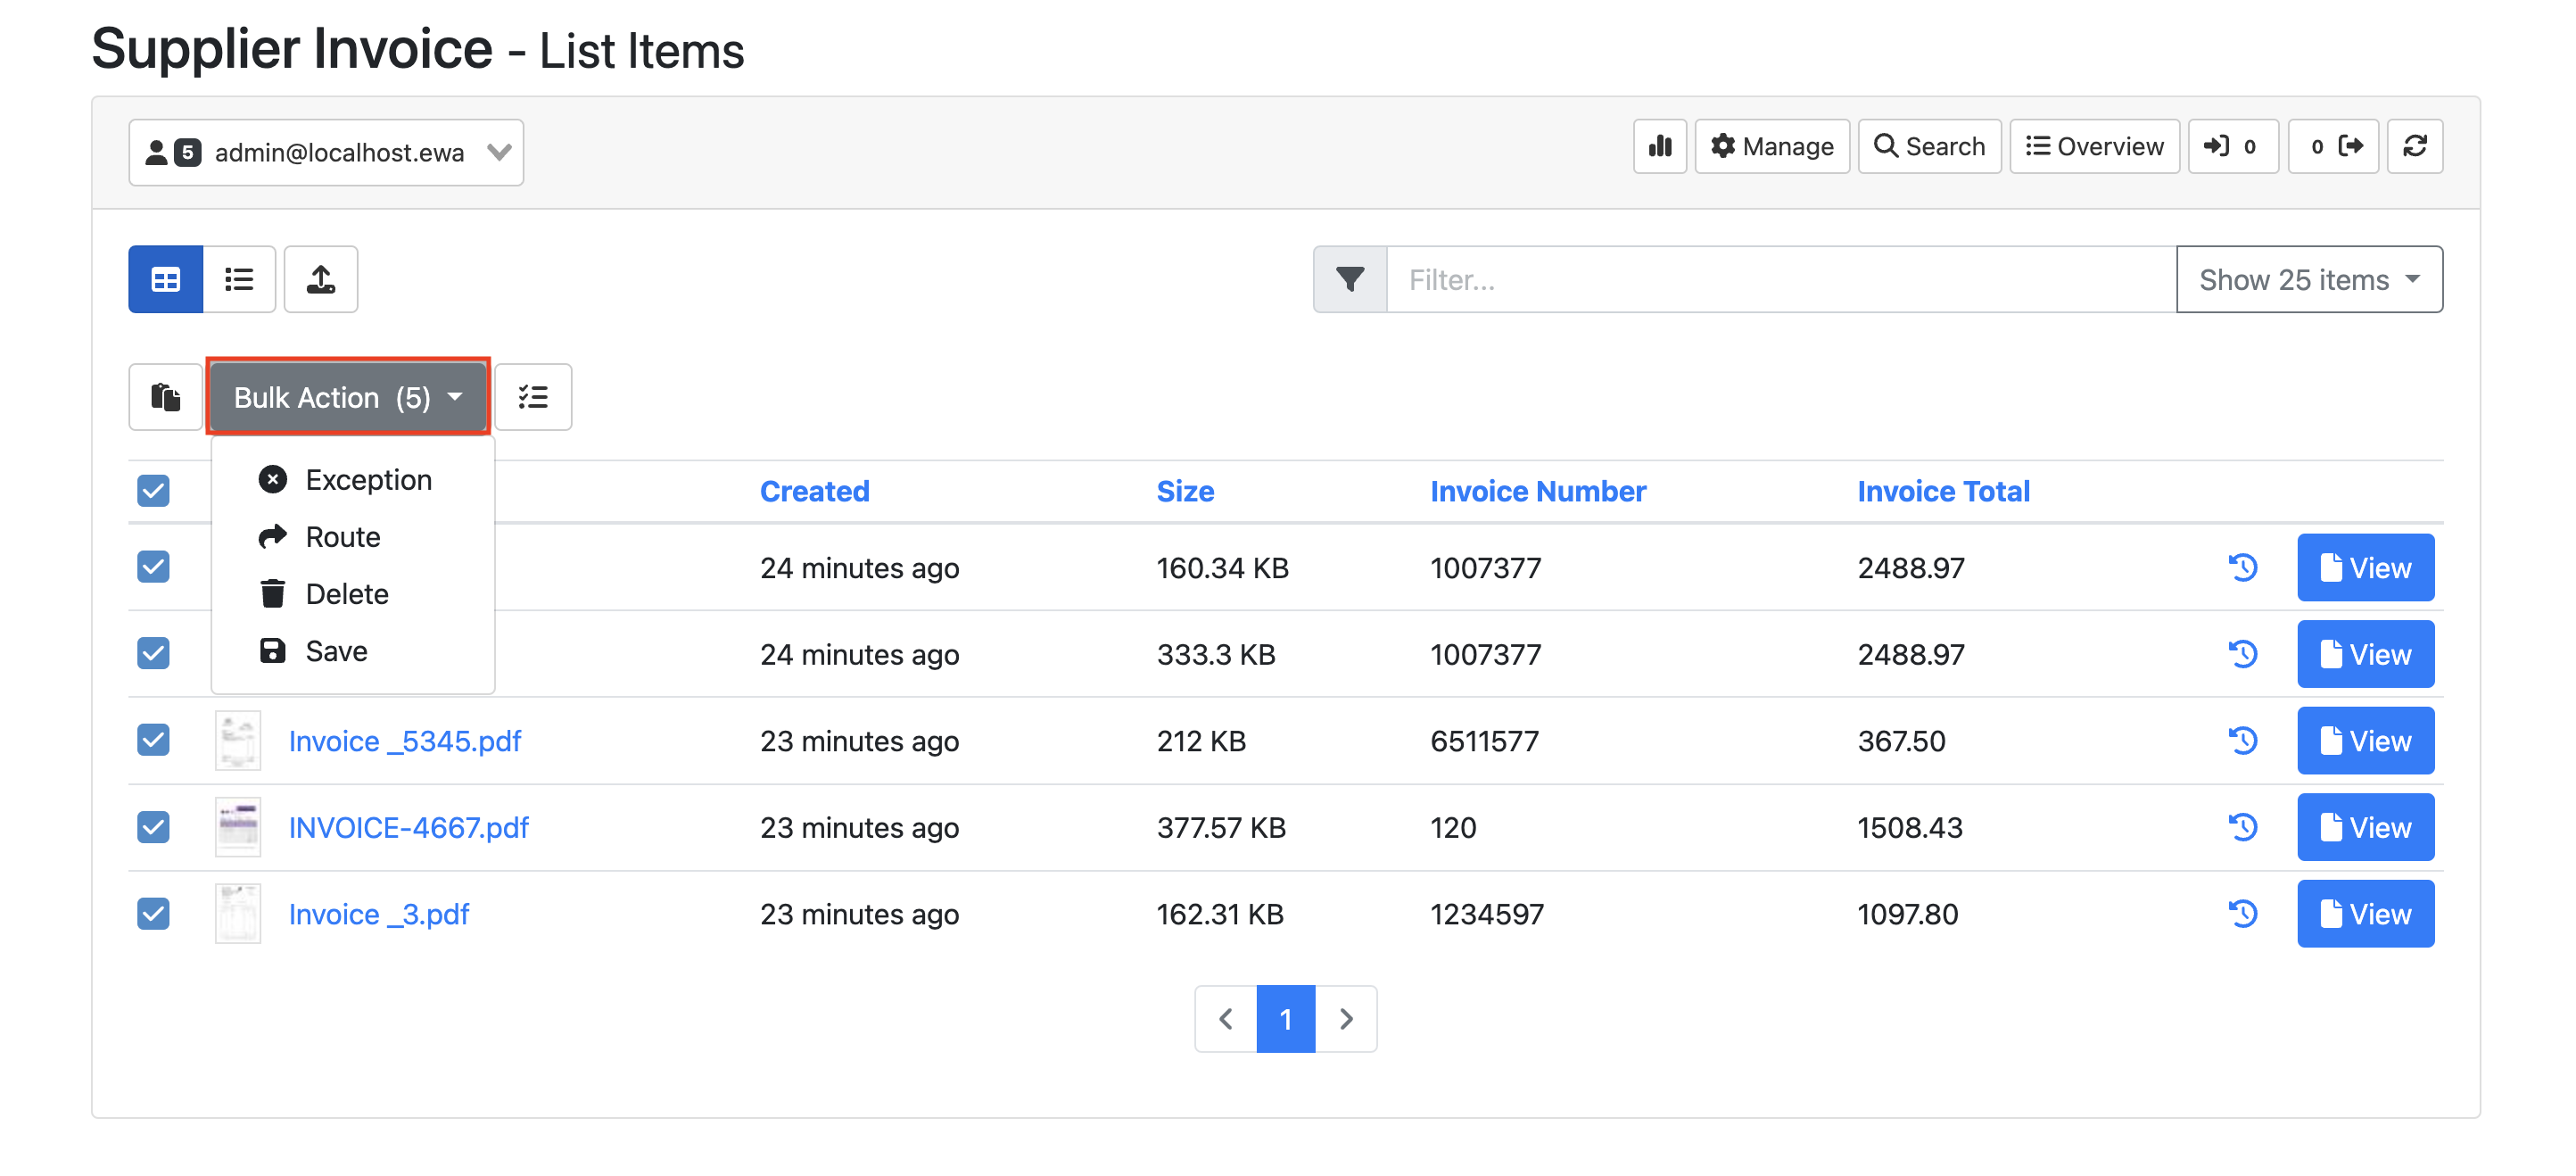
Click the “Bulk Action” button to perform the desired action to the selected documents. The number in brackets indicates how many documents you have selected. Choose the desired action from the available options and follow any additional prompts or instructions to complete the bulk action. Please note that your organisation must have bulk actions enabled to successfully perform this action.
Video Tutorial: https://youtu.be/adMnnLd1IlQ