1. Overview
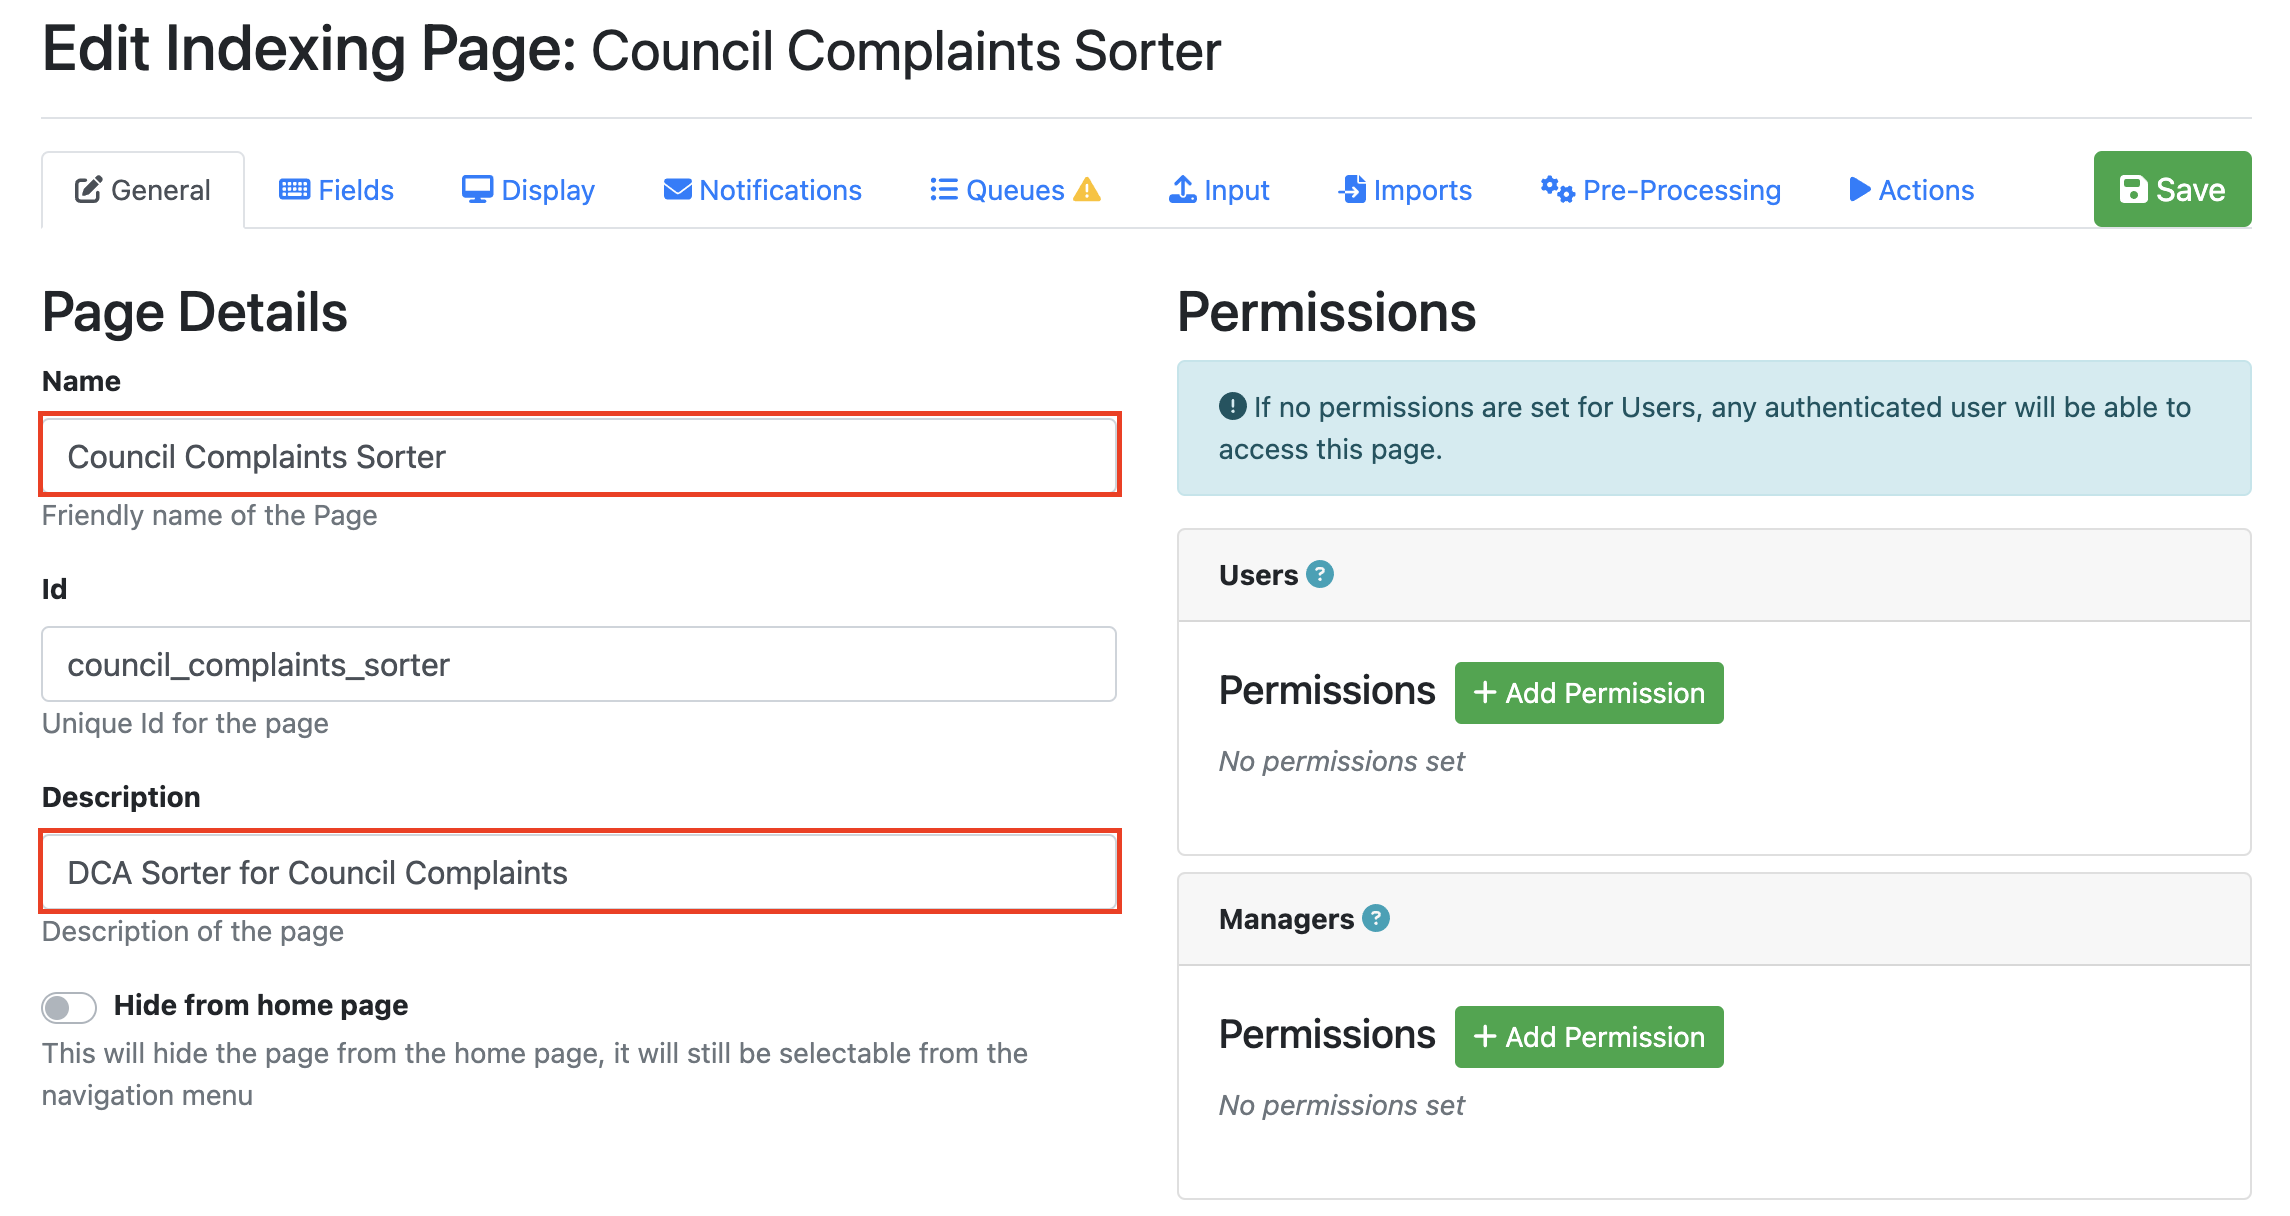
The Document Classification Assistant (DCA) is a tool designed to classify documents specific to customer requirements. It enhances document management within your existing web applications by enabling automated sorting and categorization based on custom-trained models. This assistant can be integrated into your system seamlessly, building on the customer's specific document types.
2. Integration and Setup
2.1 Installation
The DCA is installed as part of the Web Apps Install package but is licensed separately from RIA. Initially, it operates in a minimal state ("brain dead") until it is configured and trained on the customer’s specific document types.
2.2 Configuration
-
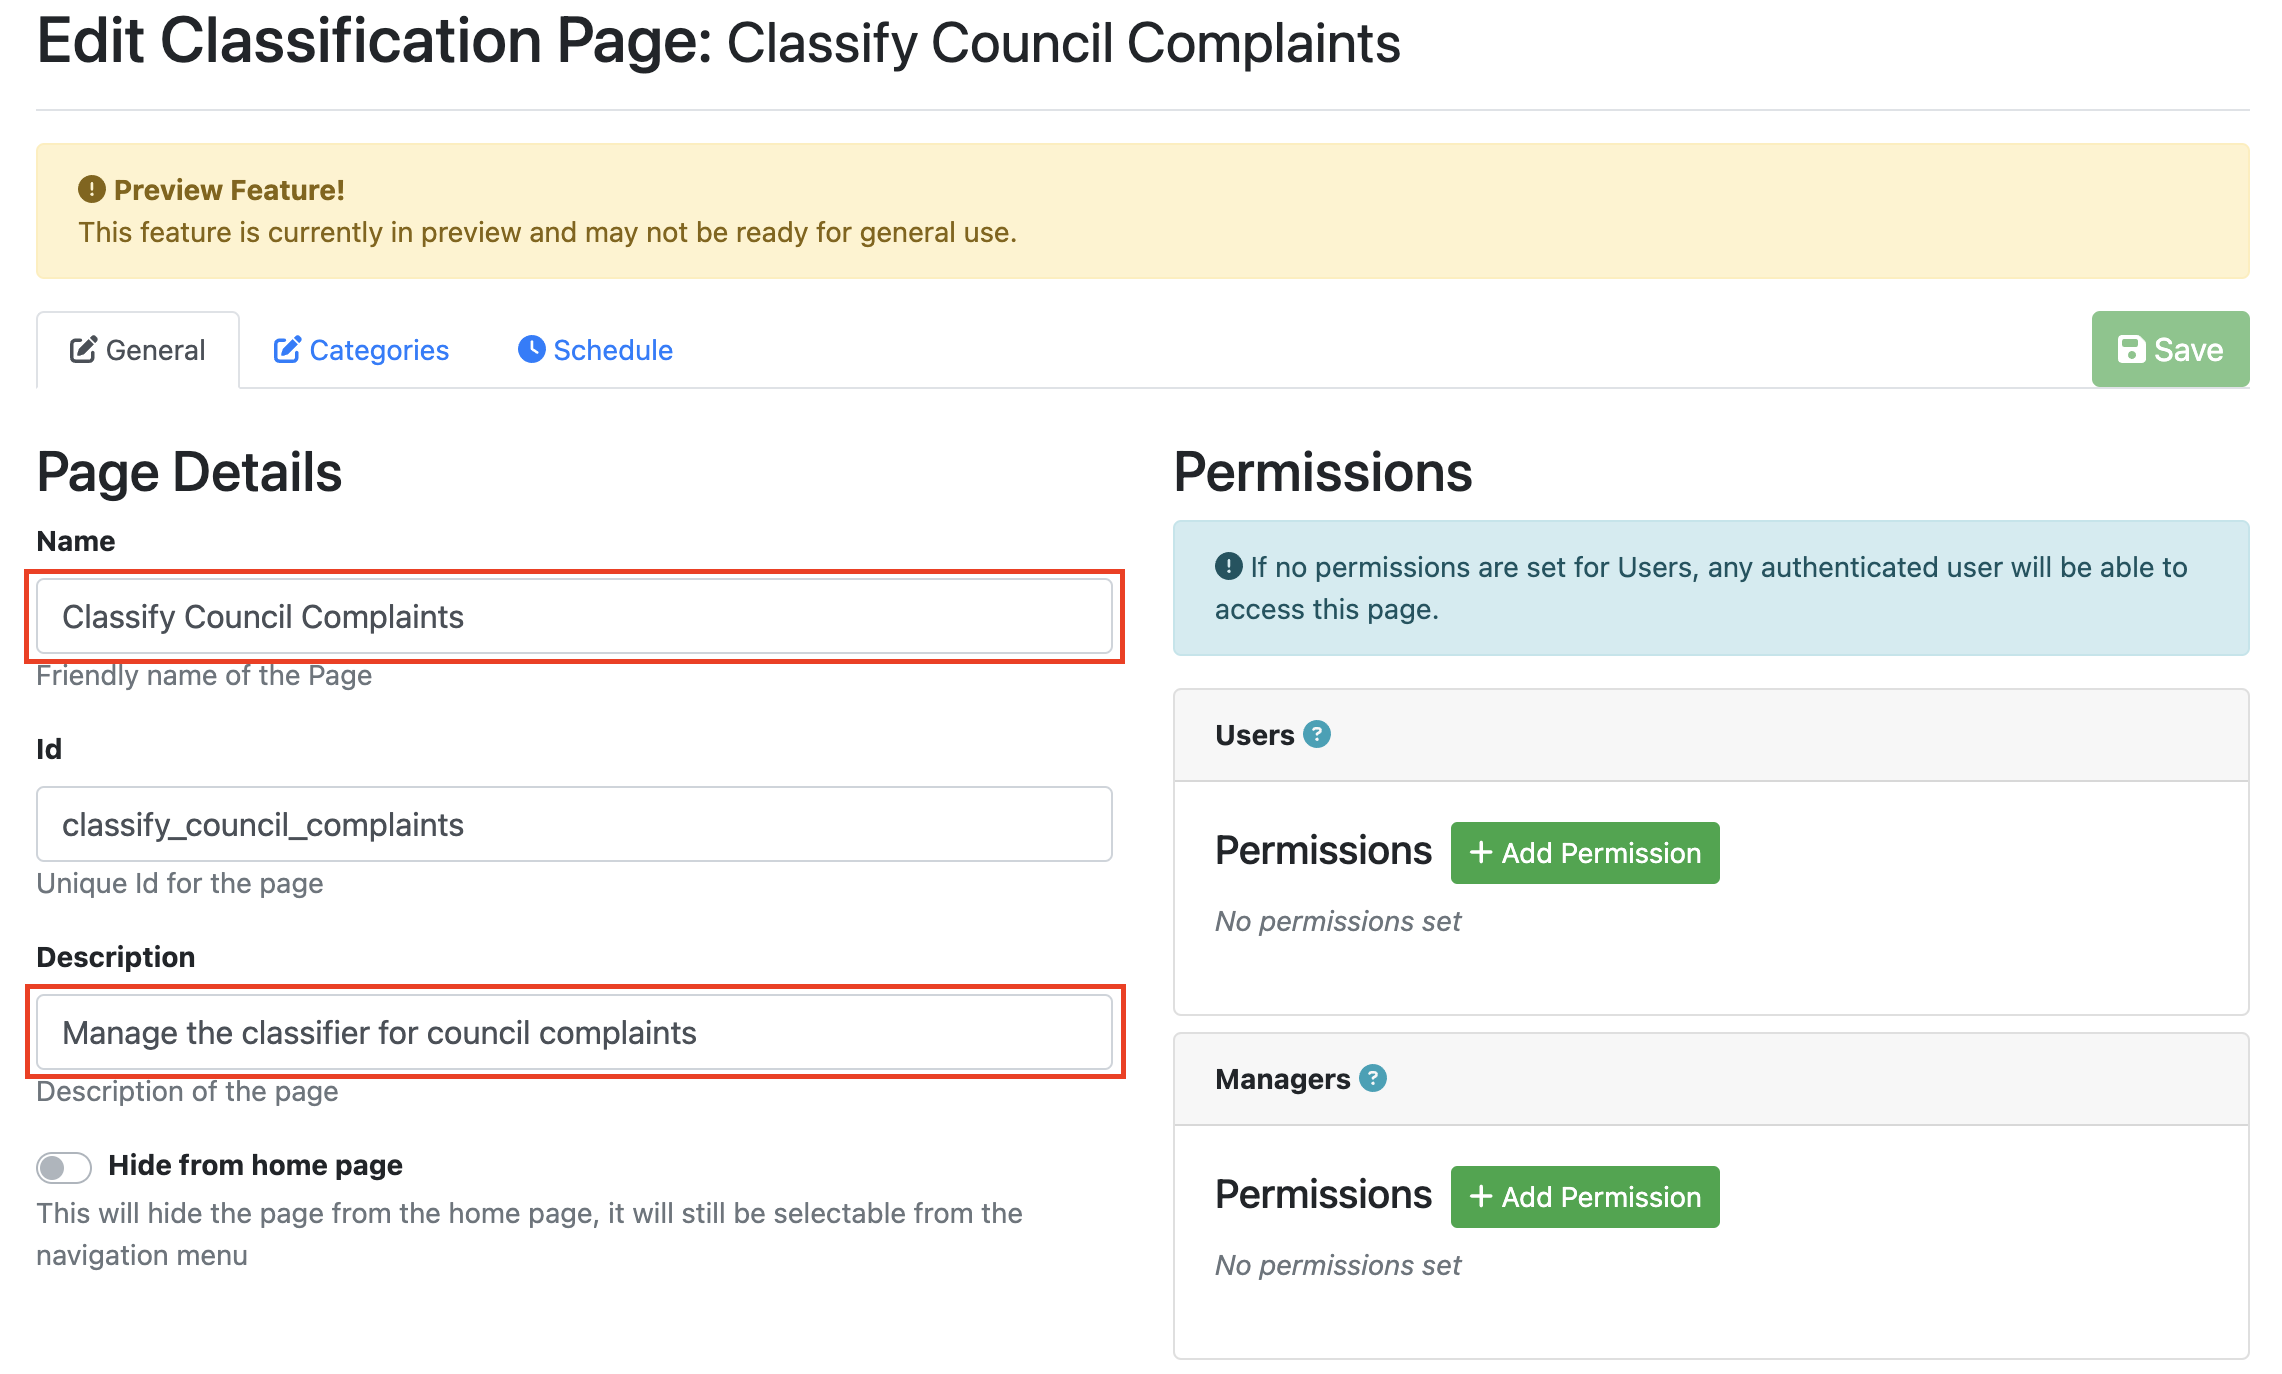
Go to the App Pages Tab and Select App Page from the green drop-down button → Select DCAPage - Document Classification Assistant

-
Give your DCA page a Name and Description.
-
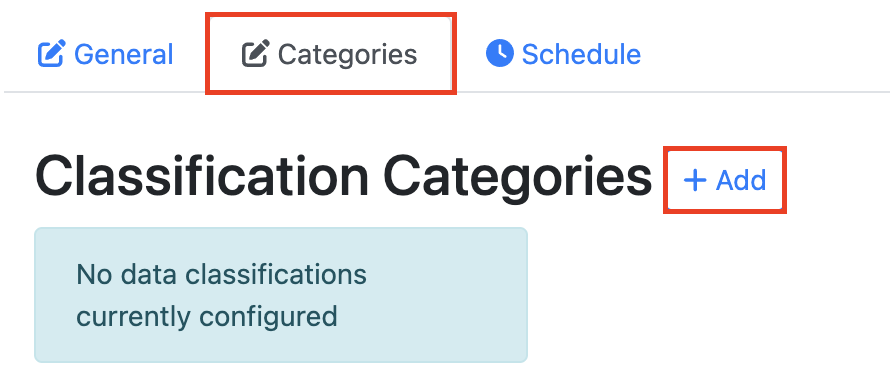
To add a classification type, go to the categories tab and Select + Add.
-
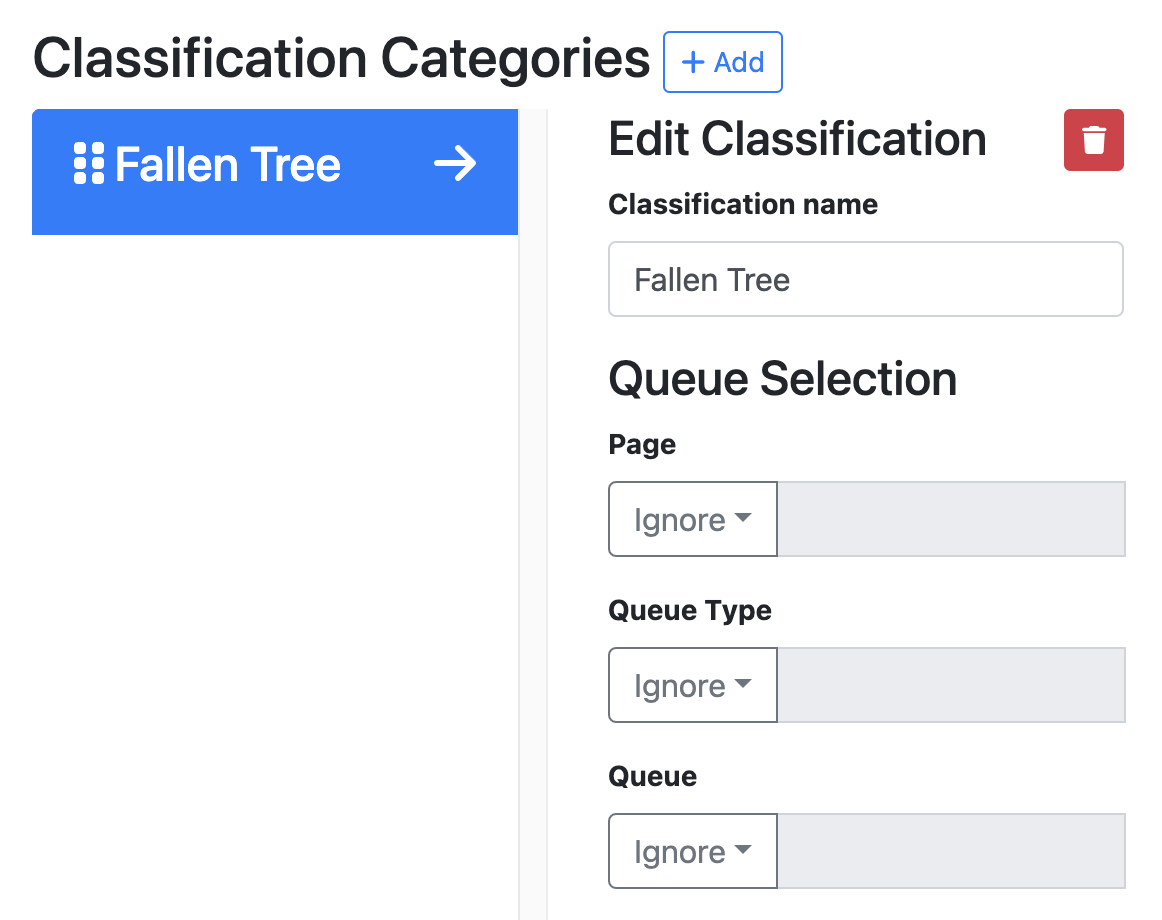
Name the Classification type (e.g fallen tree)
-
Under Queue Selection you will need to select the Page you would like to send classified documents to. You have three options:
|
Choice |
Explanation |
|---|---|
|
Simple |
Allows you to select a pre-configured RIA Page from the drop-down menu |
|
Manual |
Allows you to manually enter either a page name or ID |
|
Ignore |
Allows you to not select a page. |
-
You must then select a Queue Type from the following:
|
Choice |
Explanation |
|---|---|
|
Simple |
Allows you to select a queue type from the drop-down menu |
|
Manual |
Allows you to manually enter either a queue type name or ID |
|
Ignore |
Allows you to not select a queue type |
-
You must then select a Queue from the following:
|
Choice |
Explanation |
|---|---|
|
Simple |
Allows you to select a queue from the drop-down menu |
|
Manual |
Allows you to manually enter either a queue name or ID |
|
Ignore |
Allows you to not select a queue |
-
To add another Classification type Select + Add. It is recommended that you start training with at least three different classification types.
-
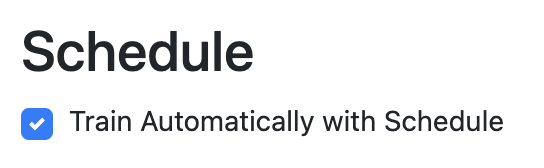
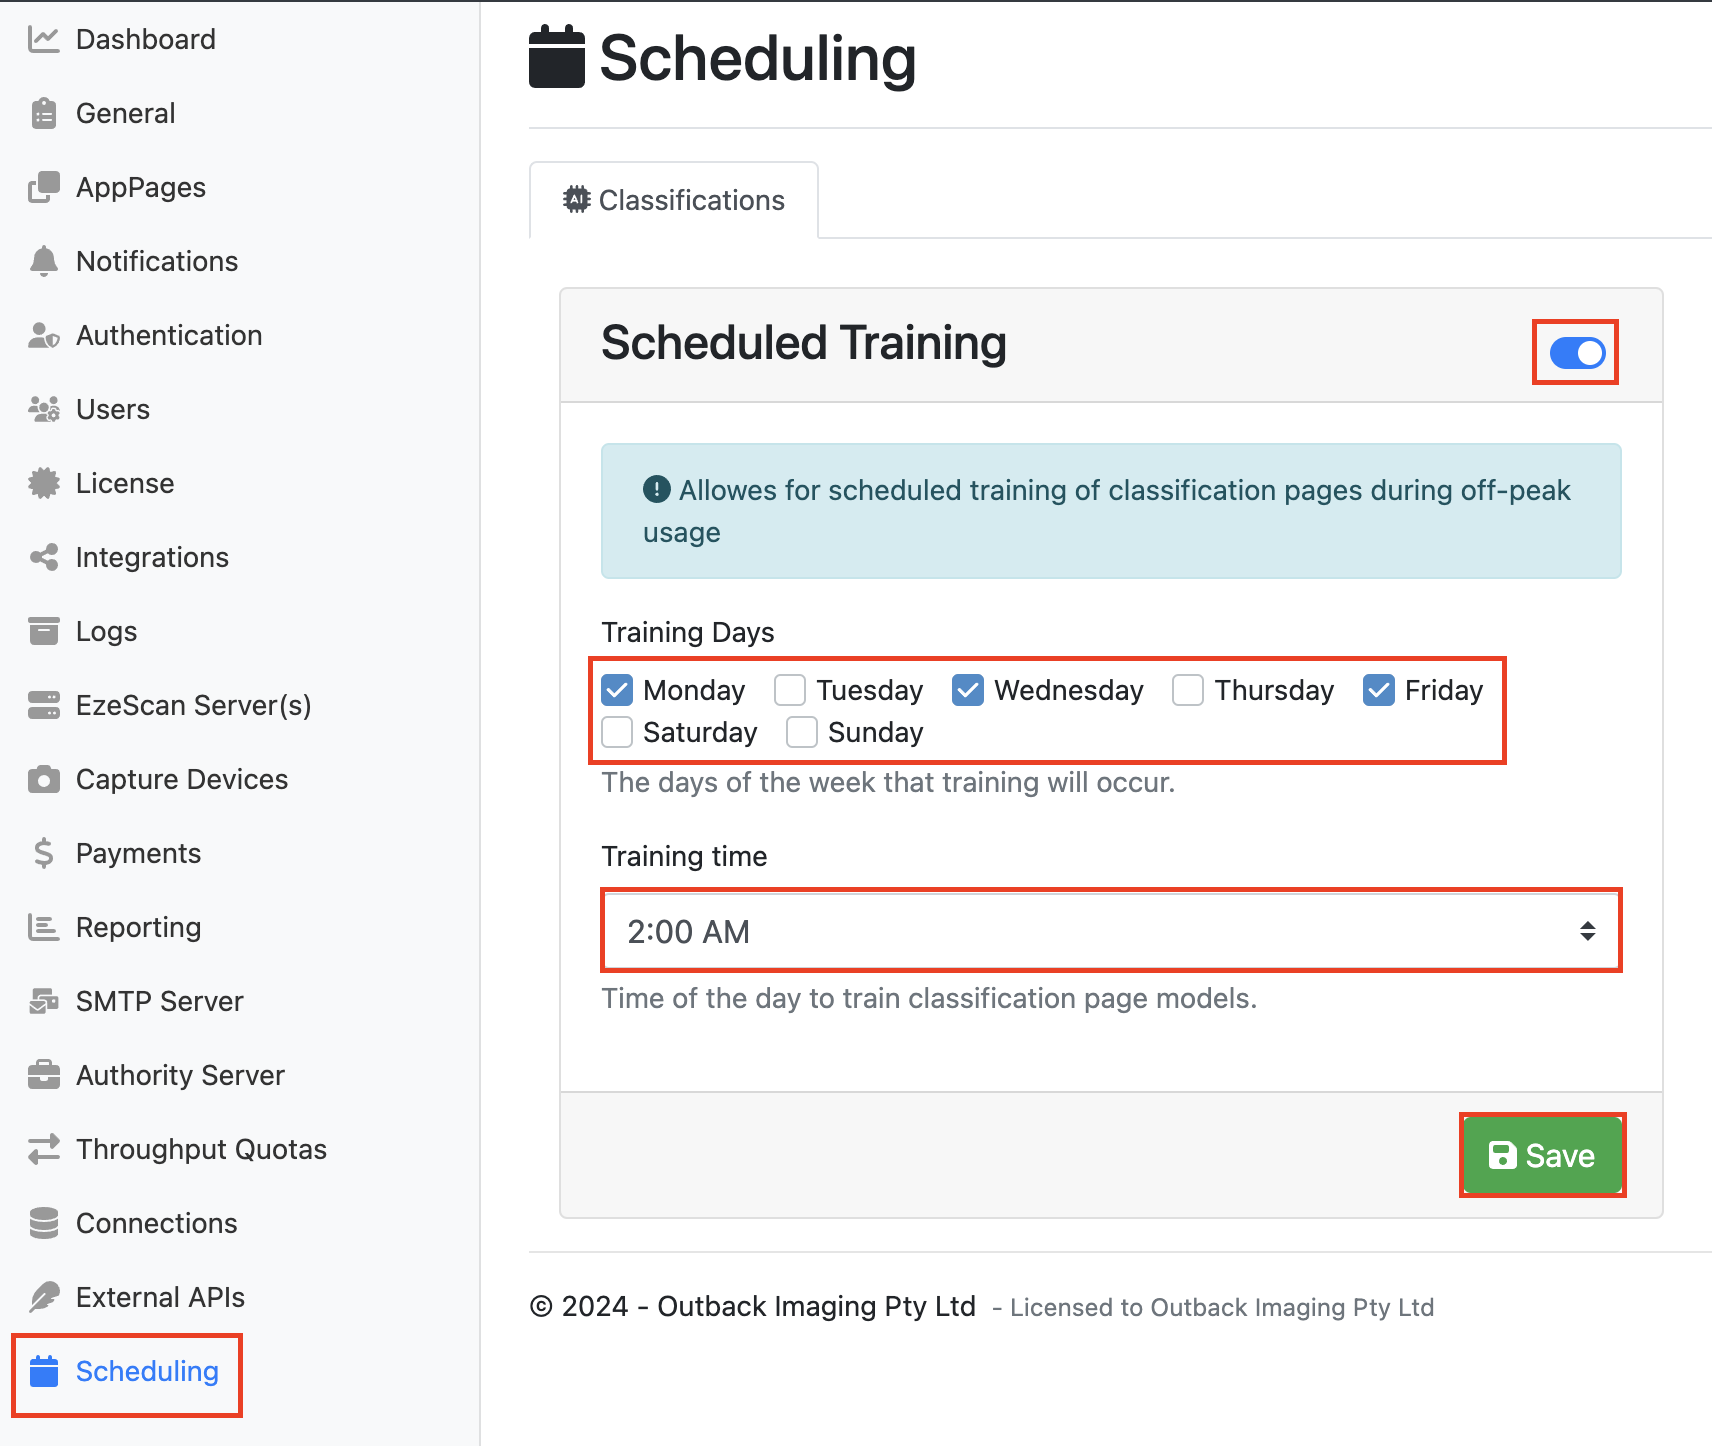
On the schedule tab, you can select whether you would like to train automatically with schedule. This means the engine will automatically train with processed documents each night at midnight.
-
Save your Engine.

Tip: you can select the days to schedule the engine to train by going to the scheduling tab on the Admin Toolbar. Click the toggle on to modify the schedules training, select your training days and training time, and then click Save
2.3 Training Your Engine
-
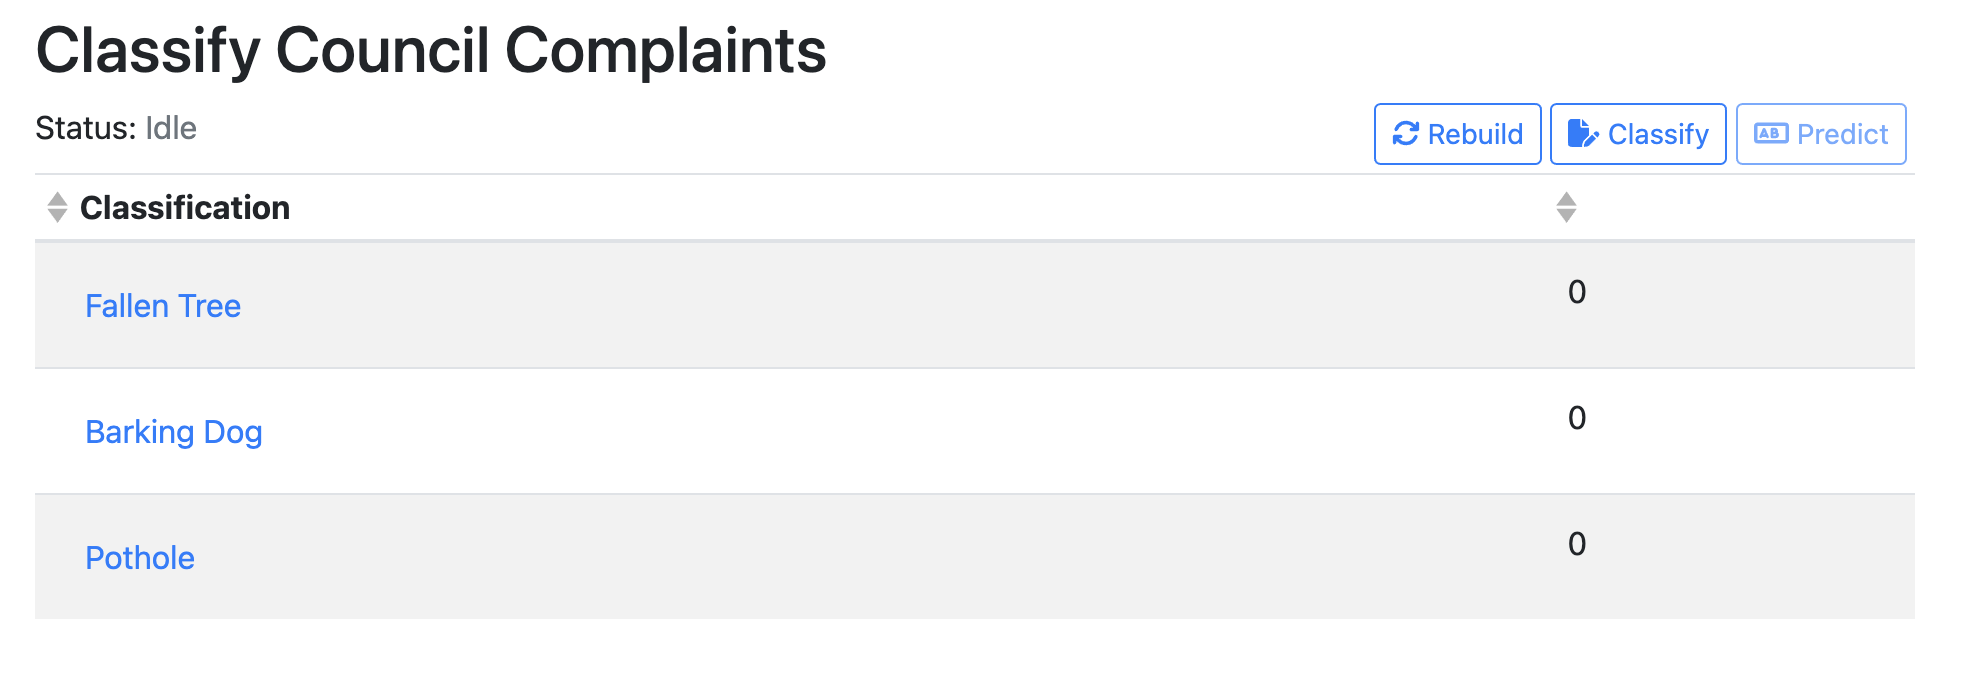
To open up your DCA engine, go to your home page and click on the Classifier Tile.
-
This will take you to a screen where you can train and test the engine on any classification categories you have created. The numbers on the left of the table represent the number of documents trained for that classification category (currently 0).
-
To train the engine select the Classify Button.

-
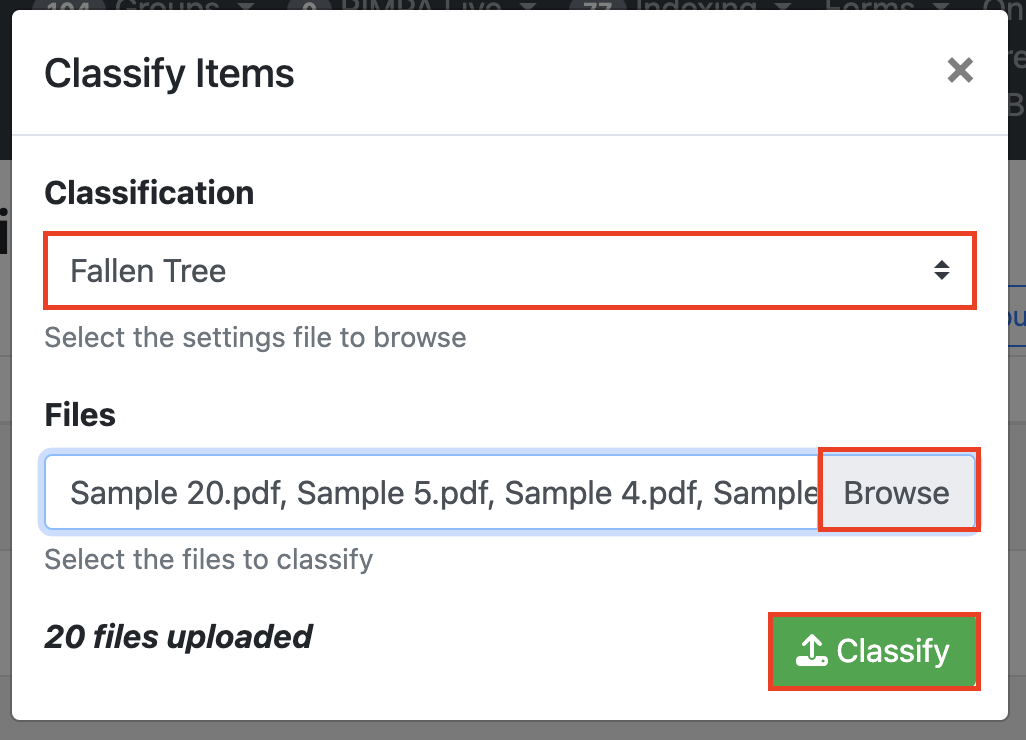
Select a category from the drop-down menu and then select upload to upload a collection of sample documents that you want to train the engine to identify as the chosen category (In this example 20 different complaint letters about fallen trees were uploaded). Select Classify.
-
whilst the table will now show the number of documents classified, you will need to select “Rebuild” to actually train the engine on these documents.
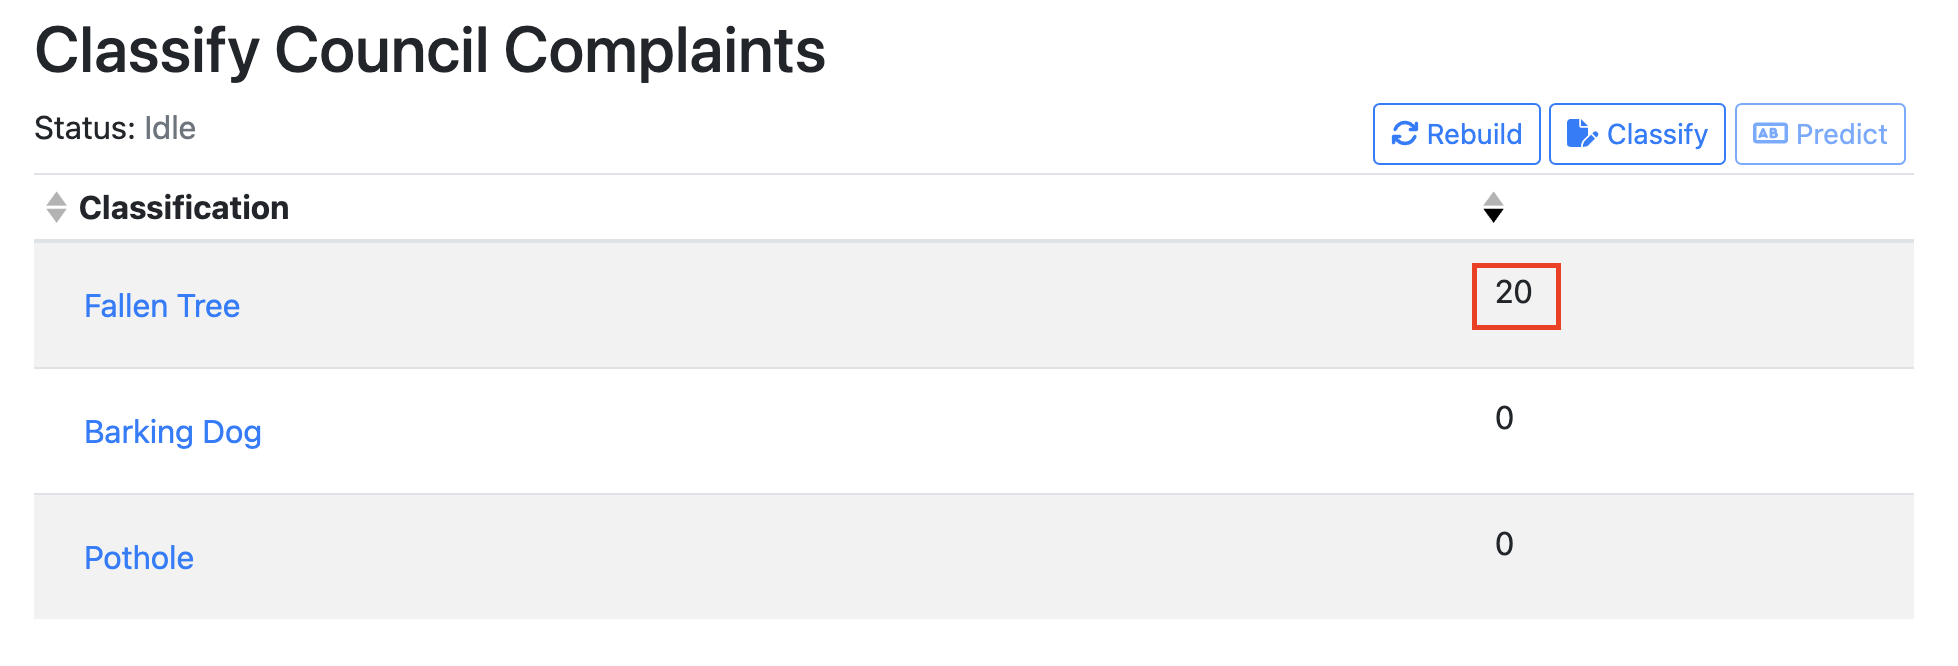
Note: You will not be able to train or “Rebuild” the engine until you have classified at least two different classification categories.
-
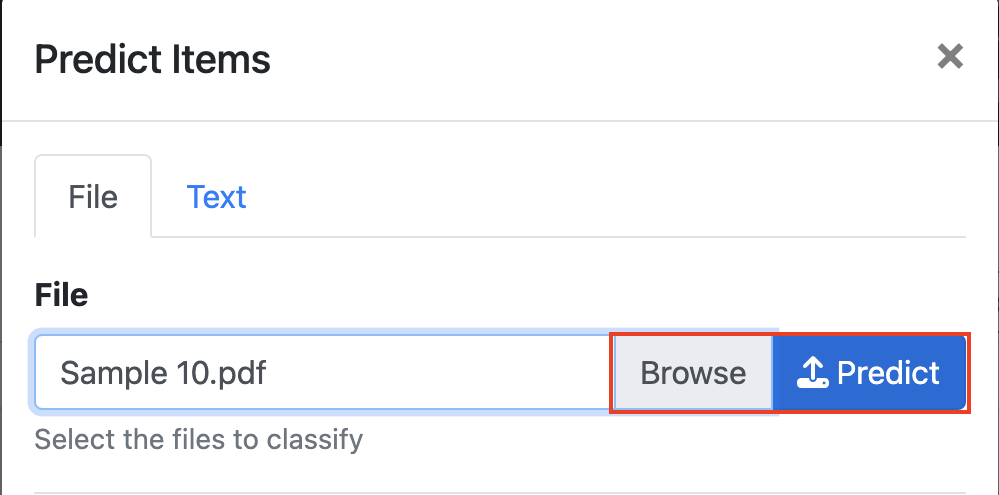
Once you have rebuilt the engine you can test your classification engine on a document by selecting “Predict” and uploading a document.
-
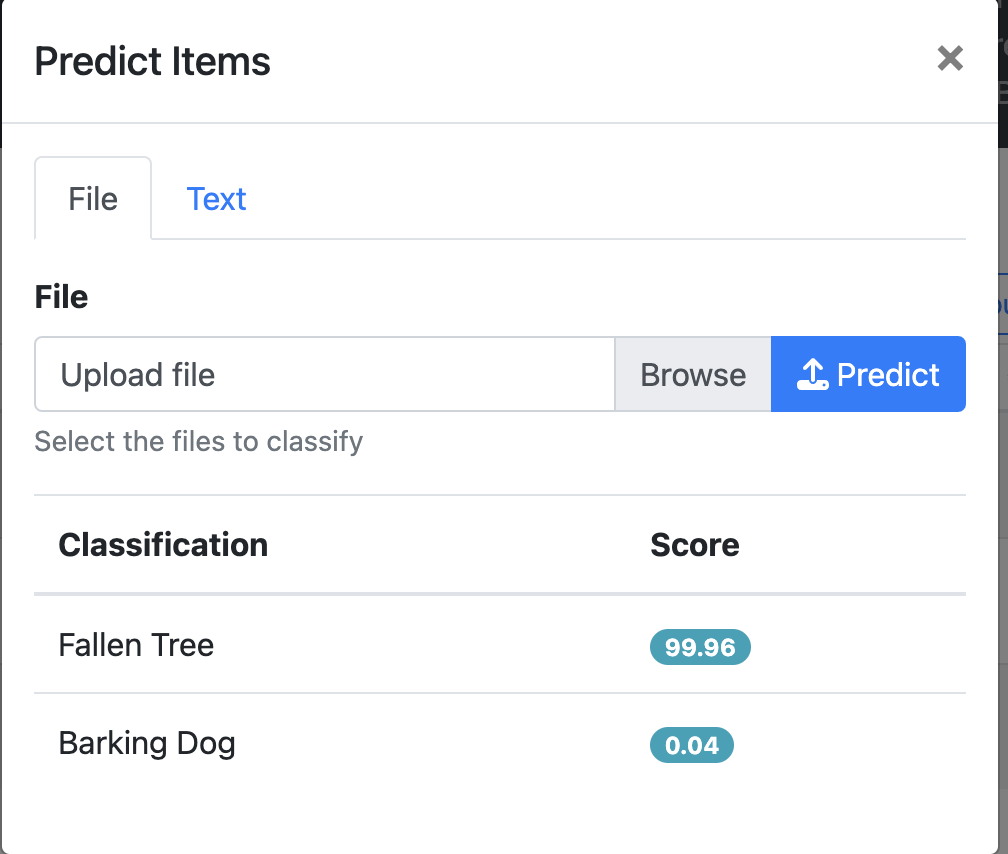
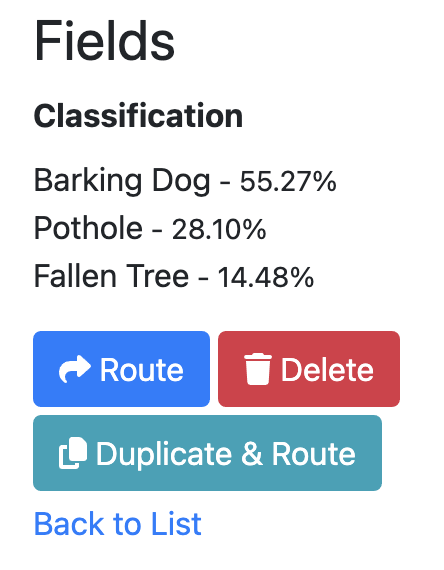
The engine will return a score on how confident it is that the uploaded document is each of the classification categories. Click the “x” to return to the training screen.
2.4 Linking Your DCA Page to a RIA Sorting Page
-
Now that you've made your DCA engine you will need to create a new RIA Page to feed the documents to for classification. It is recommended to name this RIA Page to include the word “Sorter”.
-
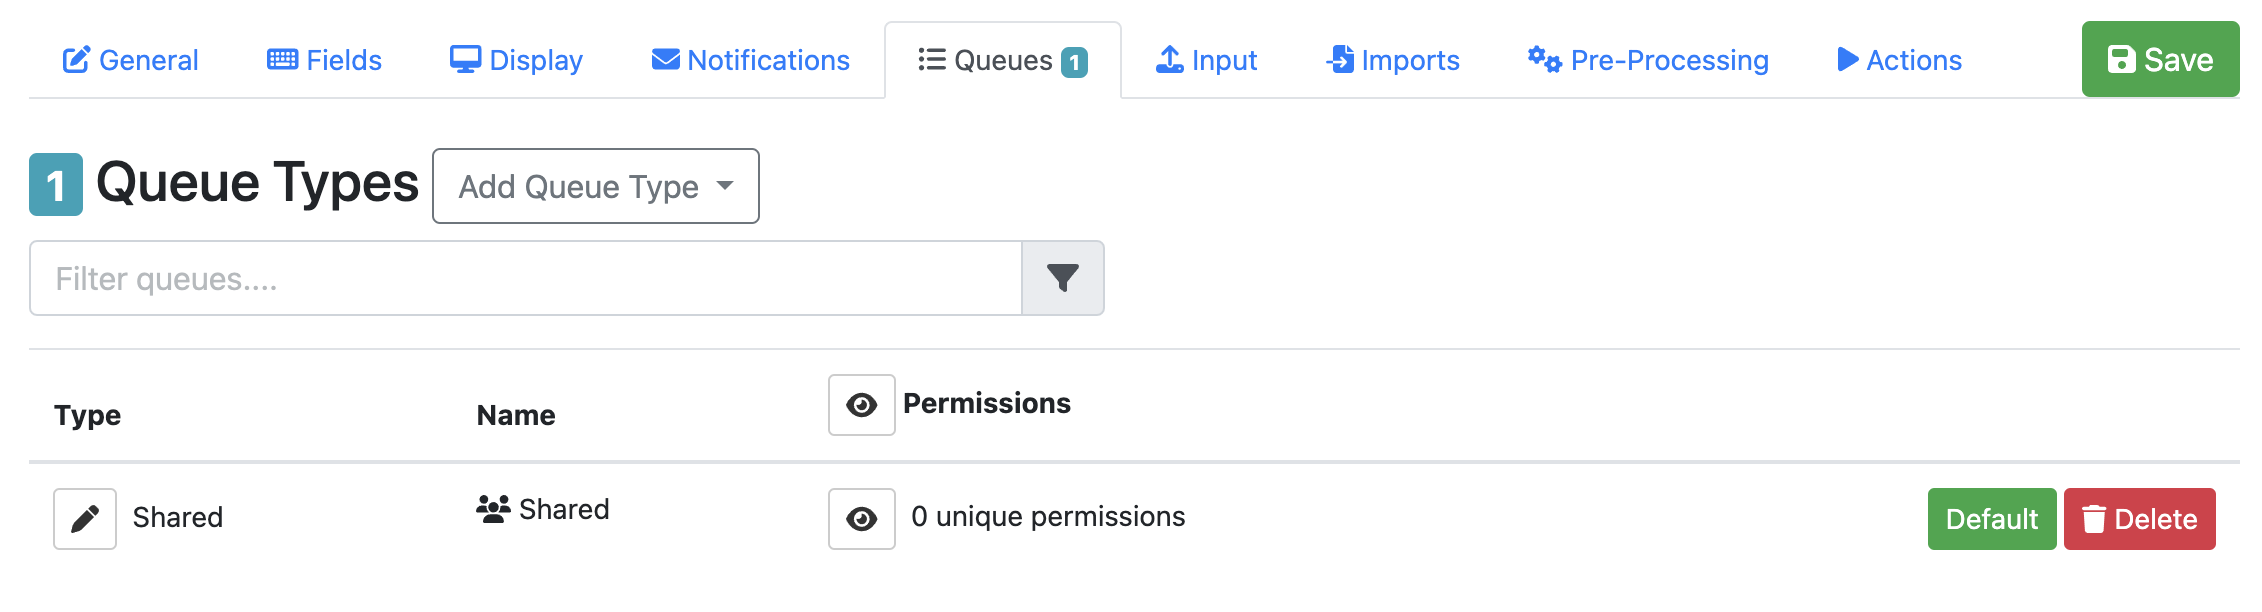
Add a Queue Type. Click Add Queue Type, Select Shared or Personal, give your Queue a name and select + Add Queue.
-
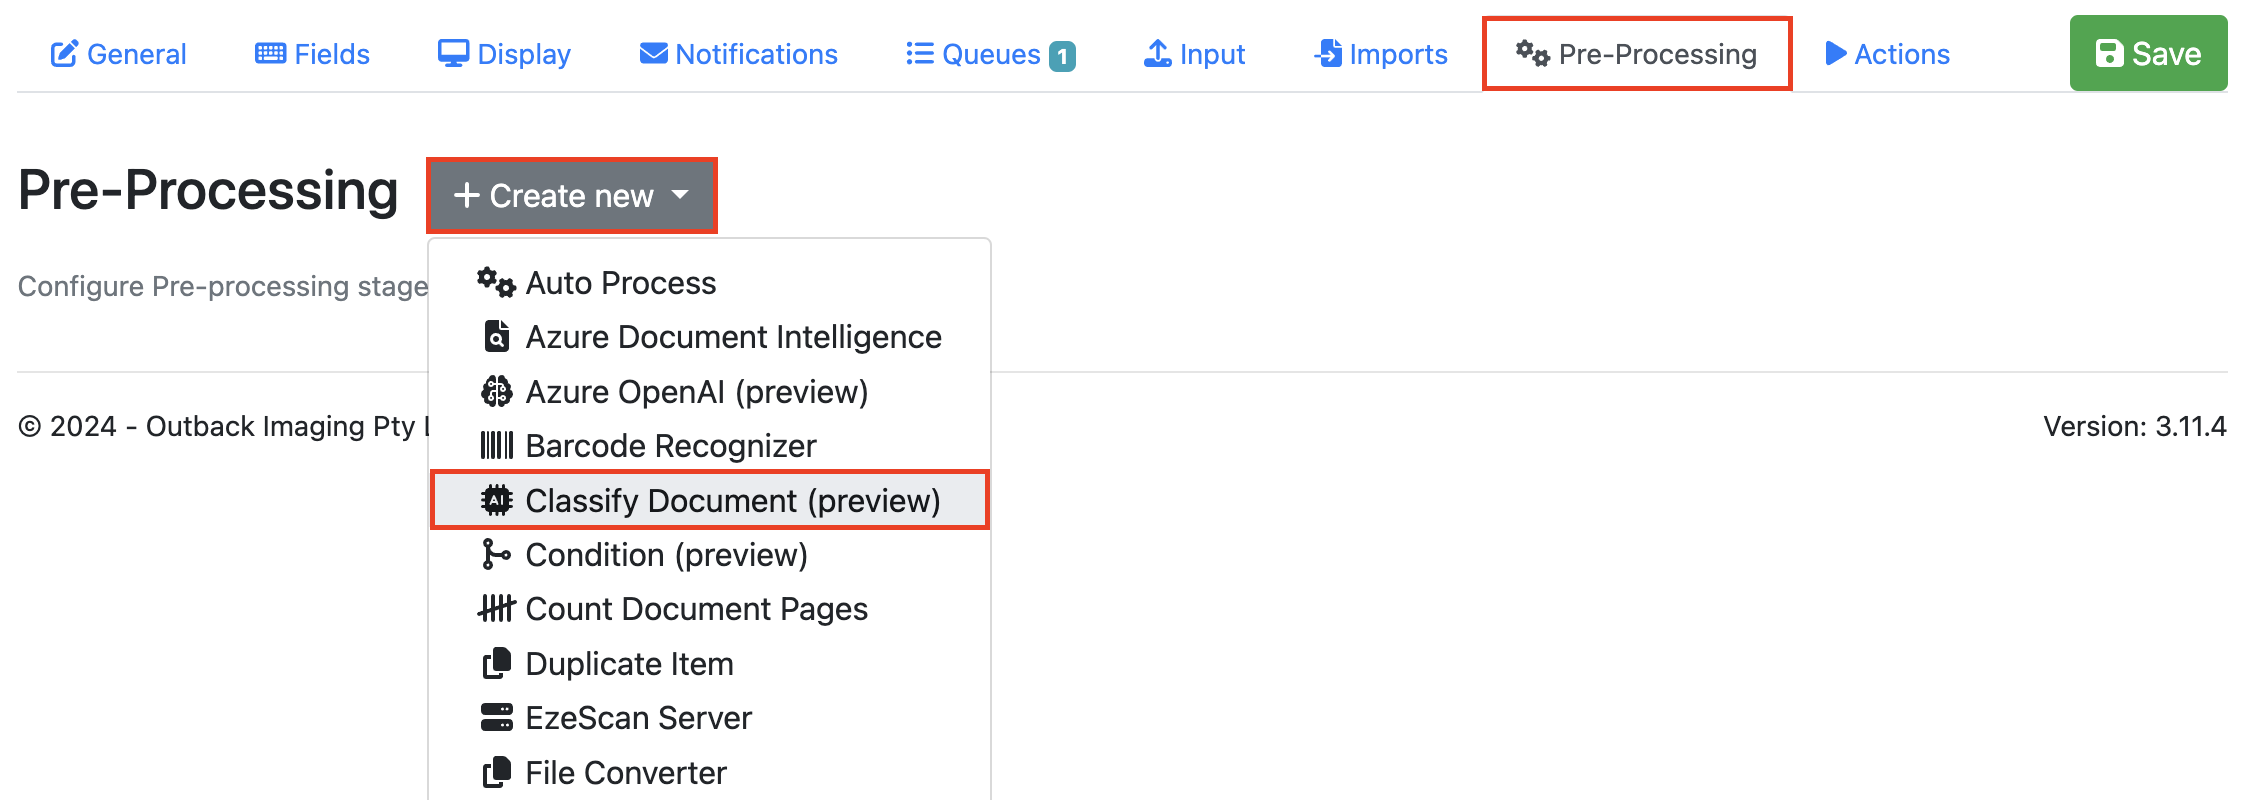
Go to the Pre-Processing tab and from the + Create New drop-down menu select Classify Document.
-
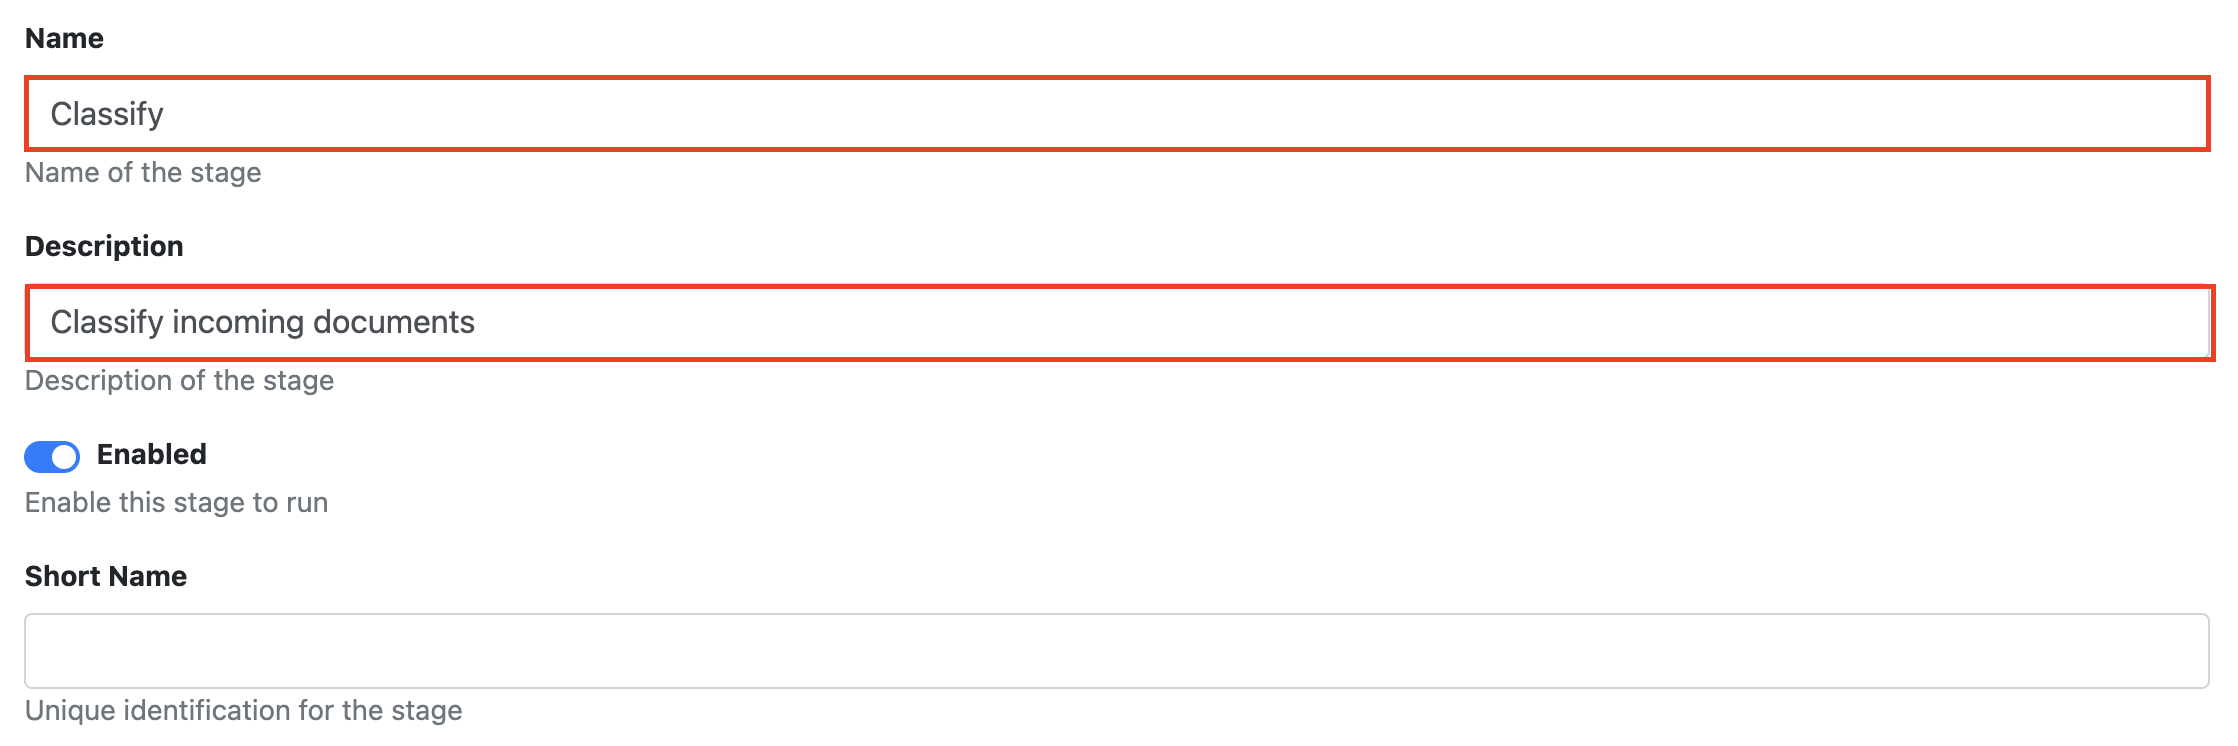
Give the Stage a Name and Description.
.
-
Scroll down to the Stage Settings Section and from the Action Drop Down menu select Predict.

-
Select your DCA engine from the drop-down menu.

-
Enter a Minimum Confidence level and Confidence Difference Level.
|
Field |
Description |
Example |
|---|---|---|
|
Minimum Confidence Level |
The minimum level of confidence a document must be identified as (doesn't matter what other percentages are) |
80 |
|
Confidence Difference Level |
The difference between Confidence Levels required for the most confident classification to be considered valid. |
60 |
-
If you would like documents that meet the above confidence levels to be automatically routed to the correct RIA queue turn on Route successful prediction. Documents that don't meet these requirements will remain in the sorter for manual sorting.
-
Click Apply.
-
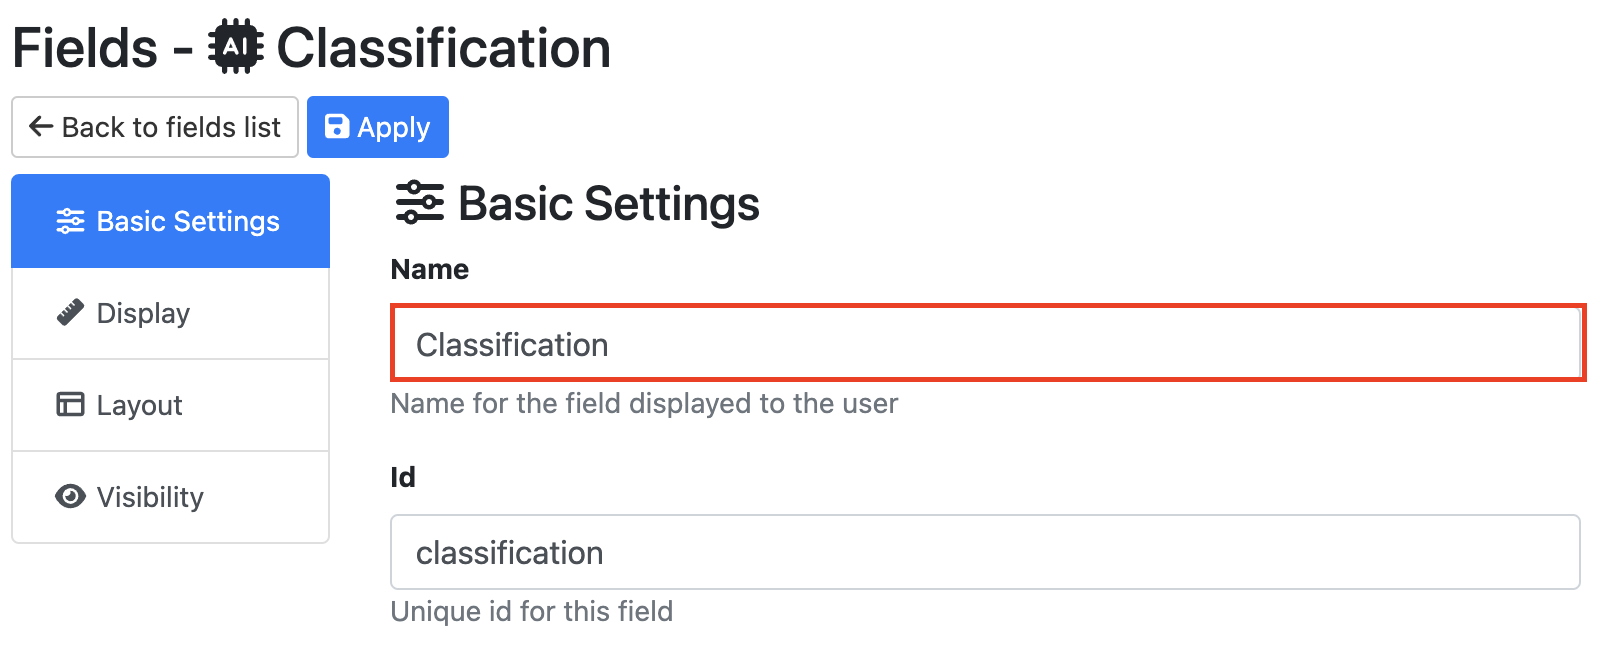
Go to the Fields Tab and add a field called Classification Info.
Note: When creating your pre-processor before the field called Target Metadata ID is called classification by default. This means this field will call in the Confidence Levels for the Classification Categories when a document is stuck in the sorter.

-
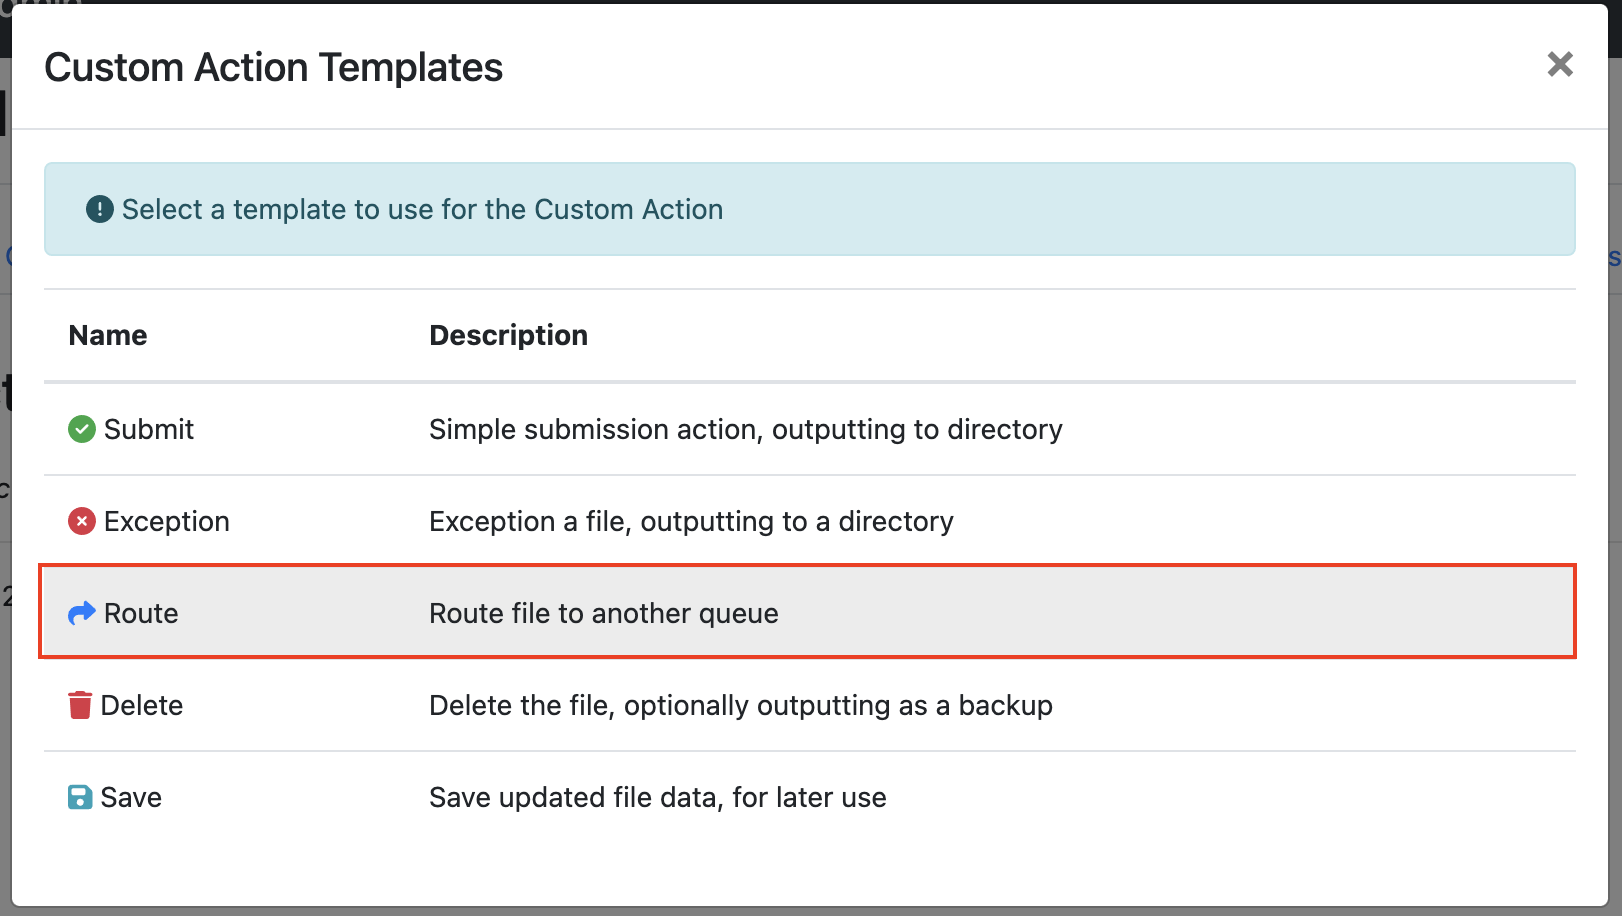
Before using the sorter you will need to add a route button to manually route documents that havent reached the confidence level. Go to the Actions Tab, the + Create New drop-down and select From Template.
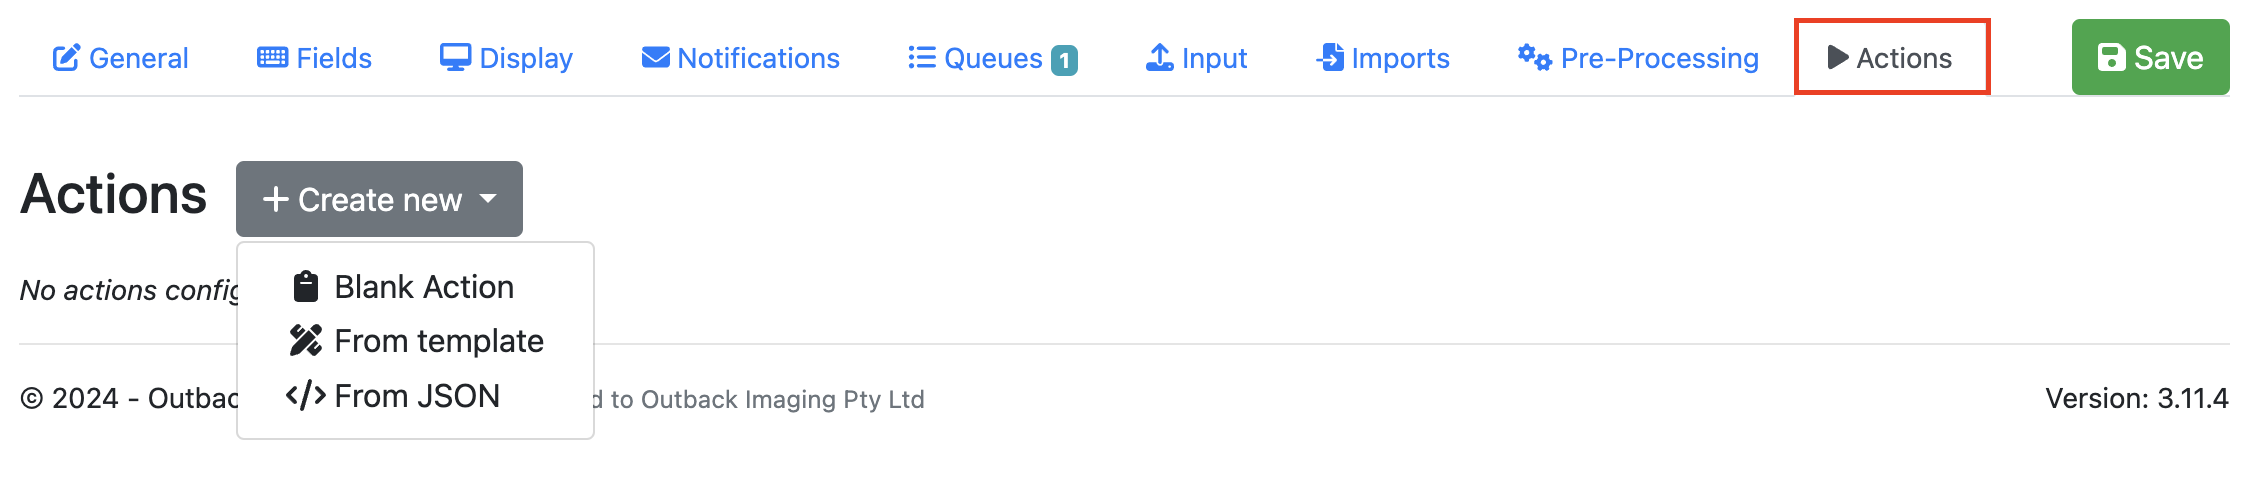
-
Select Route from the list of actions.
-
Go to the Frontend Tab and select an option from the Page Restrictions drop-down.
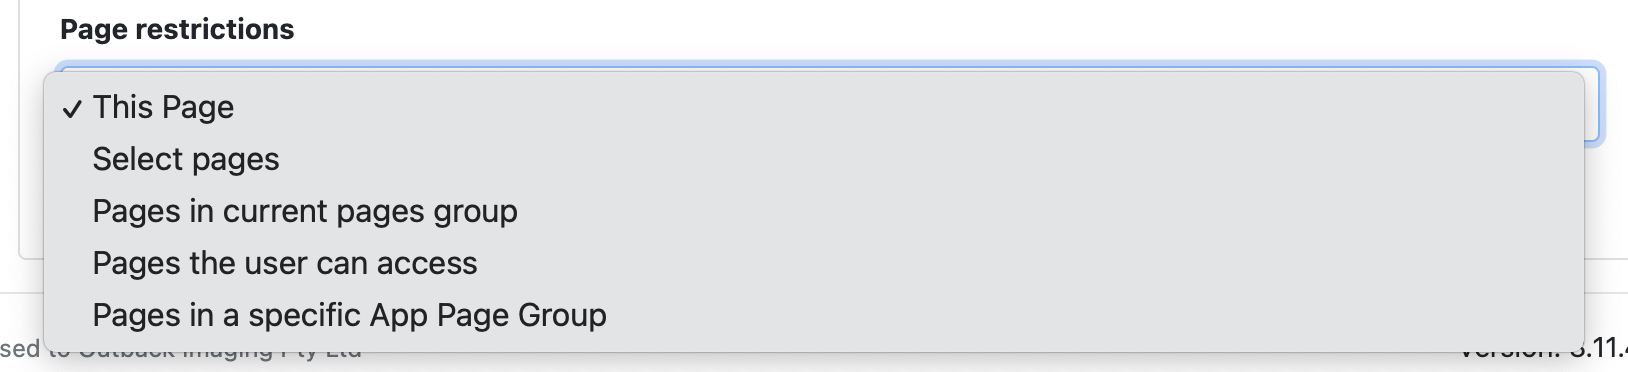
|
Action |
Description |
|---|---|
|
This Page |
Users will only be able to route documents to the current page |
|
Select Pages |
This is set to All pages by default. To select custom pages click the All Pages toggle off and select pages individually from the drop-down menu. Selected pages will appear as tags below the field. To remove one click the x. 
|
|
Pages in current app group |
Users can only route documents to pages in the app group that the sorter is part of. |
|
Pages the user can access |
Users will only be able to route documents to Queues they can access |
|
Pages in a specific App Page Group |
Users can route documents to pages in a specific app group |
2.5 Using the Sorter
-
Any Documents that arrive in the council sorter will be sent to DCA for Classification. If the document meets the configured confidence level requirements, it will be automatically routed to the correct workflow. If the document does not meet the requirements it will remain in the Queue for human intervention.
-
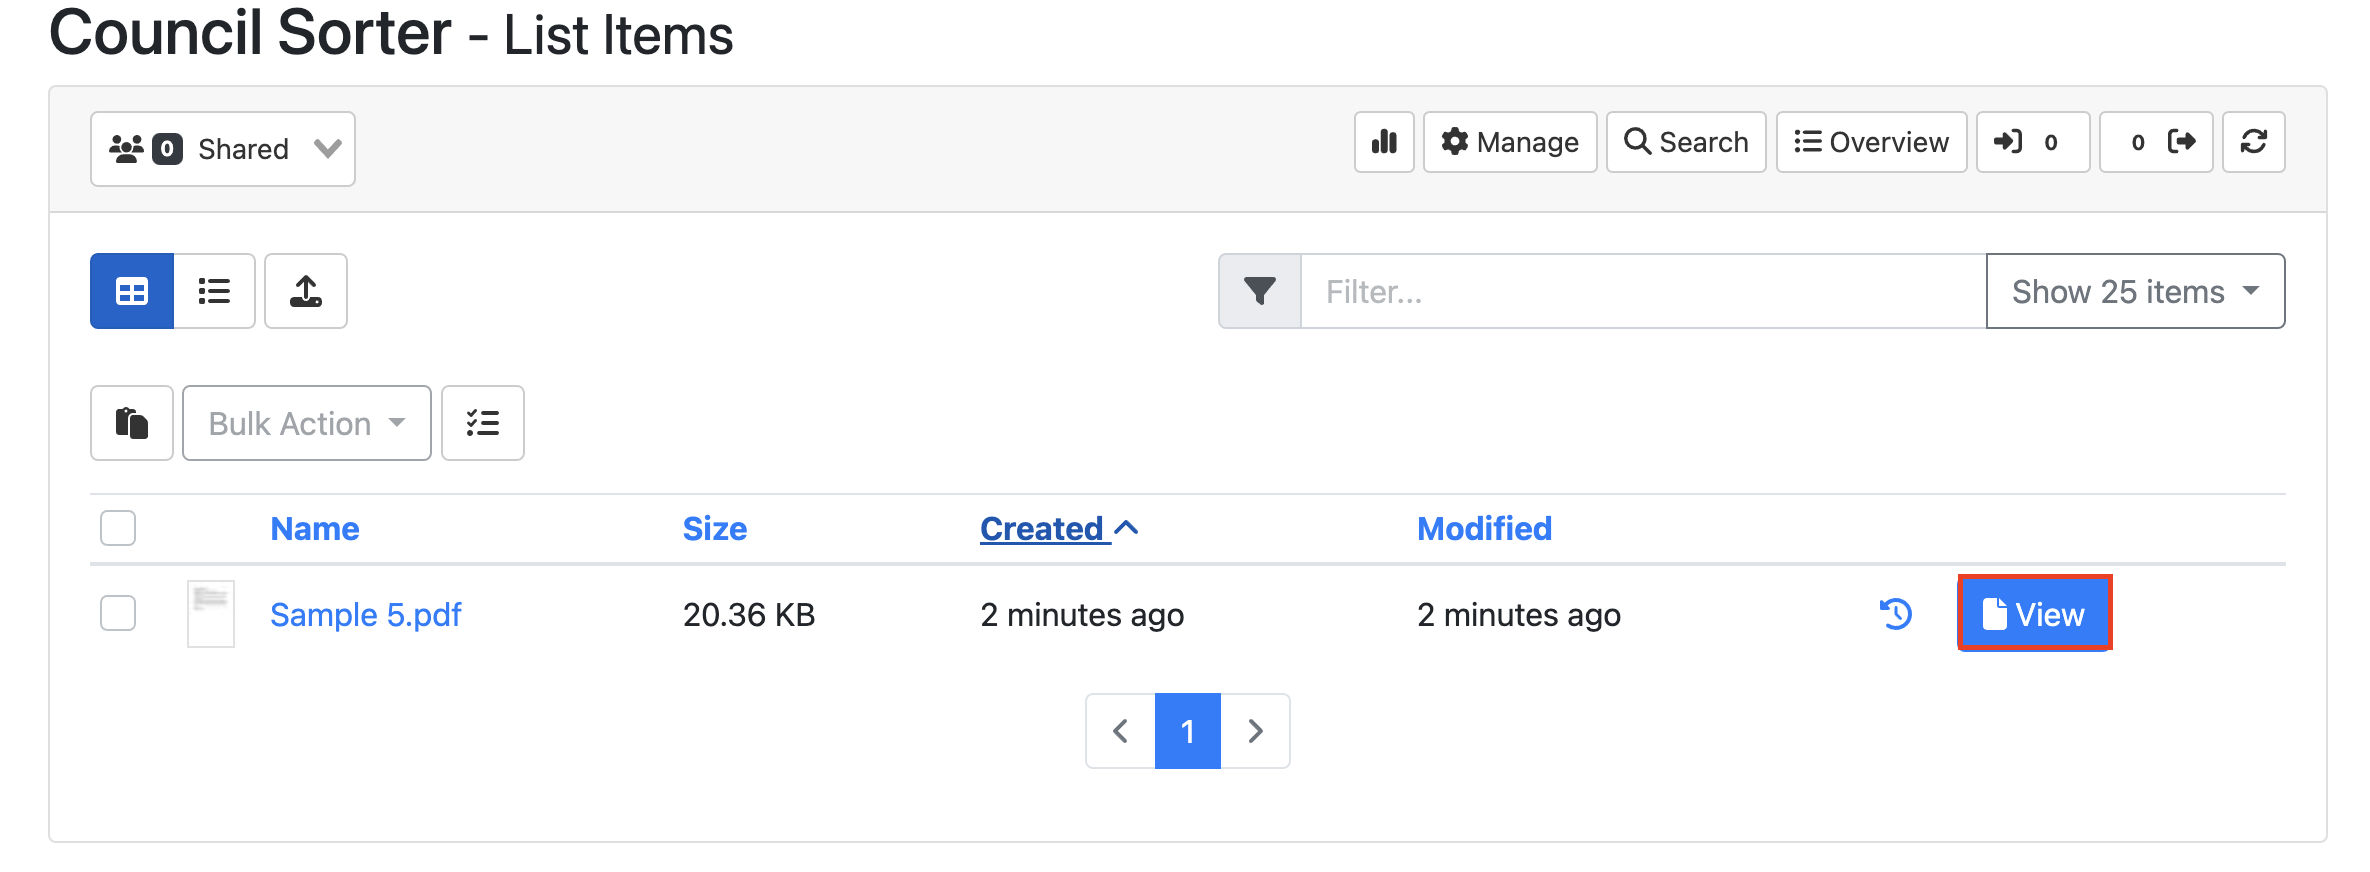
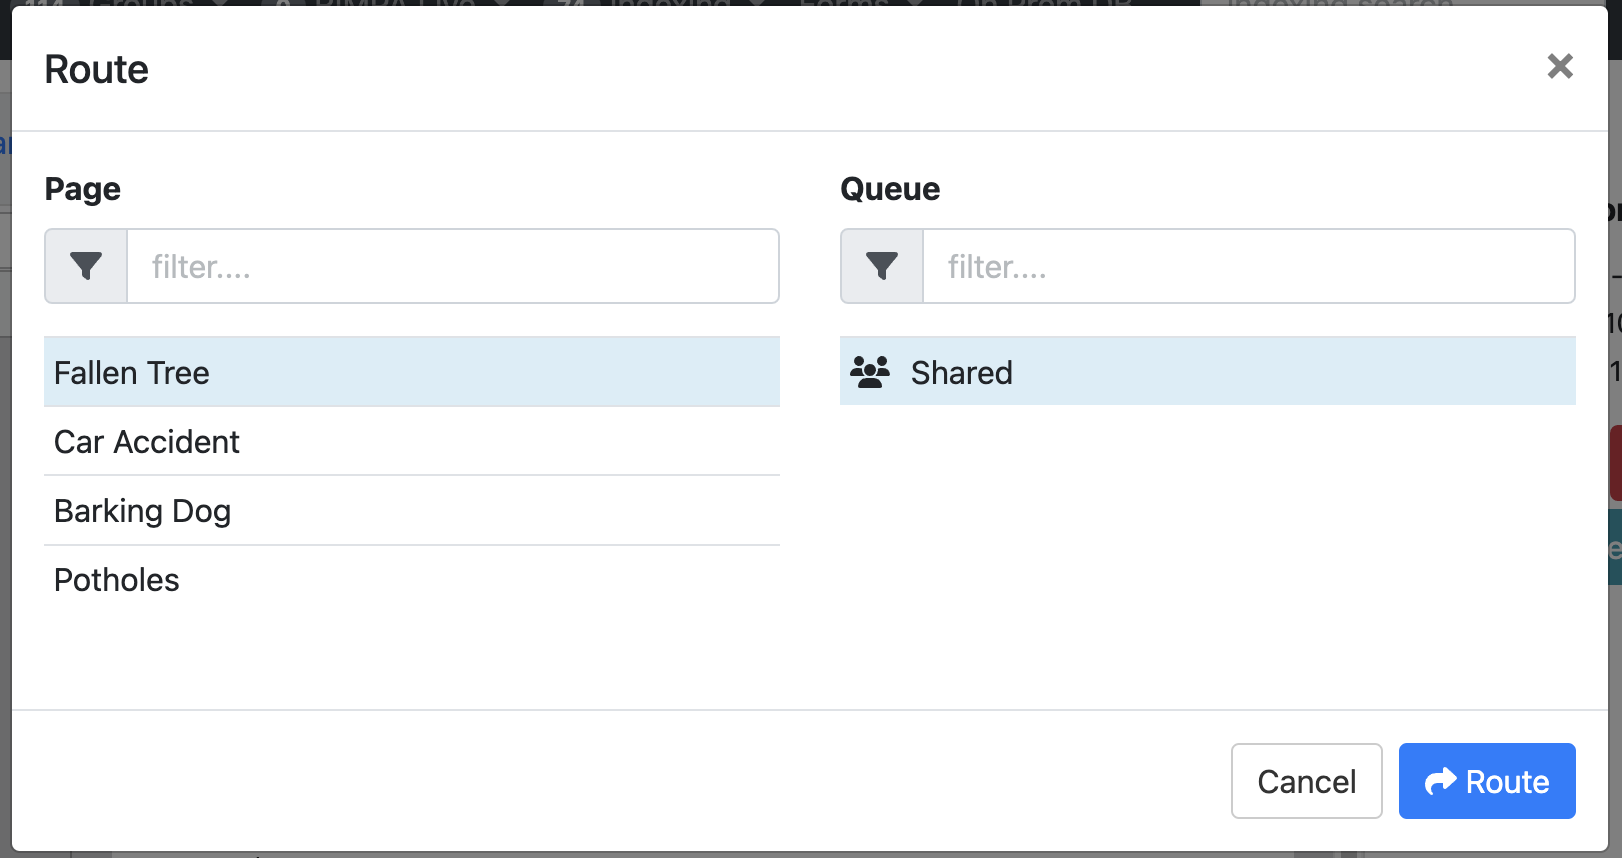
When you view the document you will be able to see what the engine has predicted the file as. To send the document to the correct workflow Click Route.
-
Select the correct page and Queue and then select Route. The document will then appear in that queue for Indexing.
-
Is it possible to setup the software to train on new documents coming in?
Yes, with some modifications to the setup:
-
Make it so that when we submit a document in a queue it will add to the training data
-
Add a stage to the RIA Page to submit documents - and classify documents - select the classification page & category
-
When a doc is submitted it sends it to the engine to say this is what this type of document looks like
-
In the admin screen - it won't be processed by the engine until the training runs at night but we can go in and “rebuild the model” - will have a green tick if processed - can reclassify or delete incorrect documents
3. Email Imports
In version 3.11 or higher, functionality has been added to hook up a mailbox to import documents to a RIA page.
3.1 Setting Up an Email Mailbox
-
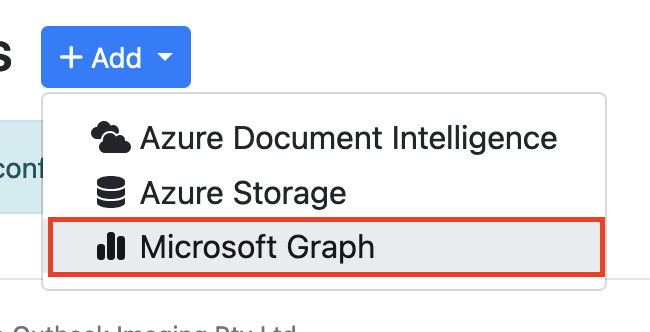
Go to the Connections Management Tab on the Admin Menu, External Connection Tab and Select + Add.
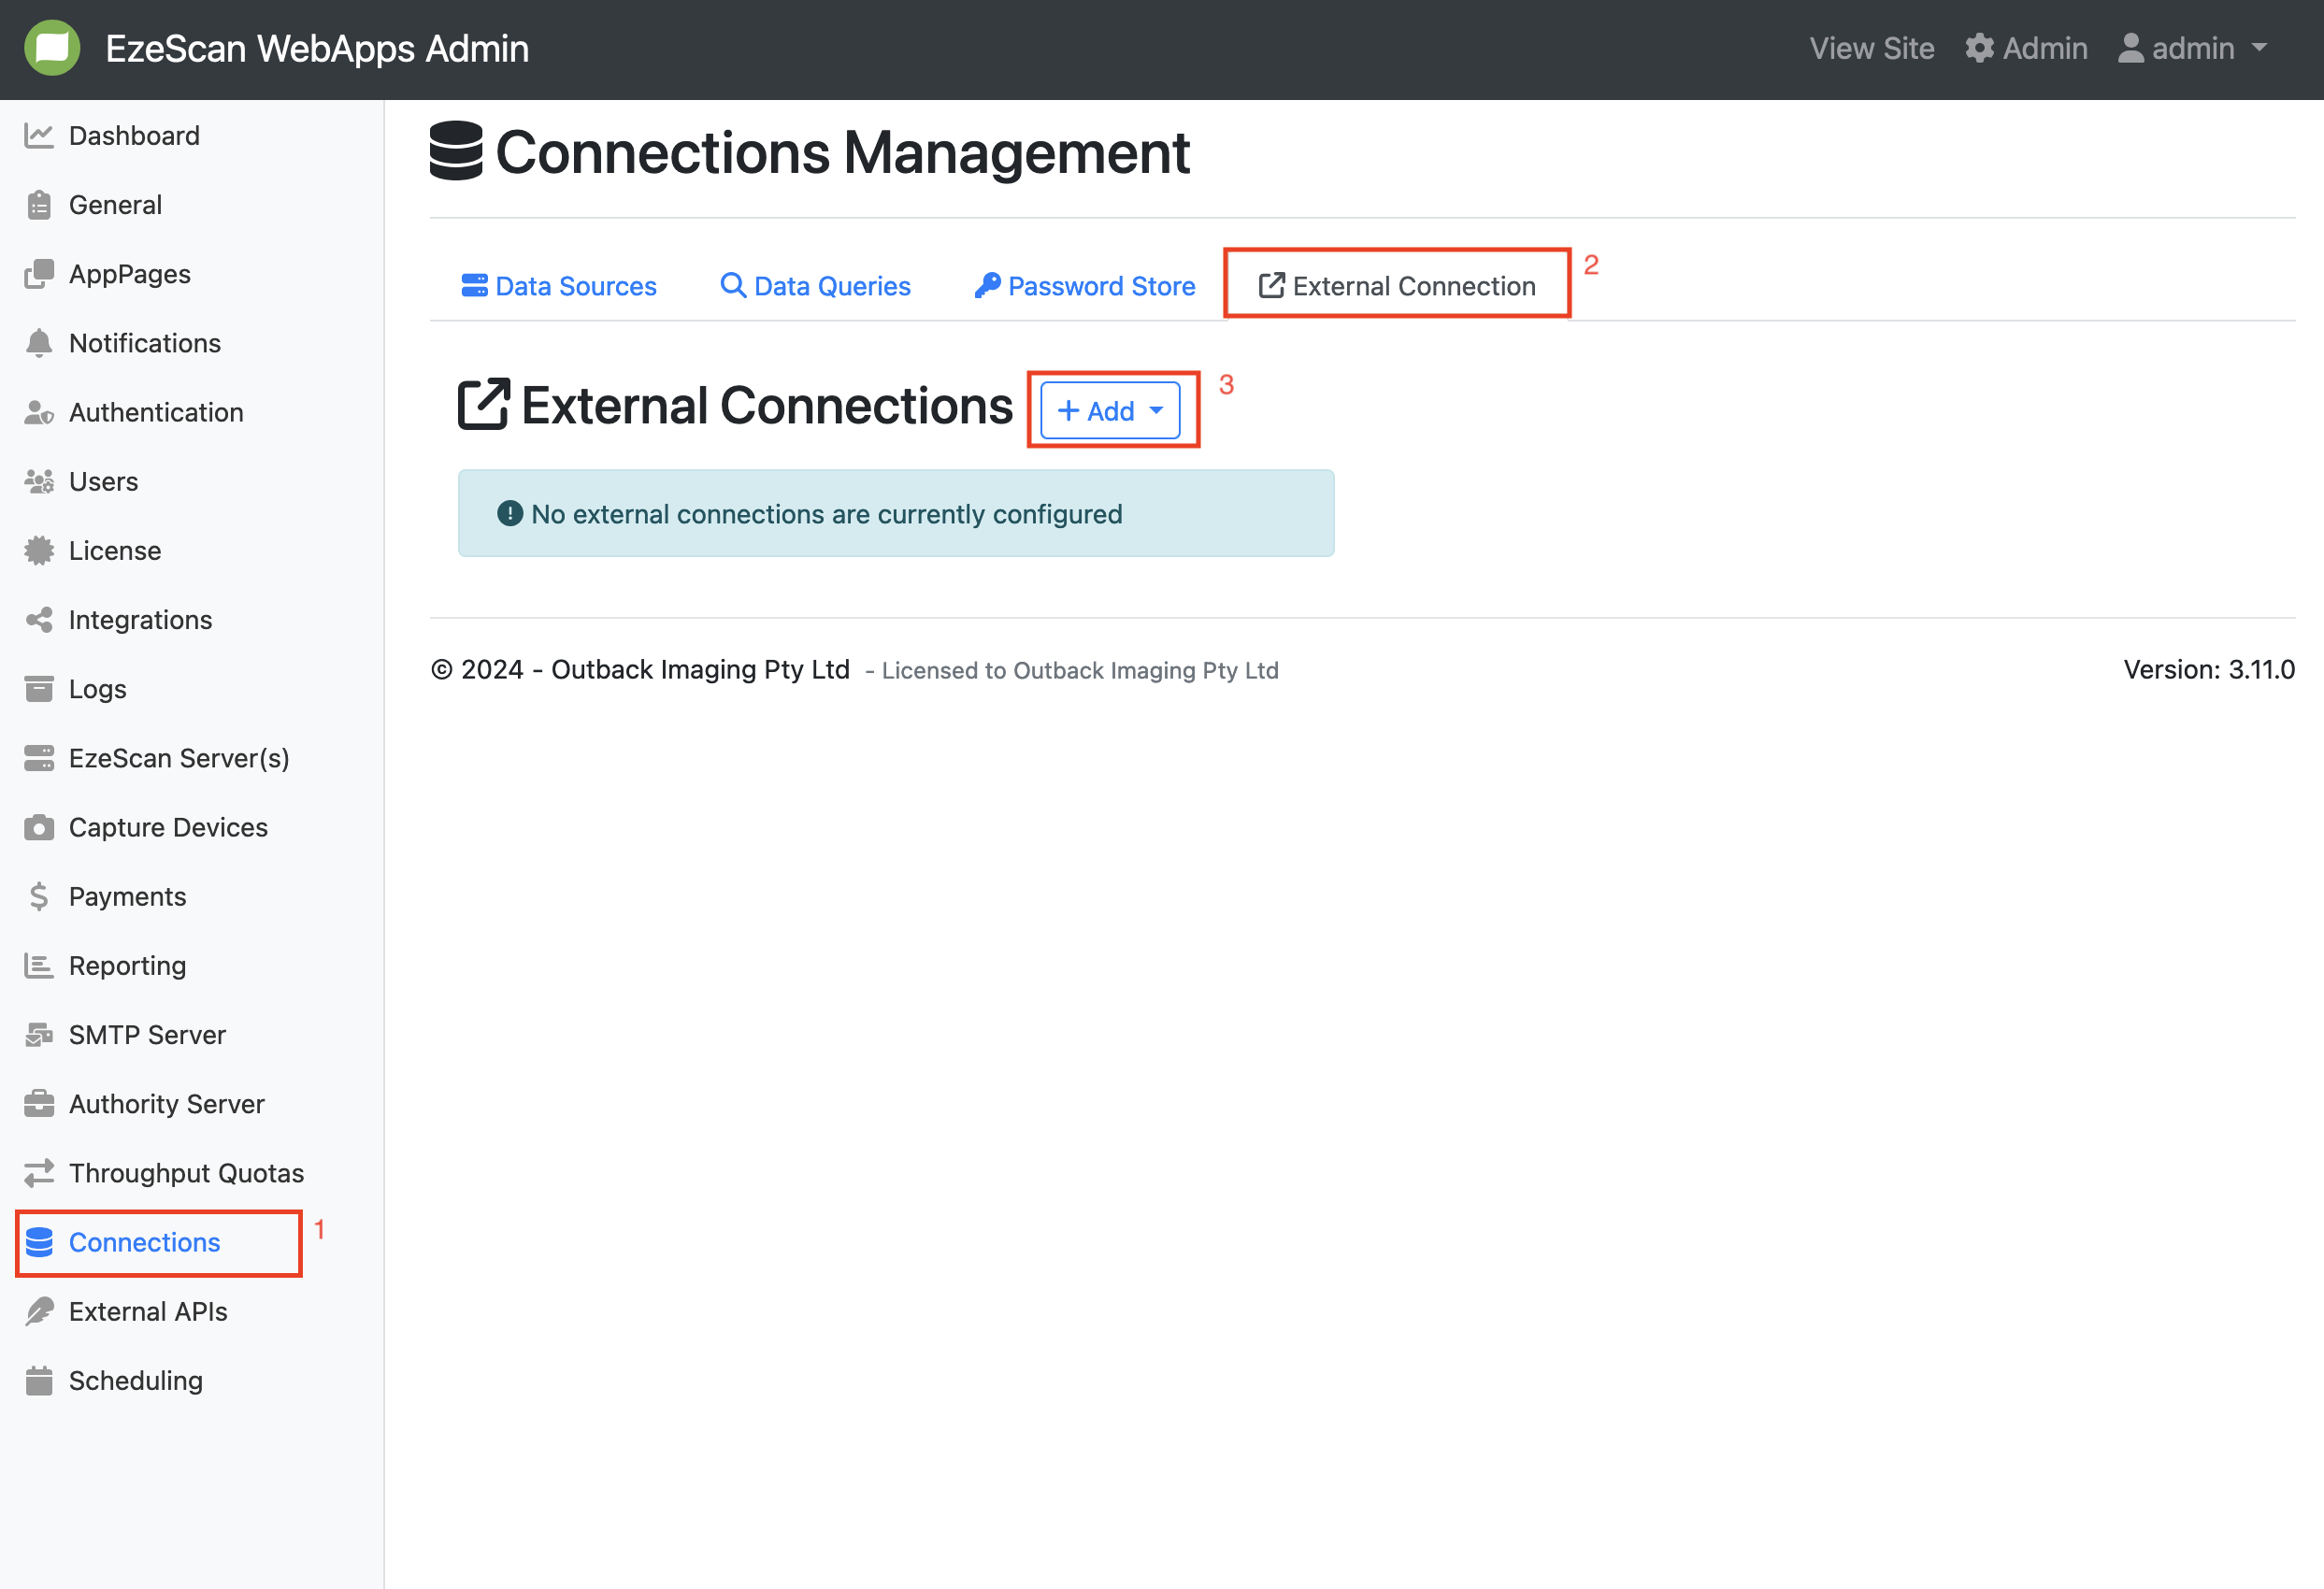
-
Select Microsoft Graph from the drop down.
-
Give the Mailbox Connection a name & description, select Inbuilt from Authentication Type and Select the Authorise Button.
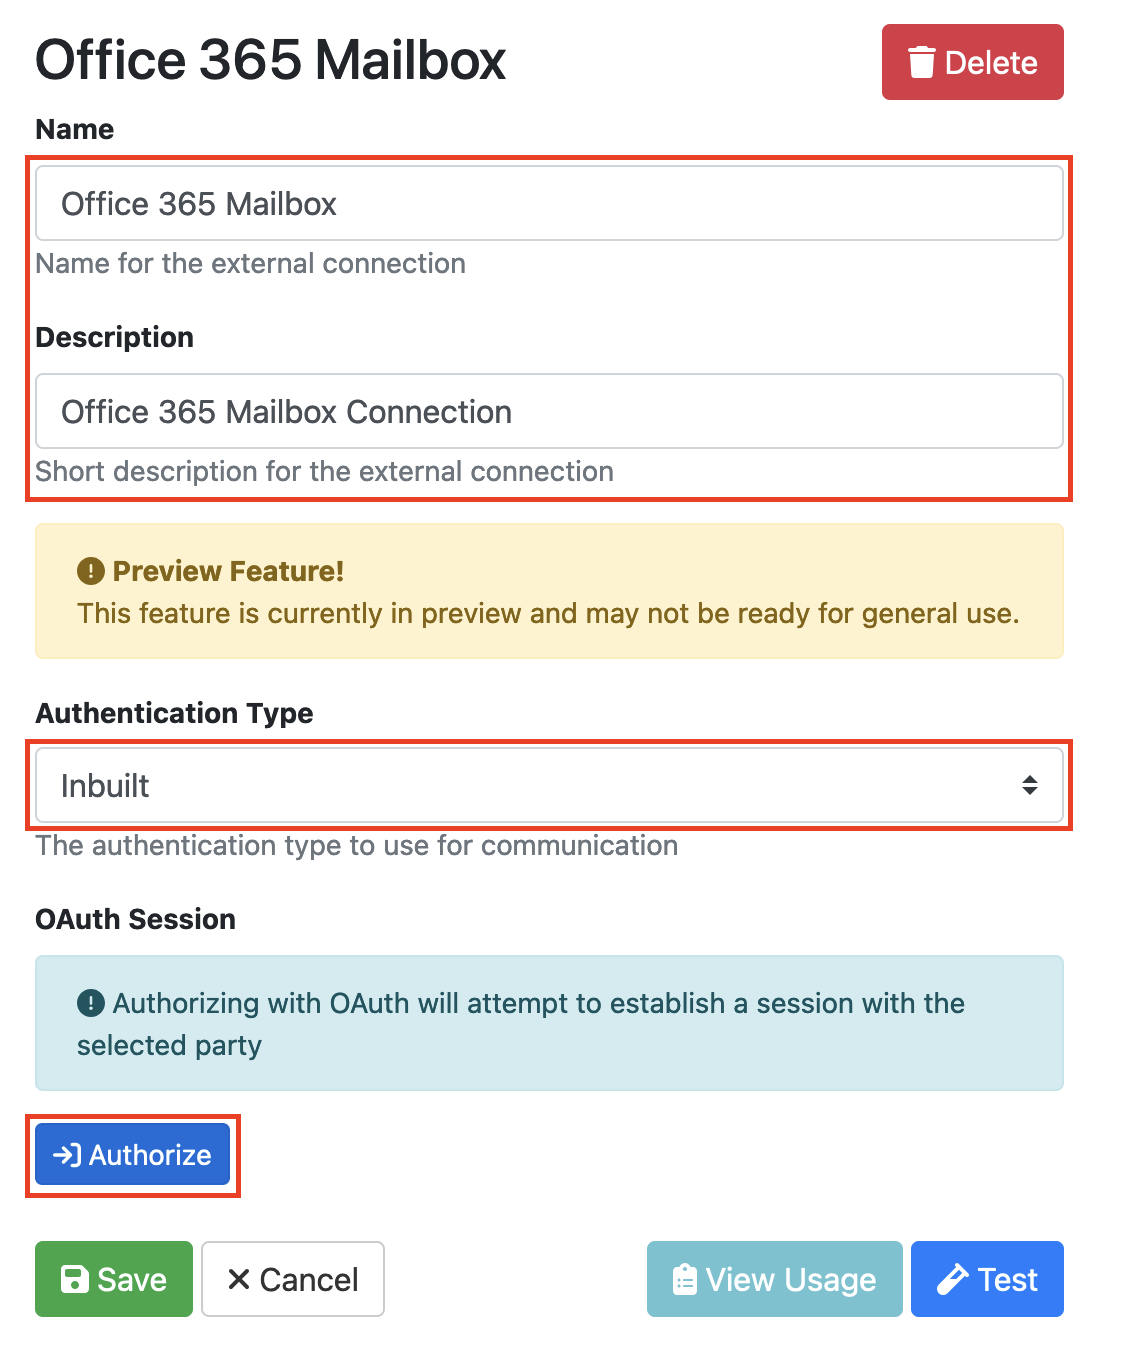
-
If the authorization is successful you will get a confirmation message.
-
If you get a ‘Pending Authorization’ tag you will need to log a support ticket to get the authorization issue sorted.
3.2 Adding Email Import to your Document Sorter
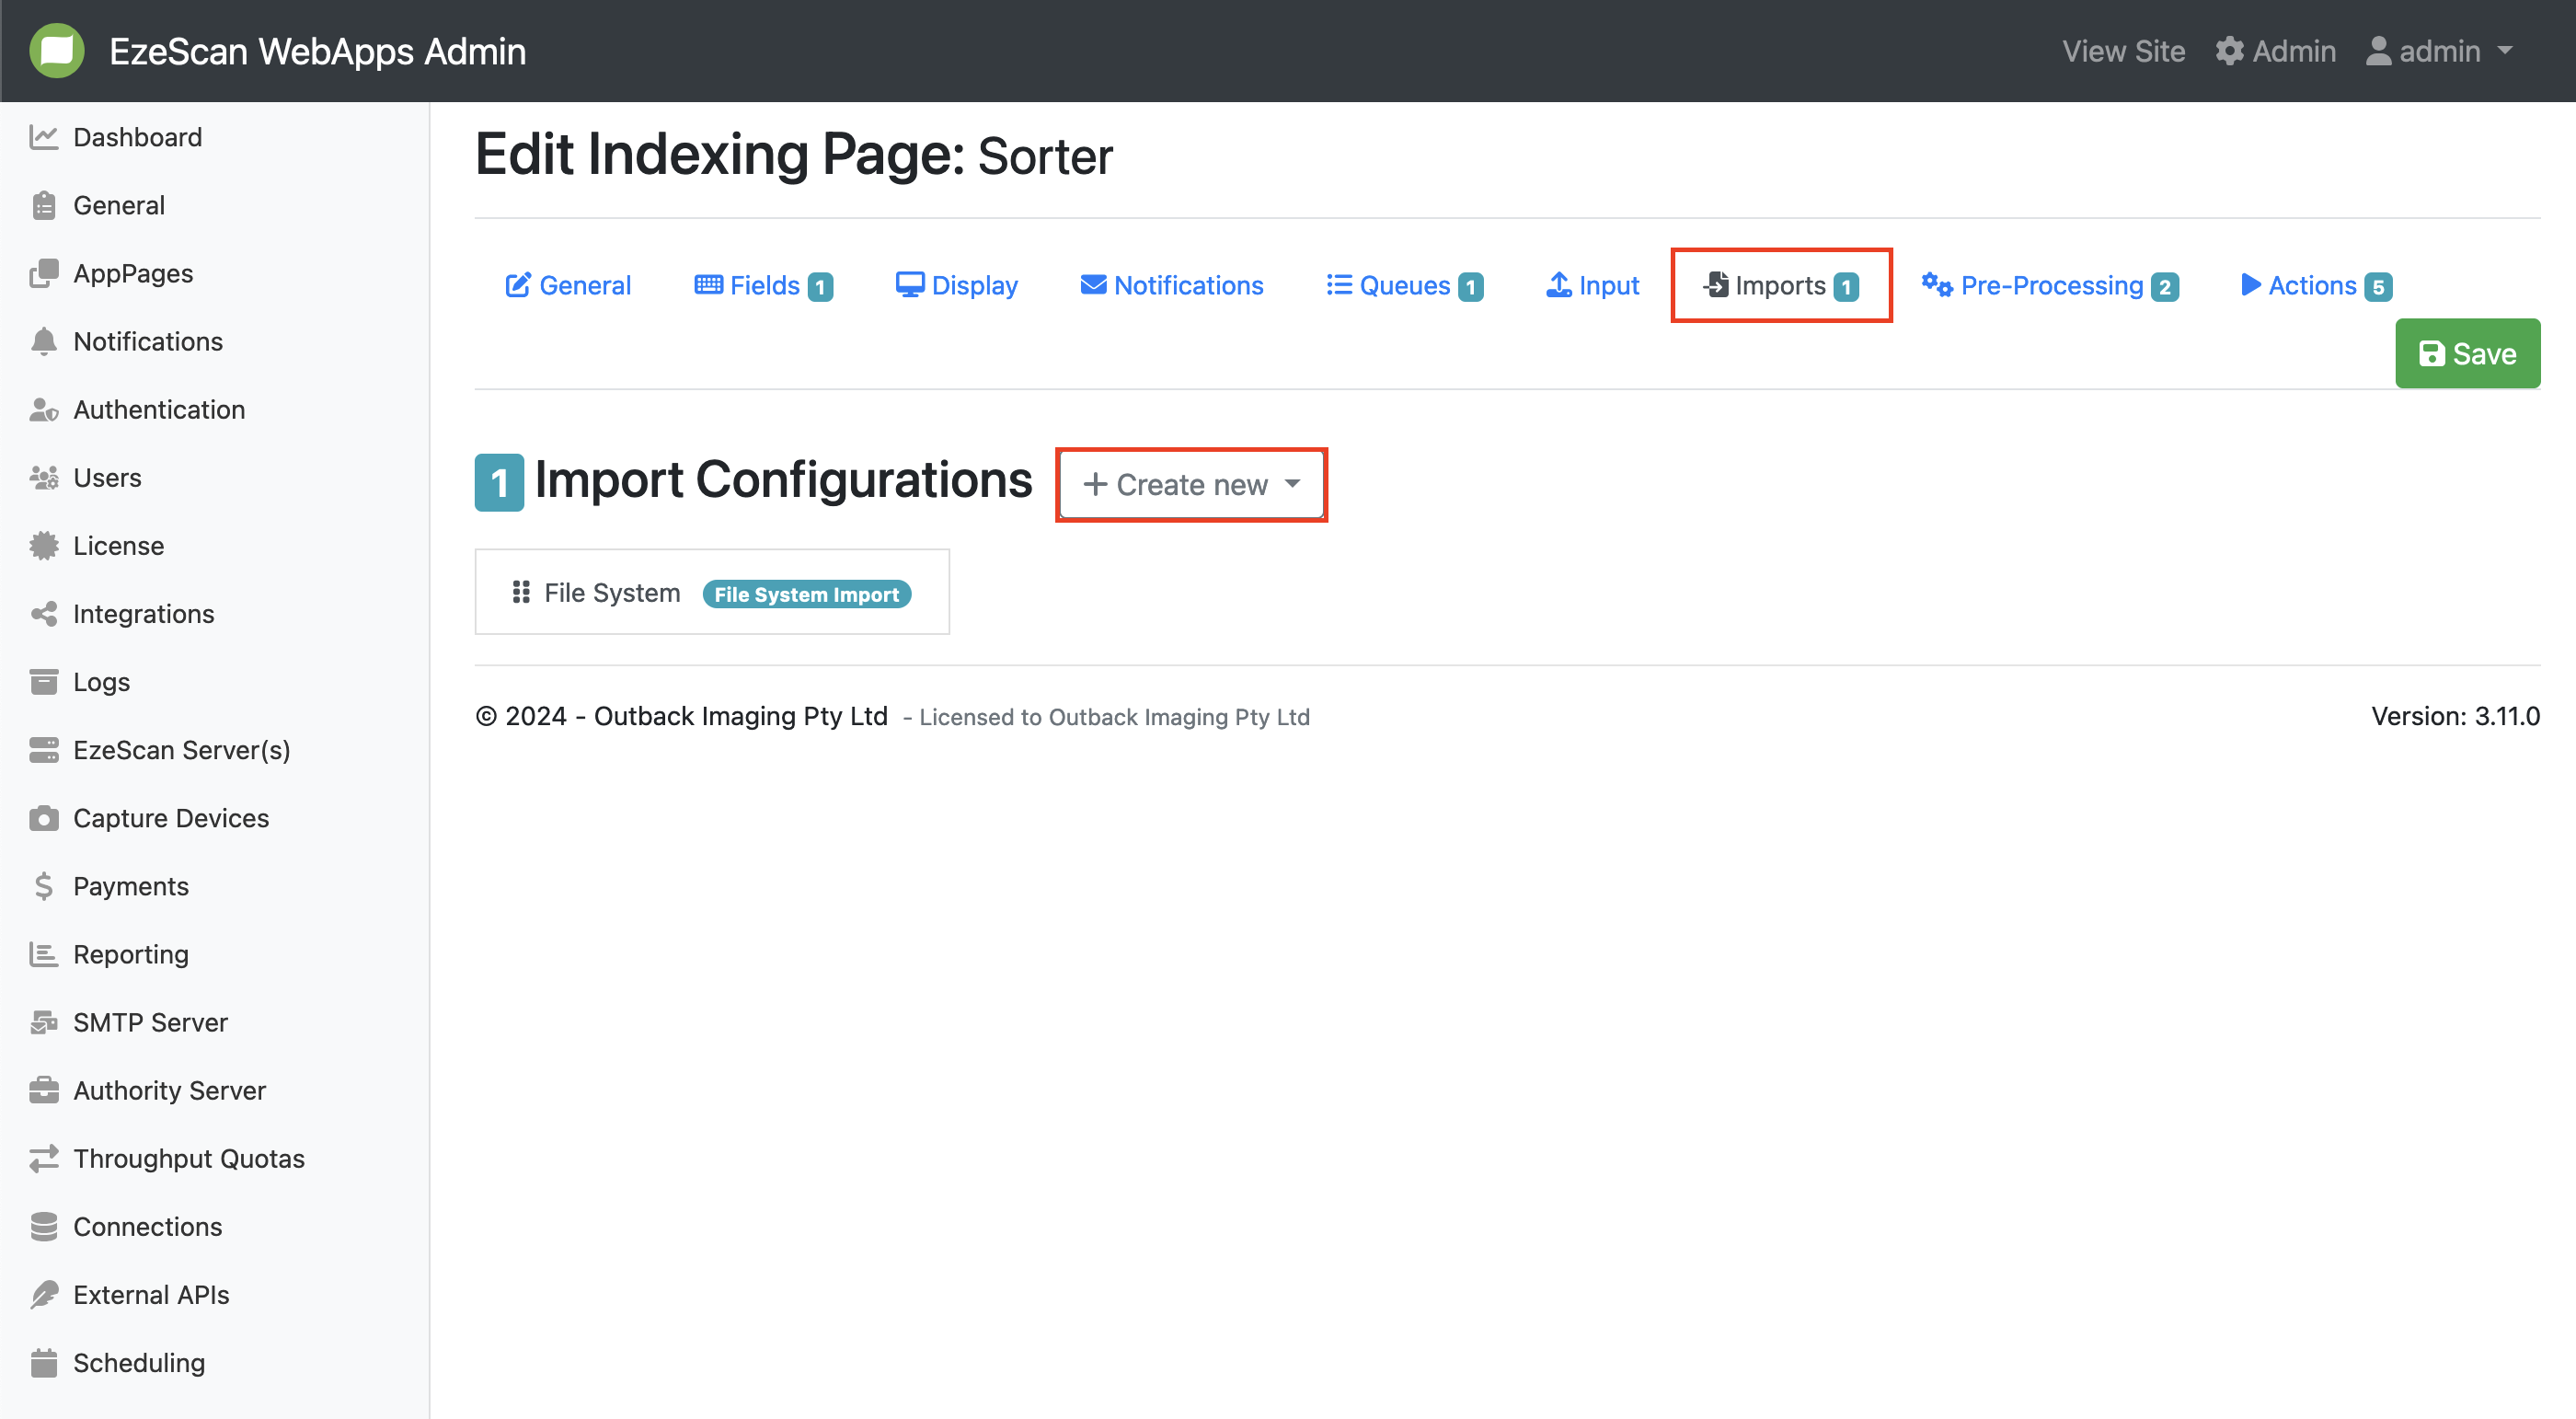
-
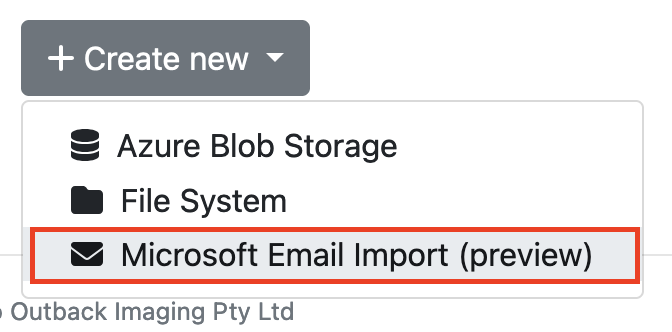
To add emails to your document sorter, go to your document sorter page > Imports > Create New
-
Select Microsoft Email Import from drop-down menu
-
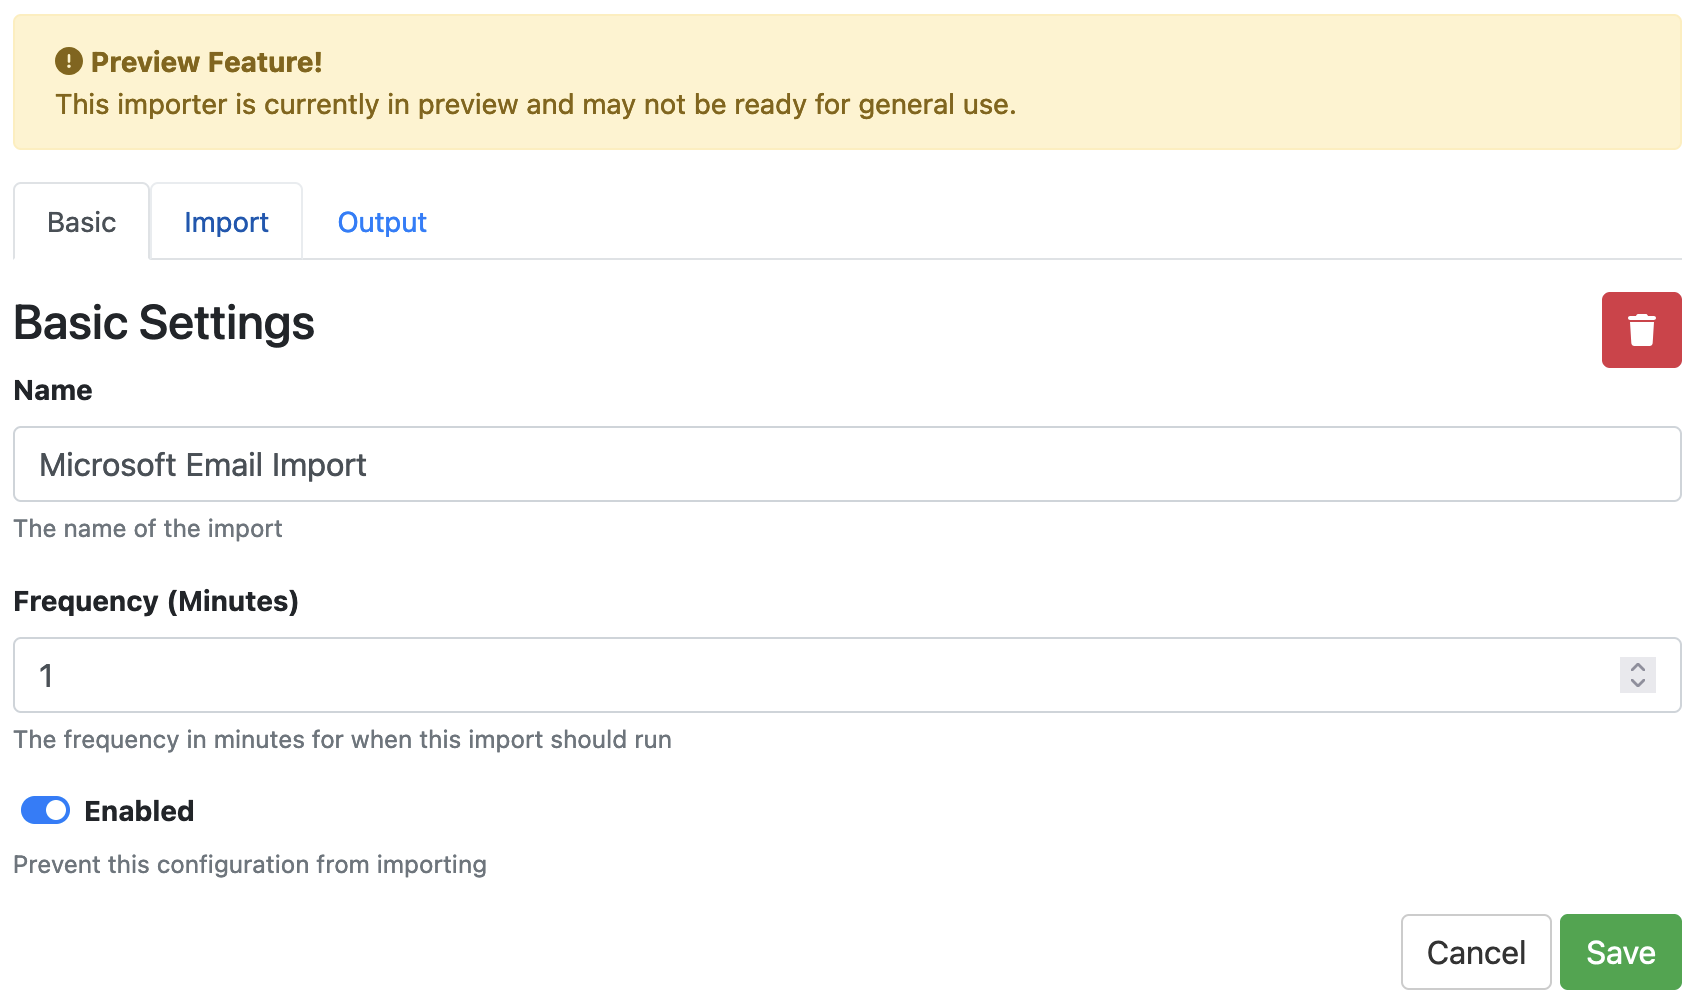
You can set a frequency for the import to run, this is set to 1 by default.
-
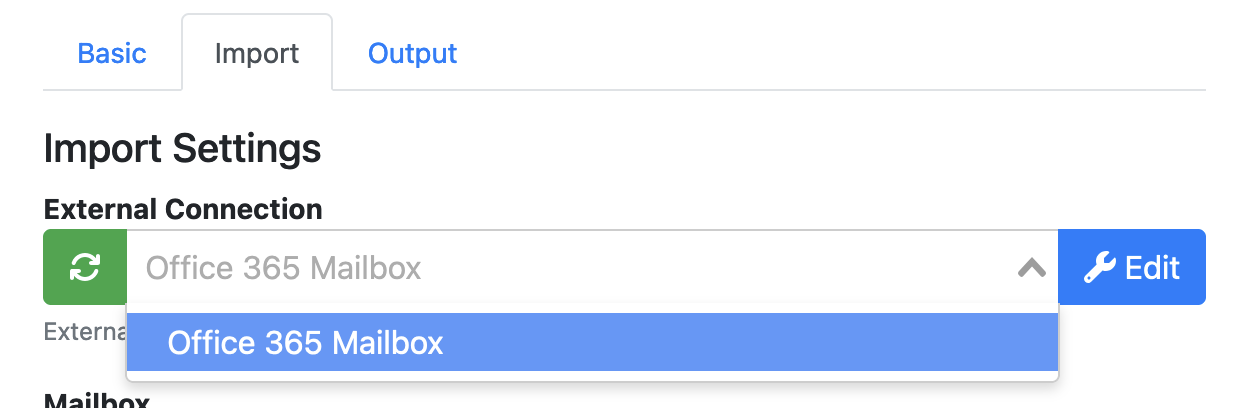
On the Import tab, Select the External Connection you created from the drop-down menu.
-
Enter the Email Address for the mailbox or shared mailbox you wish to download items from.

-
Select an email source folder to import from look-up.

-
Select a Clean up method
|
|
|
|---|---|
|
Delete File |
The file will be deleted from the inbox once it has been imported. |
|
Move Email |
The email will be moved to the destination once it has been imported. Select an email source folder to move the processed emails to. |
-
On the Output Tab Select the queue type and queue you want to output the emails to. Select Save.
|
Choice |
Explanation |
|---|---|
|
Simple |
Allows you to select a queue/ queue type from the drop-down menu |
|
Manual |
Allows you to manually enter either a queue/ queue type name or ID |
|
Ignore |
Allows you to not select a queue/ queue type |
-
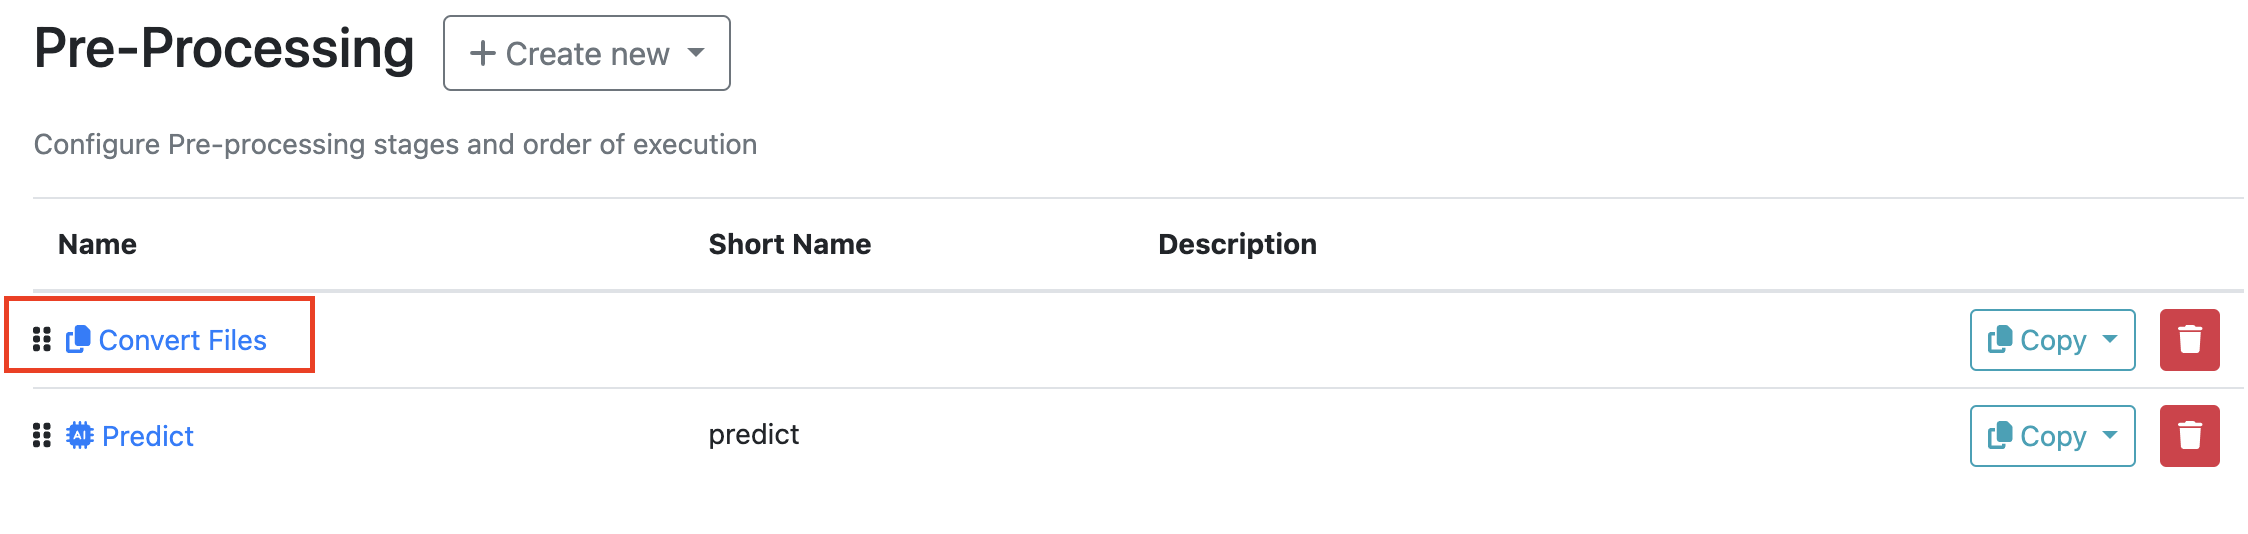
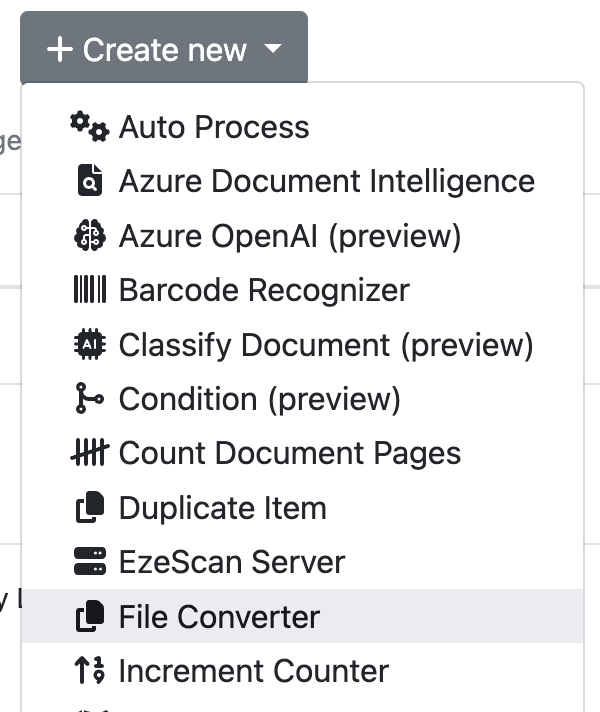
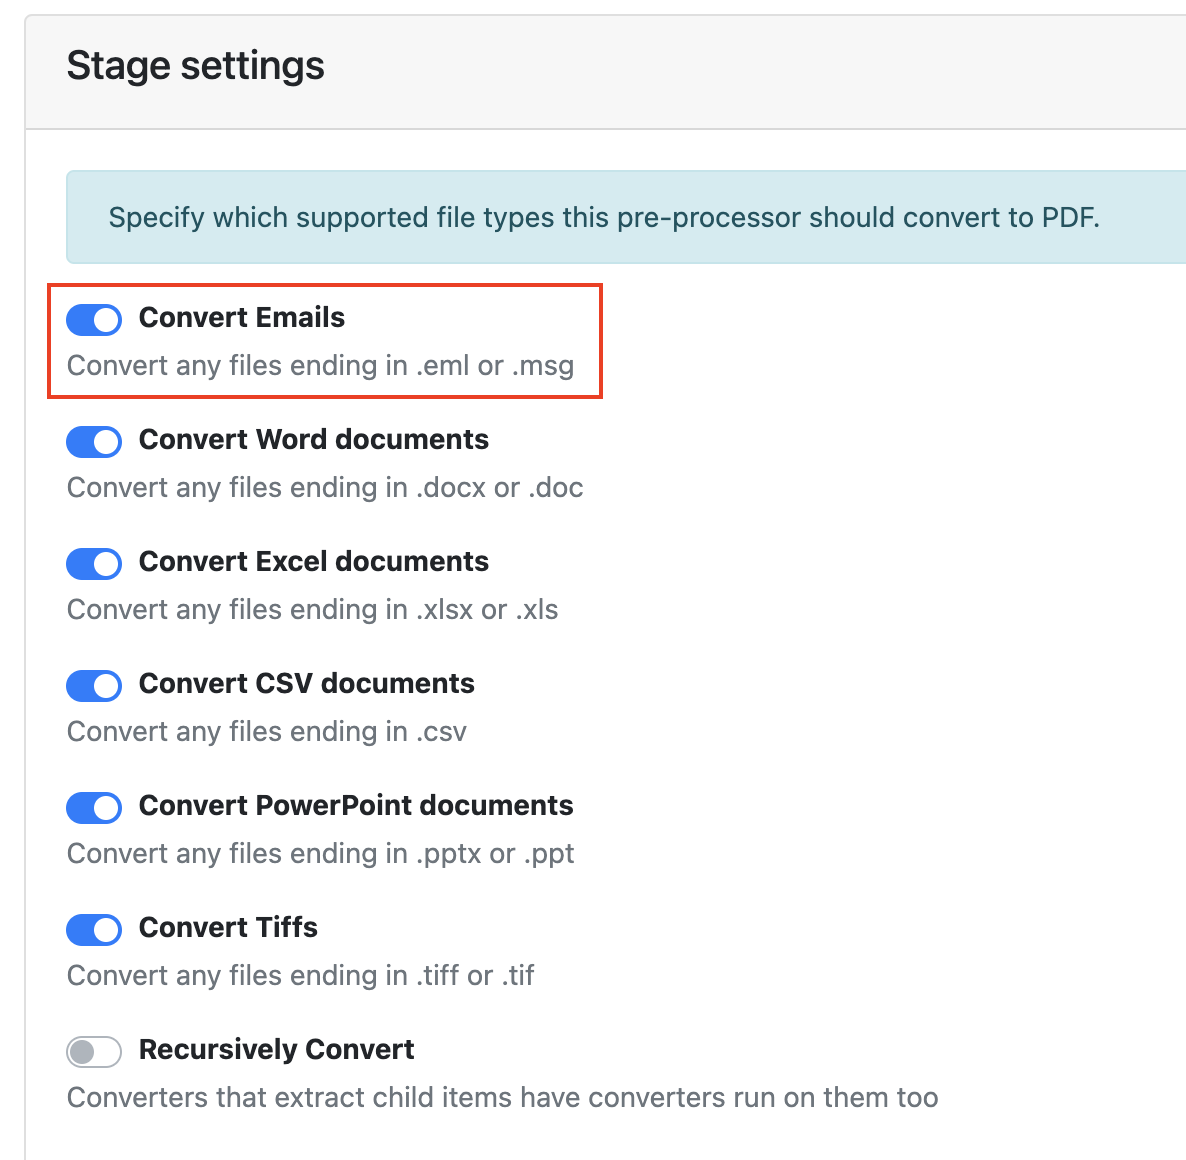
For the emails to be classified they will need to be converted from eml files to PDFs via a pre-processor. Go to the Pre-Processing tab, Select + Create New and Select File Converter.
-
In the Stage Setting, ensure Convert Emails is toggled on. Click Apply.
-
Check that the Convert Files pre-processor is the first on the list so it runs before the classification.