1. The evolution of AI
At the dawn of computing in the 1950’s, computers were rare, expensive, physically large and not very clever at all. They only did what we humans had programmed them to do. Computers were unable to perform new tasks unless more programming code was added to the application. Everything we wanted them to do needed to be programmed into them. Even though they had limited usefulness, what they did excel at was performing boring repetitive tasks on a 24 hours per day, 365 days a year basis.
The term Artificial Intelligence was first mentioned in 1950 by Alan Turing. He wondered if it would be possible for an machine to act and behave like a human. Could a human interacting with a machine, be completely unaware it was a machine, and think it was a real person? The business world could easily see the benefits that AI might deliver to their businesses. However turning his concept into a usable reality would take time, a lot of time.
Some major roadblocks, were that computers had not been commercially developed yet, there was no internet, software development was not a career choice. Gradually over time these roadblocks were conquered.
There are several significant milestones on the journey to viable AI that exists today listed below.
In 1971 Ray Tomlinson, of BBN, sent the first message across the network, initiating the use of the "@" sign to separate the names of the user and the user's machine. He sent a message from one Digital Equipment Corporation PDP-10 computer to another PDP-10. The two machines were placed next to each other. However, It would be decades later until email became available for use by the masses.
IBM released of the first IBM personal computer (Model 5150), commonly known as the IBM PC, released on August 12, 1981. These devices were marketed for business use only, and it would be some time before their price point became accessible for use by the general population.
Windows 1.0 was released on November 20, 1985. It was the first major release of the Microsoft Windows operating system. Spreadsheets and word documents were now a part of daily business life.
The World Wide Web (WWW) was initially invented by Tim Berners-Lee in 1989 while at CERN. He later released the source code for the first web browser and editor on April 30, 1993, making it available to the public.
Only 9 years after the first PC was released, they had become faster, cheaper. CPU, memory and disk capacity was doubling almost every year in accordance with Moore’s Law.
I998 saw the launch of Google. It was really a search engine that had categorized an enormous amount of information downloaded from crawling millions and millions of internet web sites. Google added there own business intelligence on top of the data so it could be easily searched and the data was returned as search results ranked from most likely result to least likely result. It wasn’t AI, but it started a revolution.
In 2011 another big step forward came about when Apple bought Siri and then released it as an inbuilt app on the iPhone. You were able to say ‘Hey Siri’ followed by the task you wanted it perform like “Call John” or “Set an alarm called car service for a 7am”. It came bundled on the iPhone for free. If you owned an iPhone 4S or higher you just could use it. Siri was available on any Apple device, anytime, anywhere. For many people this started to feel like AI. You spoke to It, it gave you answers to your questions, but frustratingly sometimes it had no idea how to respond.
In 2015 Open AI was founded and started to work on a new AI technology based on prediction and text generation. In 2022 it released a chat bot called ChatGPT. This was the time that AI was actually was able to create new content , not just recite existing content. More importantly this was looking like real AI. A human conversing with it, was having a hard time deciding whether they were conversing with a machine or a real person?
The ability of generative AI to create new textual content quickly made it popular with ‘content creators’. Being able to create version 1 of new content by just typing a few text commands, was much easier than spending time handcrafting it word by word. Being able to further finesse that content in a conversation with chat bot repeated and until you end up with the desired content, with all the heavy lifting done by AI and with oversight provided by a human.
In 2020 Microsoft released its AI powered Forms Recognizer solution. It came with some pre-trained AI models, and also allowed users to train their own custom models. It was promoted to “accelerate your business processes by automating information extraction”.
Then in 2024, Open AI Released ChatGPT 4 and Microsoft released its Open AI chat bot. Chat bots have now made their way into most web browsers and onto most mobile devices. Chat bots are now within reach of a large portion of the worlds population.
The chat bots from Open AI and Microsoft have been trained on very large datasets (often referred to as ‘Large Language Models’, ‘LLM’s or ‘LLAMAS’). Due to their size of their training data set size (now in 2024 sitting at around 140TB) the resulting large language model files are now 380GB in size. LLM’s are currently growing at somewhere between 4-5 times in size per iteration. Larger language model sizes usually deliver better performance.
A key part of the user acceptance of chat bots, is that they are commanded to perform tasks in natural language (i.e how humans speak to each other), not in a programming language. With their large training models they are able to respond intelligently to a vast range of questions.
This discussion from here-on is focused on how EzeScan is leveraging these latest innovations in AI to improve the data extraction capabilities of unstructured data within its WebApps application.
Webapps can be deployed either on premise on a customs server, on a customer’s server hosting platform, or on our EzeScan Cloud platform (which is now available on Microsoft Azure regions in Australia, UK and USA).
We will be focussing on how WebApps is using 2 of Microsoft’s AI offerings:
a) Azure Document Intelligence
b) Azure OpenAI
These were chosen because:
-
they both offer our customers the ability to utilise the benefits of using AI whilst ensuring the highest levels of data privacy and data security.
-
both platforms do not retain any customer data for training purposes. Conversations with AI are one time, and destroyed after each conversation.
-
they are seamlessly integrated with our EzeScan Cloud platform hosted on Microsoft Azure.
-
they provide cost effective ‘pay as you use’ options for AI consumption
These 2 AI options will be discussed in greater detail below.
2. Using AI when WebApps is deployed ‘on premise’
-
For ‘On Premise’ EWA installs, the customer will need to have their own Microsoft Azure Portal account, and they must have their own subscription access to use either Azure Document Intelligence, or Azure OpenAI , or both of these depending on which AI method(need to need to be used.
https://portal.azure.com/#home
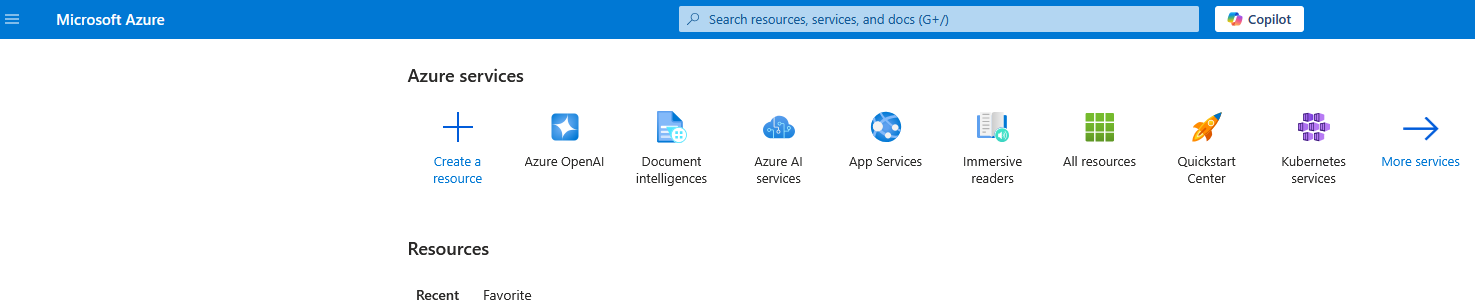
On your Azure portal you should be able to see your available Azure Portal AI Resources listed here:

The 2 Microsoft AI options use different pricing models.
Azure AI Document Intelligence Models
is available online and is best found by searching for something like ‘Azure AI Document Intelligence pricing' or at https://azure.microsoft.com/en-au/pricing/details/ai-document-intelligence/#pricing . Make sure you set the Region and Currency selection correctly before relying on the model prices shown.
Basically, Microsoft Azure Document Intelligence charges a fee per page processed. The pre-trained default models provided ‘out of the box' are the cheapest to use. Custom user trained models built by the customers are 3-4 more expensive to use per page than the pre-trained models.
-
WebApps On Premise supports the use of pre-trained default models available within an Azure region. Models like:
-
Read (only performs OCR whereas other models below perform OCR and data extraction)
-
General Document
-
Contract
-
Invoice
-
Receipt
-
Business Card
-
Identity Document
-
and any other new builtin models released by Microsoft
-
-
WebApps On premise can also be configured to utilise a custom Azure AI DI model built, trained and maintained by the customer.
Azure OpenAI Models
is available online and is best found by searching for something like ‘Azure OpenAI Service - Pricing' or at https://azure.microsoft.com/en-au/pricing/details/cognitive-services/openai-service/ . Make sure you set the Region and Currency selection correctly before relying on the model prices shown.
Basically, Microsoft Azure OpenAI charges a fee based on model type and token usage. Tokens are consumed based on a combination of
Input tokens (comprised of instructions and prompt (text layer) sent to the chatbot)
Output tokens (comprised of output text generated by the chatbot)
More info on these tokens can be found here:
https://help.openai.com/en/articles/4936856-what-are-tokens-and-how-to-count-them
Basically adding more words and punctuation to either the input prompt or input instructions, or more words being generated in the output text, means that the number of token used to process the Open AI conversation will be higher, so the cost will be higher.
You can reduce AI cost by configuring AI to only process some of the document pages instead of all of them. Most critical information is located on page 1 of a document. Use a page range of ‘1', not ‘All'.
AI models also have limits for the numbers of input, command and output tokens (they call it context). When you exceed the model context limit AI will not generate output text properly. It may truncate the JSON response part way through. You can get round this problem by either:
i. Change the page range from ‘All’ to ‘1-3’.
ii. Use the Truncate Tokens options to reduce the number of input tokens being used by the incoming text layer. If you were using gpt-35-turbo model the model context limit is 16K. Set the WebApps truncate tokens options to 13K. This will work, provided that the size of the instruction text and the size of the generated output tokens does not exceed 3K.
iii. Switching to a different model that has higher token limit and context limits. For the gtp-35-turbo model the context limit must not exceed 16K tokens., whereas for the gpt-40-mini model the context limit must not exceed 64K tokens.
Customers are solely 100% responsible for paying their Azure resource usage fees to Microsoft for the Microsoft AI services they are subscribing to.
3. Using AI when WebApps is deployed in EzeScan Cloud
For EzeScan Cloud’ installs, AI is available on our Cloud Platform.
Your subscription will only include AI if it was specifically included in our sales quote to you. The quote should include a reference to the number and value of App credits provisioned on the tenancy.
AI usage is controlled using App Credits. App credits are consumed as each page sent to AI is processed. Warnings will be issued as the App Credit limit is reached.
The 2 Microsoft AI options use different pricing models.
AI Document Intelligence Models
-
WebApps on Ezescan Cloud supports the use of pre-trained default models available within an Azure region. Models like:
-
Read (only performs OCR whereas other models below perform OCR and data extraction)
-
General Document
-
Contract
-
Invoice
-
Receipt
-
Business Card
-
Identity Document
-
and any other new builtin models released by Microsoft
-
Every document that is processed using these Azure DI models will consume App Credits. App credit usage for each document processed is recorded in each pre-processor log file.
-
WebApps on EzeScan Cloud is currently not supporting using a customers own custom model that they may have built and trained on the Azure Portal.
Azure OpenAI Models
Tokens are consumed based on a combination of:
Input tokens (approximately = amount of words + punctuation in the text layer)
Command tokens (approximately = amount of words + punctuation in the instruction command).
Output tokens (approximately = amount of words + punctuation in the generated output text)
Adding more words and punctuation to either the input text, command text, or more words being generated in the output text , means that the number of token used to process the Open AI conversation will be higher, so the cost will be higher.
You can reduce AI cost by configuring AI to only process some of the document pages instead of all of them. Most critical information is located on page 1 of a document. Use a page range of ‘1', not ‘All'.
AI models also have limits for the numbers of input, command and output tokens. When you exceed the token limits AI will not generate output text properly. It may truncate the JSON response part way through. You can get round this problem by either:
i. Change the page range from ‘All’ to ‘1-3’.
ii. Use the Truncate Tokens options to reduce the number of tokens being used by the incoming text layer. If you were using gpt-35-turbom model the token limit is 16K. Set the truncate tokens options to 13K. This will work, provided that the size of the command tokens and generated output tokens does not exceed 3K.
iii. Switching to a different model that has higher token limits, or using the the Truncate Length option to tell Web Apps to try and keep the total tokens used below a certain limit. For the gtp-35-turbo model the token usage must not exceed 16K tokens., whereas for the gpt-40-mini model the token usage must not exceed 80K tokens.
Every document that is processed using these Azure OpenAI models will consume App Credits. App credit usage for each document processed is recorded in each pre-processor log file.
Please talk to our sales team, if you’d like to upgrade your EzeScan Cloud subscription to include AI for an agreed number of document pages/month.
4. What version of WebApps supports AI?
-
The 2 Microsoft AI pre-processors (Azure Document Intelligence, Azure Open AI) and are only enabled in EWA 3.11 or later only.
5. AI requires a text layer
There is one important thing you need to know.
For AI to be able to find and extract data from each page of an input document, the input document submitted to AI must include a text layer for each page that AI is going to process.
The file format that works best with AI is PDF, especially text searchable PDF (because it already contains a text layer for each page in the document).
In WebApps It's possible to process other file formats by implementing a File Converter pre-processor on the RIA page (e.g to convert TIF to PDF, JPG to PDF).
What if your PDF does not yet include a text layer? refer to the next section.
6. How can WebApps generate a text layer?
There are 2 types of pre-processors in WebApps that can create this OCR text layer.
-
Azure Document Intelligence pre-processor (uses Azure inbuilt OCR+ICR engine)
a. The Read model - generates OCR/ICR text layer (i.e. raw text layer)
b. The other models such as ‘General Document’ and ‘Invoice’ - generate the raw OCR/ICR text layer and provide the OCR/ICR data as Key Value Pairs (KVP).
or
-
OCR pre-processor (uses EWA’s inbuilt OCR engine)
a. Only generates the raw OCR text layer.
7. Three Methods Of Configuring AI in WebApps
There are 3 methods:
Method 1: if you choose to add the pre-processor Azure Document Intelligence ‘General Document' or ‘Invoice’ model, it will generate an OCR text layer, and it will include Key Value Pairs derived from that OCR data. You will also need to add a Map Metadata pre-processor to map the Key Value Pairs into the relevant RIA page fields
Method 2: if you choose to add the pre-processor Azure Document Intelligence ‘Read’ model, it will generate an OCR text layer, but you will also need to add an additional Azure OpenAI pre-processor to find and extract the data in the OCR layer. You will command the OpenAI chat bot to read data from the page OCR layers, and output that data with field names that match the RIA page field id’s.
Method 3: If you choose to add the OCR pre-processor, it will generate an OCR text layer, but you will also need to add an additional Azure OpenAI pre-processor to find and extract the OCR data. You will command the OpenAI chat bot to read data from the page OCR layers, and output that data with field names that match the RIA Page field id’s.
A detailed overview of how to setup each of these methods follows below.
7.1. Use Azure Document Intelligence pre-processor ‘Built in’ model, with a Map Metadata pre-processor
Document Intelligence uses models to read data from documents.
There are 2 types of models supported in Document Intelligence on Microsoft Azure:
-
Default inbuilt models (e.g. ‘General Document’ and ‘Invoice’). These were pre-trained by Microsoft using large datasets. Work well in many cases, but you have then 'as is; because no retraining/modification to the base model is allowed by Microsoft.
-
Custom models. Built by the user using Microsoft Model building and training tools. Can be used to build custom solutions not supported by Default models. May require constant retraining/update if too small a dataset is used when training the model.
Basically both model types are trained to find key value pairs of data.
Hint: This discussion will focus on using built-in models only.
A Key value pair consists of 2 strings. The first string is the label or name of the data field. The second string is the actual data value. For example:
Label Value
Invoice Number: 100001
Date: 22/10/2024
Price: $100.00
A simplified way to look at how Key Value pairs work is that the software has been trained to look for some label text and then find the value that is written to the right of it or below it.
Thus for the data laid out on the document as
Invoice Number: 100001
Depending on the model being used the Key value pair would be output as
Kvp.InvoiceNumber, 100001 or as afr.InvoiceNumber, 100001
(Note: KVP names never include spaces in them)
Configuring a RIA page to extract data from Document Intelligence Key Value Pairs.
Create A RIA Page
-
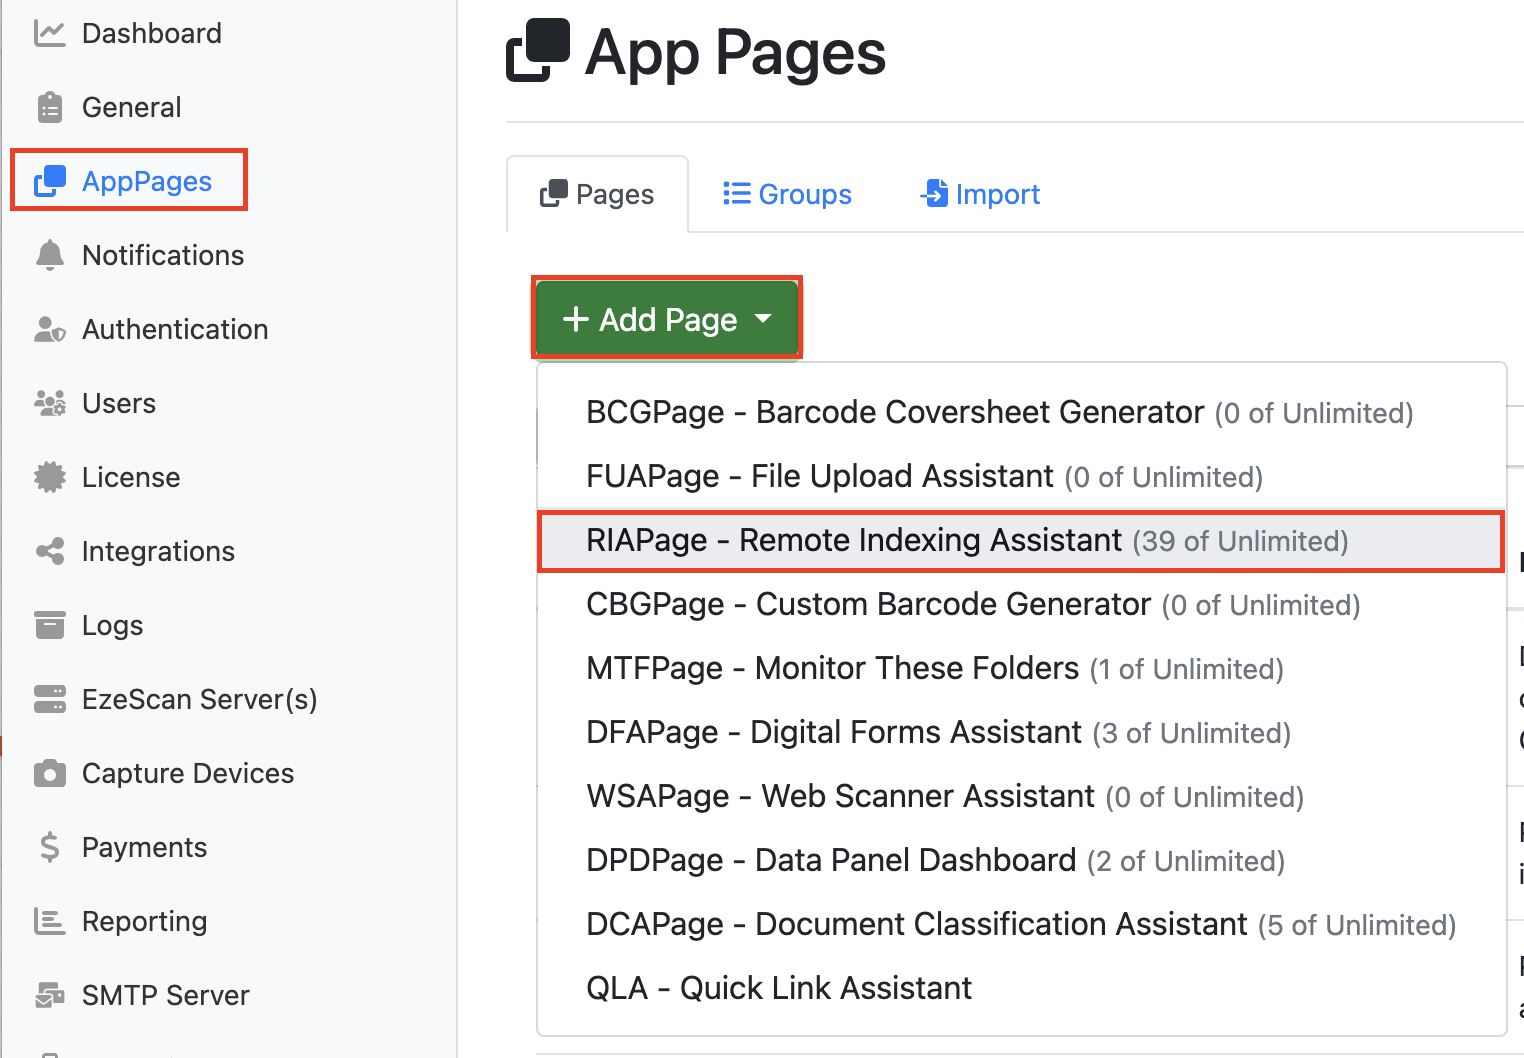
Create a new RIA Page. Go to the App Page tab on the Admin Menu, Pages Tab, + Add Page and select RIAPage - Remote indexing Assistant from the drop-down menu.
-
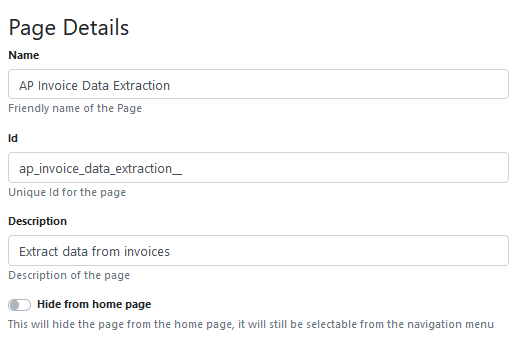
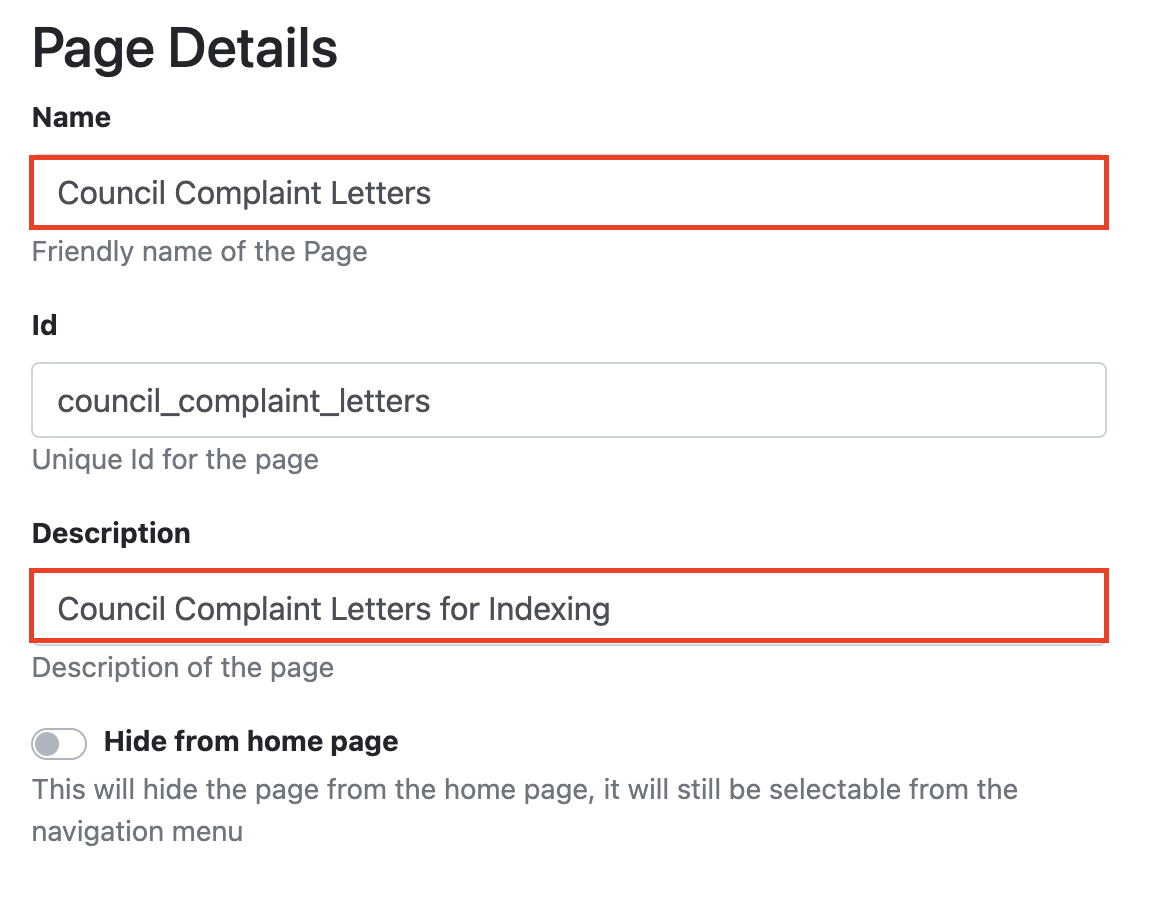
Give your RIA page a Name and Description.
-
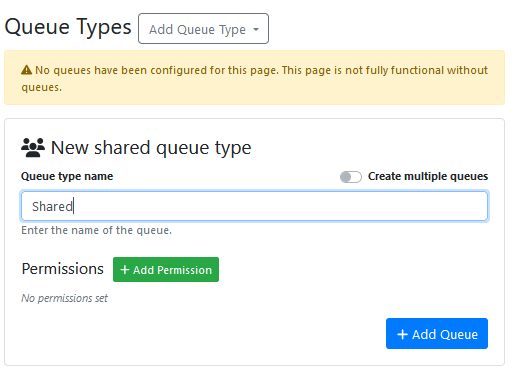
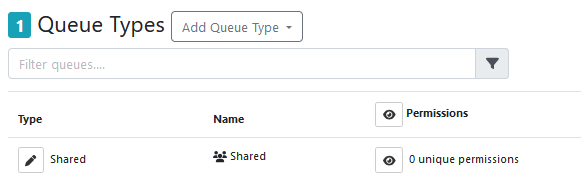
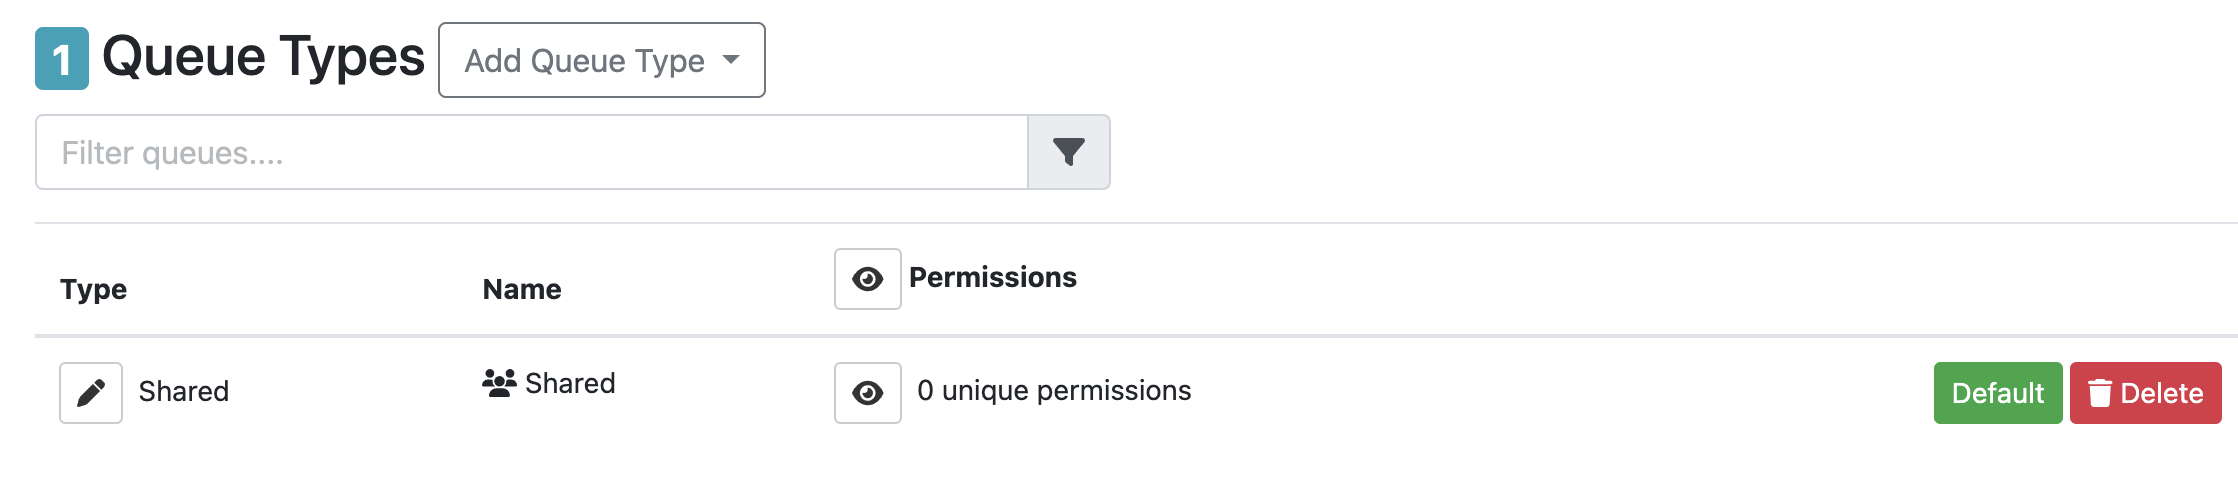
Create a Queue, and assign it
-
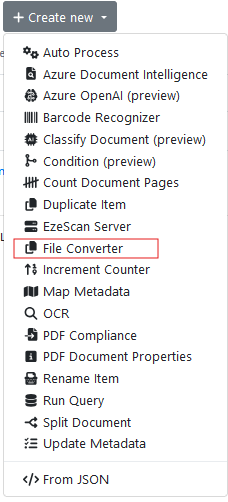
Go to the Pre-Processing Tab, Select + Create New and select File Converter from the drop down.
(Note: This file converter will be used to help to convert input documents that aren’t in PDF format to PDF format)
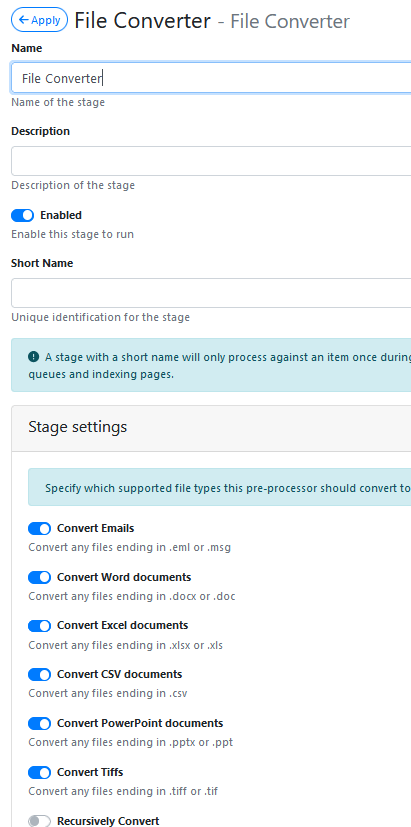
Name it as ‘File Converter’
Apply and Save the changes.
-
Go to the Pre-Processing Tab, Select + Create New and select Azure Document Intelligence from the drop down.
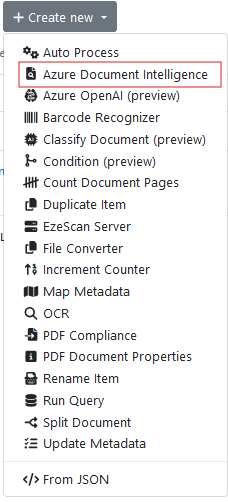
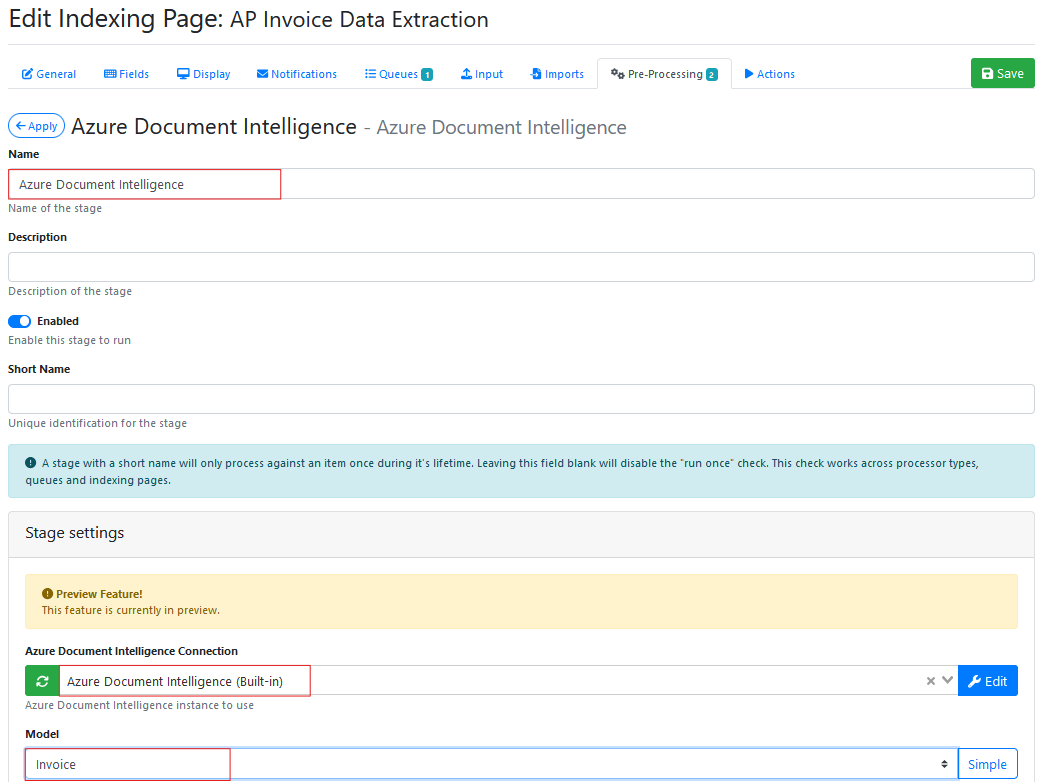
Name it as Azure Document Intelligence.
Select Azure Document Intelligence (Built-in) from the Azure Document Intelligence Connection drop down list.
Select ‘Invoice from the model type drop down list.
Scroll down further and tick ‘Key Value Pairs’
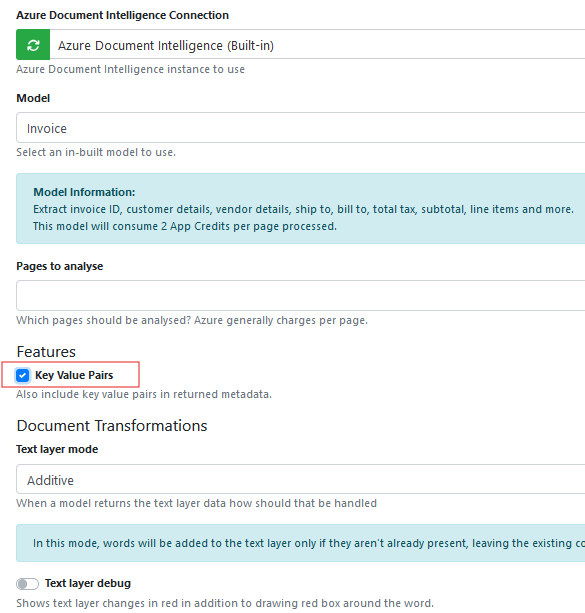
Apply and Save the changes.
-
Go to the Pre-Processing Tab, Select + Create New and select Map MetaData from the drop down.
Name it as Map KVP Metadata
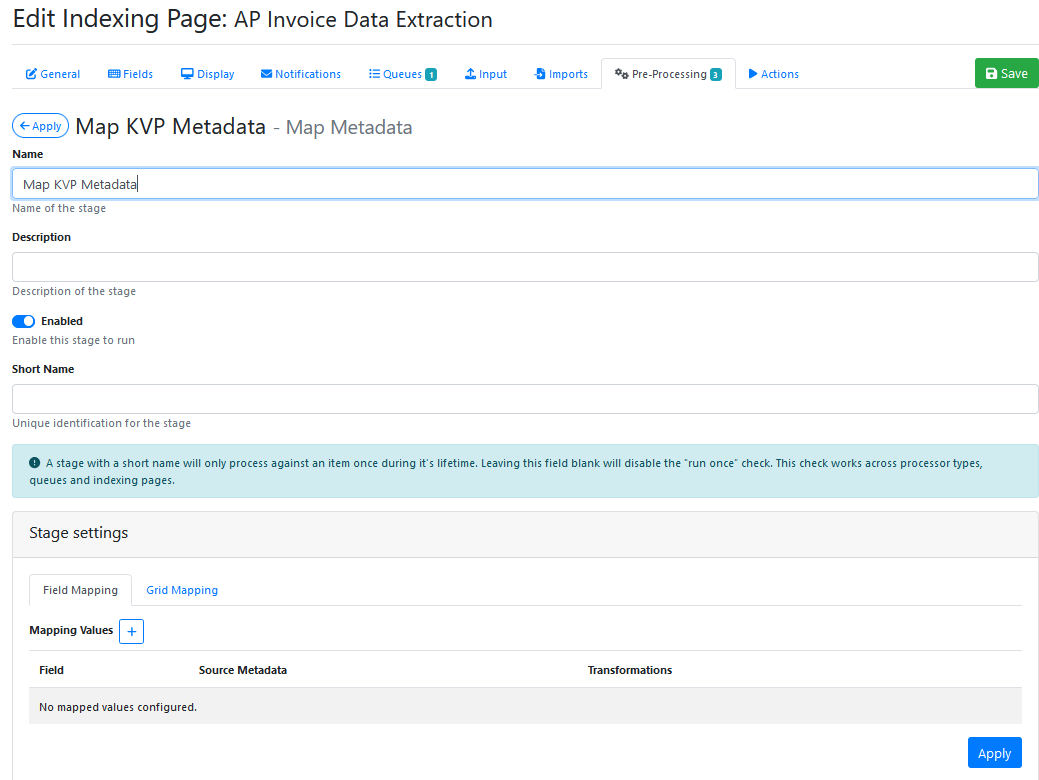
Apply and Save the changes you have made (even though no mappings were added at this time).
Note: Its not possible to map the actual Key Value Pairs yet, because you don’t know what names the Azure Document Intelligence (Built-in) Invoice model is going to generate.
When the first invoice is submitted to the RIA page and the Azure Document Intelligence pre-processor is run, look on the item history form, metadata tab it will display all of KVP name,value pairs returned by the model.
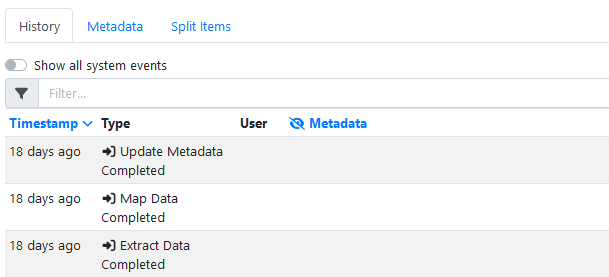
Click on the Metadata tab. The key value pairs and grid items are displayed. This can be a long list, so remember to scroll down to see more.
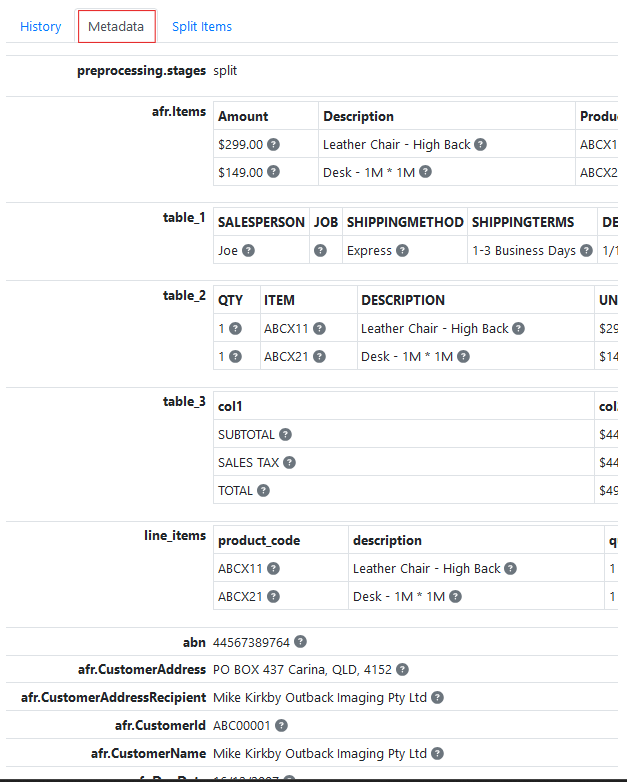
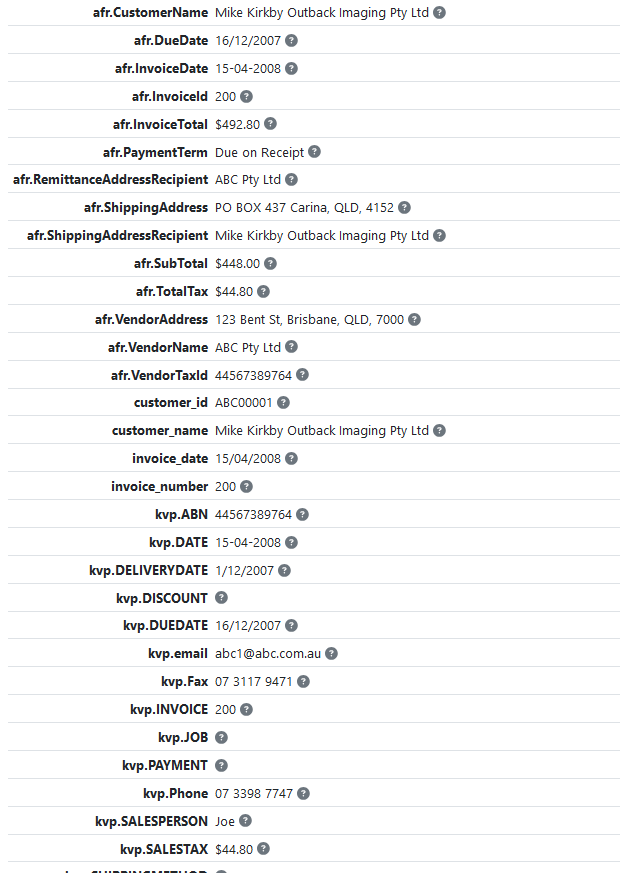
Find the KVP values that you want to display in the RIA Page fields.
Let's use these 2 results to show how this is done.
afr.InvoiceId 200
afr.InvoiceDate 15/04/2008
-
Edit the RIA App page and create 2 fields.
Invoice Date
Invoice Number
Hint: Write these field names down, so you can recall them for use in the next step.
Apply and Save the field edits that you made.
-
Edit Map KVP Metadata pre-processor that you created earlier.
On the Field Mapping tab , press the Mapping Values + button, to add new mapped values.
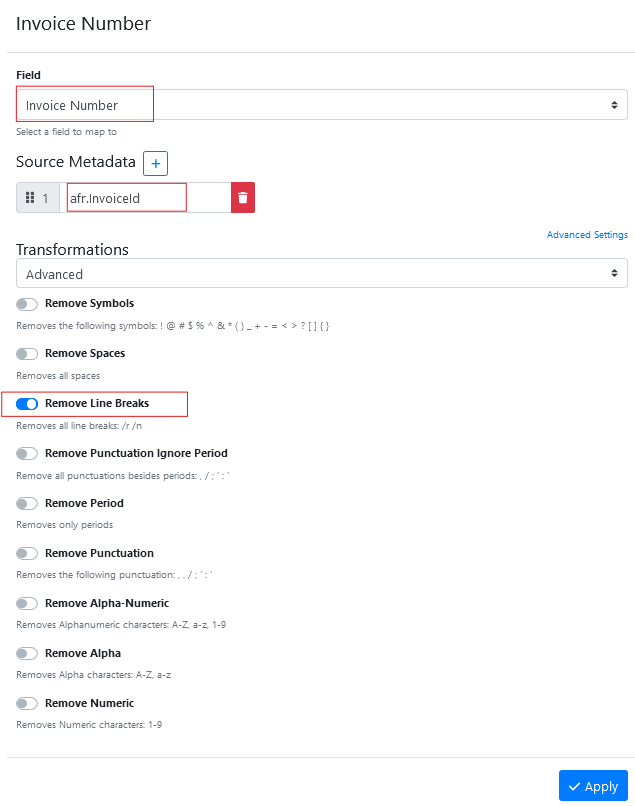
Select the field named ‘Invoice Number’ from the list.
Insert the text afr.InvoiceId into #1 mapping box (hint: it is case sensitive so make sure you type it exactly as it was displayed on the item history metadata tab)
Enable any transformations that you want to apply to the KVP data as it is read into the field.
Press Apply to save the new field mapping.
Repeat this step again for the Invoice Date field.
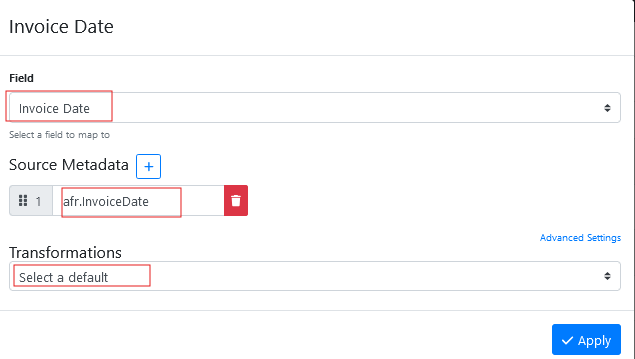
Select the field named ‘Invoice Date’ from the list.
Insert the text afr.InvoiceDate into #1 mapping box (hint: it is case sensitive so make sure you type it exactly as it was displayed on the item history metadata tab)
Enable the transformations that you wan to apply to the KVP data as it is read into the field.
Press Apply to save the new field mapping.
Repeat these steps for all the the invoice field data that you want to map across into other app page fields.
-
Once you’ve added your app page fields, added the File Converter pre-processor, added the Azure Document Intelligence Invoice Model pre-processor, added the Map KVP Metadata pre-processor and mapped the KVP pairs, you should drag and drop one of your sample invoices onto the app page.
-
All going well, the Azure Document Intelligence pre-processor should OCR the pages and create KVP data from the OCR data. The Map KVP Metadata pre-processor should map the KVP data into the relevant fields on the RIA page. The OCR data should automatically populate the app page fields.
-
Troubleshooting. If no data is displayed , check each of the pre-processor logs for the presence of any errors and check that the Item History Metadata tab to make sure the KVP is being generated, and then double check you didn’t make a typo in the Map Metadata screens for each mapping that you set up. Repeat the process of resolving each error and retesting until it works.
7.2. Use Azure Document Intelligence pre-processor ‘Read' Model, with an Open AI pre-processor
Configuring a RIA page to extract OCR data using an Open AI chat bot.
-
Create a new RIA Page. Go to the App Page tab on the Admin Menu, Pages Tab, + Add Page and select RIAPage - Remote indexing Assistant from the drop-down menu.
-
Give your RIA page a Name and Description.
-
Assign your page a Queue.
-
Go to the Pre-Processing Tab, Select + Create New and select File Converter from the drop down.
(Note: This file converter will be used to help to convert input documents that aren’t in PDF format to PDF format)
Name it as ‘File Converter’
Apply and Save the changes.
-
Go to the Pre-Processing Tab, Select + Create New and select Azure Document Intelligence (Built-in) from the drop down.
Name it as Azure Document Intelligence.
Select Azure Document Intelligence (Built-in) from the Azure Document Intelligence Connection drop down list.
Select Read from the model type drop down list.
Apply and Save the changes.
This will provide an OCR text layer to any downstream AI pre-processor.
-
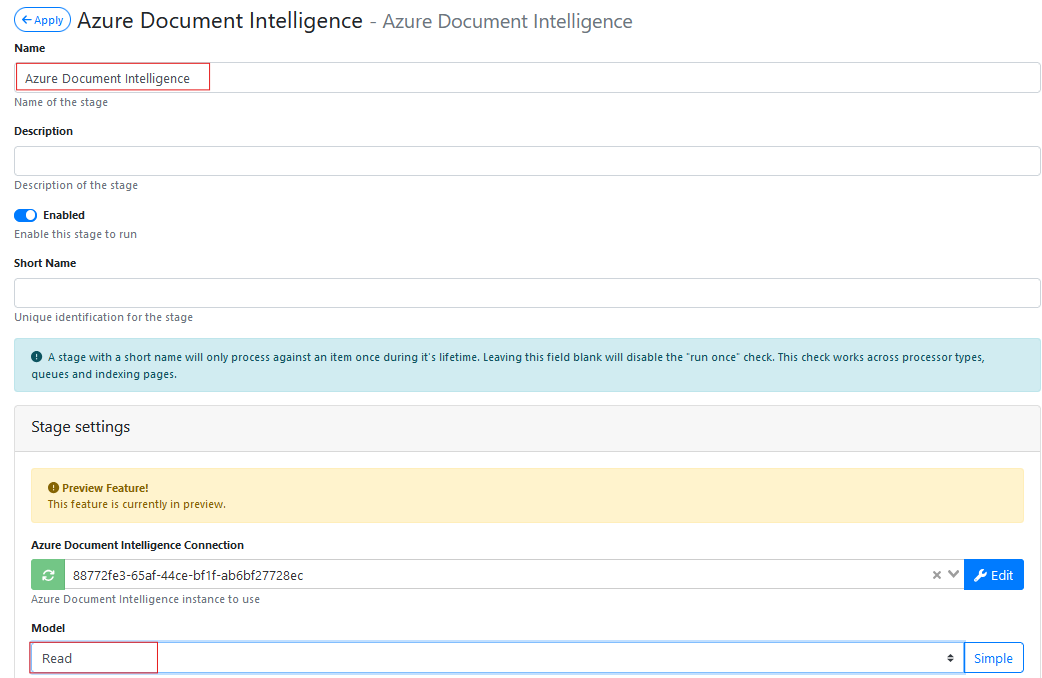
Go to the Pre-Processing Tab, Select + Create New and select Azure OpenAI from the drop down.

Give your pre-processor a Name and Description.

From the Azure OpenAI Connection drop down Select Azure OpenAI (Built In).

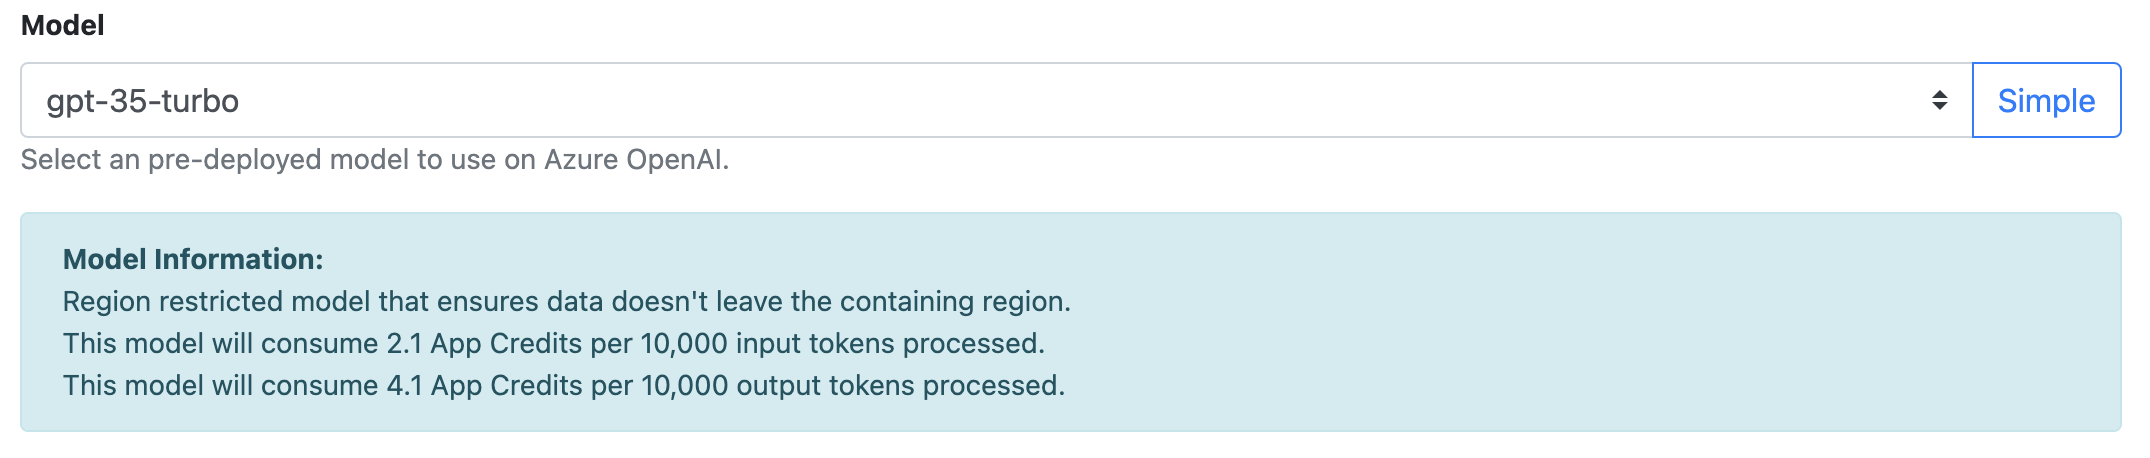
Select a Model from the drop-down menu.
|
Model |
|
Input Tokens |
Output Tokens |
|---|---|---|---|
|
gpt-35-turbo |
Region Restricted model that ensures data doesn't leave the containing region. |
2.1 App Credits per 10,000 input tokens processed |
4.1 App Credits per 10,000 output tokens processed. |
7 a) There are 2 payloads that can be returned by the OpenAI pre-processor.
The first type of payload is a single command payload as demonstrated below:
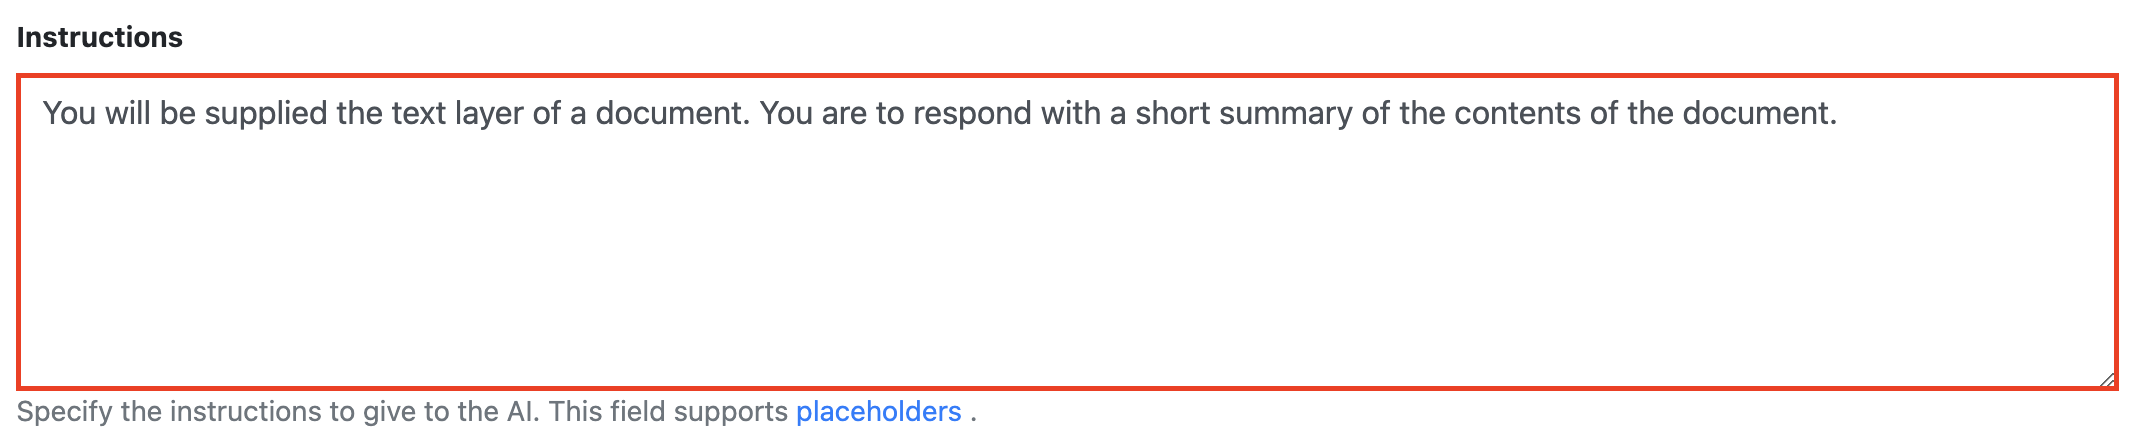
Configure the chat bot Instructions field to return what you are after.
The default instruction will be “You will be supplied the text layer of a document. You are to respond with a short summary of the contents of the document”.
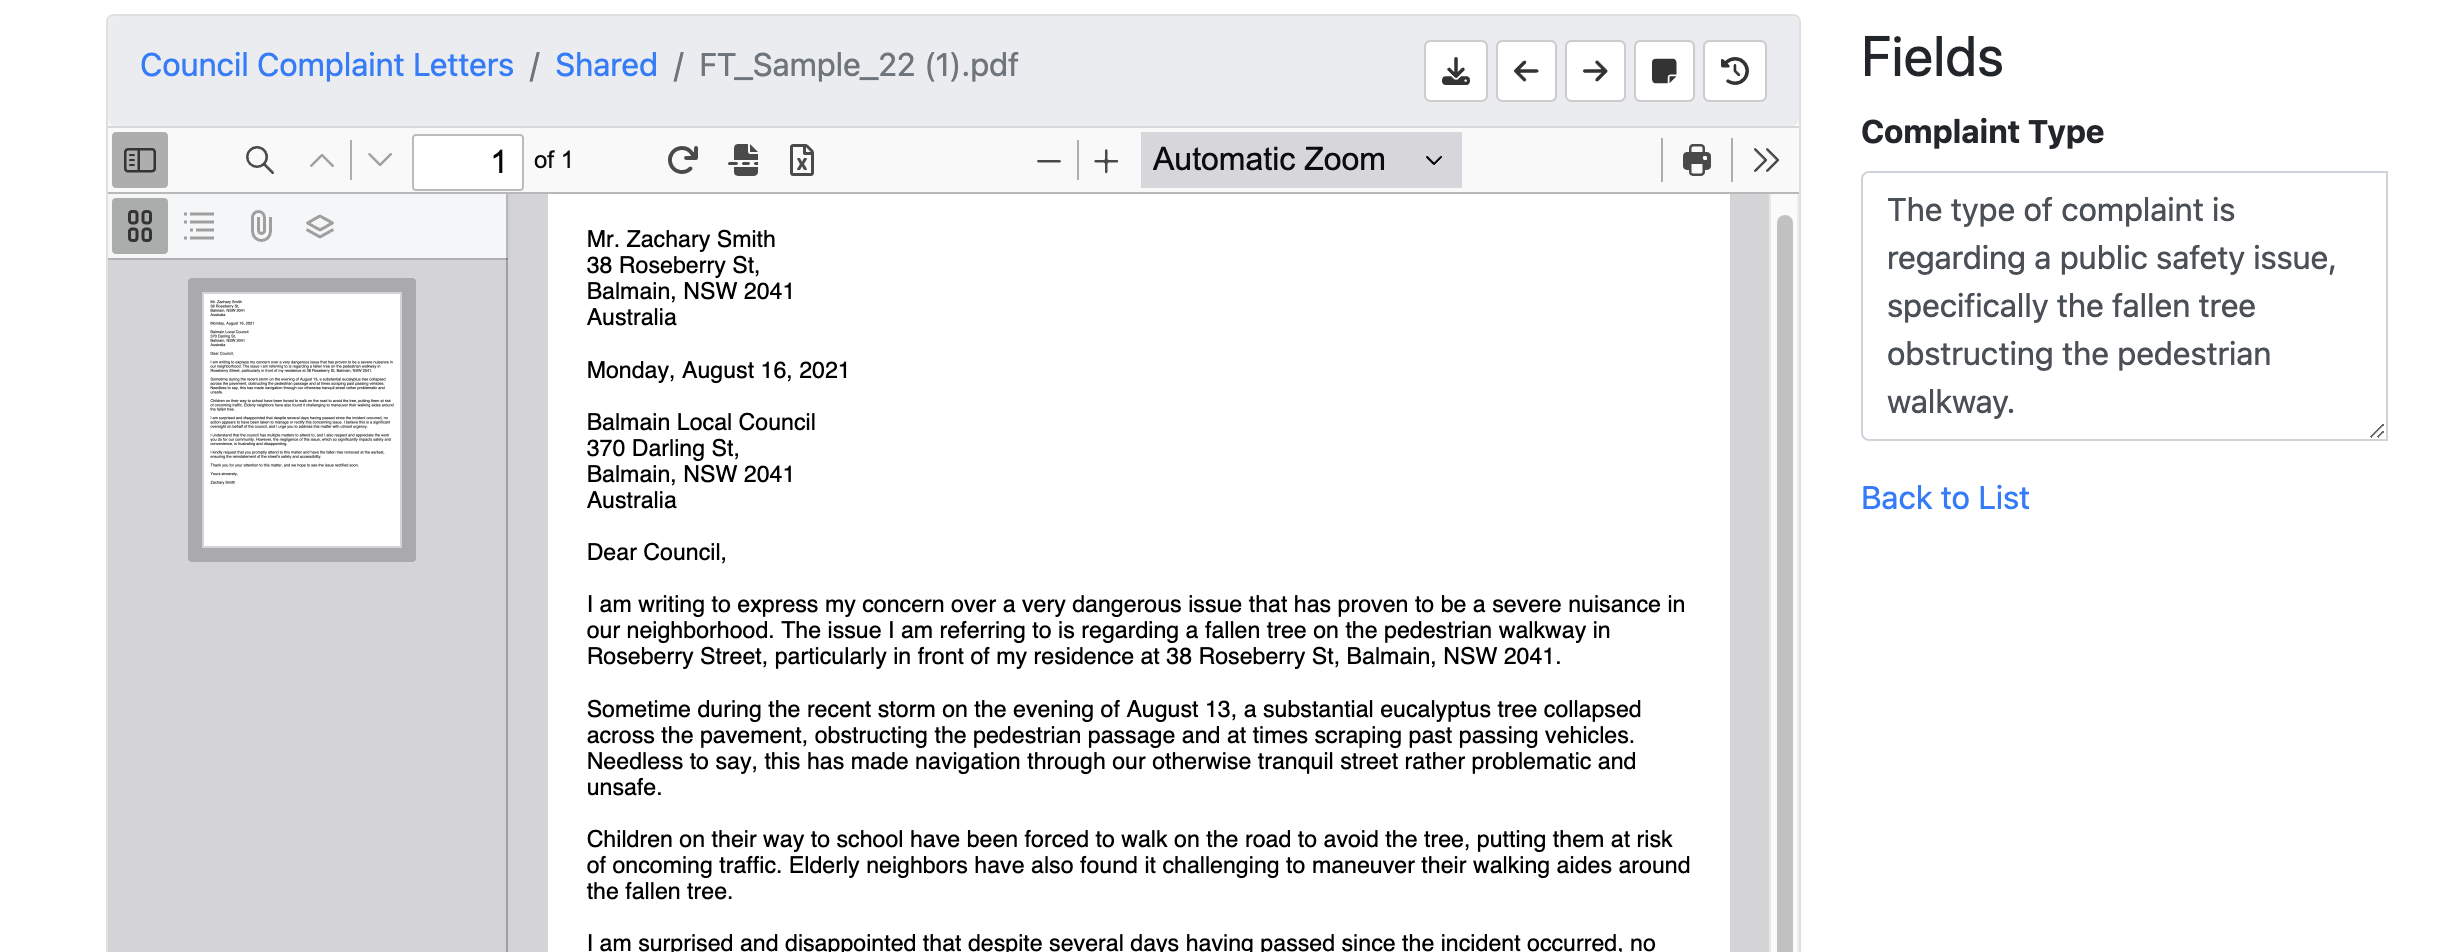
In the following example we are asking the AI engine to return what the complaint is about.
|
You will be supplied with the text layer of a complaint letter. You are to respond with the type of complaint. |
The target Metadata Id is the id that will call the OpenAI results in on the RIA page. You will need to create a RIA field with this ID.

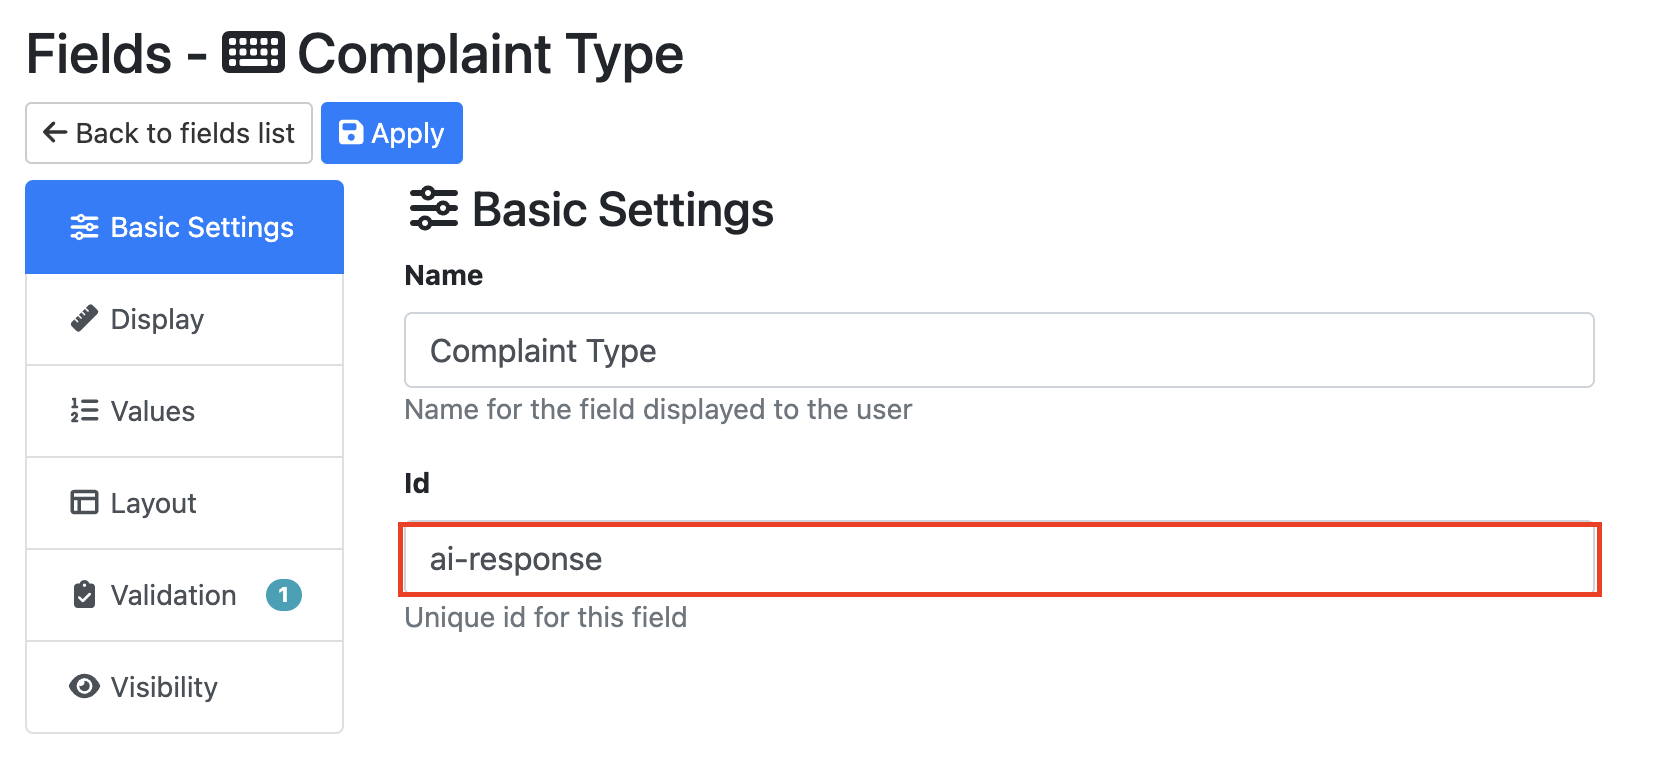
When indexing a document you will see the response from the AI engine in the corresponding field.
Simply re-configure the chat bot instructions to modify the result.
In the following example, we asked the engine to return it in 5 words.
|
You will be supplied with the text layer of a complaint letter. You are to respond with the type of complaint in 5 words or less. |

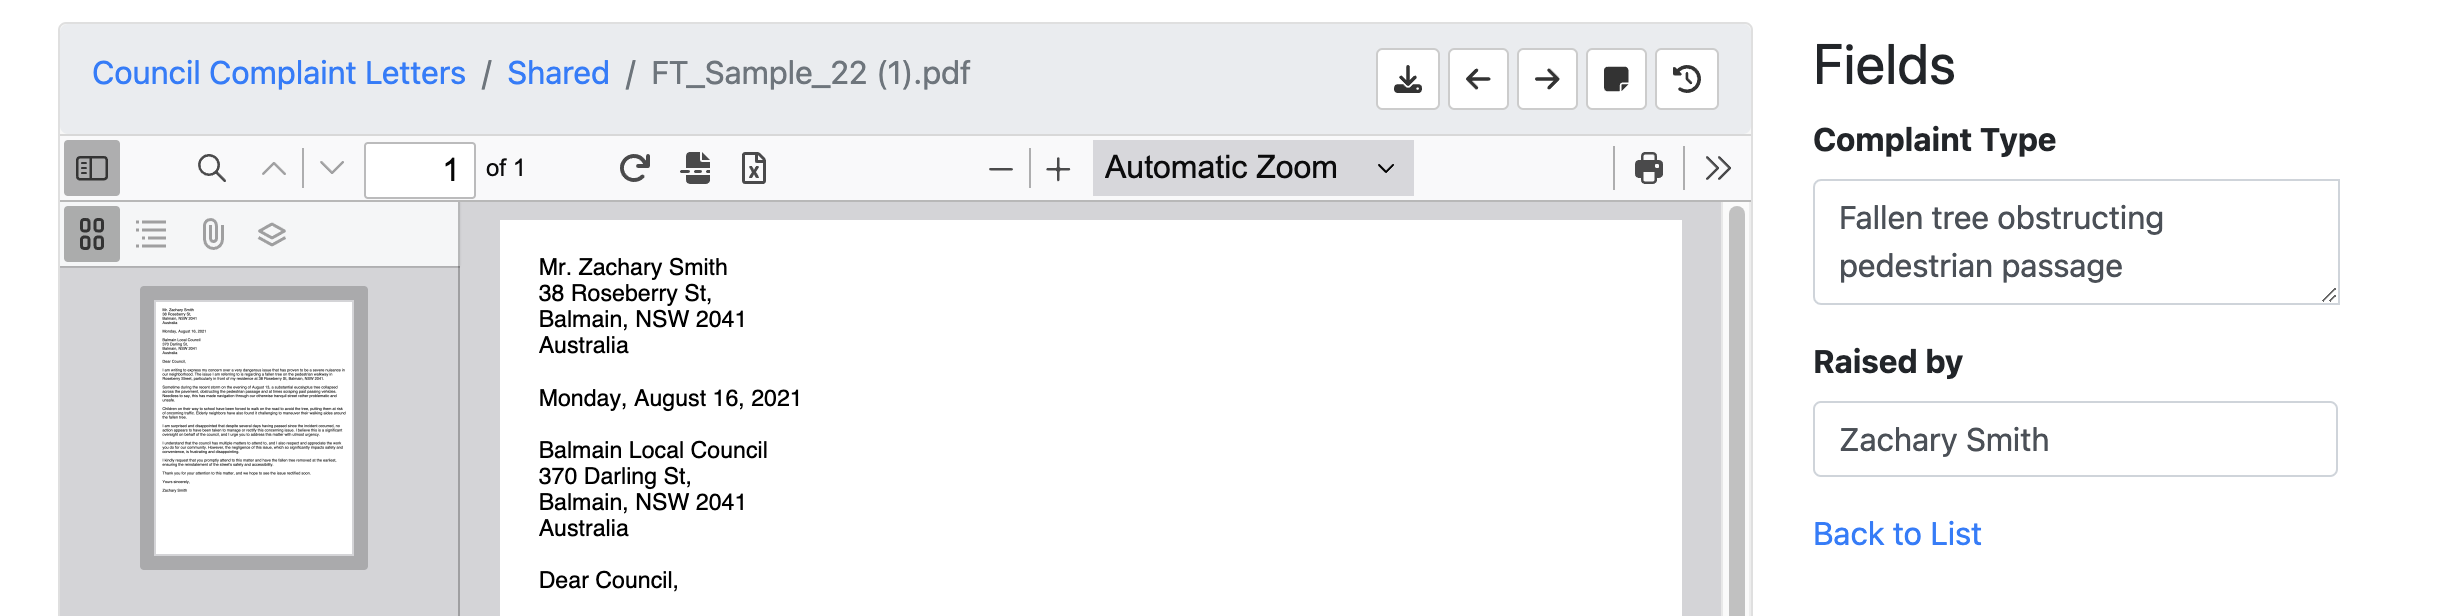
7b. The second type of payload is a multi value JSON payload as demonstrated below:
Returning Multiple Results
We can also use the OpenAI engine to return multiple results that we can link to different metadata fields by parsing the results as JSON. Find the Parse response as JSON toggle and turn it on.

You will need to modify the Instructions so that are asking the engine to respond with the following fields and how you want them mapped to your metadata fields.
In the following example, we are now asking the engine to also find who raised the complaint and return this as raised_by. This means we will need to create a new field with the Id raised_by.

Not sure how JSON works? Here is the base structure of how you can ask the AI engine in JSON. It is recommended you keep the text in black and only modify that in red.
You will be supplied with the text layer of a complaint letter. You are to respond with the following fields:
"Type of complaint in 5 words" as complaint_type
"Person who submitted the complaint" as raised_by
If no value for a field is found then leave it blank
You are to respond with a JSON object. You will reply only with the JSON itself, and no other descriptive or explanatory text.
The engine has now populated both metadata fields.
7.3. Using an OCR pre-processor, with an Open AI pre-processor
Configuring a RIA page to extract OCR data using an Open AI chat bot.
-
Create a new RIA Page. Go to the App Page tab on the Admin Menu, Pages Tab, + Add Page and select RIAPage - Remote indexing Assistant from the drop-down menu.
-
Give your RIA page a Name and Description.
-
Assign your page a Queue.
-
Go to the Pre-Processing Tab, Select + Create New and select File Converter from the drop down.
(Note: This file converter will be used to help to convert input documents that aren’t in PDF format to PDF format)
Name it as ‘File Converter’
Apply and Save the changes.
-
Go to the Pre-Processing Tab, Select + Create New and select OCR from the drop down.
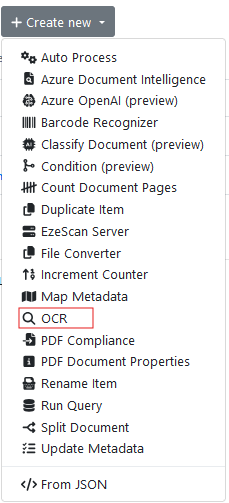
Name it as OCR.
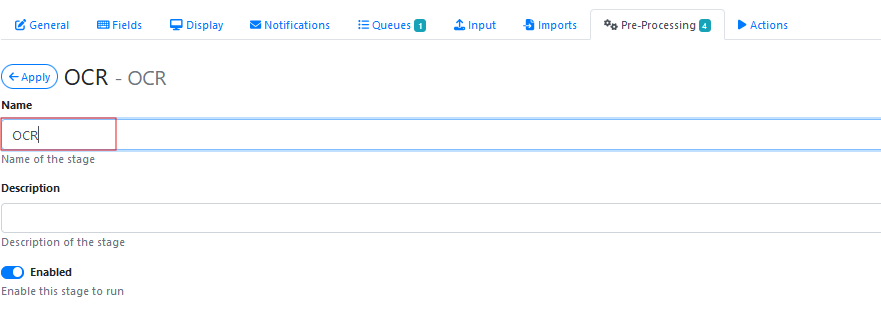
This will provide an OCR text layer to any downstream AI pre-processor.
-
Go to the Pre-Processing Tab, Select + Create New and select Azure OpenAI from the drop down.
Give your pre-processor a Name and Description.
From the Azure OpenAI Connection drop down Select Azure OpenAI (Built In).
Select a Model from the drop-down menu.
|
Model |
|
Input Tokens |
Output Tokens |
|---|---|---|---|
|
gpt-35-turbo |
Region Restricted model that ensures data doesn't leave the containing region. |
2.1 App Credits per 10,000 input tokens processed |
4.1 App Credits per 10,000 output tokens processed. |
7a. There are 2 payloads that can be returned by the OpenAI pre-processor.
The first type of payload is a single command payload as demonstrated below:
Configure the chat bot Instructions field to return what you are after.
The default instruction will be “You will be supplied the text layer of a document. You are to respond with a short summary of the contents of the document”.
In the following example we are asking the AI engine to return what the complaint is about.
|
You will be supplied with the text layer of a complaint letter. You are to respond with the type of complaint. |
The target Metadata Id is the id that will call the OpenAI results in on the RIA page. You will need to create a RIA field with this ID.
When indexing a document you will see the response from the AI engine in the corresponding field.
Simply re-configure the chat bot instructions to modify the result.
In the following example, we asked the engine to return it in 5 words.
|
You will be supplied with the text layer of a complaint letter. You are to respond with the type of complaint in 5 words or less. |
7b. The second type of payload is a multi value JSON payload as demonstrated below:
Returning Multiple Results
We can also use the OpenAI engine to return multiple results that we can link to different metadata fields by parsing the results as JSON. Find the Parse response as JSON toggle and turn it on.
You will need to modify the Instructions so that are asking the engine to respond with the following fields and how you want them mapped to your metadata fields.
In the following example, we are now asking the engine to also find who raised the complaint and return this as raised_by. This means we will need to create a new field with the Id raised_by.
Not sure how JSON works? Here is the base structure of how you can ask the AI engine in JSON. It is recommended you keep the text in black and only modify that in red.
You will be supplied with the text layer of a complaint letter. You are to respond with the following fields:
"Type of complaint in 5 words" as complaint_type
"Person who submitted the complaint" as raised_by
If no value for a field is found then leave it blank
You are to respond with a JSON object. You will reply only with the JSON itself, and no other descriptive or explanatory text.
The engine has now populated both metadata fields.
8. Some Tips For Setting Up An AI Demo
If you are trying to setup a RIA page to use AI to populate the fields for a demo
-
When creating a new field that will be populated from AI (especially OpenAI), consider just using a Custom text field (text box or text area)
-
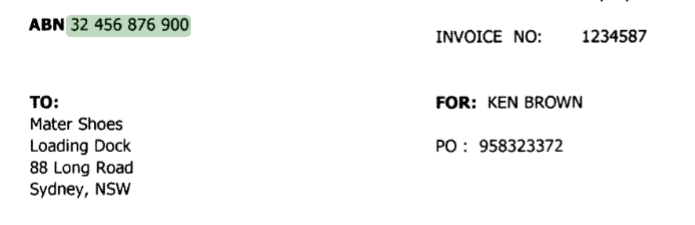
By using a custom field, instead of a numeric field you will find that the OCR data found by the AI process such as an ABN number (e.g. 23 101 456 898) will be displayed in the field, without first having to remove spaces from it.
-
By using a custom field, instead of a numeric field you find that the OCR data found by the AI process such as Invoice Total (e.g. $1,634.31) will be displayed in the field, without having to remove comma’s from it.
-
By using a custom field, instead of a date field you find that the OCR data found by the AI process such as Invoice Date (e.g.24th September, 2024) will be displayed in the field, without having to first convert the date into a DD/MM/YYYY.
-
This also helps to improve the usability of Find Value in viewer on focus option, available on the field Values tab.
-

When enabled at the field level, if you click in the field of the RIA page indexing panel, the corresponding area of the image where the AI found the data will be highlighted in green as shown below.

The viewer displays this green highlighting over the image where the data is located.
-
When using custom fields for AI data, you may need to use an Update Metadata stage to clean up the data (e.g. remove spaces, remove comma’s, convert date to a specific format) when the data is being written out during the Submit button action.
For example below, it shows the Mapping Values needed to:
-
remove all spaces from abn_number field output
-
convert long spaces to short spaces in supplier_name field output
-
remove all spaces from invoice_amount field output
-
replace comma with nothing in gst_amount field output
-
replace comma with nothing in invoice_total field output
-
format a variable date string in dd/mm/yyyy format
Here is some of the mappings that were used to help clean up the data as it was output.
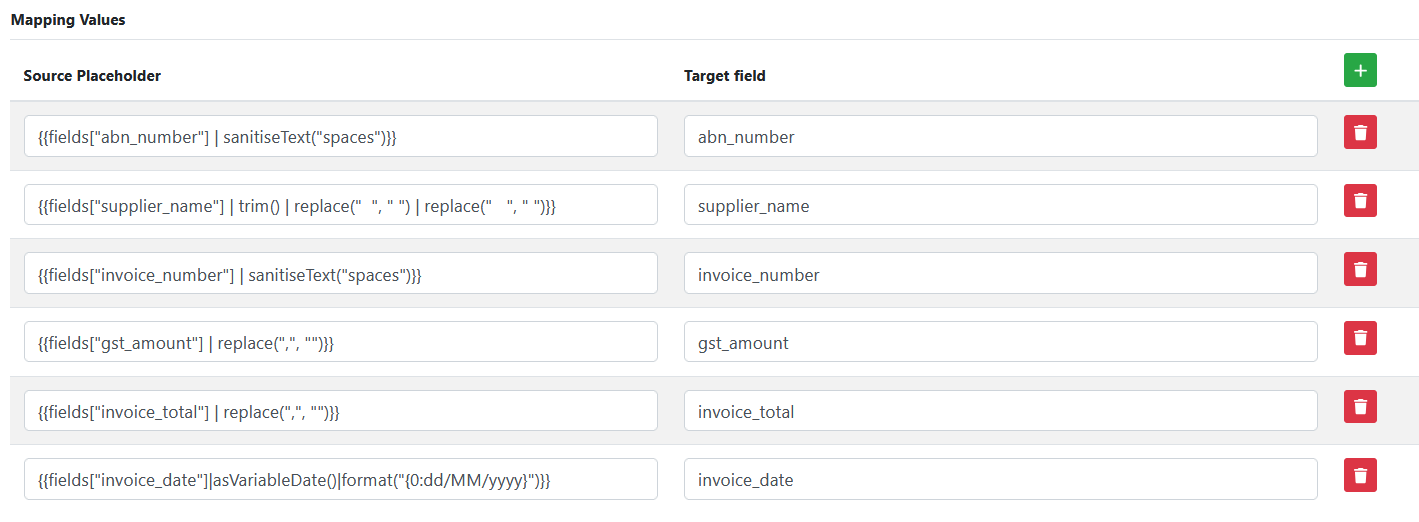
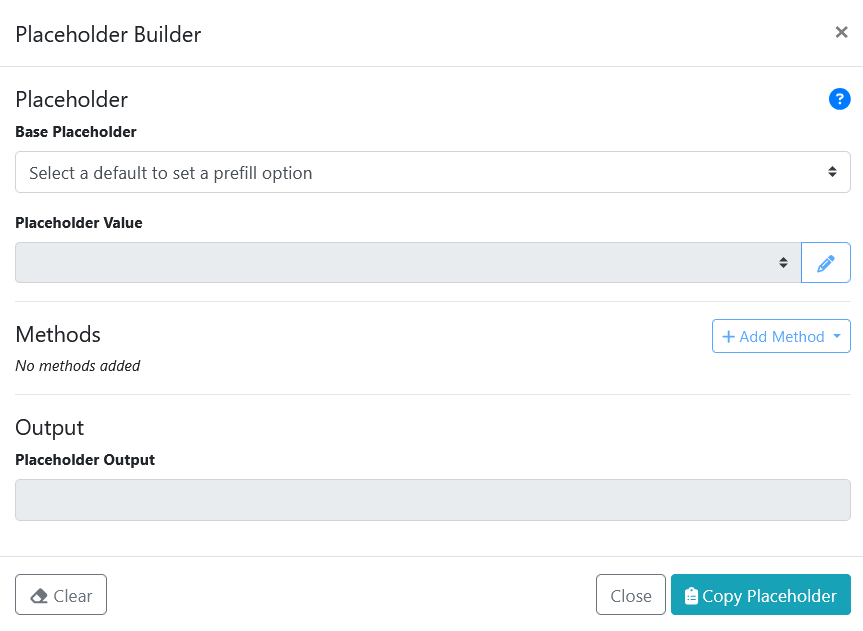
These source placeholders were built using the Placeholder Creator tool. Each placeholder value created in the tool was cut and pasted into the applicable source placeholder cell. The tool is visible when using the Admin panel in WebApps.

The Placeholder Builder form is shown below.