
If you have multiple Azure AD tenants that you want to allow EzeScan WebApps to authenticate with then please follow the steps below.
-
Set up the app registration in one of the tenants by following only the “Setting up Authentication” section on Authenticating with Azure AD via OpenID Connect
-
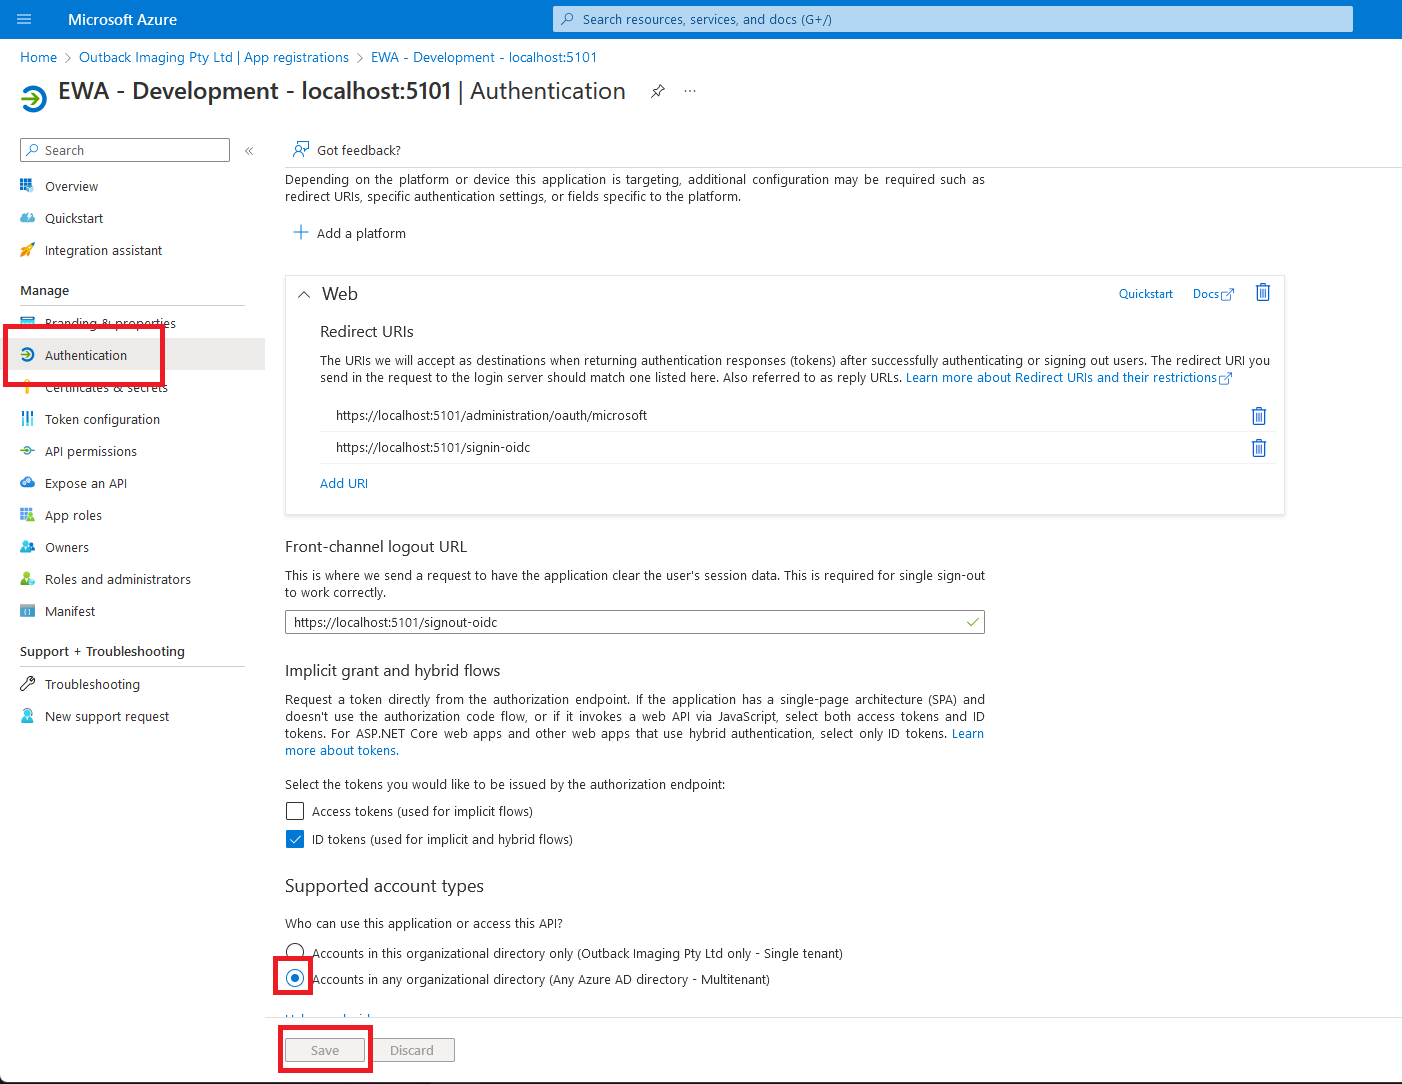
Navigate to the Azure AD portal and then change the app registration authentication settings supported account types from Single tenant to Accounts in any organizational directory (Any Azure AD directory - Multitenant)
-
On the EzeScan WebApps server, edit your appsettings.json file Authentication section to contain the following:
JSON"Authentication": { "EnableApiKey": true, "Providers": { "OpenIdConnect": { "Authority": "https://login.microsoftonline.com/common/v2.0", "ClientId": "[Application (client) ID]", "MetadataAddress": "https://login.microsoftonline.com/common/v2.0/.well-known/openid-configuration", "TokenValidationParameters": { "NameClaimType": "name", "ValidIssuers": [ "https://login.microsoftonline.com/[Directory (tenant) ID]/v2.0", "https://login.microsoftonline.com/[Directory (tenant) ID]/v2.0" ] } } } }Note: Create an entry in the ValidIssuers array for each tenant you want to allow.
-
Confirm your Authentication section now looks like the following and save the file.
JSON"Authentication": { "EnableApiKey": true, "Providers": { "OpenIdConnect": { "Authority": "https://login.microsoftonline.com/common/v2.0", "ClientId": "00000000-0000-0000-0000-00000000000000", "MetadataAddress": "https://login.microsoftonline.com/common/v2.0/.well-known/openid-configuration", "TokenValidationParameters": { "NameClaimType": "name", "ValidIssuers": [ "https://login.microsoftonline.com/xxxxxxxxxxxxxxxxxxxxxxxxxx/v2.0", "https://login.microsoftonline.com/yyyyyyyyyyyyyyyyyyyyyyyyyy/v2.0" ] } } } }
-
Restart the IIS App Pool that runs EzeScan WebApps.
-
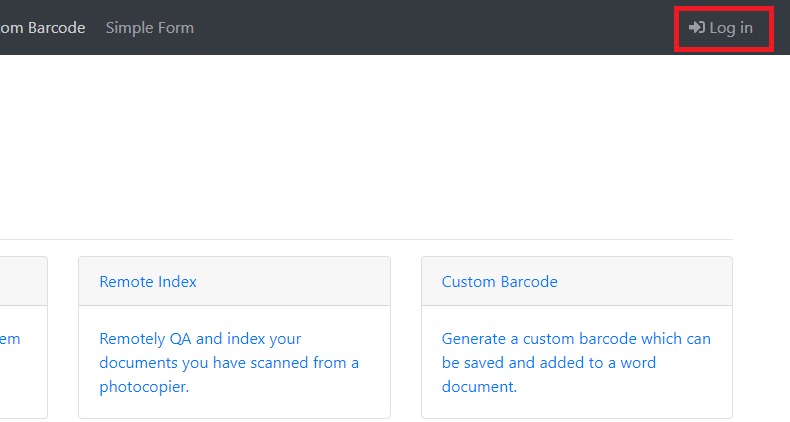
Navigate to your EzeScan WebApps site and click the Login button.
-
Login as an Azure AD Administrator, tick the Consent box and then click Accept.
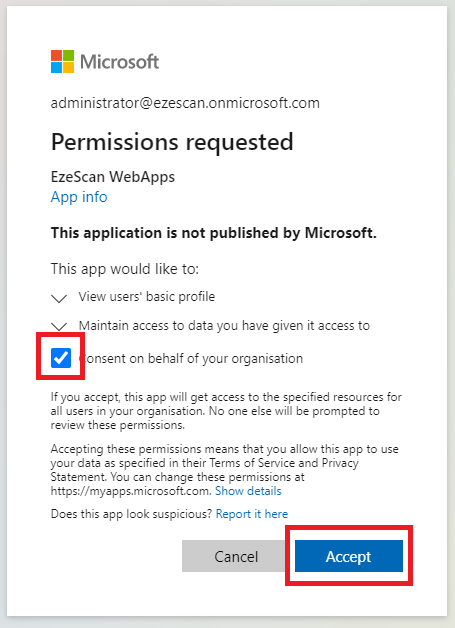
You will need to repeat this consent process for all of the domains you listed in the appsettings.json file.