Setting up SQL Server
Otherwise please ensure you have processed all files in all indexing pages before migrating as old data will not be moved.
Supported Versions:
- Microsoft SQL Server 2019, 2017
- Microsoft SQL Server Express 2019, 2017
Step-by-step guide
SQL Server Installation and Permissions
- If not installed, SQL Express and SQL Server Management Studio (SSMS) can be downloaded from https://www.microsoft.com/en-us/sql-server/sql-server-downloads
- Install using defaults (local and default named instance)
- Open SMSS and connect to your SQL server.
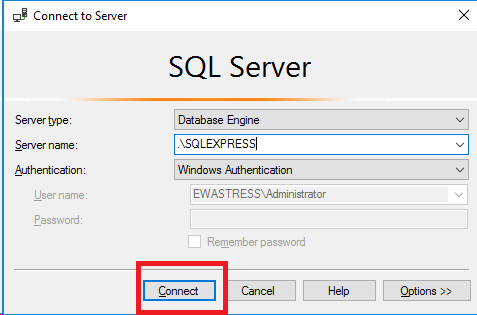
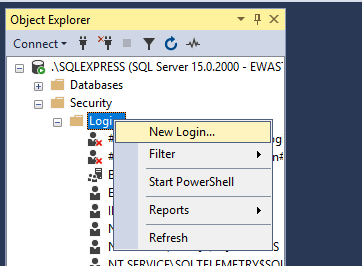
- Right click on Security > Logins and select New Login
Find the name of the AppPool in IIS that runs EWA and then enter "IIS APPPOOL\AppPoolName".
Important! Do not click the Search... button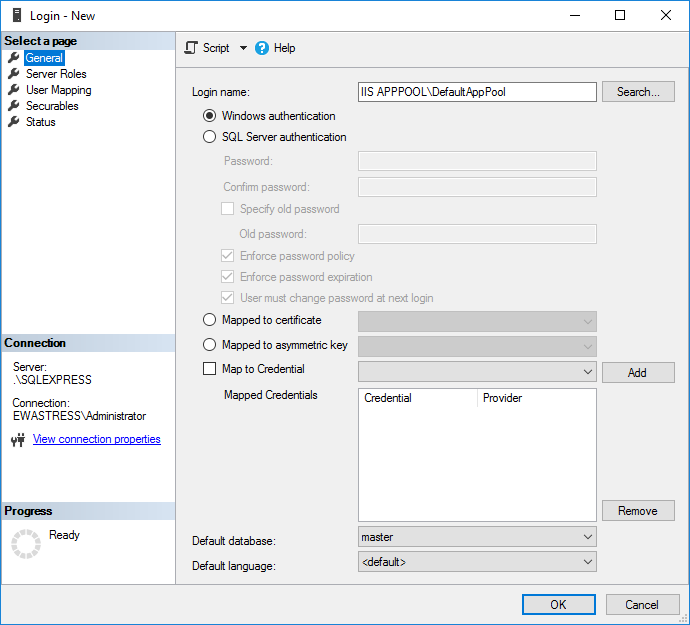
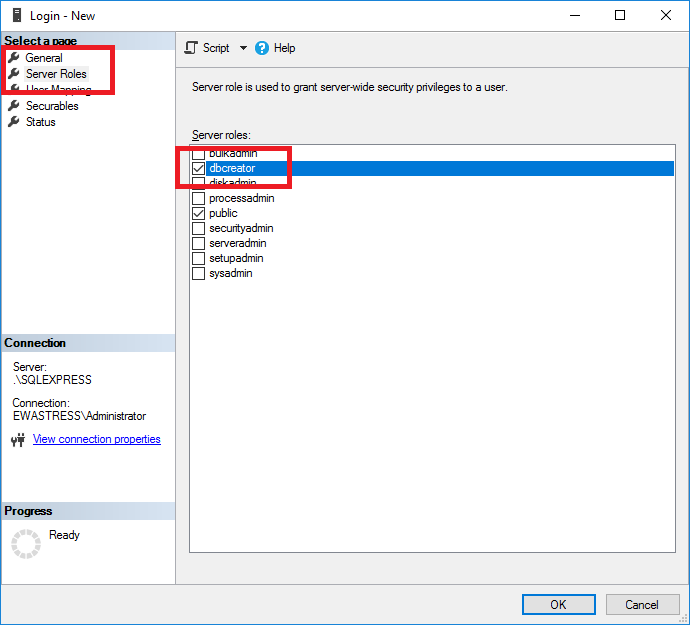
- Select the Server Roles option on the left and then tick the dbcreator server roll.
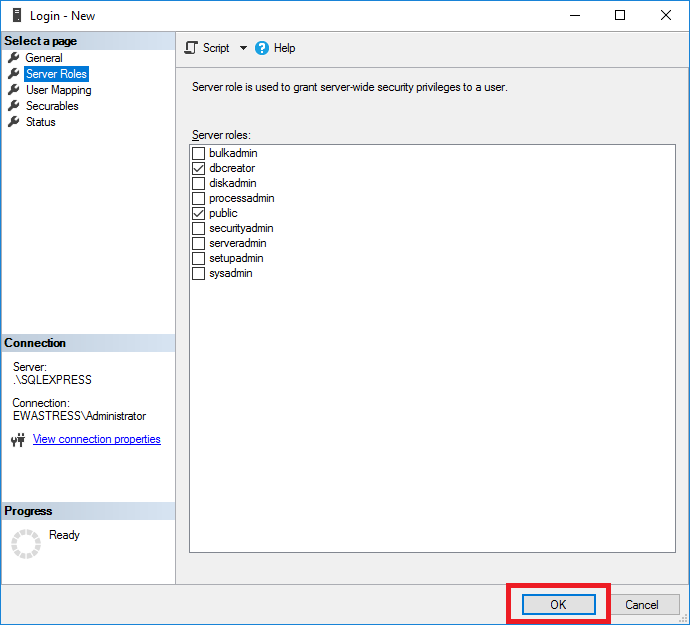
- Click the Ok button.
Configuring EzeScan WebApps to use the local default named instance of SQL Server
- Stop IIS.
- Navigate to the isntallation directory of EWA.
- Locate the appsettings.template.json file and copy it to appsettings.json
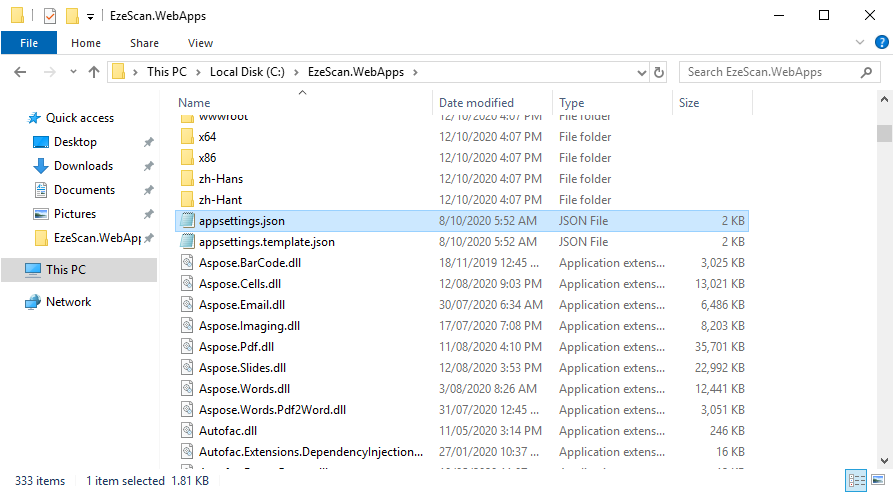
- Open the appsettings.json in a text editor and remove the underscore in front of the word apps.
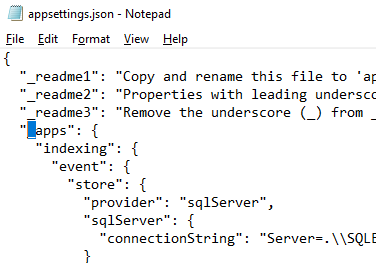
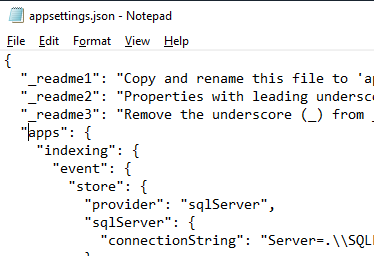
- Save and close the appsettings.json file.
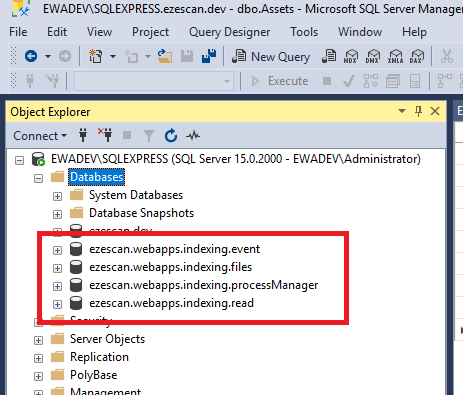
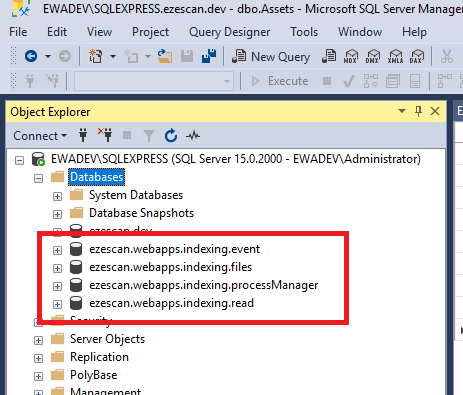
- Start IIS and then load the EzeScan WebApps webpage. Confirm the page loads without errors and then confirm in SQL Server Management Studio that the databases have been created.
Configuring EzeScan WebApps to use an SQL Server on another host
- Stop IIS.
- Navigate to the installation directory of EWA.
- Locate the appsettings.template.json file and copy it to appsettings.json
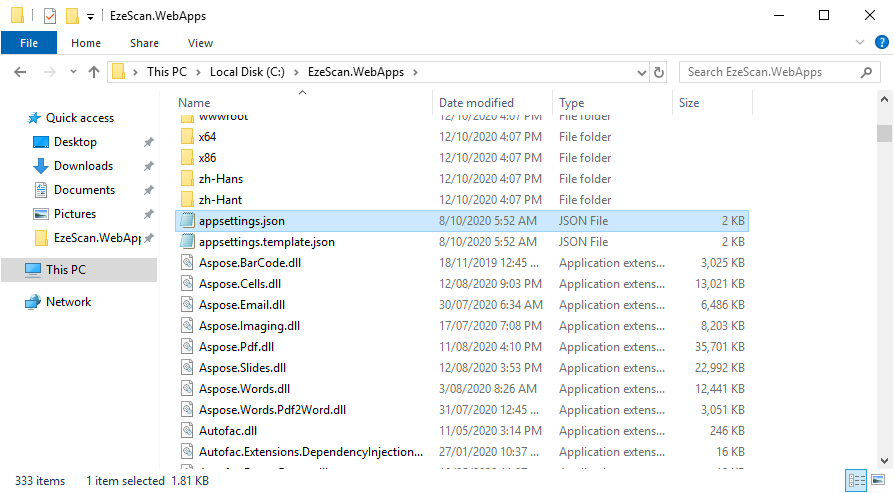
- Open the appsettings.json in a text editor and remove the underscore in front of the word apps.


Find and adjust the connection strings.
There is two ways to authenticate against a remote SQL server.Use Windows Authentication by configuring your IIS App Pool to run as a windows domain service account and then grant that account access to the MS SQL server in SQL Server Management Studio.
Example Connection String
SQL"connectionString": "Server=SERVER.DOMAIN.COM;Database=ezescan.webapps.indexing.event;Integrated Security=true;"Use SQL Authentication and pass in a username and password in the connection string.
Example Connection String
CODE"connectionString": "Server=SERVER.DOMAIN.COM;Database=ezescan.webapps.indexing.event;User Id=myUsername;Password=myPassword;"
- Start IIS and then load the EzeScan webpage. Confirm the page loads without errors and then confirm in SQL Server Management Studio that the databases have been created.
