-
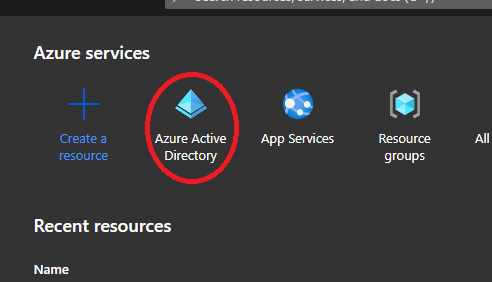
Navigate to the Azure Portal and select Azure Active Directory.
-
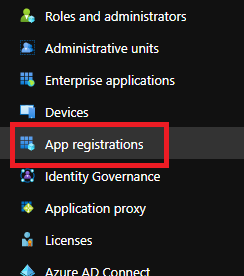
On the left menu select App Registrations.
-
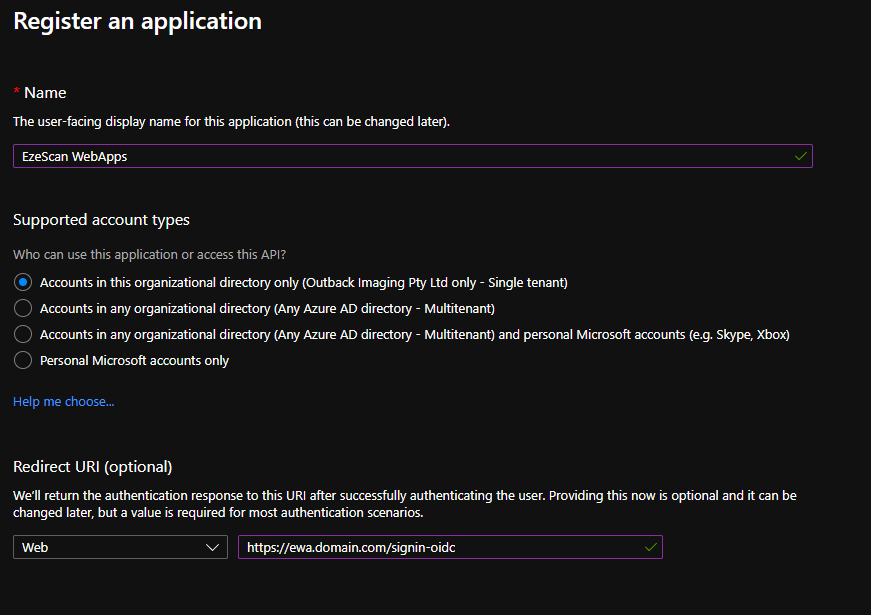
Enter the following details and then click the Register button:
Option
Value
Name
EzeScan WebApps
Supported account types
Accounts in this organizational directory only ([Your tenant name here] only - Single tenant)
Redirect URI
Web -
https://ewa.domain.com.au/signin-oidc
(Sub in the URL of your EWA install).
-
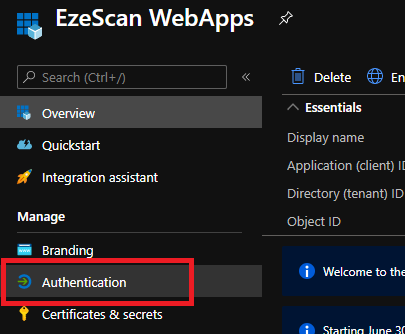
On the left menu click on the Authentication option.
-
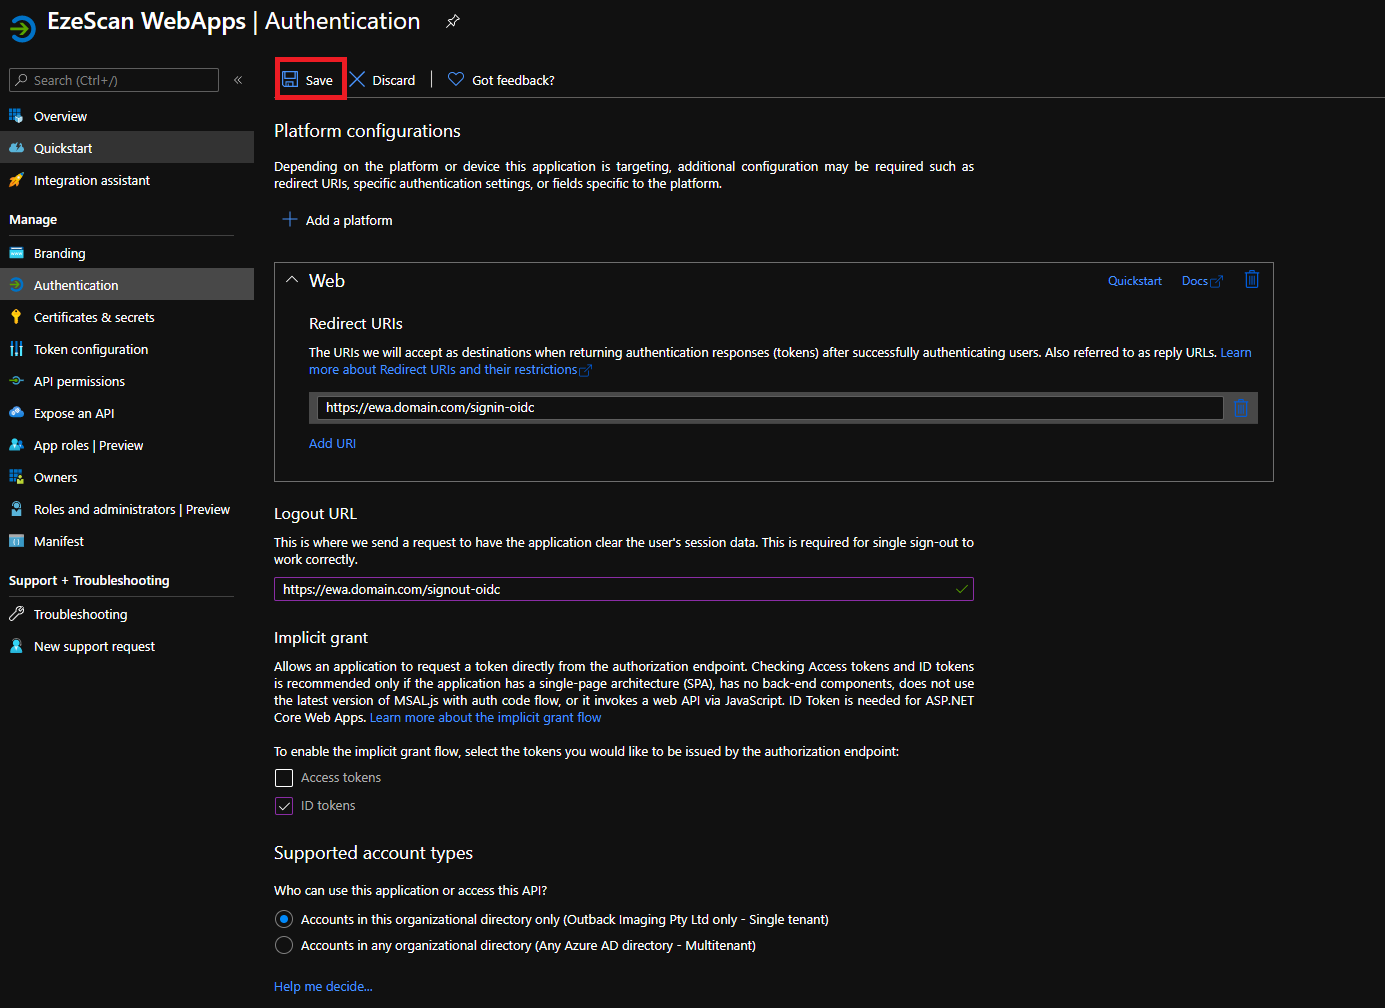
Set the following options and then click Save:
Option
Value
Logout Url
https://ewa.domain.com/signout-oidc
(Sub in the URL of your EWA install).
Implicit Grant
ID tokens
Supported Account Types > Who can use this application or access this API?
Accounts in this organizational directory only ([Your tenant name here] only - Single tenant)
Advanced Settings > Allow public client flows
No
-
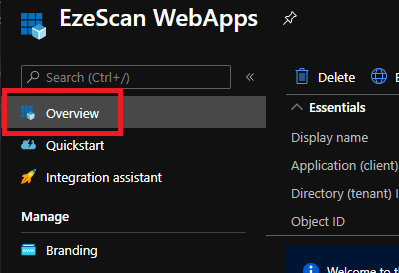
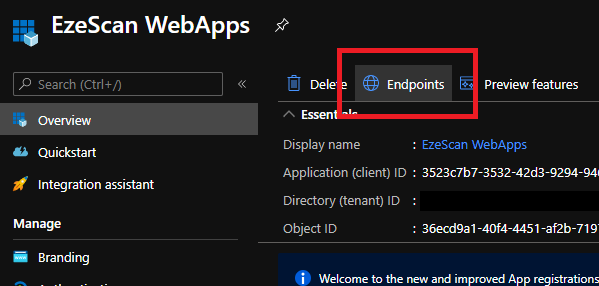
On the left menu select the Overview option.
-
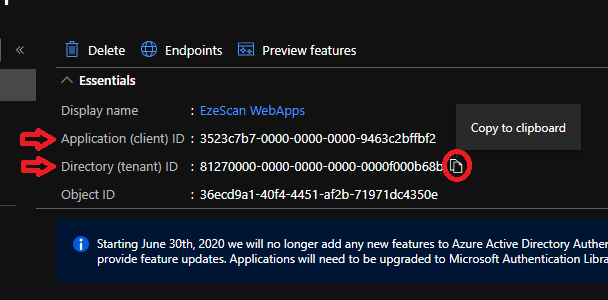
Take note of the Application (client) ID and the Directory (tenant) ID by mousing over then clicking the copy to clipboard button and saving them somewhere safe for later use.
-
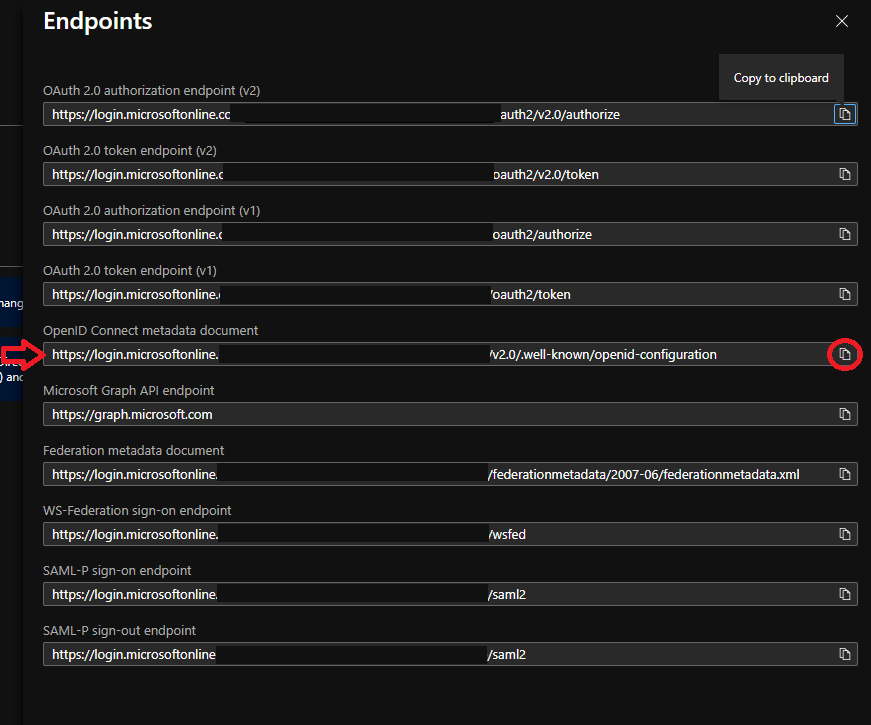
Click on the Endpoints option in the top menu.
-
Take note of the OpenID Connect metadata document URL by clicking the copy to clipboard button and saving it somewhere safe for later use.
-
You should now have the 3 respective values saved out ready to put into EzeScan WebApps appsettings.json file.

-
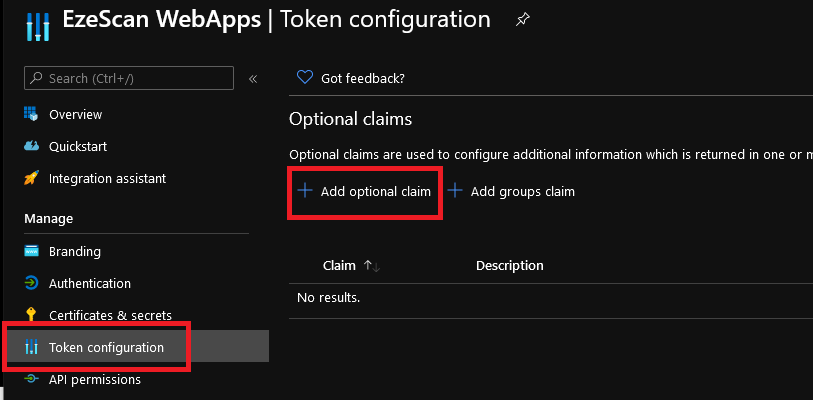
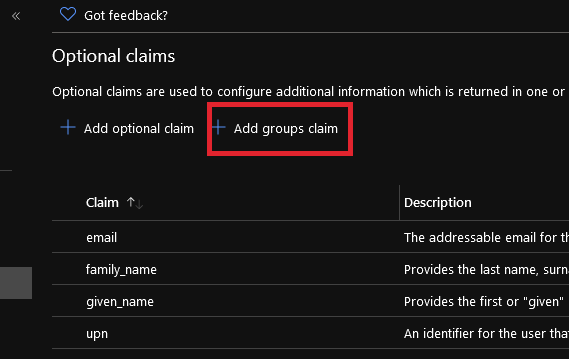
Navigate to Token configuration and click Add optional claim
-
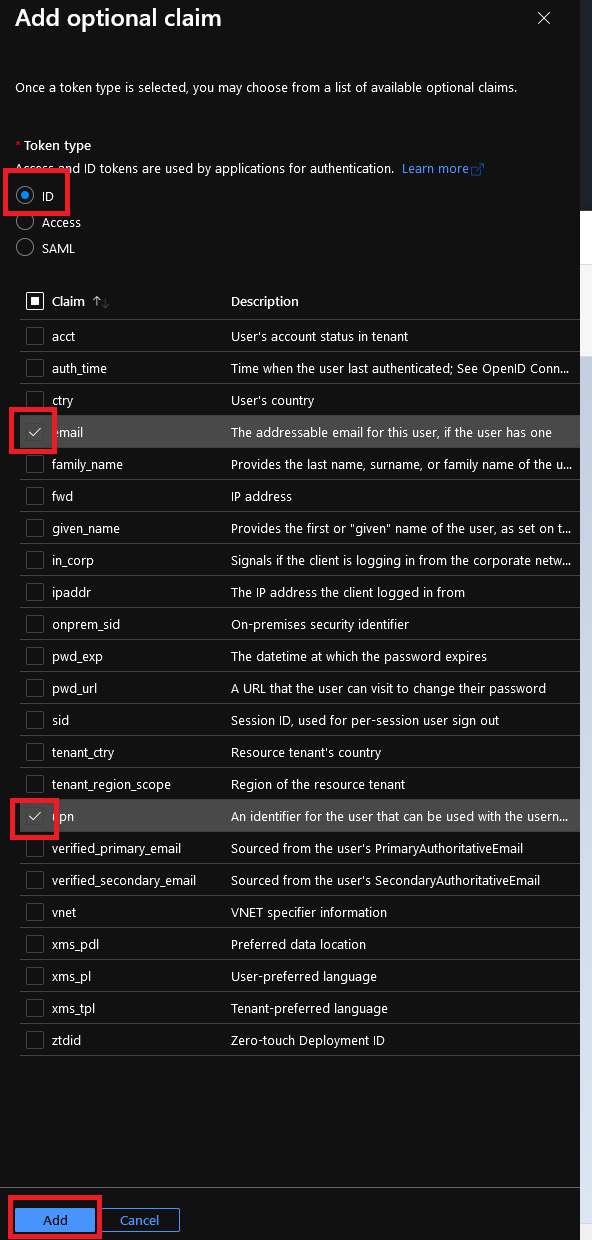
Select the Token Type: ID, then tick the options to enable email, upn, family_name and given_name. Click the Add button.
-
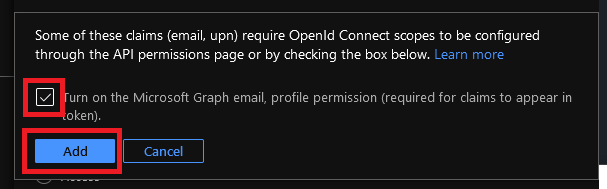
If asked then tick the "Turn on the Microsoft Graph email, profile permissions" option and click Add.
-
Click Add groups claim
-
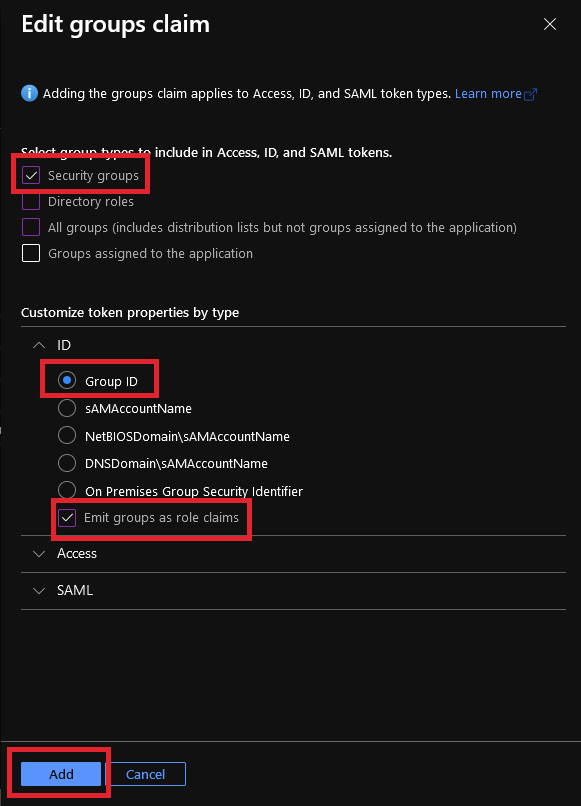
Set the following settings and then click Add:
Option
Value
Select group types to include in Access, ID, and SAML tokens.
Security groups
Customize token properties by type (ID)
Group ID
Emit groups as role claims
-
Edit your appsettings.json files Authentication section to contain the following:
JavaScript"Authentication": { "EnableApiKey": true, "Providers": { "OpenIdConnect": { "Authority": "https://login.microsoftonline.com/[Directory (tenant) ID]/v2.0", "ClientId": "[Application (client) ID]", "MetadataAddress": "[OpenID Connect metadata document]", "TokenValidationParameters": { "NameClaimType": "name" } } } }Confirm your Authentcation section now looks like the following and save the file.
JavaScript"Authentication": { "EnableApiKey": true, "Providers": { "OpenIdConnect": { "Authority": "https://login.microsoftonline.com/81270000-0000-0000-0000-0000f000b68b/v2.0", "ClientId": "3523c7b7-0000-0000-0000-9463c2bffbf2", "MetadataAddress": "https://login.microsoftonline.com/81270000-0000-0000-0000-0000f000b68b/v2.0/.well-known/openid-configuration", "TokenValidationParameters": { "NameClaimType": "name" } } } }
-
Restart the IIS App Pool that runs EzeScan WebApps.
-
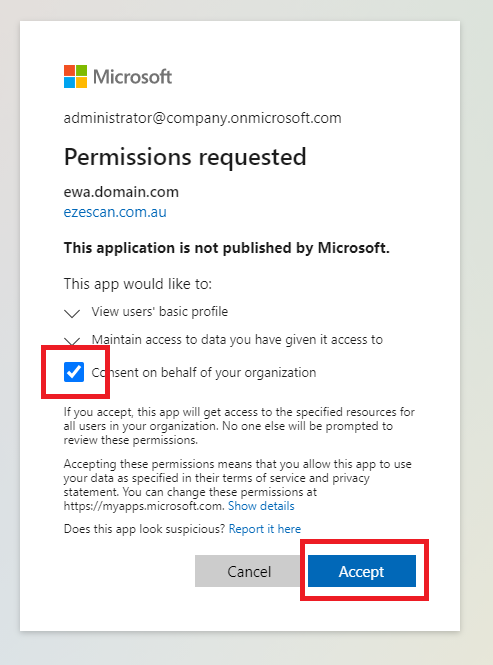
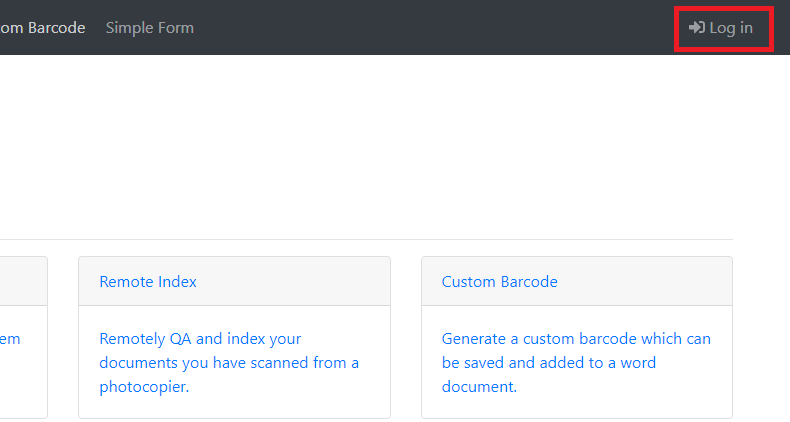
Navigate to your EzeScan WebApps site and click the Login button.
-
Login as an Azure AD Administrator, tick the Consent box and then click Accept.