
Connection
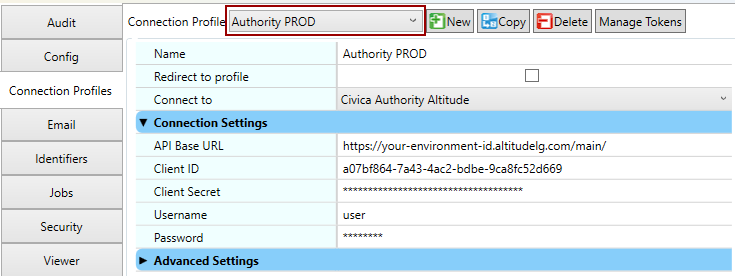
The connection to Civica Authority Altitude requires a Connection Profile be configured in Admin → Workstation Options. Use the New button to select Civica Authority Altitude from the list of available integrations. Give the profile a name (e.g. Authority PROD) and then fill in the below connection settings.
|
Option |
Description |
|---|---|
|
API Base URL |
The Civica Altitude API base URL (for example, |
|
Client ID |
The Client ID to use for authorisation. |
|
Client Secret |
The Client Secret to use for authorisation. |
|
Username |
Login using this username. Supports placeholders |
|
Password |
Login using this password. Supports placeholder |
KFI Browse
The following actions are available to browse or search records in Altitude from a KFI Field when the browse button […] is pressed.
Lookup Module Entity Data (PREVIEW)
Automatically lookup entity data from modules such as Applications, Infringements, and Name Register.
This action requires an API endpoint that uses the GET http method and supports OData query parameters. Refer to the Authority API’s Swagger UI page for available endpoints.
|
Option |
Description |
|---|---|
|
API Endpoint |
The API endpoint to query. For example:
|
|
Filter |
The OData filter to use to filter results of the respective API endpoint. For example, to filter the name regsiter items by email address:
|
|
Order By |
Order returned items by this field. For example:
|
|
Limit |
The maximum number of results to find. Default is |
|
Result Format |
The formatting to use for matched items. This can contain placeholders inside curly brackets that contain either a property name or JSON path. For example, to return the email address of the matched entity in name register use:
For example, use JSON path to select an array item:
|
Choose Name Register Links (PREVIEW)
Choose Name Register links to pass through to OpenText Content Manager upload to search for and/or create a corresponding location to link to the record.
|
Option |
Description |
|---|---|
|
ID Format |
The identifier format to return to the hidden field after selecting a NAR entry. The default format is |
|
Person Location Format |
Configure the location field pairs to pass through to OpenText Content Manager upload person entities. This value is used when searching for or creating a location to attach to the record. The default format is:
|
|
Organisation Location Format |
Configure the location field pairs to pass through to OpenText Content Manager upload for organisation entities. This value is used when searching for or creating a location to attach to the record. The default format is:
|
Choose Module Links (PREVIEW)
Choose entities from various modules to pass through to OpenText Content Manager upload and link to the record.
|
Option |
Description |
|---|---|
|
Link Modules |
Configure the Modules that will be available to operator to search for entities to link to the record in OpenText Content Manager upload. Use the browse button […] to edit this value. 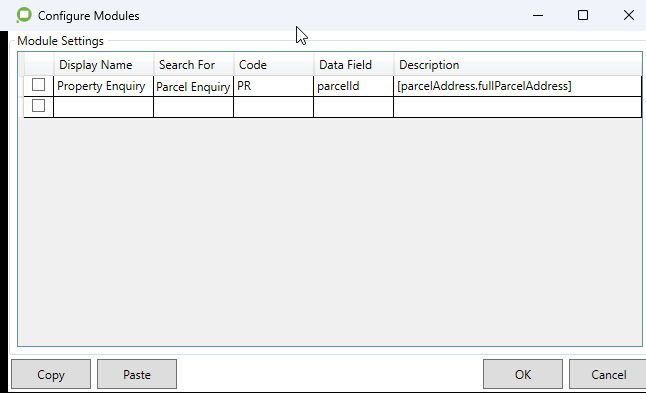
For each module required:
Search methods are linked to API methods that are defined in the following file:
Additional API endpoints can be manually added to this JSON file as required. |
How-To Guides
How to migrate Accounts Payable solution from Civica Authority on-premise to Altitude cloud
These steps migrate an Accounts Payable invoice workflow from an on-premise Civica Authority 7.1 server to Civica Authority Altitude in the cloud.
Take a full backup before proceeding to allow recovery if needed.
Do not change the target integration from Civica Authority Purchases to Civica Authority Altitude before running the migration tool below; otherwise, the settings to migrate will be missed.
-
Update EzeScan to the latest release (at least 5.1.34 or higher).
-
Open the Admin menu and click Workstation Options.
-
Navigate to the Tools tab.
-
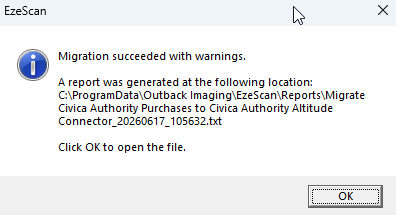
Click the Migrate button under the heading
Migrate Civica Authority Purchases to Altitude.
-
Review the migration notes for potential warnings.
-
Navigate to the Connection Profiles tab.
-
Repeat steps 8-11 for each connection profile that was migrated to Civica Authority Altitude.
-
Update the API Base URL with the Altitude environment’s base address with
/mainsuffix.
For example,https://your-environment-id.altitudelg.com/main/ -
Update the Client ID & Secret with the new values.
These must be requested from Civica if not already known.
-
Update the Username & Password with the new login credentials of the user that EzeScan will upload invoices on behalf of.
-
Click Apply to save the changes.