
To configure the EzeScan Admin Options:
-
Select the Admin > Workstation Options menu option
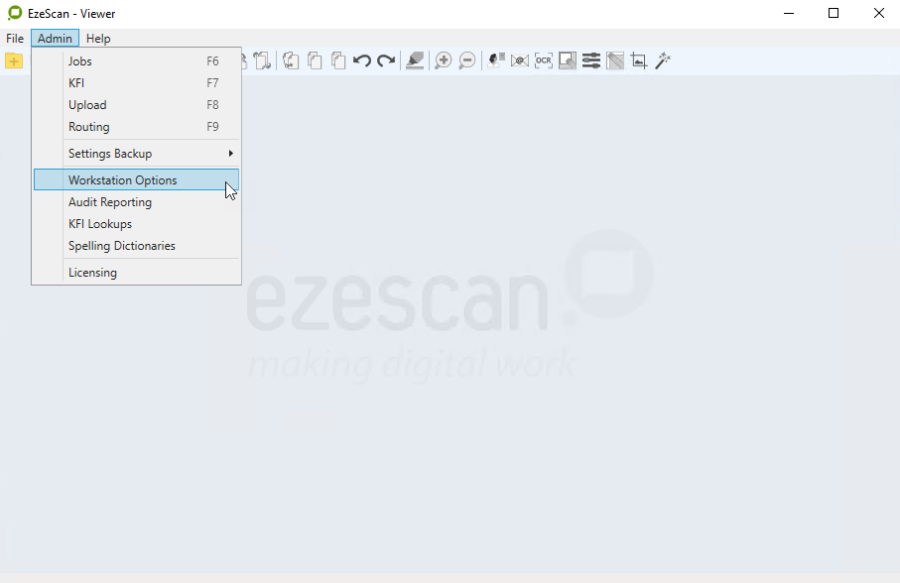
Accessing Admin > Workstation Options
The EzeScan Workstation Options screen displays:
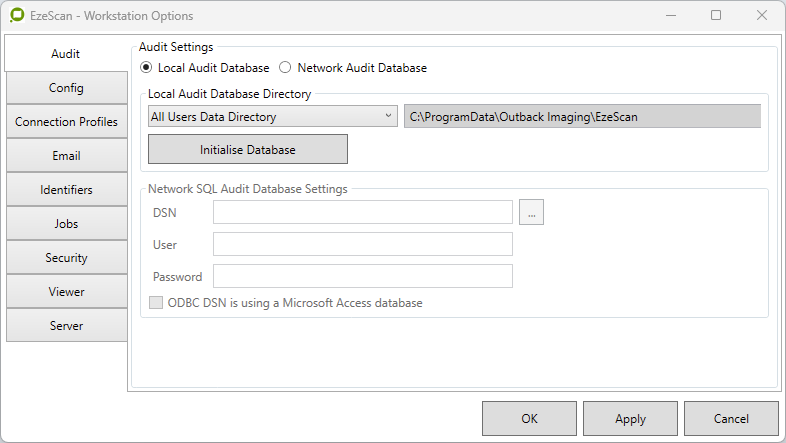
Workstations options screen - open on the Audit tab
Audit Options
The Audit database has multiple configuration options (as shown above).
A local database can be used per instance (i.e. on the EzeScan Workstation PC),
OR
One centralized network database can be used and all the EzeScan PC's can be configured to point back to that respective database.
The following options are available in this frame:
Local Audit Database Directory
This is where EzeScan stores its local Audit Database (MDB). This would be used if a database via ODBC is not required.
All Users Data Directory
When enabled, EzeScan saves it's settings in the common user application data directory.
-
Windows Server 2019 / 2016 / 2012 R2 / 2008 R2
-
Windows 10 / 8.1 / 7
C:\ProgramData\Outback ImagingEzeScanCurrent User Data Directory
When enabled, EzeScan saves it's settings in the per user application data directory.
-
Windows Server 2019 / 2016 / 2012 R2 / 2008 R2
-
Windows 10 / 8.1 / 7
C:\Users\<Username>\AppData\Roaming\Outback ImagingEzeScan
Custom Directory
When enabled, EzeScan saves it's settings in the custom directory provided by the user.
The user must have write permissions to the directory where these settings are stored, otherwise EzeScan will not function properly.
The default is set to the "All Users Data Directory".
Initialise Database
This option enables the Audit database.
Network SQL Audit Database Settings
|
Option |
Description |
|---|---|
|
DSN |
This is the name of the ODBC data source created in the ODBC Data Source Administrator |
|
User |
The SQL login. i.e. sa |
|
Password |
The SQL user password |
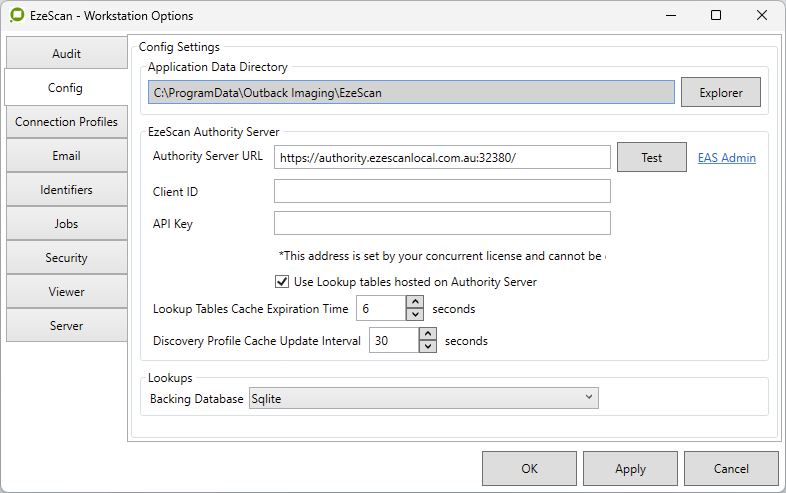
Config Options
The configuration tab allows the operator to choose where the EzeScan configuration, license and cache files reside. For performance purposes it is recommended that this set to the default setting of a local drive.
This is where EzeScan will store job and cache files. For performance reasons, it is recommended for this to be a local drive.
When enabled, EzeScan saves it's settings in the common user application data directory C:\ProgramData\Outback Imaging\EzeScan.
EzeScan Authority Server
This is the website URL of the EzeScan Authority server. The EzeScan Authority Server is a web services server for managing concurrent licenses, centralised configurations, document counters and Lookups and is available free for use of organisations who are in-maintenance.
When the Use Lookup Tables Hosted on Authority Server is ticked EzeScan will look to the Authority Server for Authority Lookup tables where any Authority Table will take precedence over a same named local Lookup Table (Local Lookup Tables are stored in <EzeScan Default Data Path>\Lookups e.g. C:\ProgramData\Outback Imaging\EzeScan\Lookups).
Ticking or unticking the checkbox will take immediate effect without the need to restart EzeScan.
Please refer to the EzeScan Authority User Guide for more information.
EzeScan Backing Database
For EzeScan 5 the use of Microsoft Access as a backing database has been deprecated in favour of SQLite as the recommended backing database.
The recommendation for the use of SQLite is especially relevant for EzeScan x64 operations, noting Microsoft Access is still available for use should an Organisation wish to continue using in instances of EzeScan x86 use.
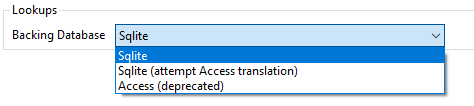
Three modes of operation are available.
-
Sqlite will use SQLite syntax exclusively.
-
Sqlite (attempt Access translation) will use Sqlite and attempt to translate any existing Access syntax to that of SQLite, will not always be effective.
-
Access (deprecated) will use Access exclusively and will require either the Access 2010 or Access 2016 components installed (either x86 or x64 depending on the EzeScan bitness)
As SQLite syntax is different to that of Microsoft Access, an existing EzeScan v4.x configuration updated to EzeScan 5.x will default to Access (deprecated) as the backing database system.
An Organisation can trial the option of Sqlite (attempt Access translation), or can alternatively ensure their Lookups and SELECT IIF() statements, etc. conform to the SQLite syntax.
Starting a brand new configuration of EzeScan version 5 will default to SQLite as the backing database (recommended).
-
EzeScan includes SQLite already built in for EzeScan's use.
-
For an Organisation to utilise Microsoft Access as the EzeScan backing database, the Org would need to install the Microsoft Access 2010 or 2016 Components in bitness versions matching that of EzeScan. These are available for download from Microsoft's download repository or are generally included in Microsoft Office installs.
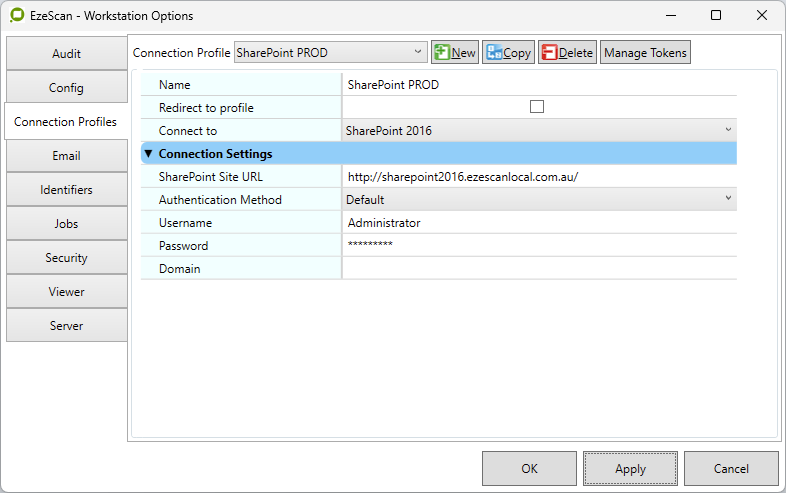
Connection Profiles
This will allow for connections to be configured globally and re-used across the various interfaces of EzeScan.
Profile Options
|
Option |
Description |
|---|---|
|
Name |
Name of the connection profile (must be unique). |
|
Redirect to profile |
Enable this to have this profile redirect to another profile. This is useful when configuring an integration for various environments such as DEV, TEST, and PROD. By using a redirect only the profile needs to be updated to reflect the new target (e.g. DEV → TEST). Normally you would have to change all of the Jobs/Routes/Uploads/etc to target the alternative connection profile. |
|
Target profile |
The connection profile to redirect to when Redirect to profile is enabled. The target must not also be configured to redirect otherwise an error will be shown when attempting to save the changes. |
|
Connect to |
The integration the connection profile will use. |
|
Connection Settings |
Displays the connection settings of the selected integration. |
Advanced Settings
|
Option |
Description |
|---|---|
|
Reset token on startup |
Only applicable to connection profiles using OAuth 2.0 or OpenID Connect (OIDC) authentication protocols. Clears the access token persisted for this connection profile during application startup to enforce the connection be re-authenticated next time it is used. It is recommended this be enabled when EzeScan will be used by multiple users on the same workstation to prevent the previous user’s authentication from being retained for the next user. |
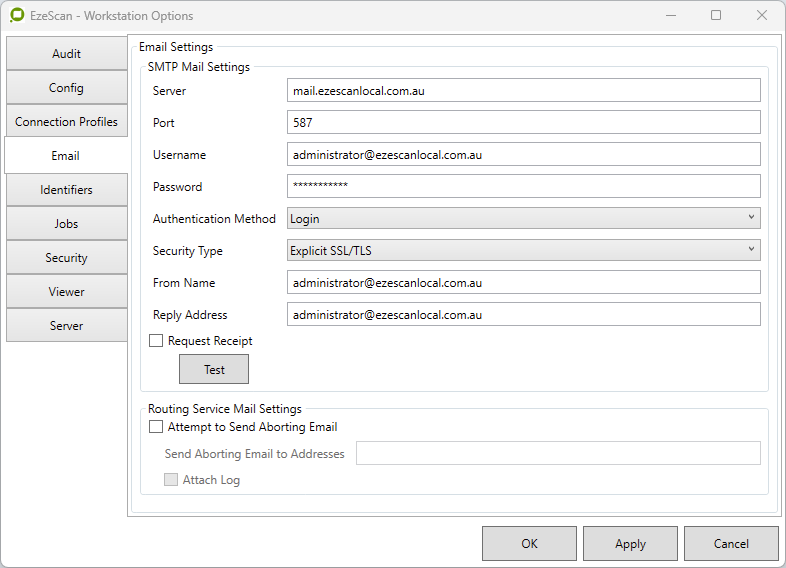
Email Options
The email SMTP settings are required to be applied for EzeScan jobs that are set to output to Email or UPLOAD jobs are set to SMTP. The SMTP settings also need to be applied for jobs that have Barcode or KFI exceptions enabled.
SMTP Mail Settings
|
Option |
Description |
|---|---|
|
Server |
The hostname of the SMTP mail server. |
|
Port |
The SMTP server's port, default is 25. |
|
Username |
The login name for the mailbox i.e. "Jane" or "jane@EzeScan.com". |
|
Password |
The mailbox accounts password. |
|
From Name |
The from name to be showed in the email. |
|
Authentication |
The type of authentication to use when connecting to the SMTP server. |
|
Security Type |
The security type to use when connecting to the SMTP server. |
|
Reply Address |
The reply address shown in the email. |
|
Request Receipt |
Request a read receipt be sent back to the specified Reply Address. |
|
Test Button |
Troubleshoot the current connection settings through testing. |
Routing Service Mail Settings
|
Option |
Description |
|---|---|
|
Attempt to Send Aborting Email |
This will attempt to send an email when the Routing Service has shut down from unrecoverable error. Depending on the error the email may not be able to send. It is recommended to also use an external monitoring tool for if the Organisation wants full coverage of shutdown notifications. |
|
Send Aborting Email to Addresses |
This is the email address or addresses to send the email. Use a semi-colon ; to separate the list |
|
Attach Log |
Attach a log to the email. The log will be zipped. |
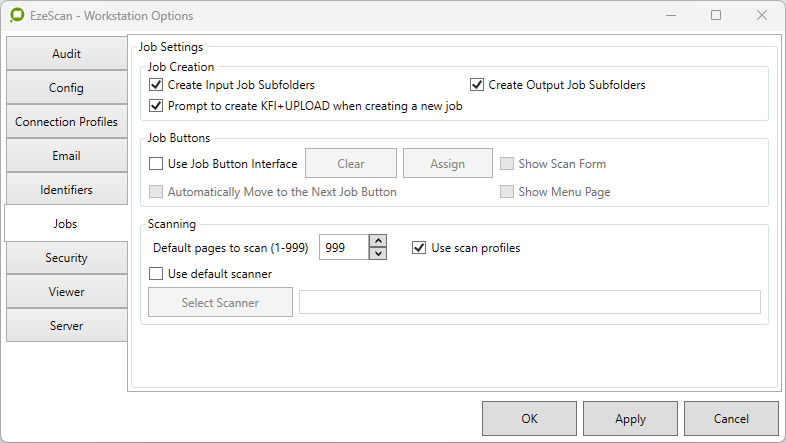
Jobs Setting
These are global job settings that can be applied on the EzeScan workstation.
Job Creation
Create Input Job Subfolders
-
When a new job is created,
-
The name of the job will be appended to the input folder path.
-
It will appear as \<<JOB>>
-
Create Output Job Subfolders
-
When a new job is created,
-
The name of the job will be appended to the output folder path.
-
It will appear as \<<JOB>>
-
Prompt To Create KFI+UPLOAD When Creating A New Job
If the EzeScan PC contains a KFI & UPLOAD license, when a new job is created a prompt will appear asking to create a KFI of the same name.
If yes is clicked another prompt also appears asking to create an UPLOAD of the same name.
This feature is a good way to create / manage EzeScan jobs as the operator can easily refer to them at a later date.
Job Buttons
Use Job Button Interface
When ticked, and the operator clicks File->Scan, F2 or the Scan/Import toolbar option a Job button interface will appear instead of the Operator Action Form.
There can be 14 pages of job buttons and there is 14 buttons per page.
To populate jobs into the Job Button interface, click the assign button on the bottom right of the screen.
Please refer to the Job Buttons Documentation for further details.
Clear
This will clear all the job button shortcuts.
Assign
This will automatically assign all your EzeScan jobs in alphabetical order into the respective job button numbers.
-
If you wish to not automatically assign job buttons, Press F2, click assign and the jobs can be manually assigned per job button.
Automatically Move to the next Job Button
When a job has finished being indexed, EzeScan will highlight the next job button in the Job button list.
Show Menu Page
EzeScan has 14 pages of Job Buttons.
-
If the Menu Page is enabled it can have buttons which will redirect you to specific Button Page. For example…
-
Records Department jobs on page 1,
-
Accounts Department jobs on page 2,
-
Sales Department jobs on page 3.
-
-
Please refer to the Job Button Interface in Detail section on page or more information on setting this up.
Show Scan Form
When ticked, EzeScan will show the scan tab.
-
-
This is so the operator can change scan settings for the job. i.e. from Black & White to Colour.
-
Scanning
Default Number of Pages to Scan (1-999)
The value entered here is passed to the Operator Action screen when initially scanning images, or appending images to a batch.
It is not used when inserting, replacing or deleting images from the batch.
Use Default Scanner / Select Scanner
When selected EzeScan will be forced to use only this scanner for all new jobs that are created.
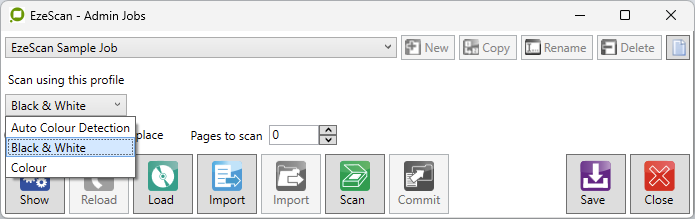
Use Scan Profiles
When enabled allows one or more scanner profiles to be configured per Job.
Identifiers

Generate Batch Identifiers
-
Prefix This is a static value that can be set for the batch. The value is called from KFI in the Value Tab -> Custom Extract -> Batch Prefix.
-
Incrementing Suffix This is a value that will increment by one every time a new batch is profiled. This value is called from KFI in the Value Tab -> Custom Extract -> Batch Suffix.
-
Use this server ID Counter This will use a counter from the EzeScan Authority server. This is handy for if there is a multiple seat EzeScan implementation and there needs to be a unique batch number across the implementation.
Generate Document Identifiers
-
Incrementing Value This is a value that will increment by one every time a new document is profiled. This value is called from KFI in the Value Tab -> Custom Extract -> Unique Doc ID
-
Incrementaing Value (Reset Daily) This is a value that will increment by one every time a new document is profiled and reset back to 1 on a new date. This value is called from KFI in the Value Tab -> Custom Extract -> Unique Daily Doc ID.
-
Use this server ID Counter This will use a counter from the EzeScan Authority server. This is handy for if there is a multiple seat EzeScan implementation and there needs to be a unique document number across the implementation.
If using the "WorkStation Options" configuration for Global Batch or Document IDs from EzeScan Authority Server, EzeScan will increment the values at the start of the processing of every Job or Route whether the counters are used or not. This is to allow for an early exception should the Authority Server be unavailable and may result in unexpected large incremental numbering jumps. To minimise such numbering jumps turn off the "WorkStation Options" configuration for Global Batch or Document IDs and instead configure their use directly on the Job or Route that requires them (via the Job/Route Identifiers Tab).
Security Options
The security options allows EzeScan to be configured so that jobs can be password protected so only an EzeScan administrator can make changes to them.
EzeScan can also be configured with LDAP authentication and depending on the EDRMS solution being used this information can be passed through as the login credentials for the EzeScan jobs.
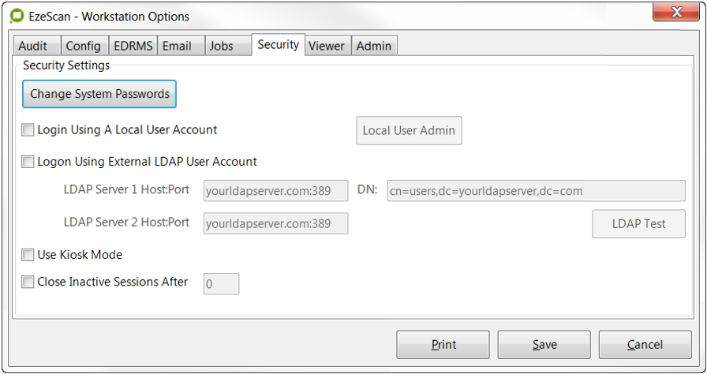
Security Settings
Change System Passwords
EzeScan passwords are used to allow that only an EzeScan administrator can make changes to jobs.
The passwords can be applied for the Job & Job button interface, KFI interface, Upload interface, Routing Interface and Audit Reporting.
EzeScan has an "Admin" password. This is the master password for EzeScan.
The username for this account is "admin"
The admin password can be applied for all EzeScan interfaces or a separate password can be used for the respective interface.
Login using a Local User Account
This option will set EzeScan for a login prompt when loading EzeScan or using in Kiosk mode.
Users can be added, modified and removed as per the image below.
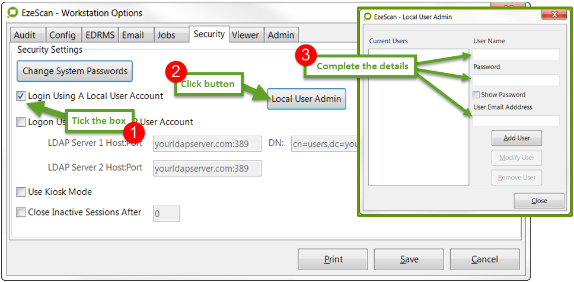
Setting a Local User account
Login using external LDAP Account
This feature allows EzeScan to Authenticate to an LDAP source.
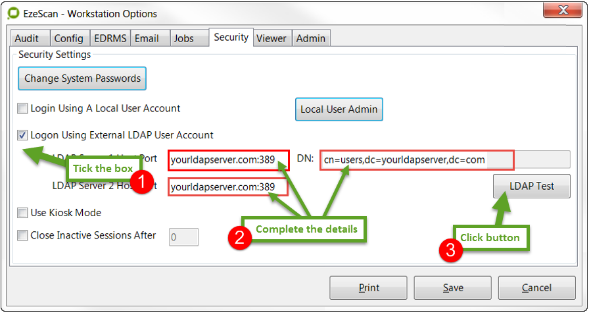
Two LDAP servers can be specified. If the first server times out the second will be used.
The DN is usualy set to the base DN of the LDAP tree. i.e. the top of the tree.
If using Active directory and are not sure what your Base DN is, from a Domain Controller or member server run the following from a command prompt "ldifde -f c:\ldap.txt" the first line of the text file will give you your DN details.
-
Please contact your network administrator for more assistance to set this up.
LDAP Test
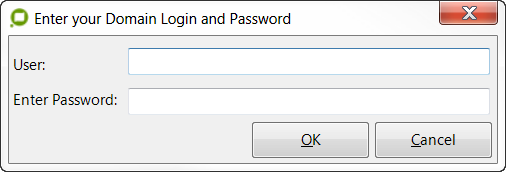
This will prompt you for a LDAP username and password.
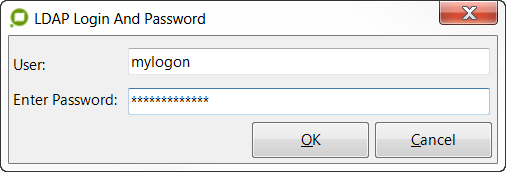
-
Type in some LDAP credentials to test.
-
If the screen disappears it means it was a successful login.
-
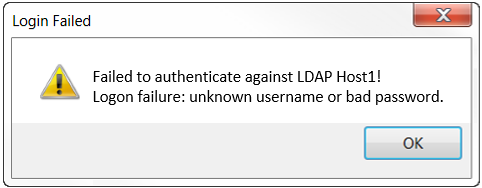
If the following message displays, incorrect login credentials have been supplied.
-
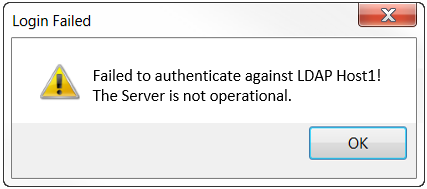
If the following message displays, it means EzeScan cannot contact the host.
Use Kiosk Mode
This option sets EzeScan to Kiosk Mode.
EzeScan KIOSK makes it easy to facilitate your own customised scanning kiosk solution.
The EzeScan Kiosk can be placed next to a dedicated scanner or multi-functional device and EzeScan would be configured to scan using that respective device.
Kiosk Mode locks the EzeScan screen (to the size it is set on) and EzeScan cannot be minimised or other applications cannot be opened.
Kiosk mode is designed to for EzeScan to work with a touch screen or a normal screen with a mouse or keyboard.
When a document is profiled, the KFI panel is larger and the icons on top of the screen are also larger.
To exit out of EzeScan you must supply the Admin password.
Close inactive Sessions After
This feature is used with the Kiosk Mode. When there has been inactivity for X amount of seconds EzeScan will prompt the user for the login credentials.
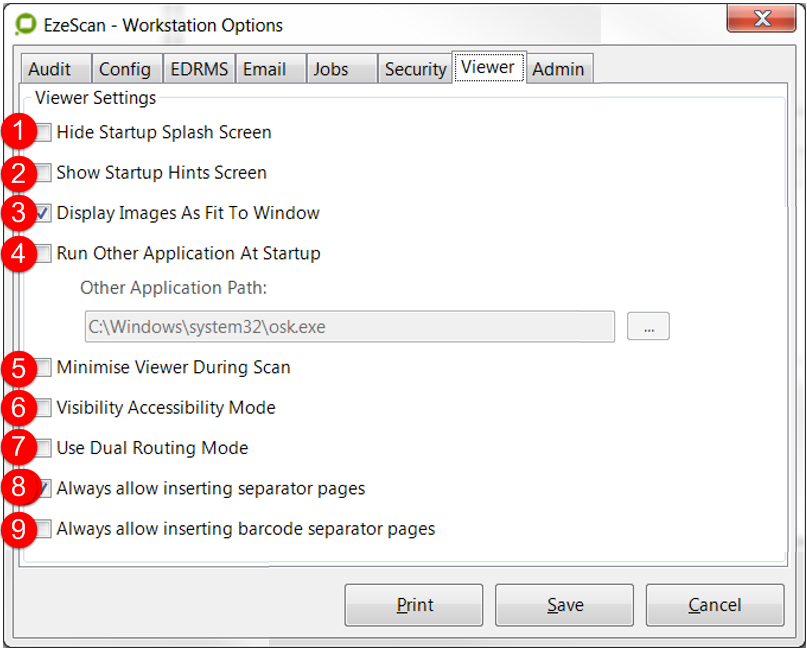
Viewer Options
The following options are available in this frame:
Each of the above options are explained below
-
Hide Startup Splash Screen
This is the splash screen:
-
-
-
Tick the Hide Startup Splash Screen check box.
-
The splash screen will not display when the program starts.
-
-
-
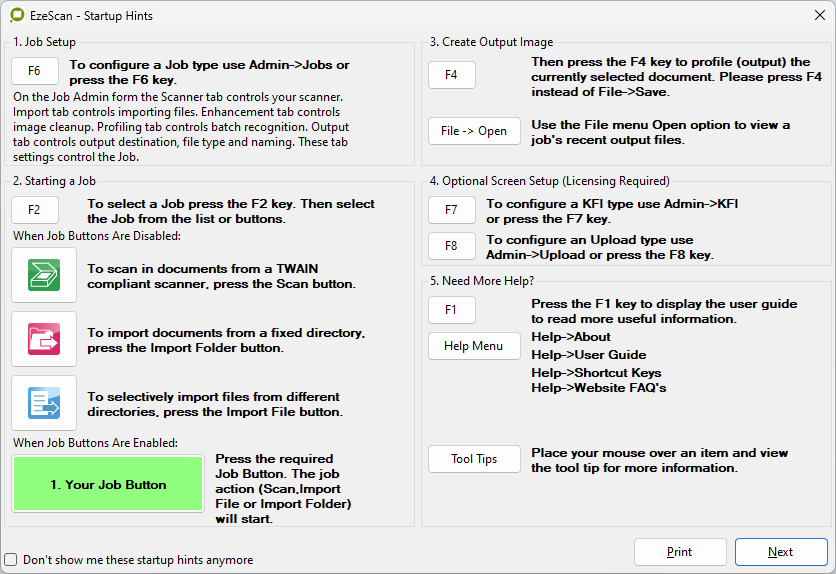
Show Startup Hints Screen
Tick the Show Startup Hints Screen checkbox.
-
-
-
When ticked this option displays the following screen at program start-up
-
Note: The buttons do not do anything.
-
-
-
Display Images As Fit To Window
Tick the Display Image As Fit To Window checkbox.
-
-
-
When ticked this option sets the default view in the image window as Fit to Window.
-
When un-ticked the view defaults to Fit To Width.
-
-
-
Run Other Application At Startup
Tick the Run Other Application At Startup to load another application when EzeScan starts.e.g. an onscreen keyboard application.
-
-
-
Select the Save button. Saves the setting changes
-
-
-
Minimise Viewer During Scan
This option will minimise the EzeScan viewer during scanning.
-
Visibility Accessibility Mode
This option enhances the colour of the border of the thumbnails for the Scan Q/A process.
-
Use Dual Routing Mode
Allows the EzeScan desktop application to run at the same time as the EzeScan Routing service.
-
Always allow inserting separator pages
This option will allow an operator to insert a black separator page in an EzeScan job that is configured for non-batch profiling.
-
Always allow inserting barcode separator pages
This option will allow an operator to insert a barcode separator page in an EzeScan job that is configured for non-batch profiling.
Server Options

Text here to explain the extra services and why we might need them?
Common Server Settings
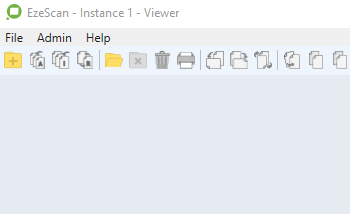
Used to set values which help identify this specific instance of EzeScan Desktop. Very useful when running EzeScan Desktop with a multi instance license, especially when performing admin tasks..

Any value entered into the Name field will be displayed in all of the windows forms title. For example the windows form below shows the value Instance 1 added into the window title.
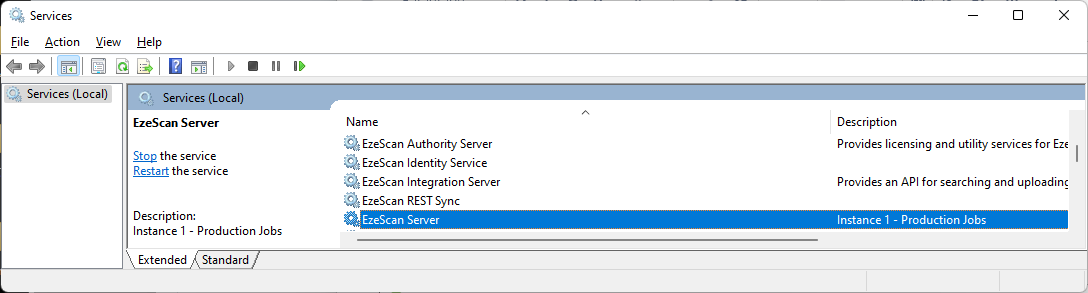
The Name field value can also be applied to the name of the EzeScan Server service using this option below
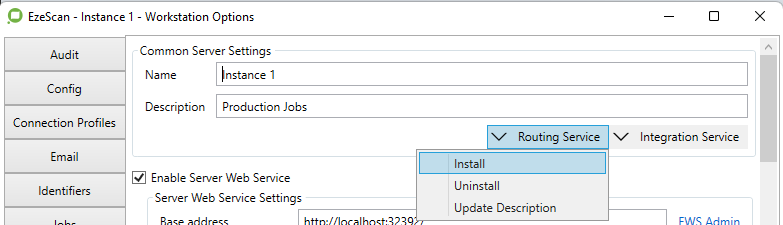
After running the Install option, go to the Services control panel and you'll see the service name has been updated.
Enable Server Web Service
When enabled this provides a web admin portal for basic management of the EzeScan Server service.
Allows users to
-
Enable and disable routes.
-
View files in exception folders (and resubmit them for reprocessing)
Before attempting to use the web admin portal you should do 2 things:
-
Set the Administrative password value.
-
Stop and restart the EzeScan Server service.
Then use the EWS admin link to launch he web admin portal page.

The following page should be displayed.
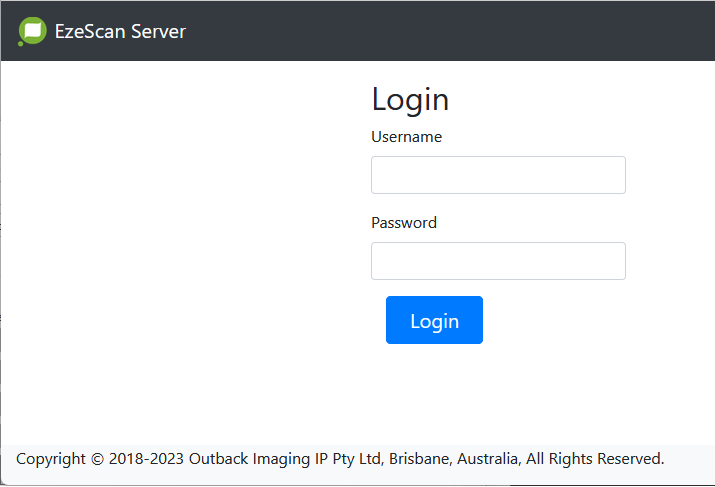
Login as Administrator , using the password you set earlier.

The homepage for the web admin portal is displayed.

Please see the Server Web Service - Web Admin Portal for additional information.
Enable Integration Web Service
Provides communications with supported integrations for EzeScan WebApps and third party applications via a REST interface.