
Overview
The EzeScan SERVER ROUTING module is a separately licensed module that can be activated within the EzeScan application. The SERVER ROUTING module provides functionality to automatically route incoming images to designated recipients based on the OCR content, barcode or route by using a KFI and or KFI / UPLOAD to pass the document into one of it's supported UPLOAD repositories.
EzeScan SERVER ROUTING can be run within the EzeScan GUI or in the background as a Windows Service.
Minimum SERVER Requirements / Specifications
The minimum PC specification for EzeScan SERVER (Routing) is:
-
Intel Xeon CPU or AMD equivalent (with at least 2 cores running at 3.00Ghz minimum)
-
8GB Ram
-
250GB HDD, preferably SSD
-
1000 Mbps Ethernet (for network scanners or to store to EDRMS / network repositories)
-
Microsoft Windows operating systems that support Microsoft .NET Framework Version 4.8 and above.
It is recommended that the server that is hosting the EzeScan Server/Routing application is dedicated only for that purpose. It is a very CPU intensive application.
Please Note: One EzeScan server instance is designed to support up to 10 low volume Multi-Function devices (i.e.input devices). If higher throughput is required to perform faster processing of documents, you will need to purchase 1 or more additional instances of EzeScan Server licenses.
EzeScan Installation
Zipped Installation File
-
The zipped installation set is available from either:
-
Provided by an EzeScan consultant
-
Downloaded from the EzeScan website (www.ezescan.com.au) - Downloads → Software Downloads → EzeScan Installers
-
-
Save the zipped installation set to a suitable location on the PC being used
-
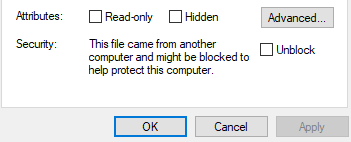
Right click properties on the zip file and check if the file is blocked. If so, click unblock and apply and ok.
-
Unzip the file and run the setup.exe program
Installation Wizard
-
This will launch the EzeScan installer. The main installation screen displays the following:
EzeScan Setup Wizard screen
-
Select Next to continue.
-
The License Agreement screen displays:
You must agree to the license agreement before proceeding
-
If you agree to the License Agreement, Select the I Accept Checkbox
-
Select Next to continue.
-
The Choose Destination Location screen displays:
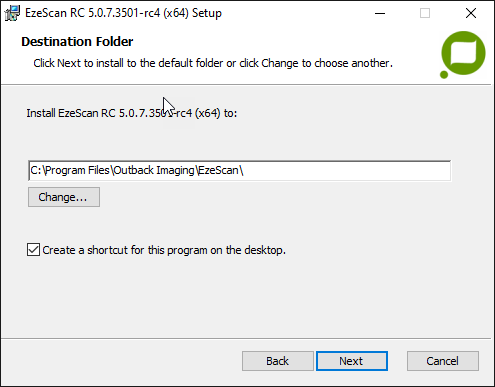
Ensure the "Create a shortcut" box is ticked before clicking Next.
-
Select Next to accept the default installation directory of C:\Program Files\Outback Imaging\EzeScan. (If required: Tick to create a shortcut on the desktop)
-
Click Install to begin the installation
-
The next screen displays while the software is loaded onto the workstation:
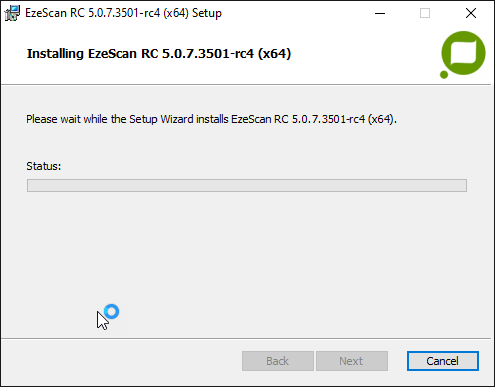
Installing EzeScan progress screen
-
Click Finish to close the setup wizard.
Licensing
To start EzeScan select Start → Programs → EzeScan → EzeScan.
When first installed EzeScan will not have a license.
A splash screen displays followed by this warning message:

Obtaining a License
To make use of EzeScan a valid license must be configured.
Both trial licenses and production licenses can be made available.
If trialing the EzeScan software an evaluation license will be provided. This may be restricted to the modules required and will have a timed expiry. Otherwise a production license file will be provided.
EzeScan SERVER operates as a standalone license (only). Please provide the server hostname to your EzeScan channel resource for issue.
Production license requests submitted to Outback Imaging are normally turned around within 24 hours (once an order has been submitted).
Once you have received the license file, detach it from the email, and place it somewhere where it is accessible.
Installing a license
-
To upload the .lic file into EzeScan Select Admin → Licensing.
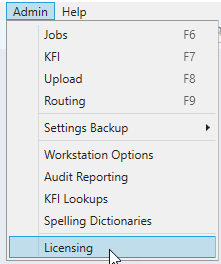
Select Admin > Licensing from toolbar
-
The following screen displays:
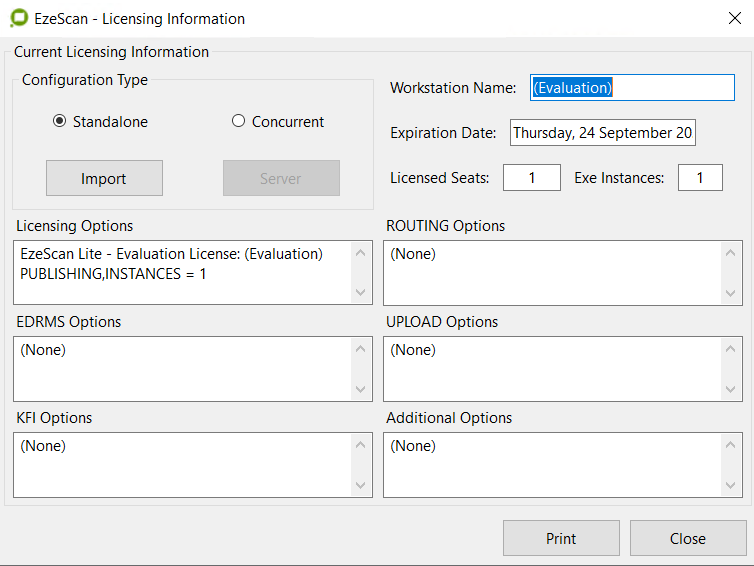
-
Select the Import button to display the following browse window:
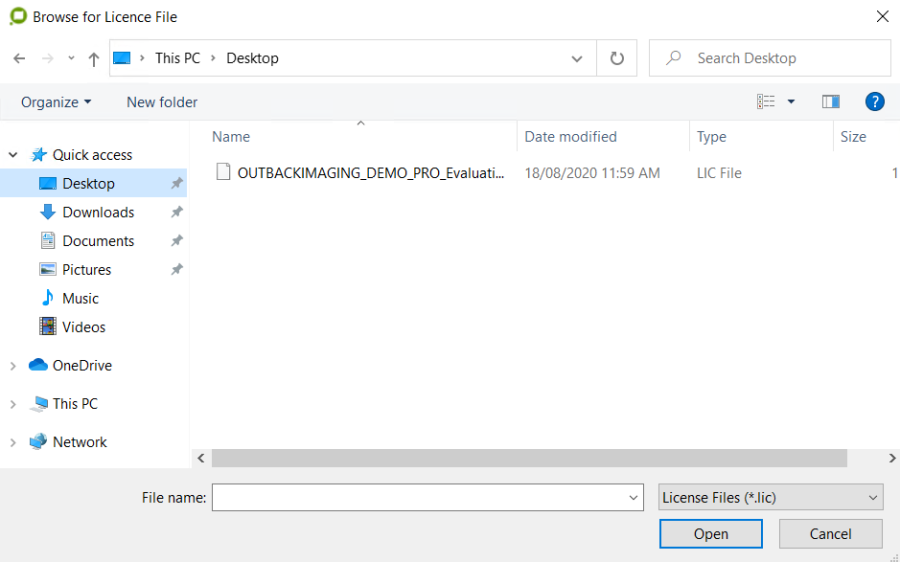
-
Select the license file you received, and then click the Open button.
-
The license imports into EzeScan.
-
If the license is incorrect, EzeScan will refuse to load it, and EzeScan will remain unlicensed. If the license is in the correct format (i.e. with a valid evaluation key and expiry date) then it will be loaded into EzeScan.
-
EzeScan will display the following message informing you to exit EzeScan and restart the program. Use File > Close > EzeScan will shut down.
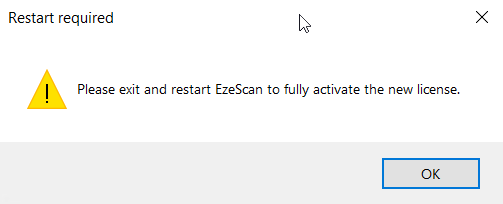
You must restart EzeScan!
-
Then restart EzeScan
-
If an evaluation license has been imported EzeScan will inform you of the number of days left in your evaluation period when the EzeScan splash screen displays (as shown below). Otherwise if a production license has been imported the operator will be taken straight to the console screen.
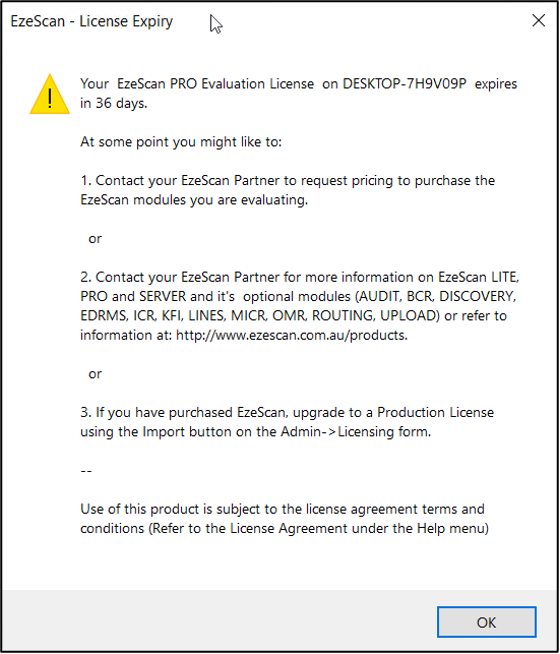
Message window displays after splash screen for Evaluation Licenses
Admin Menu Options
To configure the EzeScan Admin Options:
-
Select the Admin > Workstation Options menu option
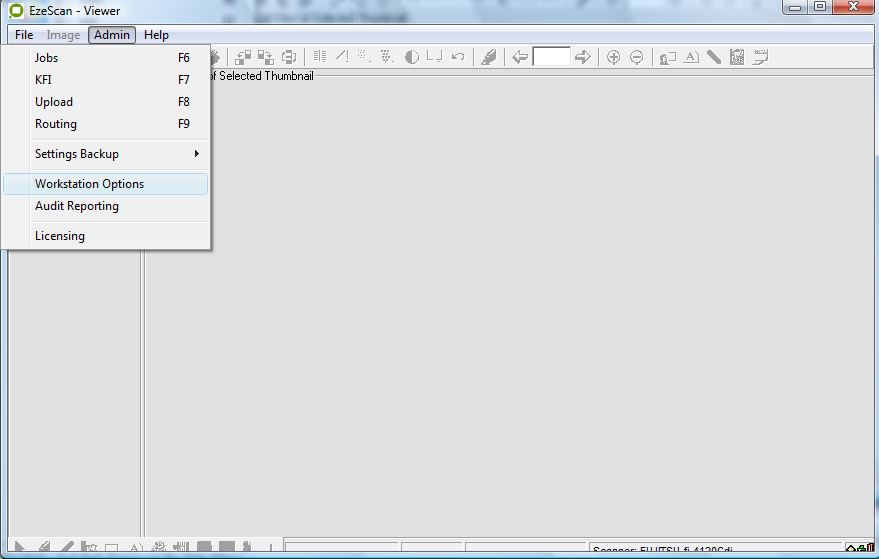
-
The EzeScan Workstation Options screen displays:
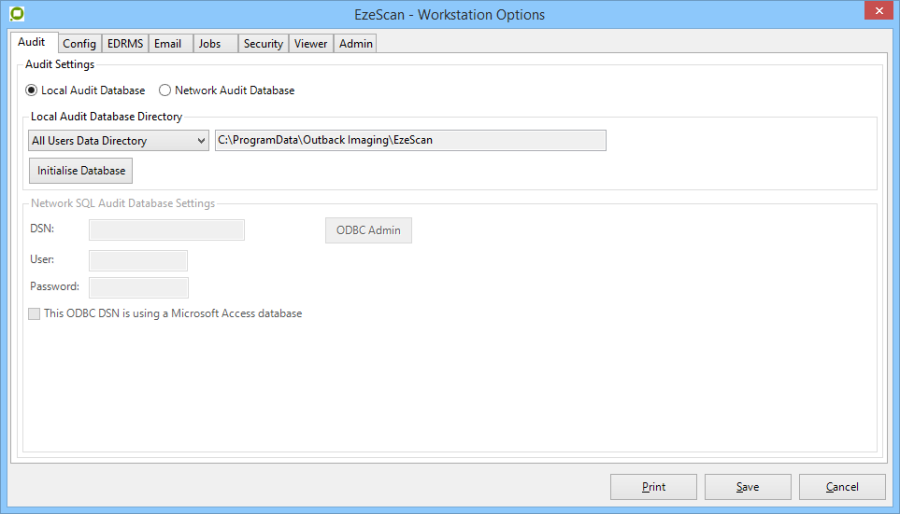
Audit Options
The Audit database has multiple configuration options. A local database can be used per instance (i.e. on the EzeScan Workstation PC), or one centralised network database can be used and all the EzeScan PC's can be configured to point back to that respective database.

The following options are available in this frame.
Local Audit Database Directory
This is where EzeScan stores its local Audit Database (MDB). This would be used if a database not using ODBC was required.
|
All Users Data Directory |
The default is set to the "All Users Data Directory" When enabled, EzeScan saves it's settings in the common user application data directory. Windows Server 2012 R2, 2012 and 2008 R2 C:\ProgramData\Outback Imaging\EzeScan |
|
Current User Data Directory |
When enabled, EzeScan saves it's settings in the per user application data directory. Windows Server 2012 R2, 2012 and 2008 R2 C:\Users\<username>\AppData\Roaming\Outback Imaging\EzeScan |
|
Application Data Directory |
When enabled, EzeScan saves it's settings in the EzeScan installation directory.
|
|
Custom Directory |
When enabled, EzeScan saves it's settings in the custom directory provided by the user.
|
Initialise Database
This option enables the Audit database.
Network SQL Audit Database Settings
|
DSN |
This is the name of the ODBC data source created in the ODBC Data Source Administrator |
|
User |
The SQL login. e.g. sa |
|
Password |
The SQL user password |
|
Custom Directory |
When enabled, EzeScan saves it's settings in the custom directory provided by the user.
|
ODBC Admin
Click this to go directly to the ODBC Data Source Administrator
This ODBC DSN Is Using a Microsoft Access Database
Tick this if a Microsoft Access Database is being used.
Config Settings
The configuration option tab allows the operator to choose where the EzeScan configuration, license and cache files reside. For performance purposes it is recommended that this is set to a local drive on the PC.

This is where EzeScan will store job and cache files. For performance reasons, it is recommend for this to be a local drive.
|
All Users Data Directory (Default) |
When enabled, EzeScan saves it's settings in the common user application data directory.
C:\ProgramData\Outback Imaging\EzeScan |
|
Current User Data Directory |
When enabled, EzeScan saves it's settings in the per user application data directory.
C:\Users\<username>\AppData\Roaming\Outback Imaging\EzeScan |
|
Application Directory |
When enabled, EzeScan saves it's settings in the EzeScan installation directory. C:\Program Files (x86)\Outback Imaging\EzeScan\" Warning: The user must have write permissions to the directory where these settings are stored, otherwise EzeScan will not function properly. |
Email Options
The email settings are required to be applied if for if any exception or output rules are required to send an email.
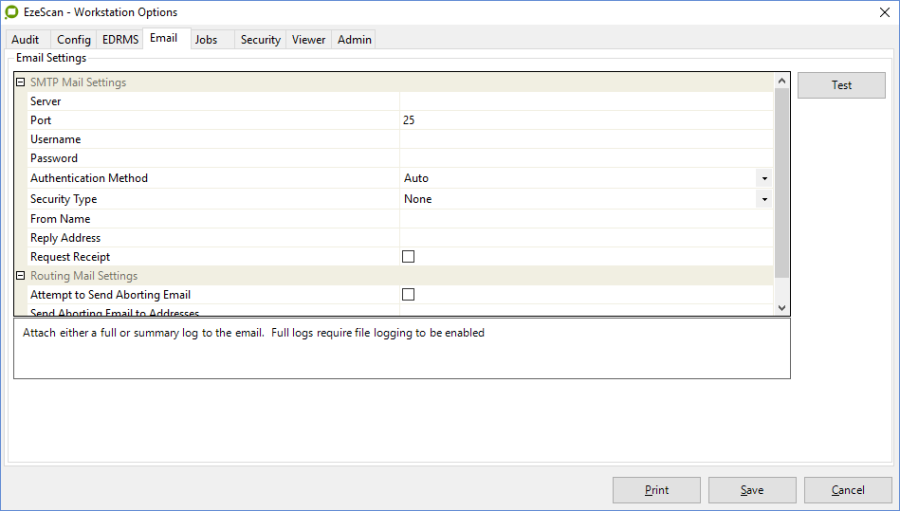
SMTP Mail Settings
|
SMTP Mail Settings |
|
|
Server |
The hostname of the SMTP mail server |
|
Port |
The SMTP serve's port, defualt is 25. |
|
Username |
The login name for the mailbox i.e. "Jane" or "jane@EzeScan.com" |
|
Password |
The mailbox accounts password |
|
From Name |
The from name to be showed in the email |
|
Authentication |
The type of authentication to use when connecting to te SMTP server. |
|
Security Type |
The security type to use when connecting to the SMTP server. |
|
Reply Address |
The reply address shown in the email |
|
Request Receipt |
Request a read receipt be sent back to the specified Reply Address. |
|
Routing Mail Settings |
|
|
Attempt to Send Aborting Email |
This will attempt to send an email when the Routing Service has shut down from uncoverable error. Depending on the error the email may not be able to send. It is recommended to also use an external monitoring tool for if the Organisation wants full coverage of shutdown notifications. |
|
Send Aborting Email to Addresses |
This is the email address or addresses to send the email. Use a semi-colon ; to separate the list |
|
Attach Log |
Attach a log to the email. The log will be zipped. |
|
Test Button |
Troubleshoot the current connection settings through testing. |
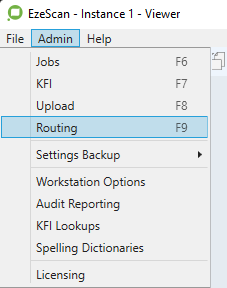
Configuring ROUTING
To configure the EzeScan Routing:
-
Choose the Admin > Routing menu option or press F9
-
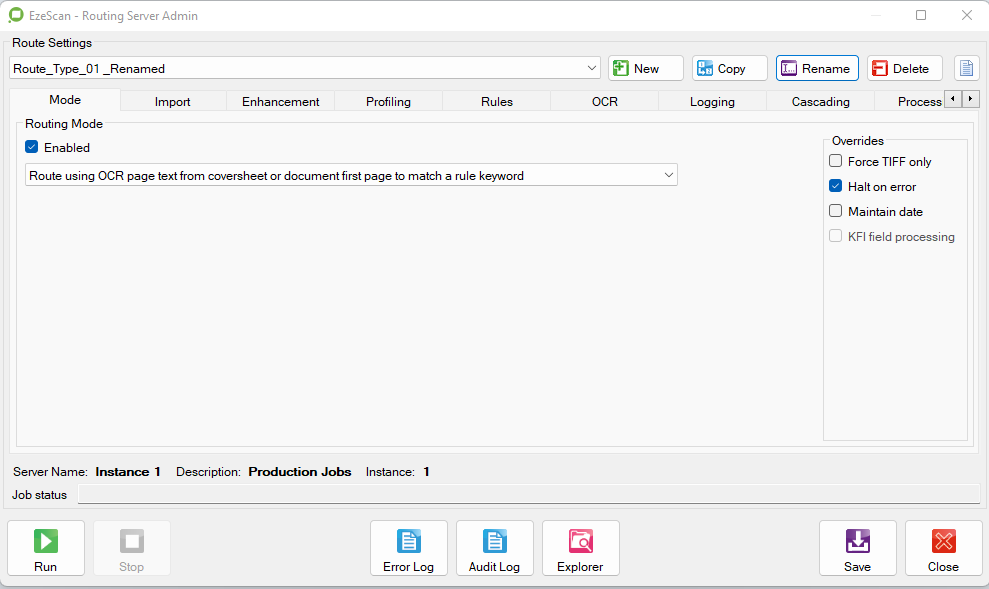
The EzeScan Routing screen displays:
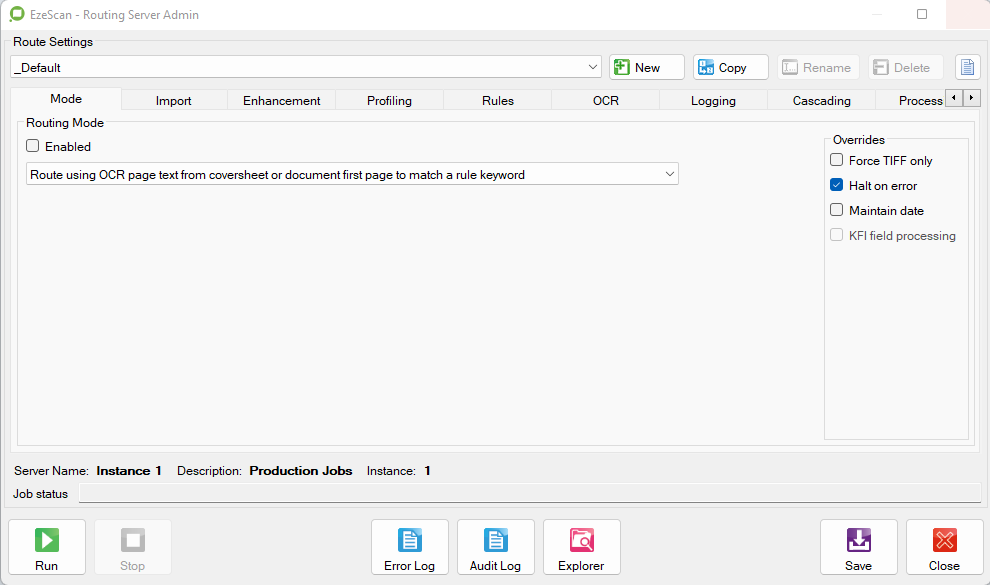
Note: To configure a Route Type the Route Type must first be selected in the drop down list on the Routing form. The configuration settings are then displayed within the shown tabs.
Route Types
The Select/Modify Route Type drop down box contains a list of the workstations' available Route Types. When Ezescan is installed the _Default Route Type is created automatically.

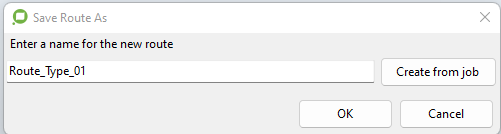
Adding a New Route
-
Select New. The Save Routing Type As form will display:
-
Type in a name for the new Route Type. This name must not already exist in the Route Type list.
-
Select OK to continue. The new Route Type will now display in the list:

-
Use the Routing Mode list to select the type of routing mode you want this route to use. More information on these modes will be provided later in this document.

Copying a Route
-
Select a Route Type from the drop down list. Then select Copy.
-
Type in a name for the copy of the selected Route Type and select OK.
Renaming a Route
-
Select from the Route Type list the Route Type to be renamed. Then select Rename.
-
The Rename Route As form displays:
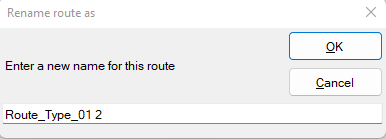
-
The original route name is displayed with a number 2 added to the end of it.
-
You can backspace over that text and change as much of it as you want to. Then press OK.
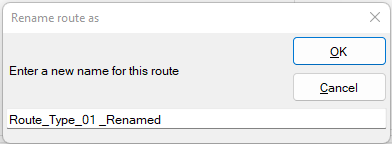
5. The Route Type will now display in the Route Type list with its new name.
Deleting a Route
-
Select from the Route Type list the Route Type to be deleted. Then select Delete.
-
The following warning prompt displays:
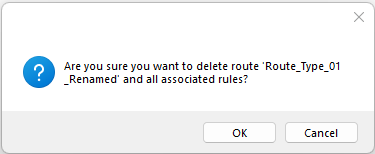
-
Select OK to delete the Route Type.
-
The Route Type deleted will no longer display in the Route Type list.
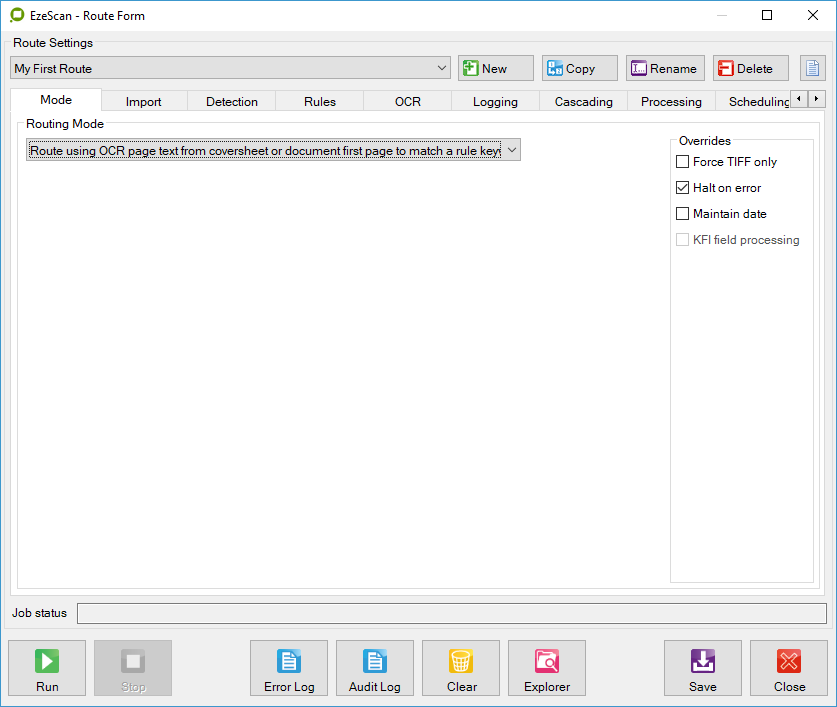
Mode Settings
The mode settings tab is for the operator to specify the type of route to be performed for the respective job.
Routing Mode Options
Perform Folder File Conversion Only
The folder processing option when enabled allows for documents to be routed to the specified output directory within the same sub directory as the import folder structure. This can be further configured in the rules tab. This option could be used to convert TIF images into Searchable PDF format.
Route images using Forms Recognition
When enabled this will allow documents to be processed through the optionally licensed forms Recognition module. This will import a batch of documents and match them to templates that have been configured in KFI.
Please Note: The operator must have setup other Routes that are using a KFI template and must have Form ID Points enabled on them. Please refer to the KFI user guide on how to setup a KFI with Form ID points.
Route index files to an UPLOAD
When enabled this will allow previously registered documents with an index file to pass through straight to an upload.
Route PDF documents to a rule based on whether it requires OCR
When enabled this will allow the importing of PDF files and have them check for if they are require OCR. If the PDF contains a non OCR page then a rule can be configured to move that file to a folder for processing. The operator would then configure another route to pickup that that and run the OCR on it.
Additional rules can also be configured for if the document already has OCR, the document is password protected or there is an error importing or checking the document.
Route using a KFI field value to match a rule keyword
When enabled imported documents are processed through the selected KFI. If the documents are to be uploaded to an EDRMS using the UPLOAD module then the upload type must be selected in the output tab of the KFI. More information on creating KFI types please refer to the EzeScan KFI User Guide.
Note: When using this option the KFI should be configured to have no operator intervention. It is recommend that if using a KFI and UPLOAD in routing that it will use an index file to import with the image or a barcoded image. If the job contains zone OCR, ICR, OMR or Discovery zones it is recommended that these types of jobs are run in the native EzeScan PRO/KFI mode.
Route index file: tick this option to route an existing index file along with the document to the specified KFI type.
Route using BCR value from coversheet or document first page to match a rule keyword
This option when enabled allows for documents to be processed according to a single barcode value contained on the first page of each document. Each rule can be configured to have specific output destination and word list in the rules tab. i.e. If a barcode value contained "NSW" a Rule called "Route to NSW" could be created. In the Rule match list it would contain the word "NSW" the rule can then be configured to save to the respective folder, email or printer.
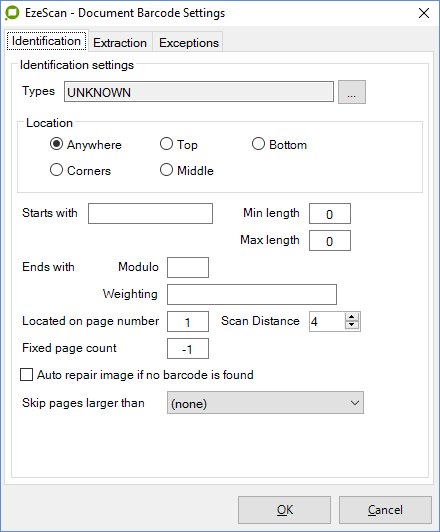
Barcode Settings
Select BCR Settings on the Processing tab to display the barcode identification settings.If the operator knows the type of barcode it can be selected from the pulldown list, otherwise leave the type as UNKNOWN and EzeScan will automatically detect the type for you.
Barcode Type
There are 26 different barcode fonts supported by EzeScan. They include:
|
INDUSTRY 2 OF 5 |
INTERLEAVED 2 OF 5 |
IATA 2 OF 5 |
DATALOGIC 2 OF 5 |
|---|---|---|---|
|
BCD MATRIX |
ONE CODE |
CODE 32 |
CODE 39 |
|
CODE 39 EXTENDED |
CODABAR 2 |
CODE 93 |
CODE 128 |
|
EAN 13 |
EAN 8 |
UPCE |
ADD 5 |
|
ADD 2 |
UPCA |
UCC128/EAN128 |
PDF417 |
|
Patch Code |
POSTNET |
QR |
DATAMATRIX |
|
ROYAL MAIL 4 STATE |
AUSTRALIAN POST 4 STATE |
|
|
Specifying the type of barcode and its location can dramatically help to speed up batch processing when barcodes are used as document separators. There are 5 options that can be used to specified where to look for the barcode on a page:
-
Anywhere
-
Top 1/3 of page
-
Middle 1/3 of page
-
Bottom 1/3 of page)
-
Corner (1/4 of the page, search order is TL, TR, BL, BR)
Location
Simply tick the location option that most accurately defines where you expect the barcode to be found on the scanned pages. If the image is going to rotate or unsure, select Anywhere.

Starts With
If your barcode has certain prefix characters you can specify the string that the barcode must start with for it to be recognised by EzeScan
Ends With
If using a barcode that contains a checksum character as its last character, EzeScan can check that the value is correct. The operator will need to enter the modulo number and the weighting mask used to create the barcode. If the modulo result calculated by EzeScan does not match the checksum value indicated by the last character in the barcode, EzeScan will ignore the barcode.
Min and Max Length
Use these options to specify the minimum and maximum length of the barcode value to be found. Routing will ignore barcodes with values that are shorter than the minimum length or longer than the max length. If a Min Length of 0 is specified then Routing will accept barcode values of any lengths not greater than the Max Length. If a Max Length of 0 is specified then Routing will accept barcode values of any lengths not less than the minimum length. If both values are set to 0 then Routing will accept any barcode value length.
Route using OCR page text from coversheet or document first page to match a rule keyword
This OCR processing option when enabled allows for documents to be routed using OCR word matches. Each rule can be configured to have specific output destination and word list in the rules tab.
Overrides
|
Force TIF Only |
Use this option to force the output of images to TIF only. |
|---|---|
|
Halt on Error |
Tick this option Halt routing if an error occurs.
|
|
Maintain Date |
This option will apply the Imported TIFF's created date to the output TIFF. |
|
KFI Field Processing |
This option can be used if a Route Type is importing an index file previously created from a KFI Job. This option will bypass processing each KFI field and just re-use the data from the imported text file. |
Import Settings
The purpose of the Import tab settings is to define where the selected Route Type acquires the incoming images. There are three available import methods, 1) Folder, 2) POP3 Mailbox 3) FTP Server. The settings are explained below
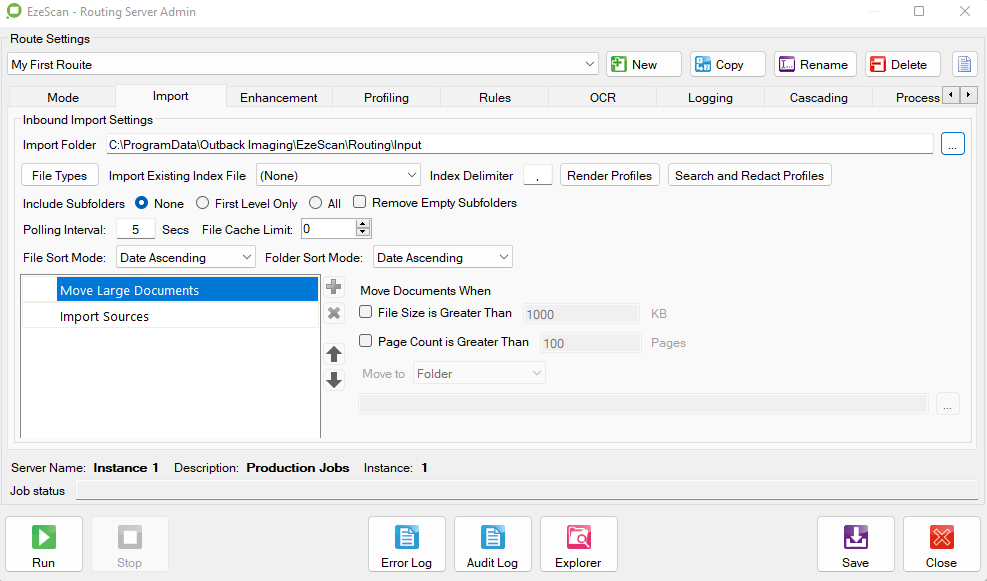
Inbound Import Settings
Import Directory
The Import Directory is where the Route Type will acquire documents to be imported. This directory is also used by the Route Type when importing from a POP3 or FTP server. The field is mandatory and therefore must be filled in.
File Types
The File Type button when selected shows the Select File Types form. On this form the user can specify what types of files will be imported and/or deleted by the Route Type.
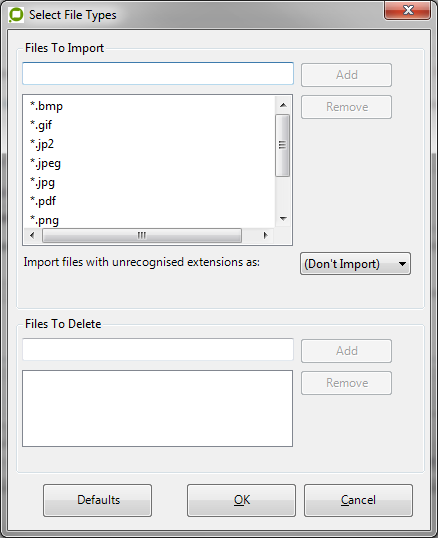
Configuring Files to Import:
-
To add a file type, in the text box type in an Asterisk character followed by the file extension and then select Add.
-
To remove a file type, select the file type in the list and then select Remove.
-
To Import files with unrecognised extensions using a different extension, select one of the available extensions from the drop down list.
Configuring Files to Delete -
-
To add a file type, in the text box type in an Asterisk character followed by the file extension and then select Add.
-
To remove a file type, select the file type in the list and then select Remove.
-
Note: To restore the original File Types settings, select the Defaults button.
-
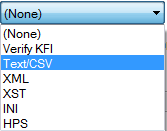
Import Existing Index File
Use this list to select the type of Index File to be imported from the Import Directory #1. An index file can then be used in the KFI module as fields. Please refer to the "Entry in data file" feature in the Value Tab in the KFI User Guide.The imported index file must contain the same file name as the image.i.e. image_1.pdf and image_1.csvWhen EzeScan sees that there is two files of the same name it will import them together.Please note: For this option to be enabled the KFI module must be enabled.
-
Index Delimeter
This text box allows the operator to specify the delimiter to be used with the imported index file. The default value is the Comma character.
-
Sub Directories
The option Include Subfolders when enabled allows the routing to import documents from Subdirectories contained within the Import Directories. First Level Only will select just the children of the root, whereas All will route all subfolders regardless of depth.The option Remove Empty Sub Directories will then remove the directories when they no longer contain any files.
![]()
-
Polling Interval
This is the polling interval (in seconds) on how often EzeScan should check the import folder\s for images to import. The interval can be set from 1 to 999 seconds.
File Cache Limit
When polling a folder, EzeScan by default will cache the contents as to correctly poll them in order of date of creation. If a folder contains a large number of files, this may add significant processing time. Entering a value for the File Cache Limit will override the default and only cache the designated value of files. The default value is 0.
-
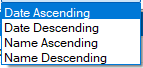
File Sort Mode
When a folder import occurs during automated processing,. the next file to be processed from the current import folder will be determined by the selected file sort mode. The sort modes are::.
-
Folder Sort Mode
When a folder import occurs during automated processing,. the next folder to be processed will be determined by the selected folder sort mode. The sort modes are::.
-
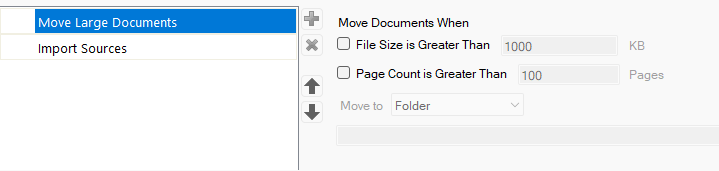
Move Large Documents
Documents which are either very large in file size or have an excessive number of pages are detrimental to the performance of EzeScan Server/Routing. Why? Well they can cause EzeScan Routing/Server to appear to be hung or stopped. Usually it's neither because it is simply slowly processing its way through an extremely large file.
What actually happens when the document file size in MB is too large?
During the processing of A4 sized documents 300 dpi, with compression an EzeScan server will typically process each document at a rate of between 1-3 seconds per page in each document. hence a 10 page document takes anywhere between 10 to 30 seconds to process before EzeScan Server can import and process the document from its import folder.
When a document has a large file size (>5MB), its usually due to either having been:
a. incorrectly rendered from a 72 dpi x 72 dpi up to a higher resolution, resulting in extremely large page dimensions, which greatly increase document processing time.
b. having been produced by scanning at 600 x 600 dpi resolution, resulting in large page sizes which greatly increase document processing time.
c. Having been scanned in colour, with no compression (page sizes being 33 times larger than compared with using JPEG compression) or LZW compression (pages size about 4 times larger compared with using JPEG compression), resulting in large page sizes which greatly increase document processing time.
d. It simply has too many pages in it which greatly increase document processing time (this is discussed further below).
That's why we don’t recommend processing documents larger than 25MB per document during normal business hours, when system users are expecting their documents to be processed with a short turn around time.
You could use the ‘File Size is Greater Than' option to move a file larger than KB in size (e.g. 25000KB or 25MB). Caution should be used when setting the KB value, as setting it to a low value could cause of lot of documents to be flagged as being 'large files’ when they may not need to be.
And then either choose the Move to Folder option to move it to a sub folder which we called ‘Large Files Process After Hours'.

Or choose to move it to a Route rule that has been configured to handle the large file more efficiently.
In this example, the LARGE FILE HANDLER rule would be configured to send an email alert that a large file was detected and will be processed after hours.
What actually happens when there are more than 100 pages in an input document?
When processing normal size documents EzeScan server processes each document at a rate of between 1-3 seconds per page in each document.
A 10 page document takes anywhere between 10 to 30 seconds to process before EzeScan Server can import and process the document from its import folder. System users don’t notice an delays in processing of their documents.
A 100 page document takes anywhere between 100 to 300 seconds (i.e. between 1 minute 40 seconds and 5 minutes) to process before EzeScan Server can import and process the document from its import folder. System users might notice somel delays in processing of their documents., but are not usually concerned about it.
However when a document has a large number of pages, say 10000 pages, the processing time is now between 10000 and 30000 seconds (i.e. between 166.7 minutes to 500 minutes, or between 2.78 hours and 8.33 hours). System users will notice large delays in the processing of their documents.
That's why we don’t recommend processing documents larger than 100 pages per document during normal business hours.
Use the options below to help move the file out of the main processing Route, and push it into a route that is set to run to run after hours or on weekends.
First you just need to tick the ‘Page Count is Greater than’ option, enter your number of pages (e.g. 100).
And then either choose the Move to Folder option to move it to a sub folder which we called ‘Large Files Process After Hours'.
Or choose to move it to a Route rule that has been configured to handle the large file more efficiently.
In this example, the LARGE FILE HANDLER rule would be configured to send an email alert that a large file was detected and will be processed after hours.
Render Profiles
The Render Profiles button opens a window in which you can configure the Image and PDF requirements for the imported documents. The Email and Microsoft Office Excel, PowerPoint and Word document rendering options are also available if EzeScan is licensed for them.
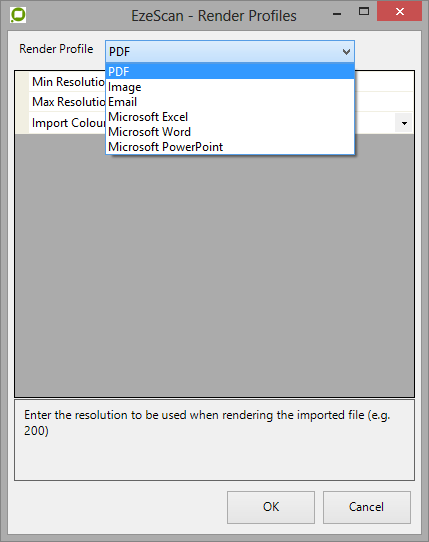
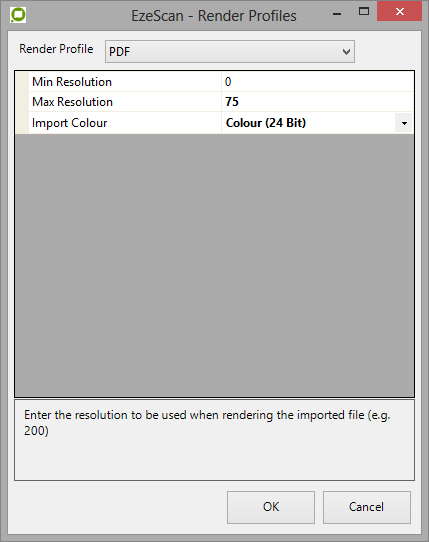
PDF
-
Min Resolution
This option allows the operator to set the minimum resolution (in DPI) when importing PDF files. Use 0 for auto-detect.
Imported images are increased to the minimum resolution if the original PDF has a lower resolution.
-
Max Resolution
This option allows the operator to set the maximum resolution (in DPI) when importing PDF. Use 0 for auto-detect. Imported PDF's are reduced to the maximum resolution if the original has a higher resolution.
Please note: Wherever possible it is best to import TIFs as the import resolution is automatically set by EzeScan.
-
Import Colour
This option allows the operator to force the import PDF file to the colour type selected from the drop down list. The options are Auto Detect, Black & White, Gray Scale, Colour (24 Bit).

Image
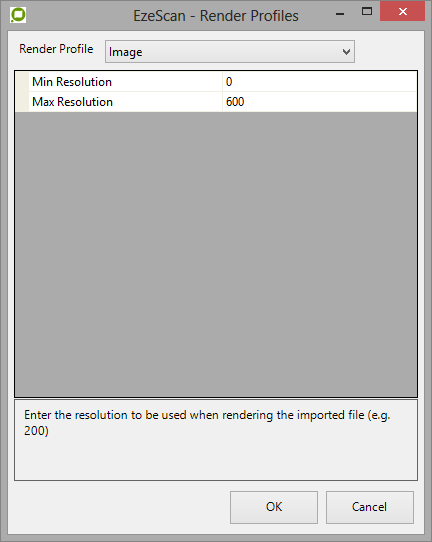
-
Min Resolution
This option allows the operator to set the minimum resolution (in DPI) when importing image files such as TIF, JPG, GIF or BMP files. Use 0 for auto-detect.
Imported images are increased to the minimum resolution if the original has a lower resolution.
-
Max Resolution
This option allows the operator to set the minimum resolution (in DPI) when importing image files such as TIF, JPG, GIF or BMP files. Use 0 for auto-detect. Imported images are reduced to the maximum resolution if the original has a higher resolution.
Please note: Wherever possible it is best to import TIFs as the import resolution is automatically set by EzeScan.
Email Settings
The Email Render Profile has the settings for the rendering of eml files into images for processing. The header properties of the email can be included as a header in the image, followed by the email body and any attachments. Separators can be inserted between attachments. Note: You need to select the .eml as a file type in the Import File Types section. See File Types in this chapter for more information. Note: If you are importing directly from a mailbox use the 'Generate .eml file from email' setting to create the eml file to be rendered. This is found in Email Download Options.
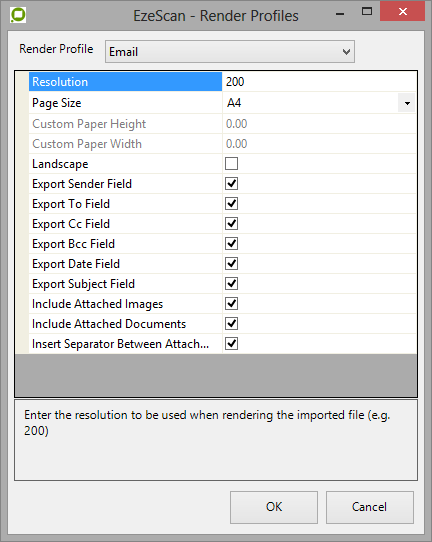
-
Resolution
Rendered images are created with the specified resolution.
-
Paper Size
This sets the page size of the rendered image. If Custom is selected then the height and width of the page can be can be manually entered in inches.
-
Custom Paper Height
If Custom is selected for the Paper Size then the height in inches can be entered in this field.
-
Custom Paper Width
If Custom is selected for the Paper Size then the height in inches can be entered in this field.
Note: 1 inch = 25.4 mm
-
Landscape
Select this to set the page orientation to be landscape, the default if this is unchecked is portrait orientation.
-
Export Sender Field
Include the Sender field in the header when rendering the email.
-
Export To Field
Include the To field in the header when rendering the email.
-
Export Cc Field
Include the CC field in the header when rendering the email.
-
Export Bcc Field
Include the BCC field in the header when rendering the email.
-
Export Date Field
Include the Date field in the header when rendering the email.
-
Export Subject Field
Include the Subject field in the header when rendering the email.
-
Include Attached Images
Include any attached images (i.e. BMP, GIF, JPG) when rendering the email.
-
Include Attached Documents
Include the CC field in the header when rendering the email.
The Email render can only handle PDF, Word and Excel attachments. PowerPoint attachments would need to be saved and processed with the separate PowerPoint Render Profile.
-
Insert Separator Between Attachments
If this check box is selected a black separator page will be included between the email and the attachments and between each attachment.
Note: The Email settings apply to the import of eml files which will be rendered to images.
Microsoft Excel Settings

-
Resolution
Rendered images are created with the specified resolution.
Microsoft Word Settings

-
Resolution
Rendered images are created with the specified resolution.
Microsoft PowerPoint Settings

-
Resolution
Rendered images are created with the specified resolution.
FTP Settings
The Download Images from FTP Server option if enabled allows the Route Type to download files from FTP Server folders into the Import Directory. A maximum of 4 FTP Servers can be specified per Route Type. Warning: Routing will delete files on the FTP Server as they are downloaded.
-
FTP Server: Type in the FTP Server's address or IP Address.
-
Port: Type in the FTP Server's Port number. This is usually Port 21.
-
User: Type in the FTP Server Username. Please ensure that the User specified has Delete privileges, otherwise downloaded files can't be deleted.
-
Password: Type in the FTP Server User's Password.
-
Security Type: Select the Security Type from the drop down. (Implicit or Explicit)
-
Connection Type: Select the Connection Type from the drop down (Passive or Active).
-
Connect Timeout: Specify the maximum time in seconds that will be allowed to establish the connection, default is 30.
-
Folder: Type in the Folder where documents are to be downloaded from.
-
File Folder Import Limit: Specify the maximum number of files to import per session, or leave as 0 for unlimited.
IMAP Download Settings
The Download Images from IMAP Server option if enabled allows the Route Type to download emails from the IMAP server into the Import Directory.
Warning: Routing will delete emails on the IMAP server as they are downloaded.
-
IMAP Server: Type in the IMAP server address
-
IMAP Port: Type in the IMAP Port.
-
IMAP Username: Type in the IMAP Mailbox Username.
-
IMAP Password: Type in the IMAP Mailbox Password.
-
IMAP Security Type: Select the Security Type of the IMAP Mailbox.
-
IMAP Mailbox: Specify the correct IMAP Mailbox.
-
IMAP Subfolder: Type in the IMAP subfolder to be polled.
-
IMAP Move to Mailbox: Specify the IMAP mailbox to move the email to after processing, or leave blank to delete the email.
POP3 Download Settings
The Download Images from POP3 Server option if enabled allows the Route Type to download emails from the POP3 server into the Import Directory.
Warning: Routing will delete emails on the POP3 server as they are downloaded.
-
POP3 Server: Type in the POP3 server address
-
POP 3 Port Type in the POP3 Port.
-
POP3 Username: Type in the POP3 Mailbox Username.
-
POP3 Password: Type in the POP3 Mailbox Password.
-
POP3 Security Type: Select the Security Type of the POP3 Mailbox.
Email Download Options
-
Create index from headers
This option will create an XML index file (in the specified import folder of the job) which will contain header information of the email. These include:
-From, To, CC, BCC, Reply Address
-Subject, Body
-Date, Date Downloaded
The operator can use the optional licensed KFI module to extract this data for KFI field processing. Please refer to the "Entry in data file" feature in the Value Tab in the KFI User Guide.
-
Generate .EML File from Email
This option will generate an .eml file from the email body and Tiff/PDF attachments.
The Email Render option configured in Render Profiles will allow rendering of image, PDF, Microsoft Word and Microsoft Excel documents.
Run Command Line
Run Command Line will allow command lines to be executed while the route happens.
Detection Settings
The purpose of the Detection settings is to define how to separate the image and the types of image enhancement applied to the imported images before and after they are processed. The settings are explained below.
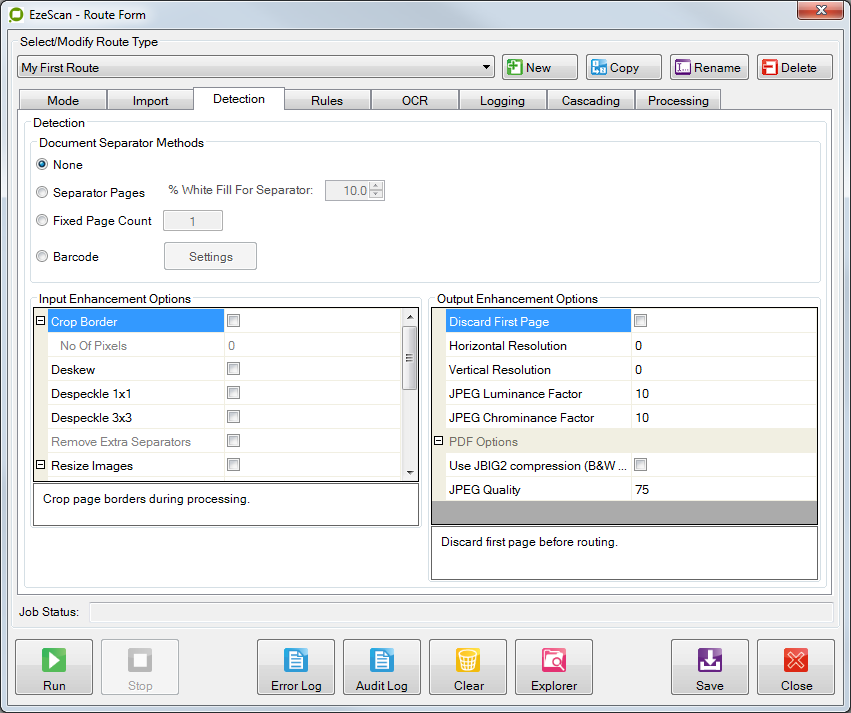
Detection Settings
When a sepeartor methods is selected Routing will consider the file that has been imported may contain multiple documents. Routing will use the selected method's logic to locate the start & finish of documents in the file.

-
None
If the None option is selected then Routing will consider the imported file to contain only a single document.
-
Separator Pages
Set this value to around 10% when using Black separator pages. We recommend using black separator pages rather than white separator pages. EzeScan will assume any value < 50% indicates that you will be using black separator pages. Any value >= 50% will be treated as using white separator pages. We suggest using 10% for black separators and 99.95% for white separators.
-
Fixed Page Count
In this mode, Routing will split the imported file into separate documents based on the fixed page count value. The file is not expected to contain any separator pages.
-
Barcode
In this mode, Routing will expect the file to contain 1 barcode on the start page of each document to be separated. The file is not expected to contain any separator pages. Select Settings on the Enhancement tab to display the barcode identification settings.If the operator knows the type of barcode it can be selected from the pulldown list, otherwise leave the type as UNKNOWN and EzeScan will automatically detect the type for you.
-
Barcode Type
There are 26 different barcode fonts supported by EzeScan. They include:
|
INDUSTRY 2 OF 5 |
INTERLEAVED 2 OF 5 |
IATA 2 OF 5 |
DATALOGIC 2 OF 5 |
|---|---|---|---|
|
BCD MATRIX |
ONE CODE |
CODE 32 |
CODE 39 |
|
CODE 39 EXTENDED |
CODABAR 2 |
CODE 93 |
CODE 128 |
|
EAN 13 |
EAN 8 |
UPCE |
ADD 5 |
|
ADD 2 |
UPCA |
UCC128/EAN128 |
PDF417 |
|
Patch Code |
POSTNET |
QR |
DATAMATRIX |
|
ROYAL MAIL 4 STATE |
AUSTRALIAN POST 4 STATE |
|
|
|
|
|
|
|
|
|
|
|
|
Specifying the type of barcode and its location can dramatically help to speed up batch processing when barcodes are used as document separators.There are 5 options that can be used to specified where to look for the barcode on a page:
-
Anywhere
-
Top 1/3 of page
-
Middle 1/3 of page
-
Bottom 1/3 of page)
-
Corner (1/4 of the page, search order is TL, TR, BL, BR)
-
Location
Simply tick the location option that most accurately defines where you expect the barcode to be found on the scanned pages. If the image is going to rotate or unsure, select Anywhere.

-
Starts With
If your barcode has certain prefix characters you can specify the string that the barcode must start with for it to be recognised by Ezescan
-
Min and Max Length
Use these options to specify the minimum and maximum length of the barcode value to be found. Routing will ignore barcodeswith values that are shorter than the minimum length or longer than the max length. If a Min Length of 0 is specified then Routing will accept barcode values of any lengths not greater than the Max Length. If a Max Length of 0 is specified then Routing will accept barcode values of any lengths not less than the minimum length. If both values are set to 0 then Routing will accept any barcode value length.
-
Ends With
If using a barcode that contains a checksum character as its last character, EzeScan can check that the value is correct. The operator will need to enter the modulo number and the weighting mask used to create the barcode. If the modulo result calculated by EzeScan does not match the checksum value indicated by the last character in the barcode, EzeScan will ignore the barcode.
-
Fixed Page Count
If the barcoded documents have a fixed page count, then simply enter the number of pages in the barcode fixed page count box shown below.For example, if each barcoded document was 1 page long, then type 1 in this box.If needing EzeScan to ignore barcodes of the same value on the next and following pages set this setting to 0. For example, if barcode value "0001" is on page 1 and page 2, and on page 3 the barcode is "0002" EzeScan would make page 1 and 2 a document.
Auto Repair Image If No Barcode is Found
Sometimes the quality of a barcode image may be of poor quality.
Ticking this box (off by default) will make a 2nd pass will be made over the document to attempt a repair on the image, which may in turn find the barcode.
-
Skip Pages Larger Than
If processing images that may be larger than a certain size. (E.g. A3 and greater) and there will never be any barcodes on these pages then enable this setting. It will improve the recognition speed as it will not look for barcodes on these pages.
-
Extraction Settings
This tab is disabled because it does not apply to barcode seperation in Routing Mode.
-
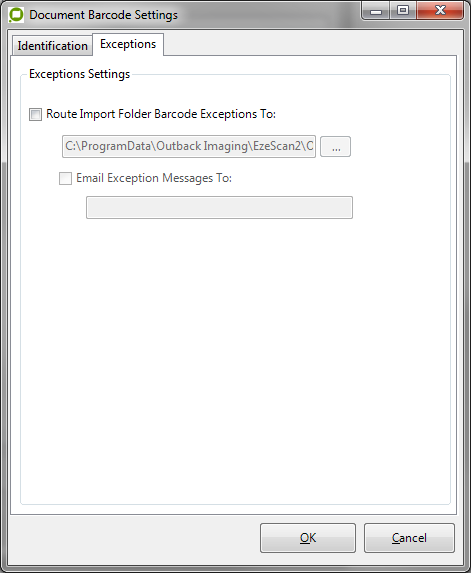
Exceptions Settings
When the Route type is configured to use barcode separation, Routing checks the first page for a barcode. If the document does not have a barcode then it can be automatically routed to an exception folder.
-
Route Import Folder Barcode Exceptions To:
This is the folder location of where the barcode exception files are to be sent to.
-
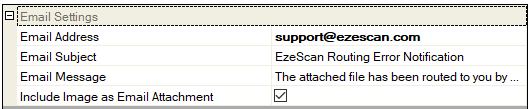
Email Exception Messages To:
This will send an email notification to the specified email address of a barcode exception. The file is not attached to the email. Below is a sample notification message.
Job EzeScan - Barcodes: Doc (1) barcode 1 exception routed to C:\Program Files\Outback Imaging\EzeScan\Output\EzeScan - BCR - Split + Name Files\Barcode1_Exceptions\ICR OMR – Auto Payment Form.tif
Input Enhancement Options
-
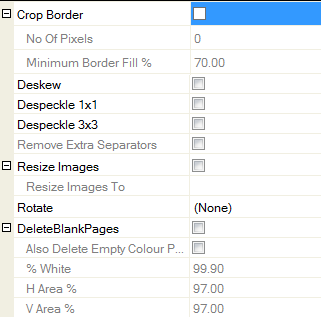
Crop Border
Tick this option to enable the crop border feature. When the number of pixels to crop is = 0 it performs an auto crop. -1 for half page black cropping, -2 for half page white cropping, -3 for aggressive black border cropping, -4 for aggressive white border cropping.
The Minimum Border Fill% is used with the -3 or -4 aggressive cropping modes. The higher the number the more cropping is performed. Please test samples before choosing your preferred settings.
-
Despeckle 1x1, 3x3
Tick this option to despeckle (e.g. remove pepper sized black dots from) imported images. Despeckle 3x3 performs a more aggressive clean-up compared to Despeckle 1x1.
-
Deskew
Tick this option to deskew imported images.
-
Remove Extra Separators
When scanning in duplex the separator page will appear as two images. This option will remove the extra separator image.
-
Resize Images To
This option will resize the image. A Paper size can be set. e.g. A3, A4 or a % ratio i.e. 50 or 200%. Please note that this option can decrease the image resolution.
-
Rotate
Left 90
The Left 90 option, rotates each page -90 degrees. This option is very useful when scanning using a multifunction device scanning in landscape mode, as it enables you to scan in landscape mode, but display in portrait mode.
180
The 180 option, rotates each page 180 degrees. This option is very useful when scanning in documents that are damaged on the leading scanning edge. Simply put the documents in updside down and then EzeScan will flip them up the right way.
RIGHT 90
The Right 90 option, rotates each page +90 degrees. This option is very useful when scanning using a multifunction device scanning in landscape mode, as it enables you to scan in landscape mode, but display in portrait mode.
Using OCR
The Using OCR option, dynamically tests each page of the document to see whether it was scanned with the text the correct way up. If not, the page will be flipped to appear the correct way up. If EzeScan cannot determine it will leave image in the orientation that was delivered from the scanner.
Using BCR
Tick this option to dynamically rotate the images using barcode orientation. If there are follow on pages in the document, they will be rotated to the same as the barcoded page.
-
Delete Blank Pages
The Delete Blank Pages option deletes those pages from the batch, whose percentage of white pixels is >= than the % White Space for Blank Pages setting within a frame on the page whose outer border location is defined by the Horizontal Area % and Vertical Area % settings.
By default the % White Space for Blank Pages value is set to 99.90% and the Horizontal Area % and Vertical Area % are set to 97%. (e.g. 3% of the edge of the page will be ignored) You may need to adjust these values to get satisfactory results. You may delete blank pages at any time by pressing the shift + delete keys. (If you want to see what percentage of white pixels are on a page, simply select the respective page and use the right mouse button Properties menu option to display this information)
Please Note: It is recommended not to set this setting below 99.70% as EzeScan may delete a page with actual text on it. It is the customers responsibility to confirm that the delete blank page setting is correct for the enviroment.
-
Also delete empty colour pages
Enable option if performing colour scanning with coloured pages. This will remove any blank coloured pages (e.g. blue, green).
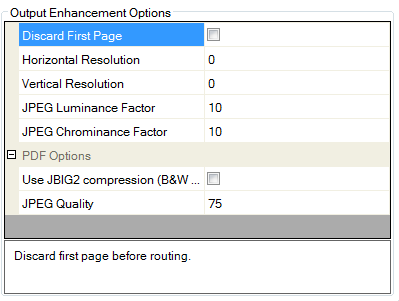
Output Enhancement Options
-
Discard First Page
Tick this option to discard the first page of the imported document after processing.
-
Horizontal Resolution
This option changes the output horizontal resolution of the imported images to the specified value. If the value is set to 0 then the horizontal resolution will remain the same.
-
Vertical Resolution
This option changes the output vertical resolution of the imported images to the specified value. If the value is set to 0 then the vertical resolution will remain the same.
Please note: Dropping the resolution on the import image will effect barcode detection and OCR quality.
-
Use JBIG2 compression
When ticked, this option will use JBIG2 lossless compression to create smaller PDF files. Only works with Black & White images.
-
JPEG Quality
This is the JPEG quality to be applied to the document. The lower the number the less the quality and the lower the output file size. This option applies to Grayscale and colour documents only.
-
JPEG Luminance/Chrominance Factors
JPEG Luminance and Chrominance Factor settings can be adjusted to reduce the output file size of any colour page, using JPEG compression. Please note: Adjusting these settings may affect the image quality.
Luminance: 0-255 (10 Higher, 24 Medium, 50 Lower Quality)
Chrominance: 0-255 (10 Higher, 30 Medium, 50 Lower Quality)
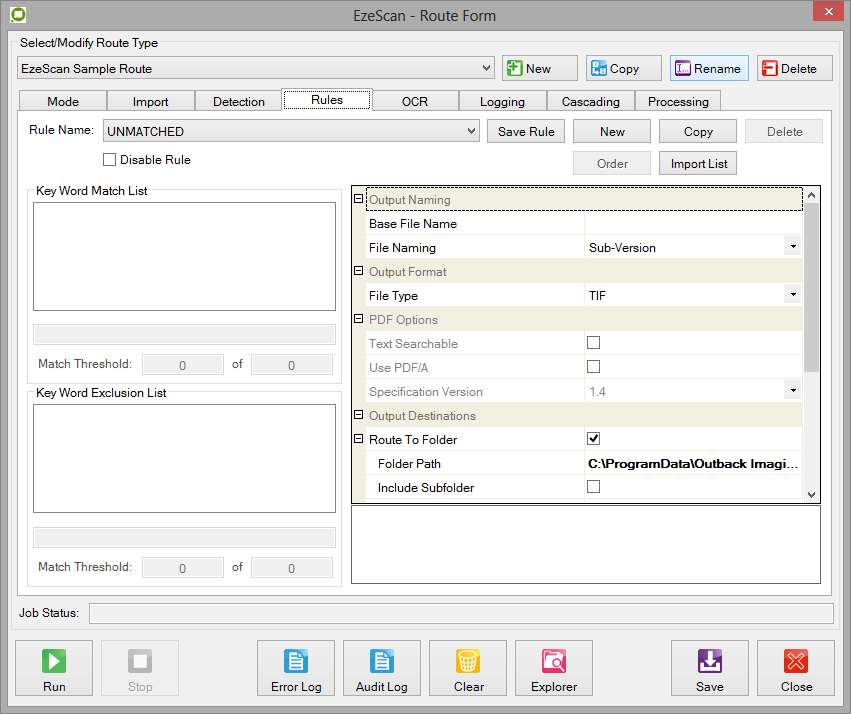
Rules Settings
This tab is used to create, modify and delete Rules. When the specified Route type is run, routing will attempt to match each imported document to a rule using Key Word Match and Exclusion lists. Routing when looking for matching rules will start at the top of the list and work its way down to the bottom of the list until a matching rule is found. If no match is found then Routing will use the UNMATCHED rule for that document. The matched rule is then used to determine the output destinations of the imported document.When Perform Folder File Conversion is selected in the Mode tab, only the UNMATCHED rule will be available. The UNMATCHED Route to Directory will be used as the top directory for output files and their subdirectories. When using Route using a KFI field value to match to rule keyword and using a KFI + UPLOAD from the Mode tab, the UNMATCHED rule will be the default, the operator can setup exception rules for when a KFI and / or UPLOAD fails. Please refer to section 5.7.1 for more information on this.
Inbound Rules Settings
This option contains a list of all availble roules for the selected route type.

-
Save Rule when selected saves any changes that been made to the currently displayed rule. Note: Rules can't be copied or deleted whist they are being modified.
-
To Create a new Rule select New. A popup box will display. Type in a name for the rule and select ok.
-
To Copy a rule select the rule to be copied in the drop down list, and then select copy. A popup box will display. Type in a name for the copy of the rule.
-
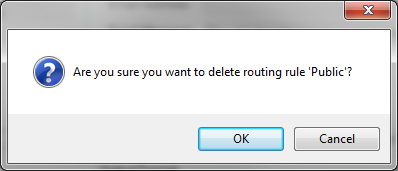
To Delete a rule, select the rule in the drop down list and the select delete. Then ok to confirm the deletion. The UNMATCHED rule is required by Routing and can therefore not be deleted.
-
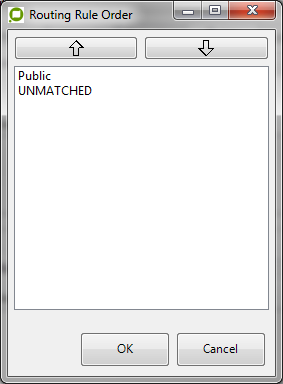
Order
Use this option to select the order in which rules are processed. Rules at the top of the list are processed first. The UNMATCHED rule cannot be moved because it is used to handle documents that aren't matched to a rule from the list.
-
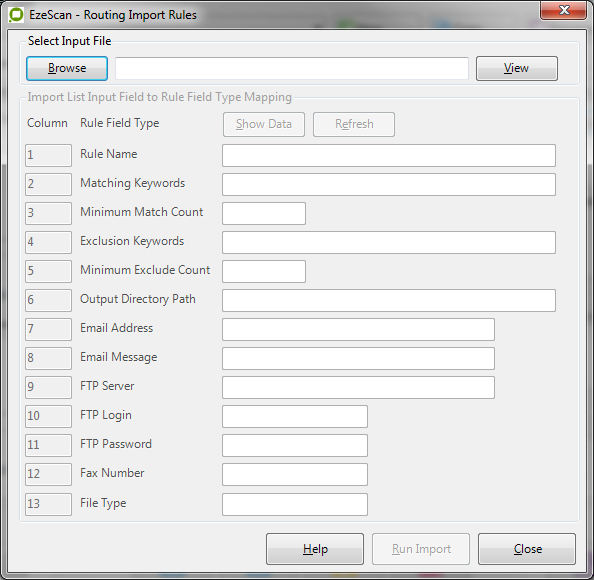
Import List
This option allows for rules to be imported from a CSV formated .txt file. The following screen appears when selected.
-
Browse
Use this button to browse for the .txt file to be imported.
-
View
This will display the .txt file in the windows default viewer. Displaying the document will help to fill in the remainder of the form.
-
Column
This is where you map the CSV formated .txt files columns to the rule field types. If a column number is set to 0 then that Rule Field Type will be ignored.
-
Show Data
Will display against each of the Rule Field Types the value found at the selected column. After this button has been selected it will display as Hide Data. Select the button again to hide the data displayed on the form.
-
Key Word Match List
Use this option to add key words that will be used to match imported documents to the selected Rule Name using the processing method selected on the Processing tab. The following is a list of the available processing methods and there uses:OCR - key words are compared to the OCR output of the imported images.BCR – key words are compared to the value extracted from the barcode.KFI – key words are compared to value used in the KFI field.Note: Folder processing only uses the UNMATCHED rule. To Add a key word to the list, type into the text box and press enter.To Remove or Change, double click on the key word. The key word will then appear in the text box where it can be changed or deleted. If you are changing the key word press enter afterwards to return it to the list.
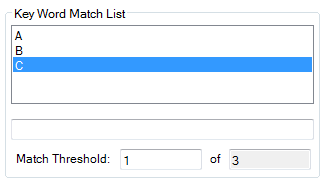
Match Threshold
This option defines the minimum number of key words to be found on the imported document for Routing to accept the rule as a match.
Key Word Exclusion List
Use this option to add key words that will be used to exclude documents from matching to the selected rule. This key word list is compared to imported documents using the processing method selected on the processing tab. To Add a key word to the list, type into the text box and press enter.To Remove or Change, double click on the key word. The key word will then appear in the text box where it can be changed or deleted. If you are changing the key word press enter afterwards to return it to the list.
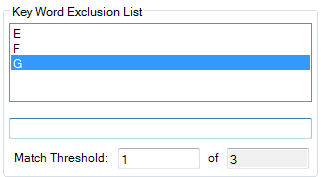
Exclusion Threshold
This option defines how many matching key words from the list are to be found on the document for Routing to exclude the rule as a match.
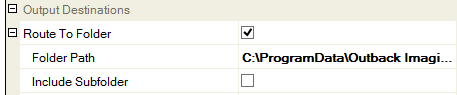
Output Destinations
-
Route to Folder
Tick this option to route matching documents to the specified folder or UNC path. The directory can be changed for each rule.
-
Route to Email Address
Tick this option to route matching documents to the specified email address as an attachment. Use the second text box to type in a custom message to be used for emails sent from this routing rule.If the operator wishes to email a link to the document instead of attaching it, put <<FILE>> in the "Email Message" setting and it will send the UNc path to it. The path is derived from the Rule Folder Path setting.
-
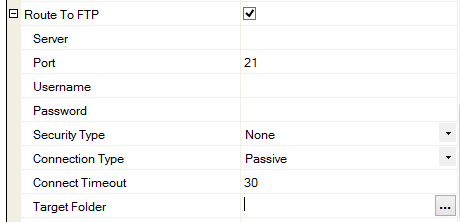
Route to FTP Server
Tick this option to Route matching documents to the specified FTP Servers target folder. The following fields need to be configured before FTP will work properly.
-
FTP Server: Type in the FTP Server's IP address.
-
Port: Type in the FTP Server's Port number. This is usually Port 21.
-
User: Type in the FTP Server Username. Please ensure that the User specified has Read/Write privileges, otherwise files can't be created.
-
Password: Type in the FTP Server User's Password.
-
Security Type: Select the security type for the FTP server.
-
Connection Type: Select the connection type used for eh FTP server.
-
Connection Timeout: set the time in seconds allowed to establish a connection before timing out.
-
Target Folder: Type in or browse to the Folder where documents are to be routed to.
-
Output Naming
Base File NameIf you enter image base filename of Image_ and a next number of 1, then your images will be auto named during profiling as Image_1.tif, Image_2.tif, Image_3.tif and so on. These file names will be used during either manual or auto profiling.Please Note: Leave the option blank if you are using the KFI module field values to name the output file. File NamingSelects the action to perform for file name conflicts, default is Sub-Version.

Output Format
This option will convert documents to the specified format before they are routed.

-
TIF - This will save the document as a multi page TIFF file.
-
PDF - This will save the document as a image only PDF File.
-
TXT – This will save the document as a .txt file
-
RTF – This will save the document as a .rtf file
-
DOC – This will save the document as a .doc file
-
DOCX – This will save the document as a .docx file
-
TXT – This will save the document as a .txt file
-
XLS – This will save the document as a .xls file
-
XLSX – This will save the document as a .xlsx file
PDF Options
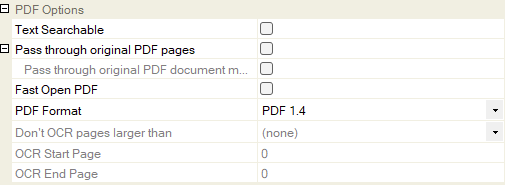
These options will be enabled when the output format is set to PDF.
|
|
|
|---|---|
|
PDF Format |
Default is PDF 1.4 Save PDFs using this format. We only recommend using the PDF/A options when long term archival is required. The available options are:
|
|
Text Searchable |
This option is used to create Text Searchable PDF's. There are a number of factors that can affect the accuracy of the text placed in the PDF. They include image quality, image resolution, image brightness, image contrast, image orientation, image skew, image fonts, and image graphics. It is the responsibility of the person(s) using EzeScan to review the text searchable PDF's created by the EzeScan to ensure that they are suitable for their intended use. |
|
Pass through original PDF pages |
This will ignore OCR on pages that already contain a text layer, for example digitally born or pre-scanned PDF documents with a text layer. It will retain that layer and pass it through to the output PDF. Please note that any page changes such as erasing or annotations will not be applied to the page. |
|
Pass through original PDF document metadata |
This will keep the original imported PDF properties. |
|
Fast Open PDF |
This option will allow the PDF to open faster when viewing from a web page. |
|
Don't OCR pages larger than |
When using multiple size originals it can be quite time consuming to convert large size pages to contain a text layer. Setting this option to a setting such as A3 will tell EzeScan to OCR pages of sizes A3 and smaller only. |
|
OCR Start Page
|
This will allow the operator to define the first page to OCR. This option is recommended for specific use case scenarios where explicitly required. |
|
OCR End Page |
This will allow the operator to define the last page to OCR. Leave as 0 to This option is recommended for specific use case scenarios where explicitly required. |
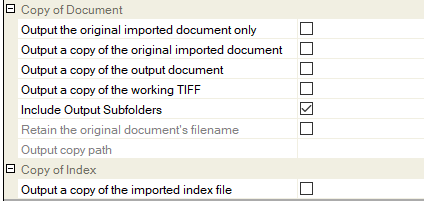
Copy of Document
This option allows you to output copies of the original or output document – only one option from original, copy of original, and copy of output can be selected.
-
Output the original imported document only – Only output an unmodified copy of the original imported document. This option is designed for EzeScan to simply pass through the imported document and to send it to the output location. E.g. Documents that do not need to be manipulated by EzeScan such as Microsoft Word documents.
-
Output a copy of the original imported document - Output an unmodified copy of the original imported document. This is in addition to the output document.
-
Output a copy of the output document - Output an additional copy of the output document.
-
Output a copy of the working TIFF – this will output the working TIFF cache file used before the final output document has been created.
-
Include output sub folders – This option will recreate the same output sub folder structure as the import folder structure. It is primarily designed for the Mode tab option "Perform Folder File Conversion Only (convert inut folder TIFF files to PDF).
-
Retain the original document's filename – Only available when outputing the original document – will keep the original filename.
-
Output copy path – Enter or browse to the folder path where the copies of documents are to be saved.
Copy of Index
Output a copy of the imported index file – If the route is set to import an index file, this file can also be output.
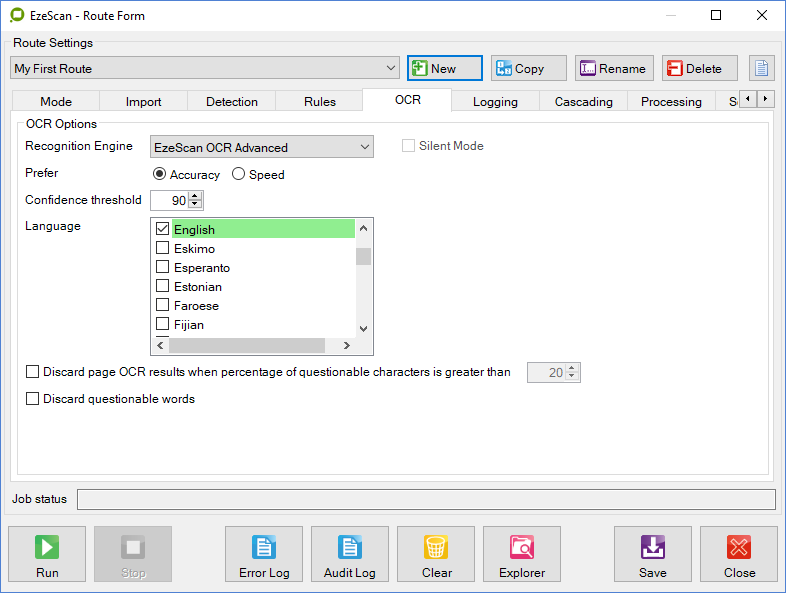
OCR
This tab allows the operator to adjust OCR specific settings. It is recommended that the "EzeScan OCR Advanced" Recognition Engine is used. • OCR EngineThis option allows the EzeScan operator to choose the OCR Engine. EzeScan OCR & EzeScan OCR Advanced is supplied with the EzeScan. To use the OmniPage OCR option a separately purchased copy of OmniPage Pro version 16 or 17 must be installed on the workstation. We recommend using "EzeScan OCR Advanced"• OCR LanguageThis option specifies which language dictionary to use to perform the OCR, and is only available if the EzeScan OCR Advanced engine is selected.• Silent ModeUse this option to hide OmniPage Pro progress messages when Routing is running.• OCR PerformanceSets the OCR engine to Slow or Fast. Please check the OCR quality before deciding which method to use.
-
Discard page OCR results when percentage of questionable characters is greater than
Tick this option to force EzeScan to discard the OCR text for the current page when creating text searchable DF's.
For example if there were 30% questionable characters read from page, then the resulting OCR text output may not be accurate enough for search purposes. In such cases it makes sense to discard that pages' OCR text and not place it in the text searchable PDF.
-
It is always the operator's responsibility to ensure that the outputted OCR text accuracy is acceptable.
-
Discard questionable words
Tick this option to force EzeScan to discard the OCR text for each OCR'ed word that has a lower confidence threshold than what is specified in the confidence threshold value on this tab.
Therefore when OCR errors occur on the page of text, those words will be removed from the index used to create text searchable PDF's.
Logging
This tab is used by Routing to enable logging, and enable options to keep the images plus OCR data. The audit and exception functions are also enabled from here.
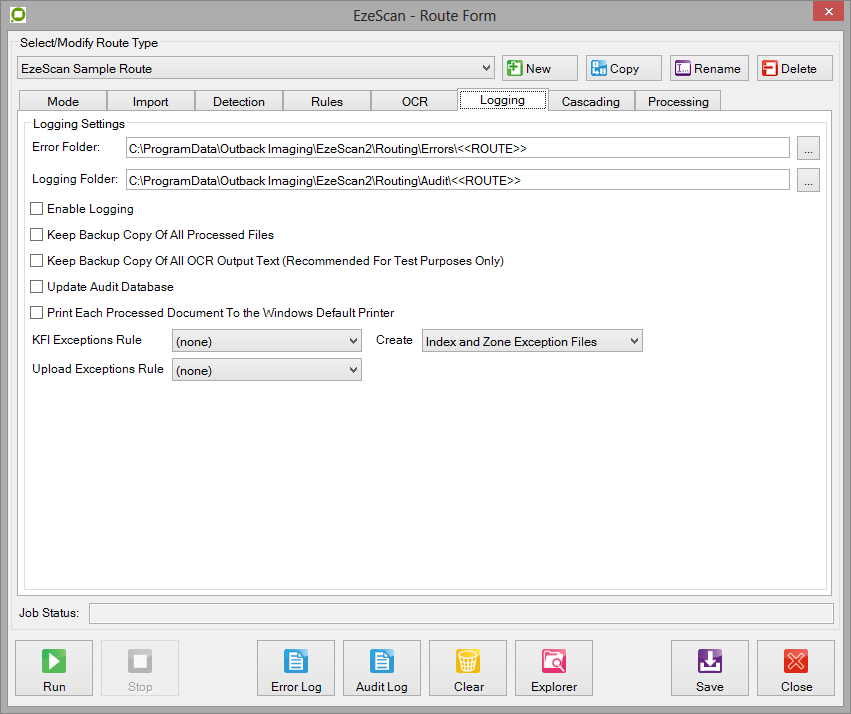
Logging Settings
-
Error Folder
This directory is where the selected route type will store error messages in a file named "error.log" and also the documents that have failed. By default a sub folder is created of the date of the error and the error log and document is stored in there.
-
Logging Folder
This directory is where the selected route type will keep records of all routed files in the file named "audit.log". Each record will contain the Input file name, the matched rule name, and full path of the output file. Example,
Image1.tif copied by rule UNMATCHED to C:\ProgramData\Outback Imaging\EzeScan\Routing\Output\Image1.tif () at 25/06/2008 9:35:53 AM
Note: Logging functionality requires the option "Enable Logging" to be enabled.
-
Enable Logging
Tick this option to enable logging for the selected route type.
-
Keep Backup Copy Of All Processed Files
Tick this option to force routing to copy each processed file to the specified Logging Directory.
-
Keep backup Copy Of All OCR Output Text
Tick this option to force routing to create an OCR output text file for each processed file.
-
Update Audit Database
Tick this option to update the Audit database with statistics collected from routing. This option requires the Audit module.
Please refer to the Audit Reporting section in the EzeScan PRO User Guide for more information.
-
Print Each Processed Document to the Windows Default Printer
Use this option to print each processed document to the default windows printer – recommended for testing purposes only.
-
KFI Exceptions Rule
This option is enabled when the mode tab option "Route using a KFI field value to match a rule keyword" is enabled. During processing, if a KFI exception occurs it will move the document to the rule that is set. Please refer to section 5.5 Rules Settings. The operator can then use and EzeScan PRO job (additional license may apply) to process these exceptions or an external process.
-
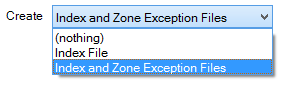
Create
Select if index and zone exception files (.ze) are to be output with any exceptions.
-
Upload Exceptions Rule
This option is enabled when the mode tab option "Route using a KFI field value to match a rule keyword" is enabled. During processing, if an UPLOAD exception occurs it will move the document to the rule that is set. Please refer to section 5.5 Rules Settings. The operator can then use and EzeScan PRO job (additional license may apply) to process these exceptions or an external process.
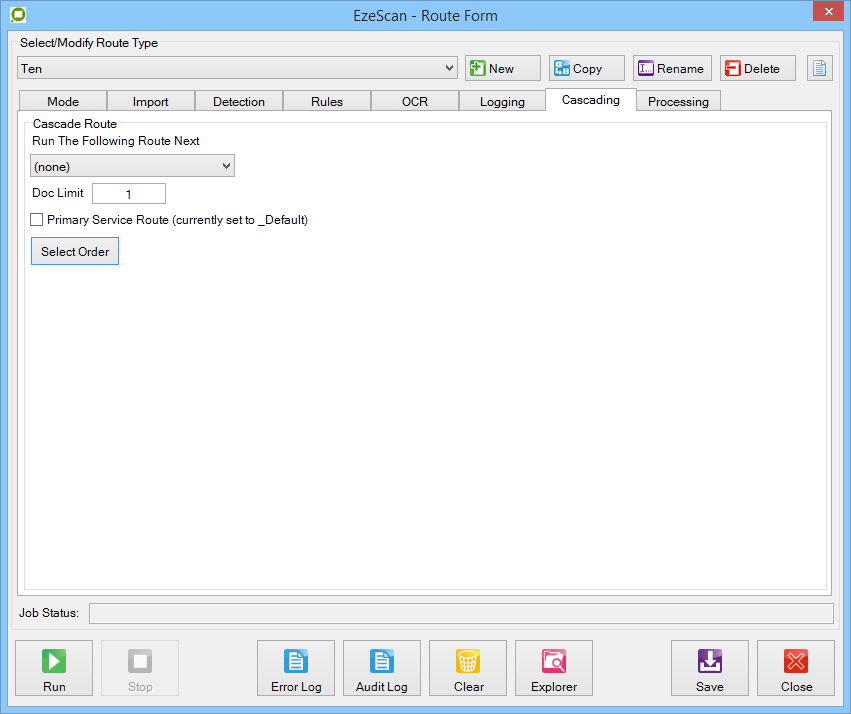
Cascade Settings
This tab is used to enable cascaded routing for the selected Route Type.
-
Run The Following Route Next
Use this option to select which Route Type routing will start on completion of the selected route type when routing is run. If this option is set to none then routing will remain on the selected route when it is run until it is stopped.
-
Doc Limit
Use this option to specify the number of documents routing is to process for the selected route type before it will run the next selected route type. If doc limit = 0 then routing will not run the next route type until all inbound documents for the selected route type are processed.
-
Primary Service Route
Use this option to make the selected route type the primary service route. This will force routing start with the selected route type when it is run.
Routing will display the name of the primary service route in brackets if it has already been assigned to another route.
-
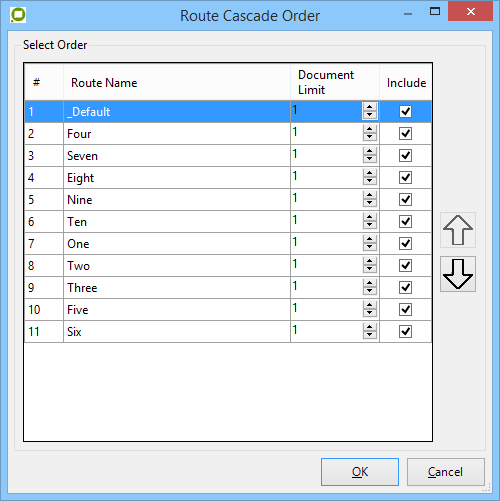
Select Order
This button will show the above form, this will allow the user to batch set the cascading order and 'Document Limit' for a breadth of routes. The arrows on the right hand side of the form will allow you to select the order, where as ticking the 'Include' button will include the selected route into the cascade.
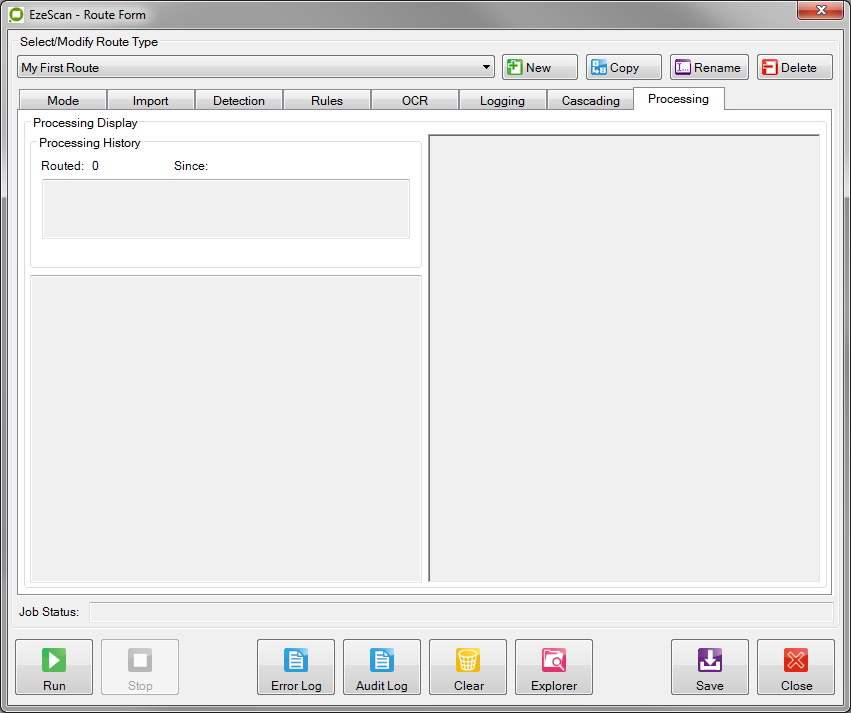
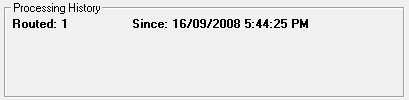
Processing Settings
The Processing tab will display when the route is active. It will show the routing history, the output text (If OCR is performed) and a thumbnail of the image.
EzeScan ROUTING Buttons

-
Run
From the Routing Admin form press the Run Routing button to run the selected Routing job. The EzeScan ROUTING module will poll the import locations (directory, sub-directory, POP3 mailbox, FTP server) looking for incoming images to process.As each incoming document is processed, the first page of the document is displayed on the document viewer panel, and the resulting OCR text is display in the text box panel. The name of the rule matched for the document is also displayed.As each incoming document is routed, the "Routed" counter is incremented by 1 to keep track of how many documents have been routed in this processing session. This provides the operator with a quick method of determining how many files have been processed by the ROUTING module. When an image matches a rule defined by the operator the image will be routed to that rules output destination. E.g. directory, email or FTP, in the specified format. I.e. TIF, image only PDF, text searchable PDF).
-
Stop
To stop the ROUTING process, press the Stop Routing button on the F1 Operator Actions Form. If ROUTING is currently processing an incoming document you'll need to wait until it finishes processing that document before you can get it to stop processing.
-
Error Log
The Error Log button when selected opens the ROUTING Error log, which can be found Error Directory of the selected route type.
-
Audit Log
The Audit Log button when selected opens the ROUTING Audit log, which can be found in the Logging Directory of the selected route type.
-
Clear
Use this option to delete all documents in the Routeflow sub-directory used by this route type. This option would usually be required if an image had an error in processing and had to be re imported.
-
Explorer
The Explorer button can be used to launch an explorer window that allows the operator to browse and open other audit files located in the EzeScan audit sub-directory.
-
Save
The Save button saves any changes made to the selected Route Types configuration.
-
Close
The Close button when selected will exit the EzeScan ROUTING form, and return the operator back to the EzeScan Viewer window.
Running Routing as a Background Service
In this case the Routing Admin form is used to configure the settings for the service. Once the configuration has been tested in a foreground window it is ready to run as a background service.
Warning: the Routing service and the Routing foreground application cannot be run at the same time. If the service is started and the operator presses Run Routing in the foreground application mode EzeScan will display and error notifying the error that this cannot be done.
Installing the Routing Service
First start the EzeScan Desktop client
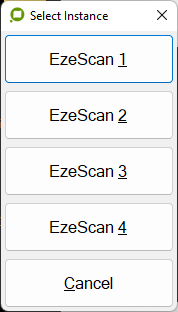
Choose which EzeScan Desktop instance you want to be configuring the service for.
Press that instance button.
Once the EzeScan Desktop Main Viewer window is displayed,
Use the Admin → Workstation Options menu to launch the Workstation options form:
Go to the Server tab.
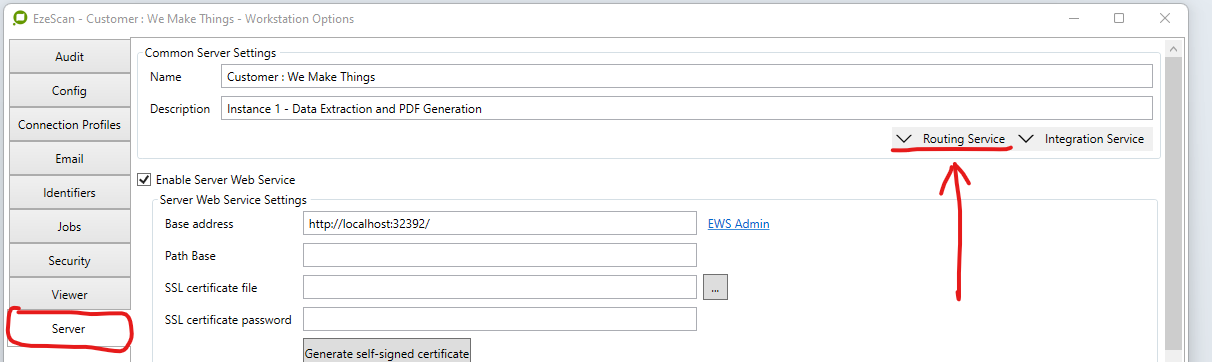
Drop down the Routing Service options:
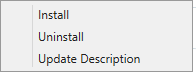
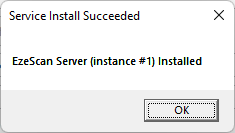
Click on Install.
The following screen should appear:
You can configure the windows properties using the windows Services application
Before starting the service, ensure that the service logs on as an account with run at least run as service privileges and make sure if using any workflows that are referencing network paths that the account has write access to these paths.
Uninstalling the Routing Service
To uninstall the service open the instance of EzeScan Desktop that corresponds to the instance of EzeScan Server service you want to uninstall.
For EzeScan Server instance 1, then that would be the button labelled
Once the required EzeScan Desktop Viewer is displayed
Use the Admin → Workstation Options menu option to launch the Workstation options form:
Go to the Server tab.
Drop down the Routing Service options:

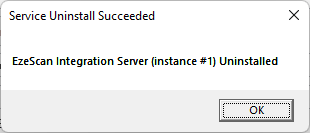
Click on Uninstall.
The following screen should appear:
Using the Integration Service
The Integration Service is a web based server that puts a wrapper around the Core EzeScan Connectors and allows them to be leveraged by web based application like EzeScan Webapps.
Installing the Integration Service
First start the EzeScan Desktop client
Choose which EzeScan Desktop instance you want to be configuring the service for.
Press that instance button.
Once the EzeScan Desktop Main Viewer window is displayed,
Use the Admin → Workstation Options menu to launch the Workstation options form:
Go to the Server tab.
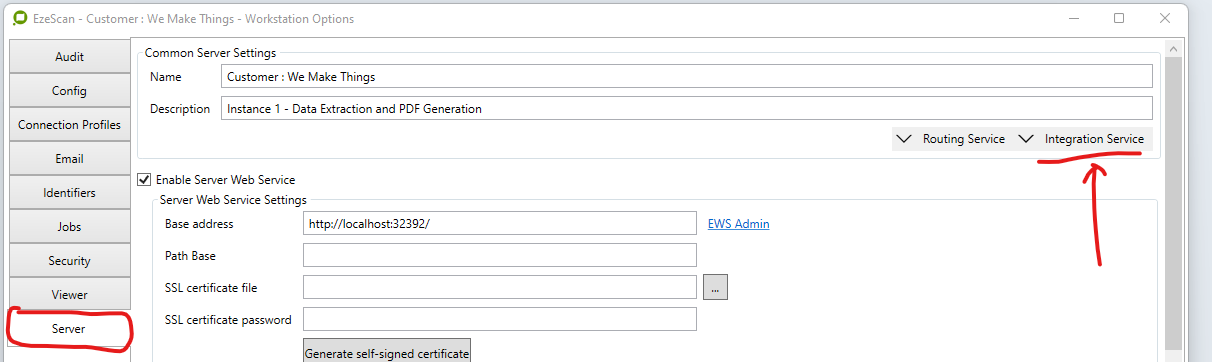
Drop down the Routing Service options

Click on Install.
The following screen should appear:
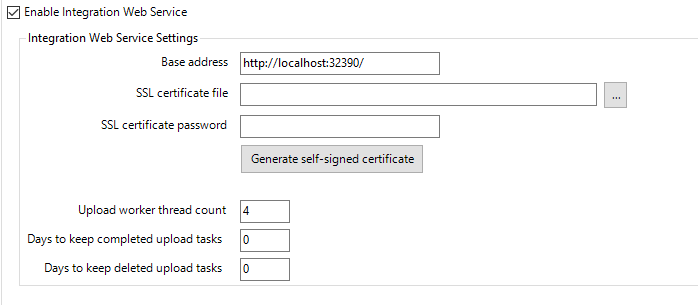
The next step is to go into Admin -> Workstation Options -> Server Tab -> Tick Enable Integration Web Service and enter the respective settings.
It is recommended to use a certificate (if possible). The customer can supply their own in as a .pfx (with password) or can selft generate. Note: the certificate will also need to be installed on any machines connecting to this service (e.g. WebApps server). For a production environment it is recommended to set settings to keep deleted and upload tasks to be 0.
-
Go into services and start the EzeScan Integration Server service
-
Open a Web browser and browse to the base address. Confirm a page like the below appears.
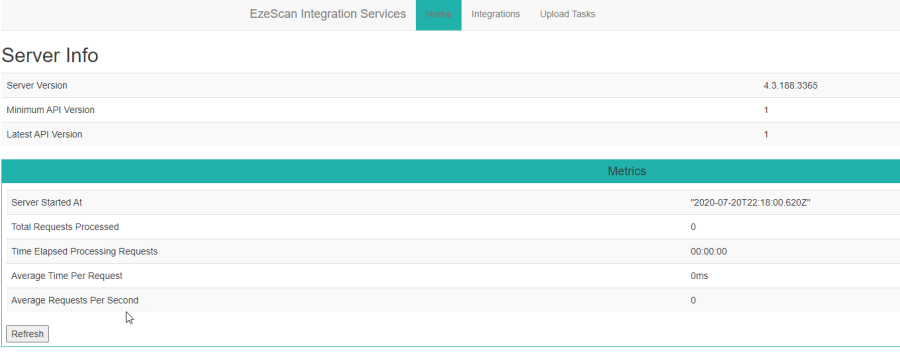
You can view the windows properties using the windows Services application
The service is now available for EzeScan WebApps to connect.
Refer to https://docs.ezescan.com.au/ezescan-webapps for more information in connecting EzeScan WebApps to this service.
Uninstalling the Integration Service
To uninstall the service open the instance of EzeScan Desktop that corresponds to the instance of EzeScan Server service you want to uninstall.
For EzeScan Server instance 1, then that would be the button labelled
Once the required EzeScan Desktop Viewer is displayed
Use the Admin → Workstation Options menu option to launch the Workstation options form:
Go to the Server tab.
Drop down the Integration Service options:
Click on Uninstall.
The following screen should appear:
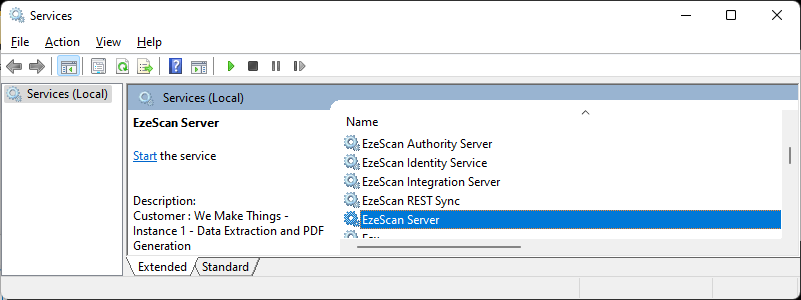
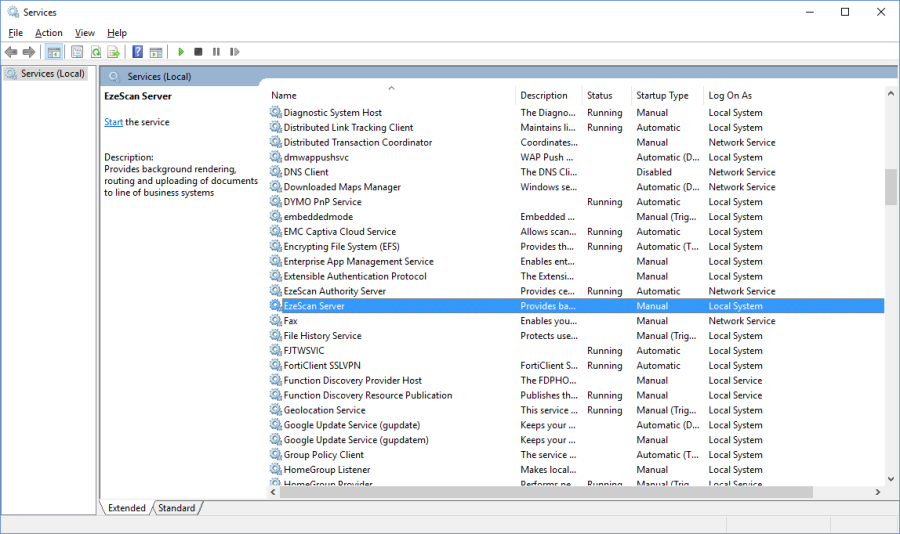
Using the Windows Services App to start/stop EzeScan Services
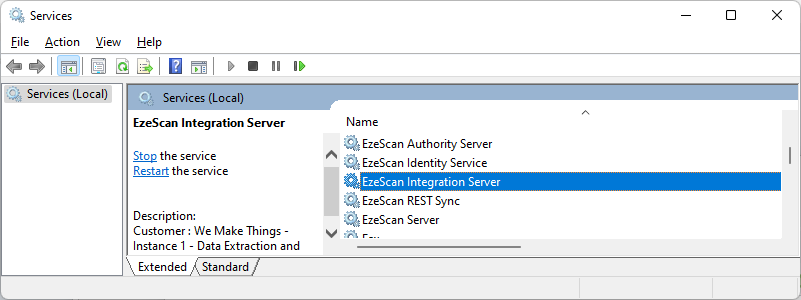
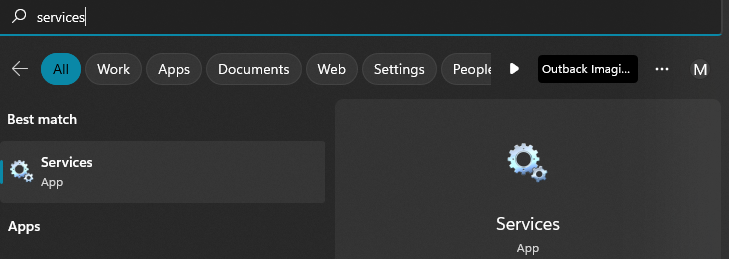
To start a service, first Launch the windows Services App.
The following screen will appear:Select the EzeScan service from the list and then select the start button in the tool bar. The following screen will appear:When the progress bar has completed EzeScan Server Service is running.
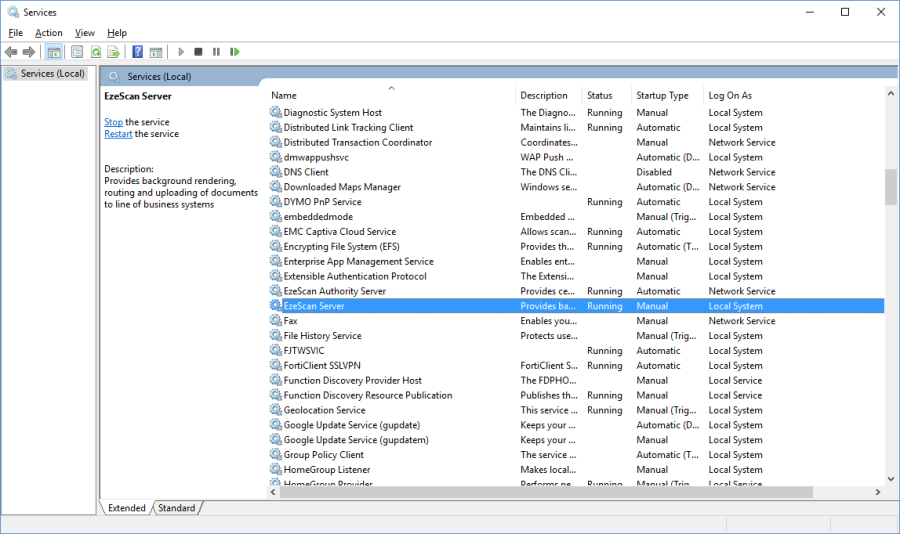
Stopping the Service.
To stop a service, first Launch the windows Services App.
The following screen will appear:Select the EzeScan service from the list and then select the Stop button on the tools bar. The following screen will appear:Once the progress bar has completed the EzeScan service will no longer be running.
Using the Windows Task Scheduler to automate the nightly restart of an EzeScan Server service.
Please Refer to Knowledge Base article 154 in the Online Help help Knowledge Base section, or in Onlne Help search for Task Scheduler.
Monitoring to see what the service is doing
To see what the EzeScan Server service is doing the logging must be enabled. To do this:
-
Copy the following file onto the desktop (or a folder outside of Program Files)
C:\Program Files (x86)\Outback Imaging\EzeScan\Resources\Override.ini
-
Edit out the ; on the following line. So it appears like
CommandLine=-DebugMemory -DebugFileOnly -MaxLogSize 5 -LogsToKeep 20
-
Copy the file to C:\Program Files (x86)\Outback Imaging\EzeScan
-
Restart the service.
Logs will be written to C:\ProgramData\Outback Imaging\EzeScan\Logs\EzeScan Server_Debug.log
Running EzeScan Routing in Route Admin Screen vs Running as a Service
Assuming you read down this far, you probably now realise that there are 2 methods of running an EzeScan Route.
Warning: Only one of these two methods can be in use at any point in time.
Method 1: Running Routing in the Route Admin form
This mode is most useful when setting up new Routes, or troubleshooting broken routes.
You can see images as they are processed and success/failure messages are displayed in this form.
The Run and Stop buttons are used to start/stop the route.
Route Admin Form - Run Button
Once the route type's tabs have been configured, the route is ready to run. The created routes can be run either from within the Routing Form, or as a Windows Service. To run ROUTING within the Routing Form press the "Run Routing" button"Warning: It is advised that ROUTING should not be run as a background service and in the Routing Form at the same time, otherwise unpredictable results may occur.

Route Admin Form - Stop Button
When EzeScan Routing is running Route Type configurations can't be changed. To Stop Ezescan Routing when running in the Routing Form press the "Stop Routing" button.

Method 2: Running as a windows service.
Files that are placed in an input folder should get picked up and processed by the route and then sent to an output destination.
The absence of processed files in the output destination is a strong indicator that the route is configured incorrectly, or that input files were not placed into the right input folder.
Routes that are incorrectly configured, or that suffer processing exceptions due to missing/bad data or host connection failures will place failed documents in an exception folder.
Reviewing the EzeScan Server debug log is useful when trying to see why a route is not working as expected..
When run as a service you will use the Windows Services App to stop or start the service.
Appendix
SERVER Routing Placeholders
Routing placeholders can be used in Routing for the Base File Name setting.
Some System placeholders (<<S?>>) can also be used in the Routing module. Please refer to the EzeScan PRO user guide section 17.2 System Placeholders for a detailed explanation.
|
Placeholder Value |
Details |
|---|---|
|
<<MD5>> |
This is the MD5# value of the saved document. |
|
<<Route>> |
This is the name of the Route being used. This would typically be applied in a KFI field. |