
LEAP
This document only provides information on how to configure the EzeScan LEAP Connector settings.
For information on EzeScan please refer to the EzeScan website - https://ezescan.com.au
For information on LEAP solution please refer to the LEAP website - https://leap.com.au
The EzeScan LEAP connector uses the LEAP Rest API.
The LEAP Desktop Client is required if you want to view the files that EzeScan has placed into LEAP.
Requires use and prior knowledge of EzeScan 5.0
NOTE
The LEAP Connector has been designed for use withe EzeScan 5.0. It is assumed that the operator has read about, or is familiar with EzeScan Job, KFI and UPLOAD modules. If not please refer to the specific EzeScan PRO, KFI and UPLOAD guides. It is also assumed that the operator is experienced with the LEAP product.
Requires a valid EzeScan LEAP License
NOTE
It is a prerequisite that the EzeScan Workstation has been been licensed for the use of the EDRMS, KFI and UPLOAD modules, along with the LEAP connector. Without a valid trial license or production license with these features enabled the LEAP connector can't be configured or used.

Configuring LEAP Connection Settings in EzeScan
The first thing that needs to be setup is to define the connection settings to talk to your instance of LEAP.
There are several ways that can be used to configure these settings with the LEAP connector.
Method 1. Configure the LEAP Connection settings once in the Admin → Workstation Options form.
When configuring a Job, KFI or Upload to use the LEAP connector the connection settings panel must be filled in. When only connecting to the one LEAP server, it is recommended that the LEAP connection settings are configured globally using this method.
- Open the EzeScan Admin → Workstation Options menu option. The Workstation Options form is displayed.
- Click the EDRMS tab and choose the LEAP option from the drop down list that appears.
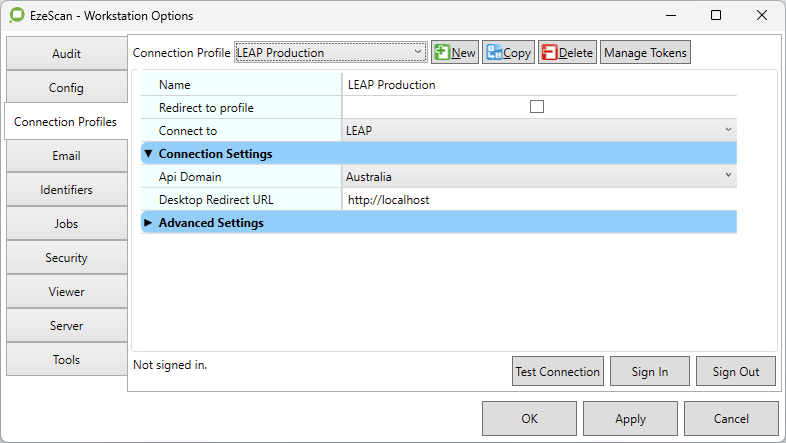
3. Enter the following information:
Field | Description |
|---|---|
| API Domain | Enter the API domain country. e.g. Australia |
| Desktop Redirect URL | Enter the redirect URL. e.g. http://localhost |
This saves you from having to setup the connection settings in each and every individual KFI and UPLOAD. that your job/route is using.
4. Use the Sign In button to launch the LEAP sign-in web browser window and Test Connection to confirm connectivity.
Method 2. Set the LEAP Connection settings within a KFI
When configuring a KFI to use the LEAP connector the connection settings panel must be filled in.
- Open the EzeScan Admin -> KFI menu option. The KFI admin form is displayed.
- Choose the Integration tab. Select the LEAP connector to display the LEAP connection settings

3. Select a connection profile if you have already configured the connection settings in Workstation Options, otherwise select (none) to configure locally.
4. Configure these settings
Field | Description |
|---|---|
| API Domain | Enter the API domain country. e.g. Australia |
| Redirect URL | Enter the redirect URL. e.g. http://localhost |
OAuth Token | Click on Manage to sign-in to the LEAP server and test the connection. |
Method 3. Set the LEAP connection settings within an UPLOAD
When configuring an UPLOAD to use the LEAP connector the connection settings panel must be filled in.
- Open the EzeScan Admin -> Upload menu option. The Upload admin form is displayed.
- The
Upload toproperty will be set to use the LEAP connector.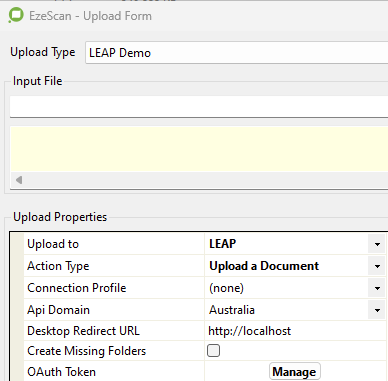
- Select a connection profile if you have already configured the connection settings in Workstation Options, otherwise select
(none)to configure locally. - Configure these settings
Field | Description |
|---|---|
| API Domain | Enter the API domain country. e.g. Australia |
| Redirect URL | Enter the redirect URL. e.g. http://localhost |
OAuth Sign-In | Press the button on the right hand side of the field to login to your LEAP server. Upon successful login an active O-Auth token will automatically populate in this field. |
Configuring LEAP Import and Profiling in Jobs
The current version of the LEAP connector does not offer support for Import From EDRMS functionality with LEAP.
The current version of the LEAP connector does not offer a job level profile form because the LEAP API does not provide one, hence the requirement to use a Job + KFI + Upload instead..
Configuring LEAP Browsing in KFI Fields
The KFI Field Settings allow the operator to browse into LEAP during KFI indexing so the operator can then select folders and object types to be applied to the document.
Configuring LEAP browse functionality
This step assumes that you have already setup the LEAP Server Settings either in the Workstation Options form EDRMS settings or in the KFI Admin form EDRMS settings.
Use the Admin→KFI form to select a KFI field to modify. On the Field properties form use the EDRMS tab to configure the type of browse or search of LEAP to use.
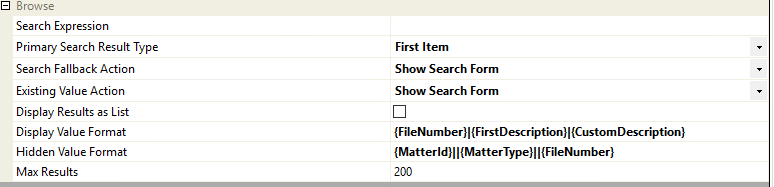
Browse Mode
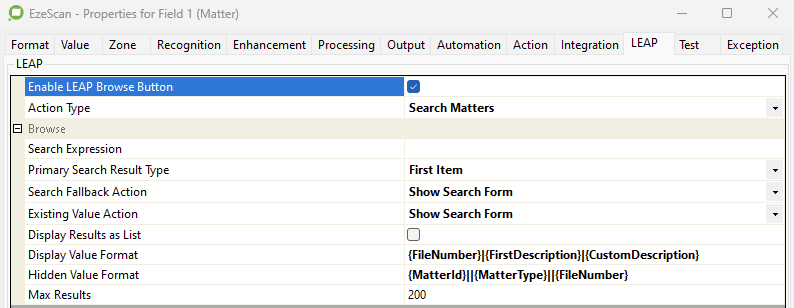
This option determines the type of LEAP Browser that is shown when the Browse button (F3) is pressed during indexing.
Choose from one of the following options:
Option | Description |
|---|---|
| Enable | When ticked, enables the LEAP Browse Button on the EzeScan Viewer KFI indexing panel. |
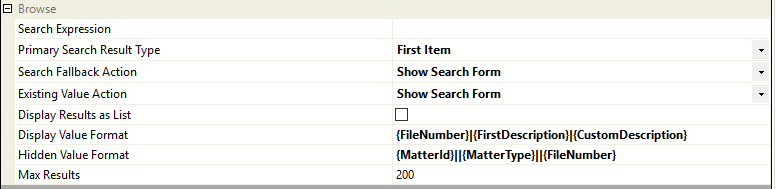
| Action Type | Available options are: Browse Document Types Browse Fees Browse Folders Browse Matters Browse Taskcodes fees Browse Tax Codes Search Cards Search Matters Depending on the Action Type various Browse property settings can be configured as below |
| Browse Document Types | The settings are:
|
| Browse Fees | The setting are:
|
| Browse Folders | The settings are:
|
| Browse Matters | The settings are:
|
Browse Taskcodes Fees | The settings are:
|
| Browse Tax Codes | The setting are:
|
| Search Cards | The settings are:
|
| Search Matters | The settings are:
|


Configuring LEAP field metadata mapping in UPLOAD
The UPLOAD module will obtain the KFI output data to pass into LEAP saving the document into the respective folder and applying metadata information.
This step assumes that you have already setup the LEAP connection settings either in the Workstation Options form → Connection Profiles tab or in the Upload Admin form settings.
Use the Admin→Upload form to select a Upload to modify. On the Upload form make sure the 'Upload To' property is set to LEAP.
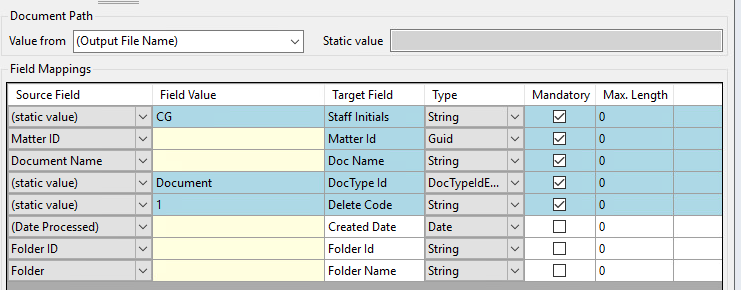
Mapping Source Field values into the required Target LEAP Fields
The following fields will appear after choosing Upload To LEAP option in the Upload Properties pane. These are the default LEAP fields.
Each target field can have its input mapped from the source field cell.
The target field can get its data from a number of sources:
- It's mapped to a source field (i.e. one of the KFI fields defined in the associated Job+KFI+Upload set).
- It's using a static value , that has either been typed into the source field value column (or browse using a browse button shown to the right hand side of the field value entry box.
The top 5 field target fields highlighted in blue in the Field Mapping grids are mandatory, so data must be passed into those field values.
The lower 3 target fields highlighted in yellow are configured as optional, but we are passing values into them as well.
Here's a brief explanation of what each target field is expecting to receive
Target Field | Description |
|---|---|
| Staff Initials | Is expecting a string of characters representing a LEAP users initials, In this example it's been hard coded to use the initials 'CG'. It could be populated from a KFI Field mapped value instead if required. |
| Matter id | Is expecting the GUID value of the Matter id that will be applied to scanned document in LEAP. Its been populated using the KFI 'Matter ID' field value. |
| Doc Name | Is expecting the name of document (i.e. title, description) that will be applied to the scanned document in LEAP. ts been populated using the KFI Document Name field value. |
| DocType Id | Is expecting a valid LEAP document type. It's been hard coded using a static value to 'Document'. |
| Delete Code | It's been hard coded to a static value of '1'. |
| Created Date | Is expecting a valid date value. It's been populated using the inbuilt EzeScan KFI field (Date Processed) value. |
| Folder Id | Is expecting the GUID value for a valid LEAP Folder. Its been populated using the KFI Field 'Folder ID' value. |
| Folder Name | Optional. Is expecting the name of a LEAP sub folder to place the document into with in the LEAP folder set by the previous Folder ID setting. Missing sub folders are automatically created when they don't already exist. |
Configuring the whole Job+KFI+Upload Process
Building an entire EzeScan Job+KFI+UPLOAD is not within the scope of this connector guide.
This connector guide is designed to give an experienced EzeScan user the additional knowledge required to configure the LEAP connector.
What is the easiest way to get a working LEAP demo up and running?
NOTE
Now that you have just read through this whole document.
You could ask our support team for a sample EzeScan Job+KFI+Upload using the LEAP connector.
You can simply reconfigure it to use your LEAP Server connection settings and your LEAP user credentials.
We've included some screenshots of how the demo operates and looks.
- First we have a LEAP Demo job button.
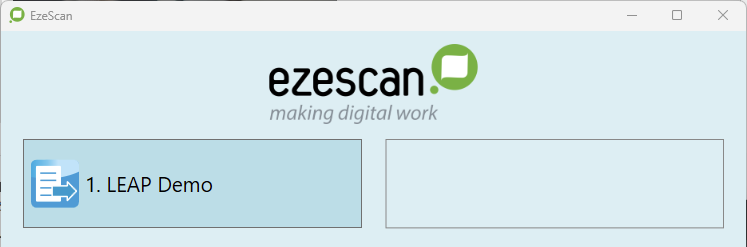
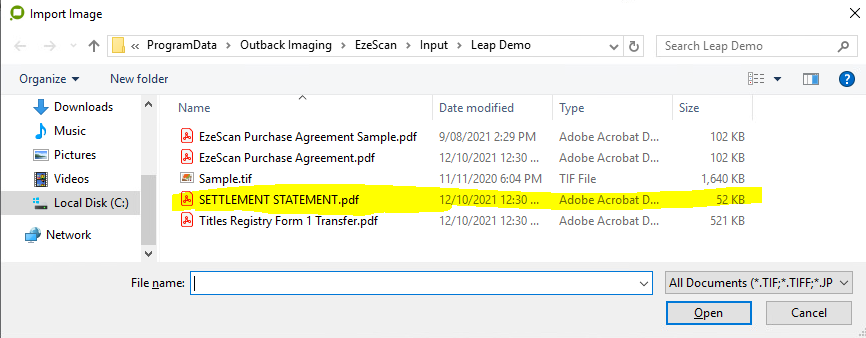
- Press the job button. Its configured to import a file from a folder (it can be configured to use a scanner, import from email).
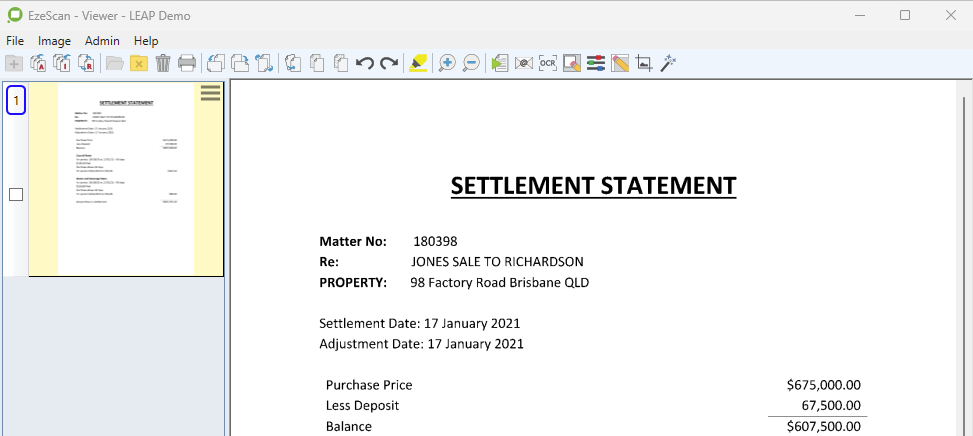
- Choose the file to import. We'll choose Settle Statement.
- The document is displayed in the EzeScan Viewer.
- Press F4 (Function Key F4) to start registering the document. The field indexing panel appears.
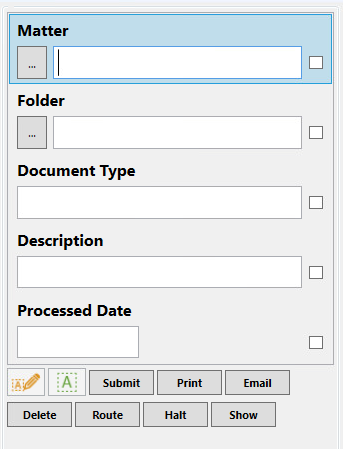
- Followed quickly by the matter search form.
You can enter some search data and get a list of matching results.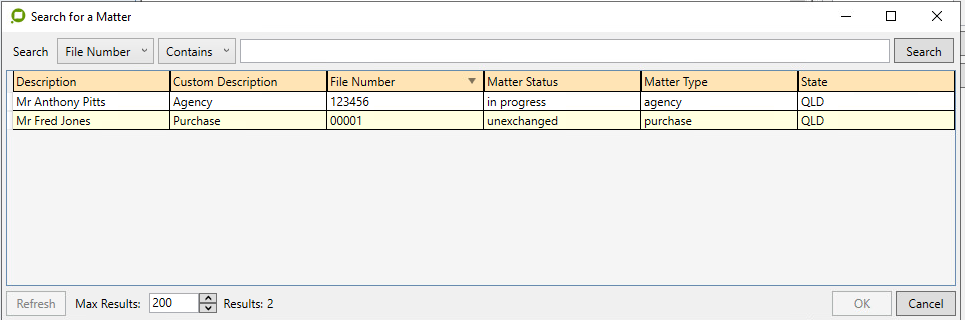
- We choose Matter File Number 123456 and pressed OK.
The matter Details have been entered in the Matter KFI field. Behind the scenes we are keeping track of the Matter GUID.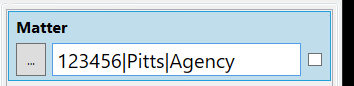
- The operator is now guided to the Folder field, and the Folder selection form is automatically displayed on screen. It display folders relating to Matter that was just selected in the first KFI Field.
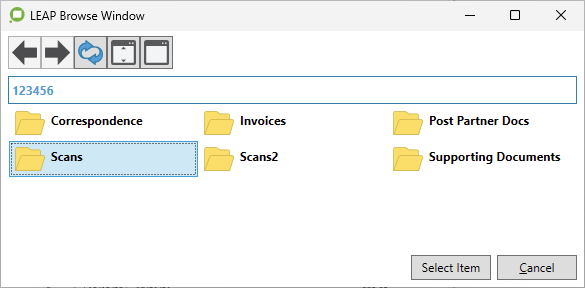
- In this case this is just one folder against this matter. Its called Scans. The user simply clicks once on the folder to select it and presses OK.
The Folder Details have been entered in the Folder KFI field. Behind the scenes we are keeping track of the Folder GUID.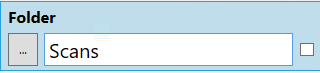
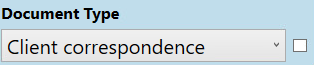
- Next the user is prompted to select a list of document types from a list. This list was a fixed list that we configure in EzeScan, not downloaded from LEAP.

- We selected Client Correspondence
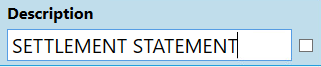
- Next the user is prompted for Description.
This will be used as part of the name applied to the document when it is uploaded into LEAP.
The user can either type free text into this field, or use the OCR pen to rope off some text on the image to use as part of the document name.

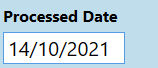
- Next the user is prompted for Processed Date. The demo is set to populate the field using today's date. (It can be set to allow the user to select the date.)
- All the required metadata has been entered. The user presses the Submit button.

- The document gets uploaded to LEAP. Start the LEAP desktop client.

- Sign in to LEAP and search for Matter 123456.

- The PDF document that was just uploaded to Scans folder is there.
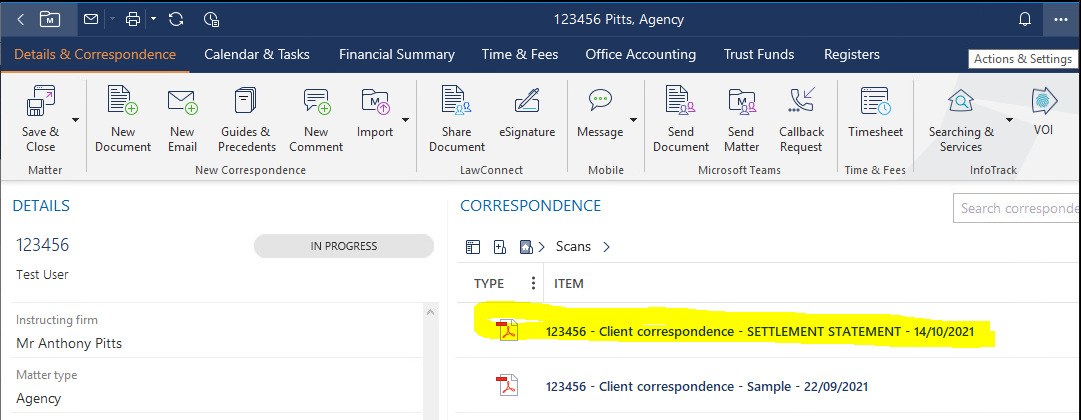
- Double click on the PDF to view the scanned document.
