
Table of Contents
Overview
This guide provides information on how to setup and configure the EWA iManage Barcode Printer application
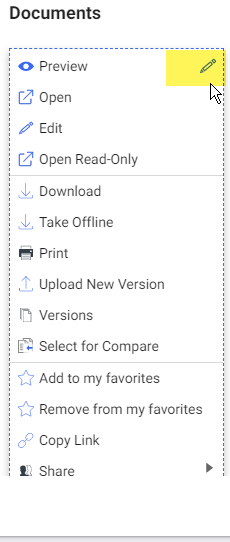
Following the successful installation of the EWA iManage Barcode Printer application, it will provide an iManage user with a new option to ‘Generate Coversheet Barcode with EzeScan’ when an iManage folder, document or workspace is selected in the iManage Work web browser interface.
By placing a printed barcode cover sheet page as the first page of a document being scanned, the scanning software is able to use barcode recognition engine to automatically use the barcode field data to accurately name the document and place it into the correct Client Matter folder or workspace location with little, or no input required from the scanner operator.
The solution relies on 3 key components.
-
A modification to the iManage Work Web menus (made in the iManage Control Centre) to add a new ‘Generate Coversheet Barcode with EzeScan' menu option to the Folder, Document and Workspace menu options. When properly configured, clicking the ‘’ option should attempt to pass a web based request to the EWA iManage Barcode printer service. That web request passes across multiple key value metadata pairs that accurately describe the selected Folder, Document or Workspace.
-
An EWA iManage Barcode Printer service that gets installed on a windows server (when using iManage Cloud, this service will be installed on one of your own servers, not in the iManage Cloud. When using Manage on premise, this could be installed on that iManage server, or on a different server). This service listens for request to print barcode cover sheets being sent by the IManage Work Web client ‘’ menu option. It takes the request and converts it into a web URL request which it sends to an EWA server BCG app page that is going to handle the request to print the barcode cover sheet.
-
An installed EWA Server that is setup to use a BCG app page. That EWA server may be deployed either on site, or might be hosted on a cloud platform. It takes the request to print generated by the EWA iManage Barcode Printer service and executes it to print the barcode coversheet.
Its important that the output of component 1 is correctly configured to be sent to the server where the component 2 service is installed, and that the output from component 2 service is correctly configured to be sent to the server where component 3, the EzeScan Web Apps BCG app page has been installed.
Terms used in this document
|
Term |
What it means |
|---|---|
|
EWA |
EzeScan Web Apps |
|
BCG |
EzeScan Web Apps – Barcode Coversheet Generator App Page |
|
Work Web |
iManage Work Web, the web browser version of iManage (not the DeskSite or FileSite windows program versions). |
System Requirements
The below details the prerequisites for this solution to be implemented.
|
Requirements |
|---|
|
Authorised access to a working iManage Work Web 10.4 Client. |
|
Someone with Admin privileges to iManage Control Center |
|
Windows x86 or x64 Bit Operating System Server supporting .Net 7 or above. to install the EWA IManage Barcode Printer service on. |
|
Admin level access to an EzeScan Web Apps (EWA) Server, in order to be able to create a BCG app page that can be accessed via a URL. |
|
EzeScan Web Apps to be configured with Windows Authentication being preferred (so that users don't keep getting prompted to login for each barcode being printed). |
EzeScan Web Apps (EWA) can reside on the same server or on a different server.
Installation
Creating a BCG App Page in EzeScan WebApps
The purpose of these tasks below is to create the Barcode Cover Sheet App Page that will be called by the EWA iManage Barcode Printer service in response to a user choosing to Generate Coversheet Barcode with EzeScan‘’ from either the Folder, Workspace or Document context menu option in the iManage Work Web client.
First. login to your EzeScan Web Apps Server using the Admin account.
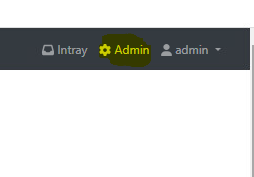
Then use the right mouse button on the Admin tool to ‘Open link in new tab.
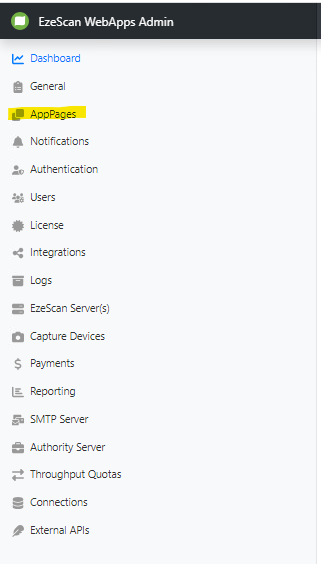
Switch to that new tab, then use the Admin menu ‘App Pages’ menu option to launch the App Pages management form.
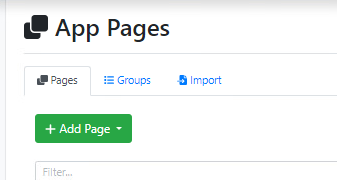
Press the ‘Add Page' button.
Select BCGPage.
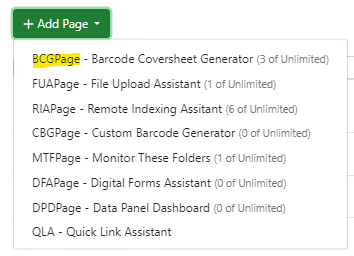
Name it ‘iManage Barcode Coversheet and this will give it an ID of ‘imanage_barcode_coversheet’
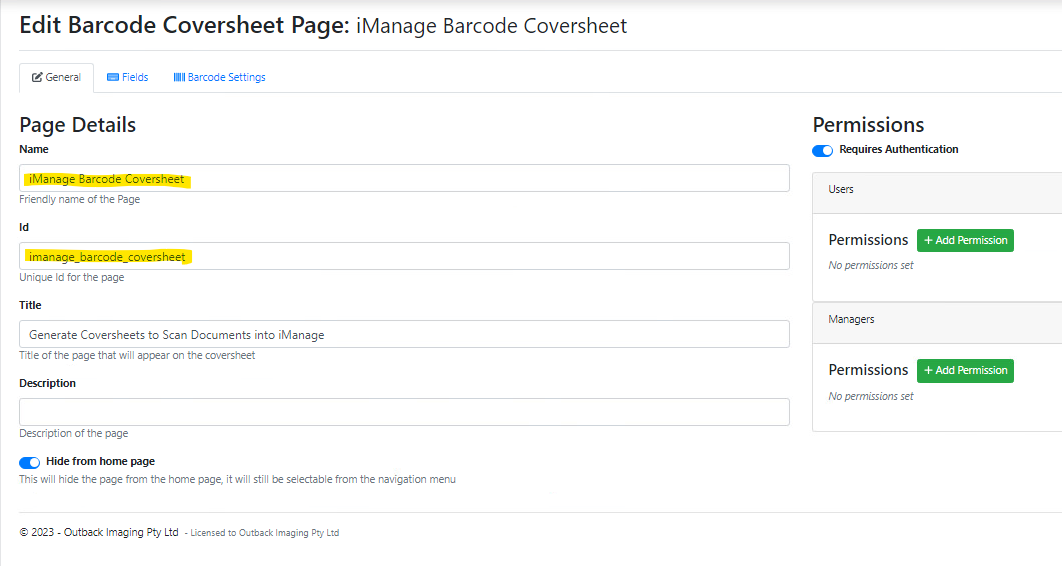
Press the Save button.

Write down the exact ID value, paying attention to the lower case characters and underscores and that it has no spaces in the ID. Yow will be inserting this ID value into the EWA IManage Barcode Printer Service appsettings.json file later on.
On the fields tab use the 'Add field; button to add a new Custom field called Title.
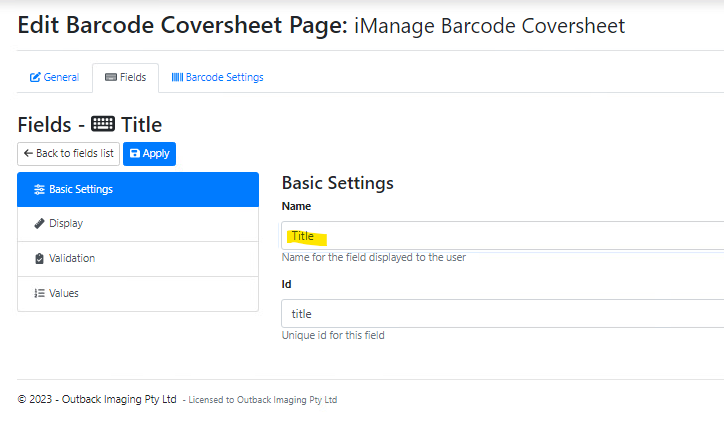
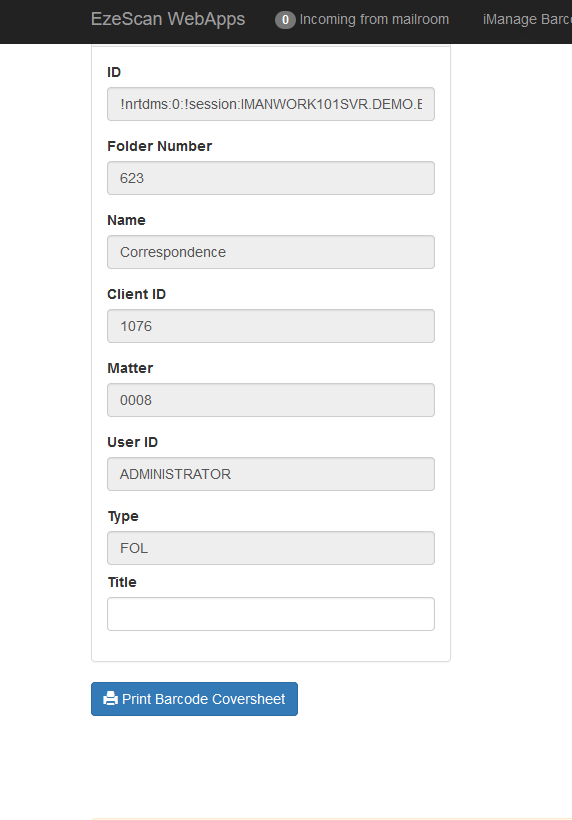
The reason we added this field, is that when we press the ‘’ from the Imanage Work Web client, the iManage Work Web client will pass all of the folder metadata across to our BCG app page. however that data won’t include a value for what we want to name the document that we are going to scan (i.e. the hardcopy document we are placing the iManage barcode coversheet on top of).
So we want to give the user the option of adding a meaningful title to the document.
You can add as many additional fields as you need to at this time.
Next we will want to specify what type of barcode font is being used for this BCG app page.
The most commonly used barcode font will be PDF417. Why? Well it supports embedding 1 or more barcode values into the barcode. in our case our barcode needs to hold the all of the folder metadata passed across from iManage Work Web client and the ‘Title’ field metadata collected within the web page itself.
So lets go ahead and move to the Barcode Settings tab and set that up the Barcode Settings tab
Choose the settings highlighted in yellow below.
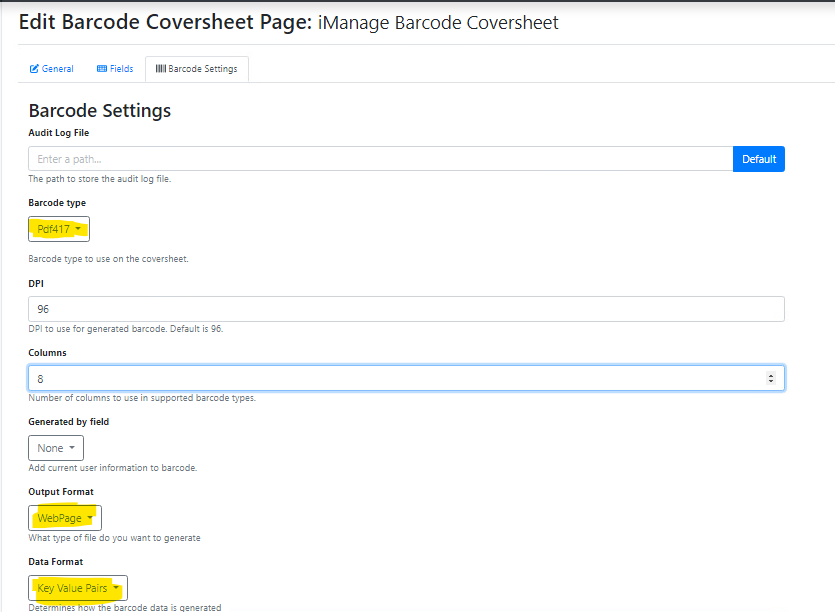
Press the Save button.
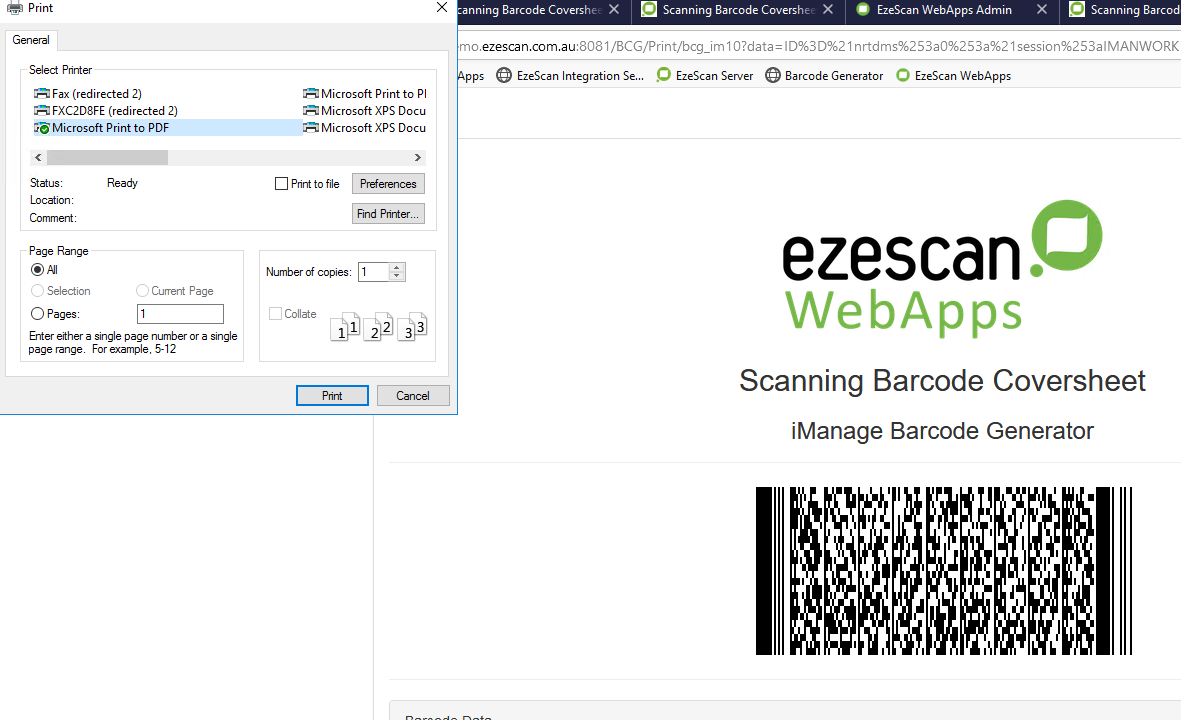
That completes the basic setup of a BCR app page that can be called by the EWA Barcode Printer for iManage Web service and passed the iManage Folder metadata for the folder selected in the iManage Work Web client when the ‘’ menu option is selected.
When the BCR app page launches it will display a PDF 417 barcode that contains the iManage Folder metadata and any app page custom field metadata.
Now let's look at how to install the EWA Barcode Printer for iManage Web service.
EWA iManage Barcode Printer Service Installer
-
It is installed using ‘EWA Barcode Printer for iManage Web.msi’ installer.
-
You can download the installer from the following location (must be logged in to access this site):
https://ezescan.co.uk/downloads/software-downloads/ezescan-webapps/
There are two installer links available on that page:
a) EWA Barcode Printer for iManage Web - Version X.X.X
b) EWA Barcode Printer of iManage Desksite
The second option (b) is a legacy method for the DeskSite client that is being phased out. It is not covered by this user guide.
So go ahead and use the download link shown below to download the latest version of the EWA Barcode Printer for iManage web version:
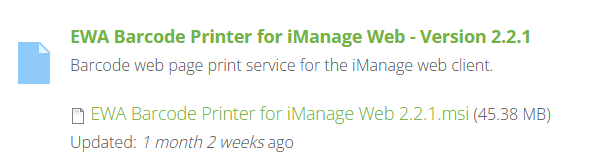
Note: In this example above it is shown as being version 2.2.1 but there may be a later version available when you perform the download
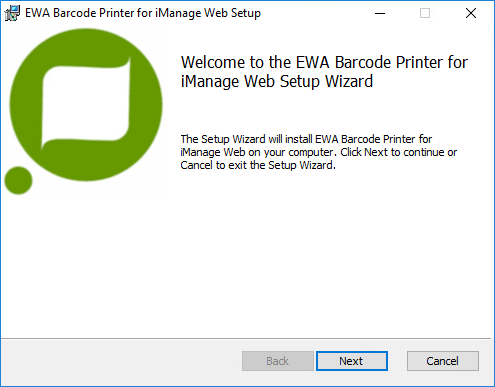
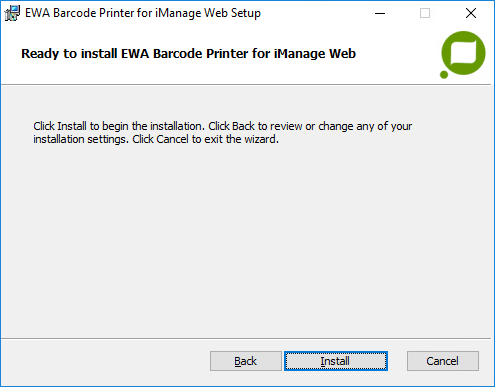
Follow the install wizard to complete the installation.
Setup Options
This product is network based and requires server information about its own deployment but also of the EWA and iManage Servers.
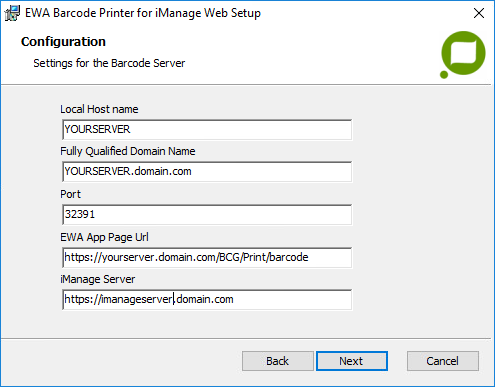
The "Settings for the Barcode server" screen lists the following settings:
-
Local Host Name - The deployment computers Host name
-
Port - The port of the Barcode server (Default: 32391)
-
EWA Server - The root URL of the EWA server
-
iManage Server - The root URL of the iManage Work server
These settings are stored in the configuration file of the Barcode server ("C:\ProgramData\Outback Imaging\EWA Barcode Printer for iManage Web\appsettings.json"). These settings are also used to automatically create Firewall rules and Http reservations.

Registration
At the end of the Installer, there is an option to run the "Registration tool". This tool produces a zip file manifest used by the iManage Work server to register other servers that serve plugins. Consult iManage documentation for further information on how to register plugins using a zip manifest.
Also check Windows Services to see if the ‘EWA Barcode Printer for iManage Web’ service has been installed.
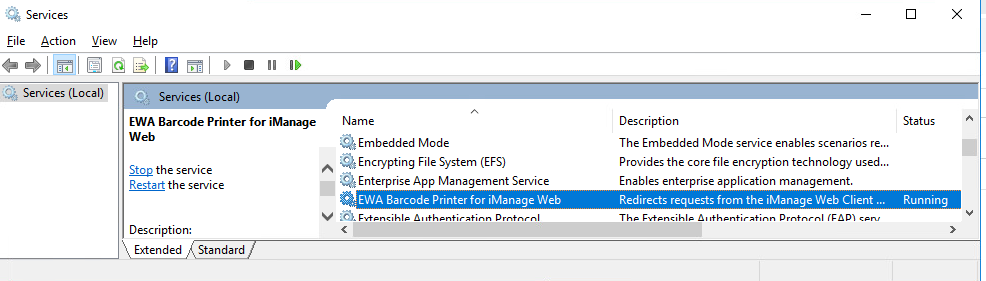
Yours will most likely not be running because it hasn’t been completely configure yet.
Configuring the Service Settings
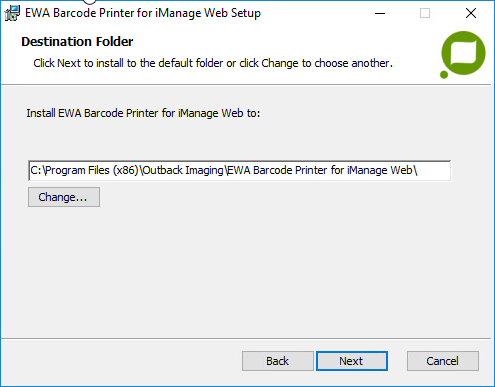
The Default install folder location is normally C:\ProgramData\Outback Imaging\EWA Barcode Printer for iManage Web

The file C:\ProgramData\Outback Imaging\EWA Barcode Printer for iManage Web\appsettings.json controls the settings used by the service.
The EWA iManage Barcode Printer service appsettings.json file will need to be configured to point to the your EzeScab WebApp URL and BCG app page.
Carefully edit the EWA Barcode Coversheet URL’s in appsettings.json file
Tip: We recommend making a backup copy of it before you edit it
Edit the “EWAMappings” section of the JSON file.
-
Replace {ewa_hostname_here} with the web address used to access your EzeScan WebApps server installation.
-
Replace {page_id_here} with the Id of the barcode coversheet generator page you have created in EzeScan WebApps.
-
To find the page id of the BCG page look in the EWA Admin Panel > App Pages section.
-

-
"EWAMappings": {
  "Folder": {
    "URL": "https://{ewa_hostname_here}/bcg/print/{page_id_here}?data=",
    "SkipBlankValues": true,
    "Mapping": {
      "Client ID": "{CUSTOM1}",
      "Client Name": "{CUSTOM1DESCR}",
      "Document Title": "{DESCRIPTION}",
      "Folder Number": "{NUMBER}",
      "ID": "{ID}",
      "Class": "{CLASS}",
      "Class Description": "{CLASS.DESCRIPTION}",
      "SubClass": "{SUBCLASS}",
      "SubClass Description": "{SUBCLASS.DESCRIPTION}",
      "Matter Name": "{CUSTOM2DESCR}",
      "Matter Type": "{CUSTOM30DESCR}",
      "Matter": "{CUSTOM2}",
      "Name": "{NAME}",
      "Practice": "{CUSTOM29DESCR}",
      "Type": "FOL",
      "User ID": "{USERID}",
      "Workspace": "{WORKSPACE.NAME}"
    }
  },
  "Workspace": {
    "URL": "https://{ewa_hostname_here}/bcg/print/{page_id_here}?data=",
    "Mapping": {
      "Client ID": "{CUSTOM1}",
      "Client Name": "{CUSTOM1DESCR}",
      "Description": "{DESCRIPTION}",
      "ID": "{ID}",
      "Class": "{CLASS}",
      "Class Description": "{CLASS.DESCRIPTION}",
      "SubClass": "{SUBCLASS}",
      "SubClass Description": "{SUBCLASS.DESCRIPTION}",
      "Matter Name": "{CUSTOM2DESCR}",
      "Matter Type": "{CUSTOM30DESCR}",
      "Matter": "{CUSTOM2}",
      "Name": "{NAME}",
      "Practice": "{CUSTOM29DESCR}",
      "Type": "WOR",
      "User ID": "{USERID}",
      "Workspace Number": "{NUMBER}"
    }
  },
  "Document": {
    "URL": "https://{ewa_hostname_here}/bcg/print/{page_id_here}?data=",
    "Mapping": {
      "ID": "{ID}",
      "Document Number": "{NUMBER}",
      "Name": "{NAME}",
      "Client ID": "{CUSTOM1}",
      "User ID": "{USERID}",
      "Class": "{CLASS}",
      "Class Description": "{CLASS.DESCRIPTION}",
      "SubClass": "{SUBCLASS}",
      "SubClass Description": "{SUBCLASS.DESCRIPTION}",
      "Type": "DOC"
    }
  }
}
When the URL for the BCG App Page is called by the EWA Barcode Printer for iManage Web service it can be provided with one of two options in the URL.
The default option is to include the word ‘print’ in the URL
"URL": "https://{ewa_hostname_here}/bcg/print/{page_id_here}?data=",
This forces the BCG app page to launch in print mode, whereby the PDF417 barcode is displayed on screen, allowing it to be printed. No edits can be made to any of the barcode data or app page field data..
Alternatively , if the word ‘print’ is replaced by the word 'fields' in the URL
"URL": "https://{ewa_hostname_here}/bcg/fields/{page_id_here}?data=",
This forces the BCG app page to be launched in a mode whereby the user will first see a screen where the barcode field and app page field metadata values are displayed. The user can’t edit the barcode values , but could update the app page field value(s), and then generate the PDF417 barcode page on screen, allowing it to be printed. This method is used when the user needs to be prompted to add the Document Title into the barcode data, before printing the barcode cover sheet.
HINT: Apart from changing the URL values leave everything else as default to start with. Only change other settings if you need additional values to be added to the barcode coversheet.
Locale Specific Mappings
Locale specific barcode mappings can be added to the EWAMappings section of appsettings.json where the barcode type name is suffixed with underscore and the respective locale. For example, the below settings includes “Folder_fr-CA” for folder barcode generation with the French Canadian locale (fr-CA).
"EWAMappings": {
  "Folder": {
    "URL": "https://imanwork104svr.dev.ezescan.com.au:8081/bcg/print/imanage_barcode_coversheet?data=",
    "SkipBlankValues": true,
    "Mapping": {
      "Client ID": "{CUSTOM1}",
      "Client Name": "{CUSTOM1DESCR}",
      "Document Title": "{DESCRIPTION}",
      "Folder Number": "{NUMBER}",
      "ID": "{ID}",
      "Type": "FOL"
    }
  },
  "Folder_fr-CA": {
    "URL": "https://imanwork104svr.dev.ezescan.com.au:8081/bcg/print/imanage_barcode_coversheet_fr?data=",
    "SkipBlankValues": true,
    "Mapping": {
      "Client ID": "{CUSTOM1}",
      "Client Name": "{CUSTOM1DESCR}",
      "Document Title": "{DESCRIPTION}",
      "Folder Number": "{NUMBER}",
      "ID": "{ID}",
      "Type": "FOL"
    }
  }
}
The locale to be used is determined by iManage Web and passed through to the barcode generator iframe. If a locale specific barcode mapping cannot be found the non-locale mapping is used instead (e.g. Folder).
Supported Mapping Values
Object types in iManage support mapping different values.
These mappings can be configured in the relevant sections of the appsettings.json file.
Folder
Folder supports mapping the following values:
|
iManage Value |
Description |
|---|---|
|
ID |
iManage Object ID |
|
NUMBER |
Folder number |
|
NAME |
Folder name |
|
DESCRIPTION |
Description |
|
OWNER |
Owner |
|
WORKSPACE |
Workspace name alias for WORKSPACE.NAME |
|
WORKSPACE.NAME |
Workspace name |
|
WORKSPACE.DESCRIPTION |
Workspace Description |
|
WORKSPACE.OBJECTID |
Workspace Object ID |
|
ADDPROP1 |
Additional property 1 value |
|
ADDPROP1DESCR |
Additional property 1 description |
|
… |
|
|
ADDPROP30 |
Additional property 30 value |
|
ADDPROP30DESCR |
Additional property 30 description |
|
USERID |
User id of the operator |
Additional Properties 1 to 30 are supported for folder object ADDPROP{NUMBER}
For example, AdditionalProperty1={ADDPROP1}
Workspace
Workspace supports mapping the following values:
|
iManage Value |
Description |
|---|---|
|
ID |
iManage Object ID |
|
NUMBER |
Workspace number |
|
NAME |
Workspace name |
|
DESCRIPTION |
Description |
|
OWNER |
Owner |
|
ADDPROP1 |
Additional property 1 value |
|
ADDPROP1DESCR |
Additional property 1 description |
|
… |
|
|
ADDPROP30 |
Additional property 30 value |
|
ADDPROP30DESCR |
Additional property 30 description |
|
USERID |
User id of the operator |
Additional Properties 1 to 30 are supported for folder object ADDPROP{NUMBER}
For example, AdditionalProperty1={ADDPROP1}
Document
Document supports mapping the following values:
|
iManage Value |
Description |
|---|---|
|
ID |
iManage Object ID |
|
NUMBER |
Document number |
|
NAME |
Document name |
|
AUTHOR |
Document author name |
|
COMMENT |
Document comment |
|
OPERATOR |
iManage Operator Object ID |
|
OPERATORDESCR |
iManage Operator Name |
|
CREATIONDATE |
Document creation date |
|
EDITDATE |
Document last modified date |
|
TYPE |
Type of document e.g. ACROBAT |
|
VERSION |
Document version |
|
LOCATION |
Document location full folder path |
|
CUSTOM1 |
Custom field 1 value. |
|
CUSTOM1DESCR |
Custom field 1 description |
|
CUSTOM2 |
Custom field 2 value |
|
CUSTOM2DESCR |
Custom field 2 description |
|
USERID |
User id of the operator0 |
iManage Authentication Settings
The iManage authentication settings are controlled by the following section of the appsettings.json file:
"Authentication": {
      "ClientId": "a00000e6-4548-48f1-a073-74f7d1cbc3c0",
      "ClientSecret": "600000ae-511d-4655-bebf-f13ed72875da",
      "AuthorizationEndpoint": "https://{imanage_hostname_here}/login/oauth2/authorize",
      "TokenEndpoint": "https://{imanage_hostname_here}/login/oauth2/access_token"
},
|
Settings Value |
Description |
|---|---|
|
ClientId |
Unique GUID generated within ICC |
|
ClientSecret |
Unique secret GUID within ICC |
|
AuthorizationEndpoint |
The authorization endpoint of your iManage installation. Eg: |
|
TokenEndpoint |
The token endpoint of your iManage installation. Eg: |
Http Endpoint Settings
These settings control the hostname and ports that the application listens for requests on.
"HttpServer": {
    "Endpoints": [
      {
        "Host": "{server_host_name_here}",
        "Port": "32391",
        "Scheme": "https",
        "FilePath": "C:\\certs\\mycert.pfx",
        "Password": "{password_here}"
      }
    ]
  }
|
Settings Value |
Description |
|---|---|
|
Host |
Host name of the server that this application is running on |
|
Port |
Port the server will listen on. Default: 32391 |
|
Scheme |
The scheme to use. Valid values are |
|
FilePath |
Path of the signed certificate. If the option to create self-signed certificate was selected on installation, the file path will point to this certificate. |
|
Password |
Password for the certificate |
If any of these settings settings are changed, you must restart the EWA Barcode Printer for iManage Web service.
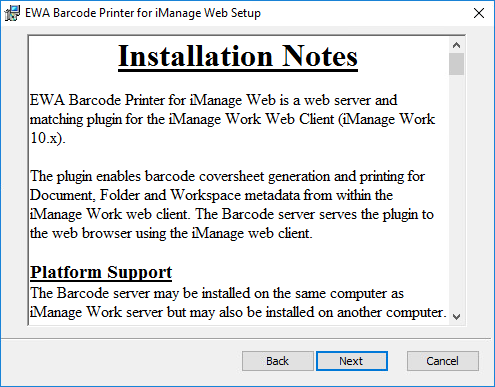
There is one other file that the installer includes. It is called ‘Install Notes.rtf’ and you’ll find it here:
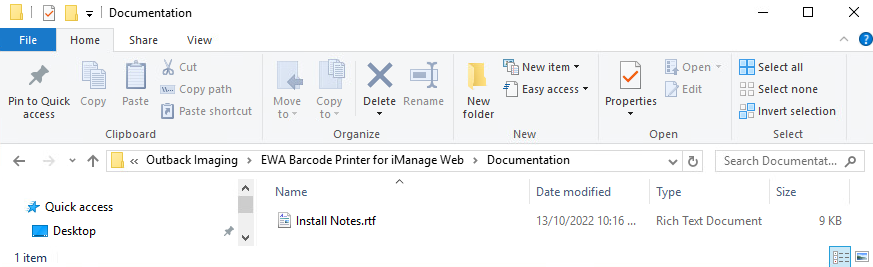
It may be worth reading this ‘Install Notes.rtf’ file too.
Installing the ‘right click menu add-on’ into iManage Web Client
This is work performed on the iManage Server using the iManage Control Centre.
For On-Premise Deployment of iManage Web Server
The following information relates to on-premise installations of iManage Web.
A deployment package is required to register the add-on in iManage Control Center. This package provides all of the settings needed by iManage to make the respective menu items available and establish connectivity to the barcode printer service.
The following registration process must be completed again after making any changes to the authentication or hosting sections in appsettings.json.
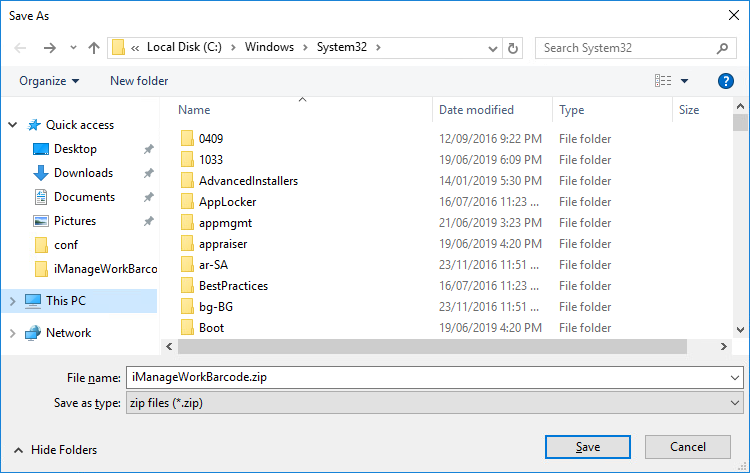
Generate Deployment Package
A deployment package can be generated using the “Generate iManageWeb Extension Registration when setup exits” option in the MSI installer wizard. Or alternatively, can be manually generated using the below command line:
cd {install-directory}
EzeScan.BarcodePrinter.iManageWeb.exe make-registration
The file iManageWorkBarcode.zip will be saved to the current user’s desktop folder.

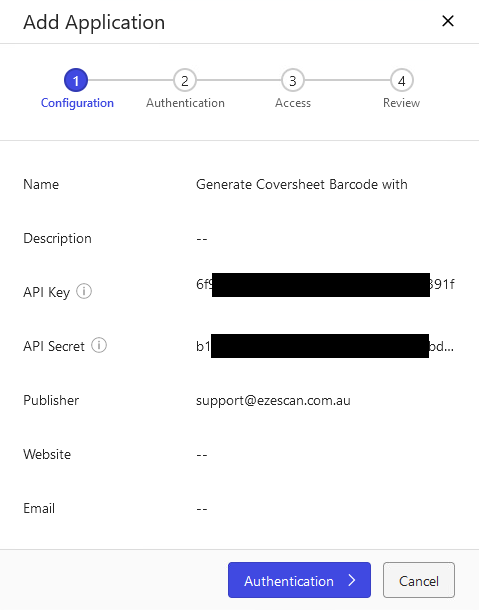
Register New Application
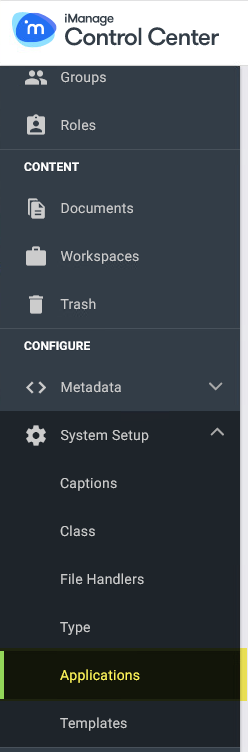
The deployment package can now be imported into iManage Control Center to complete the registration process. To import the deployment package navigate to the applications page.
For example, https://myimanageserver/work/cc/applications
Click on the Add Application button.
Click on the Upload Package button.
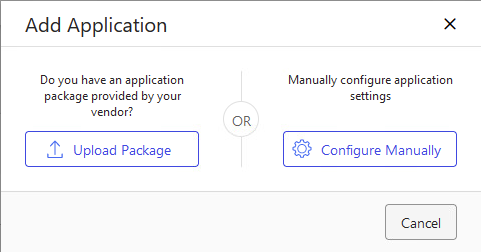
Select the iManageWorkBarcode.zip deployment package file that was generated in the previous section.
Follow the remaining prompts to complete the registration.
Update Existing Application
Search the list of available applications for Generate Coversheet Barcode with EzeScan or respective name if the name was modified in deployment package manifest.

Click on the application registration to navigate to its settings.
Click on Update Package link.
Click on Choose Package button.
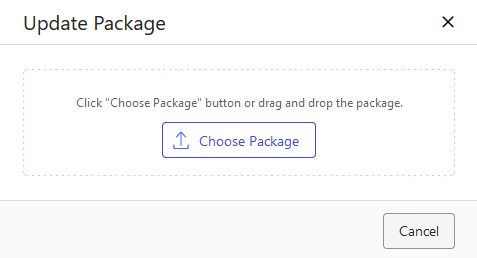
Select the iManageWorkBarcode.zip deployment package file that was generated in the previous section.
Follow the prompts to finish updating the application.
For iManage Cloud Deployments
Login to iManage Control Center as an Administrator, and then navigate to Applications under the Settings section.
Click on the Add Application button, search for and add the EzeScan - Cloud Barcode Generator application.
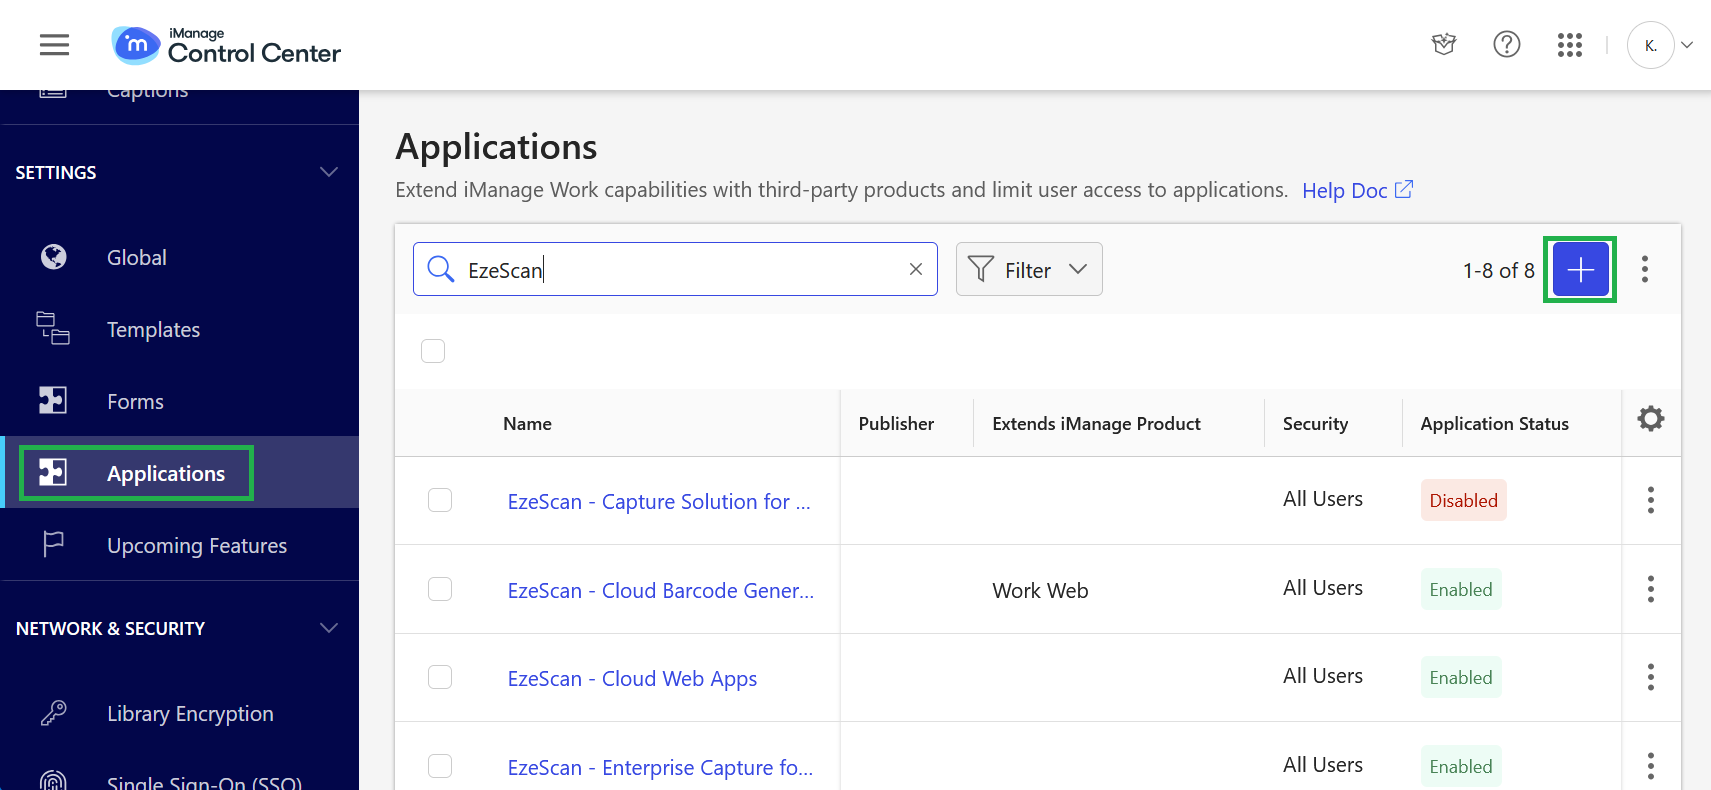
Follow the prompts ensuring the users that require the context menus have been granted access and application is enabled.
The application should now be registered.
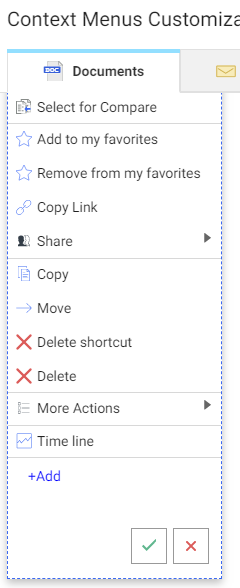
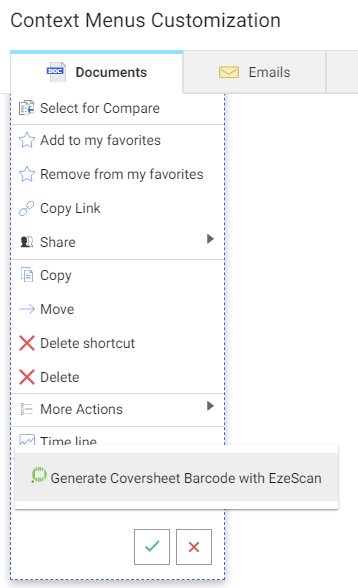
Navigate to the Context Menus page under the web option.
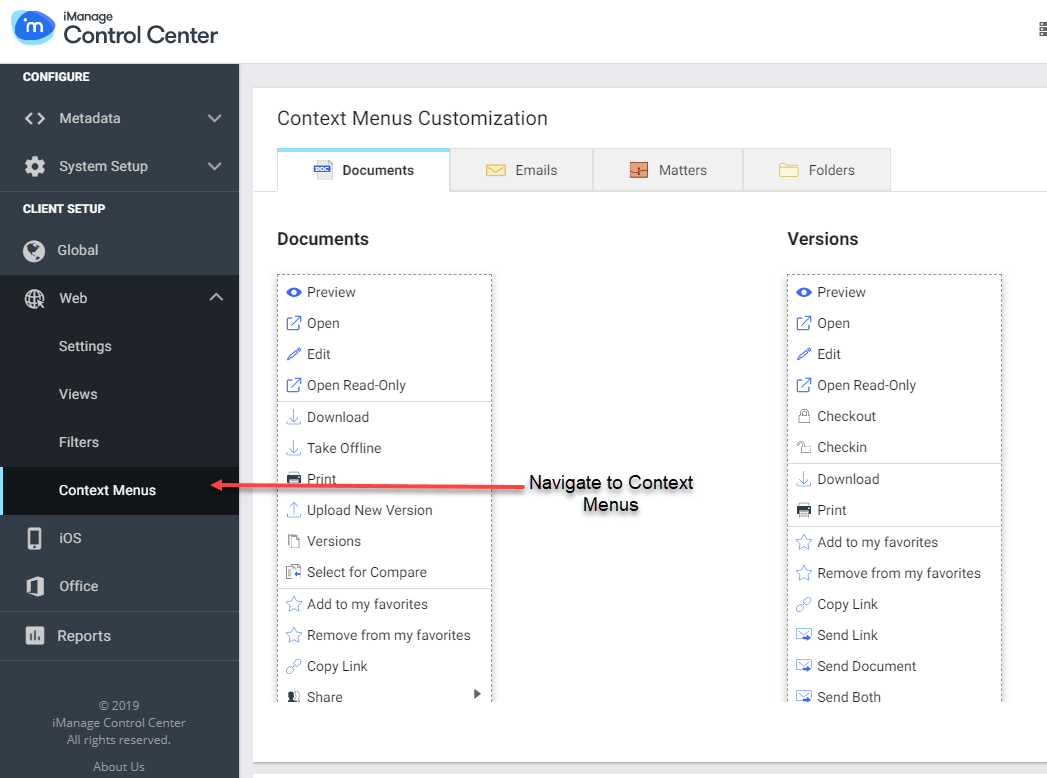
Choose the context menu to edit, and click on the edit (pencil) icon next to preview.
Scroll down until you see the option to ‘+add’.
As long as the EzeScan barcode generator was successfully added as per the zip import, you should have the option to choose ‘Generate Coversheet Barcode with EzeScan'.
Repeat this step for the folders context menu.
Repeat this step for the Workspace context menu.
Testing the Generator
To test the generator, open iManage Work in a web browser, right click on a document or folder (depending on what has been configured and select “Generate Coversheet Barcode with EzeScan”
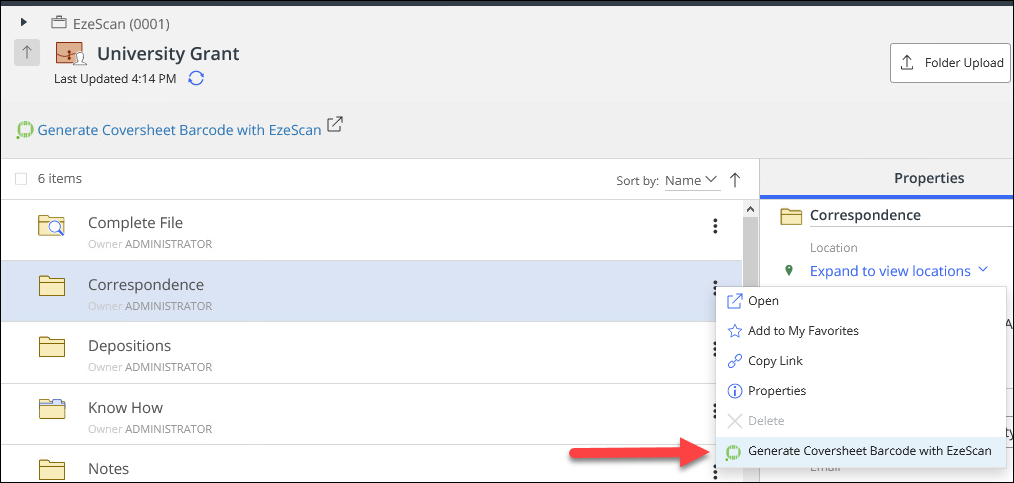
Depending on the WebApp barcode AppPage configuration the operator will be launched to the webpage. If no fields are required the operator will be taken straight to the barcode with a print dialog.
If further field entry is required then the operator will be prompted to do so.
It is recommend to have the EzeScan Web Apps (EWA) configured for Windows Authentication (challenge response) so the user does not need to login to generate the page.
If you got here , you may have successfully got the iManage Work Web Client to send a ‘Generate Coversheet Barcode with EzeScan’ request to an Ezescan WebApps Barcode Coversheet App Page via theEWA Barcode Printer for iManage Web’service. You pressed print and got yourself a coversheet to place on top o fthe hardcopy document you want to store in Client/Matter folder in iManage.
If you want to scan that document with barcode coversheet, we can provide you with different ways to that document automatically stored in that Client/Matter folder in iManage.
a) The first is by using an EzeScan Desktop Job+KFI+Upload to read the barcode meta data values embedded in the PDF 417 barcode. The KFI fields get populated with the metadata, and then they are mapped int the Upload connector to load the document and metadata direct into iManage. Runs in a GUI for a user to oversee.
b) The second is by using an EzeScan Server Route +KFI+Upload to read the barcode meta data values embedded in the PDF 417 barcode. The KFI fields get populated with the metadata, and then they are mapped int the Upload connector to load the document and metadata direct into iManage. Runs as a fully automated service no user interaction.
c) The third is by using an EzeScan EweApps RIA App Page. The PDF 417 barcode meta data field values are mapped into iManage Fields on the app page Submit button output action.
Troubleshooting the Process
Service Not Starting
-
Check the details of the certificate
-
Is the certificate in the Security folder in the application directory?
-
Has the certificate been registered?
-
Is the password correct in the appsettings.json file?
-
Fix issues with certificate.
-
Retest to see if the problem is resolved.
Some iManage Folder/Workspace/Document data is missing in the PDF417 barcode in the EzeScan Webapps App Page.
-
Check the mappings included in the appsettings.json file.
-
Remember to restart the service when you save changes to the appsettings.json file.
-
Retest to see if the problem is resolved.
The Barcode contains expected data, but some data doesn’t get uploaded to iManage when the coversheet and document are scanned, and saved to iManage.
-
The program you are processing the scanned images with, is not mapping all the required PDF417 metadata fields into the required IManage fields (system and custom fields 1-30)
-
Fix the broken mappings to resolve the issue.
-
Retest to see if the problem is resolved.